> ## Documentation Index
> Fetch the complete documentation index at: https://help.revenuehero.io/llms.txt
> Use this file to discover all available pages before exploring further.
> Push the form answers your AE actually needs into the calendar invite, and leave the routing-only fields out.
# Adding Form Entries to Meeting Invites in RevenueHero
When a prospect fills out your form, some answers help your AE prep (use case, current tool, team size). Others exist only to route the lead (country, industry, lifecycle stage). Sending all of them into the calendar invite buries the prep-relevant answers and echoes internal segmentation fields back to the prospect in their own calendar.
You control this in two layers: a global toggle that turns the feature on, and a per-form selector that picks exactly which answers land in the invite body.
A prerequisite for including form entries in the meeting invite is having a form setup. You must have either your own web form (such as HubSpot, Intercom, Pardot, or any other) embedded on your landing page and [mapped to a RevenueHero router](web-forms/overview.mdx) or a [RevenueHero form configured](routers/forms/custom-forms.mdx) and associated with the router link you share with the prospect.
## How form entries in invites work
| Setting | Where | Controls |
| :---------------- | :--------------------------------------- | :--------------------------------------------------------- |
| Master toggle | Organization Settings → Meeting Settings | Whether any form data appears in invites org-wide |
| Per-form selector | Marketing form → Edit settings | Which specific answers from that form appear in the invite |
The master toggle has to be on for any answers to appear. The per-form selector then narrows the list to only the answers worth showing the rep.
# How to add form entries to meeting invites?
Enabling this feature is an extremely straightforward process.
This is an organization-wide setting. Admins can enable or disable the option to include form entries in the meeting invitations being sent out.
In your RevenueHero dashboard, go to **Settings**. Under **Organization Settings**, click on **Meeting Settings** and locate **Add form entries in the Invites.**
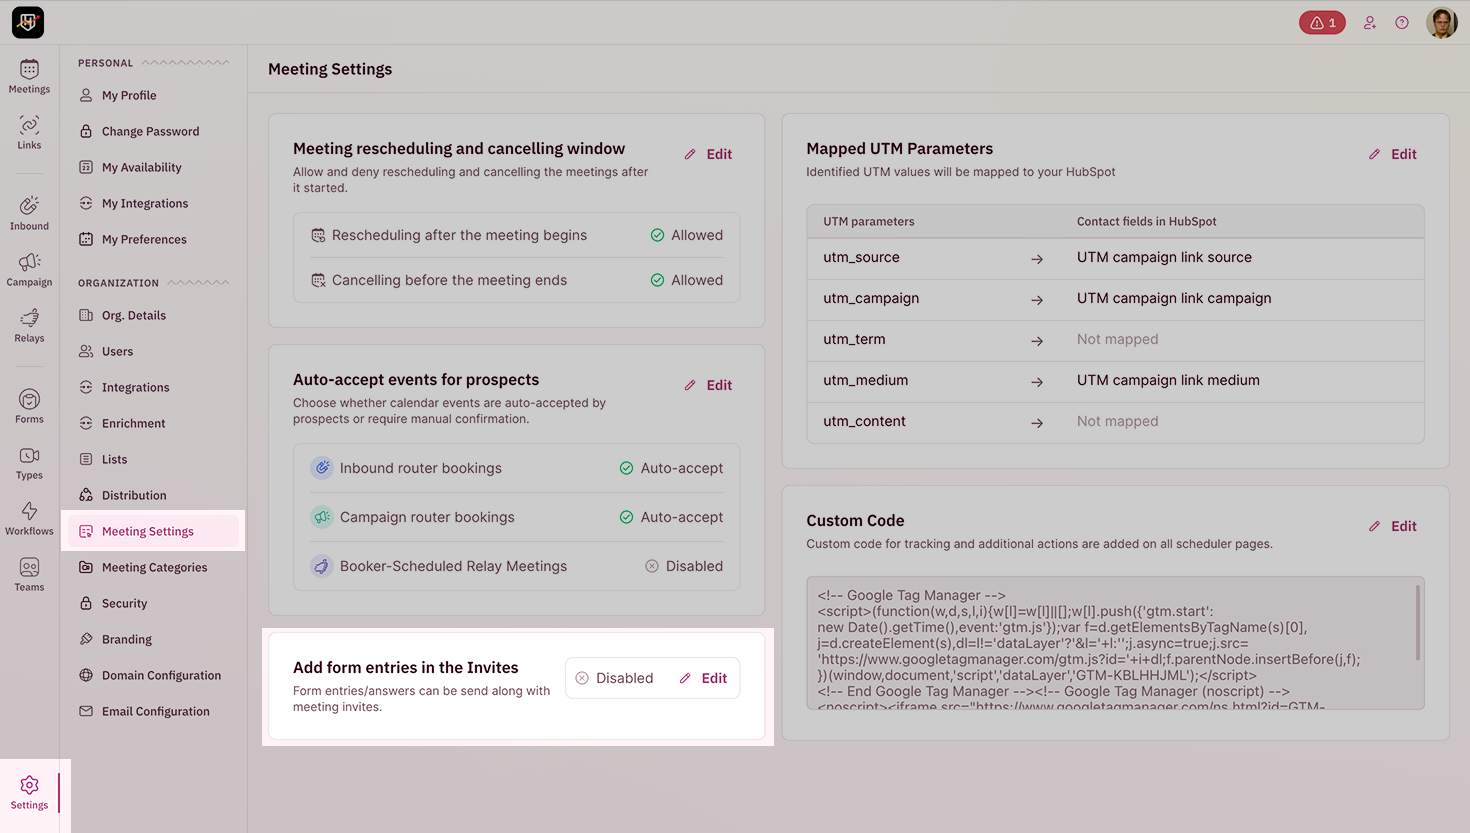 Click **Edit**, toggle **Enable Add Form Entries in Invites**, and then hit **Save**.
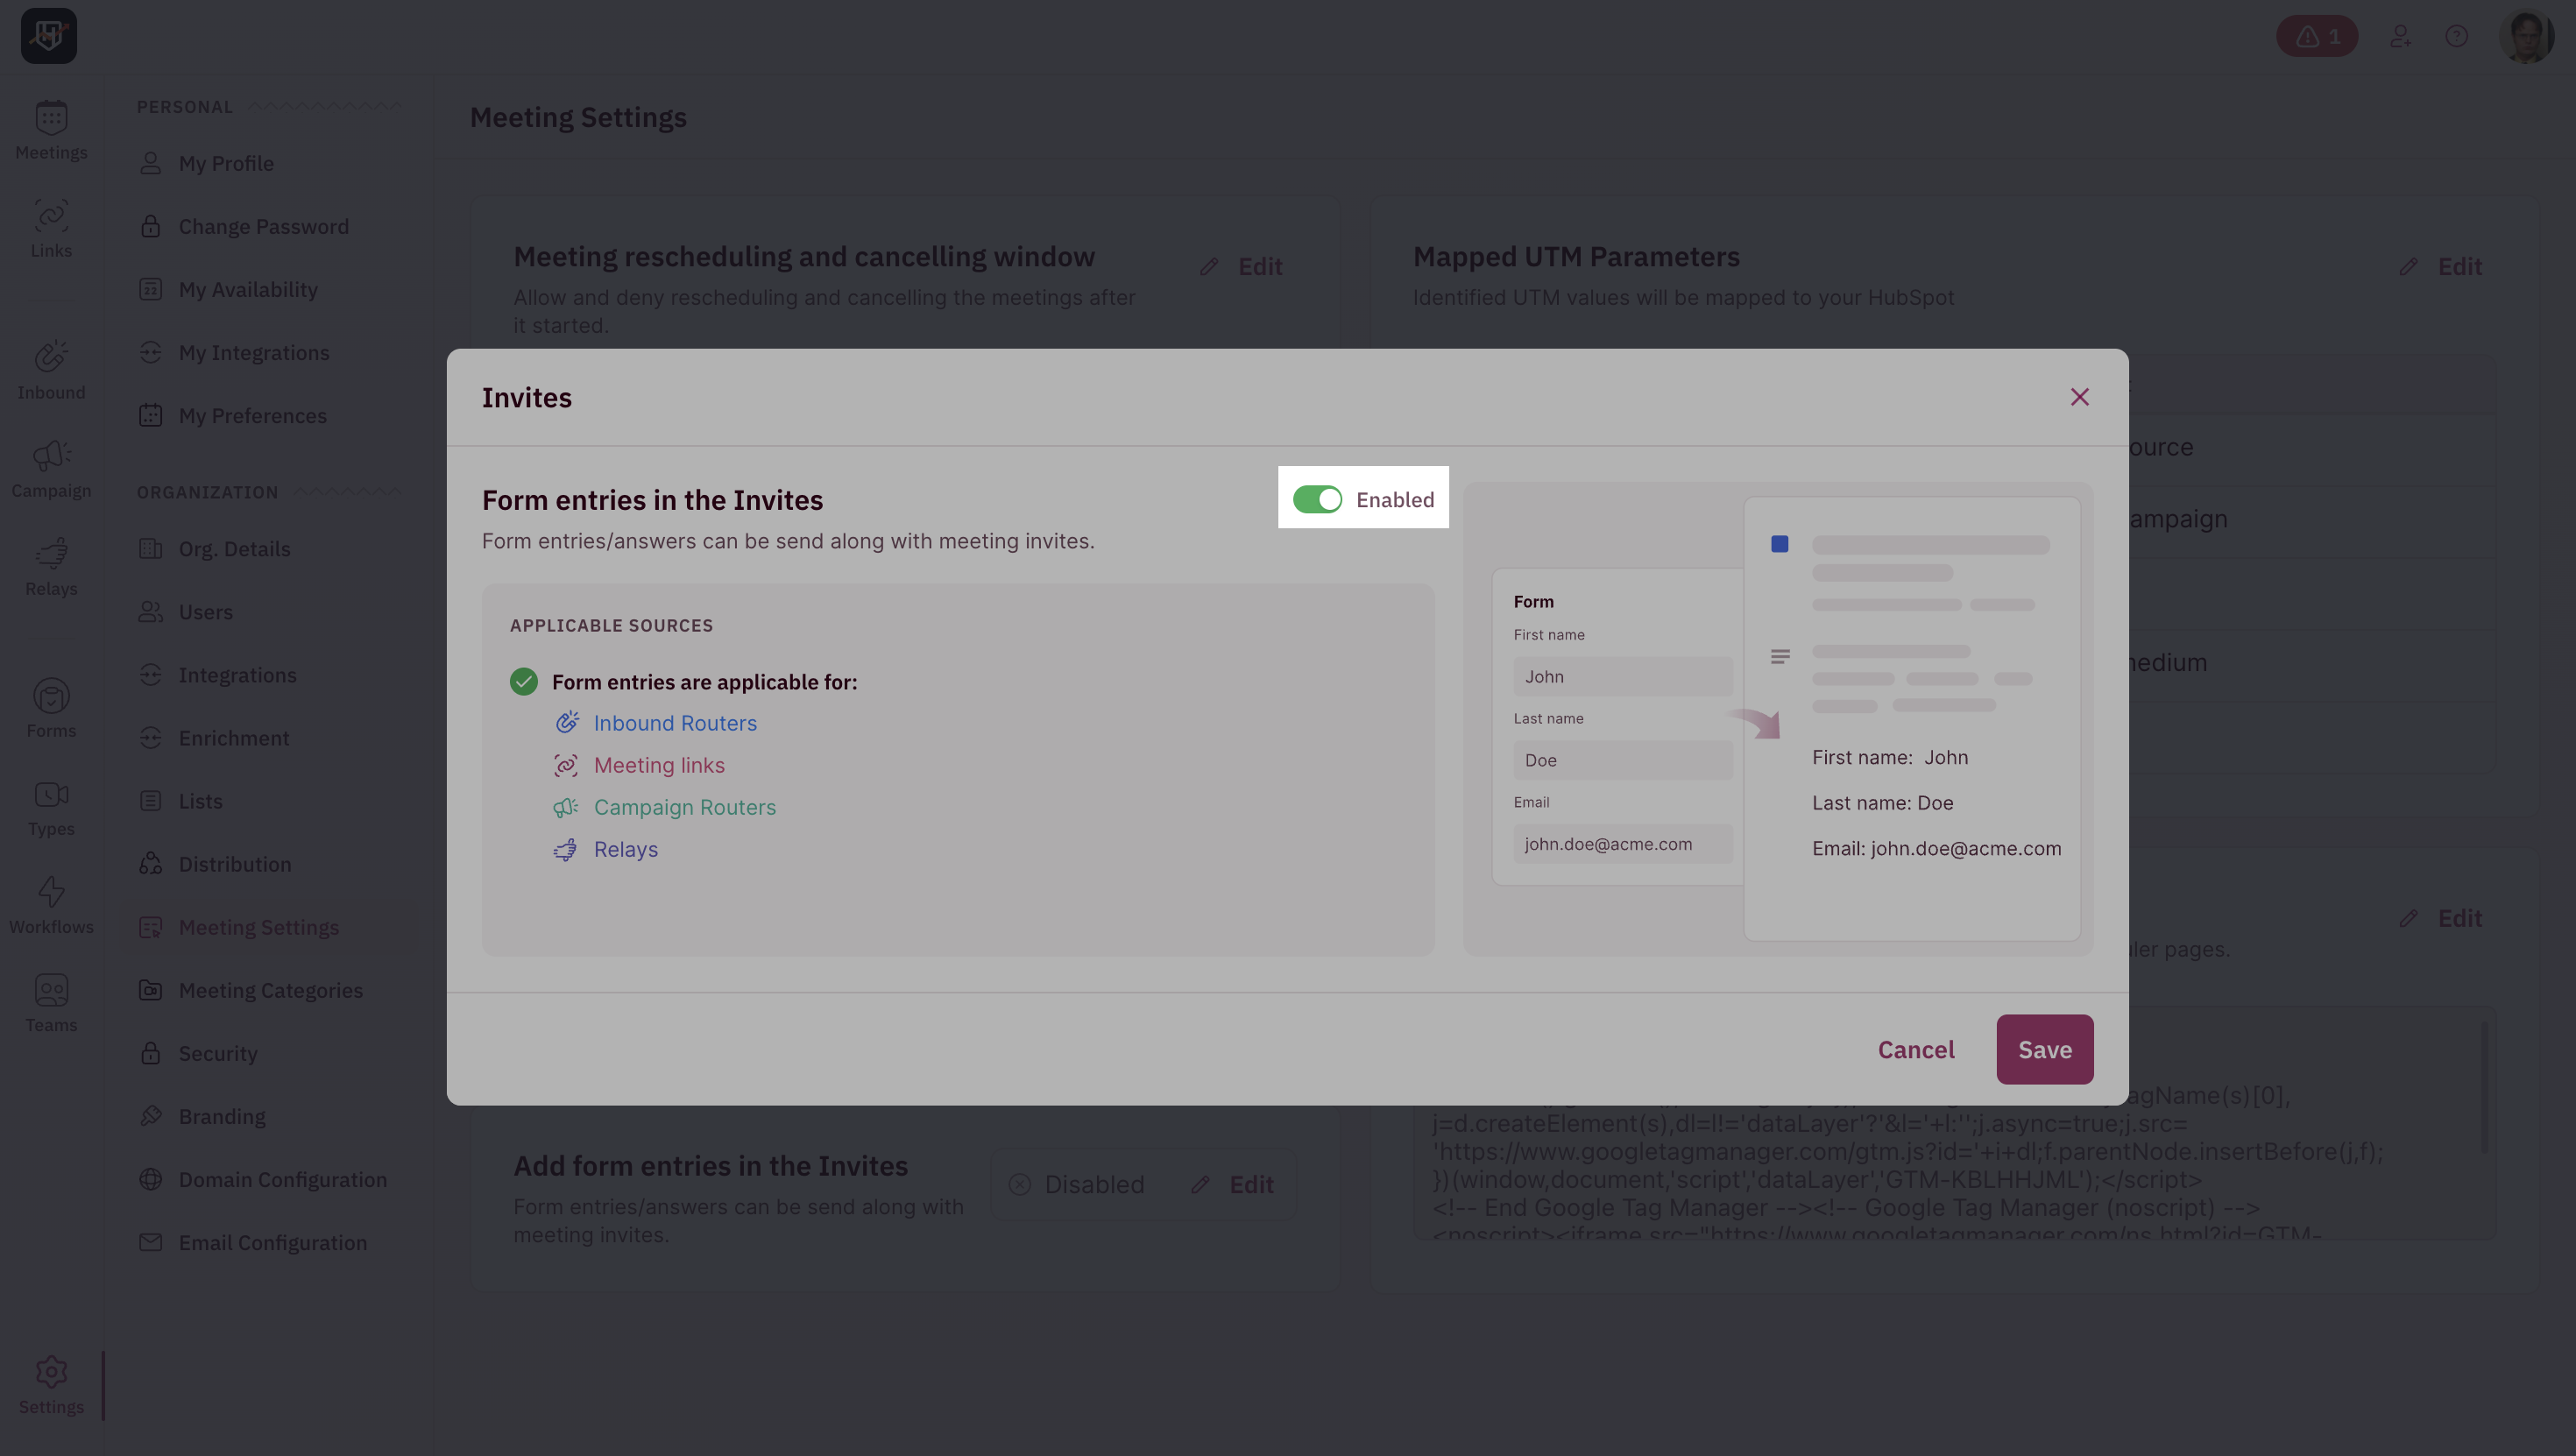 Form answers now flow into invites for meetings booked through any router. To control which specific fields appear per form, continue below.
## Choose which form answers appear in the invite
Once the org toggle is on, open each marketing form's edit settings to decide which fields are worth including. This is where you keep prep-relevant answers in and leave routing-only fields out.
### Step 1: Open the form's edit settings
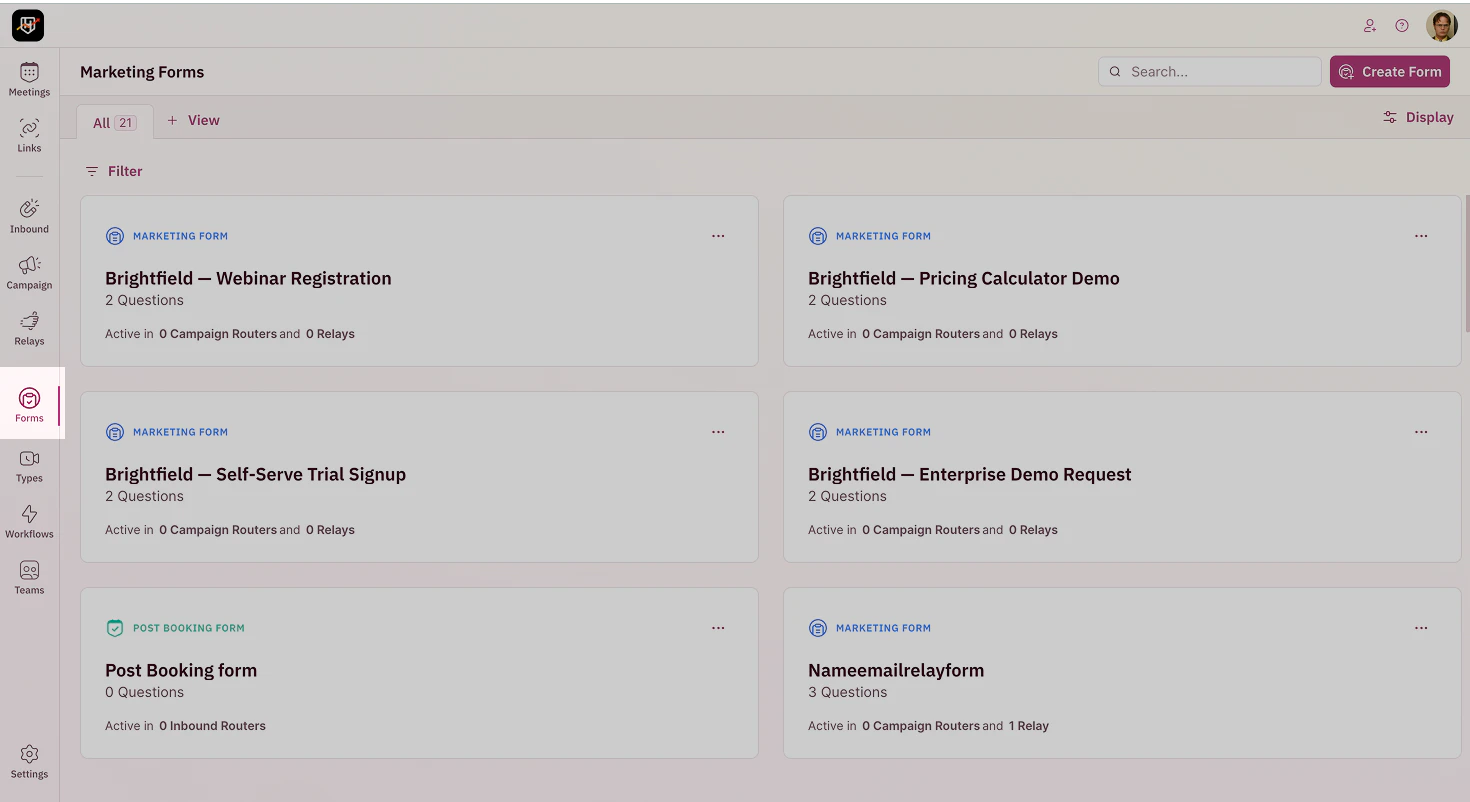
1. Go to **Forms** in the left sidebar.
2. Click the marketing form you want to configure.
Form answers now flow into invites for meetings booked through any router. To control which specific fields appear per form, continue below.
## Choose which form answers appear in the invite
Once the org toggle is on, open each marketing form's edit settings to decide which fields are worth including. This is where you keep prep-relevant answers in and leave routing-only fields out.
### Step 1: Open the form's edit settings
1. Go to **Forms** in the left sidebar.
2. Click the marketing form you want to configure.
 ### Step 2: Select the fields to include in the invite
1. Open the form's Settings screen.
2. For each field on the form, choose whether it should appear in the calendar invite body.
### Step 2: Select the fields to include in the invite
1. Open the form's Settings screen.
2. For each field on the form, choose whether it should appear in the calendar invite body.
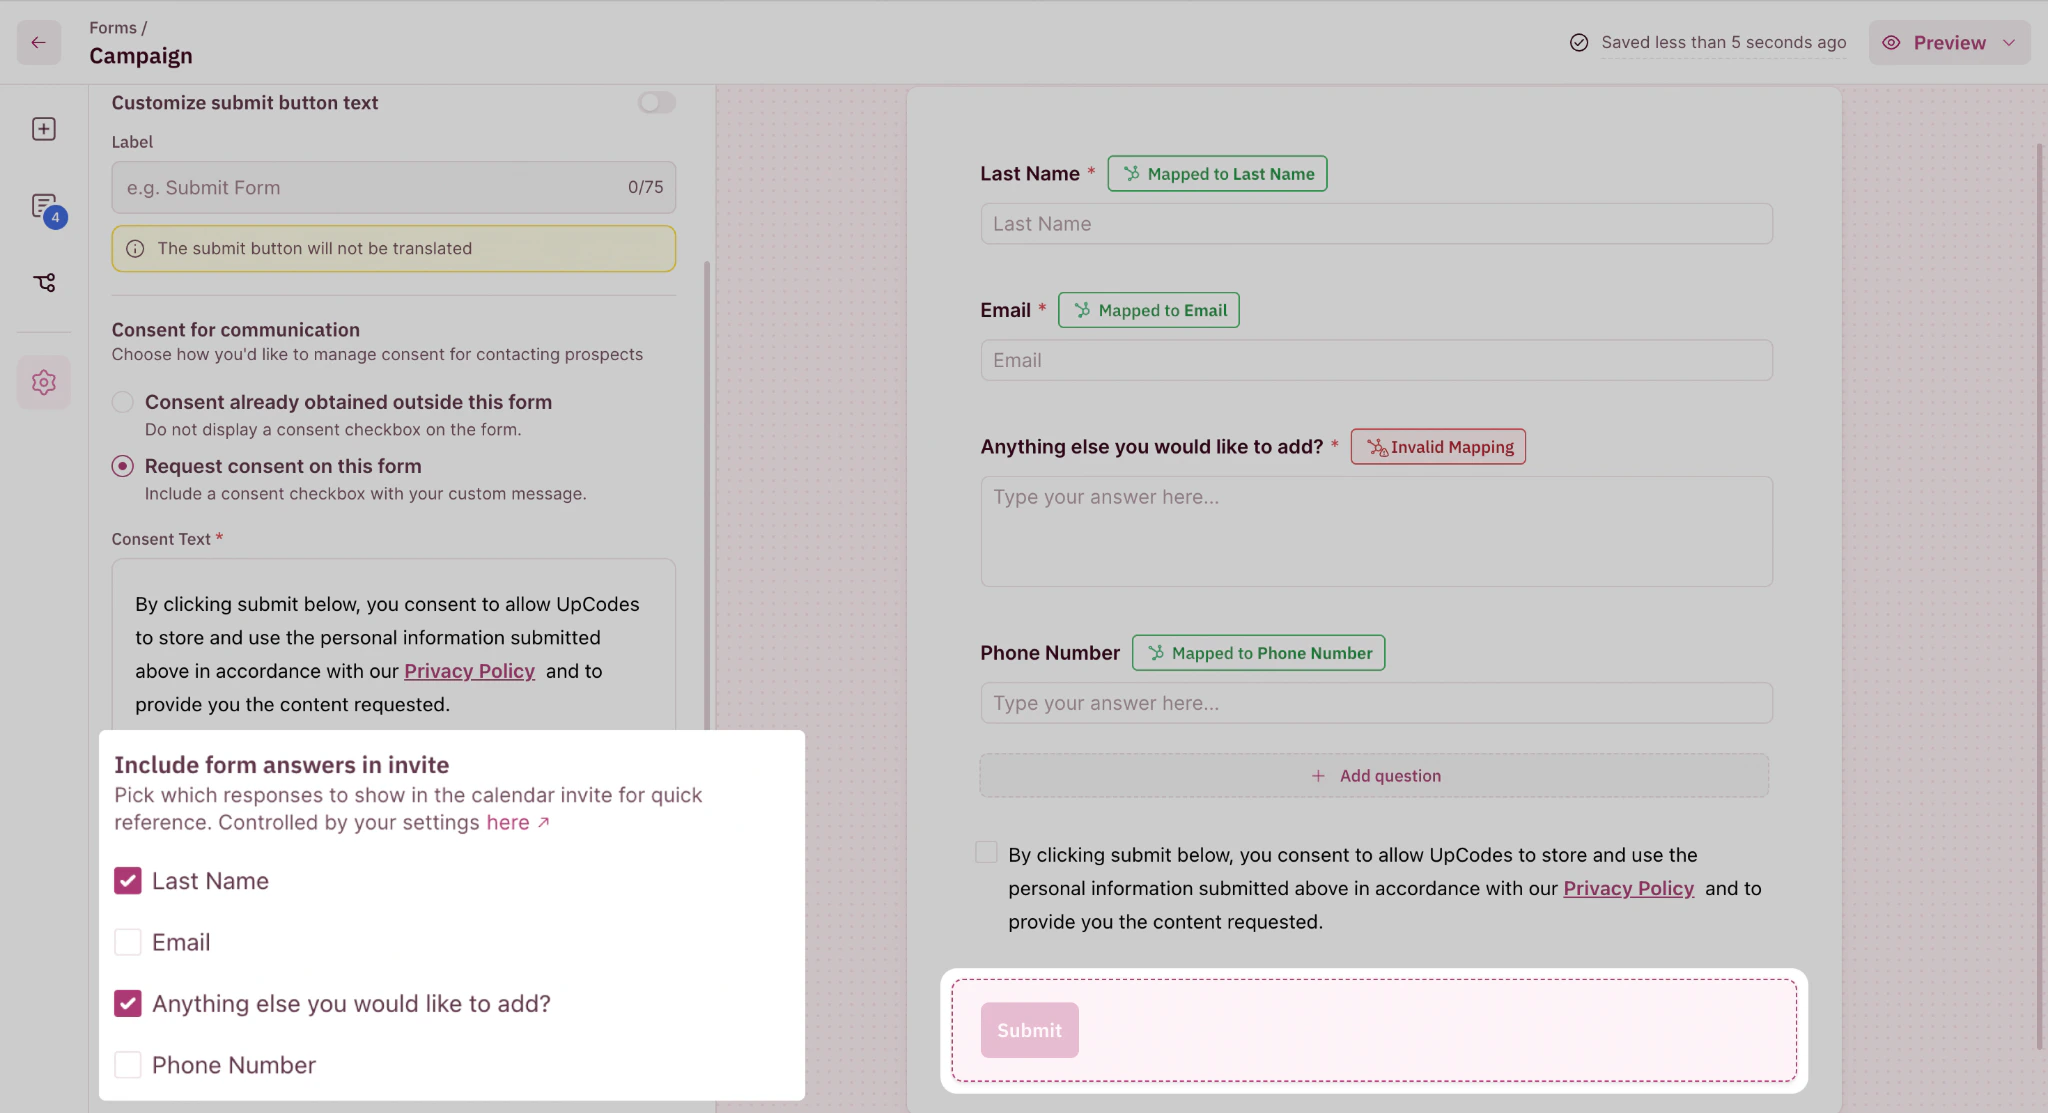 ### Step 3: Save the form
Click **Submit**. The next meeting booked through this form uses the new selection.
The per-form selection applies only to meetings booked from that specific form. If you have multiple forms feeding the same router, configure each form separately. They do not inherit settings from each other.
Your form answers now land in invites with the precision you want. Reps get the prep context. Prospects do not see your internal plumbing. 🎉🎉🎉
### Step 3: Save the form
Click **Submit**. The next meeting booked through this form uses the new selection.
The per-form selection applies only to meetings booked from that specific form. If you have multiple forms feeding the same router, configure each form separately. They do not inherit settings from each other.
Your form answers now land in invites with the precision you want. Reps get the prep context. Prospects do not see your internal plumbing. 🎉🎉🎉