> ## Documentation Index
> Fetch the complete documentation index at: https://help.revenuehero.io/llms.txt
> Use this file to discover all available pages before exploring further.
# Using Subgroups for Complex Qualification Logic
> Nest conditions logically to match how your qualification rules actually work. Eliminate endless AND/OR chains.
Your lead qualification logic is no one-size-fits-all, it's much more nuanced, and for good reason. Maybe your enterprise deals have different rules depending on the region. High-value prospects bypass normal thresholds. When you're trying to enter a new market, certain industries may qualify regardless of revenue. That's three different paths to qualification. Not one monster condition chain.
With **Subgroups**, you can organize these distinct qualification paths clearly instead of wrestling with one impossible condition chain. It lets you nest multiple conditions within logical groups, making your distribution rules easier to build, maintain, and troubleshoot.
Subgroups are available in:
* **Distribution Rules** (used in Inbound Routers)
* **Distribution Pods** (used in Relay Routers)
# How Subgroups Work
Here's how conditions are evaluated when you use subgroups:
| **Level** | **Logic** | **Behavior** |
| :--------------------------------- | :-------- | :---------------------------------------------------------- |
| Between Groups | OR | A lead qualifies if they match ANY group |
| Between Subgroups (within a group) | OR | Within a group, a lead qualifies if they match ANY subgroup |
| Within a Subgroup | OR | All conditions in a subgroup must be true |
| Within a Condition | AND | All logic within a condition must be true |
# BEFORE WE BEGIN
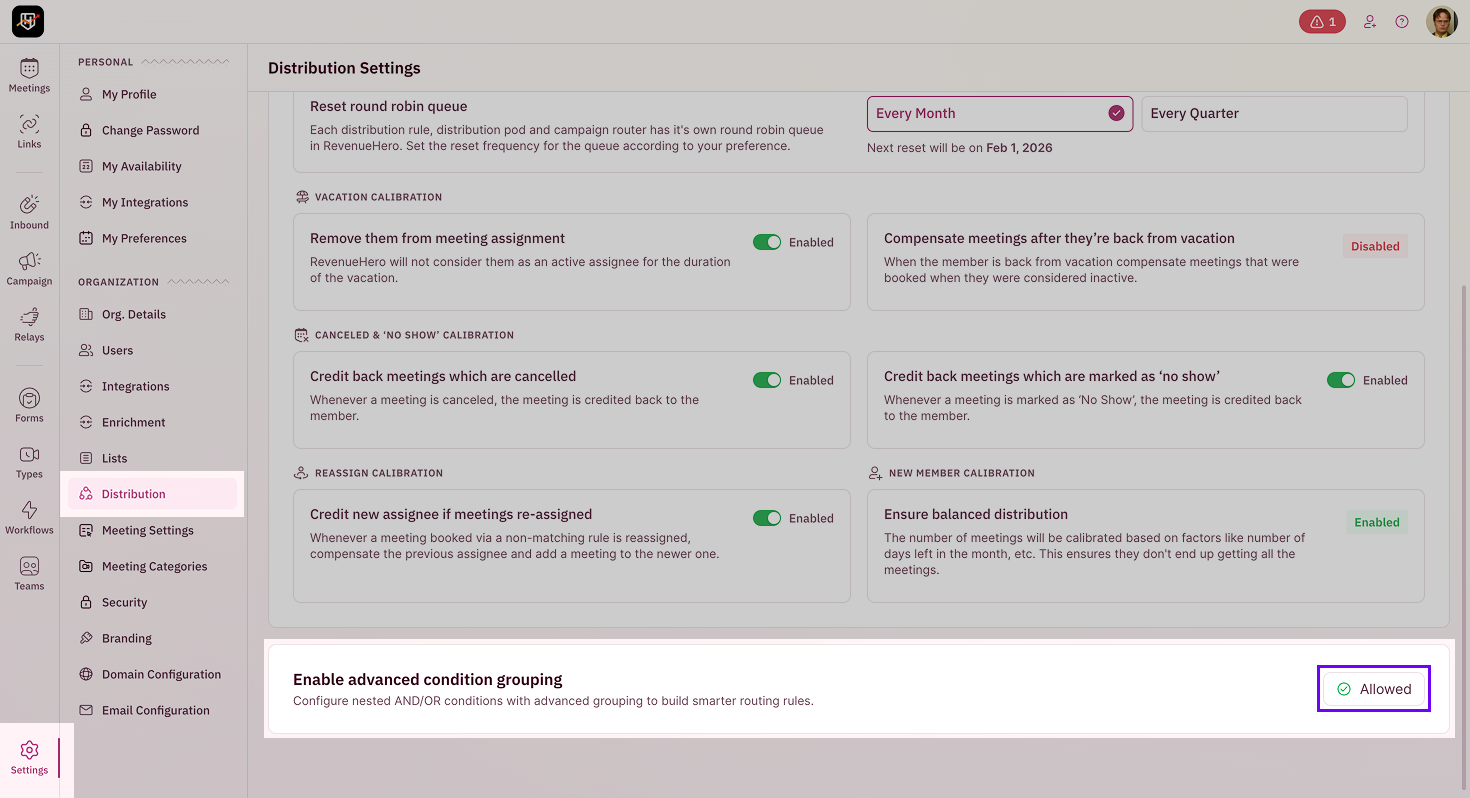
## Enable **Advanced Condition Grouping**
Go to **Settings** → **Distribution** → **Enable advanced condition grouping**
* Set the toggle to **Allowed**
 ## Create Teams
\
You'll also need to have [Teams already created](/teams/create-teams) before setting up distribution rules or pods with subgroups.
# **Adding Subgroups to Distribution Rules**
Use subgroups in Distribution Rules to organize complex qualification logic for your Inbound Routers.
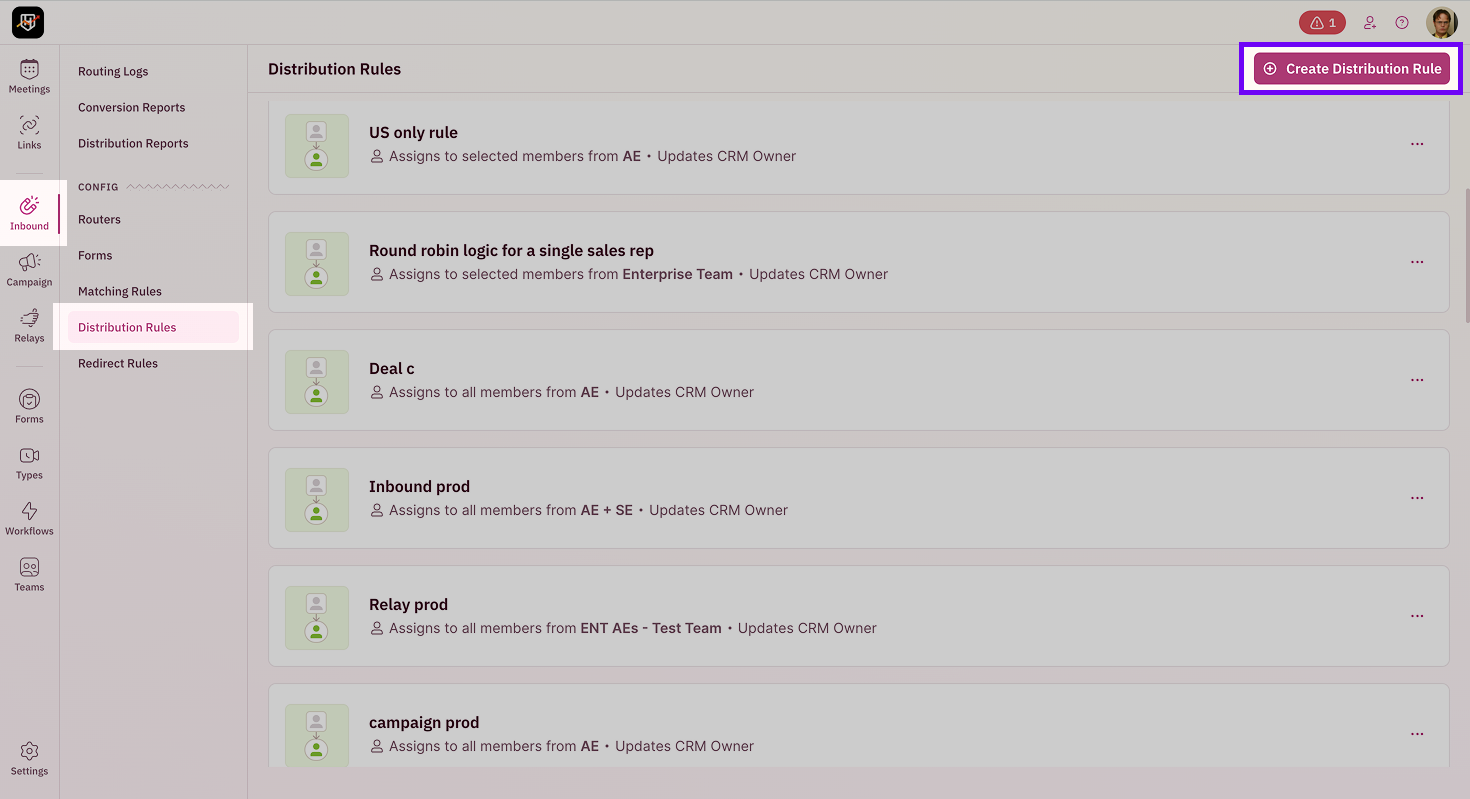
Go to **Inbound** → **Distribution Rules** and either:
* Click **Create Distribution Rule** to start fresh, or
* Select an existing rule to edit
## Create Teams
\
You'll also need to have [Teams already created](/teams/create-teams) before setting up distribution rules or pods with subgroups.
# **Adding Subgroups to Distribution Rules**
Use subgroups in Distribution Rules to organize complex qualification logic for your Inbound Routers.
Go to **Inbound** → **Distribution Rules** and either:
* Click **Create Distribution Rule** to start fresh, or
* Select an existing rule to edit
 Choose how meetings should be assigned:
* **Single team round robin** - Assign to members within one team
* **Collective round robin** - Assign across multiple teams
Select the team(s) that should receive qualified prospects.
For detailed steps on team assignment, see [Creating a Distribution Rule](/rules/distribution/create-distribution-rule).
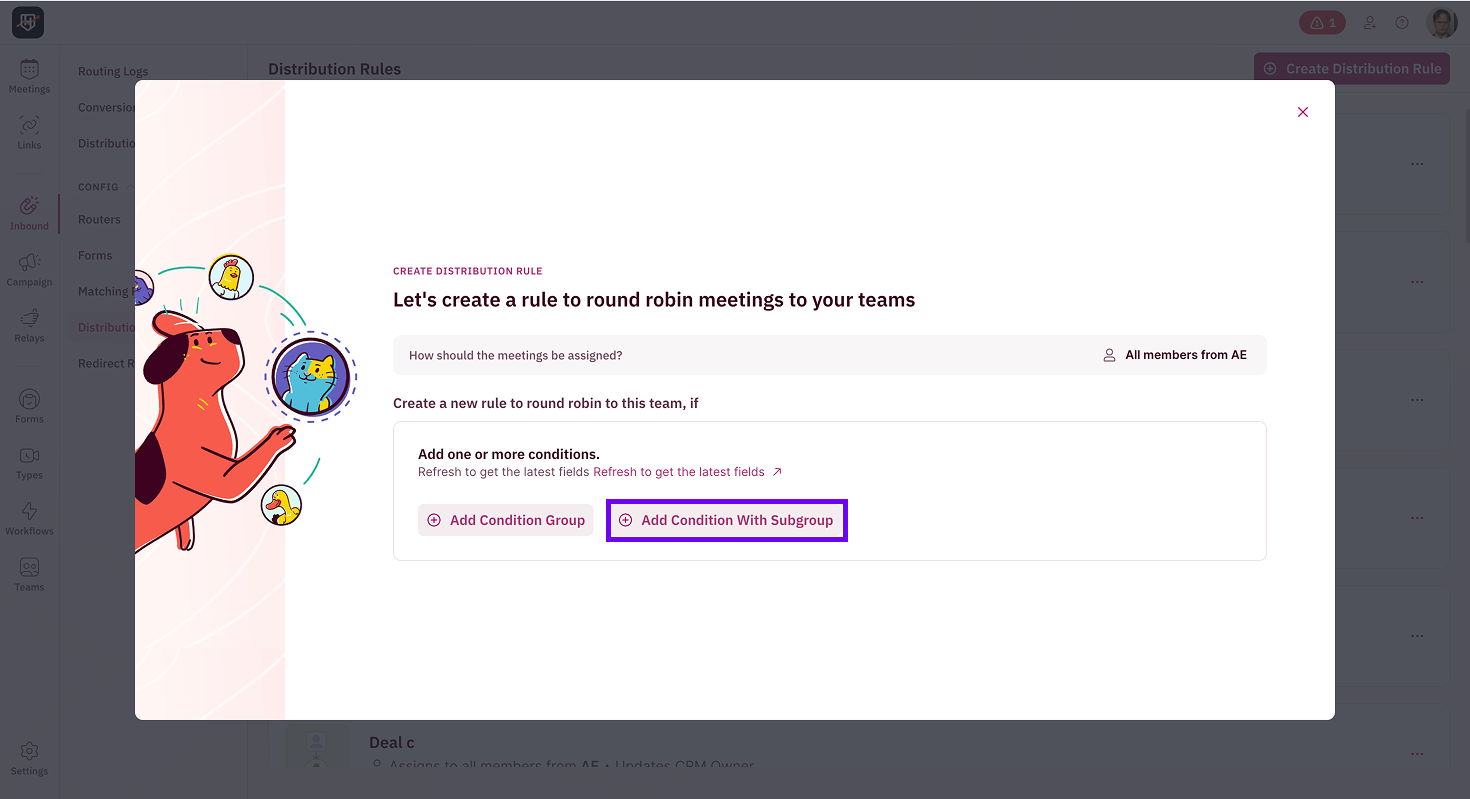
In the **Add Conditions** section, click **Add Condition With Subgroup**.
Choose how meetings should be assigned:
* **Single team round robin** - Assign to members within one team
* **Collective round robin** - Assign across multiple teams
Select the team(s) that should receive qualified prospects.
For detailed steps on team assignment, see [Creating a Distribution Rule](/rules/distribution/create-distribution-rule).
In the **Add Conditions** section, click **Add Condition With Subgroup**.
 A dropdown appears showing available fields from:
* **Form Inputs** - Data submitted through your form
* **HubSpot Properties** or **Salesforce Fields** - Data from your connected CRM
* **Enrichment** - Data from enrichment providers like Ocean, Apollo, Clearbit, or Crustdata
Click on a field to add it as a condition. For example:
* Select **Country** from HubSpot Properties
* Choose an operator (equals, contains, is not empty, etc.)
* Enter the value: "United States"
To add more conditions within the same subgroup, click **AND**. Remember, all conditions within a subgroup must be true for the lead to qualify through that path.
A dropdown appears showing available fields from:
* **Form Inputs** - Data submitted through your form
* **HubSpot Properties** or **Salesforce Fields** - Data from your connected CRM
* **Enrichment** - Data from enrichment providers like Ocean, Apollo, Clearbit, or Crustdata
Click on a field to add it as a condition. For example:
* Select **Country** from HubSpot Properties
* Choose an operator (equals, contains, is not empty, etc.)
* Enter the value: "United States"
To add more conditions within the same subgroup, click **AND**. Remember, all conditions within a subgroup must be true for the lead to qualify through that path.
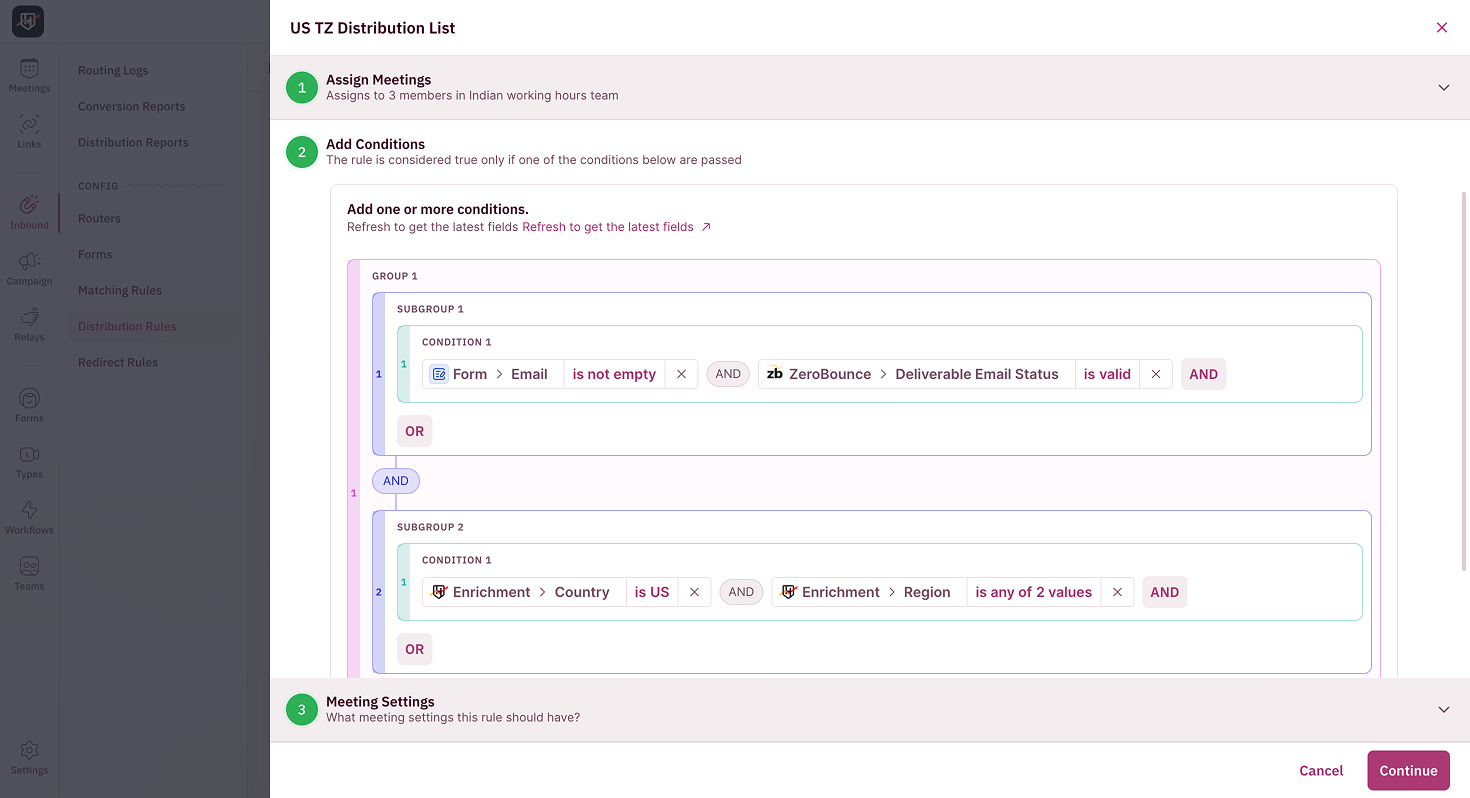 Subgroups appear with colored borders and indentation to show they're nested within a group.
### **To add another subgroup within the same group:**
Click **Add Subgroup** within that group. This creates an alternate qualification path using OR logic.
### **To add another group:**
Click **Add Condition Group** / **Add Condition with Subgroup** at the bottom. This creates a completely separate qualification path that also uses OR logic at the top level.
You can nest subgroups within subgroups for even more complex logic.
Subgroups appear with colored borders and indentation to show they're nested within a group.
### **To add another subgroup within the same group:**
Click **Add Subgroup** within that group. This creates an alternate qualification path using OR logic.
### **To add another group:**
Click **Add Condition Group** / **Add Condition with Subgroup** at the bottom. This creates a completely separate qualification path that also uses OR logic at the top level.
You can nest subgroups within subgroups for even more complex logic.
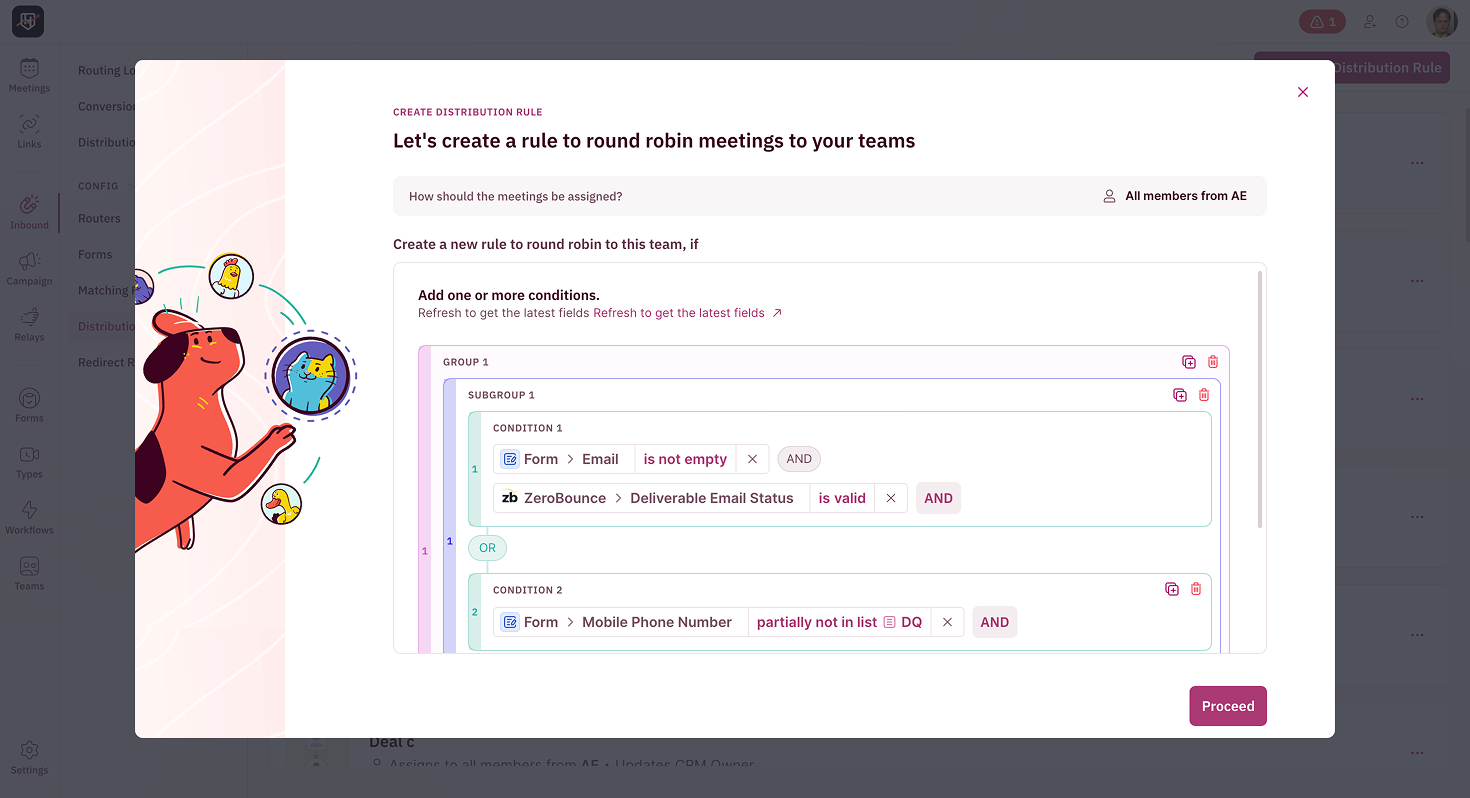 Once your conditions are configured, click **Proceed** and review the distribution rule. Click **I’m happy with the distribution rule** to finish.
Your distribution rule with subgroups is now ready to use in your Inbound Router!
# ** Adding Subgroups to Distribution Pods**
Use subgroups in Distribution Pods to organize qualification logic for your Relay Routers.
Go to **Relays** → **Distribution Pods** and either:
* Click **Create Distribution Pod** to start fresh, or
* Select an existing pod to edit
Once your conditions are configured, click **Proceed** and review the distribution rule. Click **I’m happy with the distribution rule** to finish.
Your distribution rule with subgroups is now ready to use in your Inbound Router!
# ** Adding Subgroups to Distribution Pods**
Use subgroups in Distribution Pods to organize qualification logic for your Relay Routers.
Go to **Relays** → **Distribution Pods** and either:
* Click **Create Distribution Pod** to start fresh, or
* Select an existing pod to edit
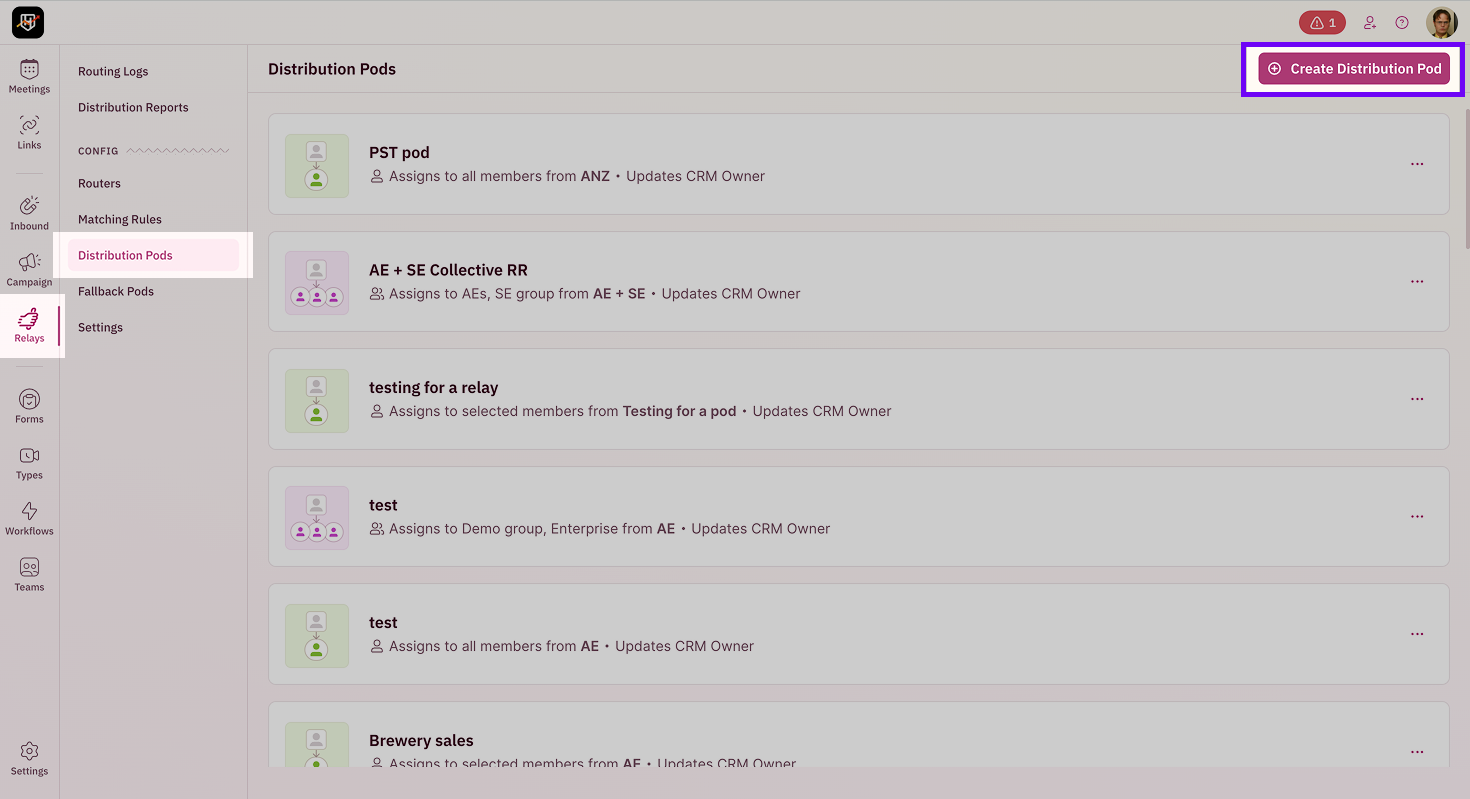 Choose how meetings should be assigned:
* **Single team round robin** - Assign to members within one team
* **Collective round robin** - Assign across multiple teams
Select the team(s) that should receive qualified prospects.
For detailed steps on team assignment, see [Creating Distribution Pods](https://help.revenuehero.io/routers/relays/create-relays#set-up-distribution-pods).
In the **Add Conditions** section, click **Add Condition With Subgroup**.
Choose how meetings should be assigned:
* **Single team round robin** - Assign to members within one team
* **Collective round robin** - Assign across multiple teams
Select the team(s) that should receive qualified prospects.
For detailed steps on team assignment, see [Creating Distribution Pods](https://help.revenuehero.io/routers/relays/create-relays#set-up-distribution-pods).
In the **Add Conditions** section, click **Add Condition With Subgroup**.
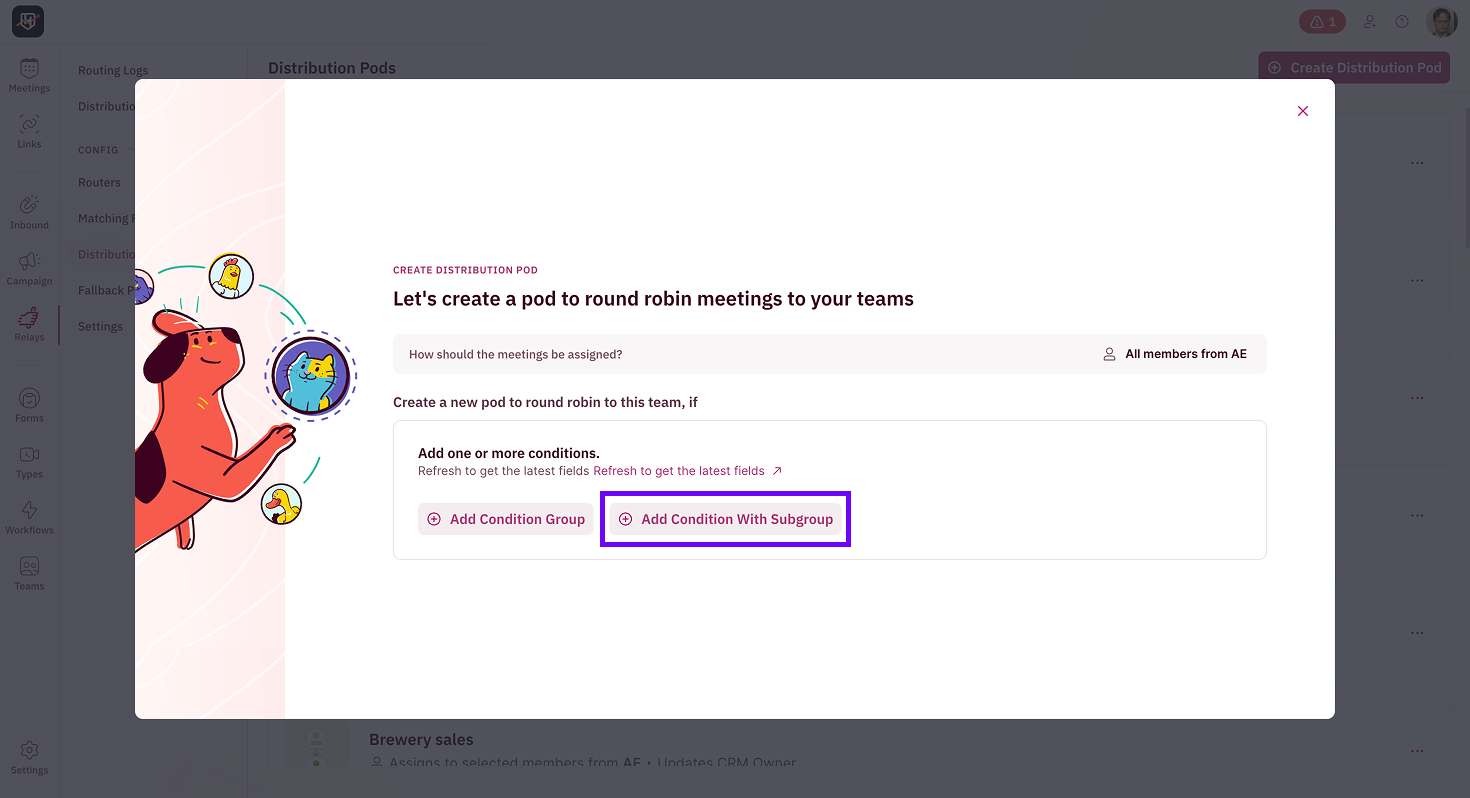 The interface works exactly the same as Distribution Rules—select fields from Form Inputs, CRM properties, or Enrichment data to build your qualification logic.
Follow the same process as Distribution Rules:
* Add conditions within subgroups (connected by AND)
* Add multiple subgroups within groups (connected by OR)
* Add multiple groups (connected by OR)
* Nest subgroups within subgroups as needed
Once your conditions are configured, click **Proceed** and review the distribution rule. Click **I’m happy with the pod** to finish.
Your distribution pod with subgroups is ready to use in your Relay Router!
# Best Practices
* **Start with groups, then add subgroups.** Think about your major qualification categories first (regions, deal sizes, product lines), then break them into specific subgroups.
* **Use subgroups for "AND" logic, groups for "OR" logic.** If conditions must ALL be true, put them in one group. If ANY could qualify a lead, create separate subgroups or groups.
* **Keep subgroups focused.** Each subgroup should represent one clear qualification path. Put your most common qualification paths first.
* **Test as you build.** Use the **Refresh to get the latest fields** link to ensure you're seeing current data from your CRM and enrichment sources.
If leads aren't routing as expected, check that:
* Your CRM fields are correctly mapped and contain data
* Enrichment providers are properly configured
* The team members in your distribution rule/pod have connected calendars
The interface works exactly the same as Distribution Rules—select fields from Form Inputs, CRM properties, or Enrichment data to build your qualification logic.
Follow the same process as Distribution Rules:
* Add conditions within subgroups (connected by AND)
* Add multiple subgroups within groups (connected by OR)
* Add multiple groups (connected by OR)
* Nest subgroups within subgroups as needed
Once your conditions are configured, click **Proceed** and review the distribution rule. Click **I’m happy with the pod** to finish.
Your distribution pod with subgroups is ready to use in your Relay Router!
# Best Practices
* **Start with groups, then add subgroups.** Think about your major qualification categories first (regions, deal sizes, product lines), then break them into specific subgroups.
* **Use subgroups for "AND" logic, groups for "OR" logic.** If conditions must ALL be true, put them in one group. If ANY could qualify a lead, create separate subgroups or groups.
* **Keep subgroups focused.** Each subgroup should represent one clear qualification path. Put your most common qualification paths first.
* **Test as you build.** Use the **Refresh to get the latest fields** link to ensure you're seeing current data from your CRM and enrichment sources.
If leads aren't routing as expected, check that:
* Your CRM fields are correctly mapped and contain data
* Enrichment providers are properly configured
* The team members in your distribution rule/pod have connected calendars