> ## Documentation Index
> Fetch the complete documentation index at: https://help.revenuehero.io/llms.txt
> Use this file to discover all available pages before exploring further.
> With custom Layouts, design scheduling experiences that feel like an extension of your brand.
# Customizing Layouts in RevenueHero
Your scheduling interface is where a prospect’s interest turns into intent. With **Layouts** in RevenueHero, you can fully tailor the look and feel of your meeting booking pages, forms, and confirmation screens to create a on-brand experience for your prospects.
# What are Layouts?
**Layouts** in RevenueHero define the structural design of your meeting scheduling experience, including how your calendar, form, and confirmation interfaces appear to prospects when they book a meeting with your team.
Admins can create and manage custom Layout templates. Once created, these templates can be used by team members when setting up their personal meeting links.
## **How to Set Up Custom Layouts?**
In your **RevenueHero dashboard**, go to **Settings**. Under **Organization Settings**, click on **Branding** and navigate to the **Layouts** tab.
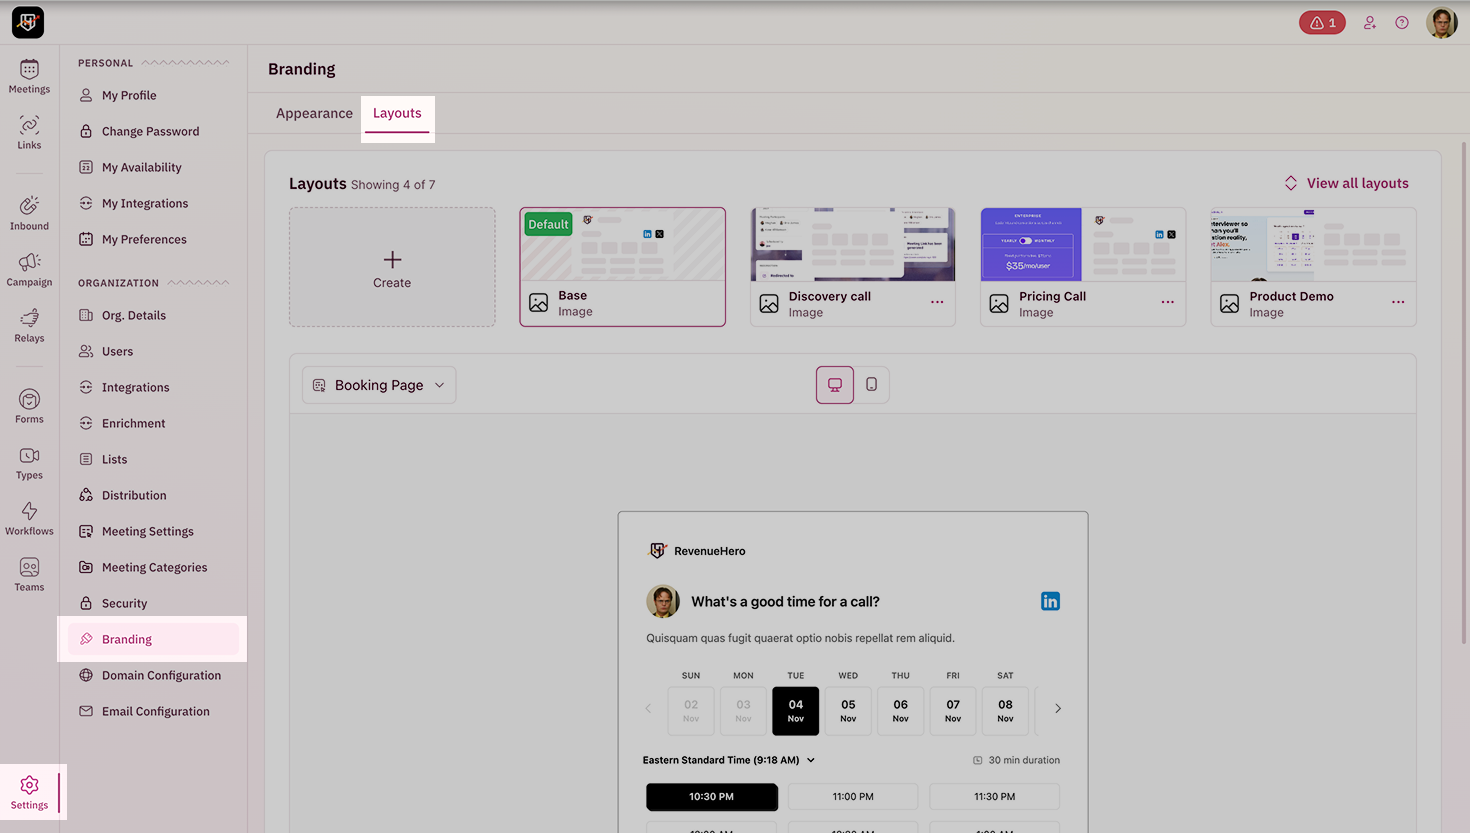 Click **Create** and name your custom layout so your team can easily identify its purpose.
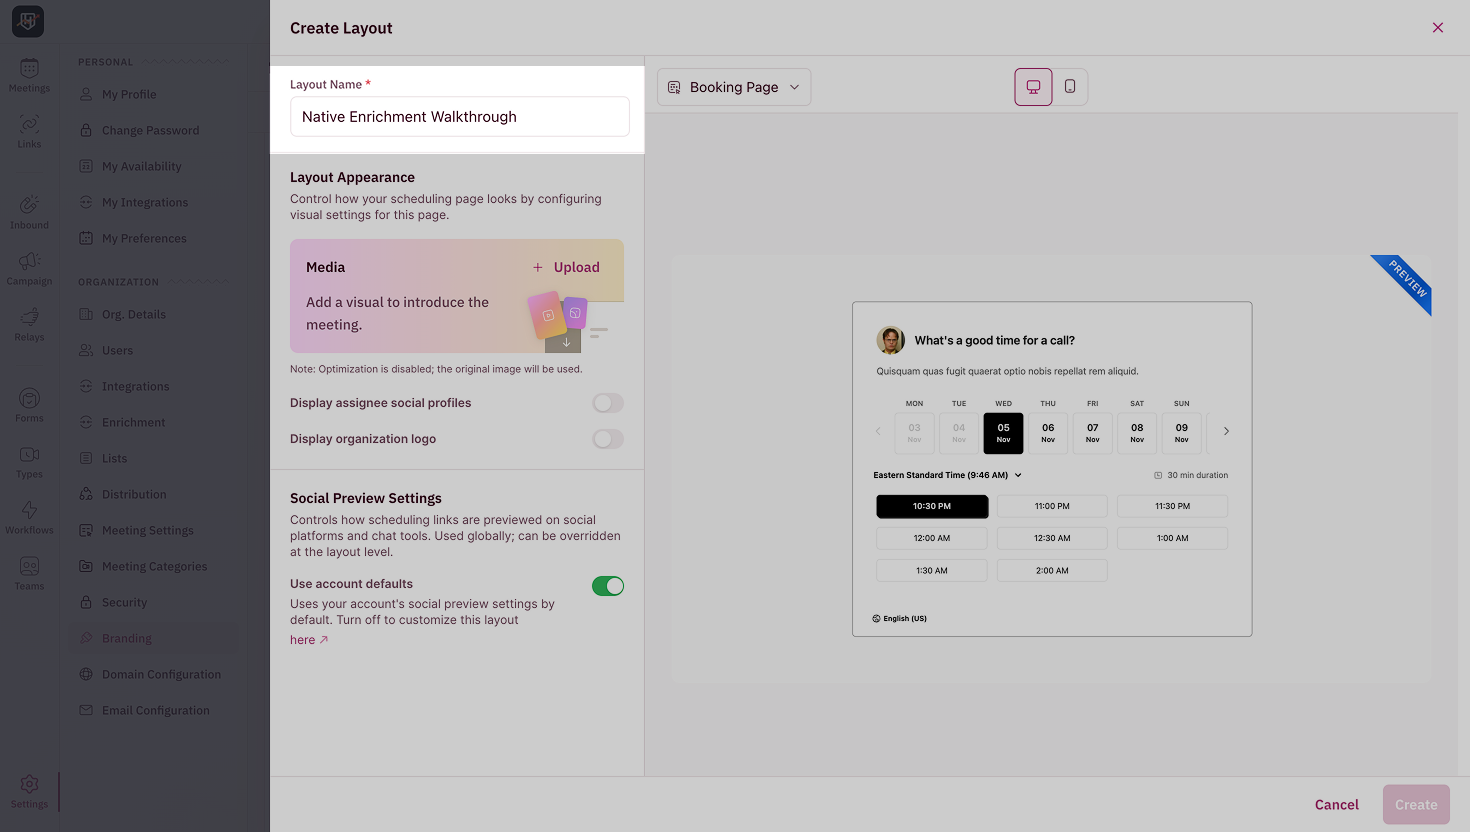 Under **Layout Appearance**, customize how your scheduling experience looks and feels.
**Add Images or Videos**
* Click **Upload** to include an image or video in your booking, form, and confirmation pages.
* You can **drag and drop** an image or upload it directly from your computer.
Under **Layout Appearance**, customize how your scheduling experience looks and feels.
**Add Images or Videos**
* Click **Upload** to include an image or video in your booking, form, and confirmation pages.
* You can **drag and drop** an image or upload it directly from your computer.
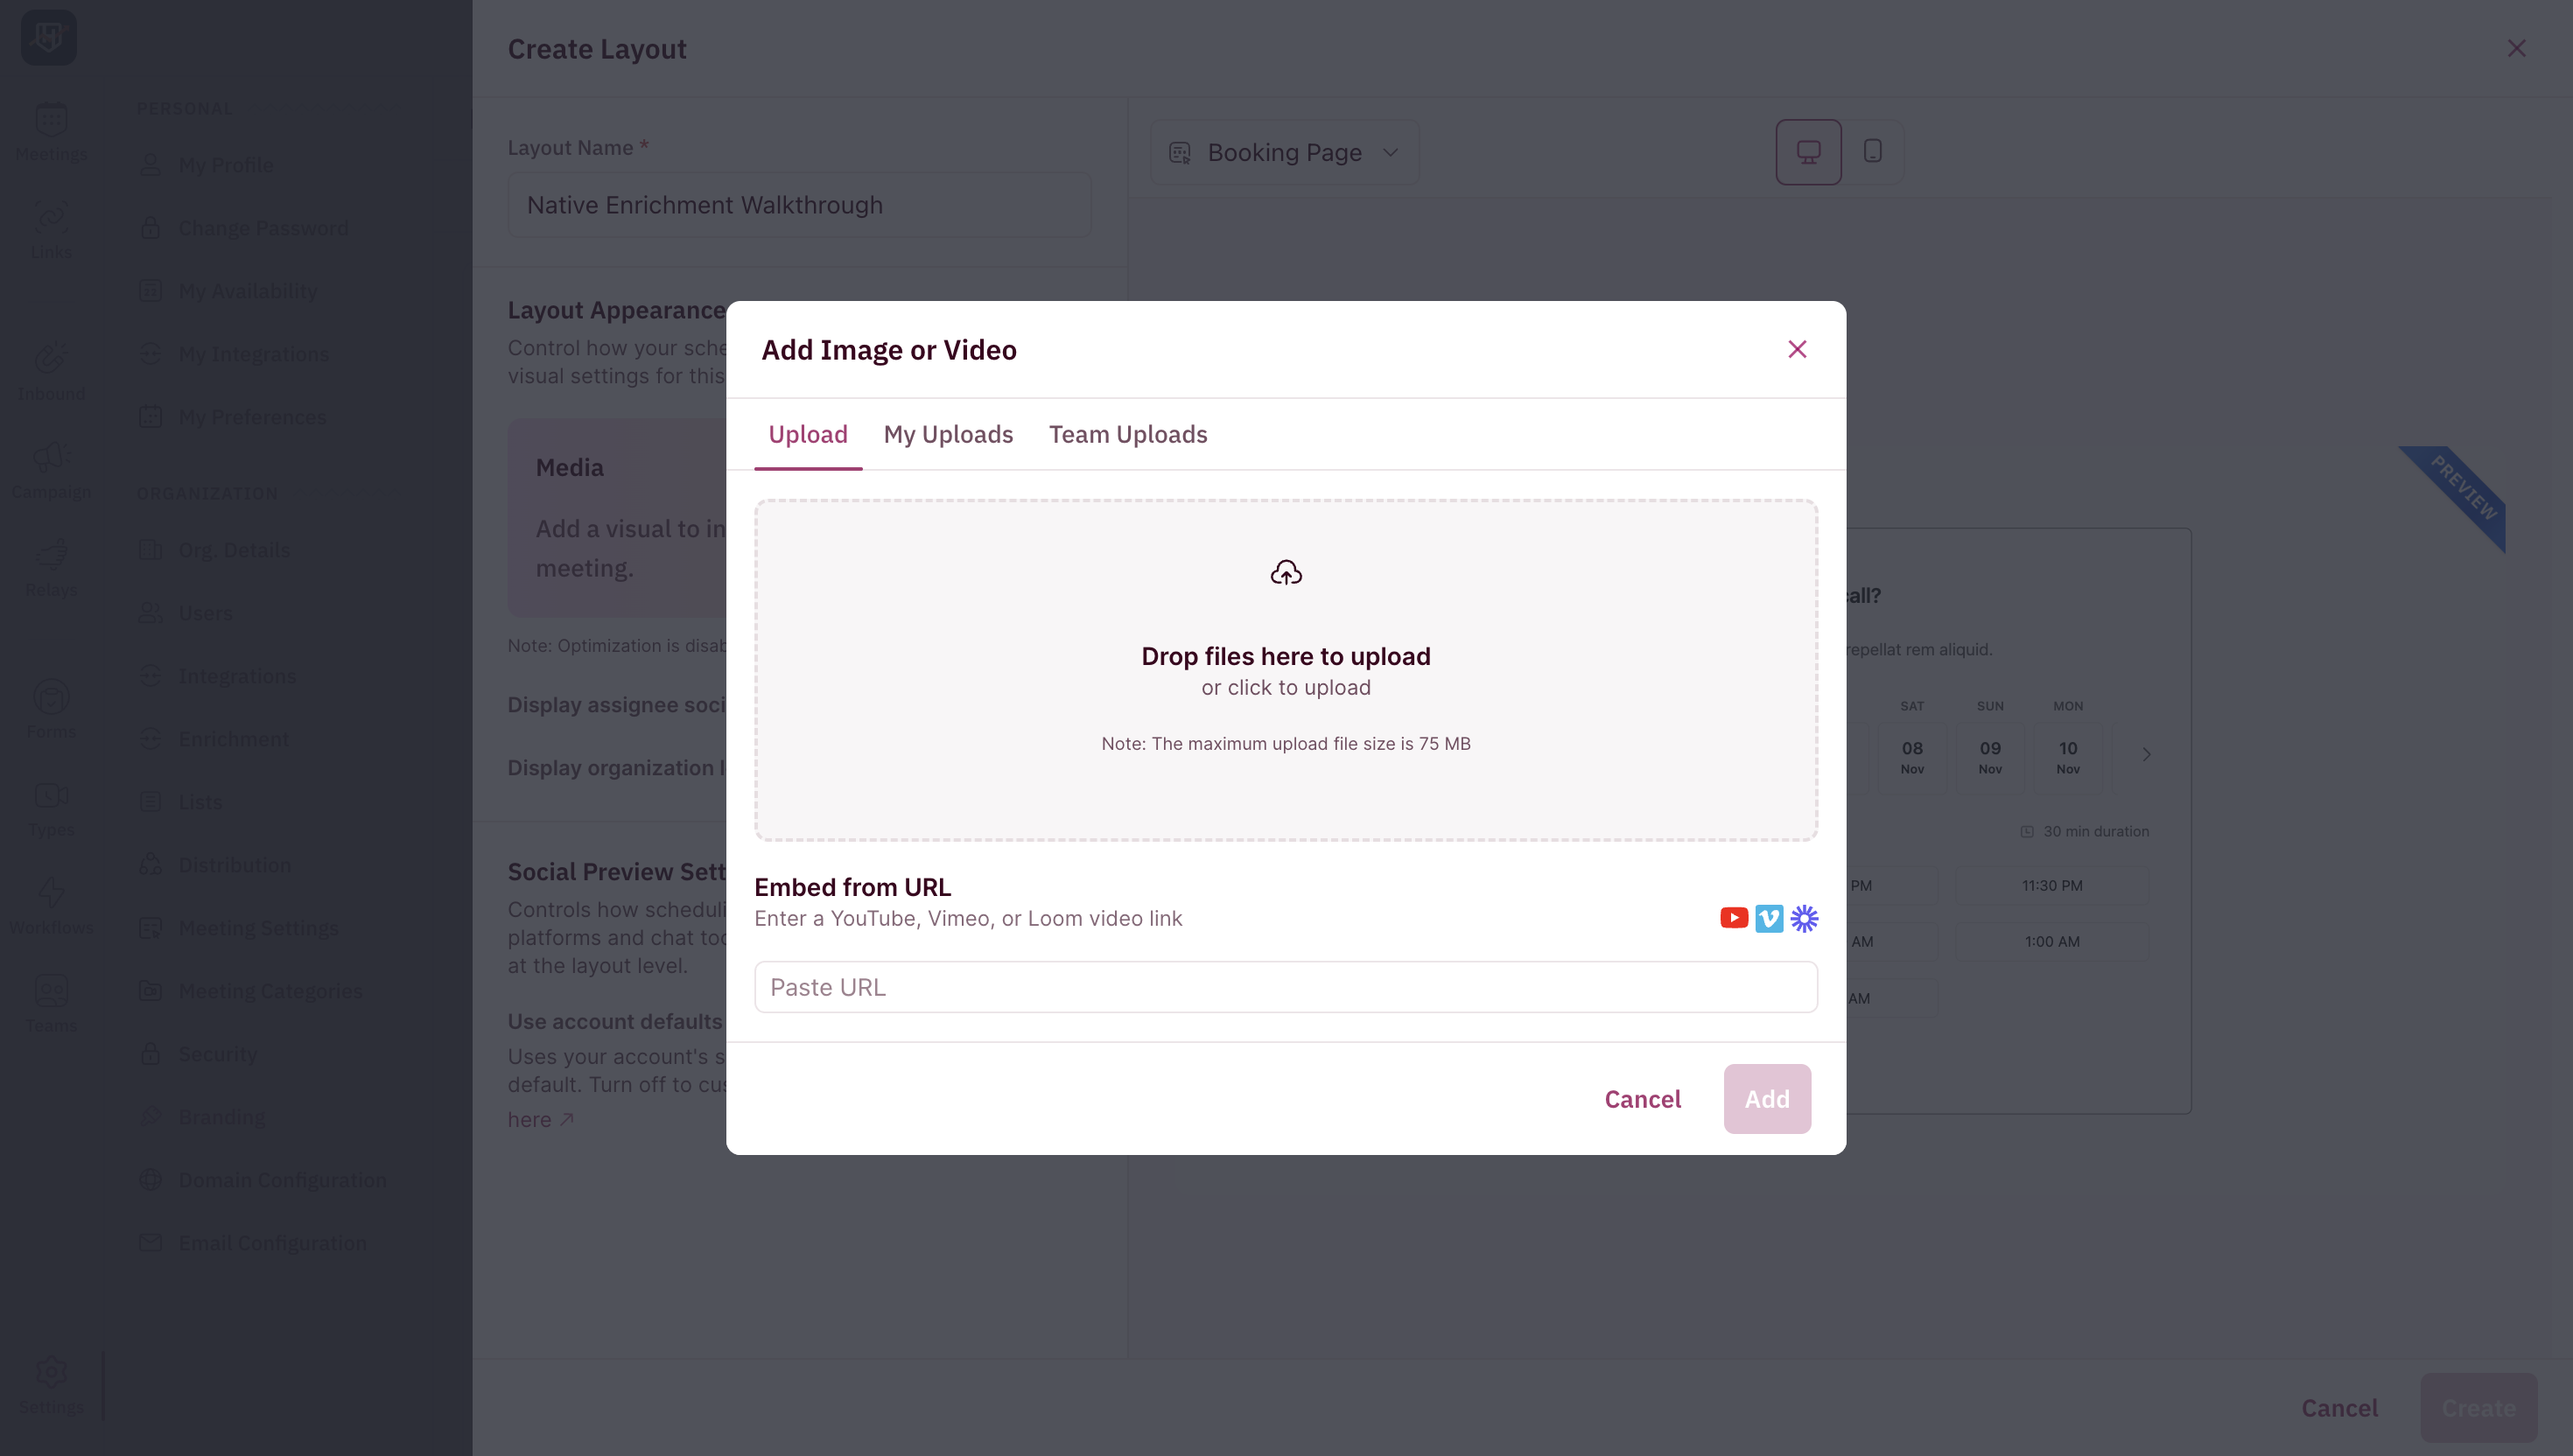 To include a video from **YouTube**, **Vimeo**, or **Loom**, paste the URL in the **Embed from URL** field and click **Add**.
You can use the media previously uploaded by you or another admin by selecting **My Uploads** or **Team Uploads**.
#### **Choose Media Placement**
Choose how the uploaded media appears on the page - as background, or aligned to left or right, and preview the changes instantly in the right panel.
To include a video from **YouTube**, **Vimeo**, or **Loom**, paste the URL in the **Embed from URL** field and click **Add**.
You can use the media previously uploaded by you or another admin by selecting **My Uploads** or **Team Uploads**.
#### **Choose Media Placement**
Choose how the uploaded media appears on the page - as background, or aligned to left or right, and preview the changes instantly in the right panel.
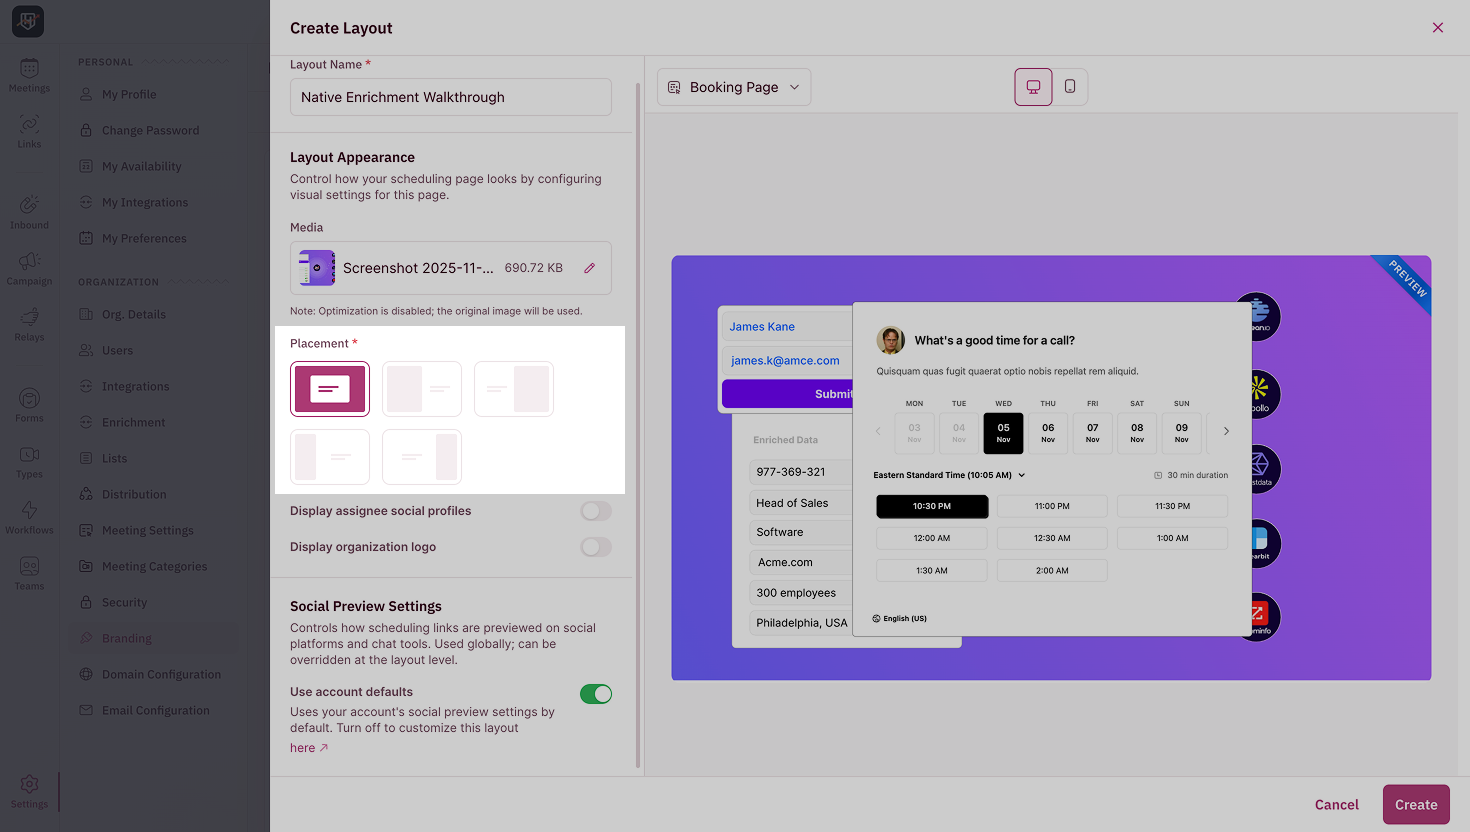 #### **Display Organization Logo and Assignee Profiles**
Toggle on the following options based on what you want to show on your booking page:
* **Display Organization Logo** - To include your organization's logo in the booking form
* **Display Assignee Social Profiles** - To include the social media profiles of the member the meeting being booked in assigned to
#### **Display Organization Logo and Assignee Profiles**
Toggle on the following options based on what you want to show on your booking page:
* **Display Organization Logo** - To include your organization's logo in the booking form
* **Display Assignee Social Profiles** - To include the social media profiles of the member the meeting being booked in assigned to
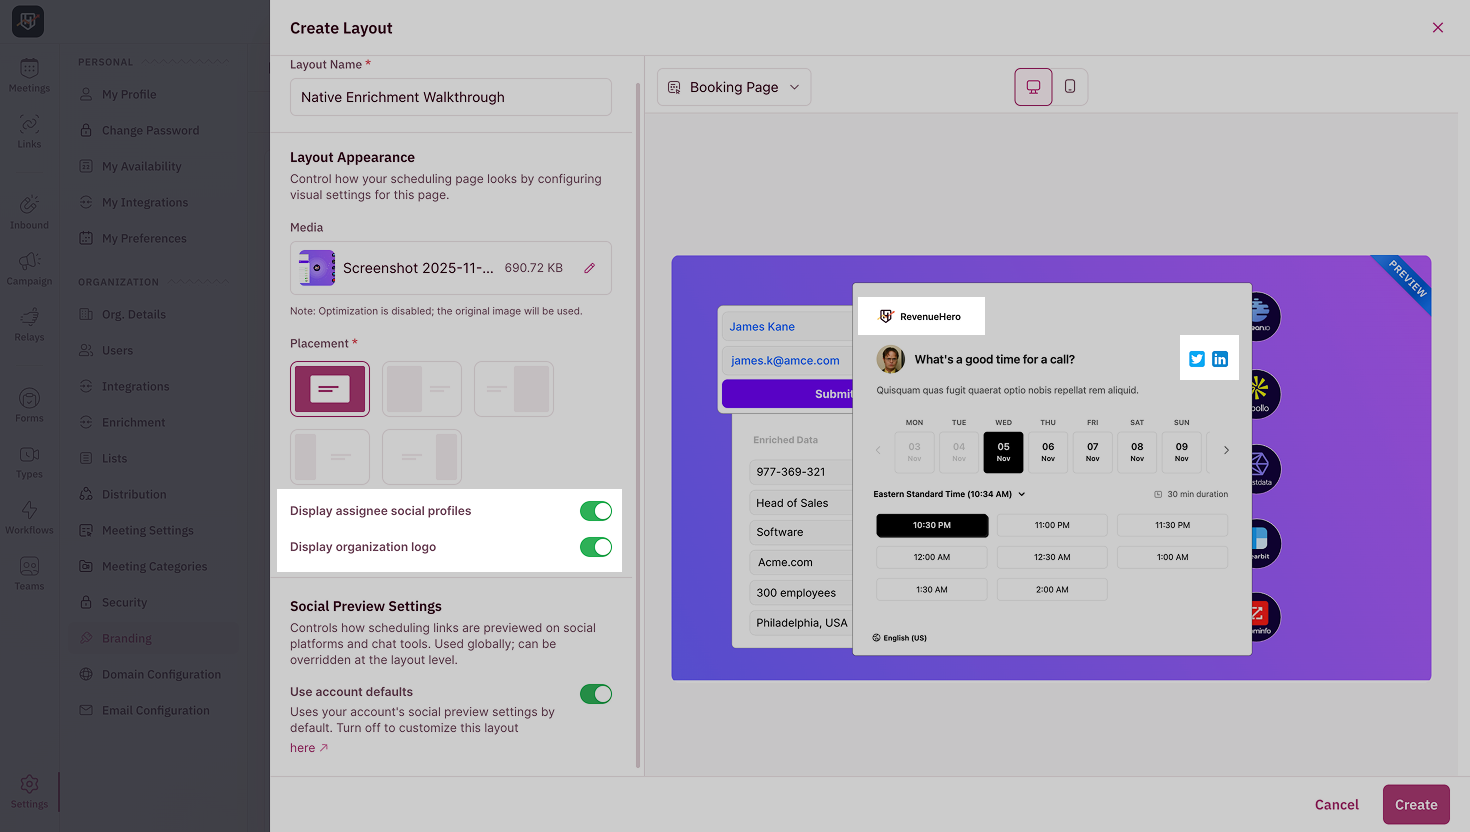 The member’s social media profiles will appear only if they’ve linked them to their RevenueHero account.
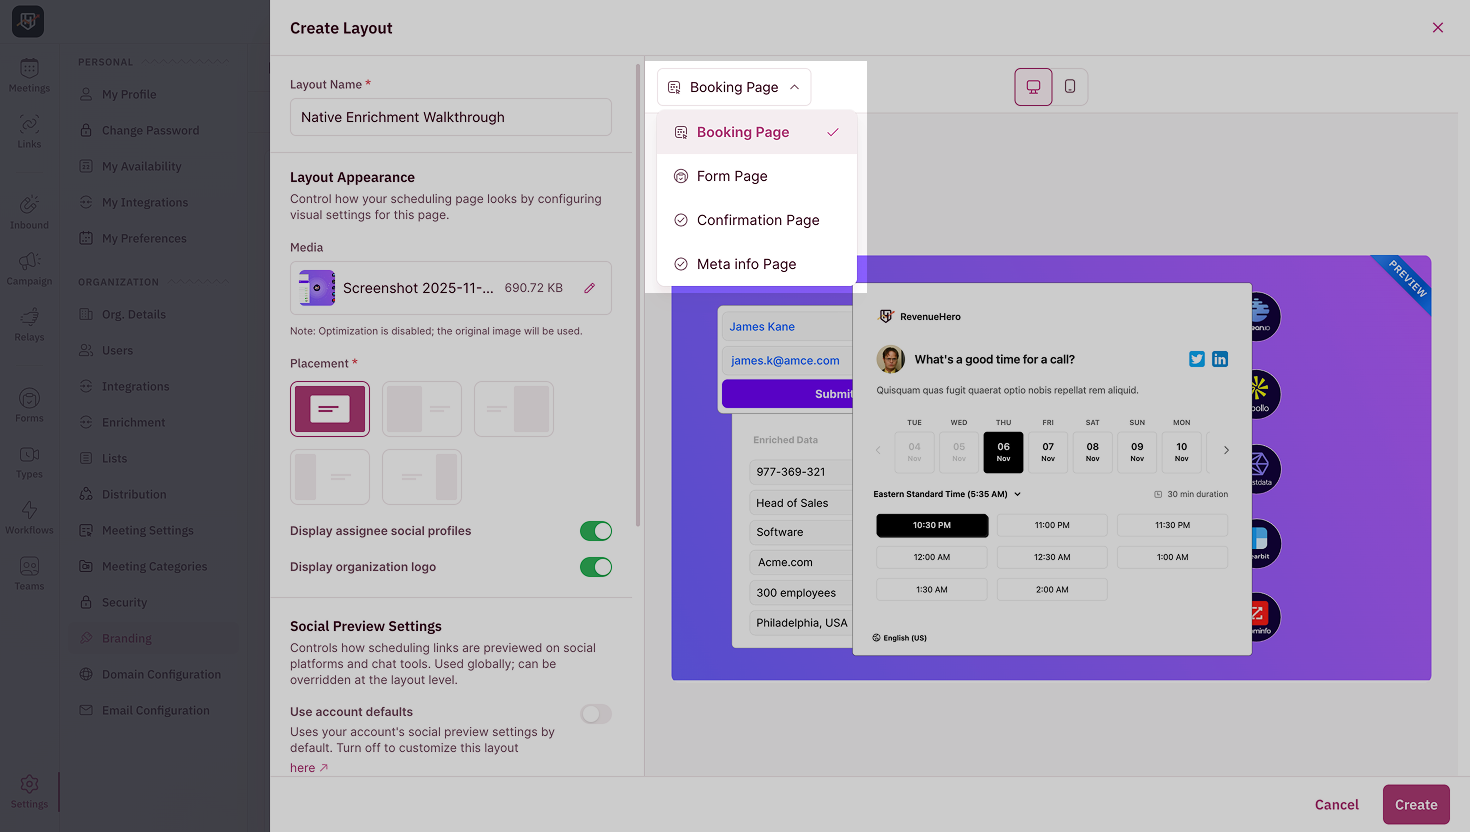
Once you have customized your layout, use the dropdown at the top of the preview section to view how each page appears, including the **Booking page**, **Form page**, **Confirmation page**, and **Meta Info Page**.
The member’s social media profiles will appear only if they’ve linked them to their RevenueHero account.
Once you have customized your layout, use the dropdown at the top of the preview section to view how each page appears, including the **Booking page**, **Form page**, **Confirmation page**, and **Meta Info Page**.
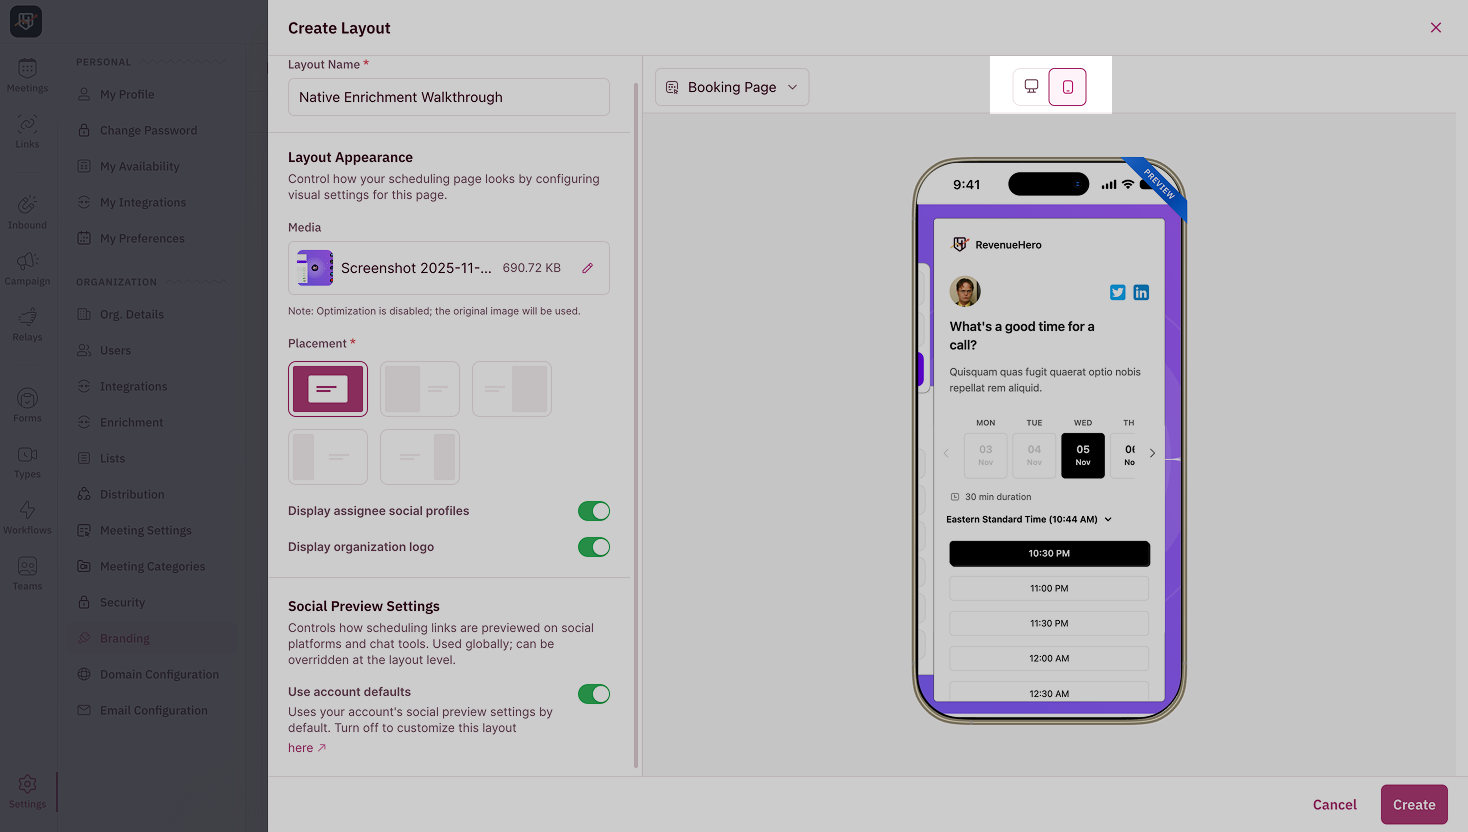
 You can also switch to **mobile view** to see how the experience adapts on smaller screens.
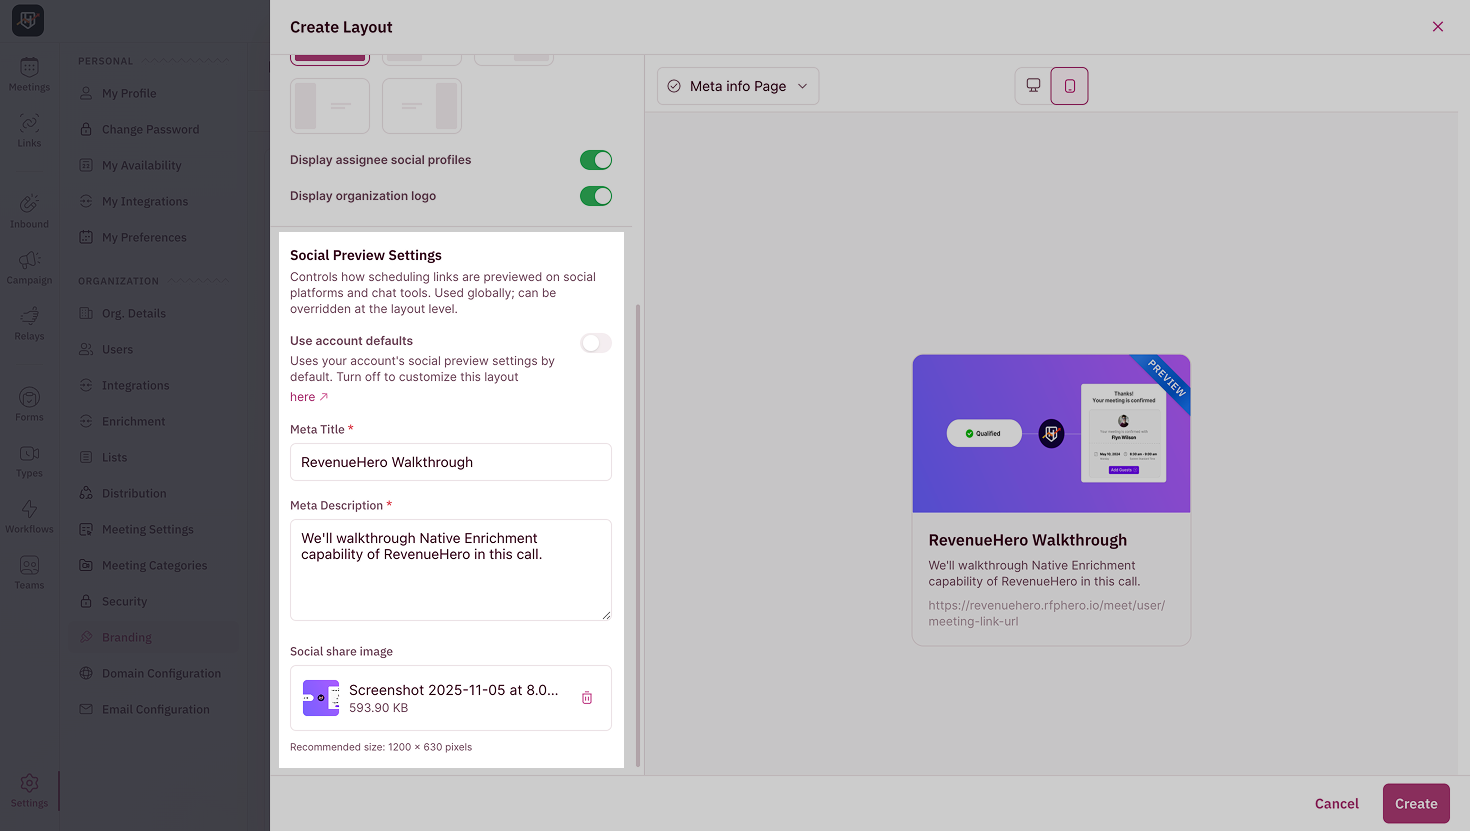
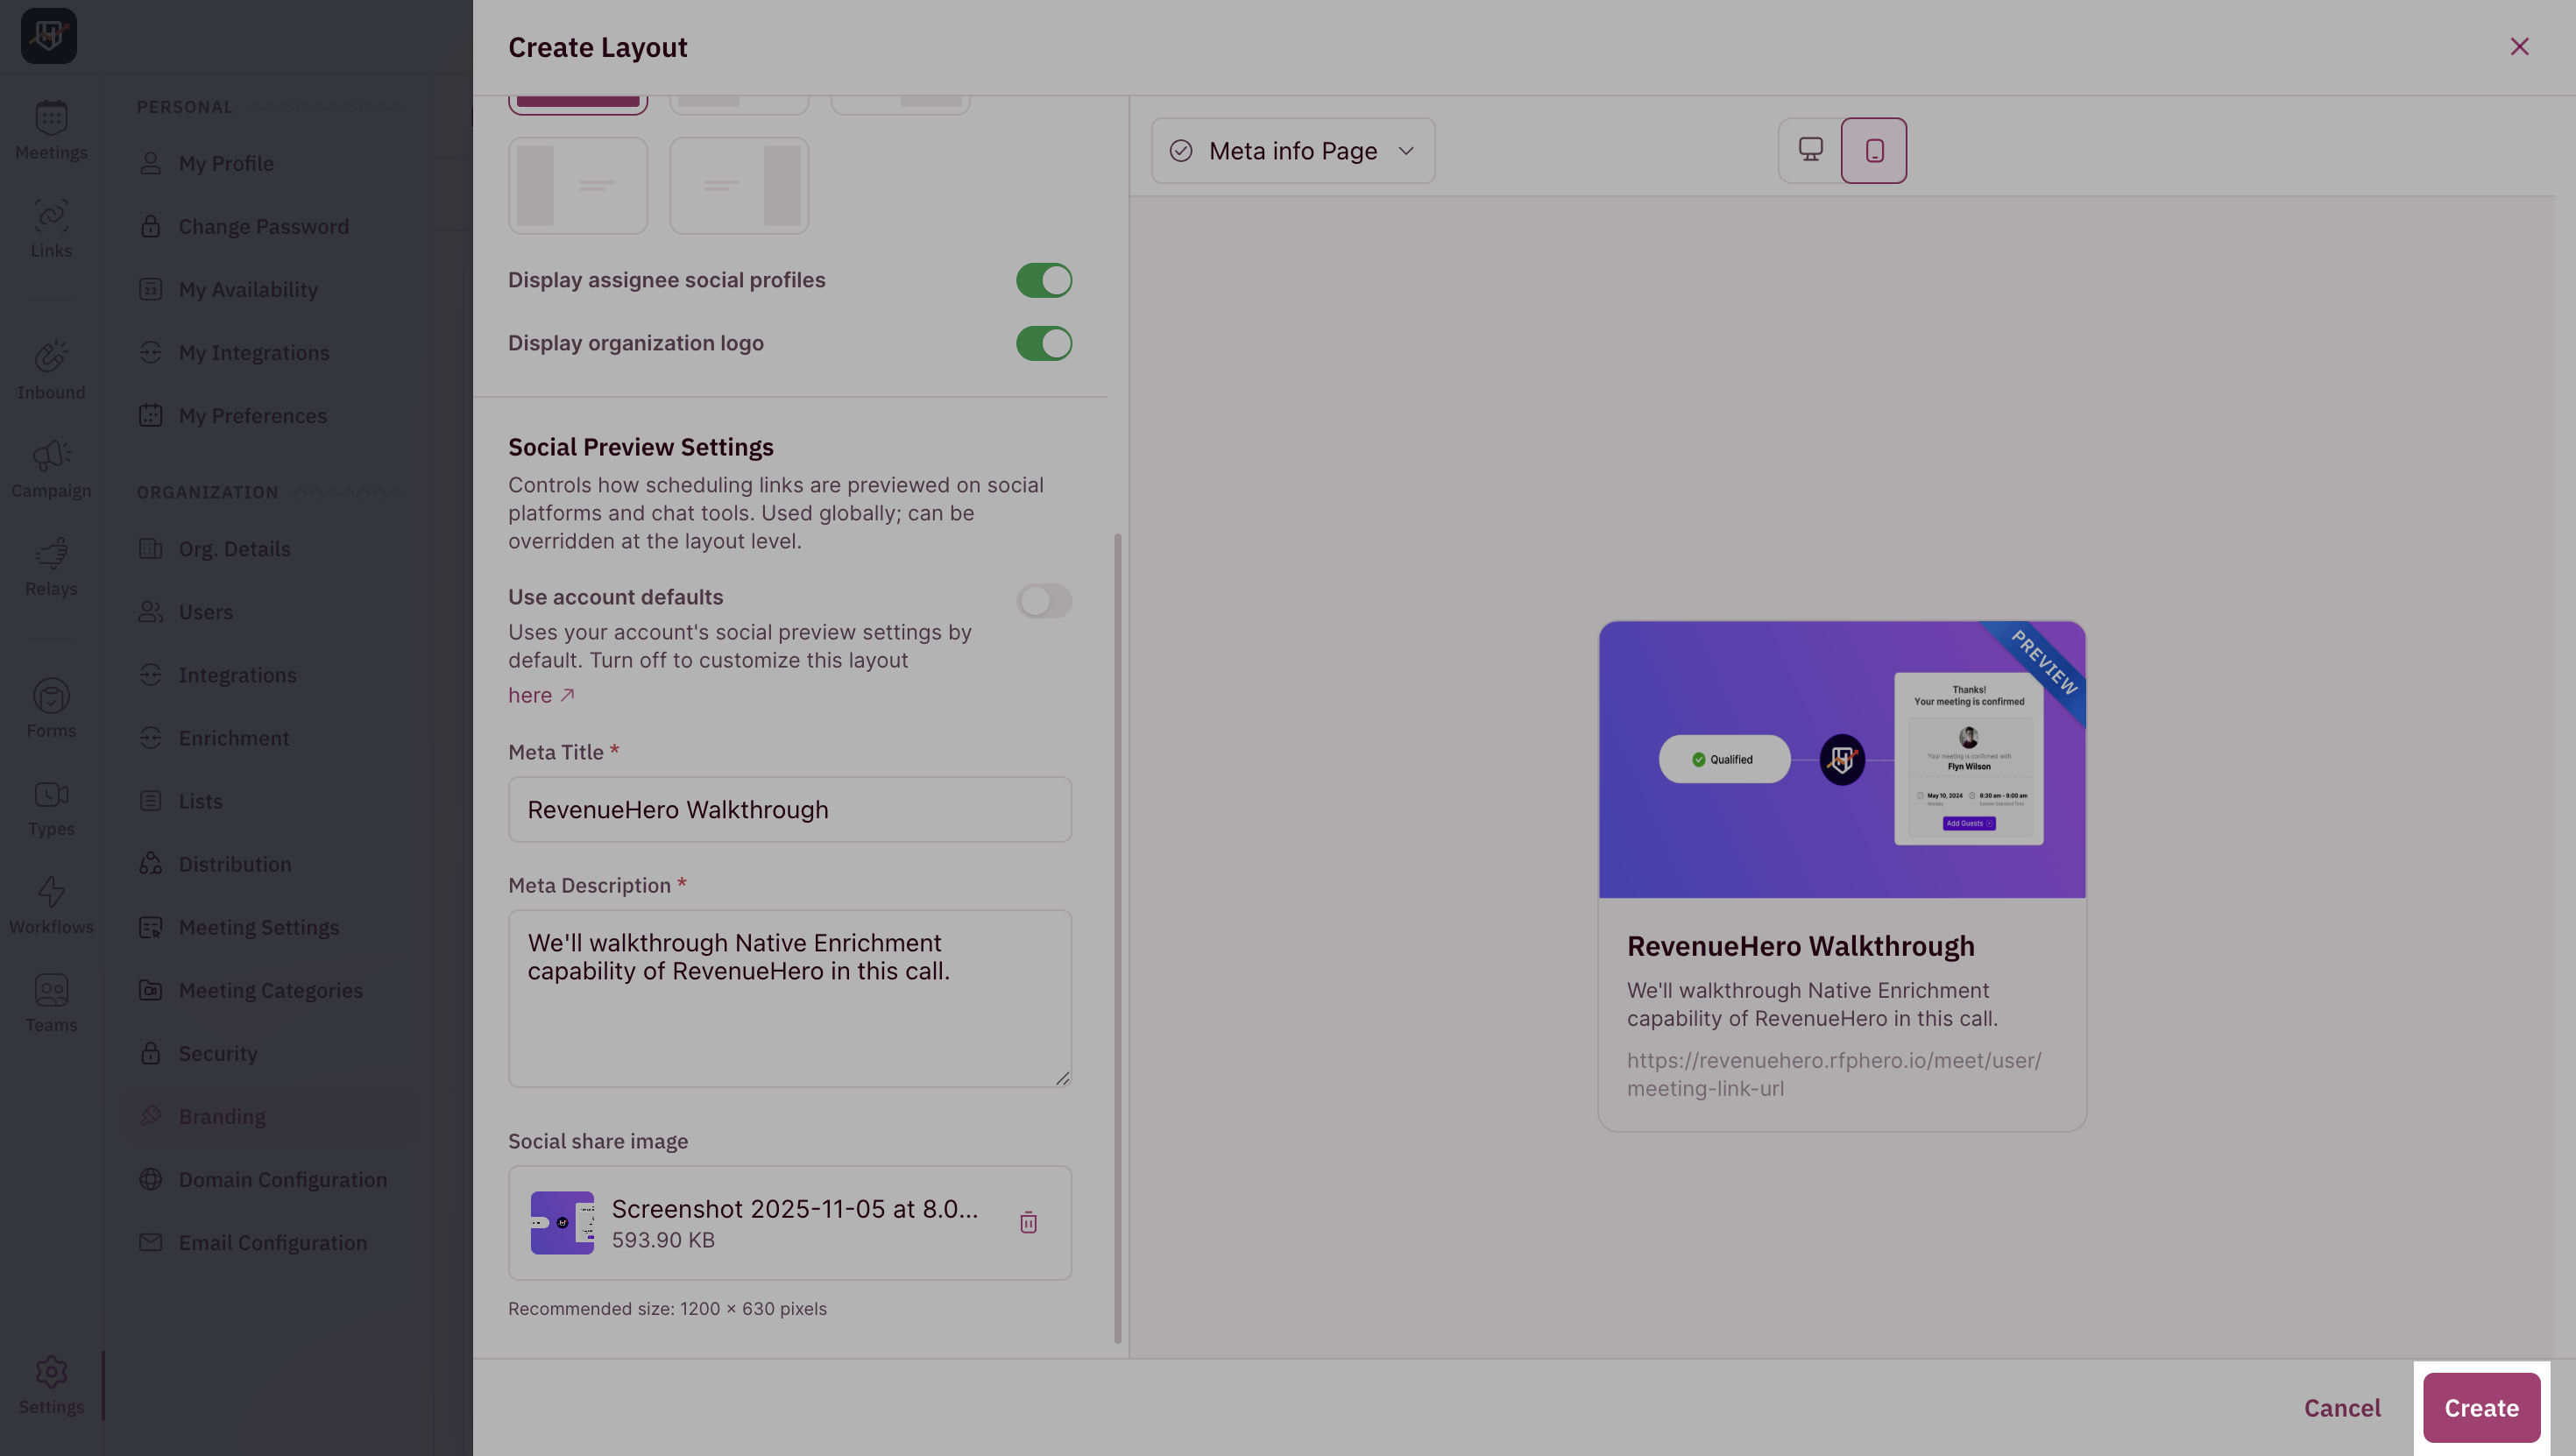
 Your **Social Preview Settings** determines how scheduling links appear when shared on social platforms or chat tools. By default, this follows your **global settings**, but you can disable that to customize it specifically for this layout.
Scroll down to:
* Add a **Meta Title**
* Write a **Description** for the meeting
* Upload an **Image** to be displayed when the link is shared
Your **Social Preview Settings** determines how scheduling links appear when shared on social platforms or chat tools. By default, this follows your **global settings**, but you can disable that to customize it specifically for this layout.
Scroll down to:
* Add a **Meta Title**
* Write a **Description** for the meeting
* Upload an **Image** to be displayed when the link is shared
 Once you’re happy with the customization, click **Create**.
 Your new layout template is ready! Team members can now select this layout while creating their **personal meeting links**.