> ## Documentation Index
> Fetch the complete documentation index at: https://help.revenuehero.io/llms.txt
> Use this file to discover all available pages before exploring further.
# How to integrate RevenueHero with Gravity forms?
> Integrate RevenueHero's scheduler with your Gravity form in 5 simple steps
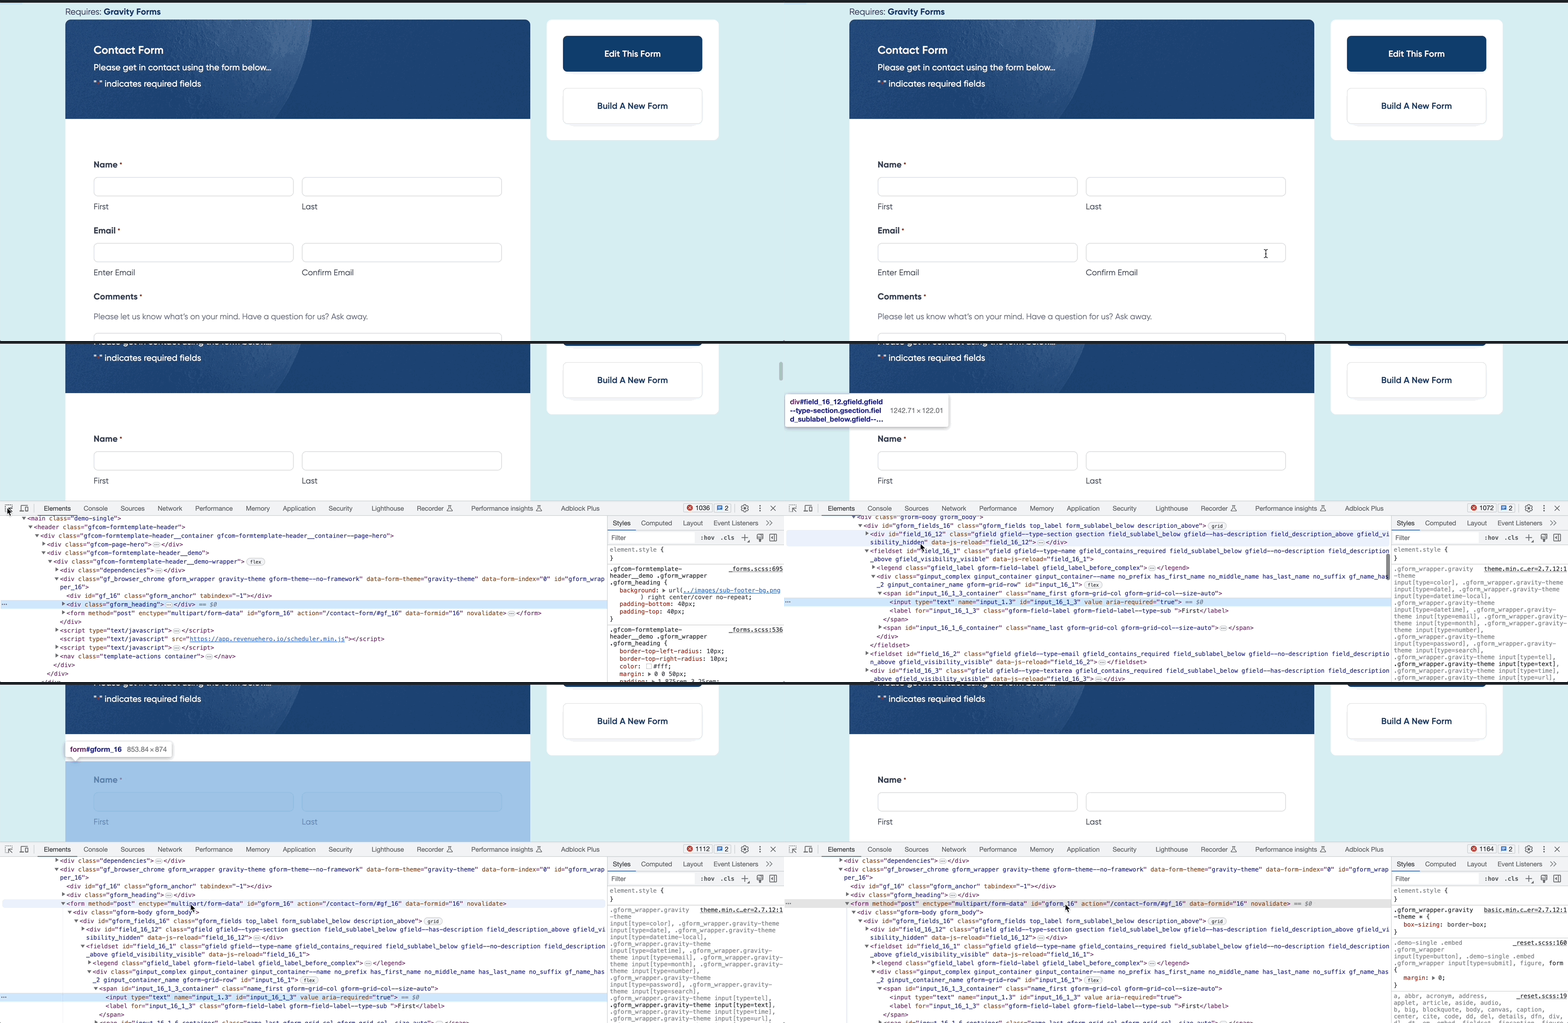
1. Go to your landing page with your Gravity form and find your form's identifier which will be something like `#gform_16`
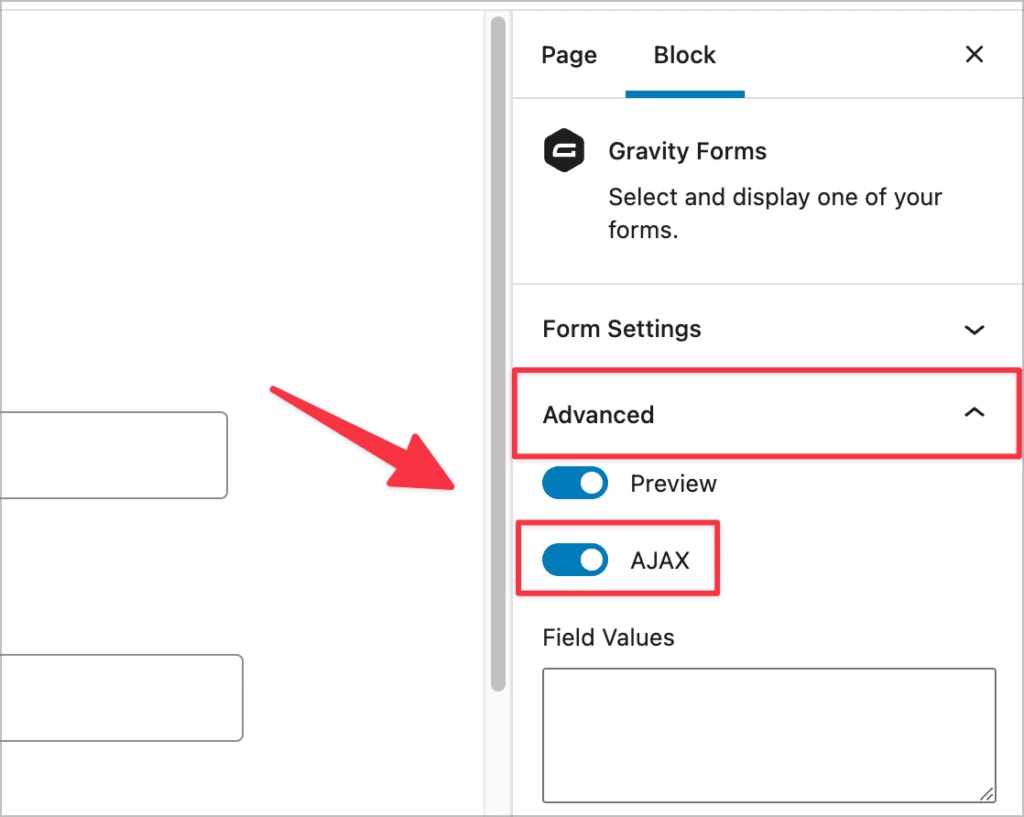
 Ensure the your Gravity form has AJAX enabled.
 2. Set up an [Inbound Router](/routers/inbound/create-inbound-router) in RevenueHero with the form identifier in your form mapping
3. Copy the [installation script](/routers/inbound/create-inbound-router#install-the-script) from the final step of the router set up.
```javascript Sample installation script theme={null}
```
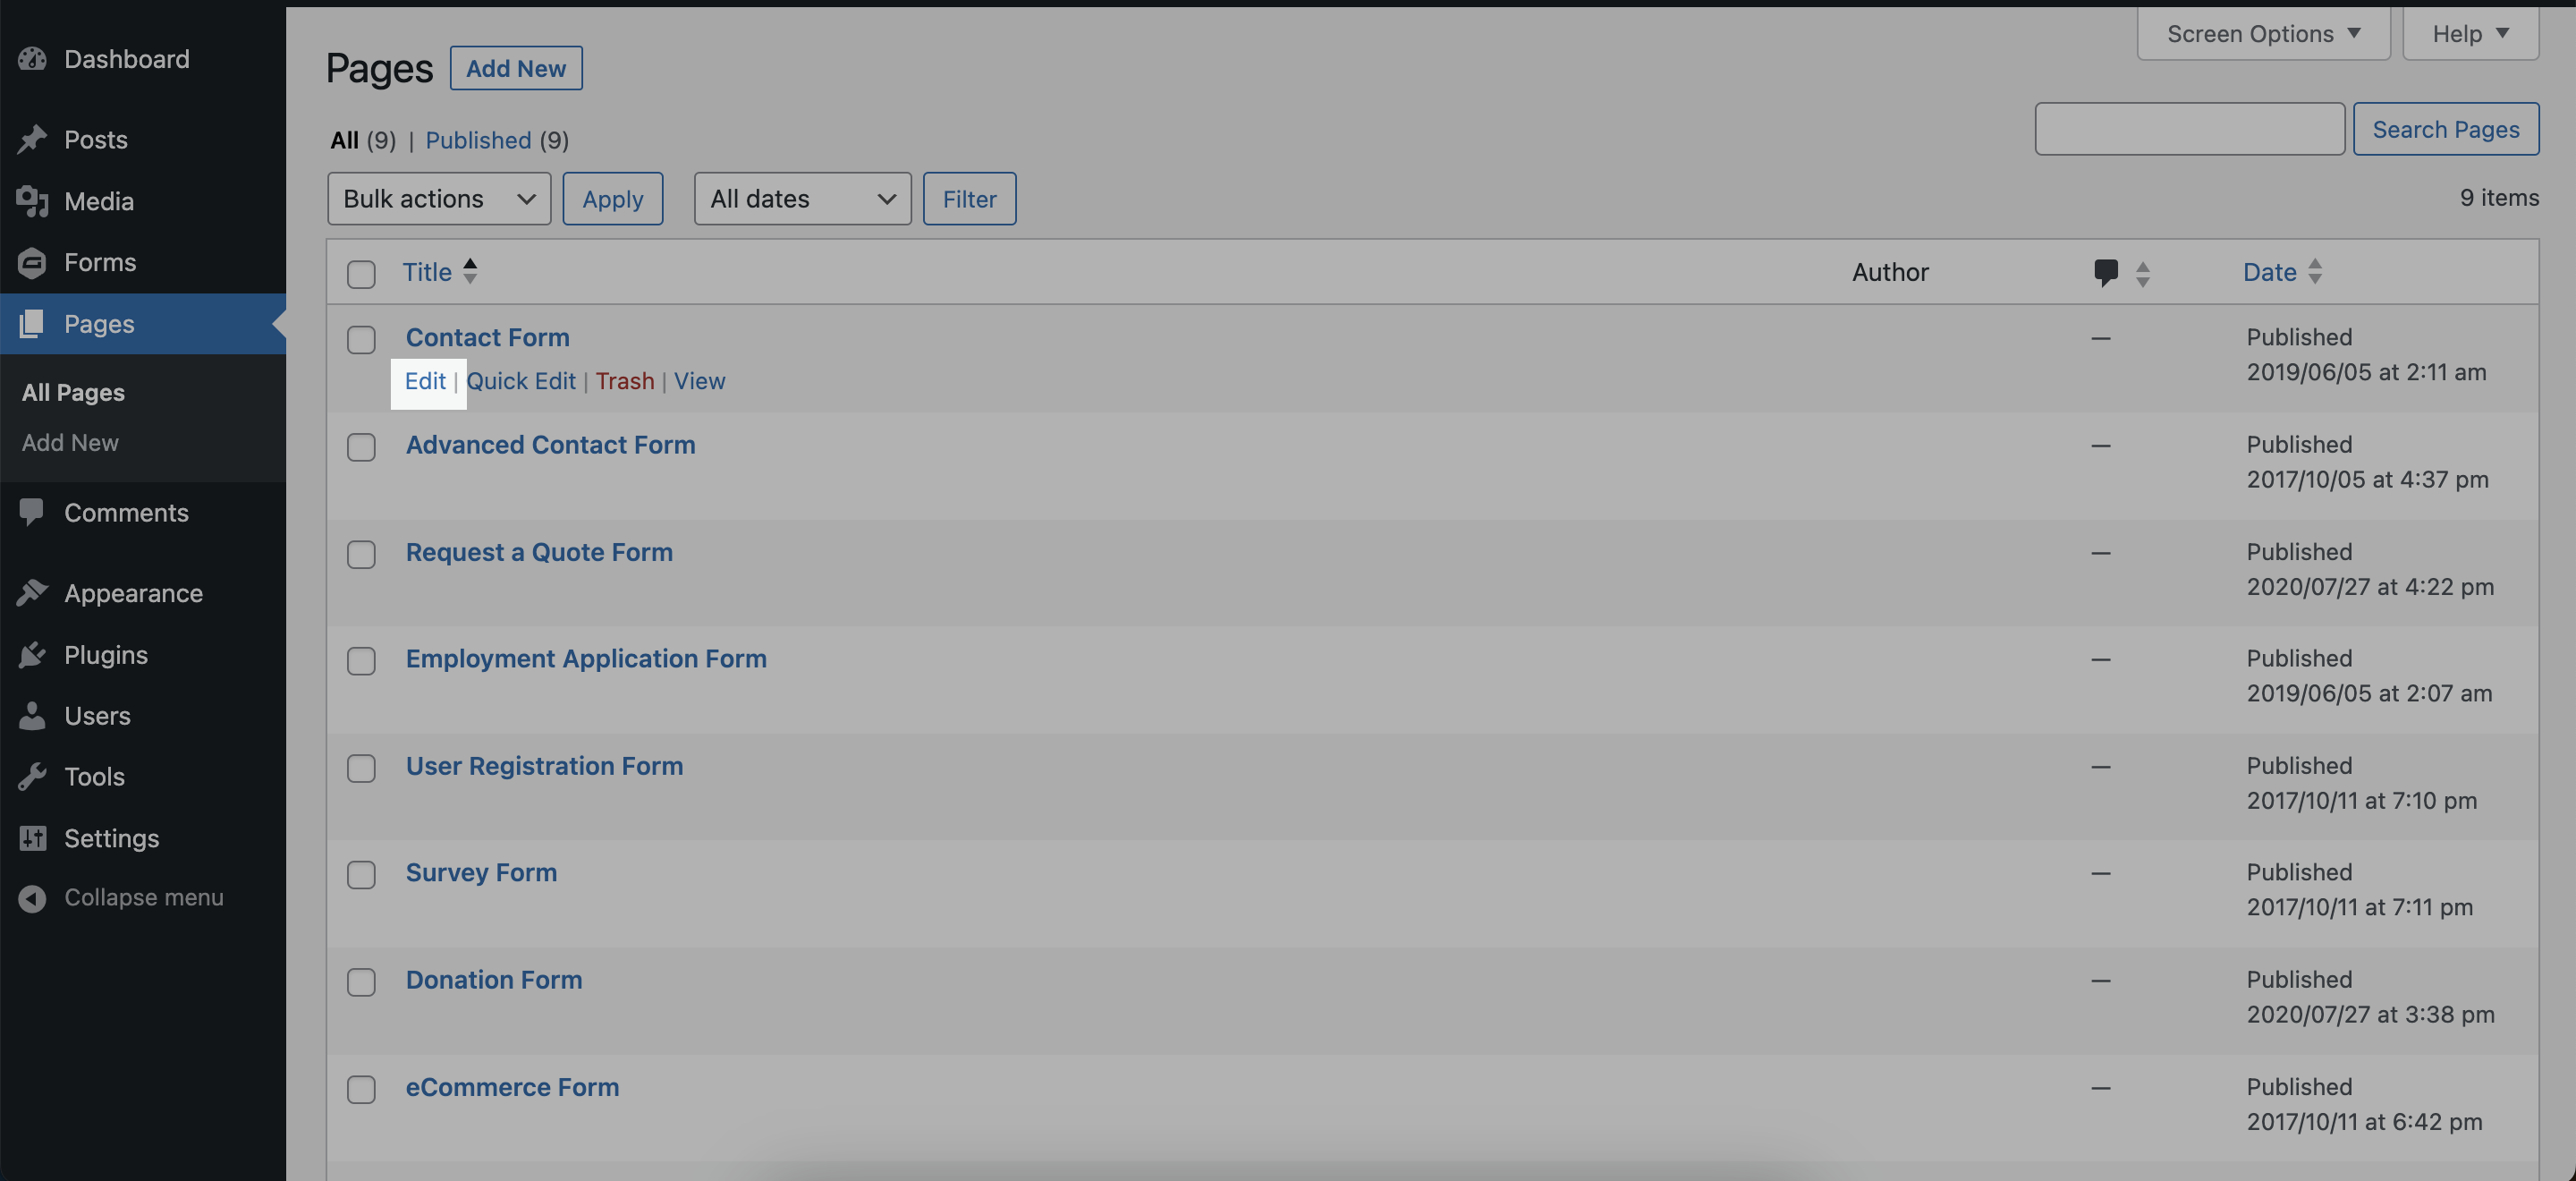
4. Go to your Gravity Forms account and navigate to your landing page by going to **Sidebar** -> **Pages** -> *Landing Page* -> **Edit**
2. Set up an [Inbound Router](/routers/inbound/create-inbound-router) in RevenueHero with the form identifier in your form mapping
3. Copy the [installation script](/routers/inbound/create-inbound-router#install-the-script) from the final step of the router set up.
```javascript Sample installation script theme={null}
```
4. Go to your Gravity Forms account and navigate to your landing page by going to **Sidebar** -> **Pages** -> *Landing Page* -> **Edit**
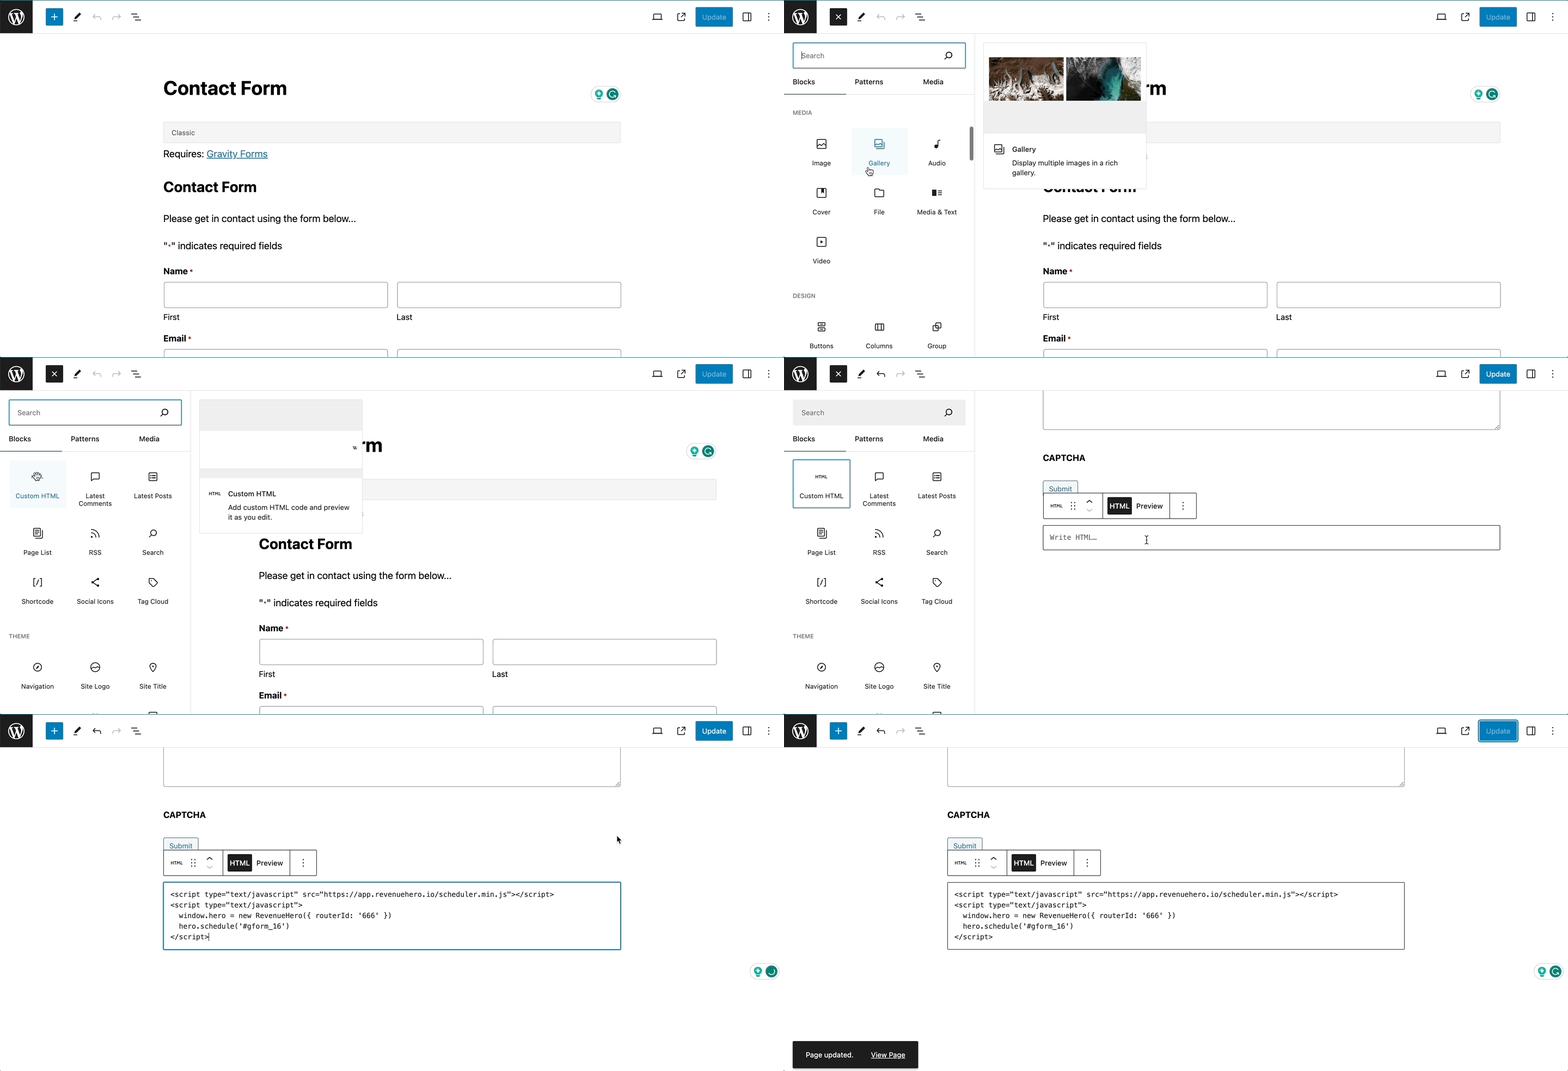
 5. Toggle the **Block Inserter**, scroll to **Widgets** and add **Custom HTML** to the bottom of the page. Paste the RevenueHero installation script in it and click **Update** on top-right corner to persist changes
 That's it. You're ready to start converting your Demo Meetings 🎉🎉