> ## Documentation Index
> Fetch the complete documentation index at: https://help.revenuehero.io/llms.txt
> Use this file to discover all available pages before exploring further.
> Connect your form submissions directly to your inbound routing workflows.
# HubSpot Form Mapping
# Integrating Hubspot forms with RevenueHero
Integrating HubSpot forms to RevenueHero is essential for form submissions to be instantly captured, qualified, and routed to the right sales rep. It lets you use form field inputs as routing conditions and trigger the right scheduling flow based on the rules you set up in the inbound router.
## How to Map HubSpot Form in RevenueHero
## In HubSpot
Ensure the form you’d like to integrate with RevenueHero is set to **Show thank you message** upon submission. You can set this up while creating the form, or to check if an existing form is set up appropriately:
* On your HubSpot portal, navigate to **Marketing** -> **Forms**
* Hover over the name of the form → Click **Edit**
* Navigate to **Contents**
* Scroll down to **On Submit**
* Set it to **Show thank you message**
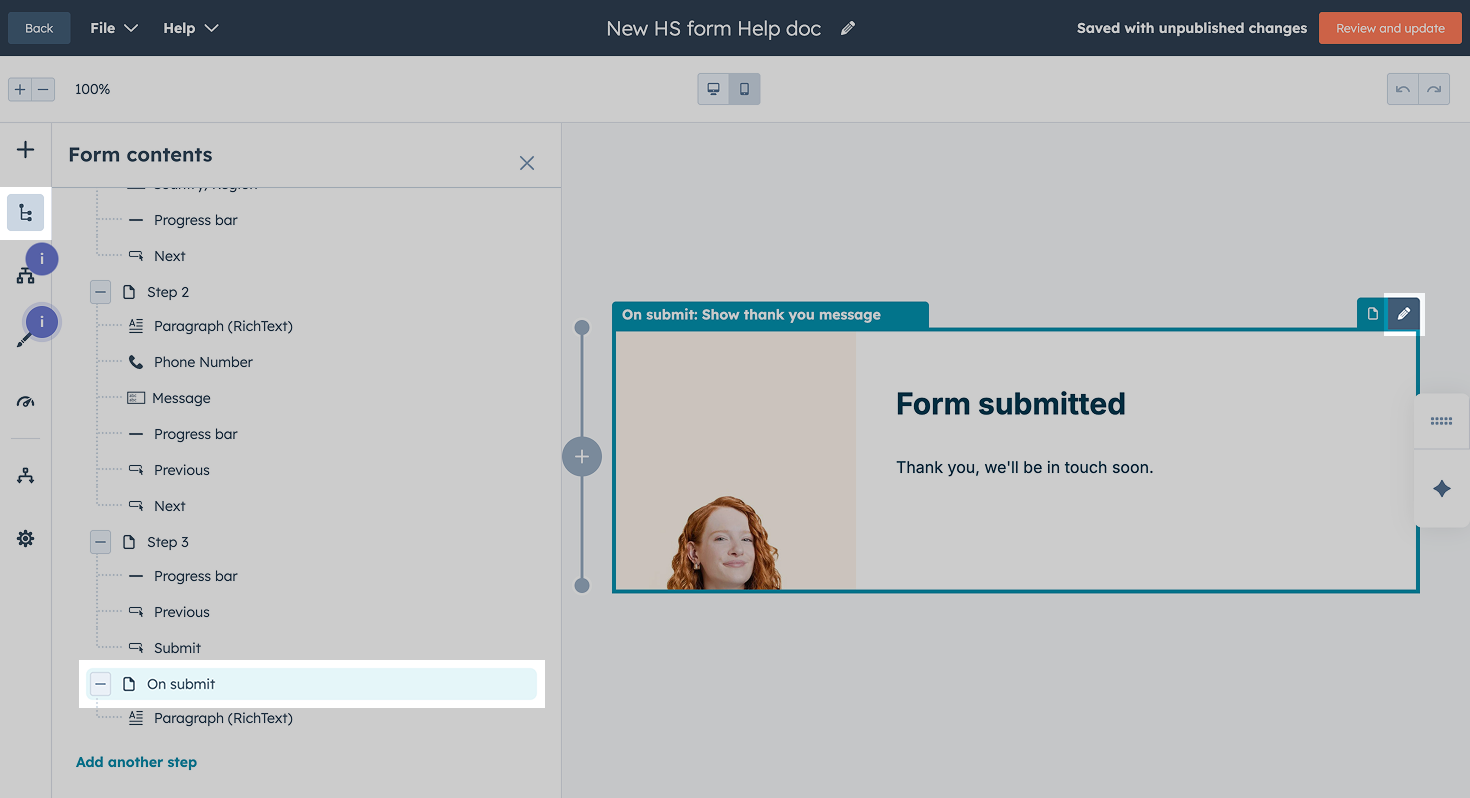 **Save** your form settings or **Review and update** if you made any changes to an existing form.
You have now completed the setup required in HubSpot. Next, you’ll map this form to a RevenueHero inbound router.
## **In RevenueHero**
[Set up your inbound router](create-inbound-router).
You can find the Selector ID of the HubSpot form you want to map in two ways.
* Click on the form you want to map, the URL contains the **Form Id**.
**Save** your form settings or **Review and update** if you made any changes to an existing form.
You have now completed the setup required in HubSpot. Next, you’ll map this form to a RevenueHero inbound router.
## **In RevenueHero**
[Set up your inbound router](create-inbound-router).
You can find the Selector ID of the HubSpot form you want to map in two ways.
* Click on the form you want to map, the URL contains the **Form Id**.
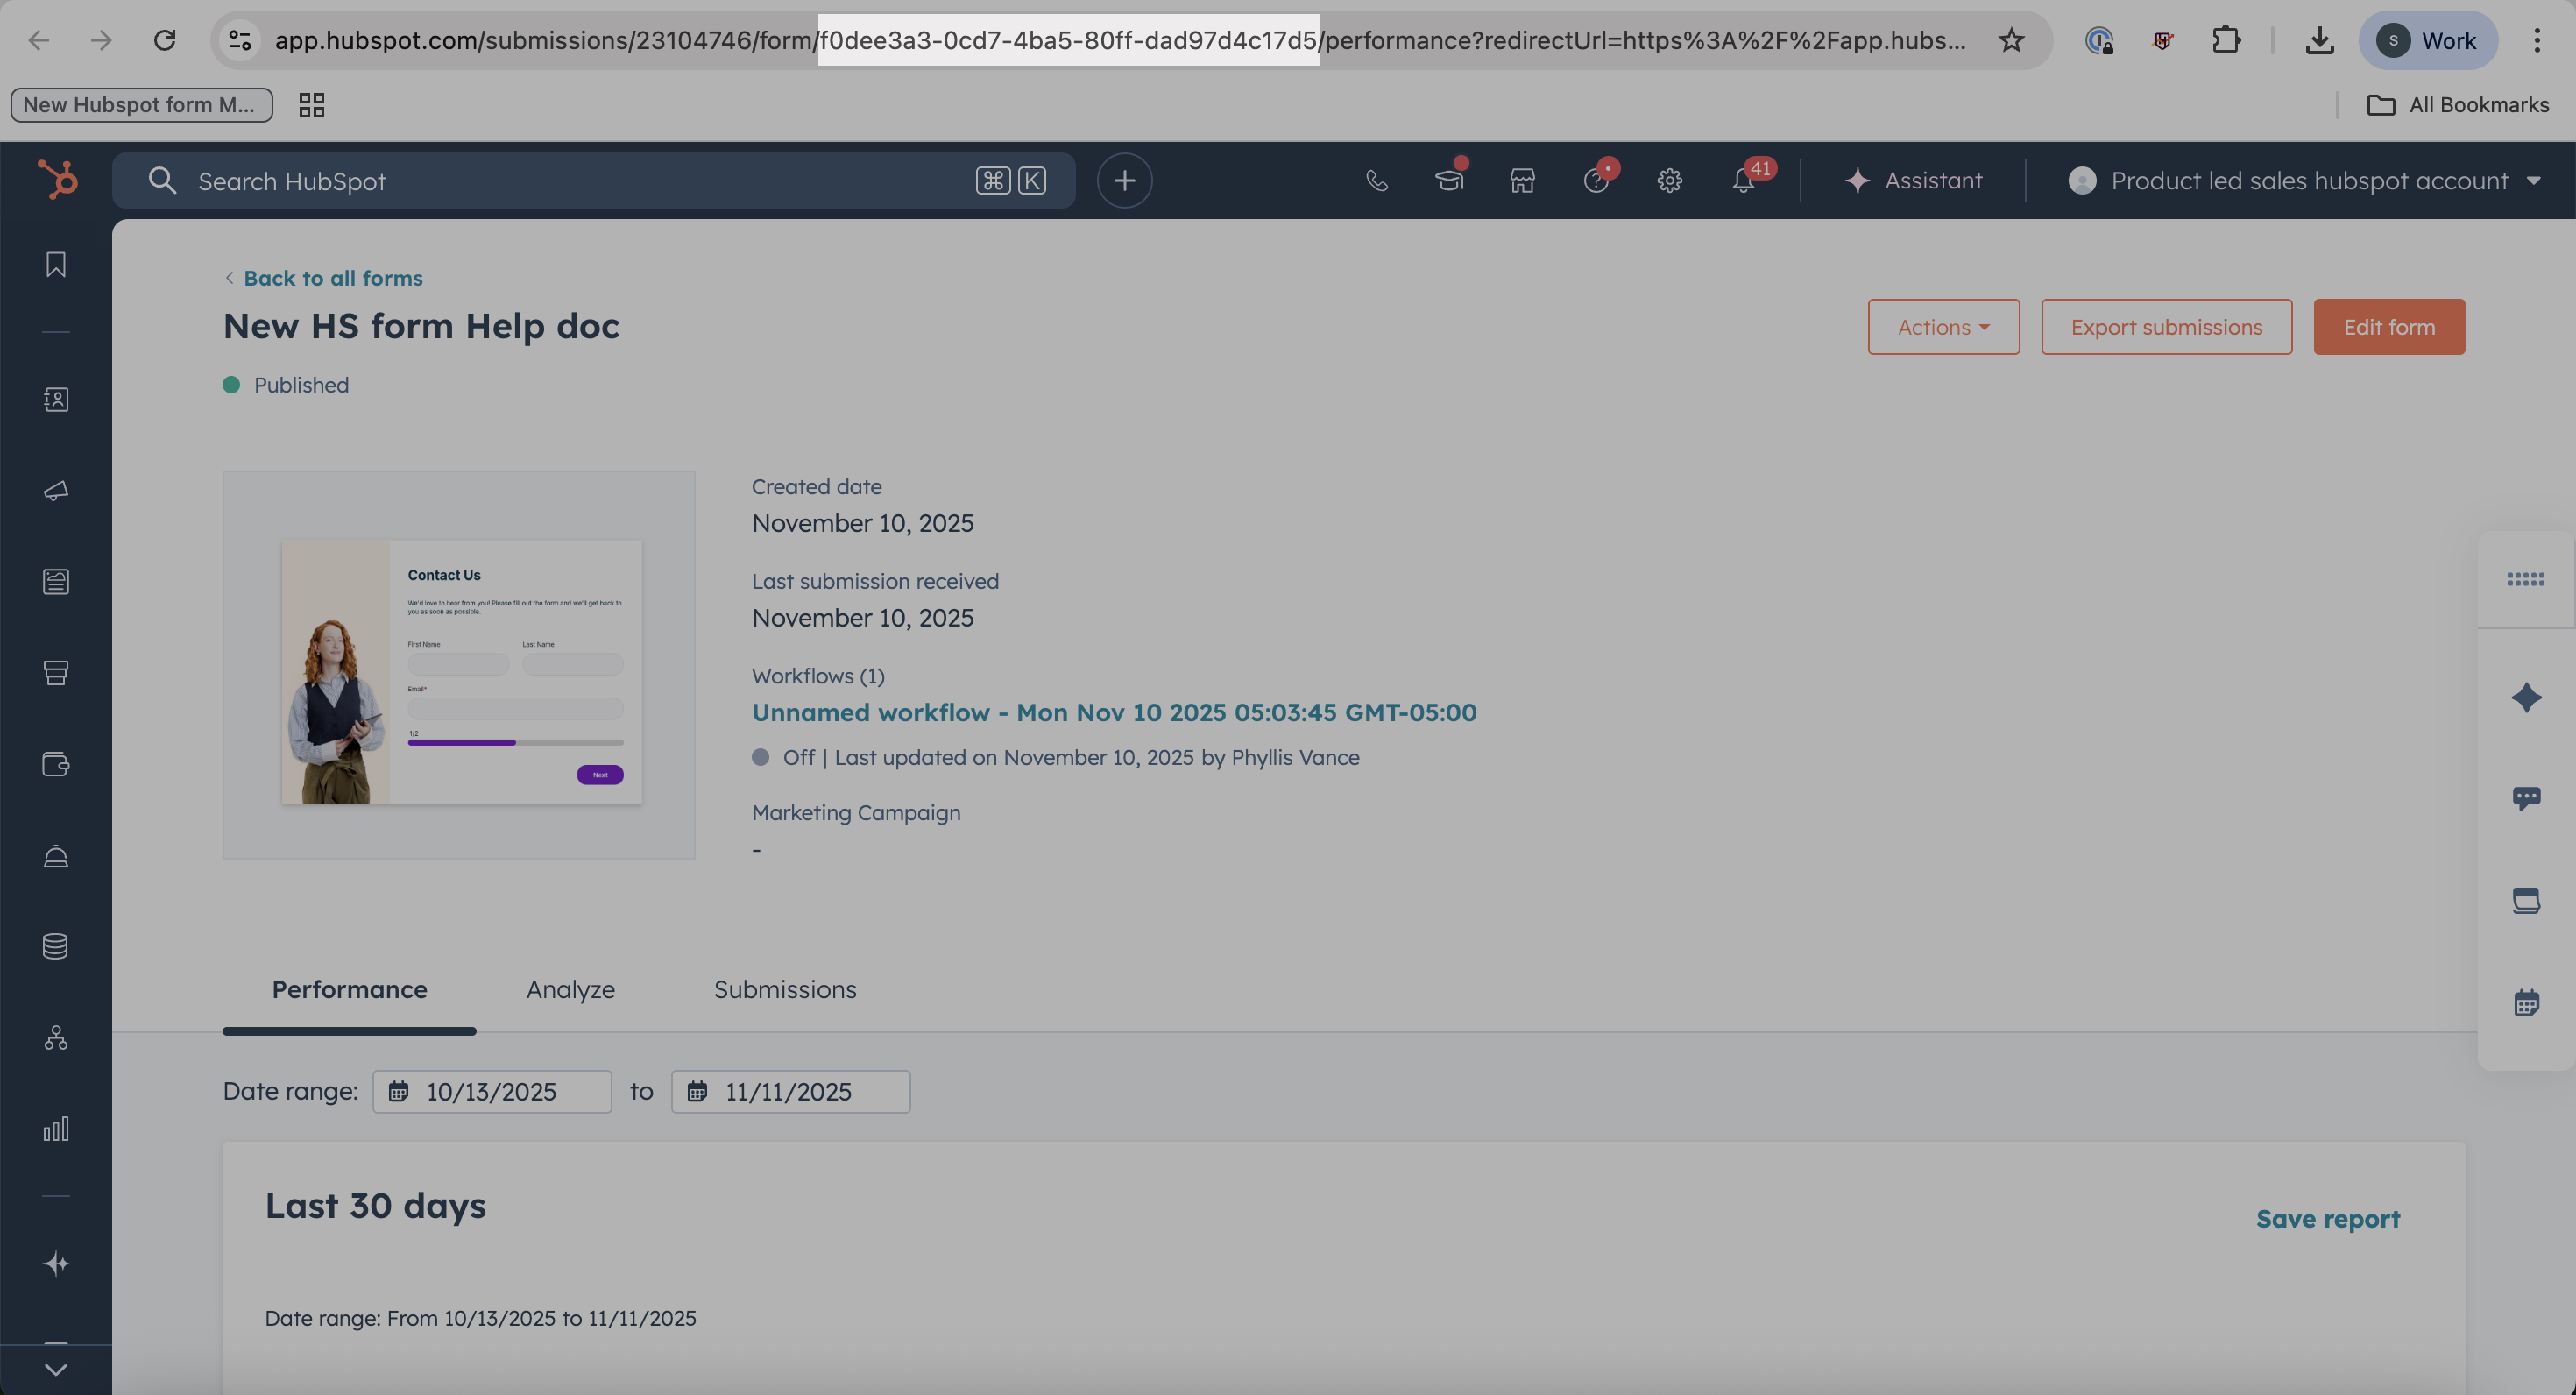 * Construct the **Selector ID** by prefixing **hsForm\_** to your Form ID
If your Form ID is\
`9918da4c-d12f-47e6-9131-4f938a372ae1`\
Then your Selector ID is\
`hsForm_9918da4c-d12f-47e6-9131-4f938a372ae1`
* Go to the webpage where your HubSpot form is embedded.
* Right-click → Select **Inspect Element**
* Click the **Element Selector** in the developer panel.
* Select the first field on your HubSpot form.
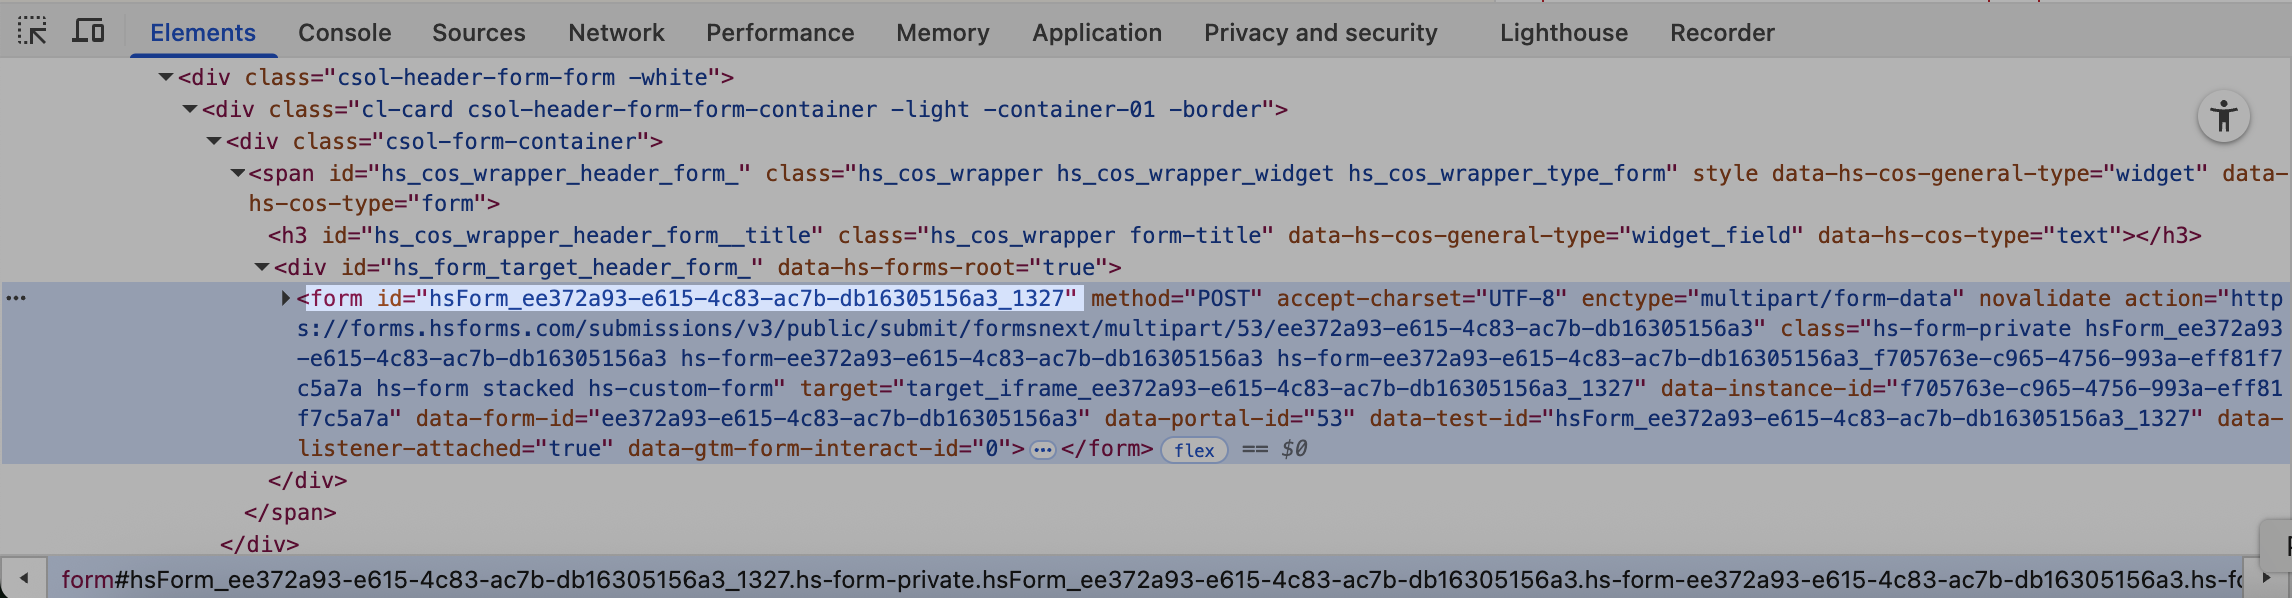
* In the developer window, locate the HubSpot selector ID (format shown below).
* Construct the **Selector ID** by prefixing **hsForm\_** to your Form ID
If your Form ID is\
`9918da4c-d12f-47e6-9131-4f938a372ae1`\
Then your Selector ID is\
`hsForm_9918da4c-d12f-47e6-9131-4f938a372ae1`
* Go to the webpage where your HubSpot form is embedded.
* Right-click → Select **Inspect Element**
* Click the **Element Selector** in the developer panel.
* Select the first field on your HubSpot form.
* In the developer window, locate the HubSpot selector ID (format shown below).
 In the **Map Form Fields** panel, add all your mandatory fields and any other form field that will be used in the distribution logic.
* Make sure to map the **Form field name** and **Contact field in HubSpot** entries accurately.
* **Form field name** is the combination of **"Object Type Id/Hubspot internaI name"**. **Contact field in HubSpot** is the name of the HubSpot property that is populated with the input from the field.
* To find a field’s **HubSpot internal name:**
* Click the field in the form.
* Go to **Options** → Copy the **Internal name**
In the **Map Form Fields** panel, add all your mandatory fields and any other form field that will be used in the distribution logic.
* Make sure to map the **Form field name** and **Contact field in HubSpot** entries accurately.
* **Form field name** is the combination of **"Object Type Id/Hubspot internaI name"**. **Contact field in HubSpot** is the name of the HubSpot property that is populated with the input from the field.
* To find a field’s **HubSpot internal name:**
* Click the field in the form.
* Go to **Options** → Copy the **Internal name**
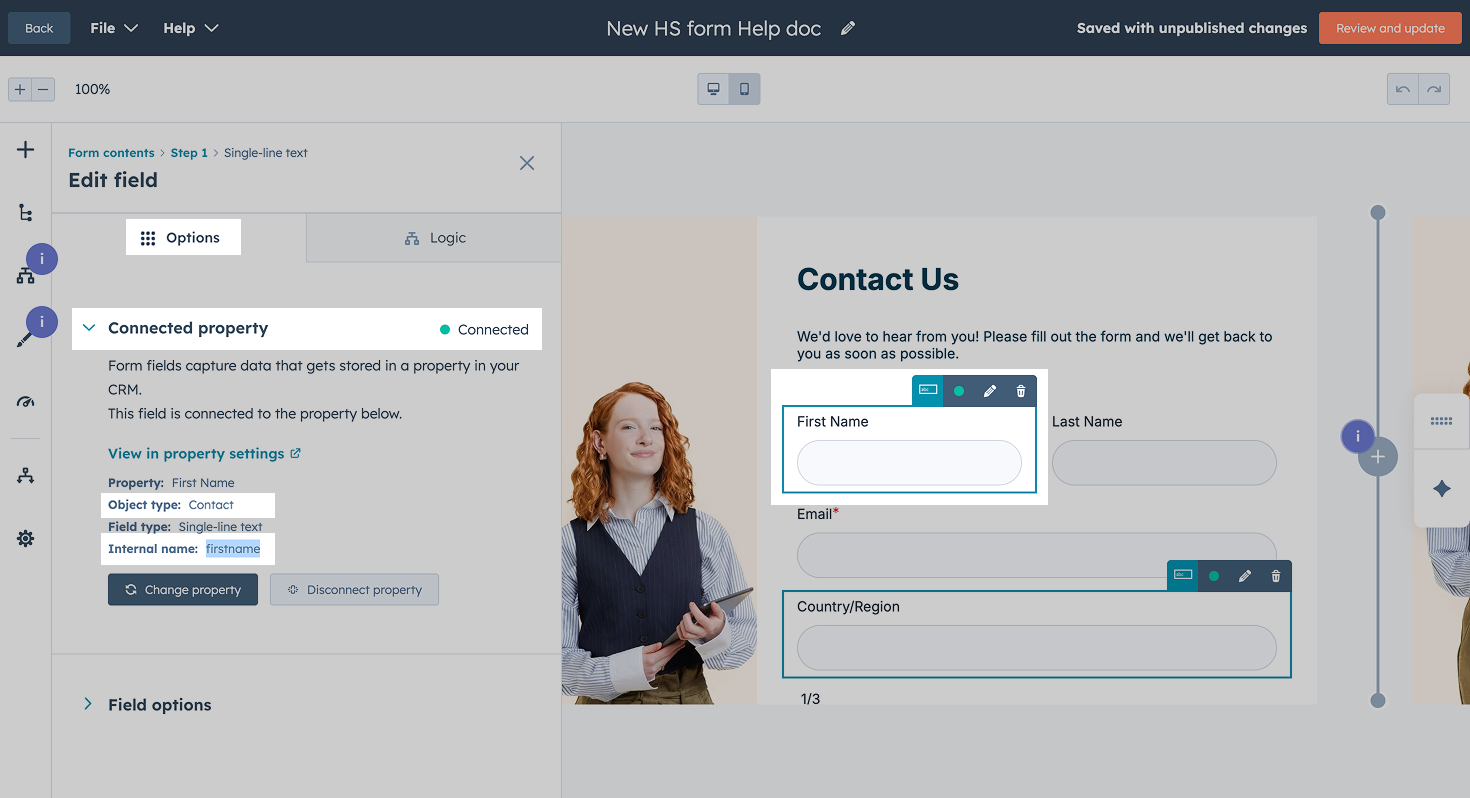 * Observe the **Object Type** to identify the relevant **Object Type Id**
Object Type IDs for the most common Object types are:
* `0-1` → Contact objects
* `0-2` → Company objects
* `0-3` → Deal objects
* You now have the **Form field name** for all the fields you wish to map with the router by concatenating the **Object Type Id/HubSpot internal name**.
* Observe the **Object Type** to identify the relevant **Object Type Id**
Object Type IDs for the most common Object types are:
* `0-1` → Contact objects
* `0-2` → Company objects
* `0-3` → Deal objects
* You now have the **Form field name** for all the fields you wish to map with the router by concatenating the **Object Type Id/HubSpot internal name**.
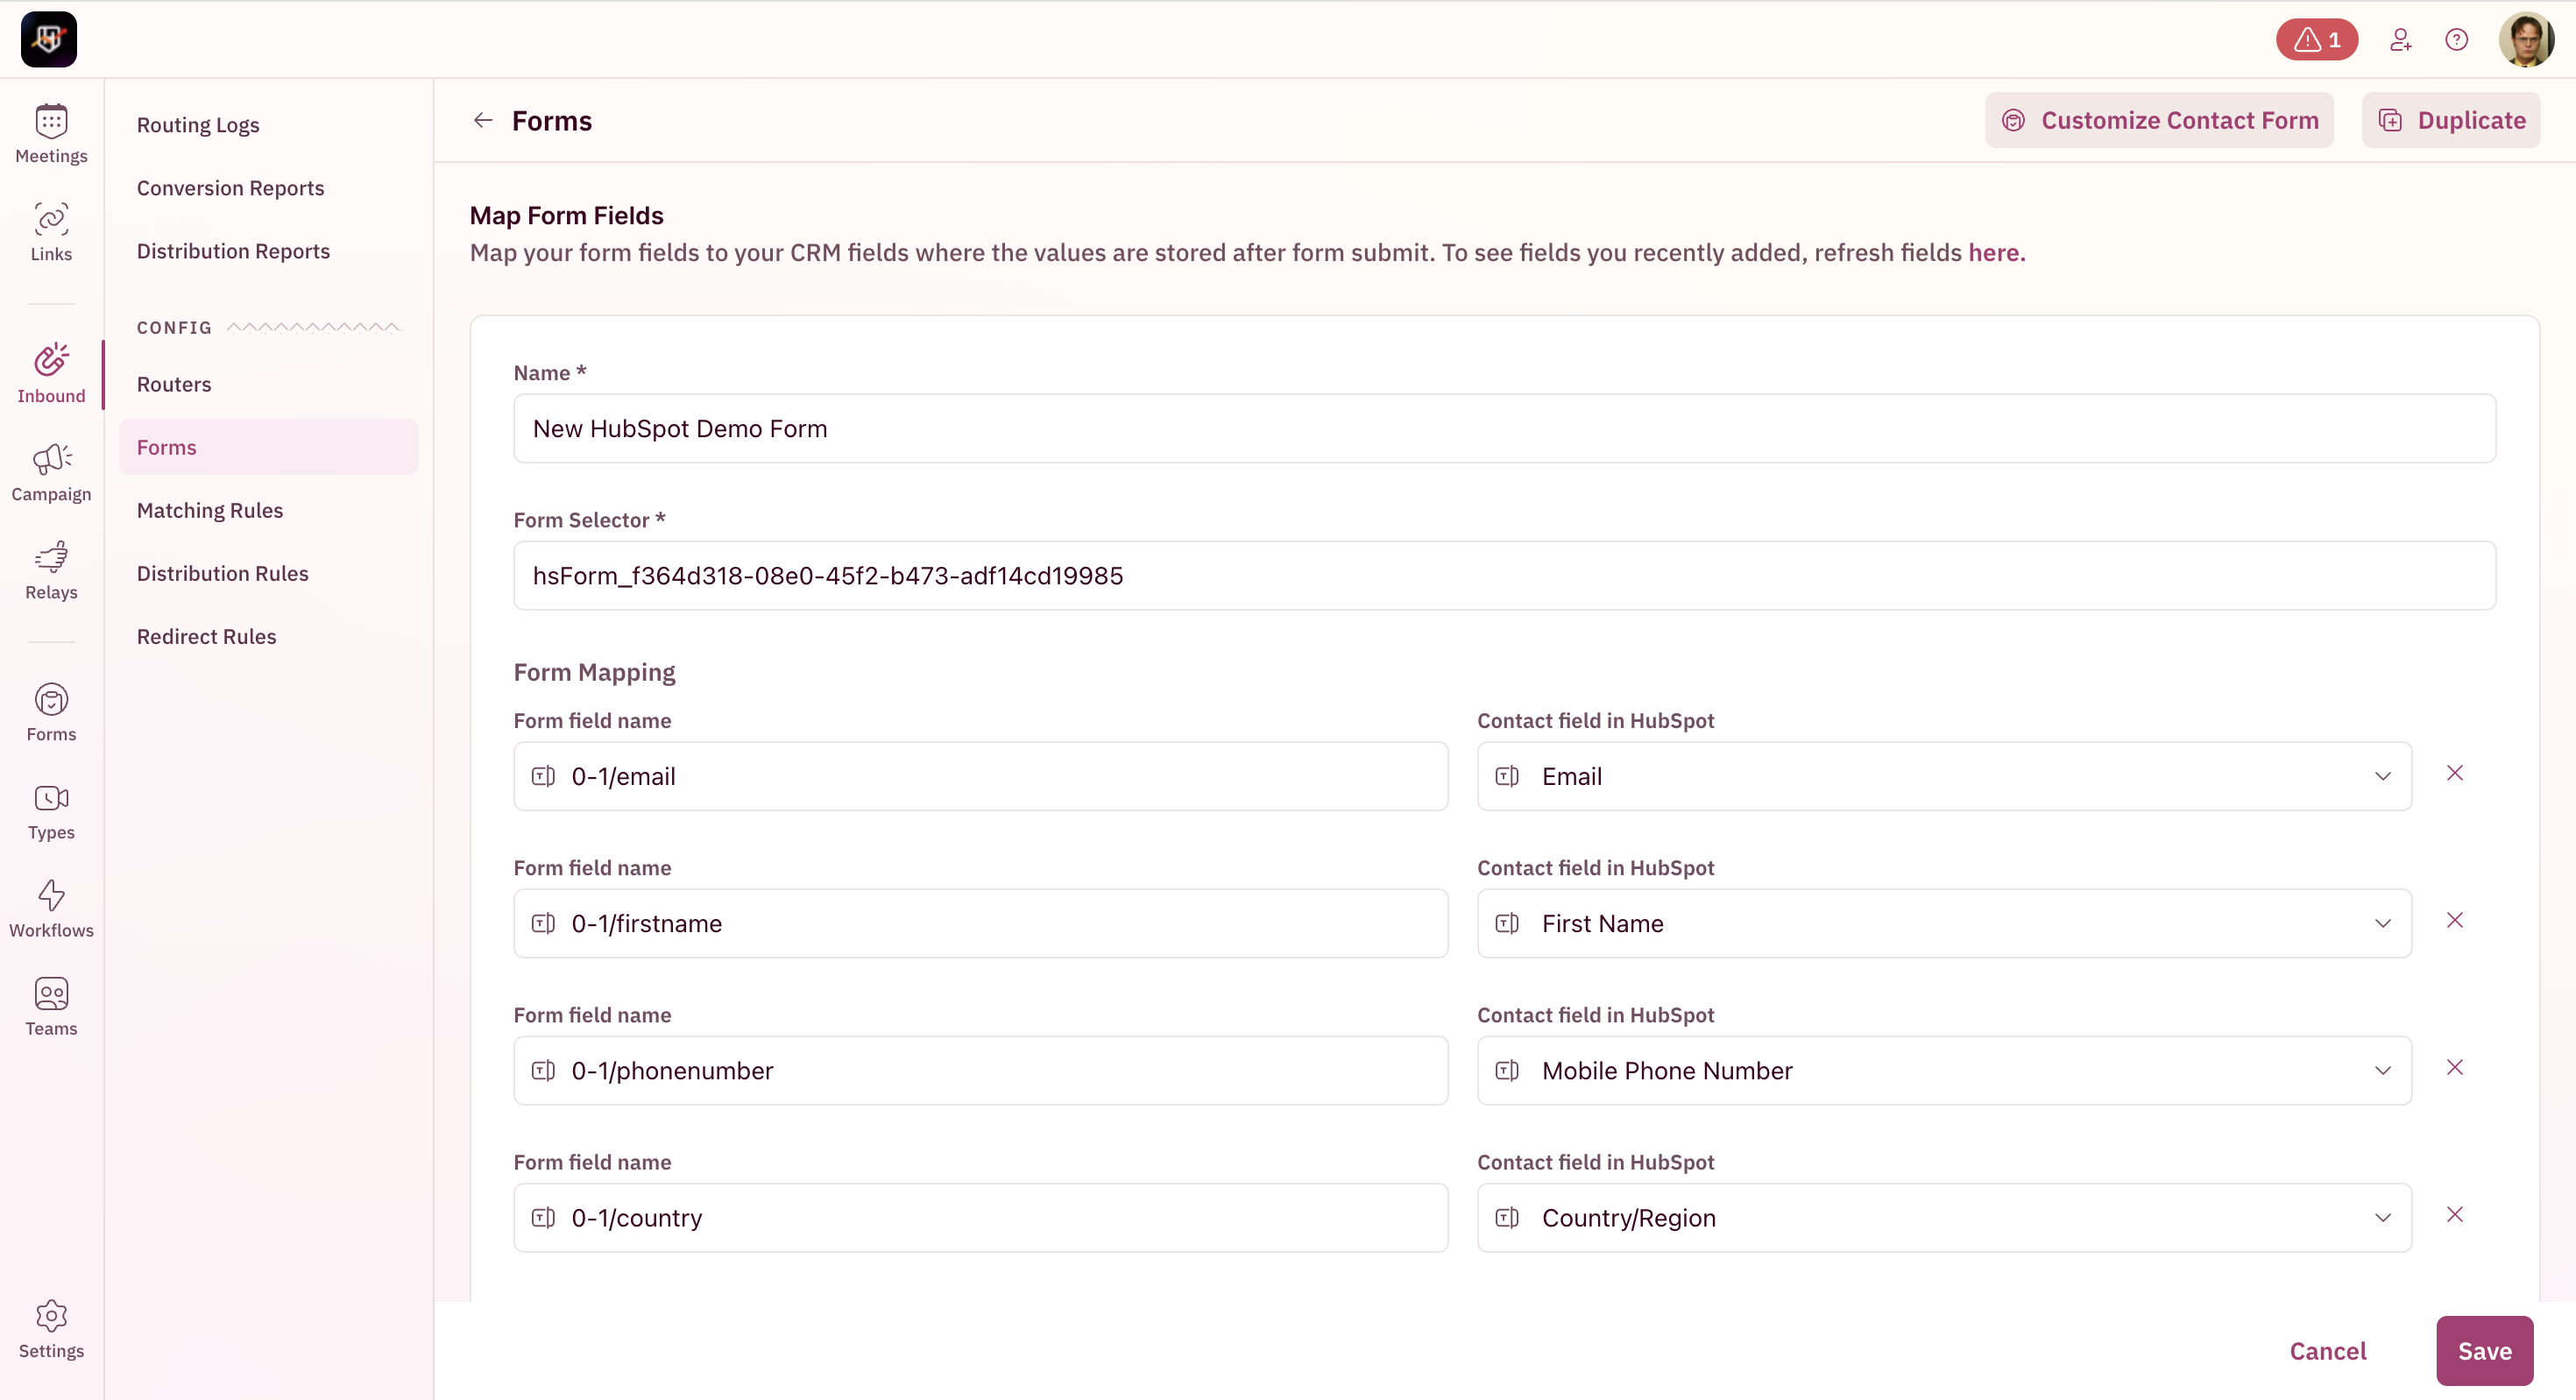 * Once you are done adding all the relevant fields, hit **Save**. 🎉 You’ve successfully mapped your HubSpot form to RevenueHero!
On your website or page containing the HubSpot form:
* Copy the **Router Installation Snippet** from RevenueHero.
* Paste the **Widget Installation Snippet** before the closing ``**tag** .
* Publish the page.
That’s it! Prospects who qualify through RevenueHero will now see the scheduler immediately after submitting your HubSpot form.
* Once you are done adding all the relevant fields, hit **Save**. 🎉 You’ve successfully mapped your HubSpot form to RevenueHero!
On your website or page containing the HubSpot form:
* Copy the **Router Installation Snippet** from RevenueHero.
* Paste the **Widget Installation Snippet** before the closing ``**tag** .
* Publish the page.
That’s it! Prospects who qualify through RevenueHero will now see the scheduler immediately after submitting your HubSpot form.