> ## Documentation Index
> Fetch the complete documentation index at: https://help.revenuehero.io/llms.txt
> Use this file to discover all available pages before exploring further.
# How to integrate RevenueHero with your Legacy HubSpot form?
> Get meetings booked right after your HubSpot Form submit.
Integrate your Legacy HubSpot form with RevenueHero and allow your qualified prospects to book meetings with the right sales reps right after the form is submitted.
### Integrating RevenueHero with Legacy HubSpot forms
Follow these steps to integrate your RevenueHero scheduling widget with your Legacy HubSpot form.
**In HubSpot**:
1. In HubSpot, navigate to the form that you would like to integrate with your RevenueHero scheduler.
2. Edit the form, and click on the *Options tab*.
3. In the **What should happen after someone submits the form?** section, choose **Display a thank you message**.
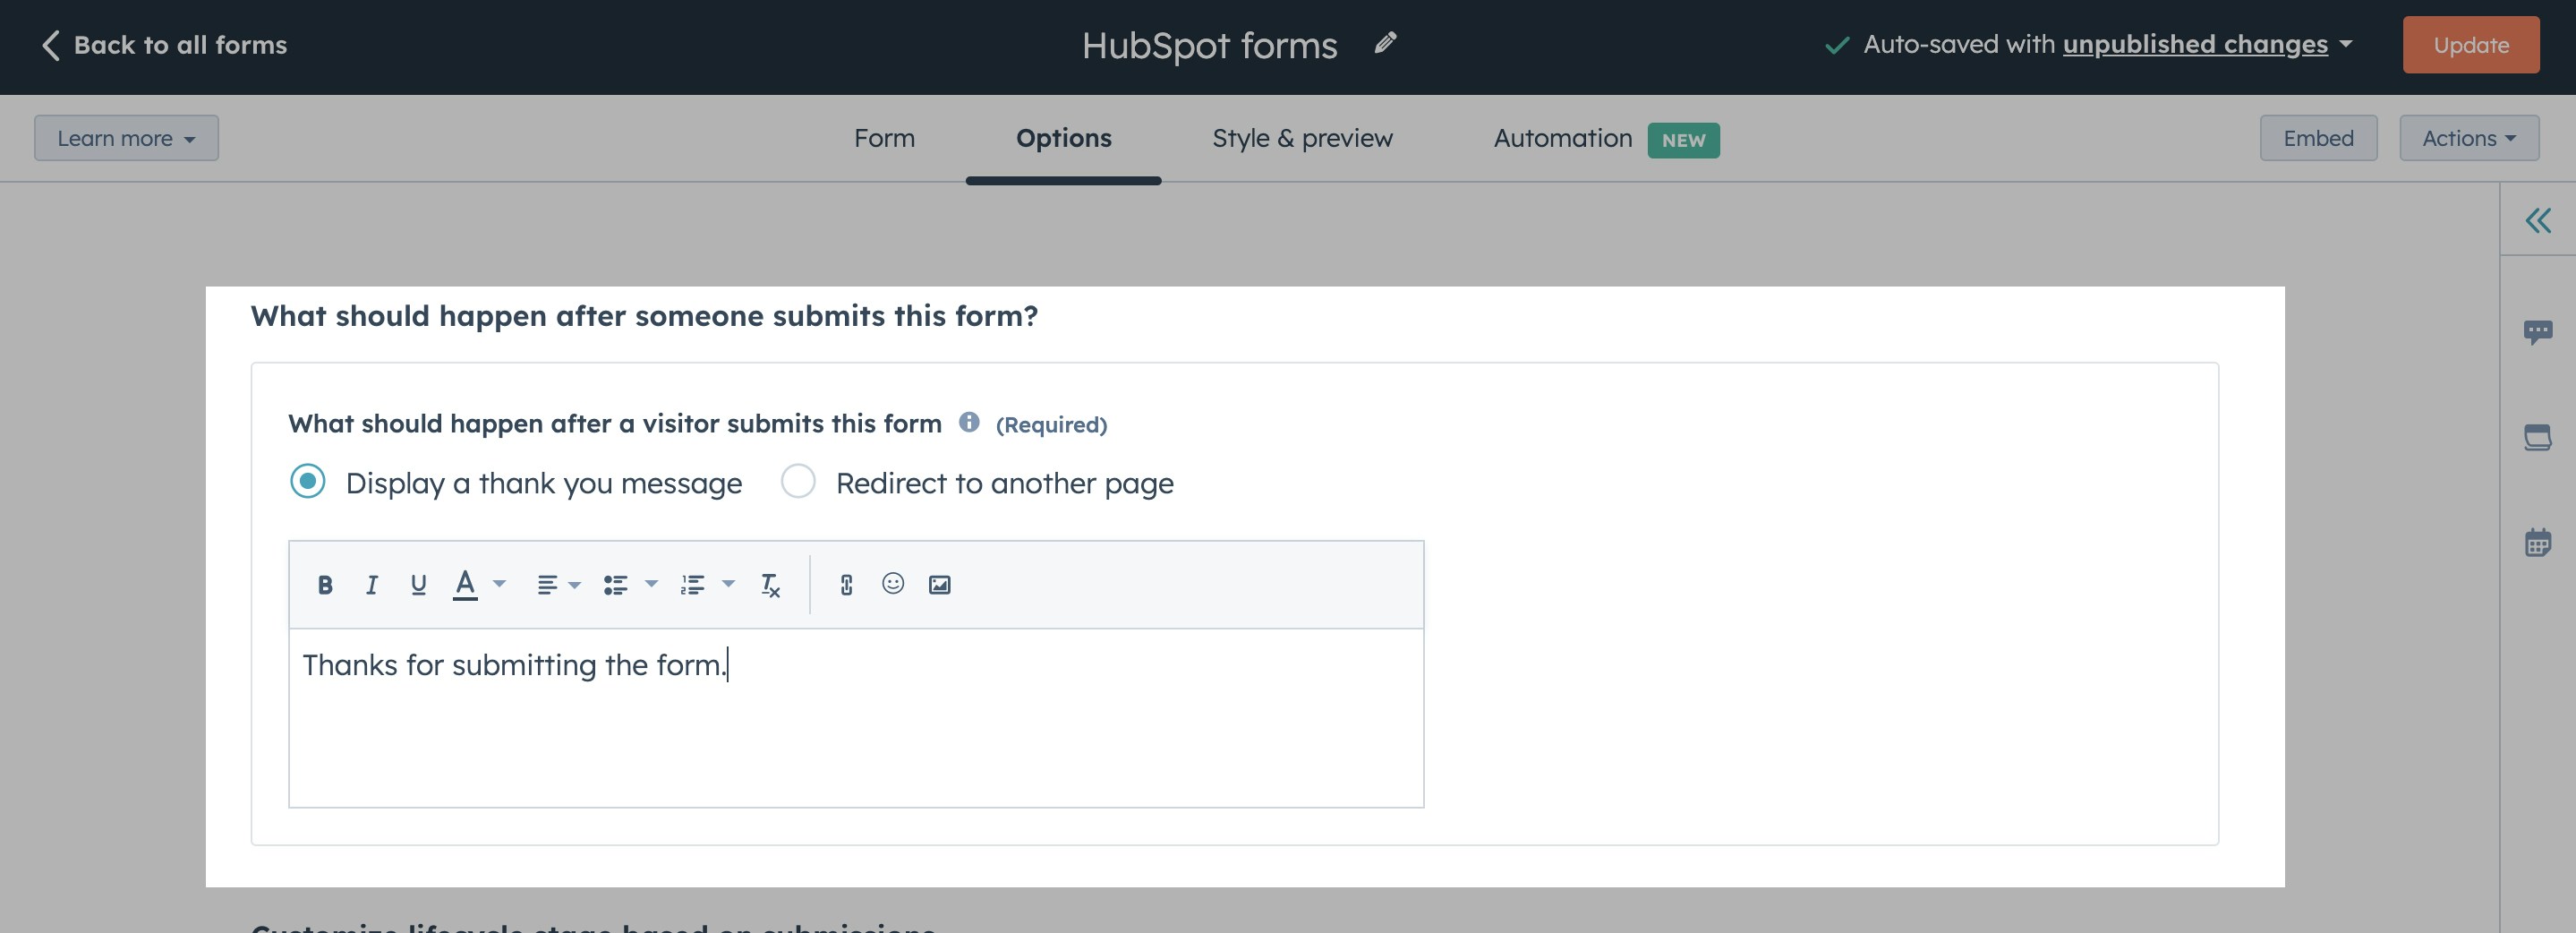 5. Update your HubSpot form settings.
That does it for changes in your HubSpot account. Once you've made these changes, you can setup RevenueHero to display the scheduler for every qualified form fill.
**In RevenueHero**:
1. Setup your [Inbound Router](/routers/inbound/create-inbound-router).
2. Type your HubSpot form selector ID as the form selector when [mapping your web form fields](/routers/inbound/mapping-your-form). You'll be able to construct your HubSpot selctor ID in the following ways:
1) In your HubSpot account, click Edit on the form that you're looking to map with RevenueHero.
2) In the URL, you'll find the form ID.
5. Update your HubSpot form settings.
That does it for changes in your HubSpot account. Once you've made these changes, you can setup RevenueHero to display the scheduler for every qualified form fill.
**In RevenueHero**:
1. Setup your [Inbound Router](/routers/inbound/create-inbound-router).
2. Type your HubSpot form selector ID as the form selector when [mapping your web form fields](/routers/inbound/mapping-your-form). You'll be able to construct your HubSpot selctor ID in the following ways:
1) In your HubSpot account, click Edit on the form that you're looking to map with RevenueHero.
2) In the URL, you'll find the form ID.
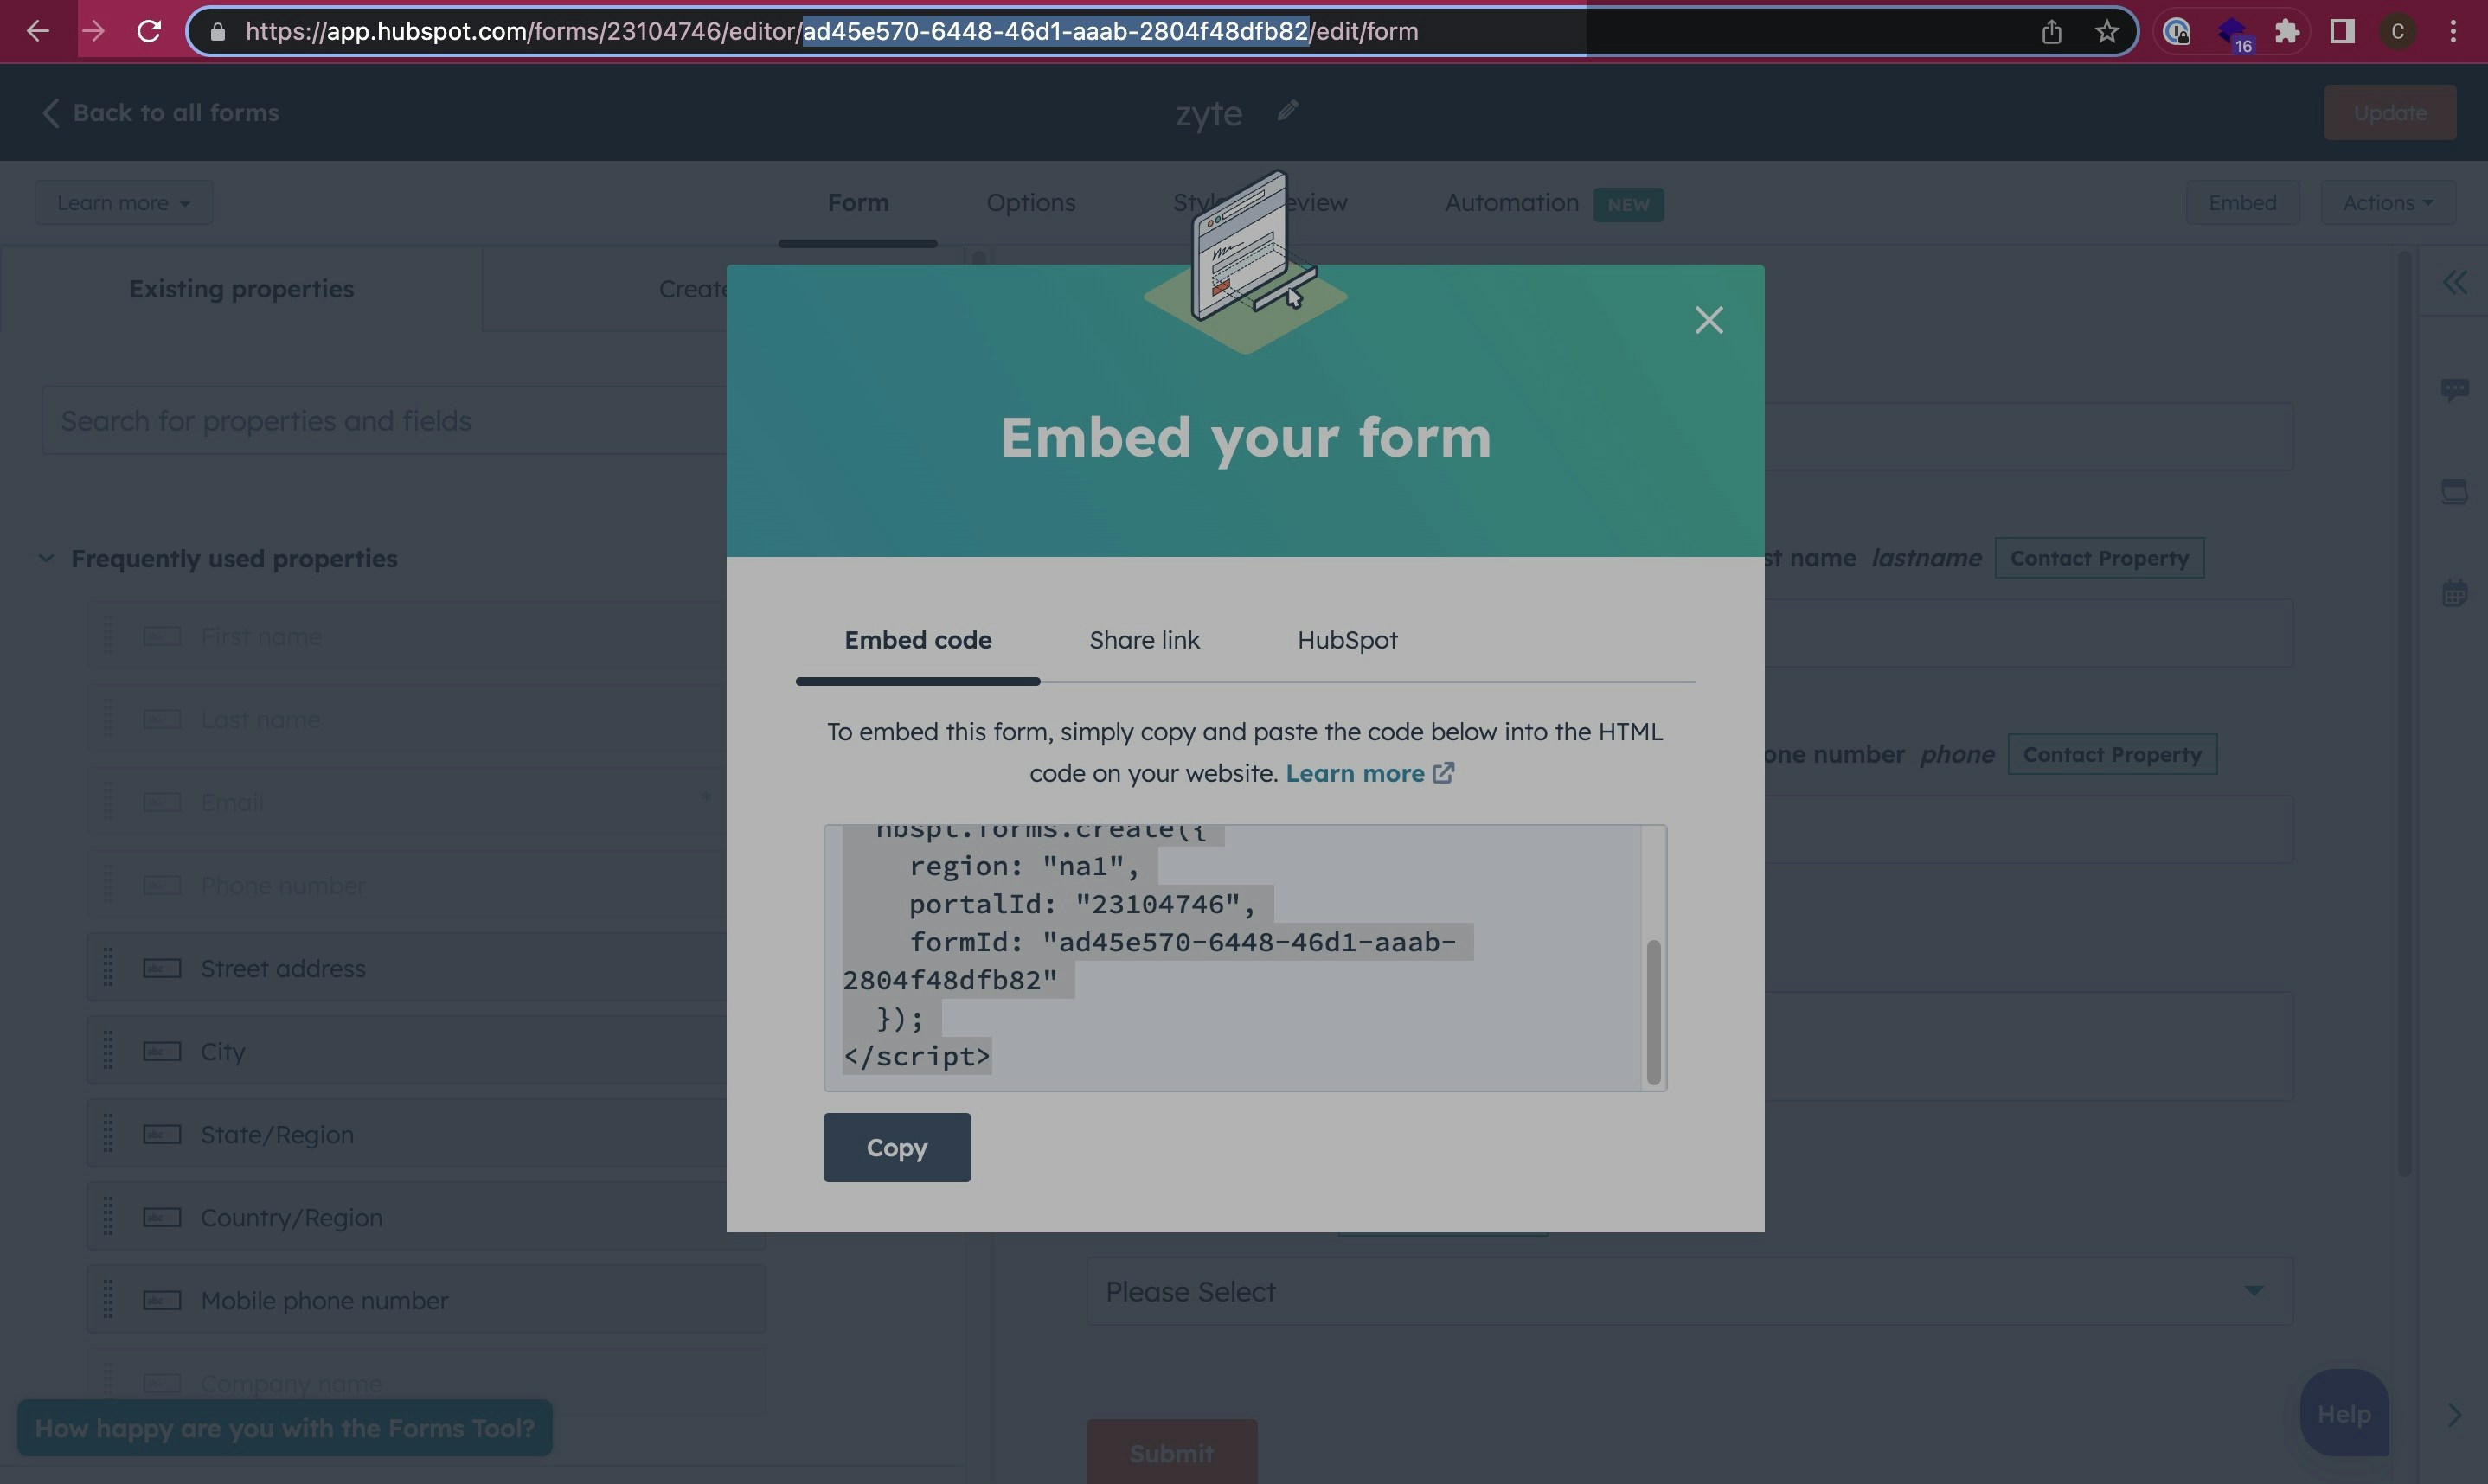 3. Add hsForm\_ to the start of the form ID.
If your Form ID is **9918da4c-d12f-47e6-9131-4f938a372ae1**
Then your Selector ID is **hsForm\_9918da4c-d12f-47e6-9131-4f938a372ae1**
4. You can pick the form field names by editing the form and clicking on the specific field.
3. Add hsForm\_ to the start of the form ID.
If your Form ID is **9918da4c-d12f-47e6-9131-4f938a372ae1**
Then your Selector ID is **hsForm\_9918da4c-d12f-47e6-9131-4f938a372ae1**
4. You can pick the form field names by editing the form and clicking on the specific field.
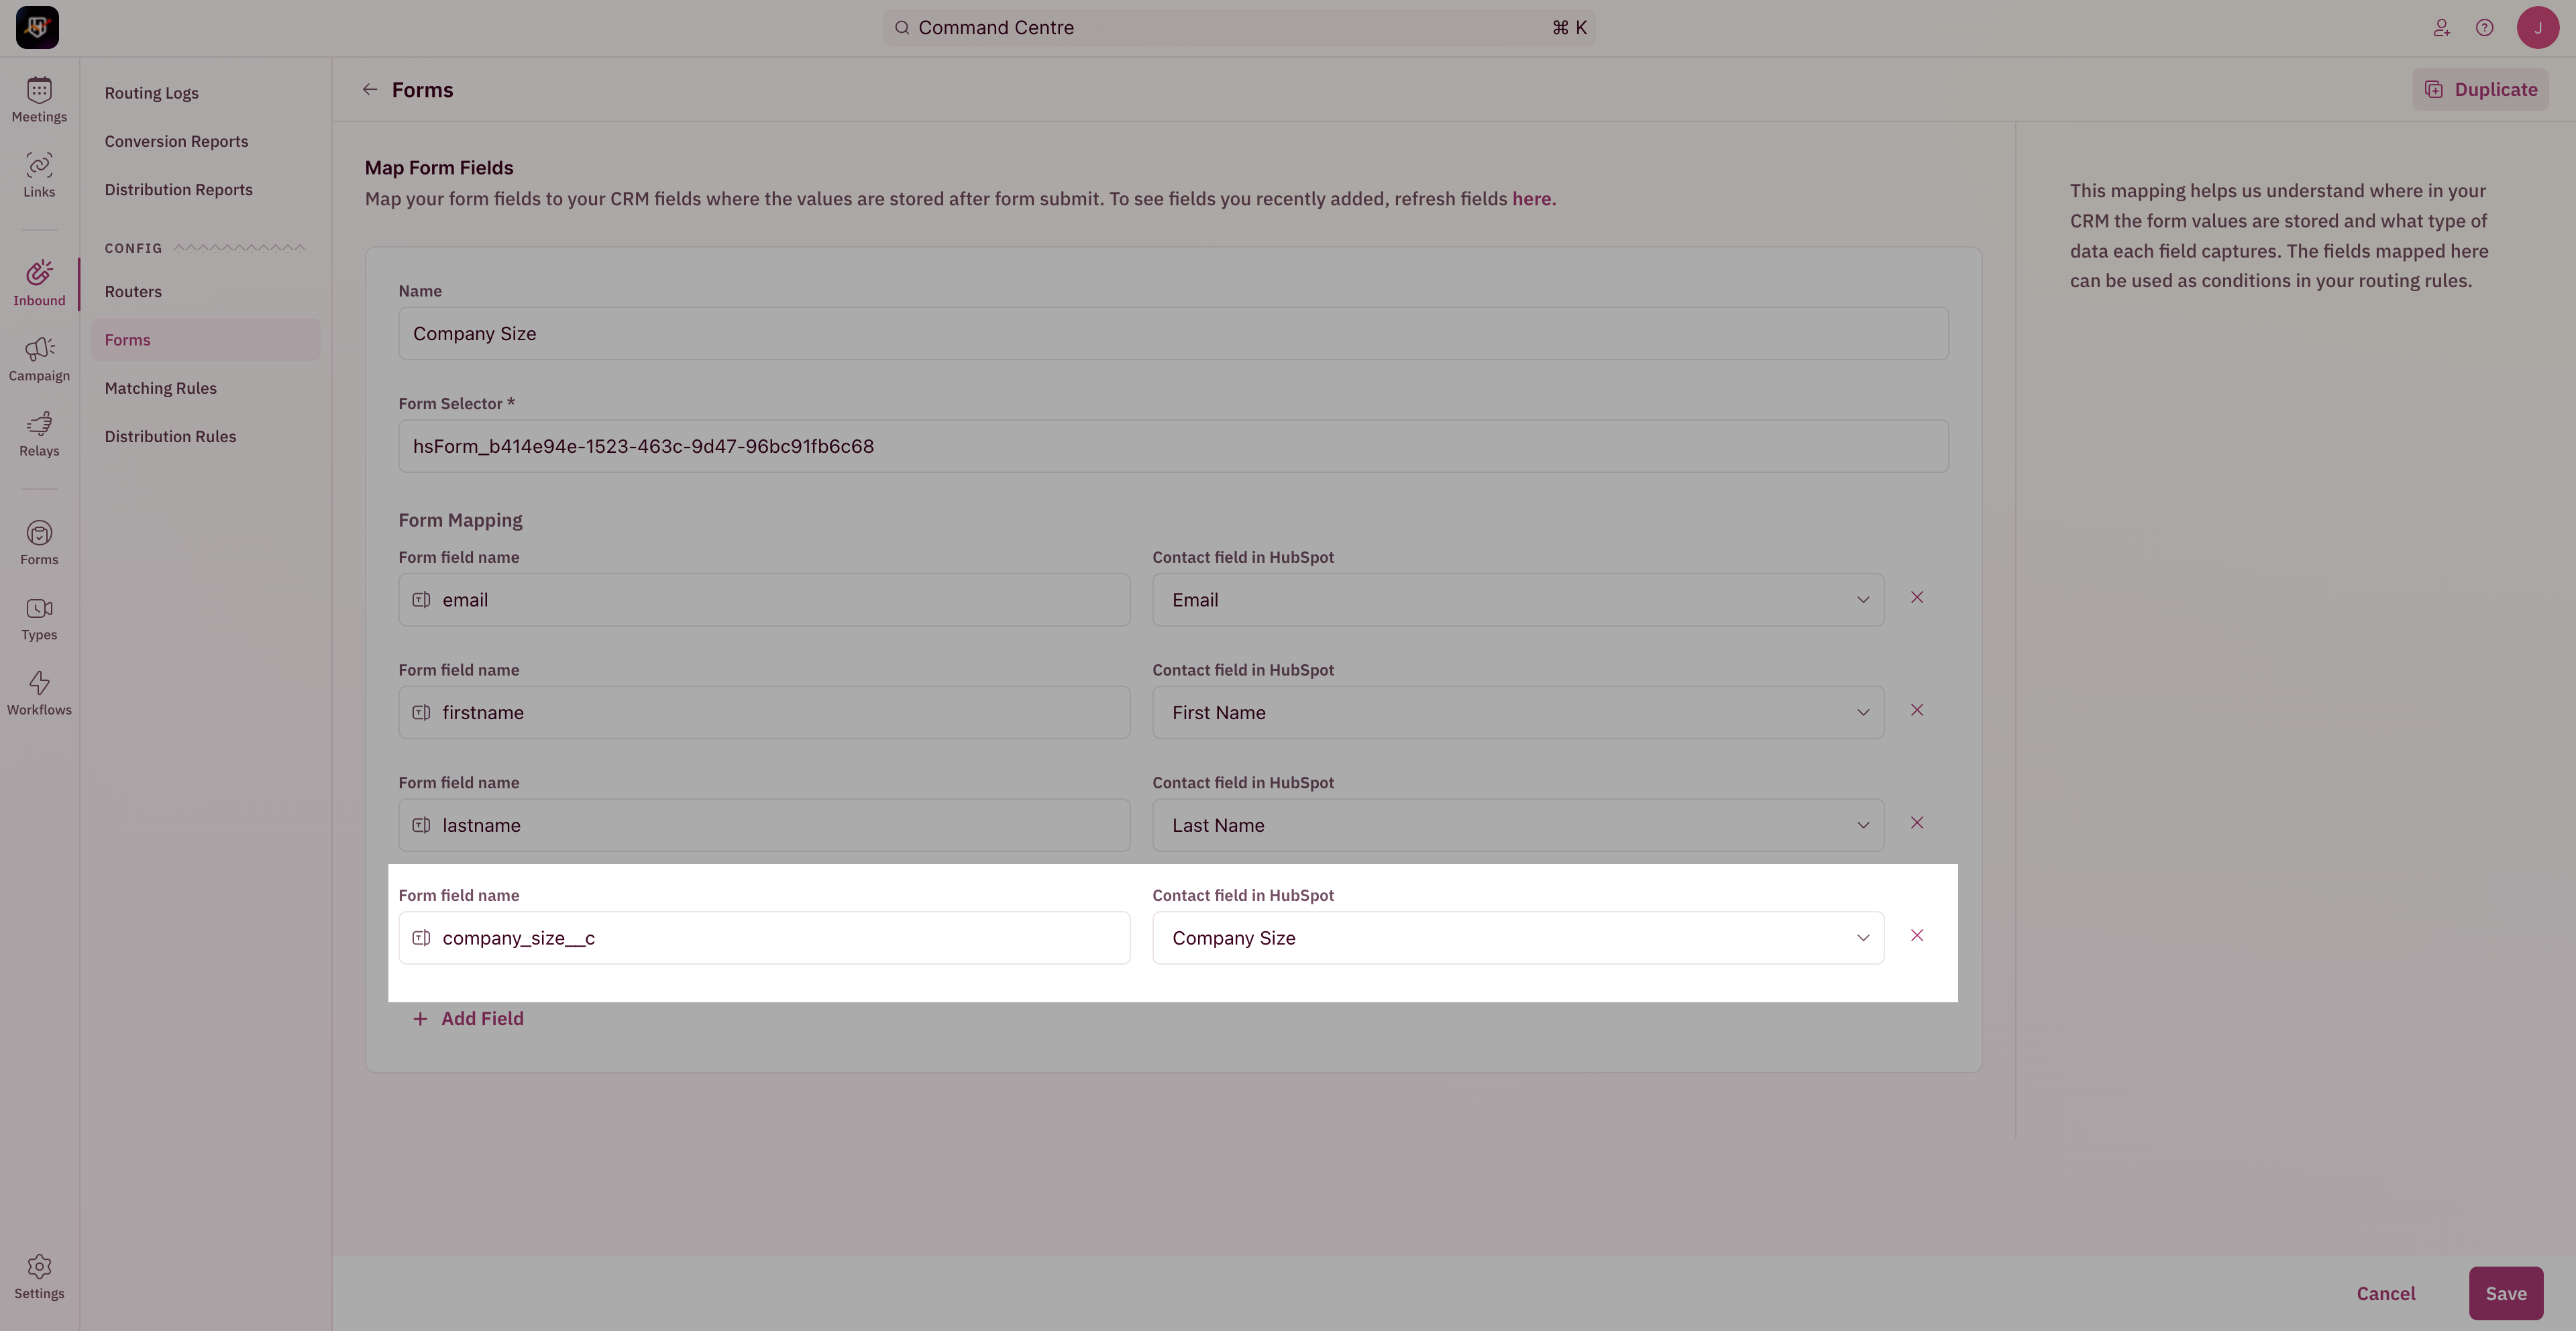
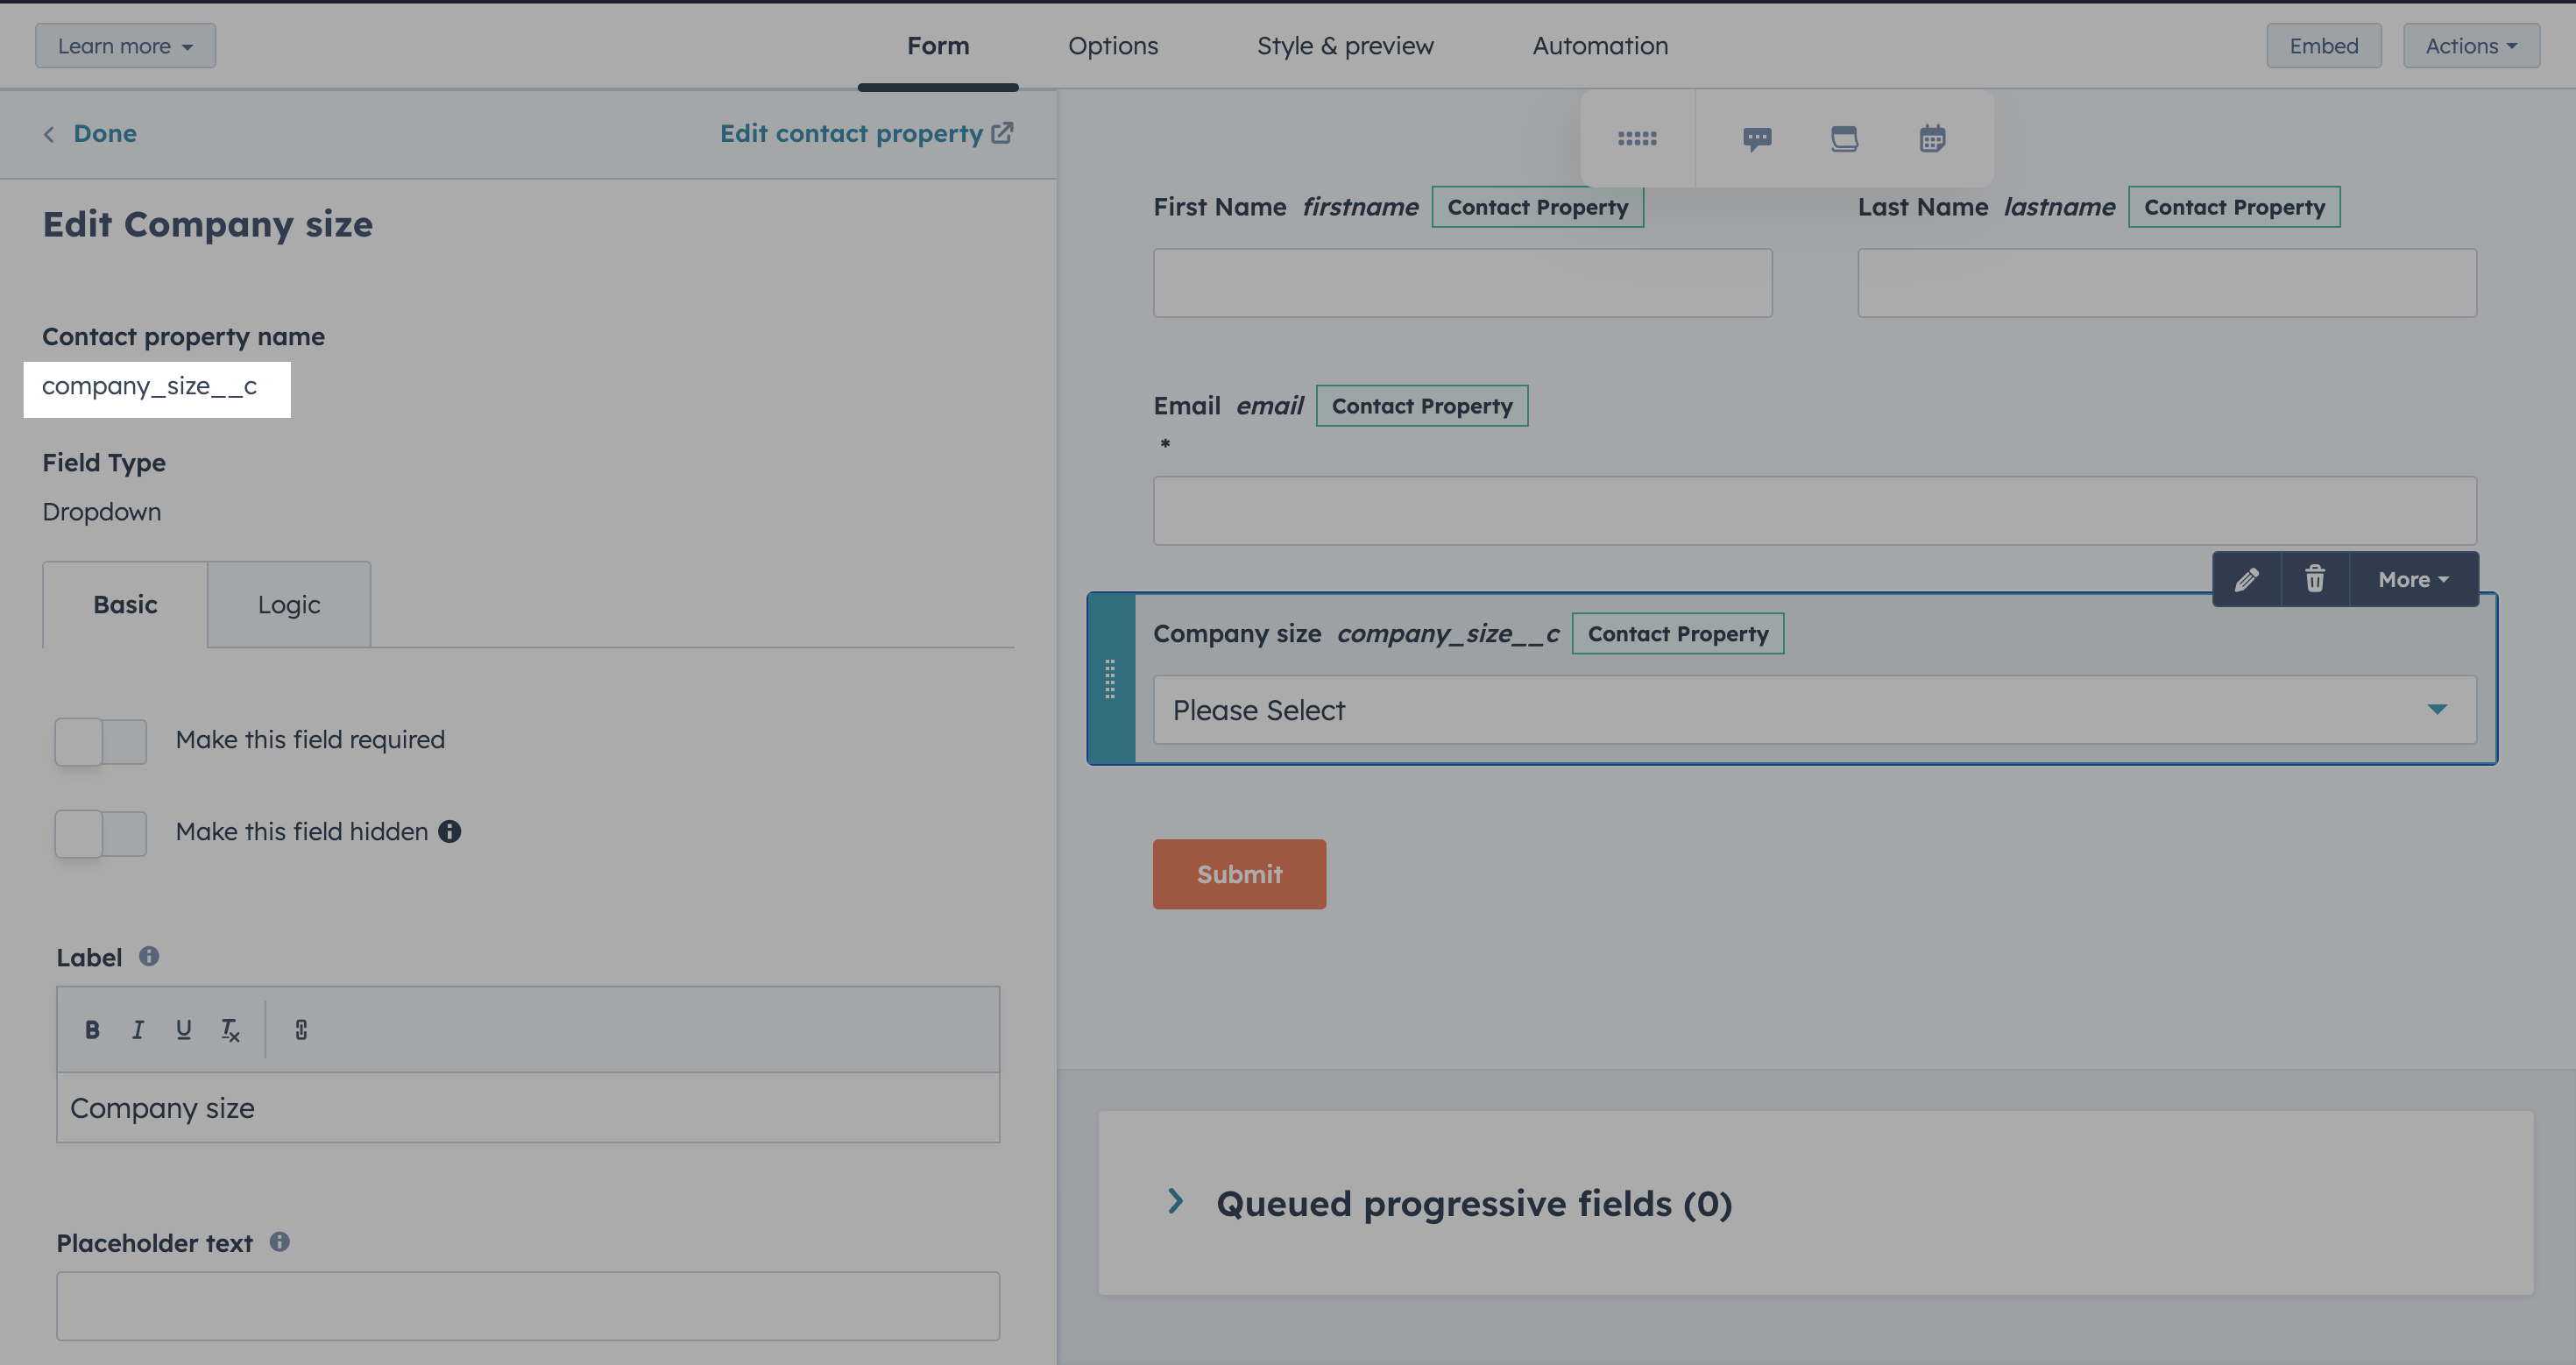 5. In your form mapping, you can add the field name you copied to the first box and map it to the right Hubspot field on the right side.
 1. Navigate to the webpage where your HubSpot form is embedded.
2. On the page, right click and select inspect element.
3. Click on the Element selector in the developer panel.
4. With the selector click on the first field on your Hubspot form on the page.
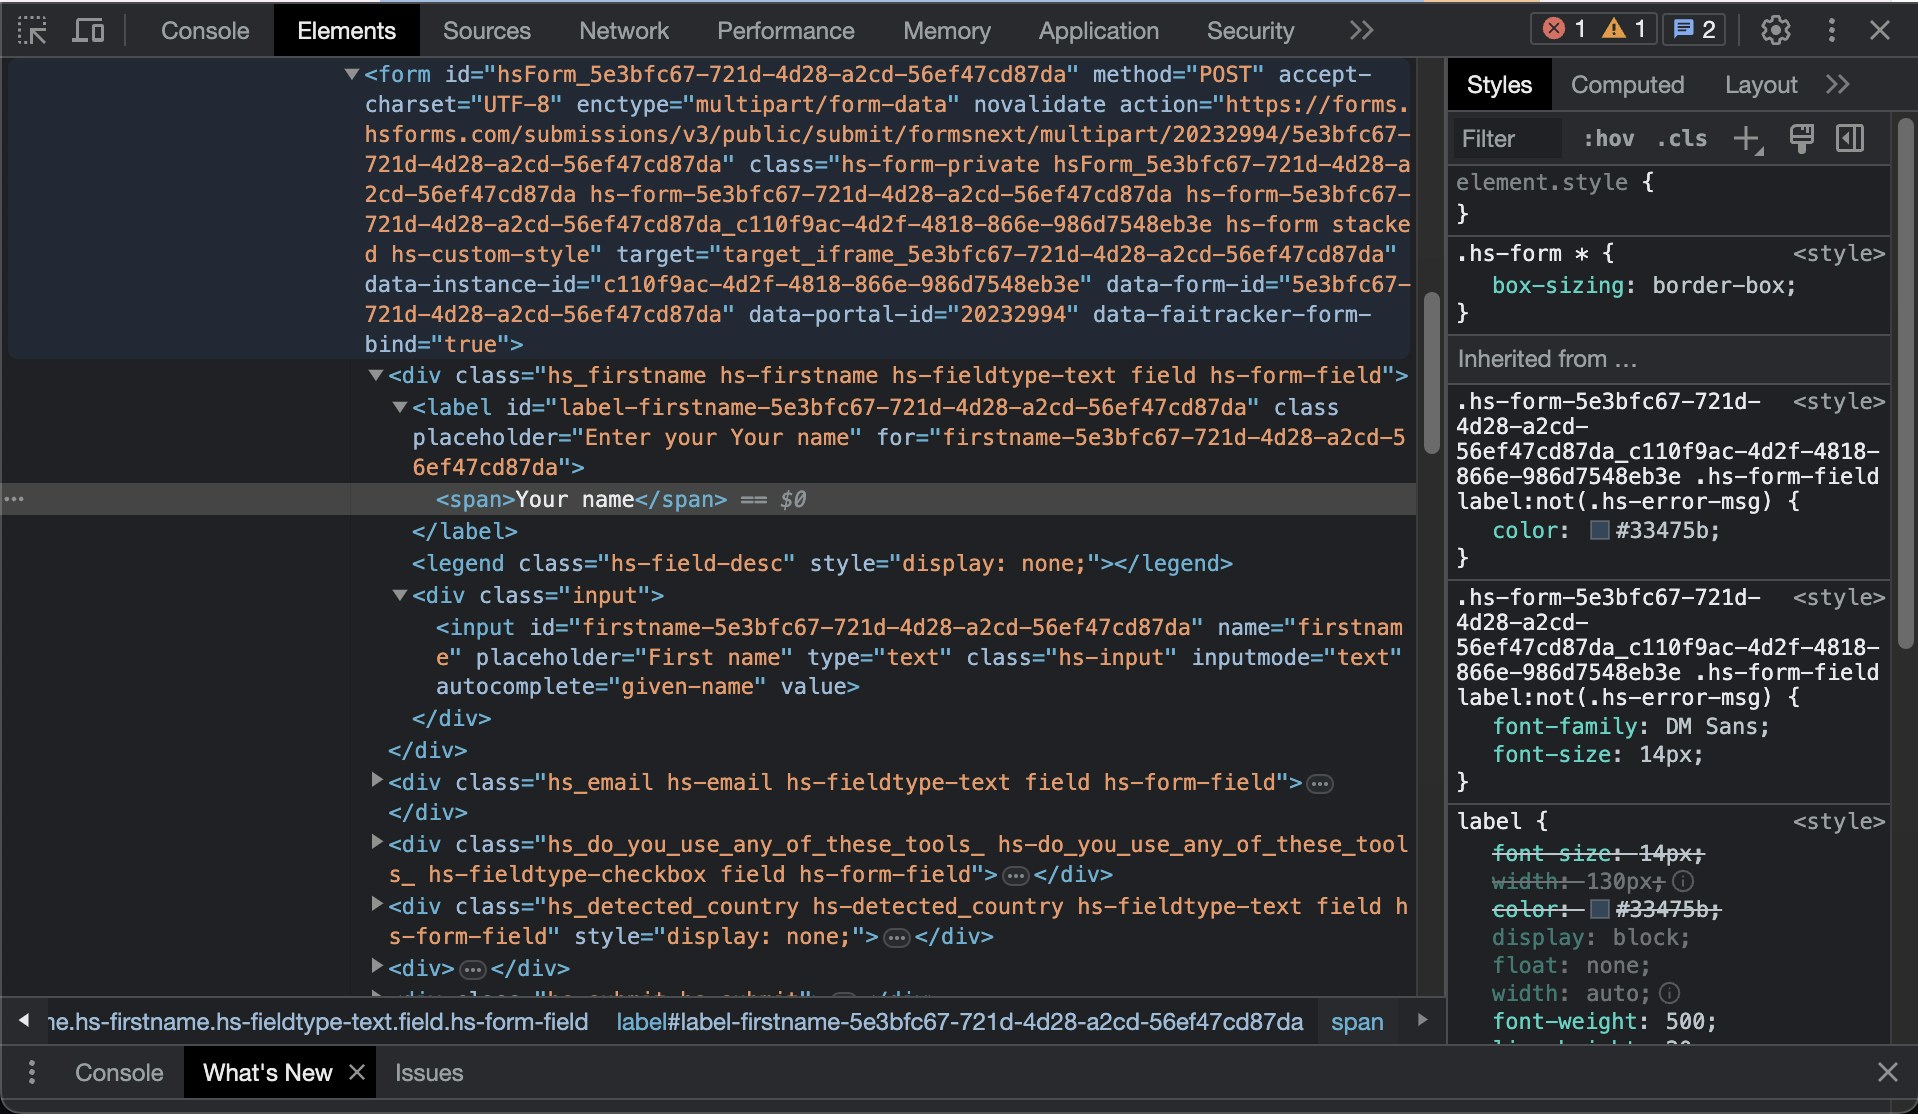
5. In your developer window, you'll find the Hubspot selector ID, in the format below -
1. Navigate to the webpage where your HubSpot form is embedded.
2. On the page, right click and select inspect element.
3. Click on the Element selector in the developer panel.
4. With the selector click on the first field on your Hubspot form on the page.
5. In your developer window, you'll find the Hubspot selector ID, in the format below -
 **On your website/page that contains the HubSpot form**
1. Once you've [configured a router](/routers/inbound/create-inbound-router), copy the router installation snippet.
2. In the page where you've embedded the Hubspot form, copy the widget installation snippet before the last `` tag.
3. Publish the script to your page.
That should do it! Prospects who are qualified through RevenueHero will now see the scheduler, when they submit your HubSpot form!
**On your website/page that contains the HubSpot form**
1. Once you've [configured a router](/routers/inbound/create-inbound-router), copy the router installation snippet.
2. In the page where you've embedded the Hubspot form, copy the widget installation snippet before the last `` tag.
3. Publish the script to your page.
That should do it! Prospects who are qualified through RevenueHero will now see the scheduler, when they submit your HubSpot form!