> ## Documentation Index
> Fetch the complete documentation index at: https://help.revenuehero.io/llms.txt
> Use this file to discover all available pages before exploring further.
# How to integrate RevenueHero with Webflow forms?
> Integrate RevenueHero's scheduler with your Webflow form in 5 simple steps
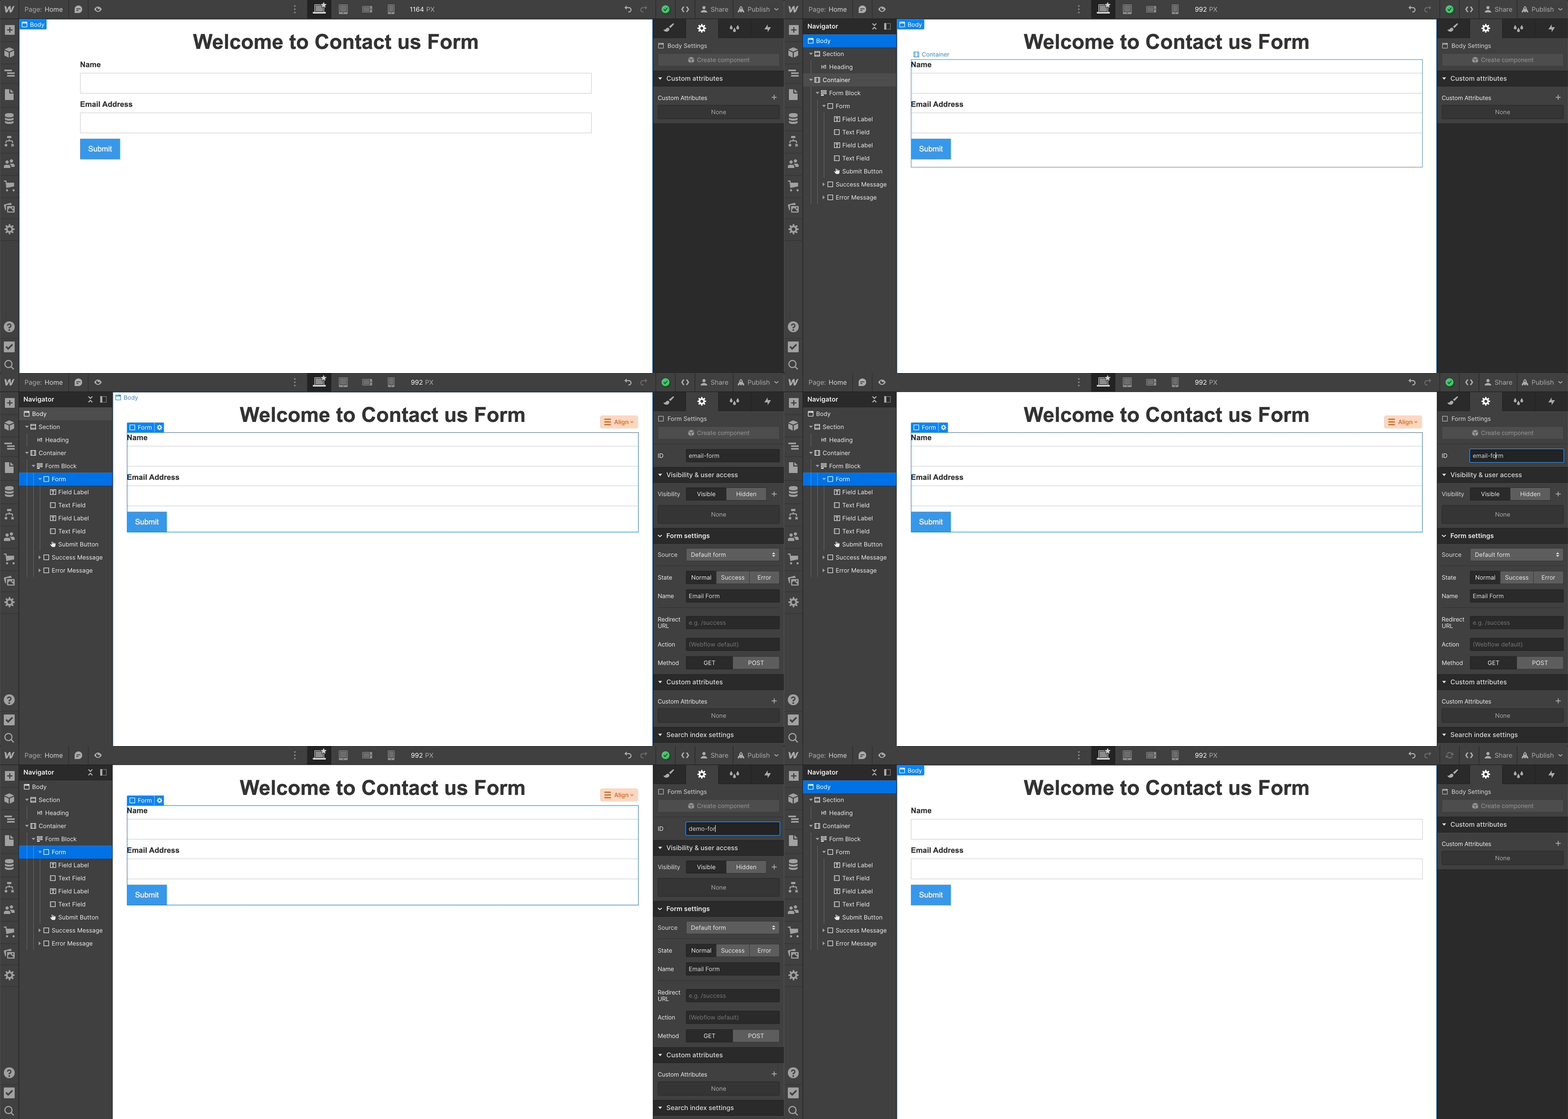
1. In Webflow, navigate to your form's settings and set a CSS ID with a unique value. For ex. `email-form`
 2. Set up an [Inbound Router](/routers/inbound/create-inbound-router) in RevenueHero with the form identifier in your form mapping
3. Copy the [installation script](/routers/inbound/create-inbound-router#install-the-script) from the final step of the router set up.
```javascript Sample installation script theme={null}
```
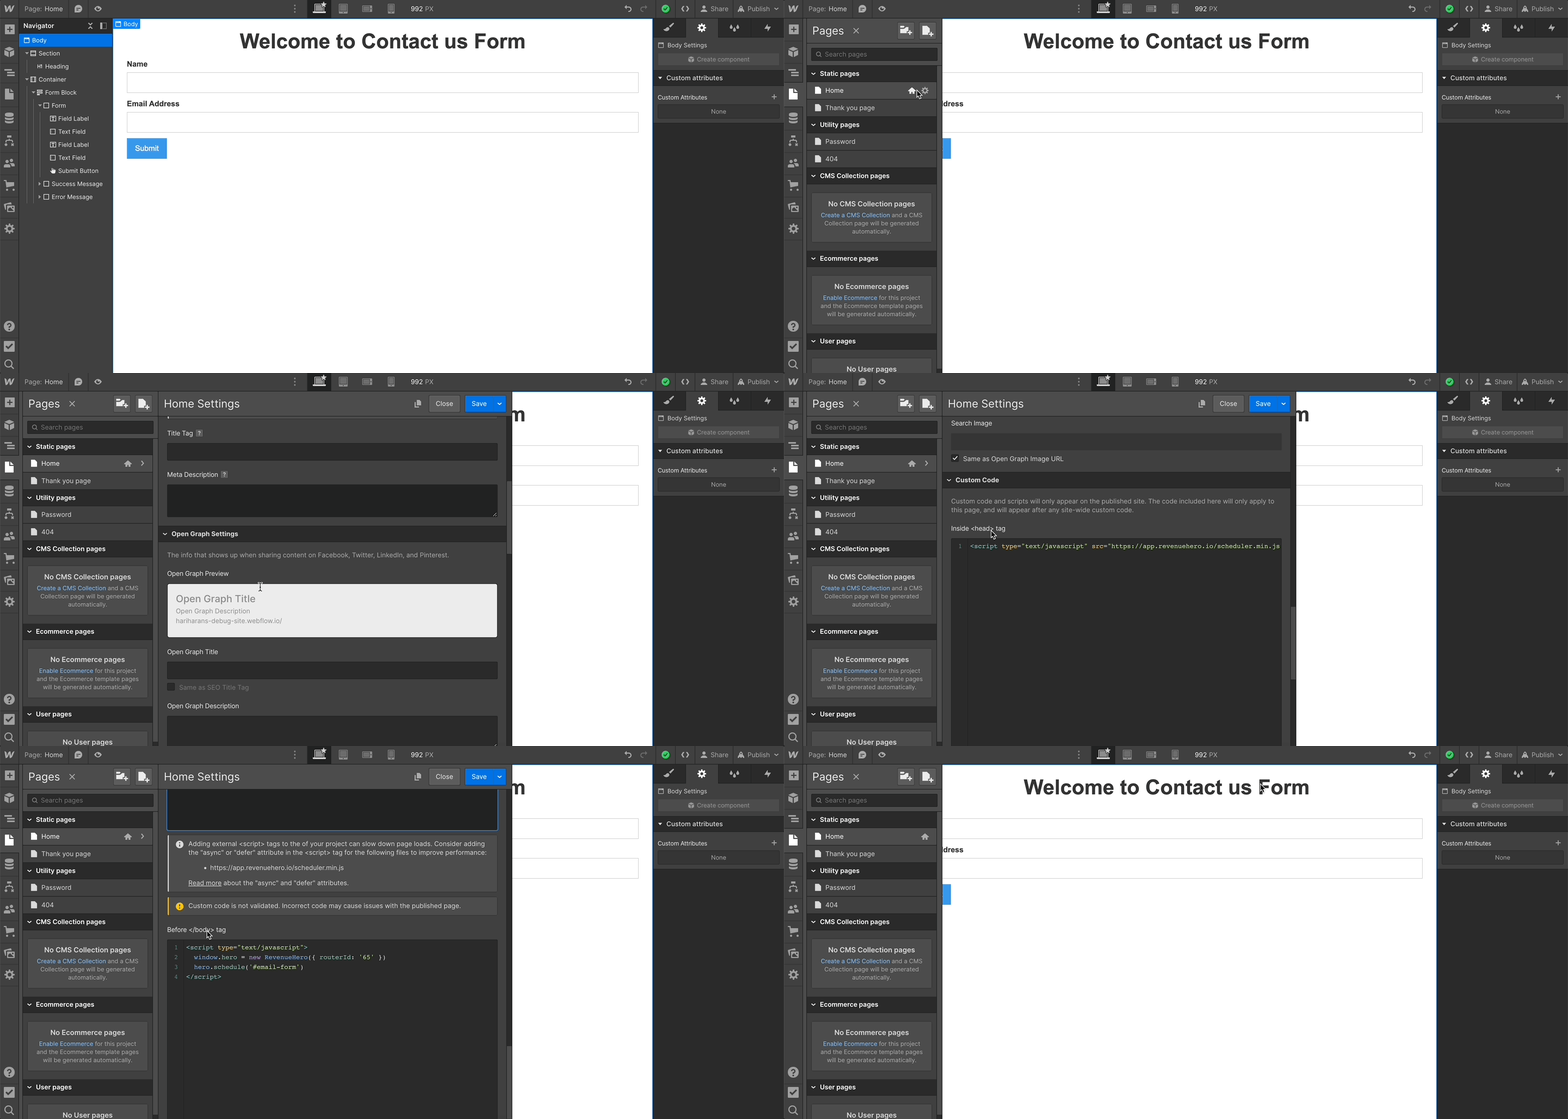
4. In Webflow, navigate to **Sidebar** -> **Pages** -> *Your landing page* -> **Edit Page settings** (wheel icon)
* Scroll to **Inside \ tag** section, and paste the RevenueHero source script
* Scroll to **Before \ tag** section, and paste the RevenueHero widget code
* Verify, and click **Save** in the slide-out's right-top corner
2. Set up an [Inbound Router](/routers/inbound/create-inbound-router) in RevenueHero with the form identifier in your form mapping
3. Copy the [installation script](/routers/inbound/create-inbound-router#install-the-script) from the final step of the router set up.
```javascript Sample installation script theme={null}
```
4. In Webflow, navigate to **Sidebar** -> **Pages** -> *Your landing page* -> **Edit Page settings** (wheel icon)
* Scroll to **Inside \ tag** section, and paste the RevenueHero source script
* Scroll to **Before \ tag** section, and paste the RevenueHero widget code
* Verify, and click **Save** in the slide-out's right-top corner
 5. Publish your landing page
That's it. You're ready to start converting your Demo Meetings from your landing page 🎉🎉
5. Publish your landing page
That's it. You're ready to start converting your Demo Meetings from your landing page 🎉🎉