- Admin Setup Guide
- User Setup Guide
Bulk creation of a meeting links
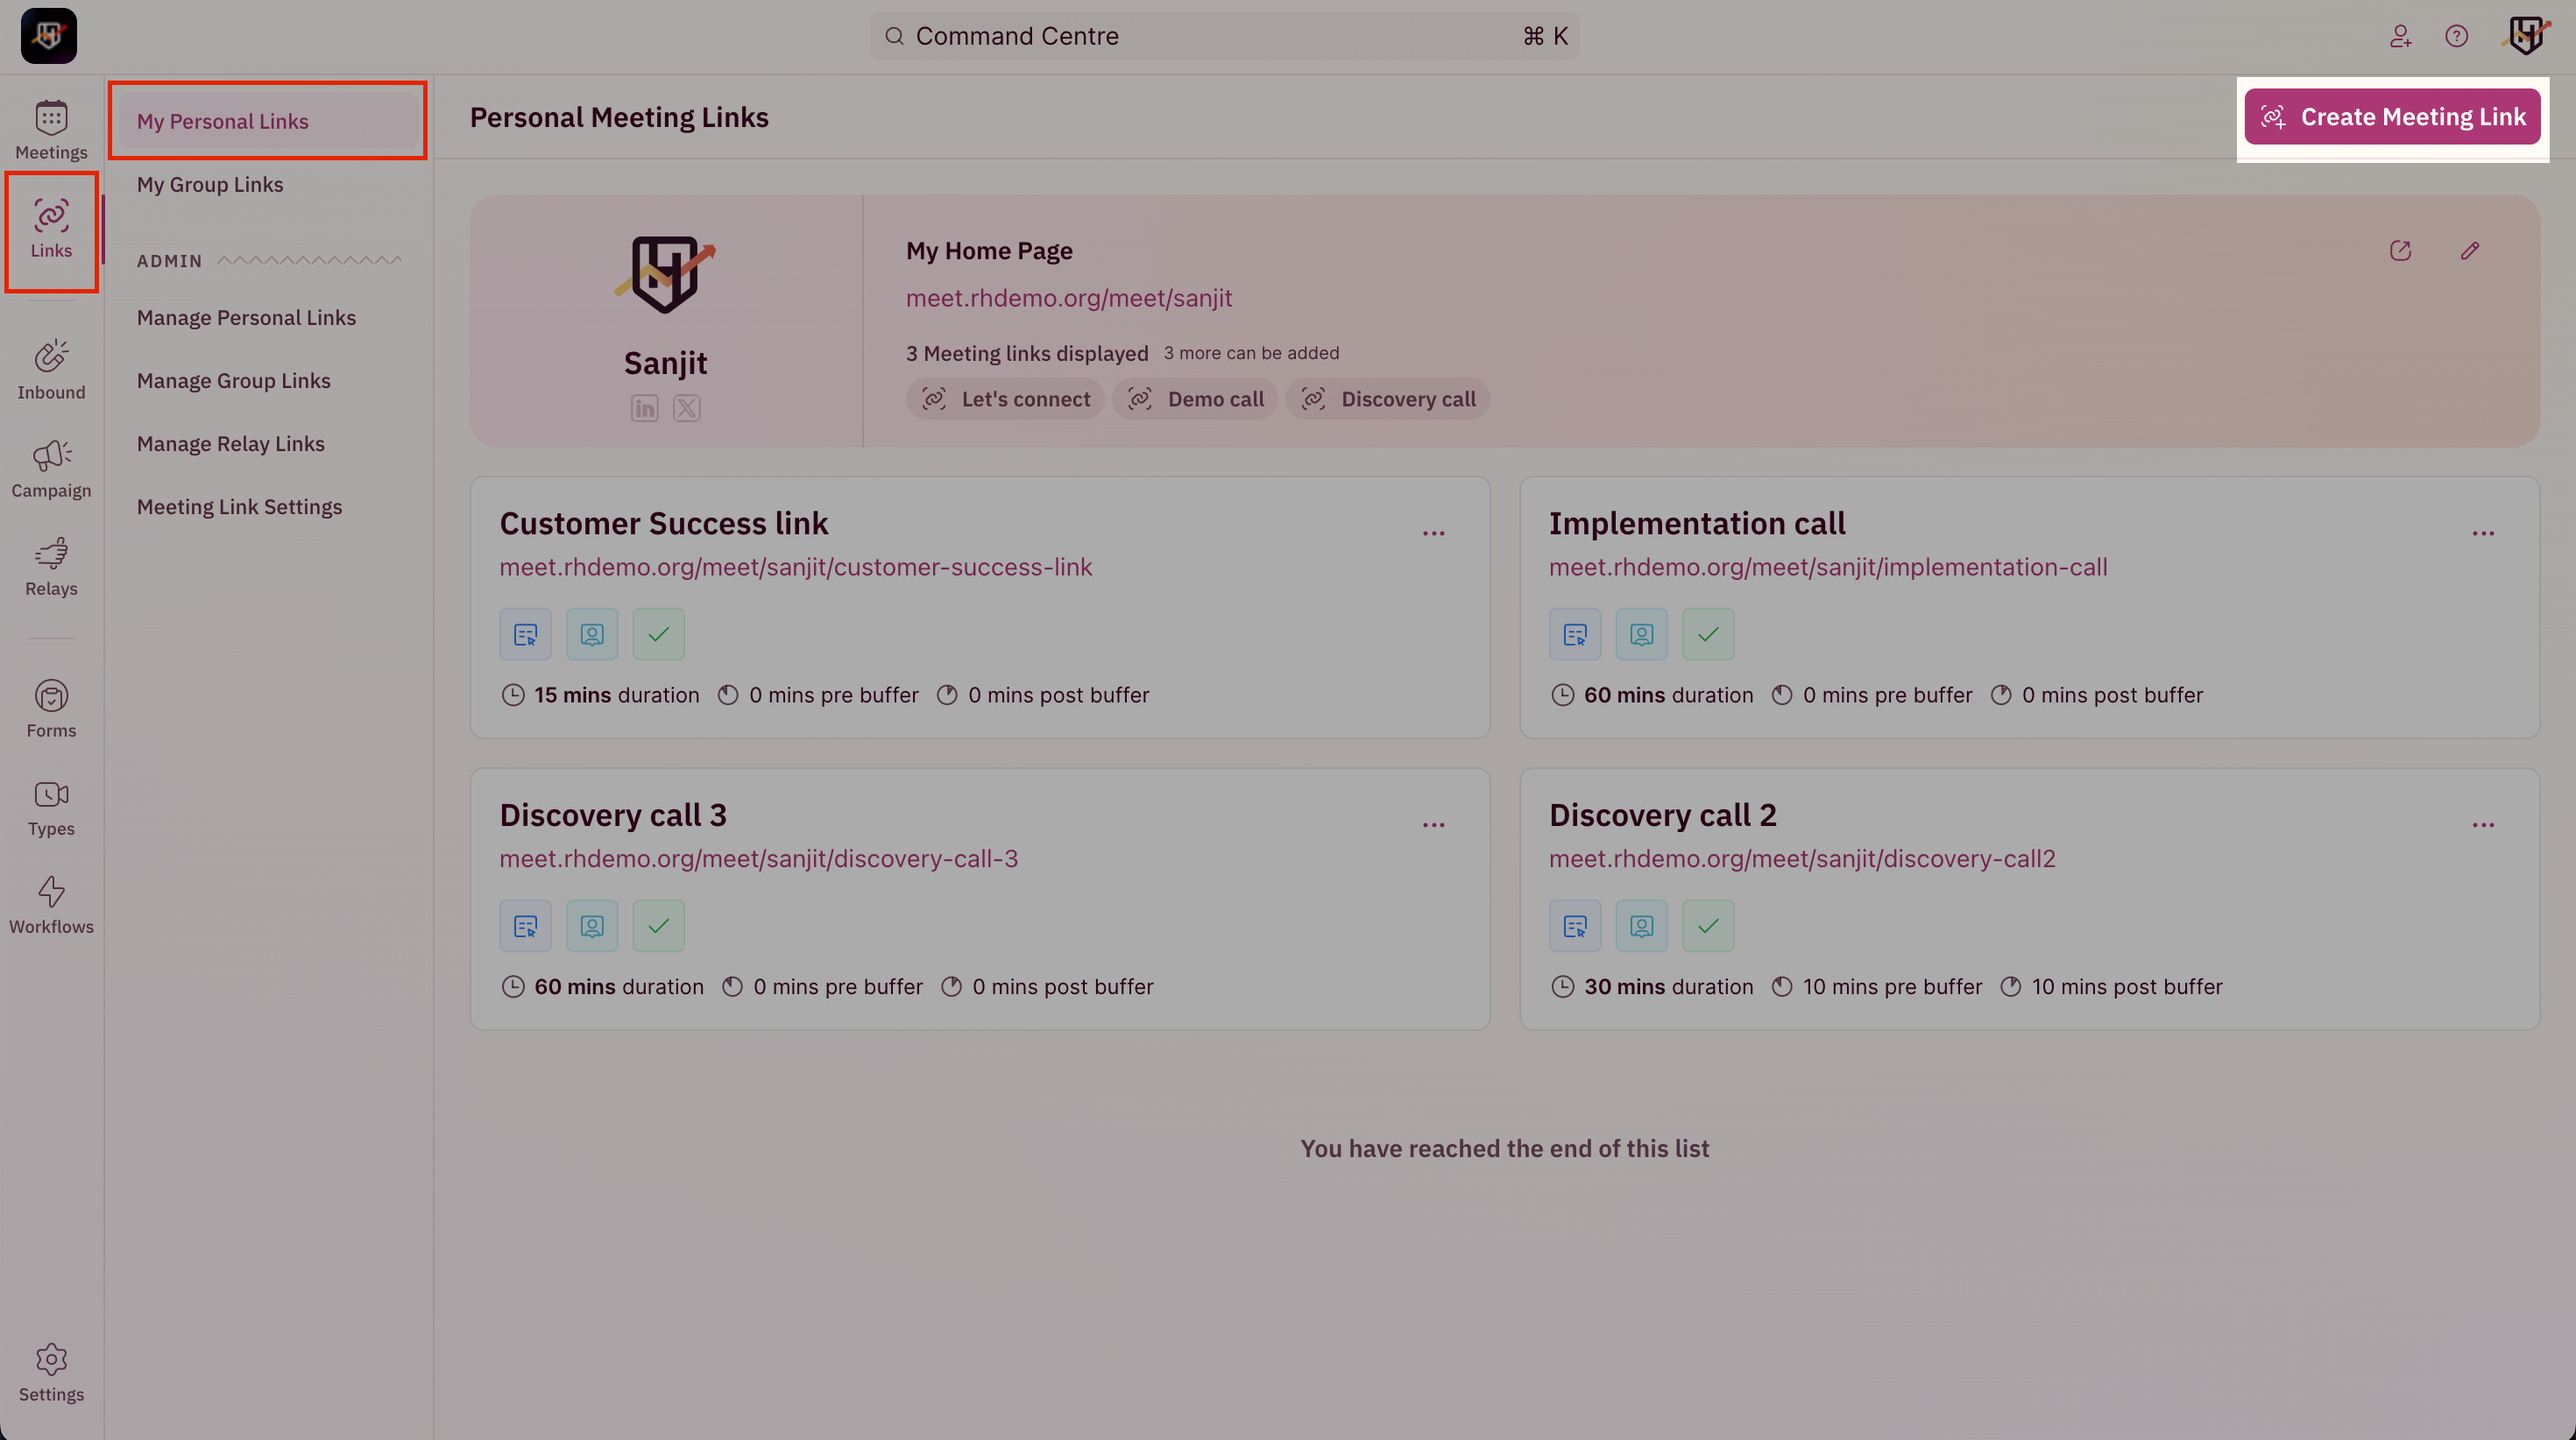
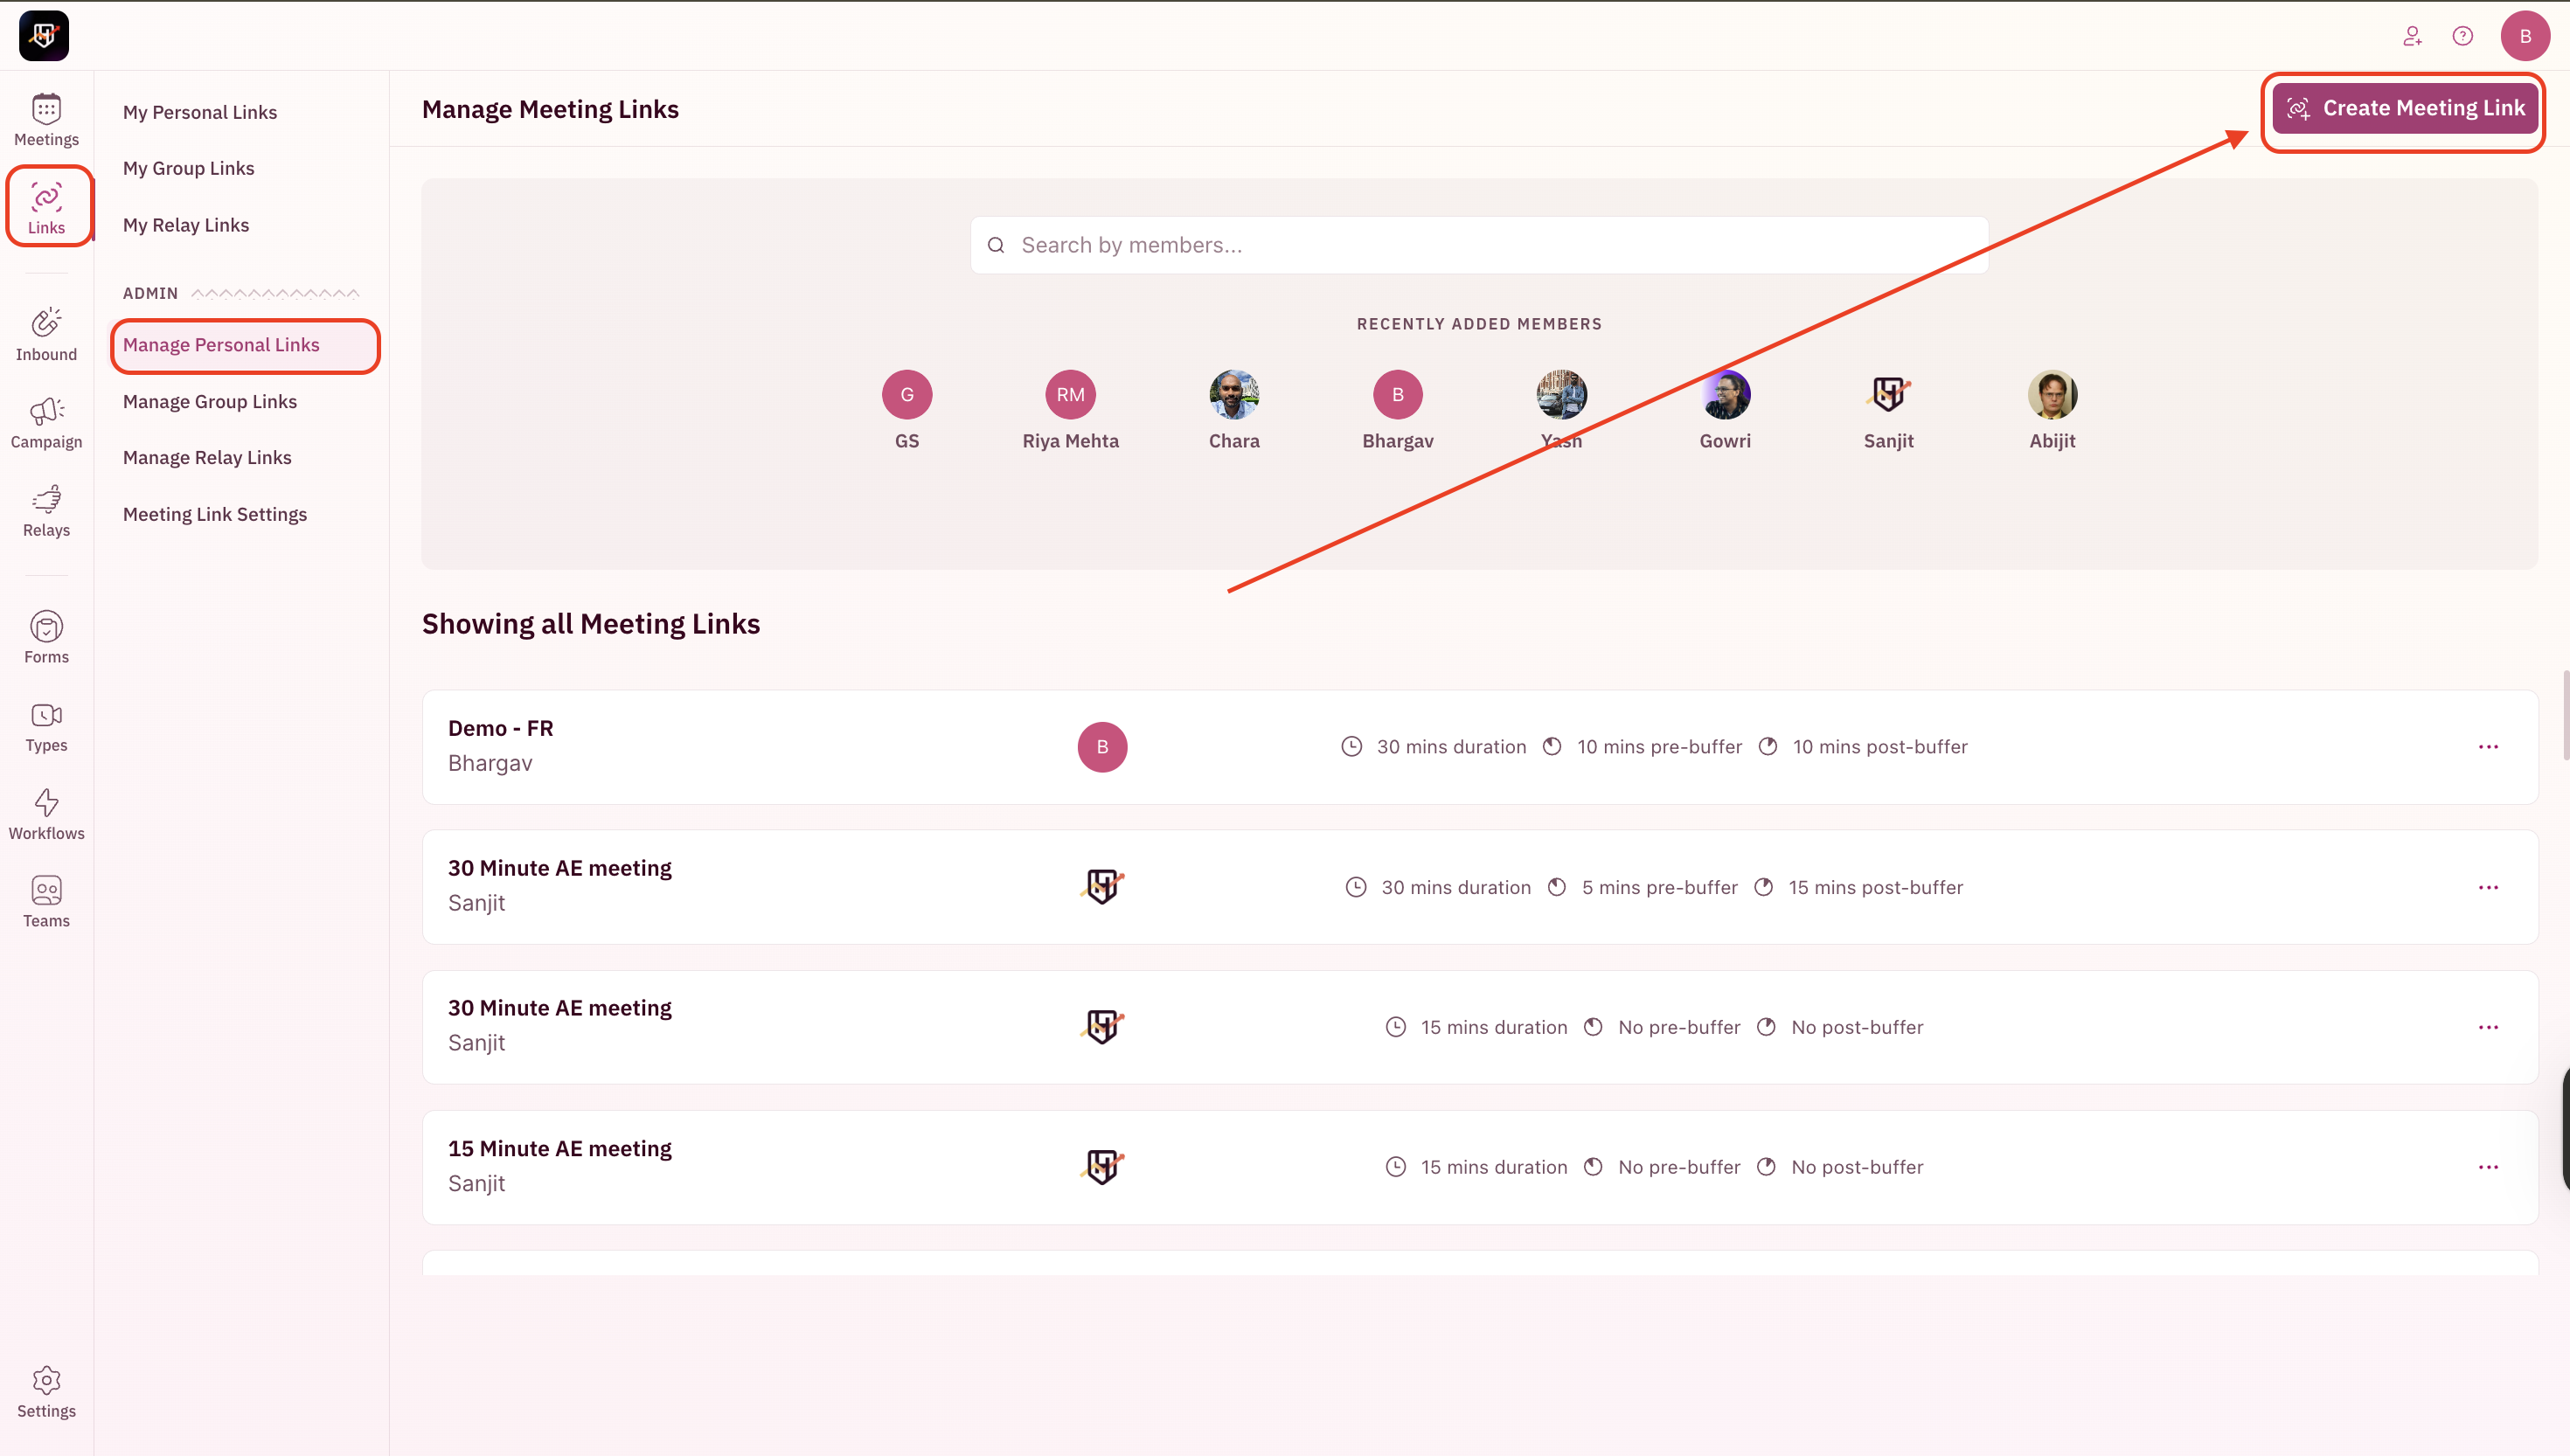
As an admin, you can bulk create meeting links for team members and configure themes, meeting types, and forms.- Navigate to Sidebar → Links → Manage Personal Links.
-
Click Create Meeting Link in the top-right corner.
-
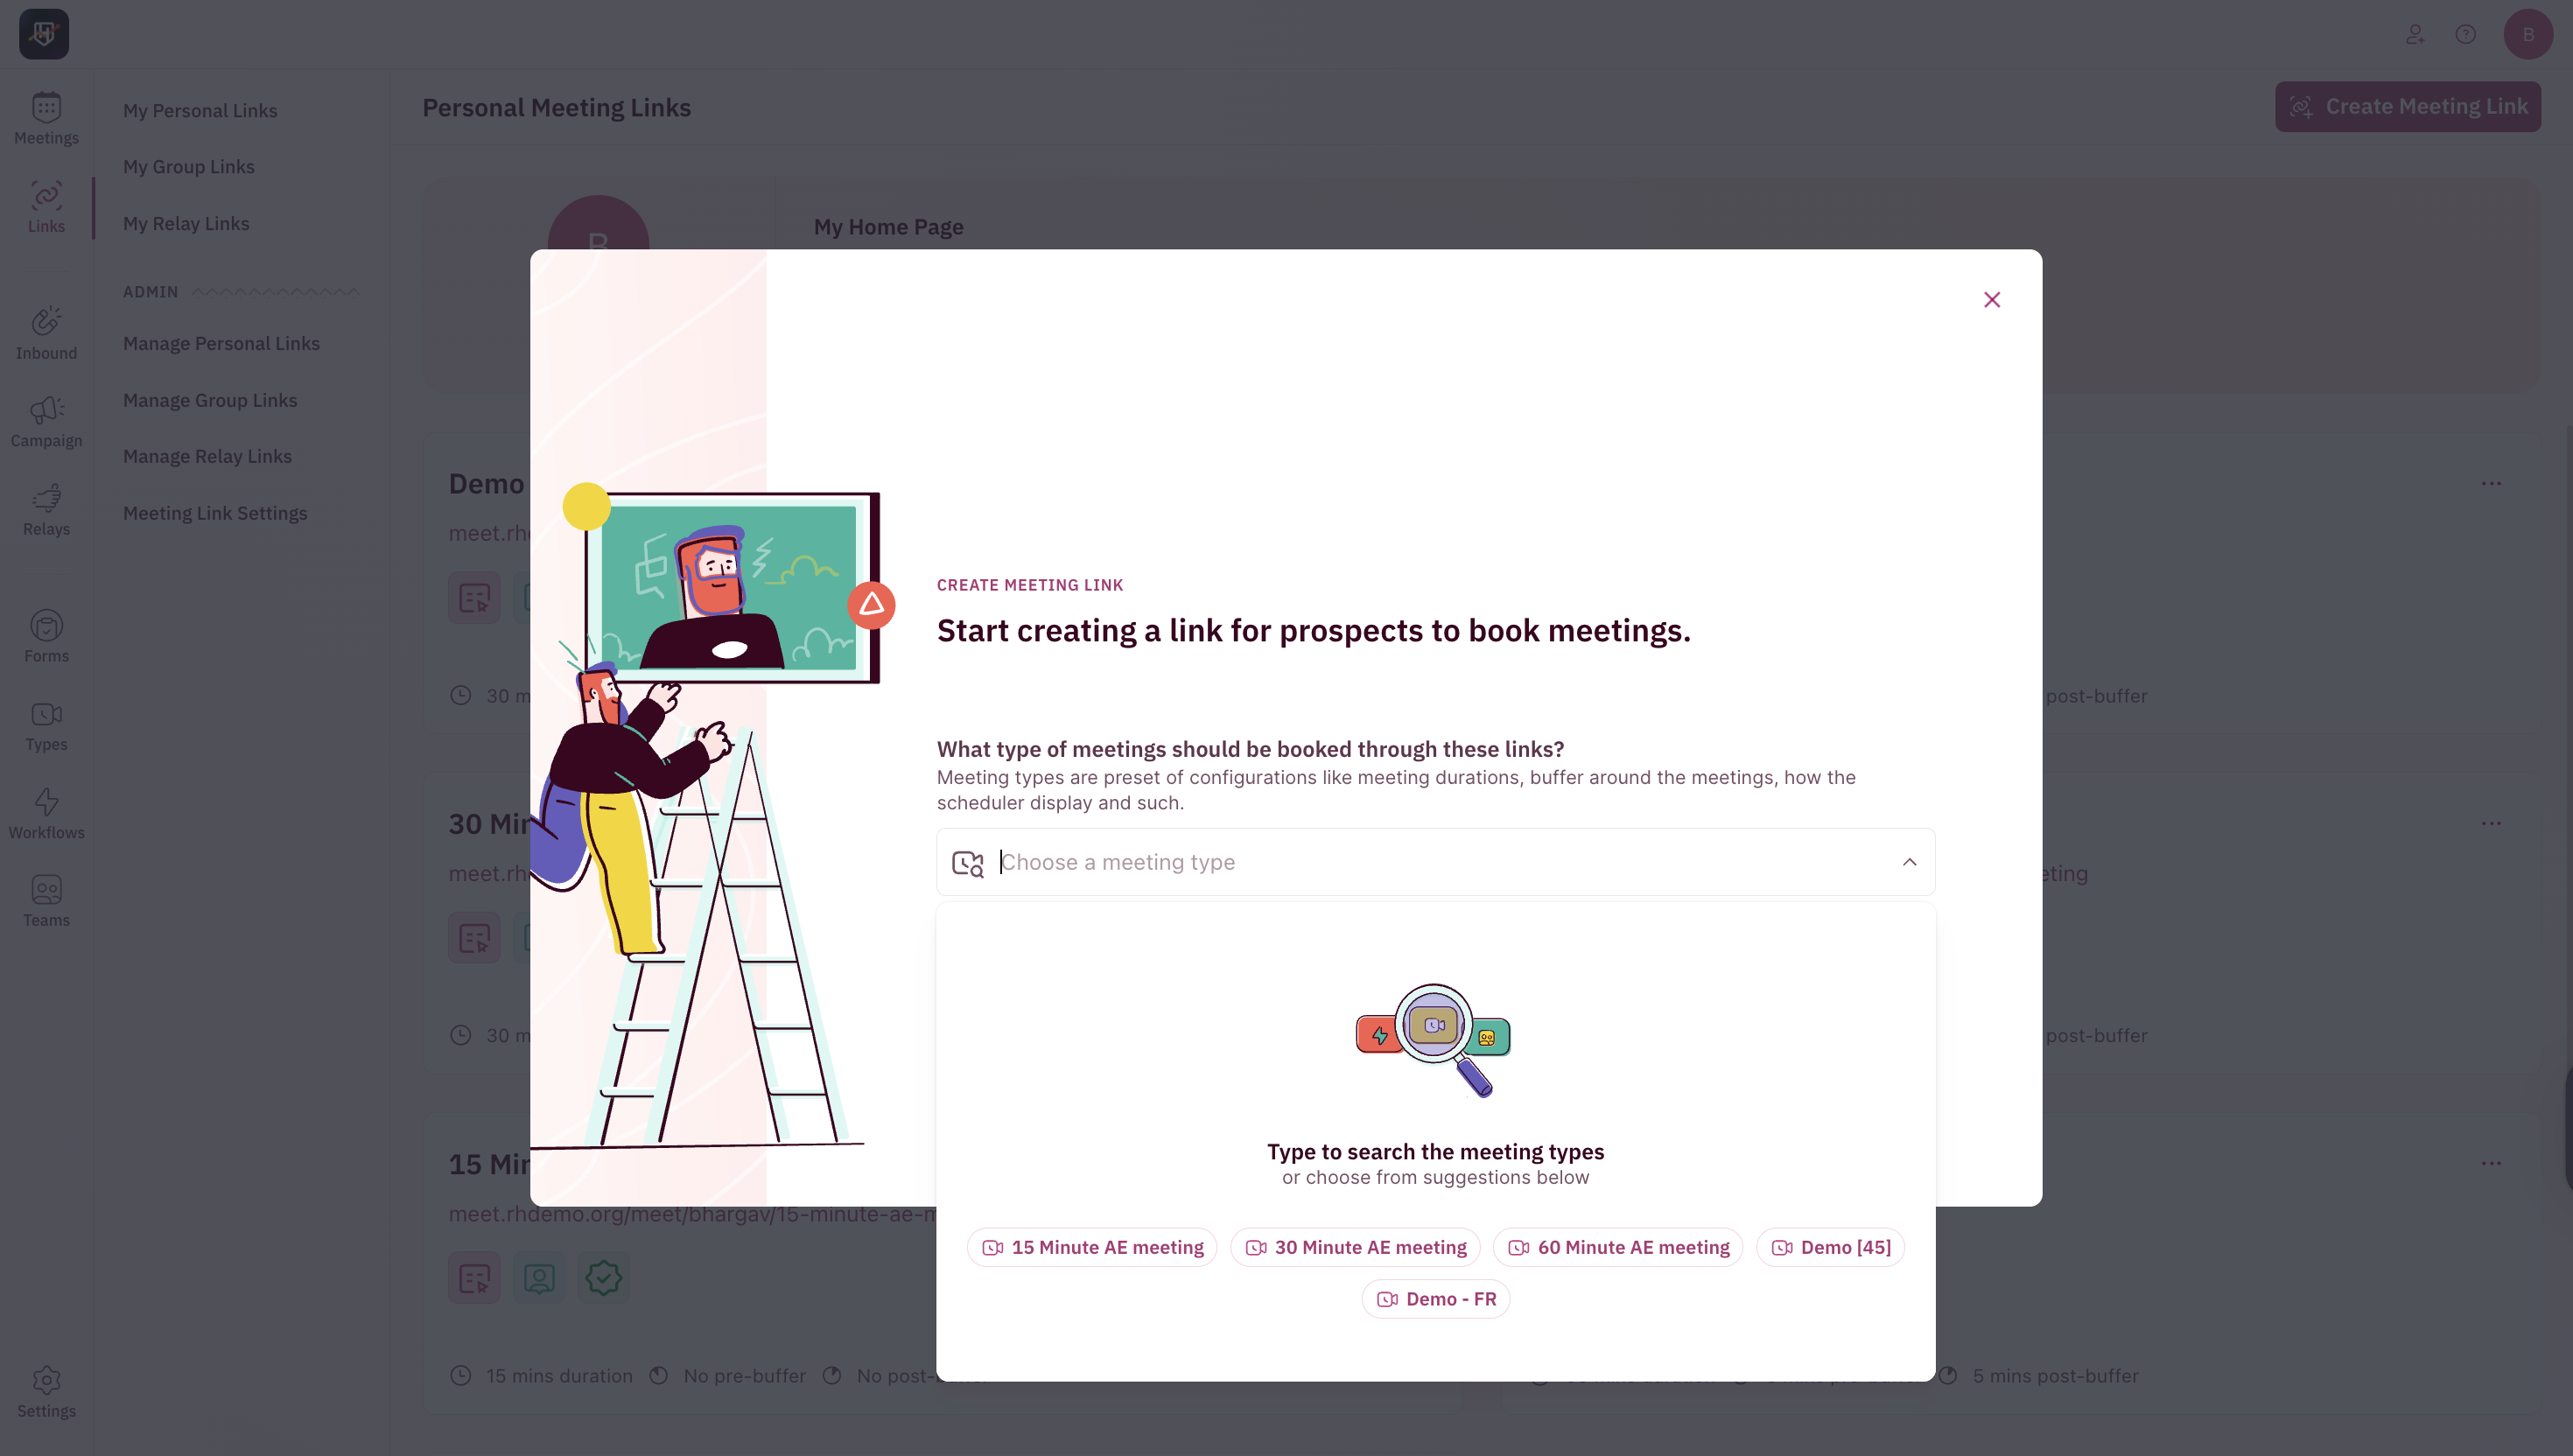
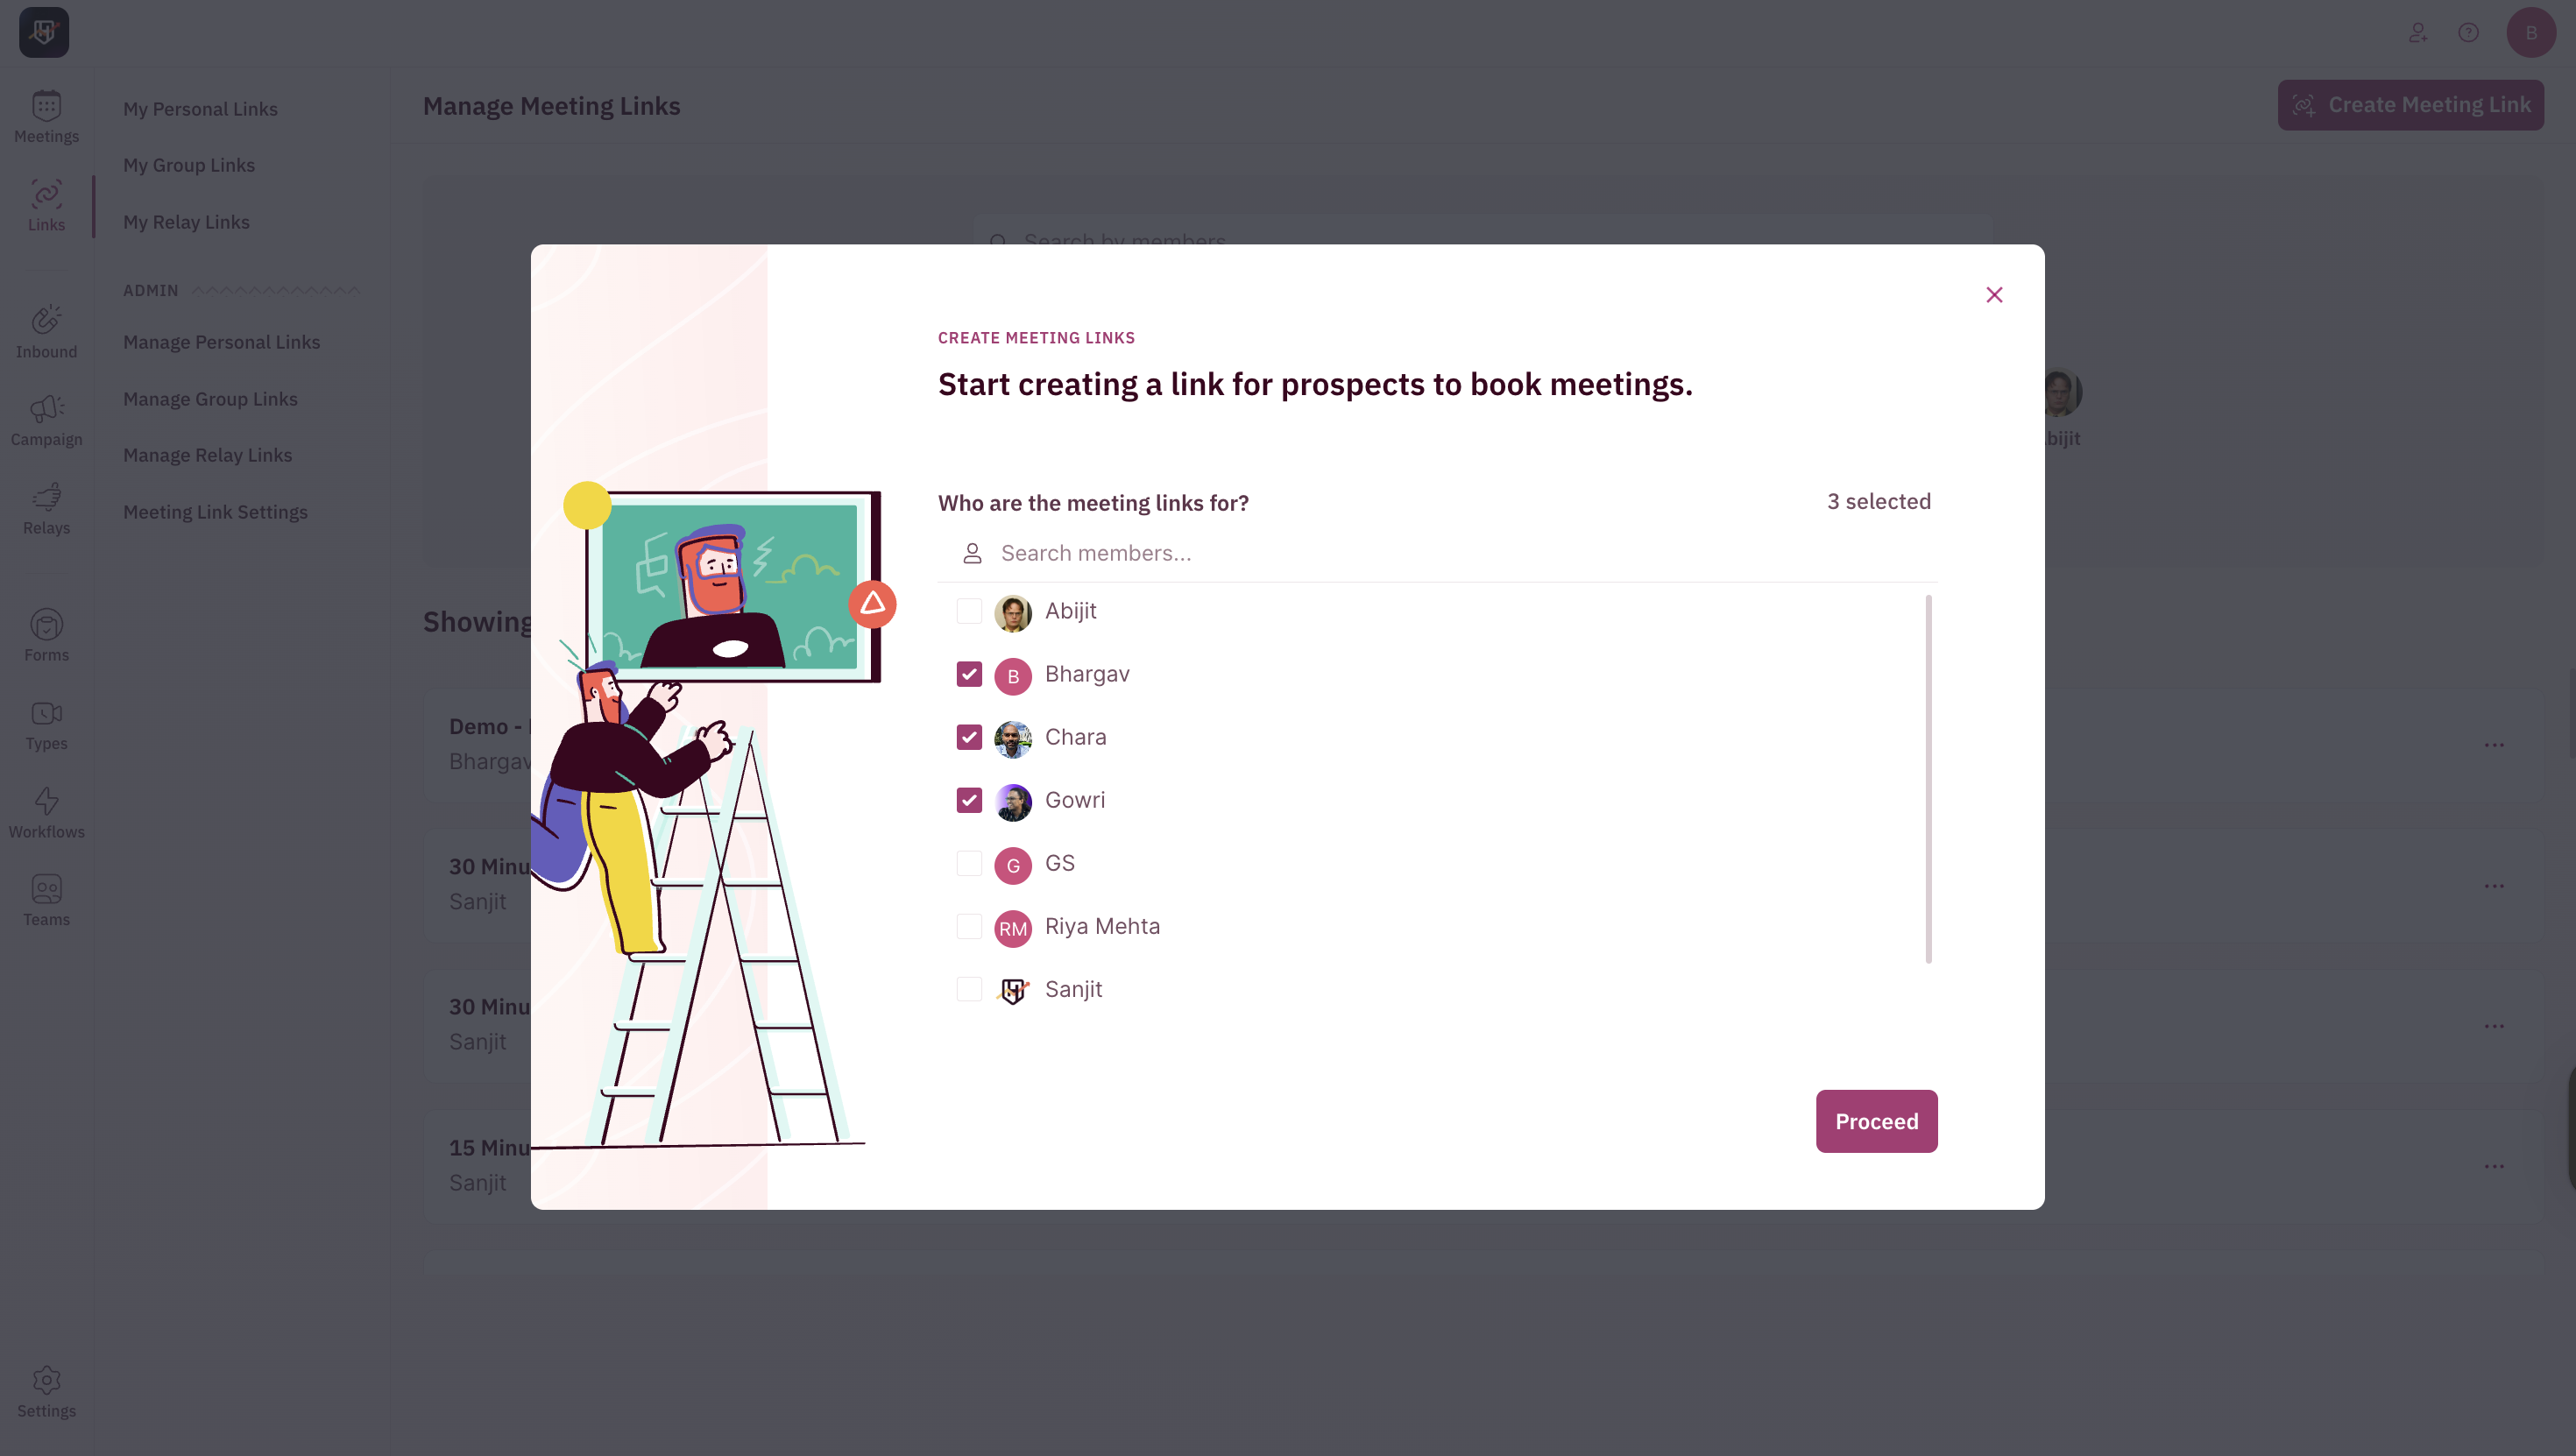
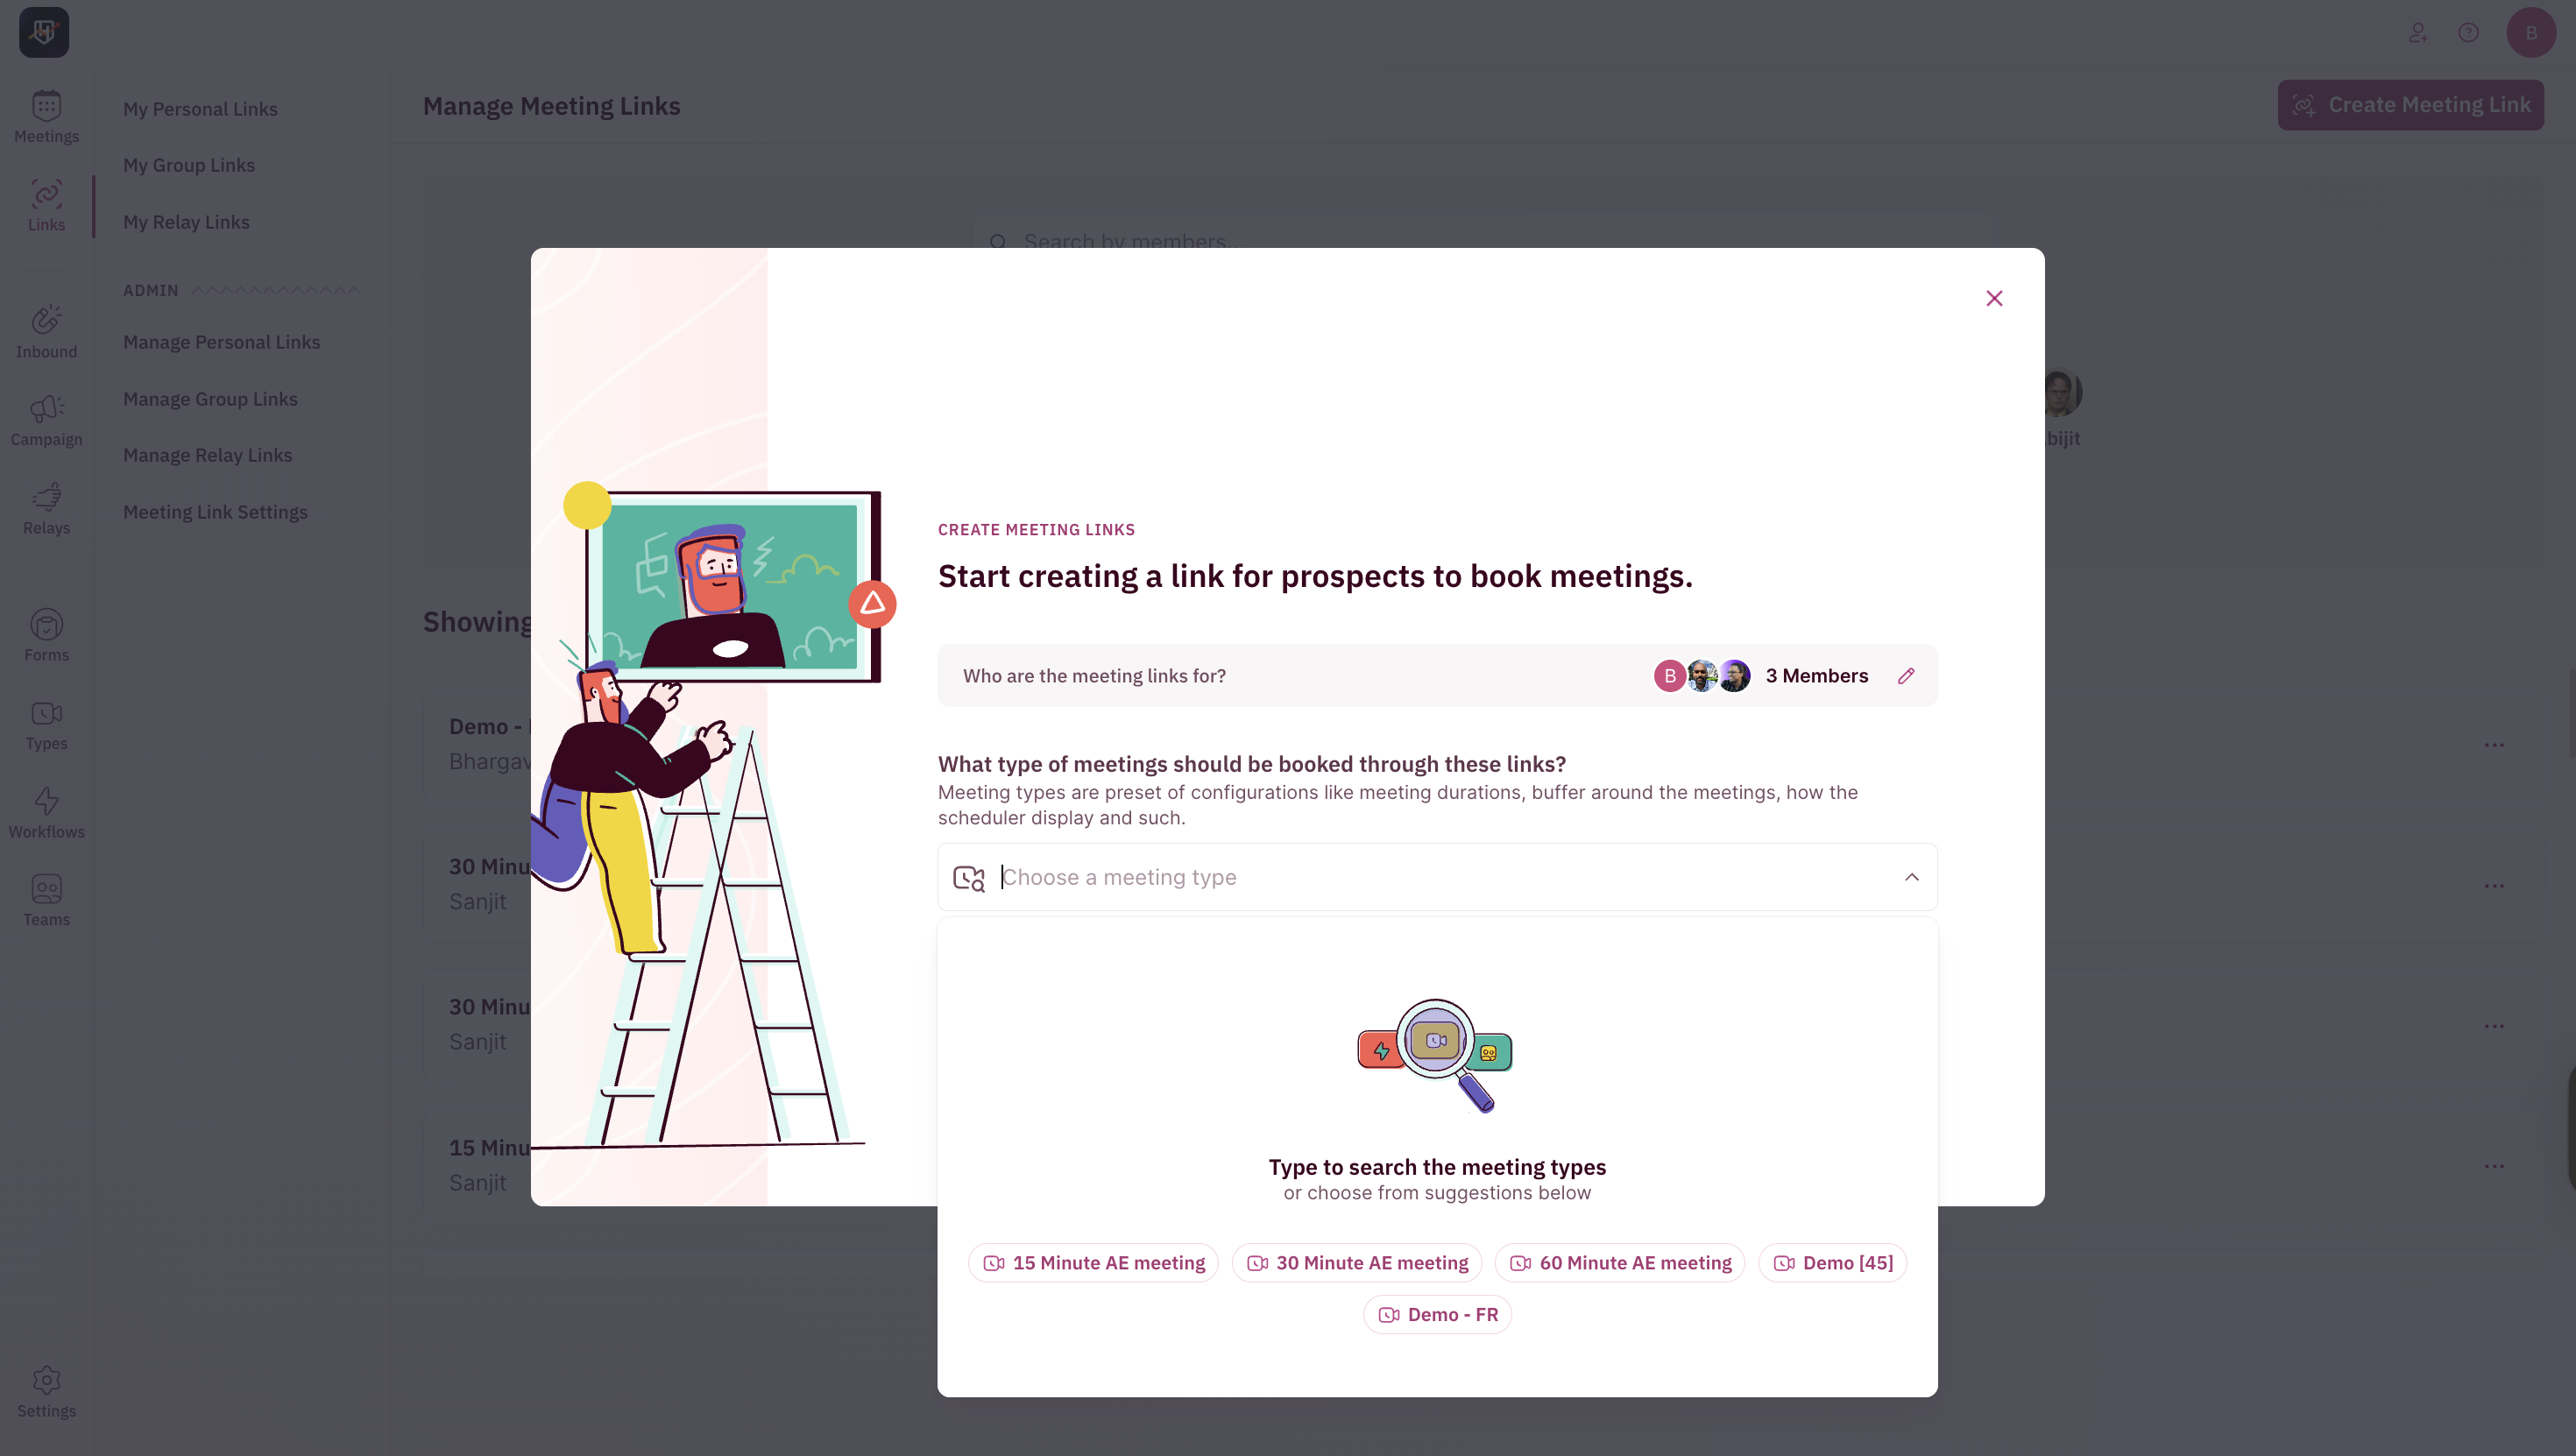
In the pop-up modal:
-
Select the users you want to create this meeting link for.
-
Choose the meeting type (sets meeting duration and applies the presets like calendar invite, reminders, and buffers configured by your admins).
-
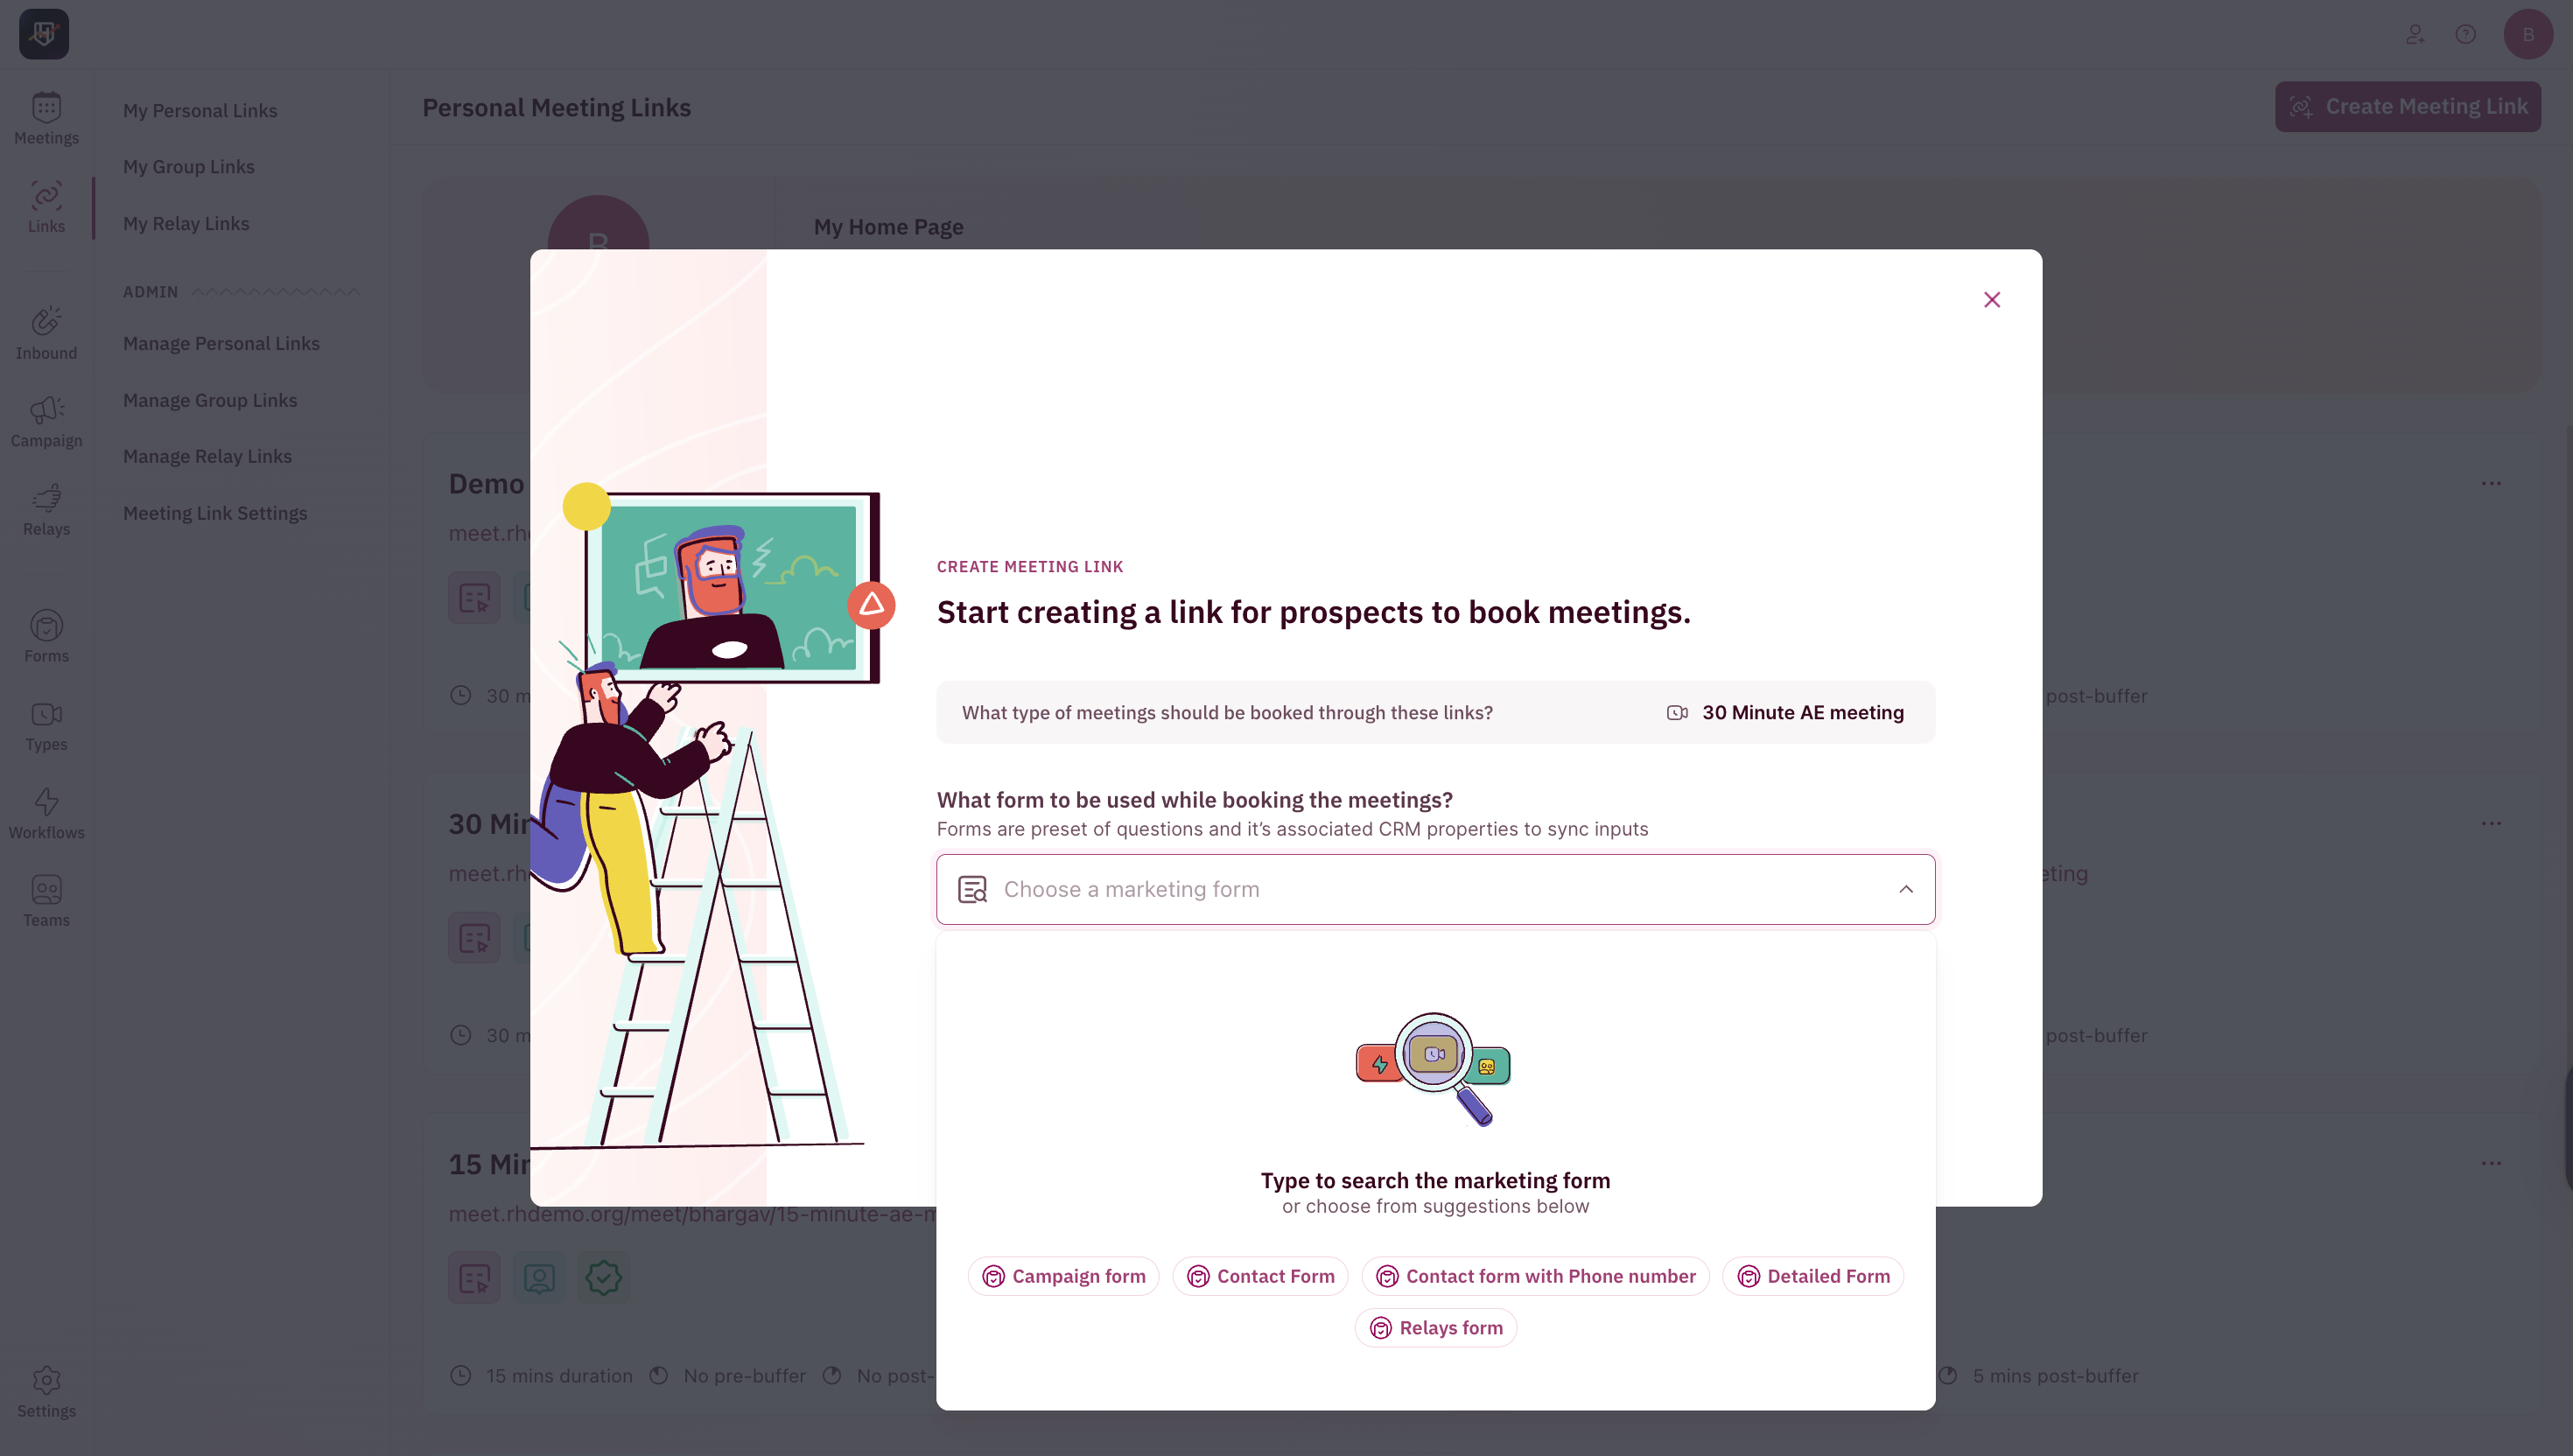
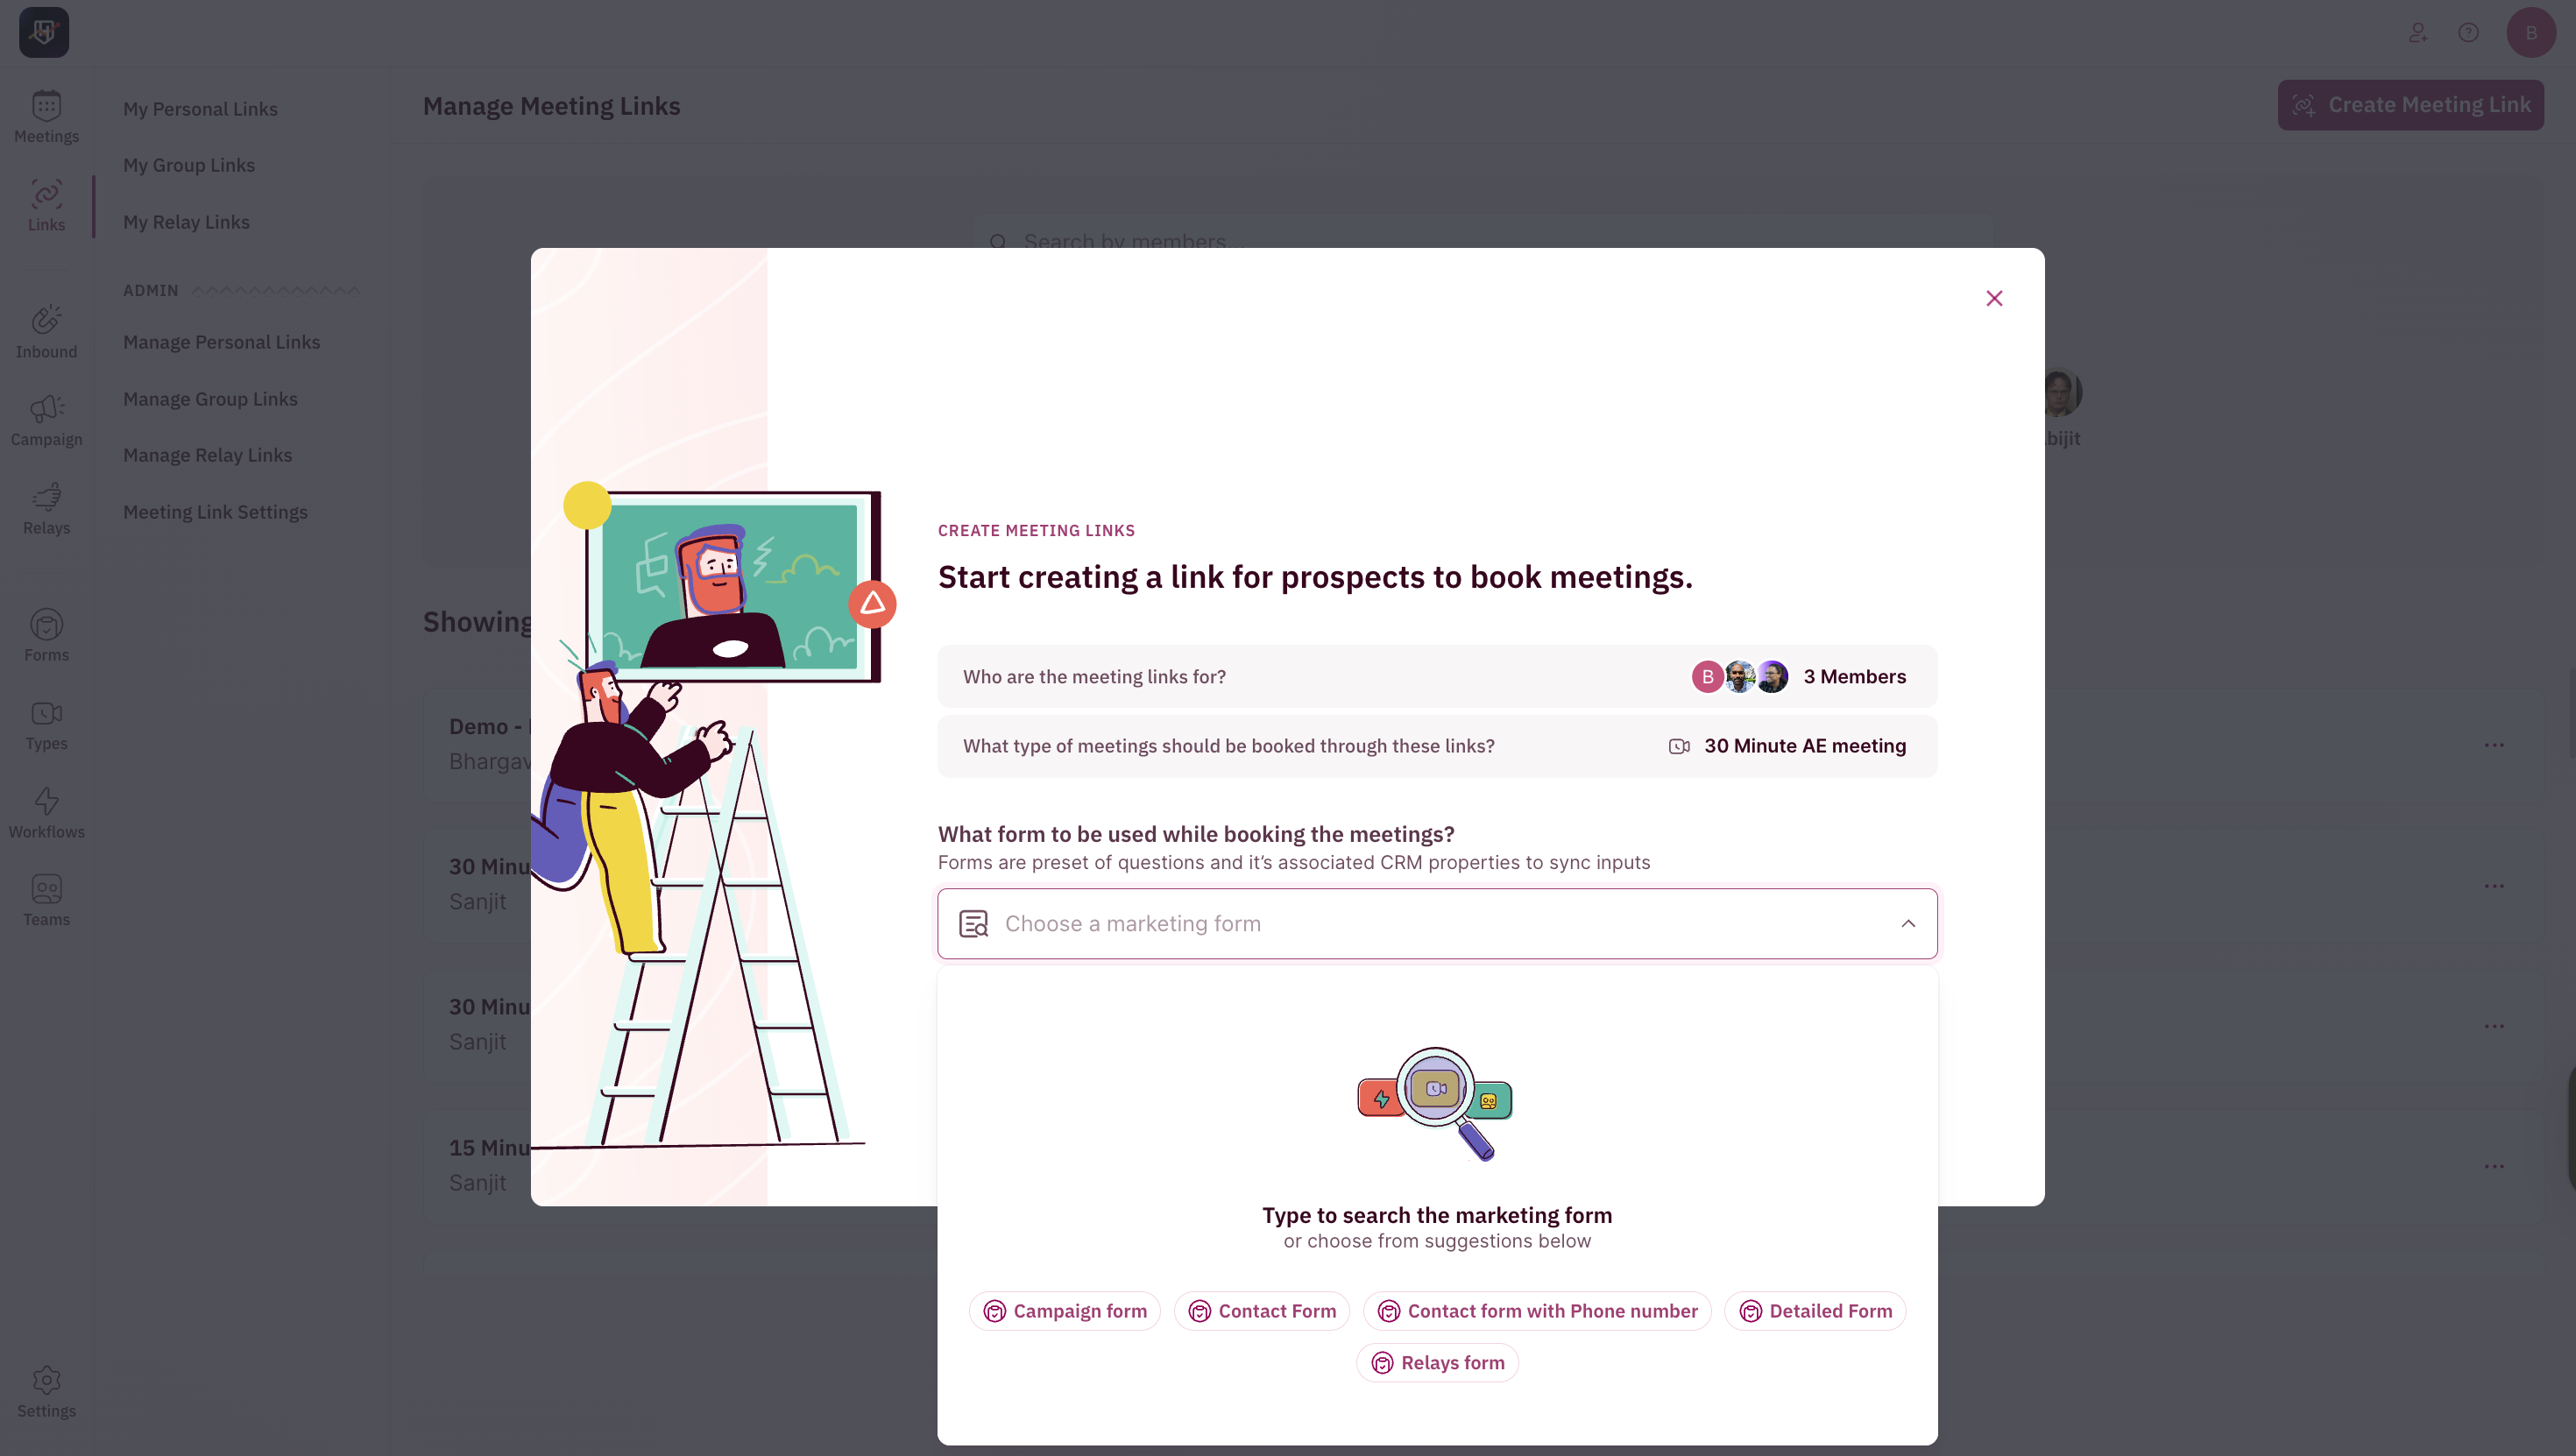
Choose a marketing form (decides what questions, configured by your admins, are shown to the person filling out the form).
-
Select the users you want to create this meeting link for.
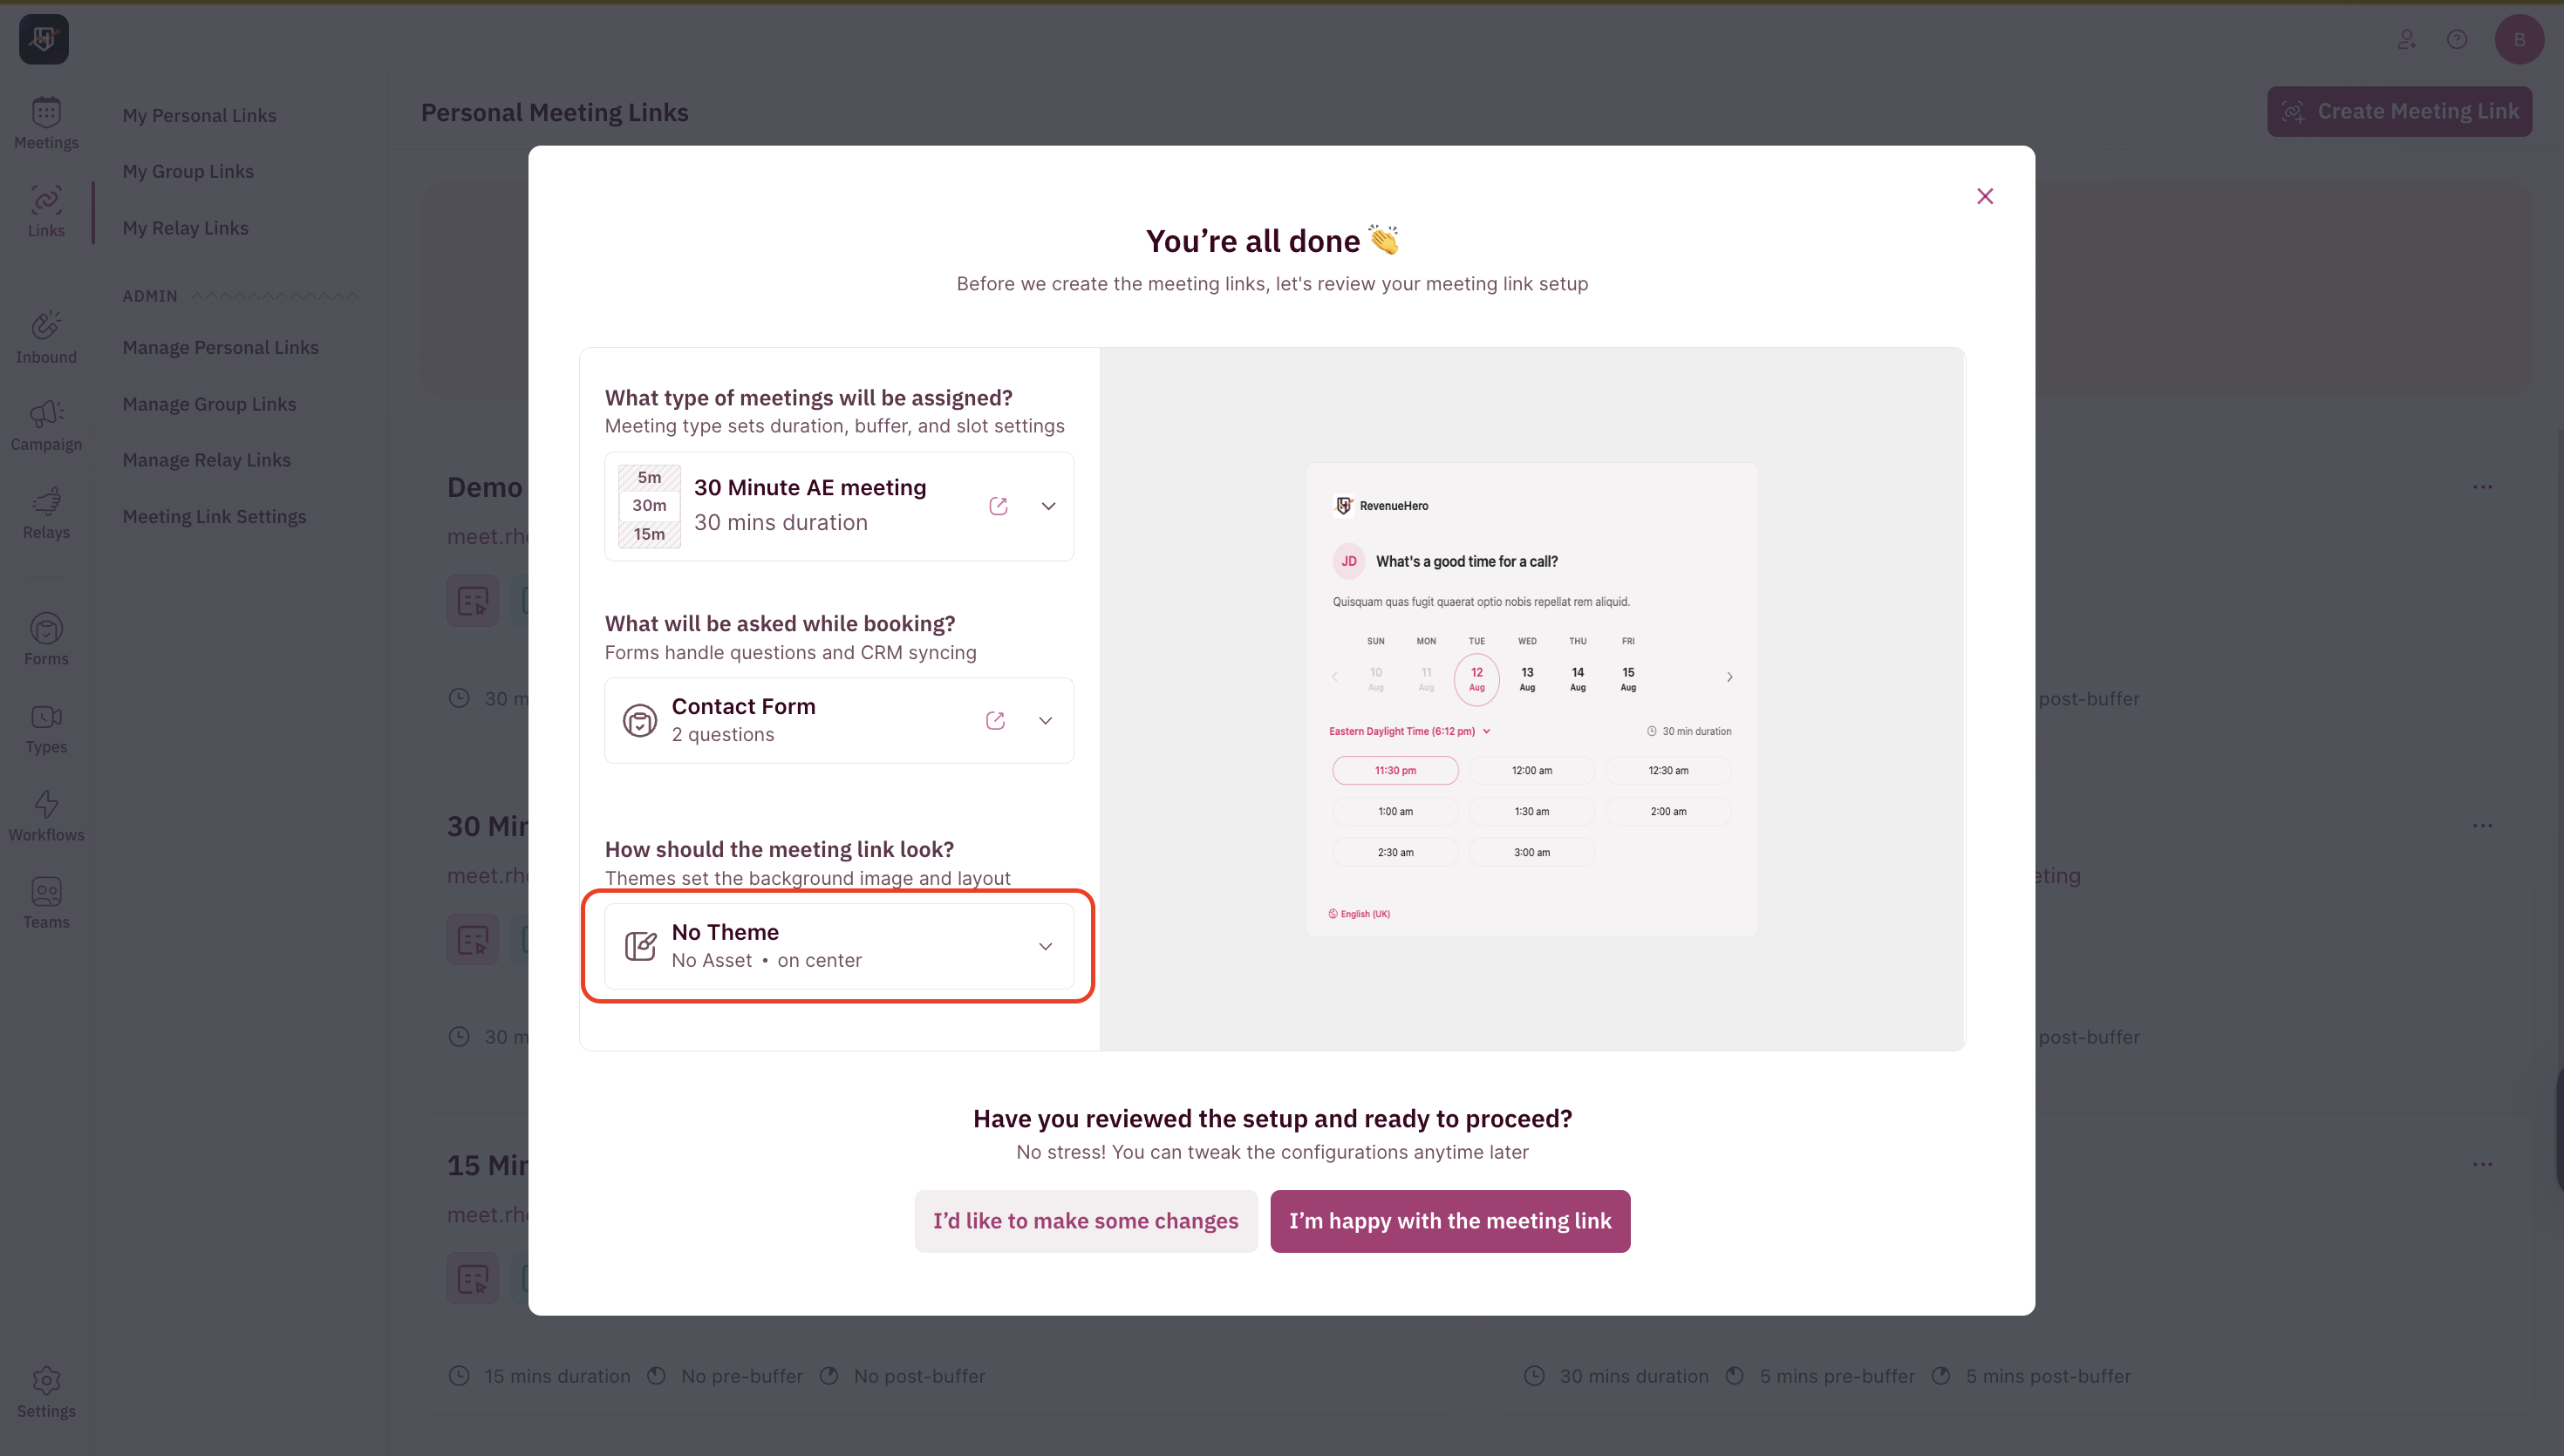
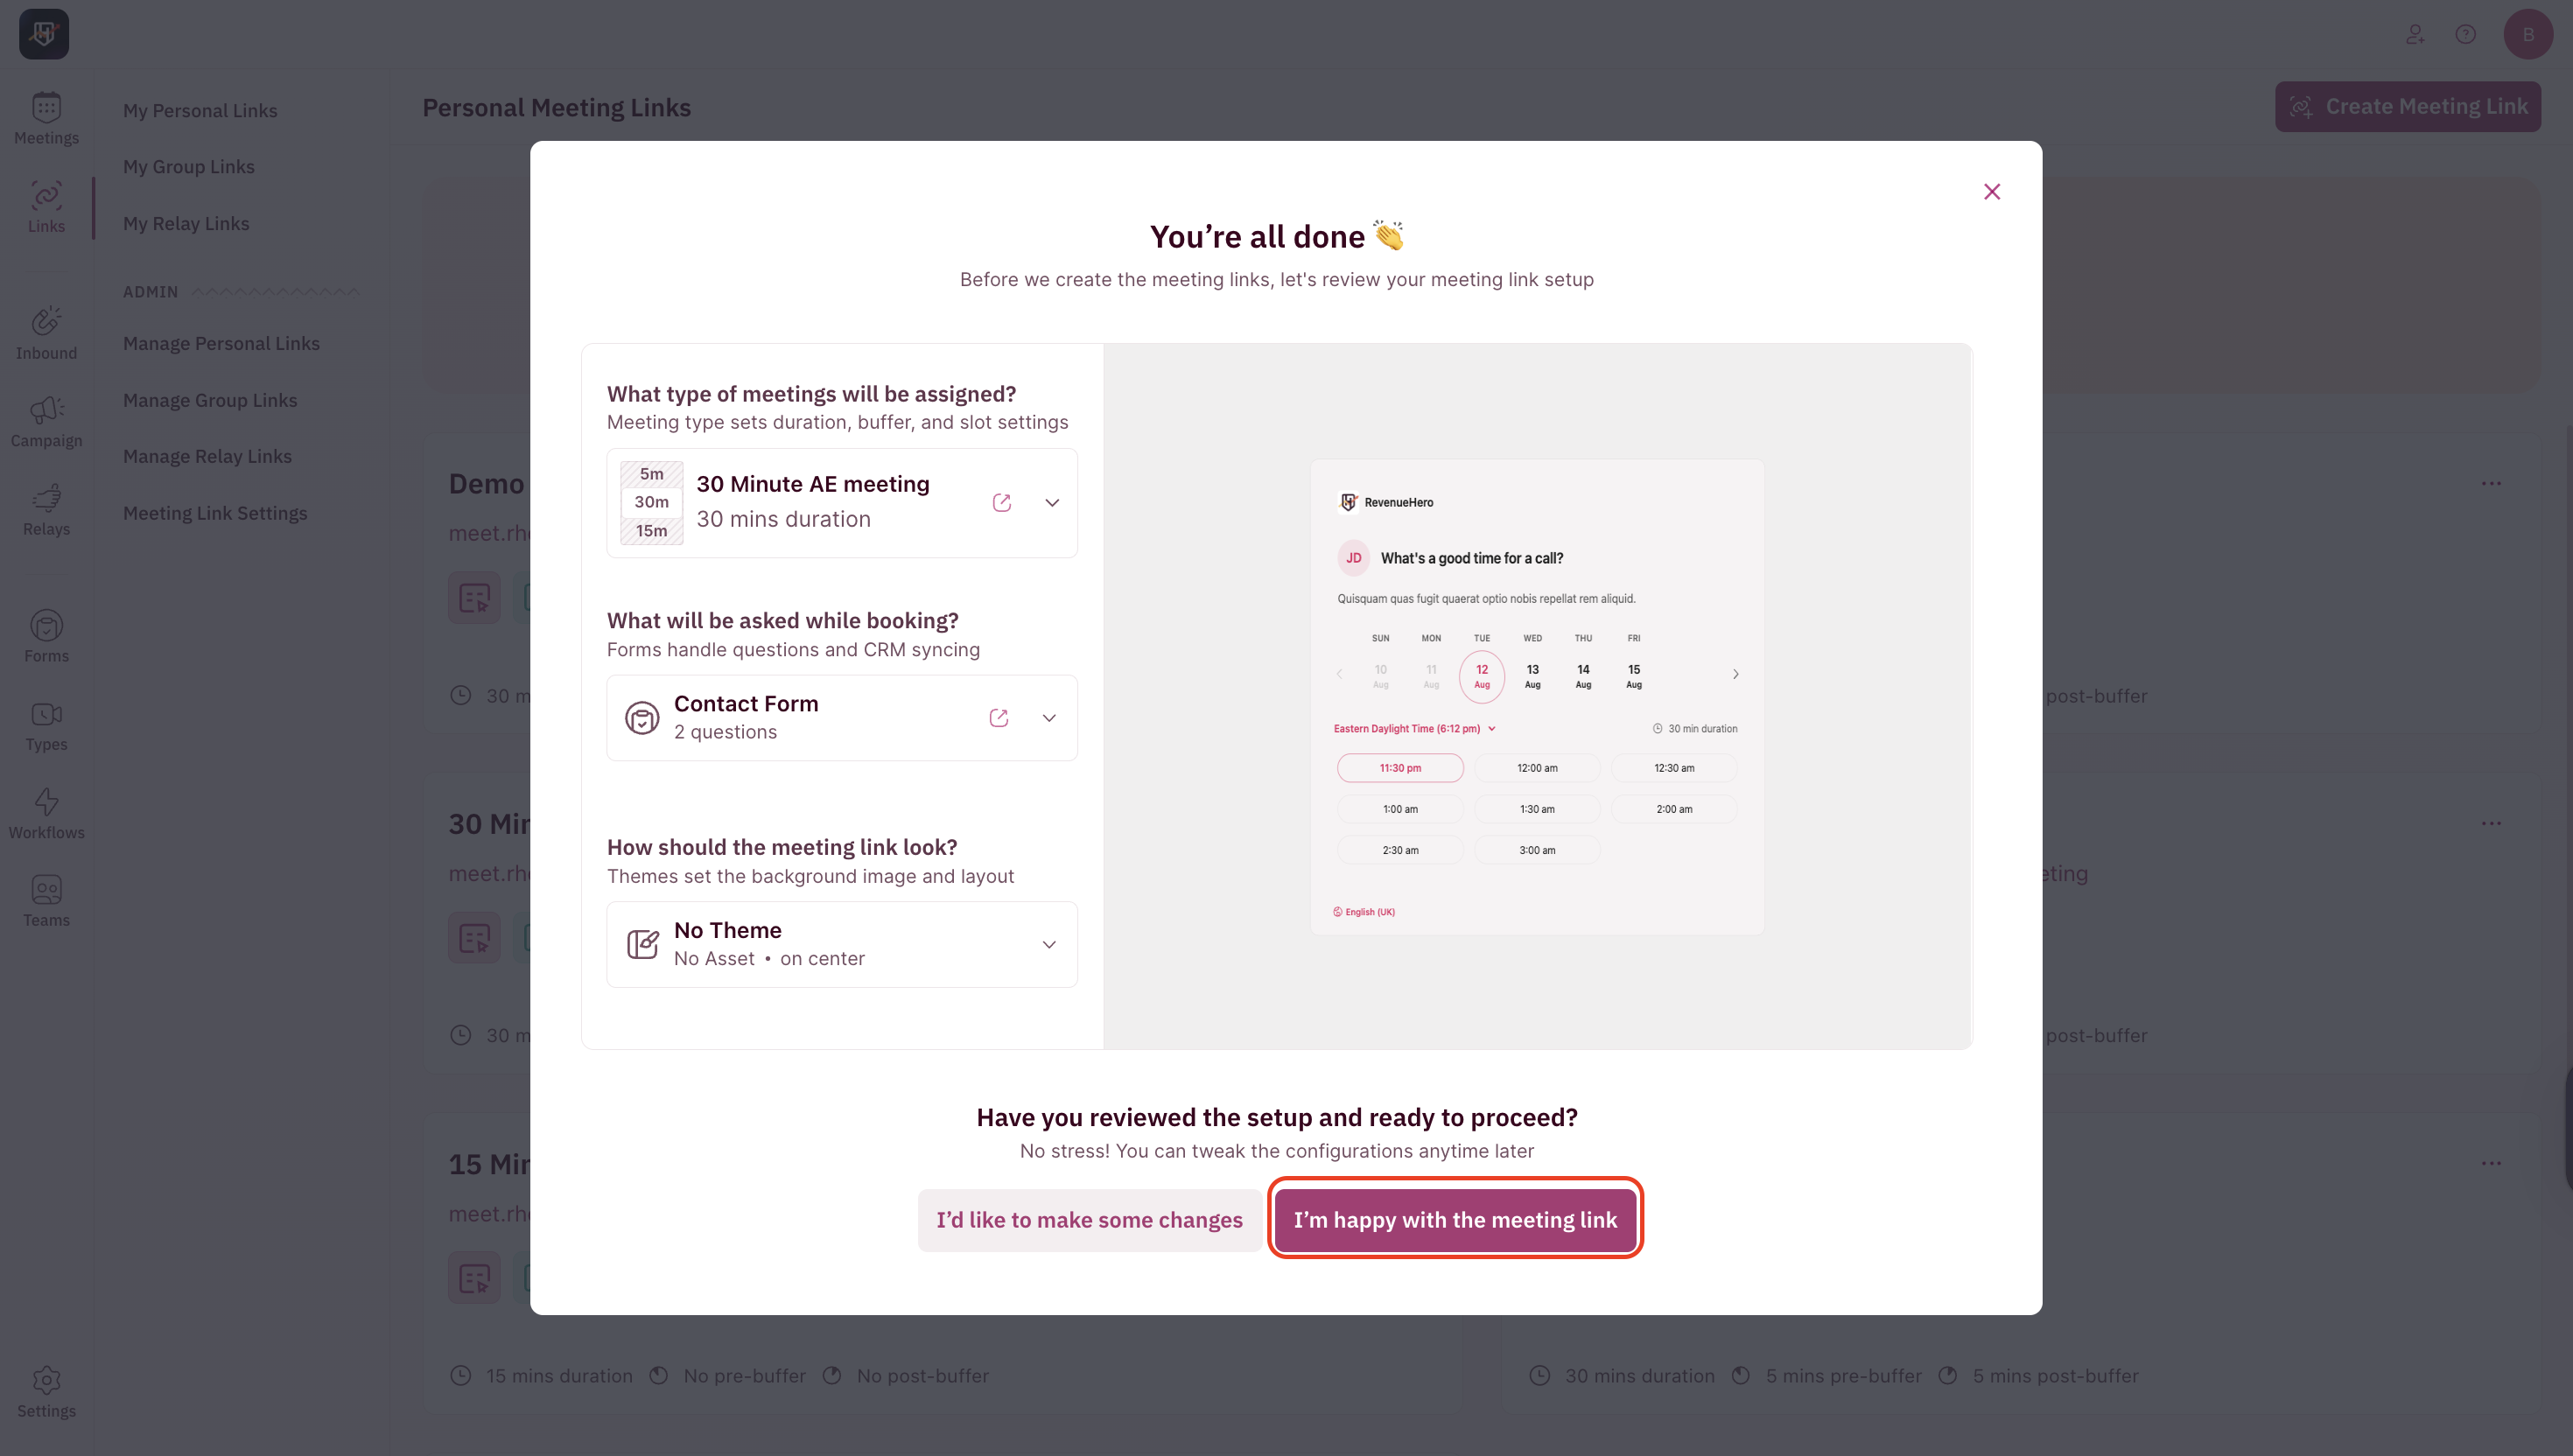
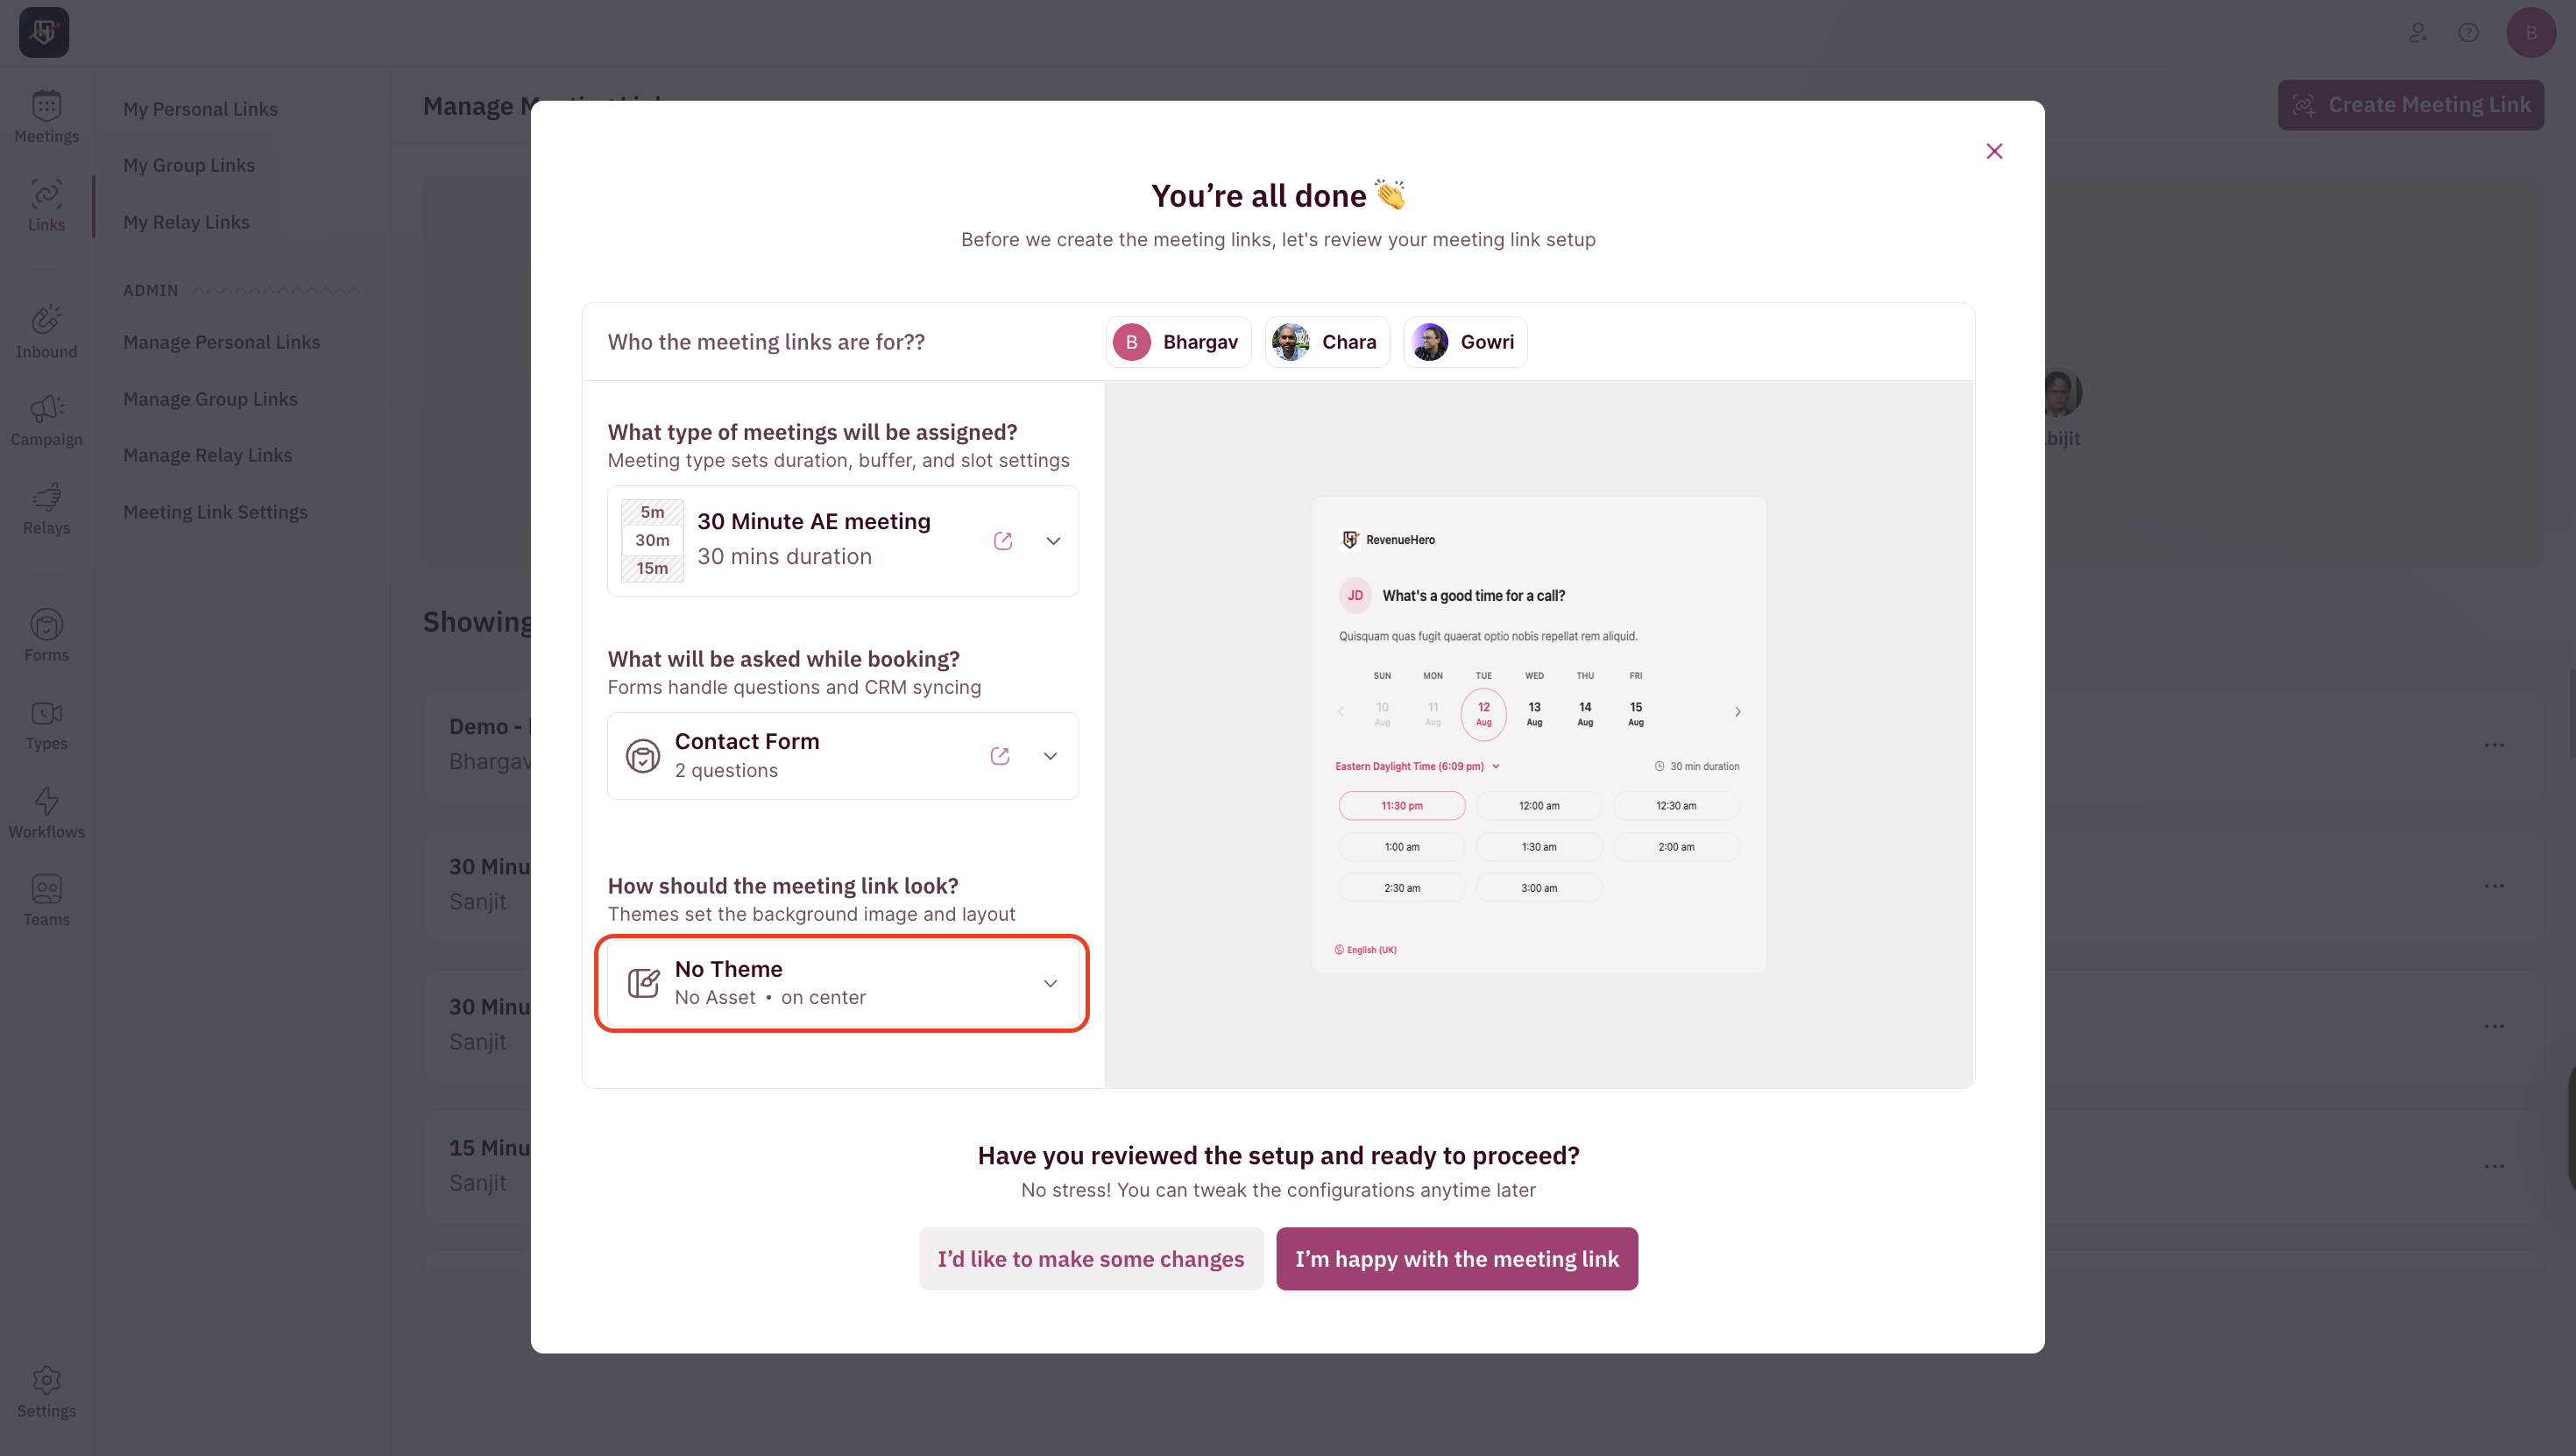
- Click Proceed to review your settings.
-
Here you will be able to select a preset theme.
-
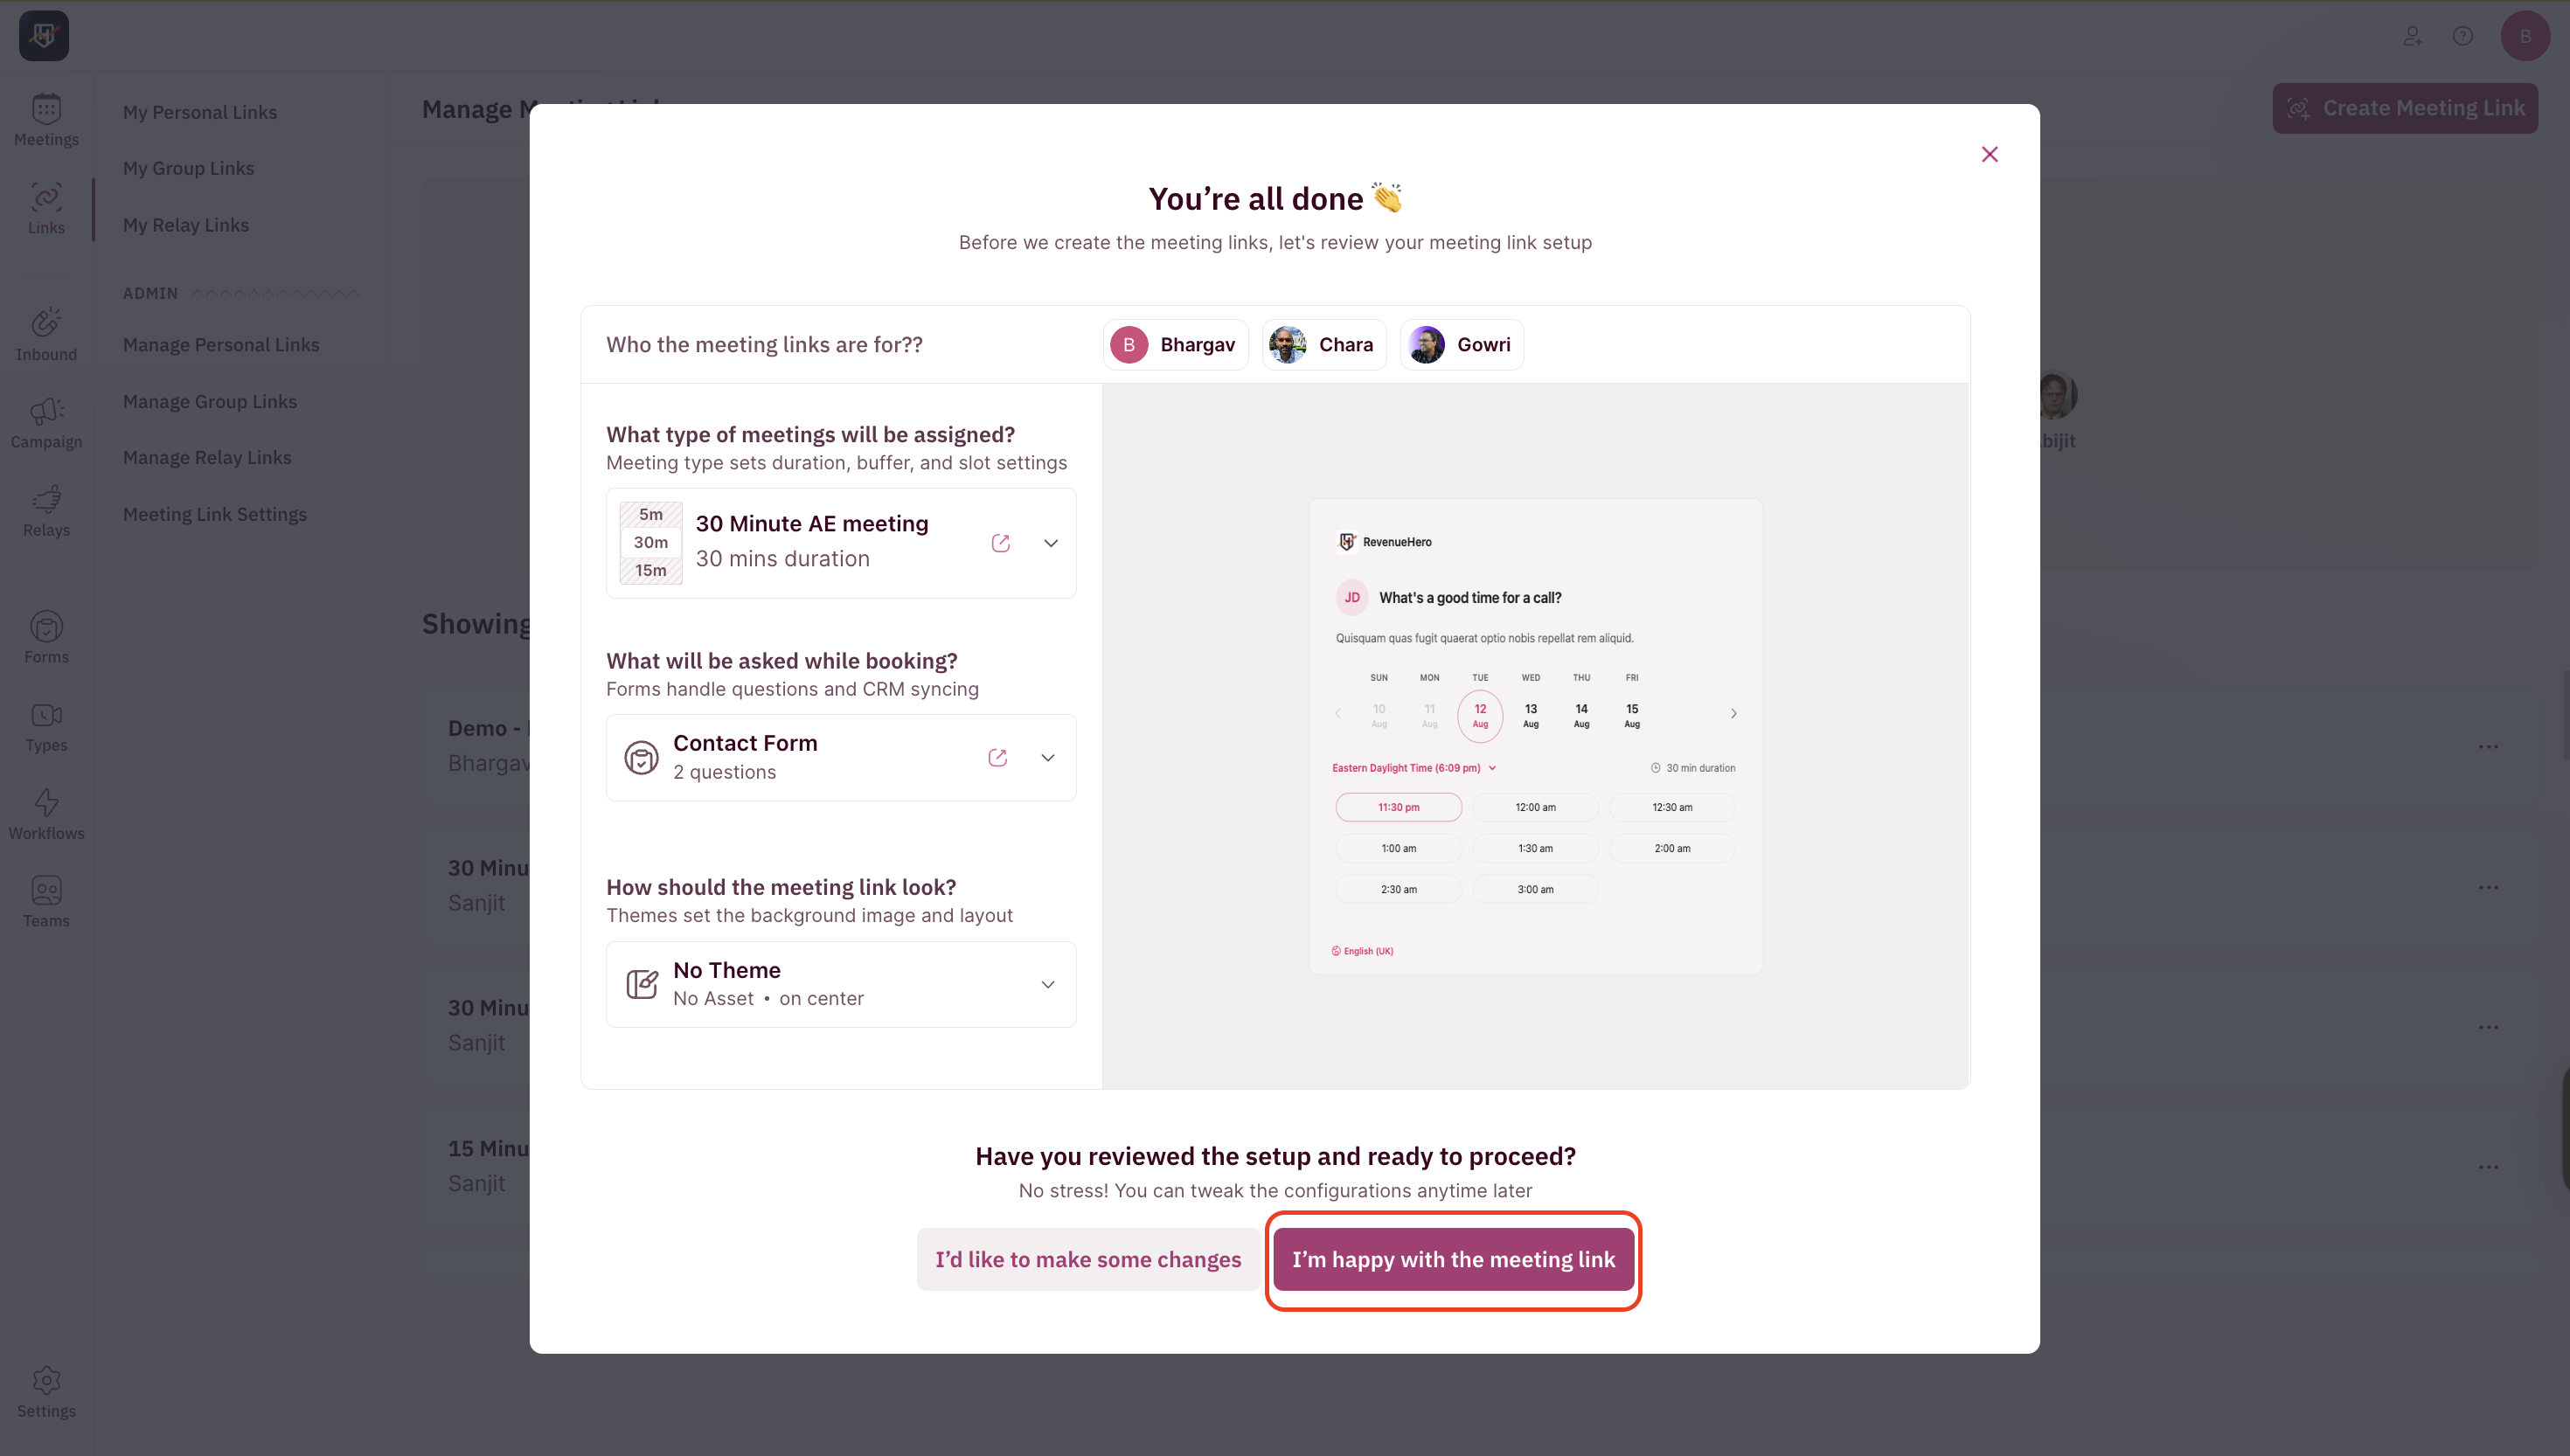
Once you are satisfied, click I’m happy with the meeting link to create the meeting link.
Meeting Link Layout
Each Personal Meeting Link has two main sections in the setup view: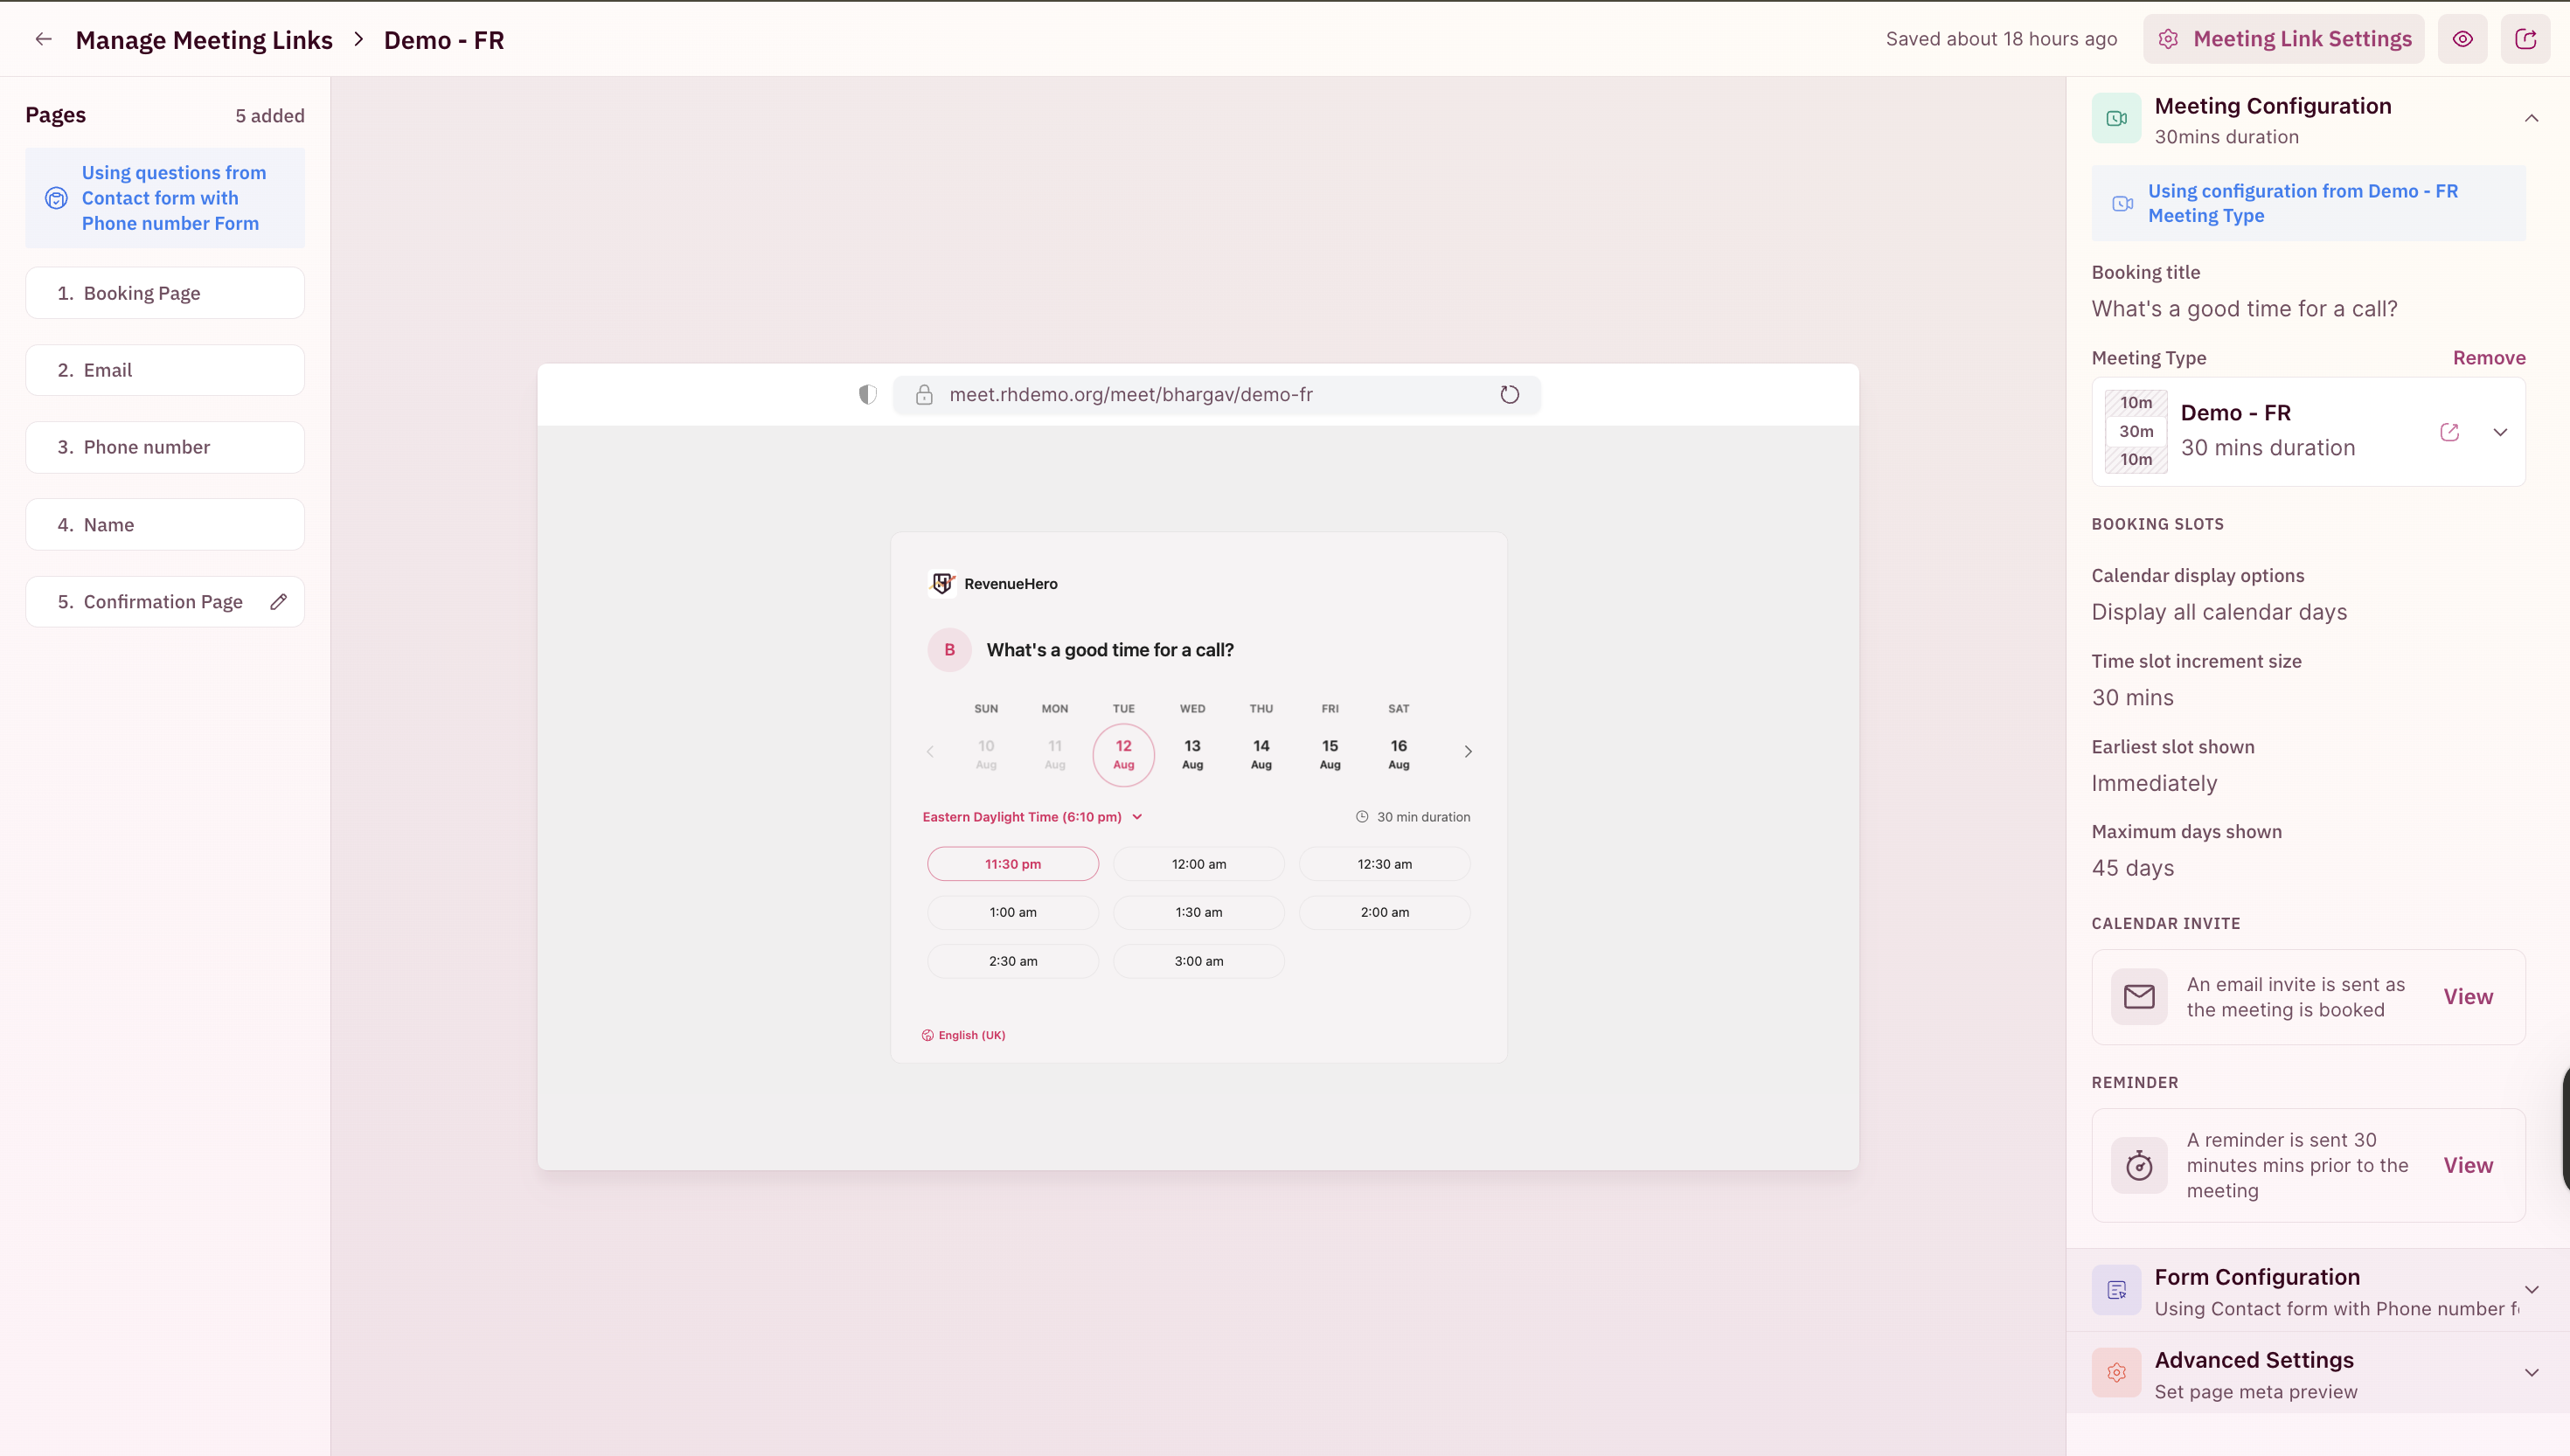
- Left Panel: Booking Page, Questions, and Confirmation Page.
- Right Panel: Manage the settings and appearance of your meeting link.
- Meeting Configuration – Change meeting type and review the duration, buffers, and basic details. (Only admins can edit the meeting type.)
- Form Configuration – Attach/change form created by your admin to collect prospect details. (Only admins can edit the form.)
- Advanced Settings – Apply themes set up by your admin. (Only admins can create new themes.)
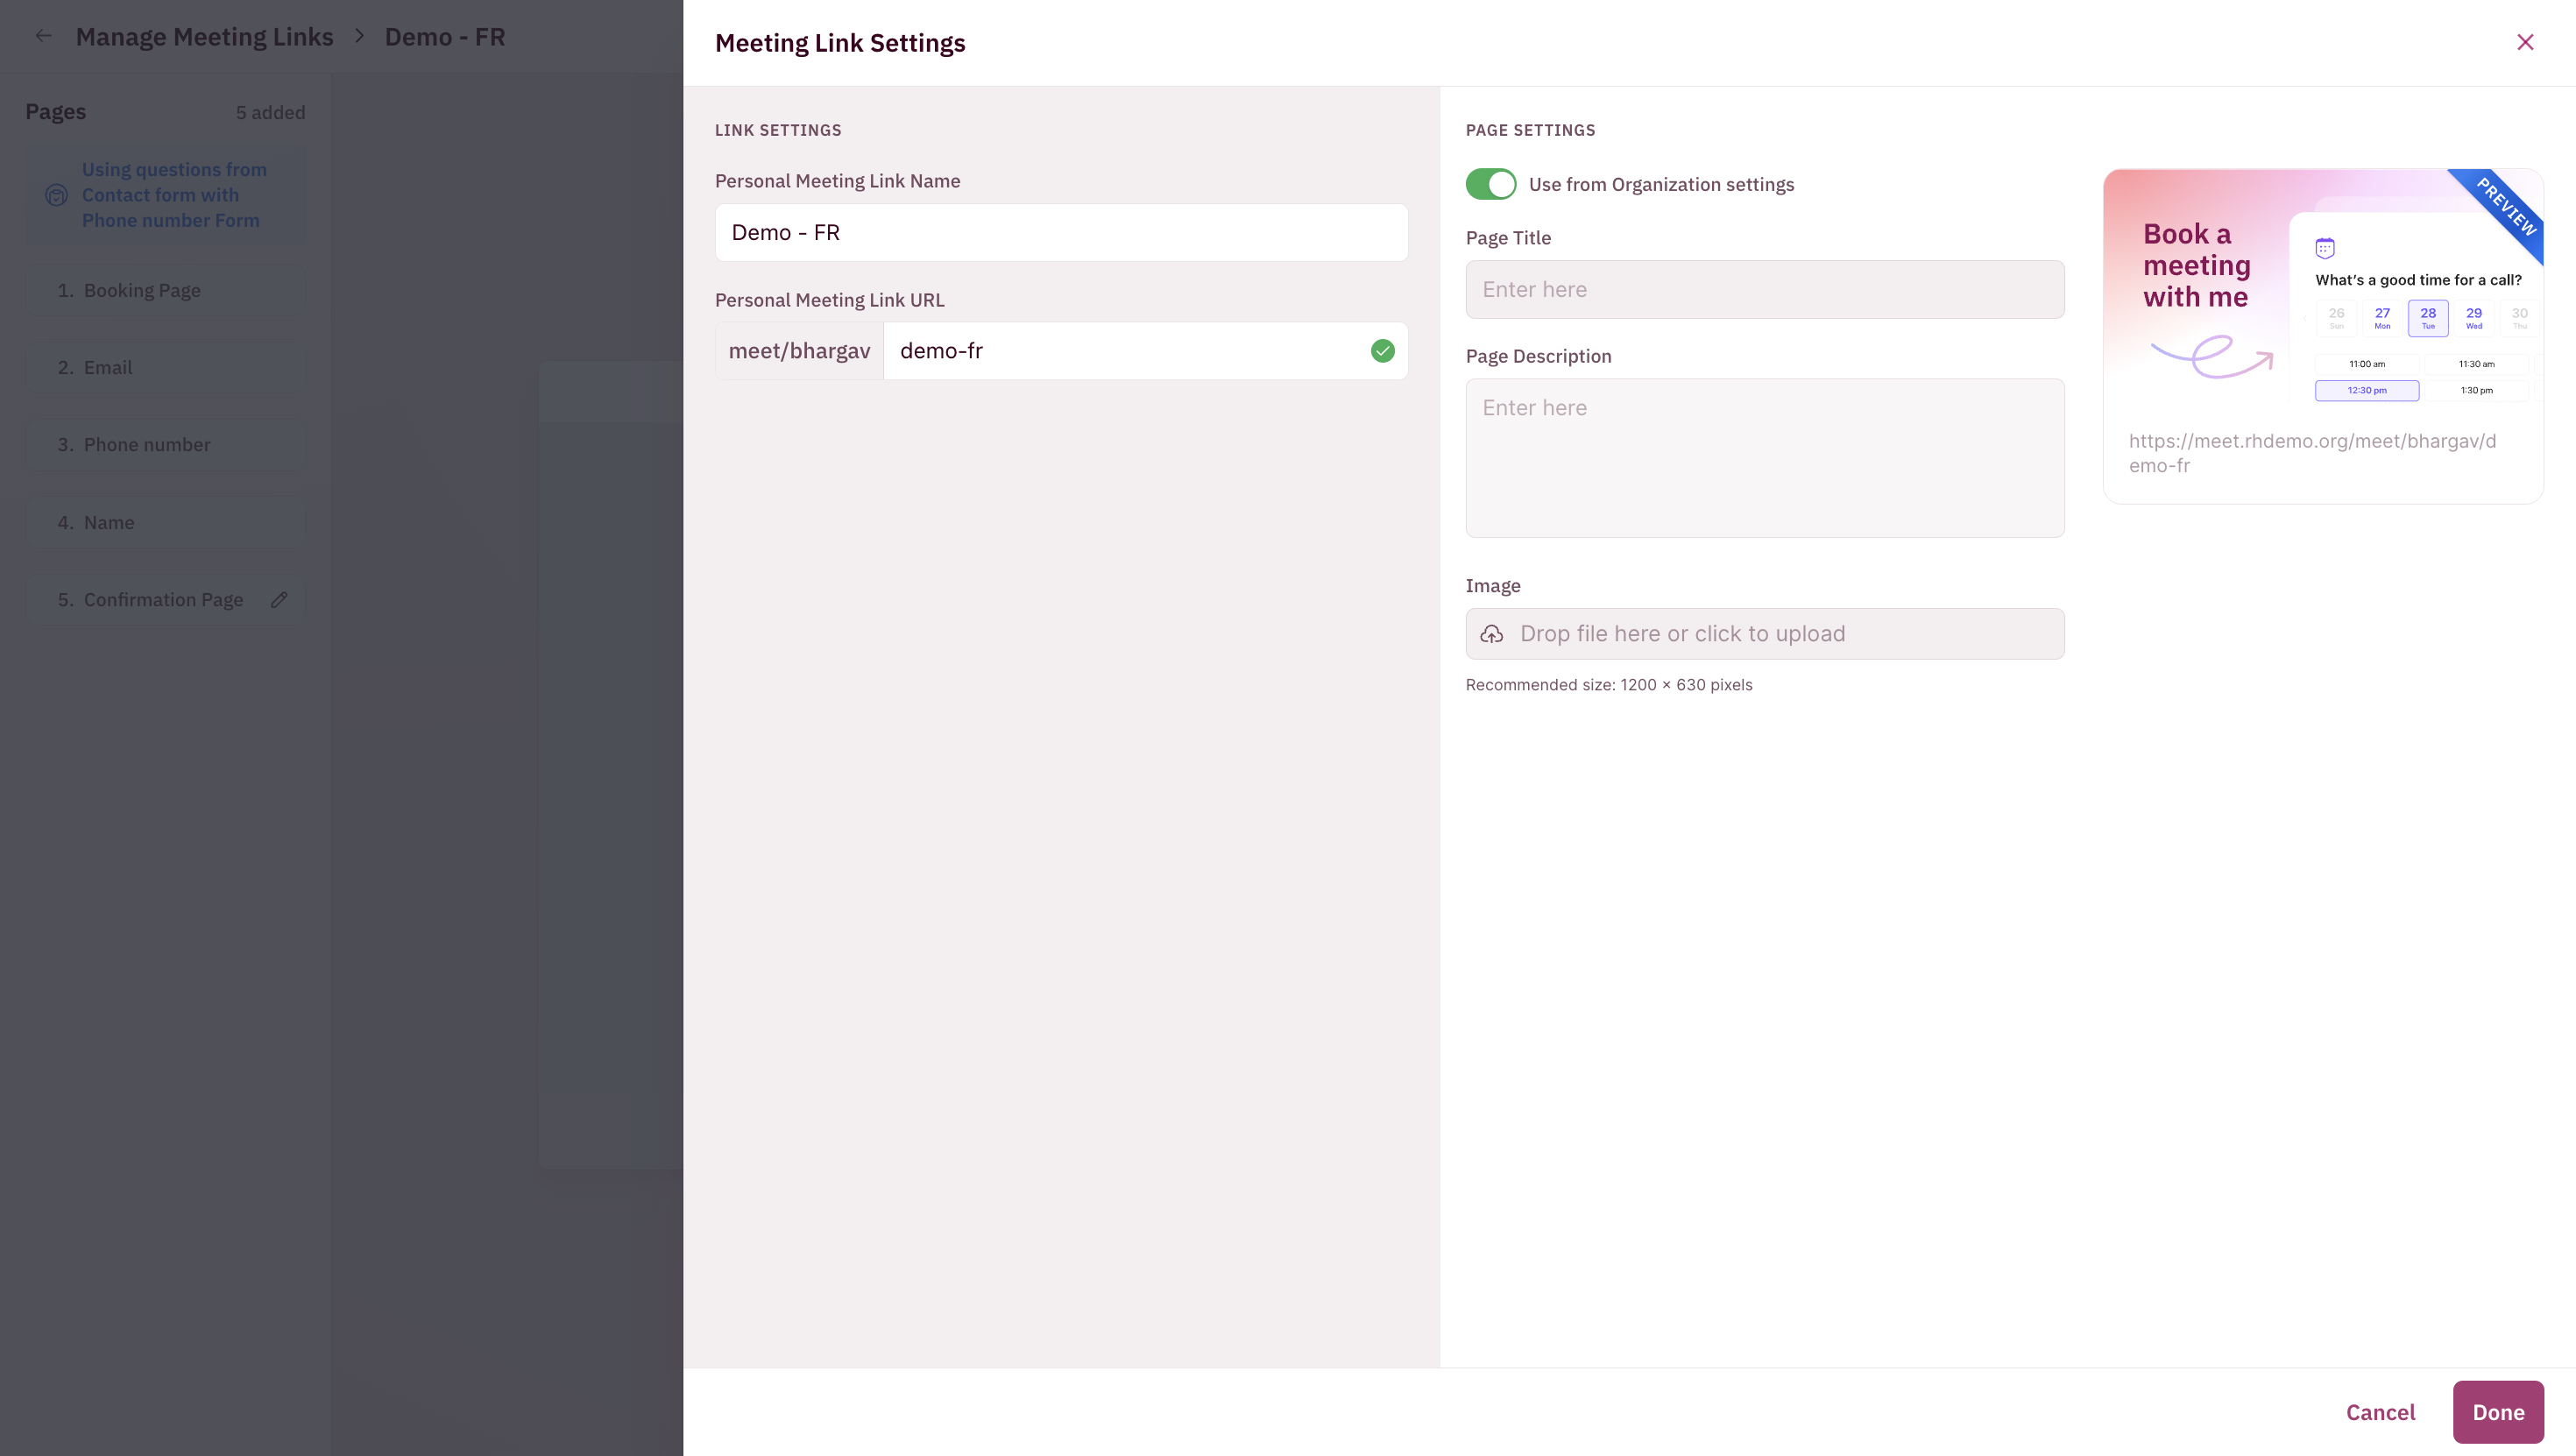
Meeting Link Settings
On the top-right of your meeting link setup page, you’ll find Meeting Link Settings.When you click into this, you’ll see two key sections:-
Link Settings
- Change the name of your personal meeting link.
- Change the URL (slug) for the meeting link.
If you update the slug, any old links you’ve shared will no longer work. Be sure to only update the slug before sharing the link with prospects. -
Page Settings
Add your own meta information (page title, description, favicon) to customize how your meeting link appears when shared.
- Alternatively, choose to use your organization’s default settings for meta information.