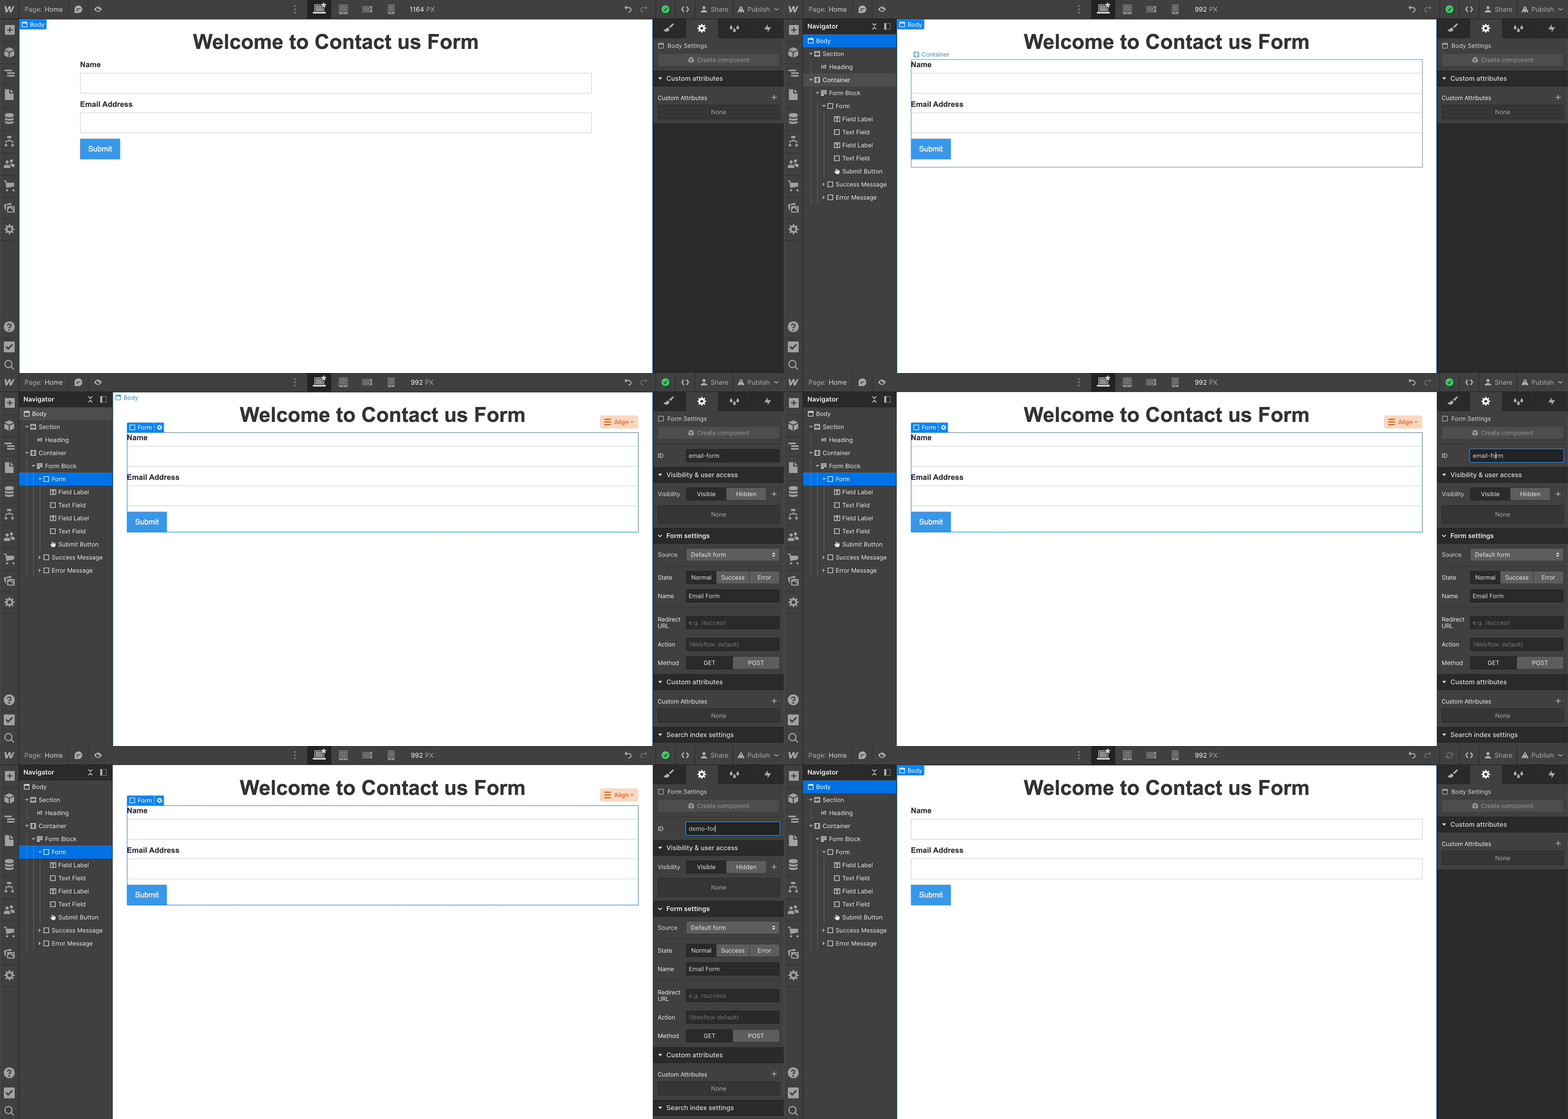
- In Webflow, navigate to your form’s settings and set a CSS ID with a unique value. For ex.
email-form
- Set up an Inbound Router in RevenueHero with the form identifier in your form mapping
- Copy the installation script from the final step of the router set up.
Sample installation script
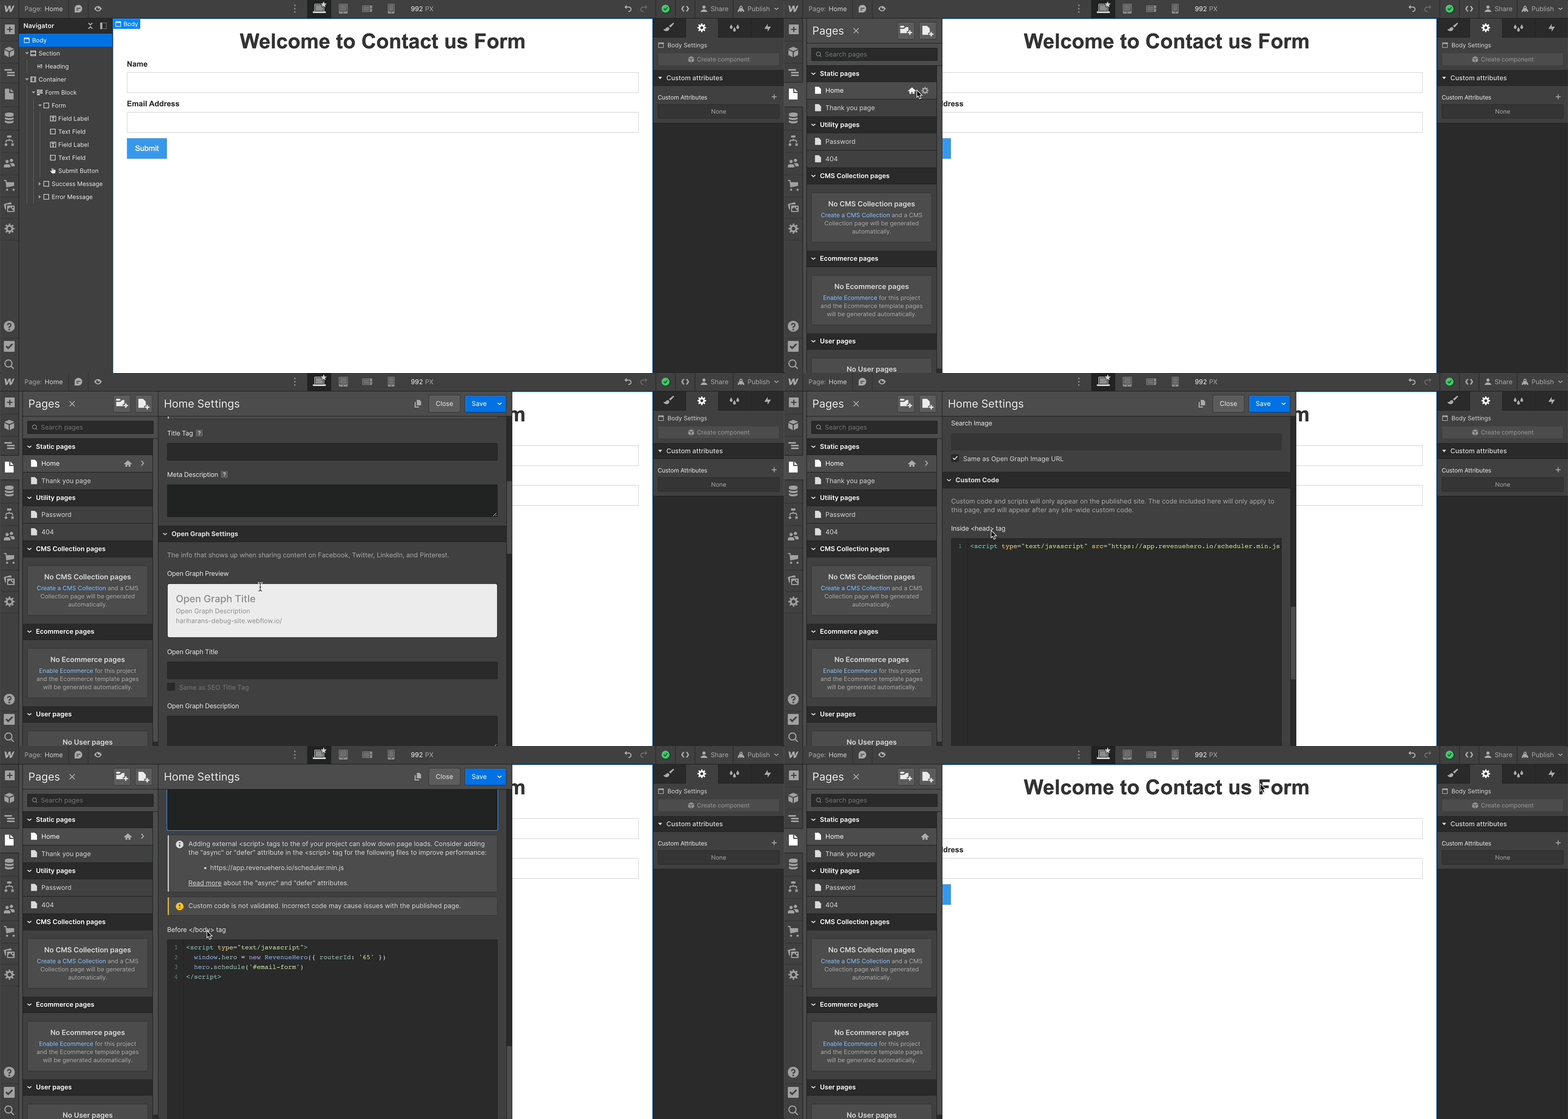
- In Webflow, navigate to Sidebar -> Pages -> Your landing page -> Edit Page settings (wheel icon)
- Scroll to Inside <head> tag section, and paste the RevenueHero source script
- Scroll to Before </body> tag section, and paste the RevenueHero widget code
- Verify, and click Save in the slide-out’s right-top corner

- Publish your landing page
How to integrate RevenueHero with Webflow forms?
Integrate RevenueHero’s scheduler with your Webflow form in 5 simple steps