BEFORE WE BEGINThere are a couple of pre-requisites to create your first Inbound Router:
Steps to create an Inbound Router
Navigate to Inbound Router
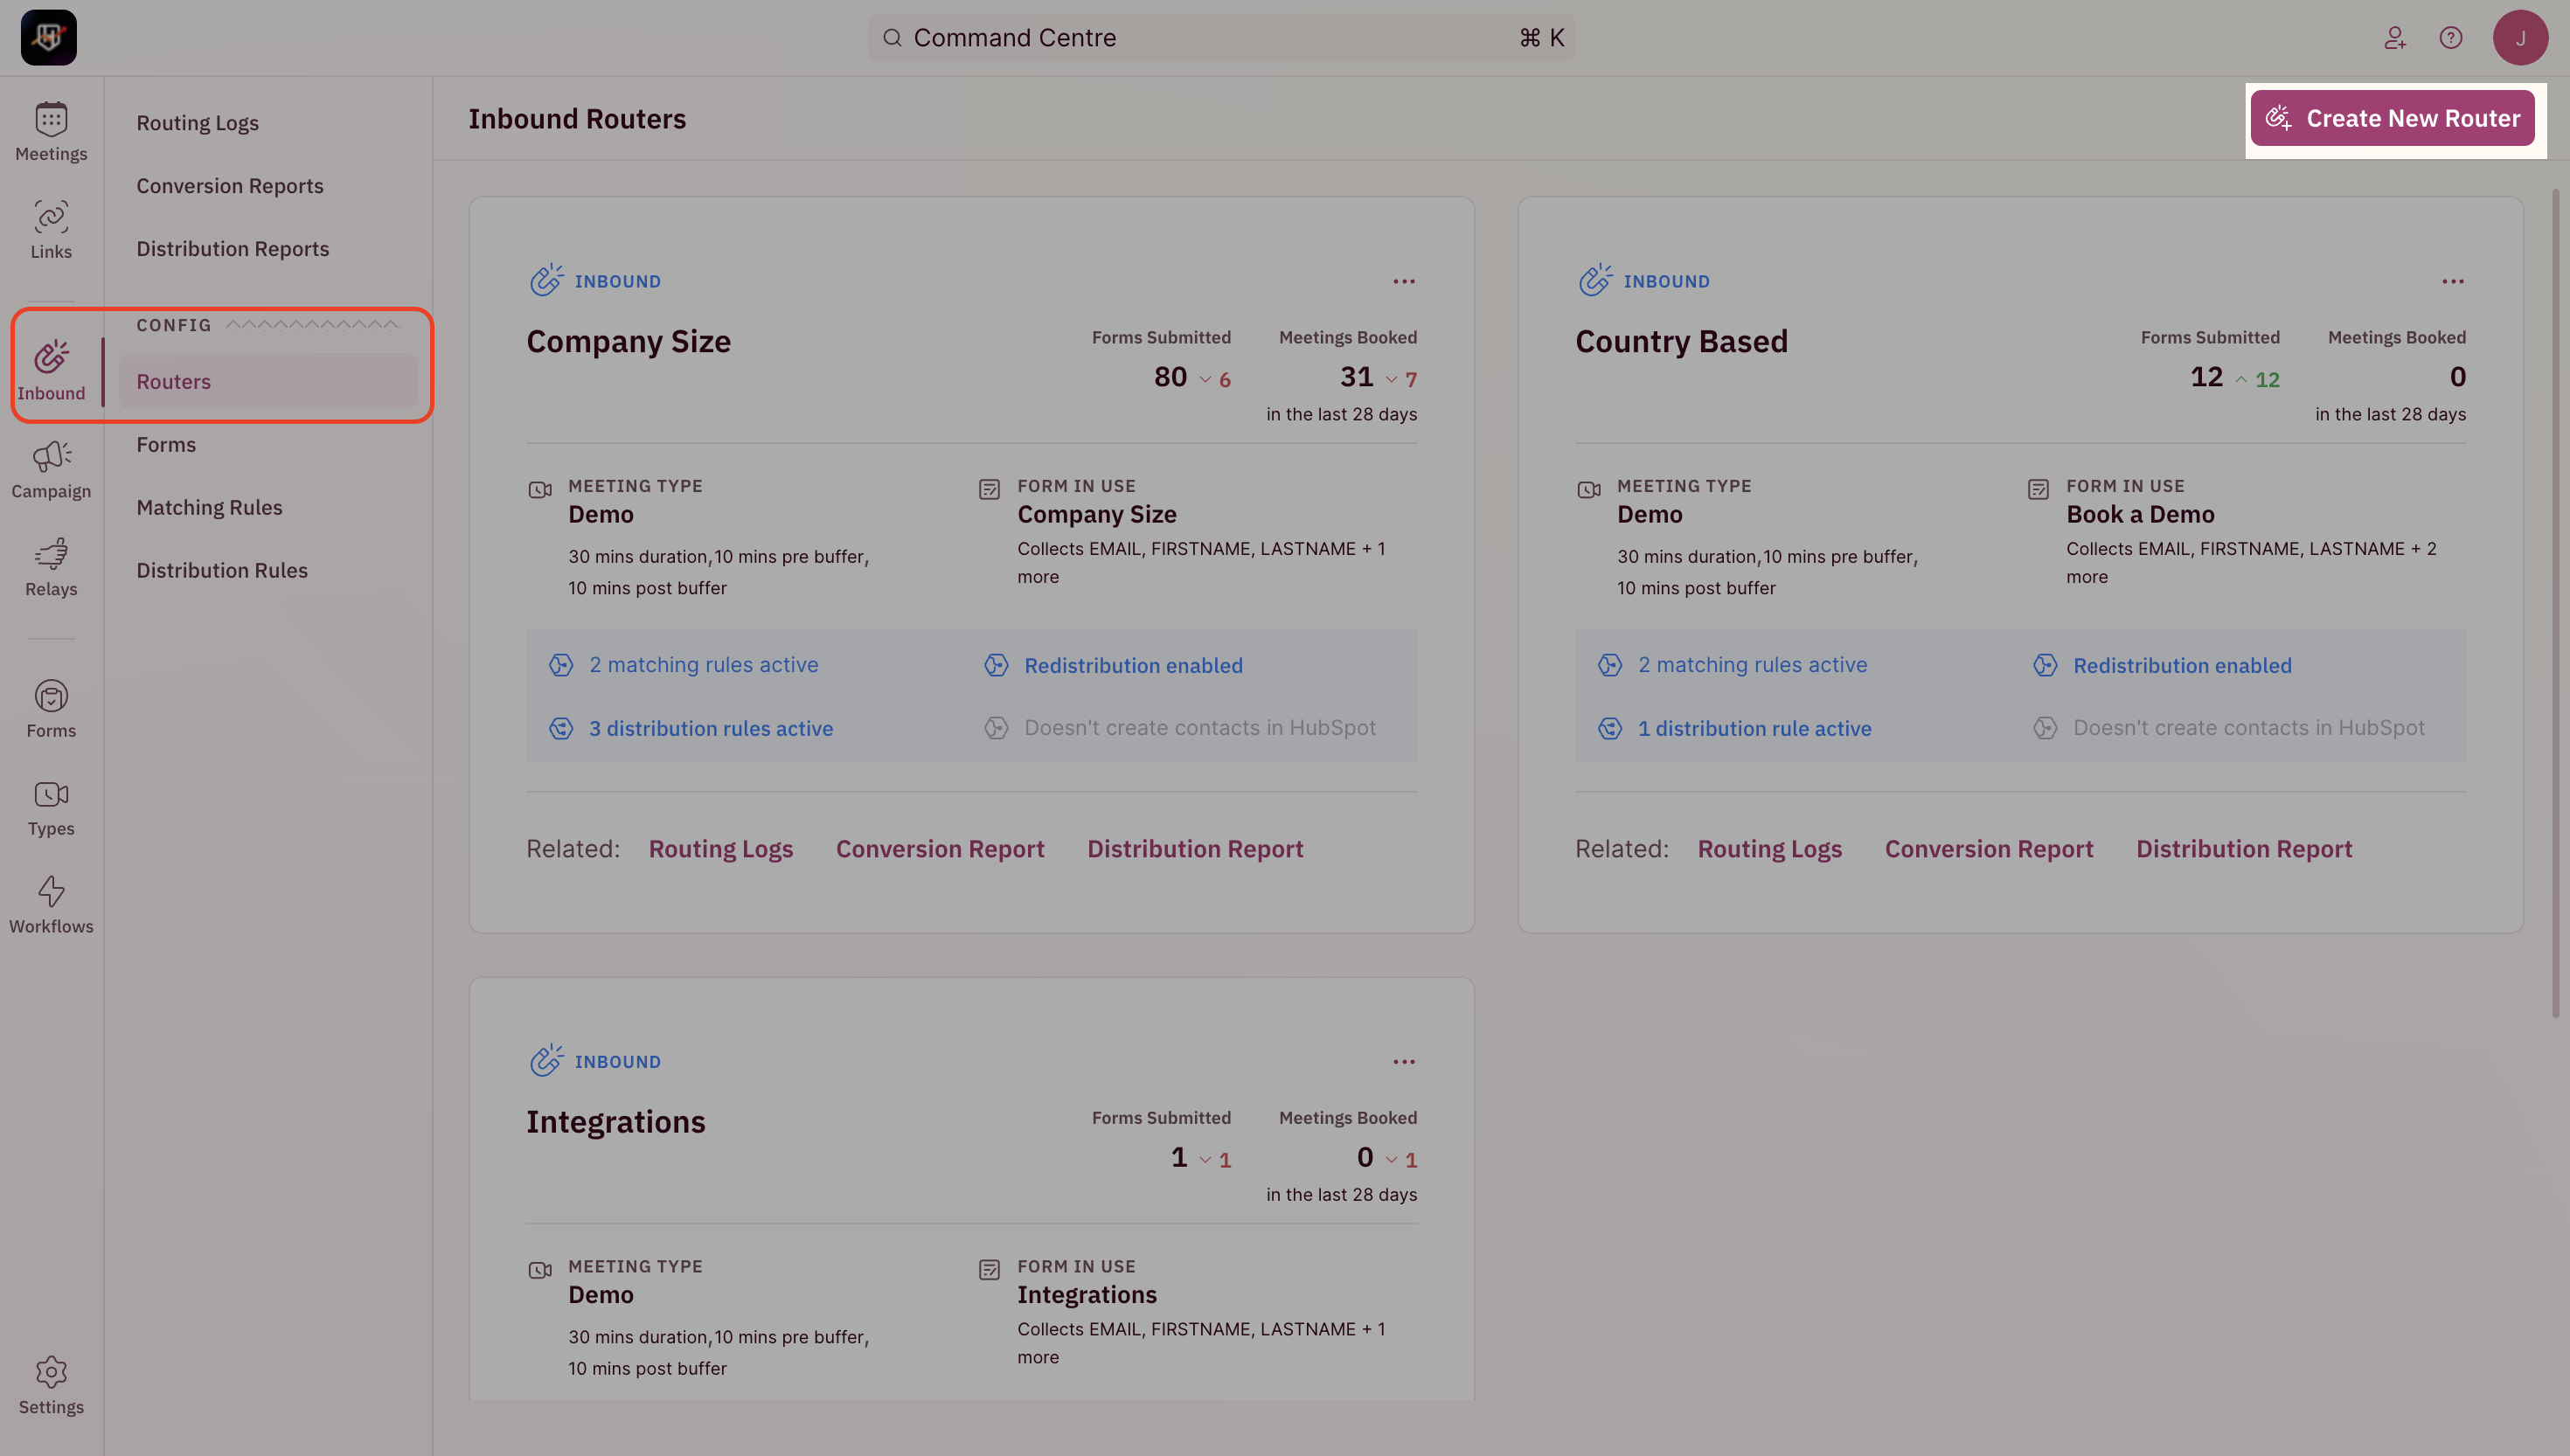
- To create an Inbound Router, use the side nav bar and click on Inbound → Routers.
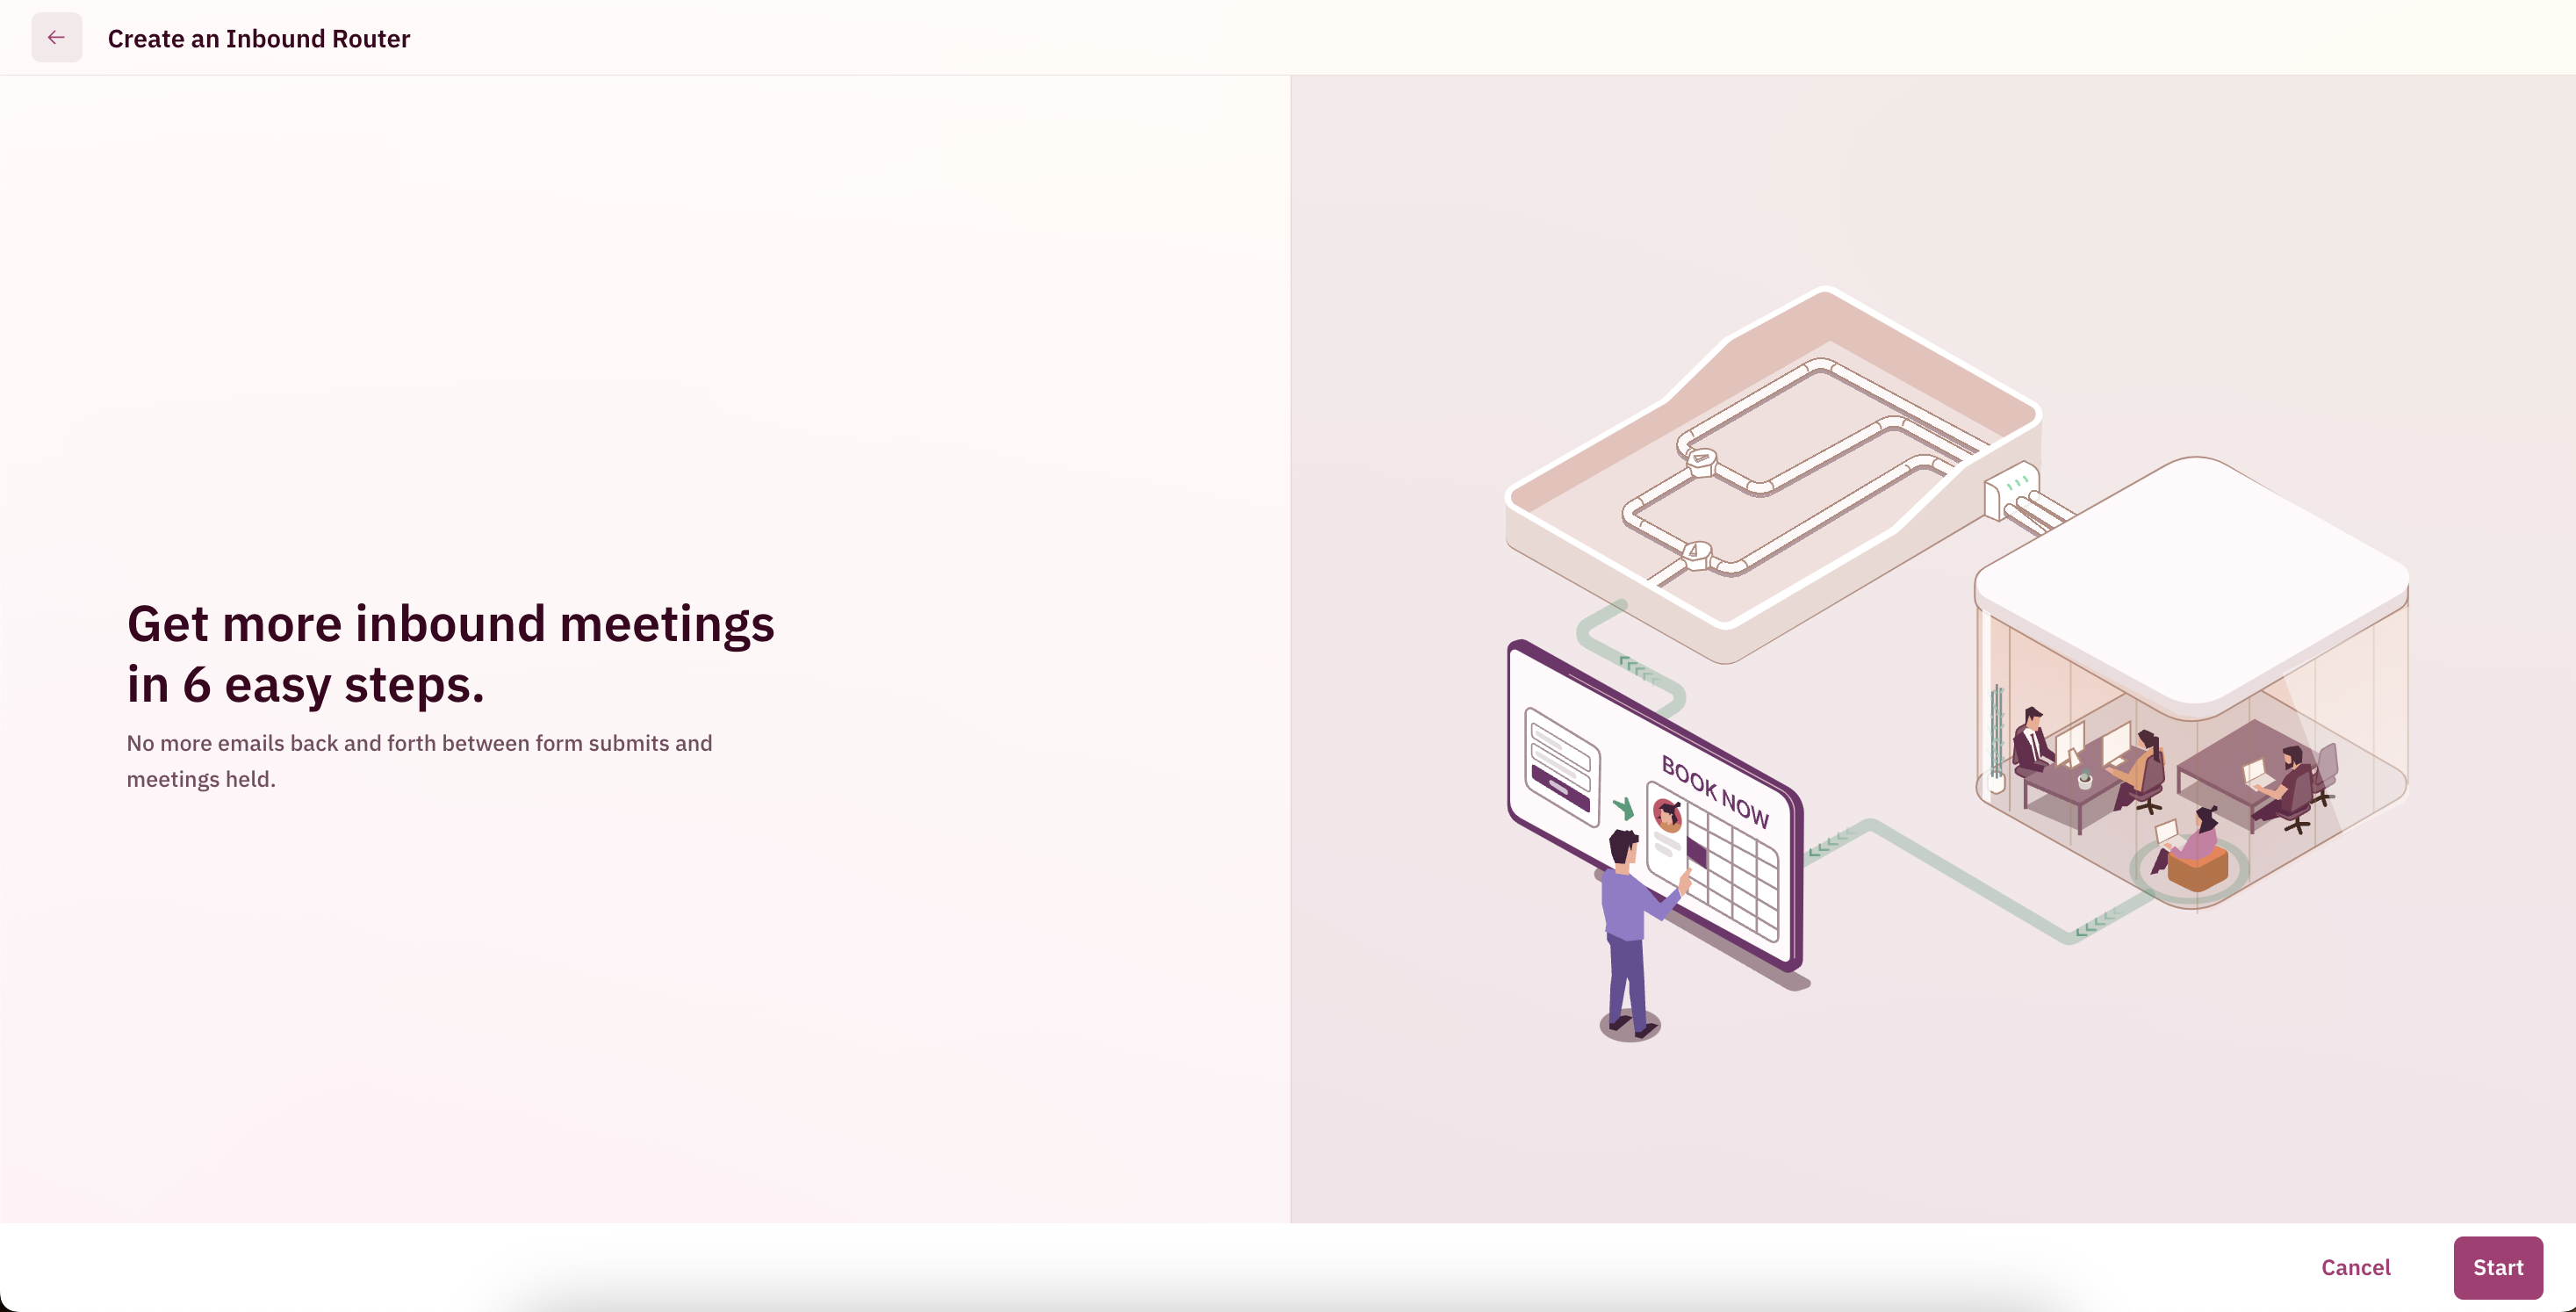
- Once you’re inside the Inbound Router page, click on the Create New Router button.
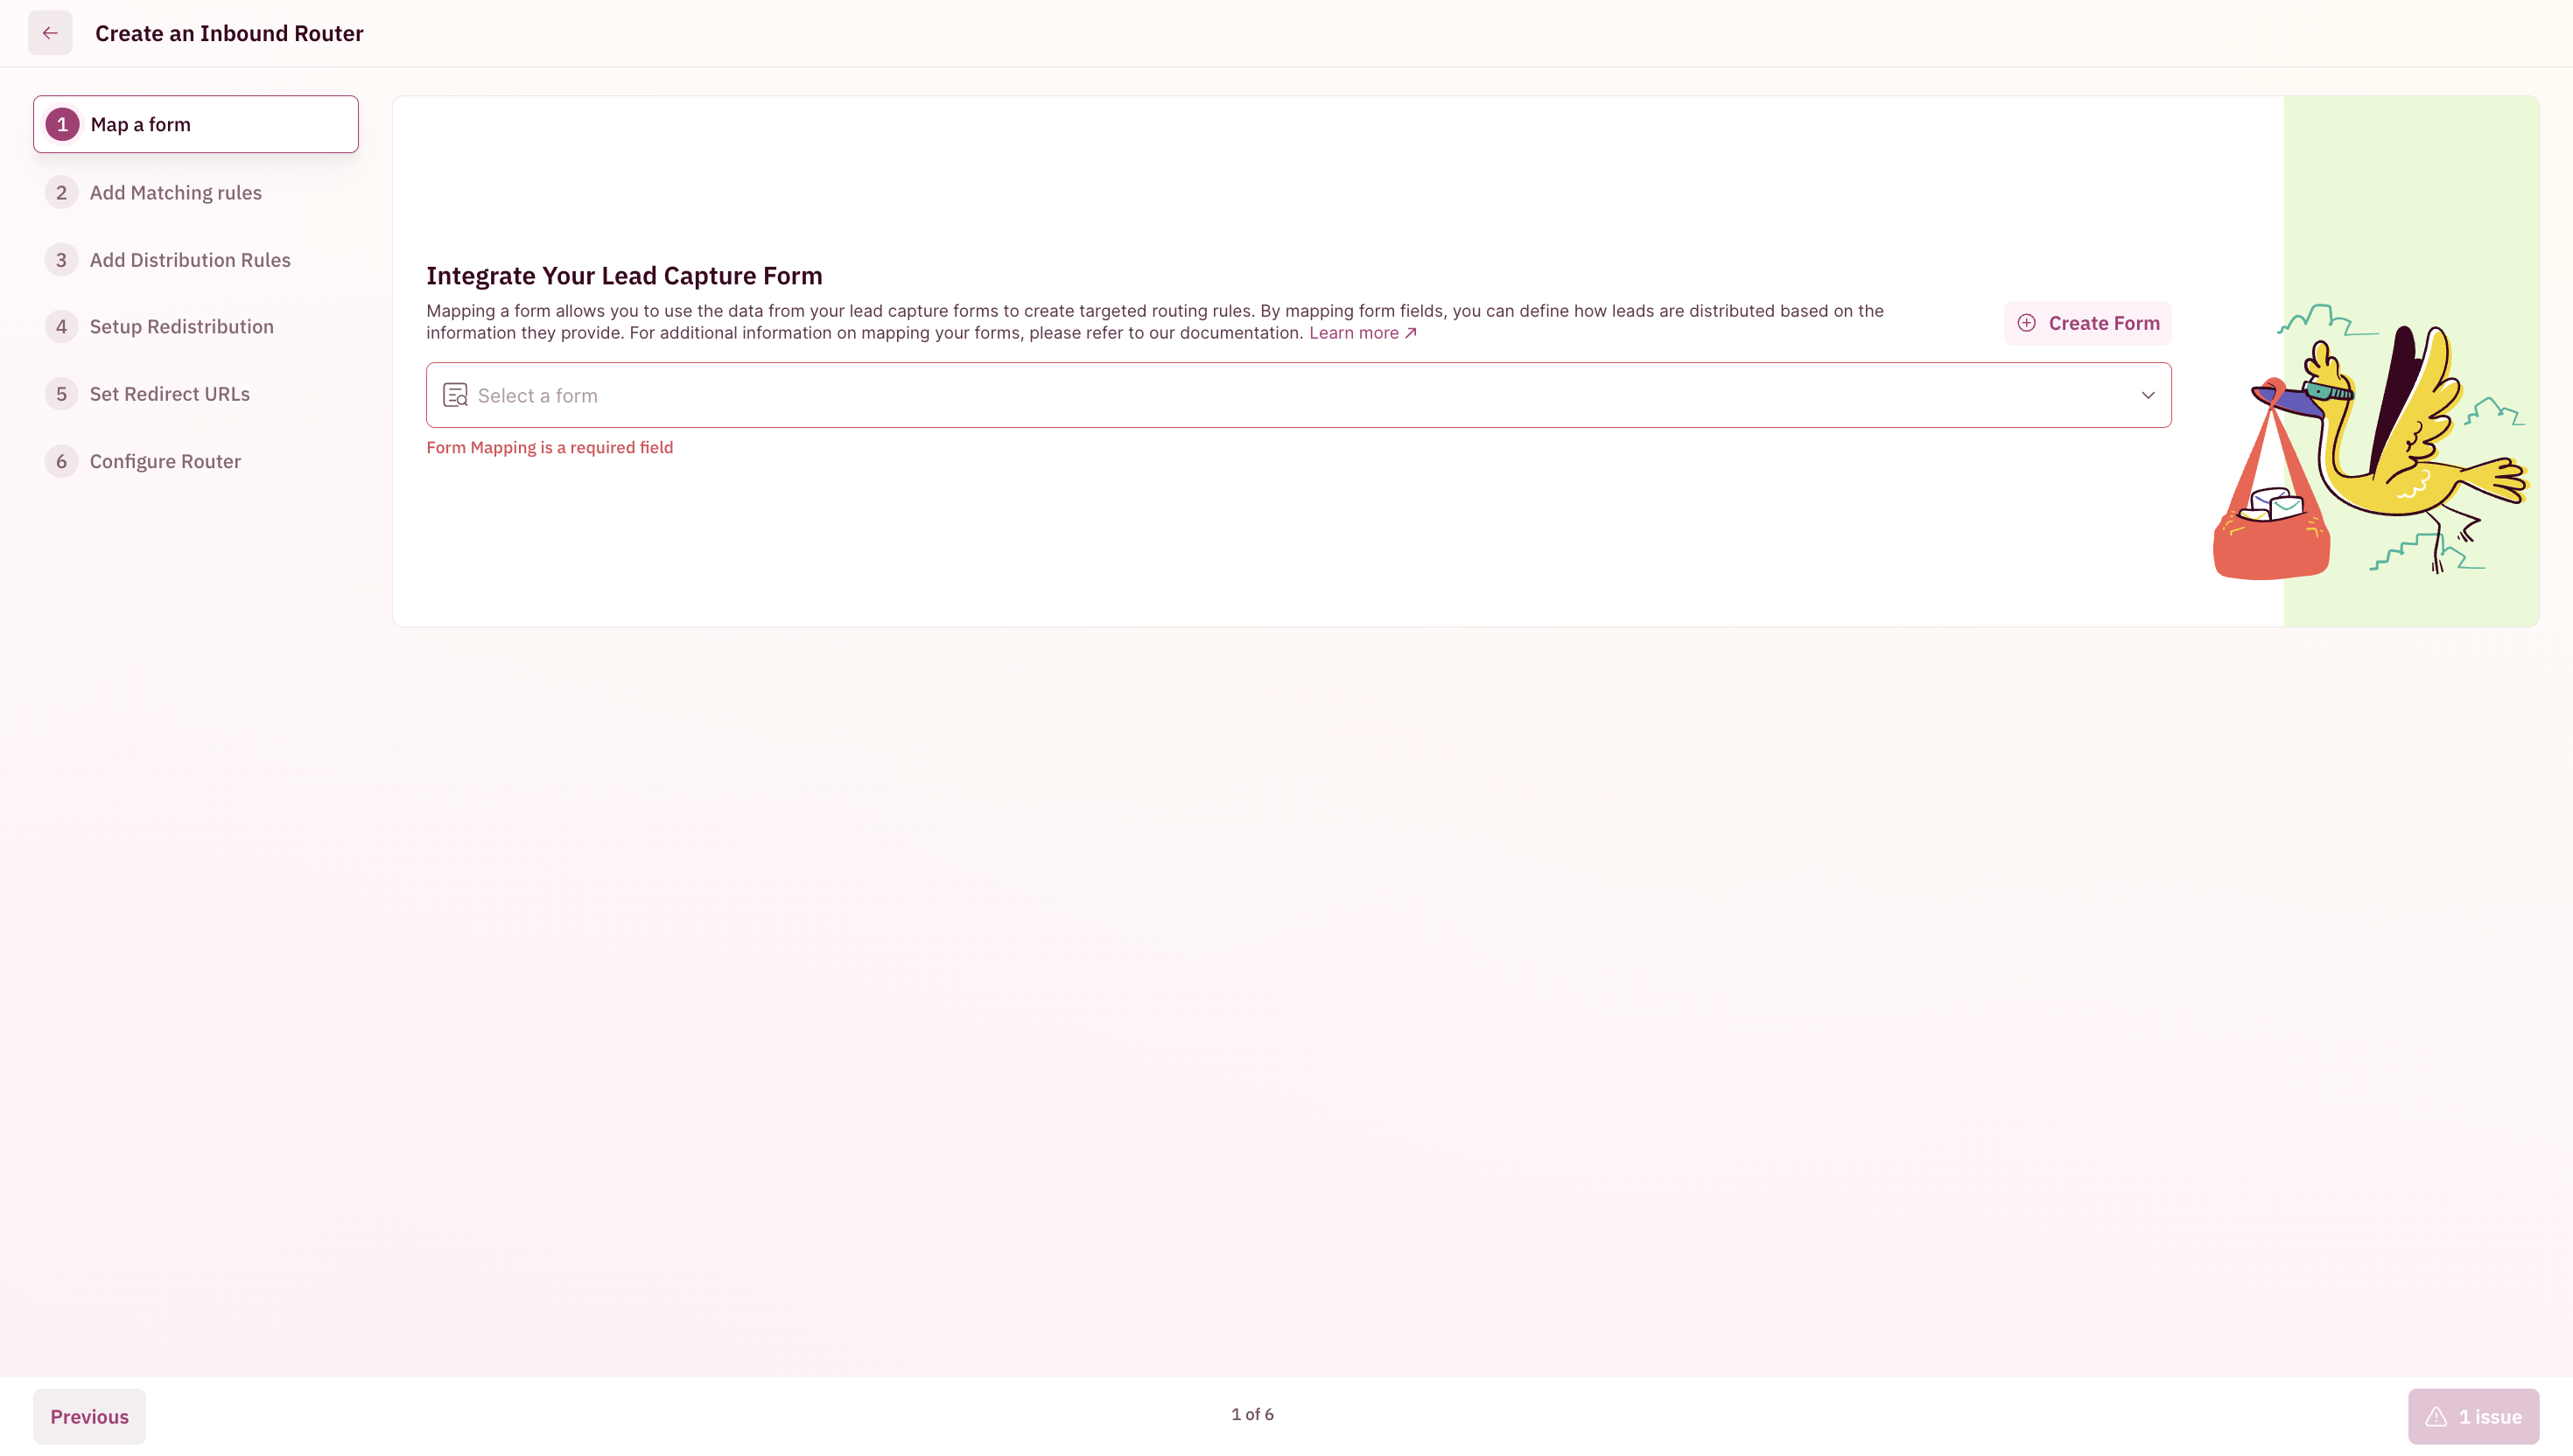
Map your web form
Mapping your lead intake form is the first step in setting up your distribution workflows in RevenueHero. The mapping allows RevenueHero to use each one of your form input fields (visible and hidden) as conditions in routing rules.NOTERevenueHero only listens to the form submission to trigger the scheduling widget. It doesn’t interfere with any of your existing data or form functions.
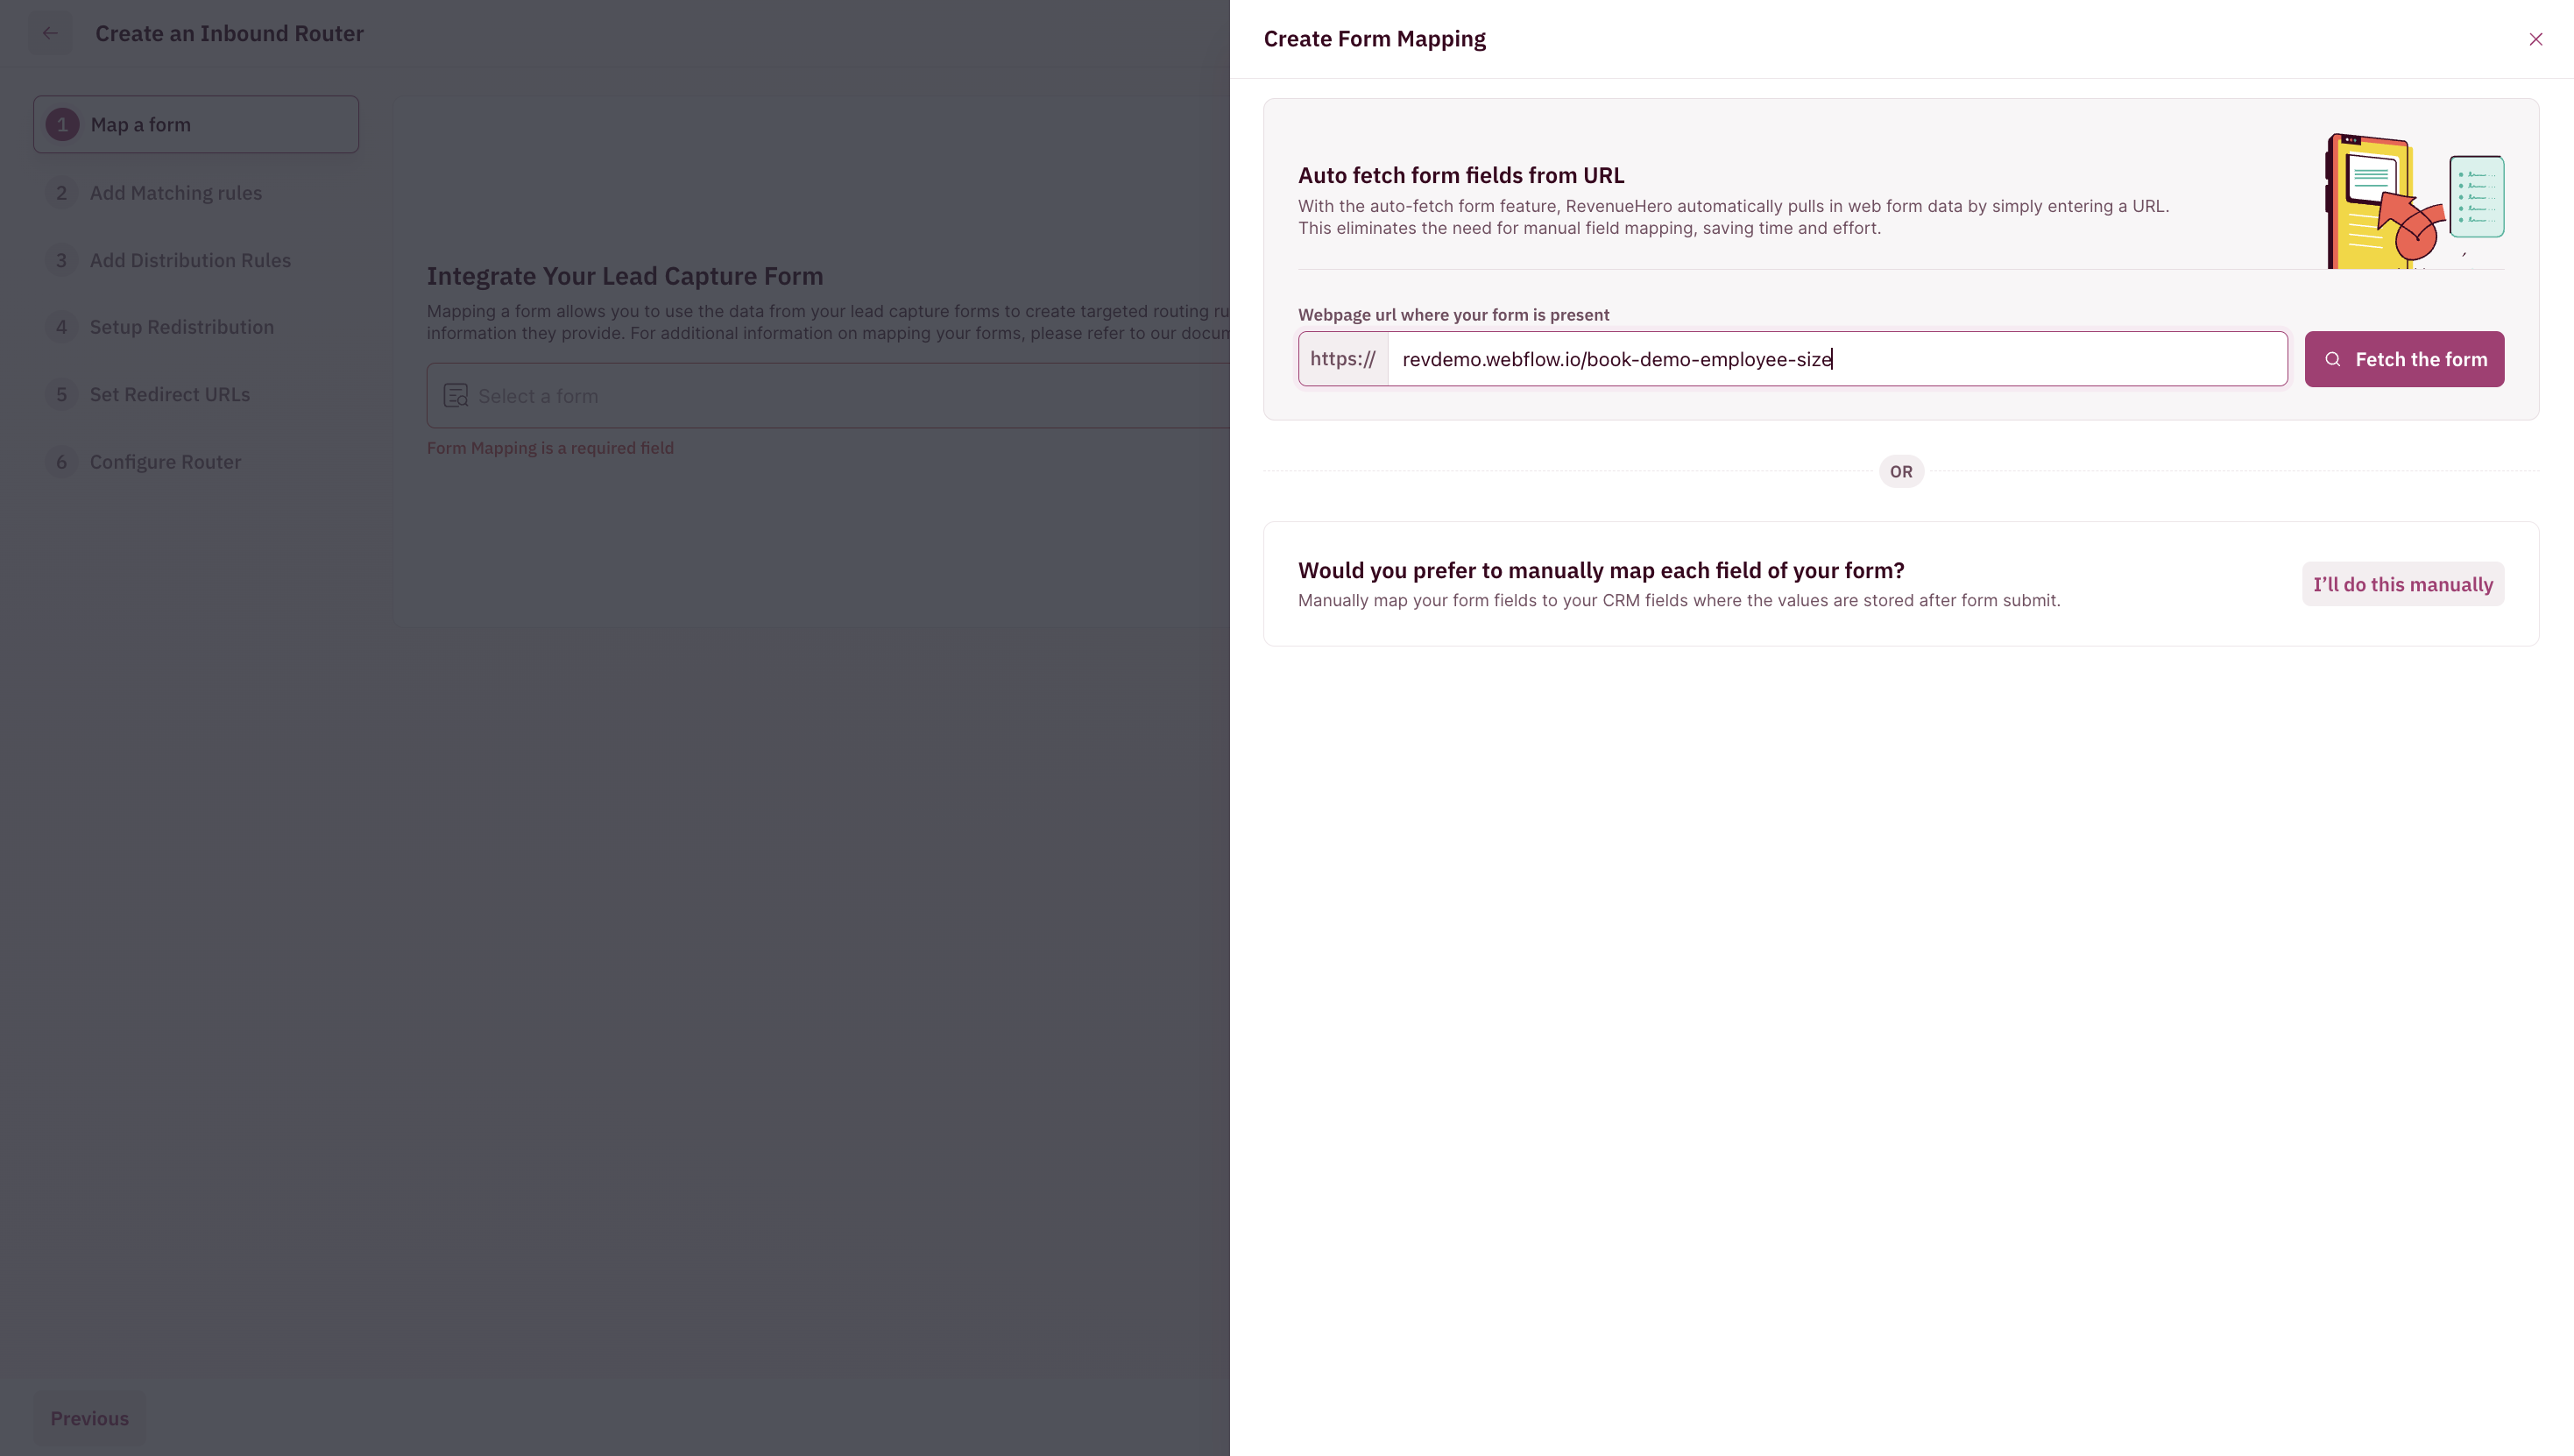
Auto-fetch the form
- Click on Create form.
- Enter the webpage URL where your form is present so that RevenueHero can auto-fetch the form.
- The forms found on the webpage will show up. Select the form you want to map and click on Map this form.
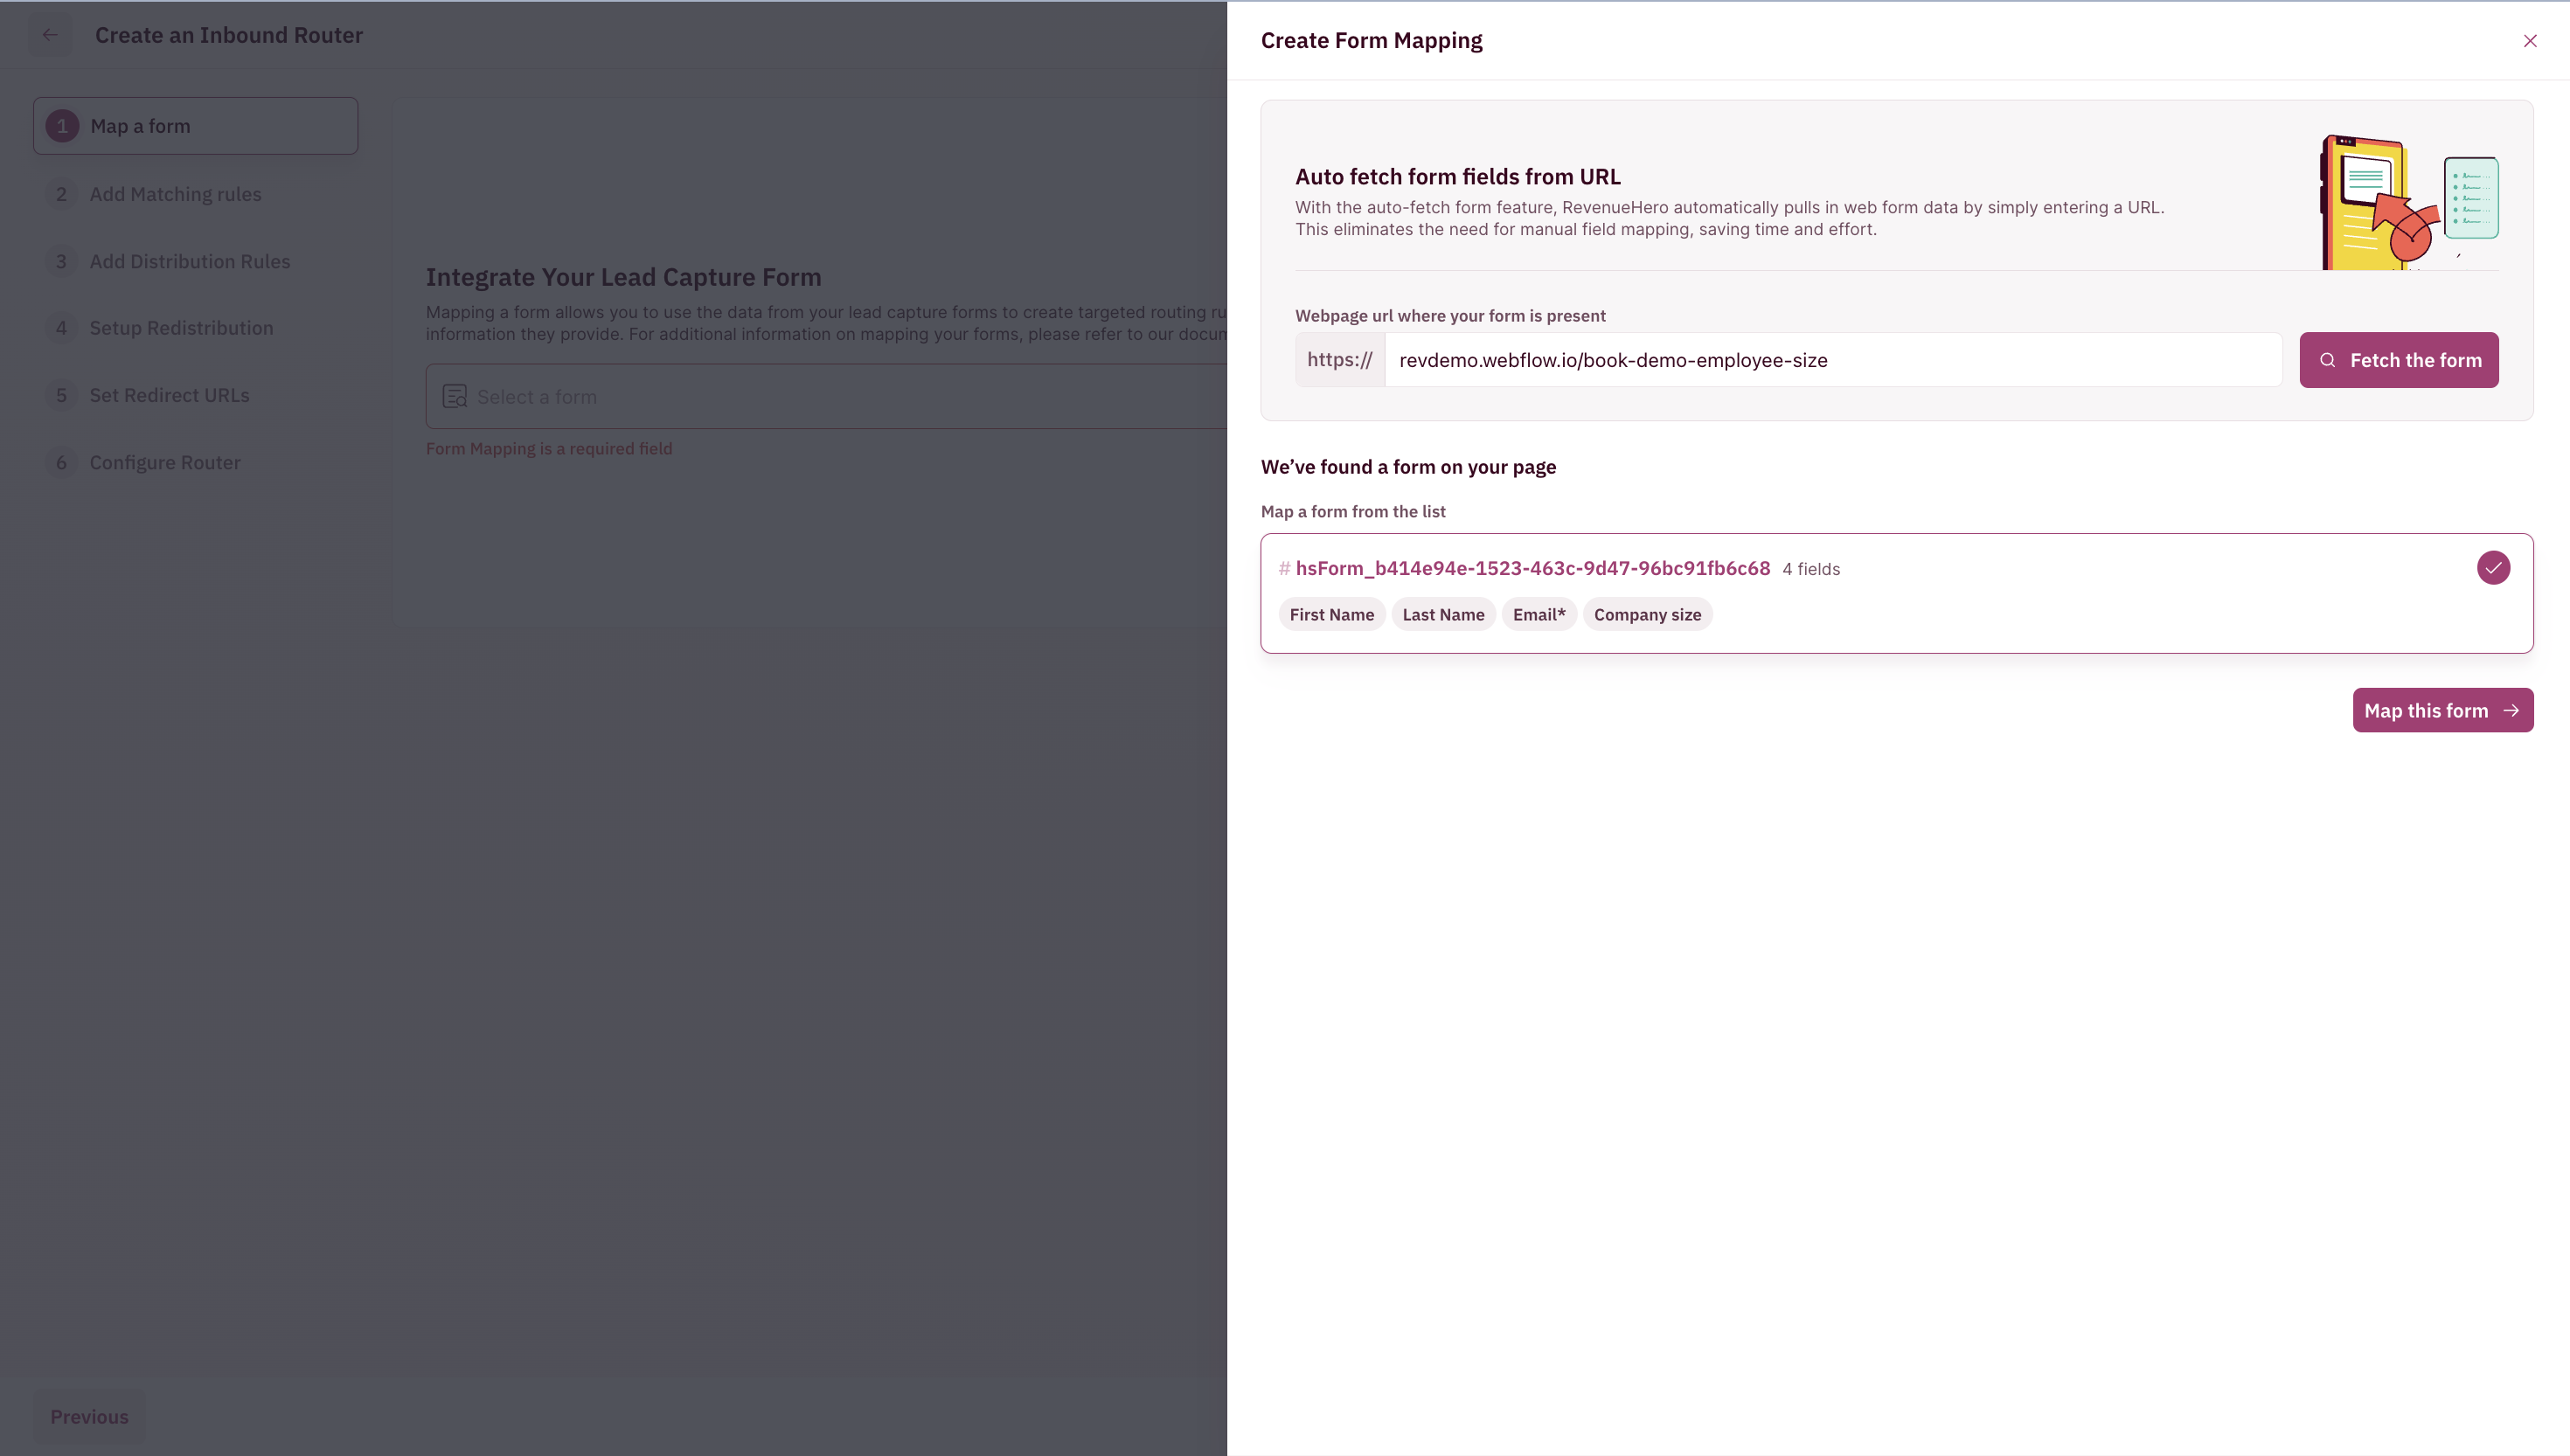
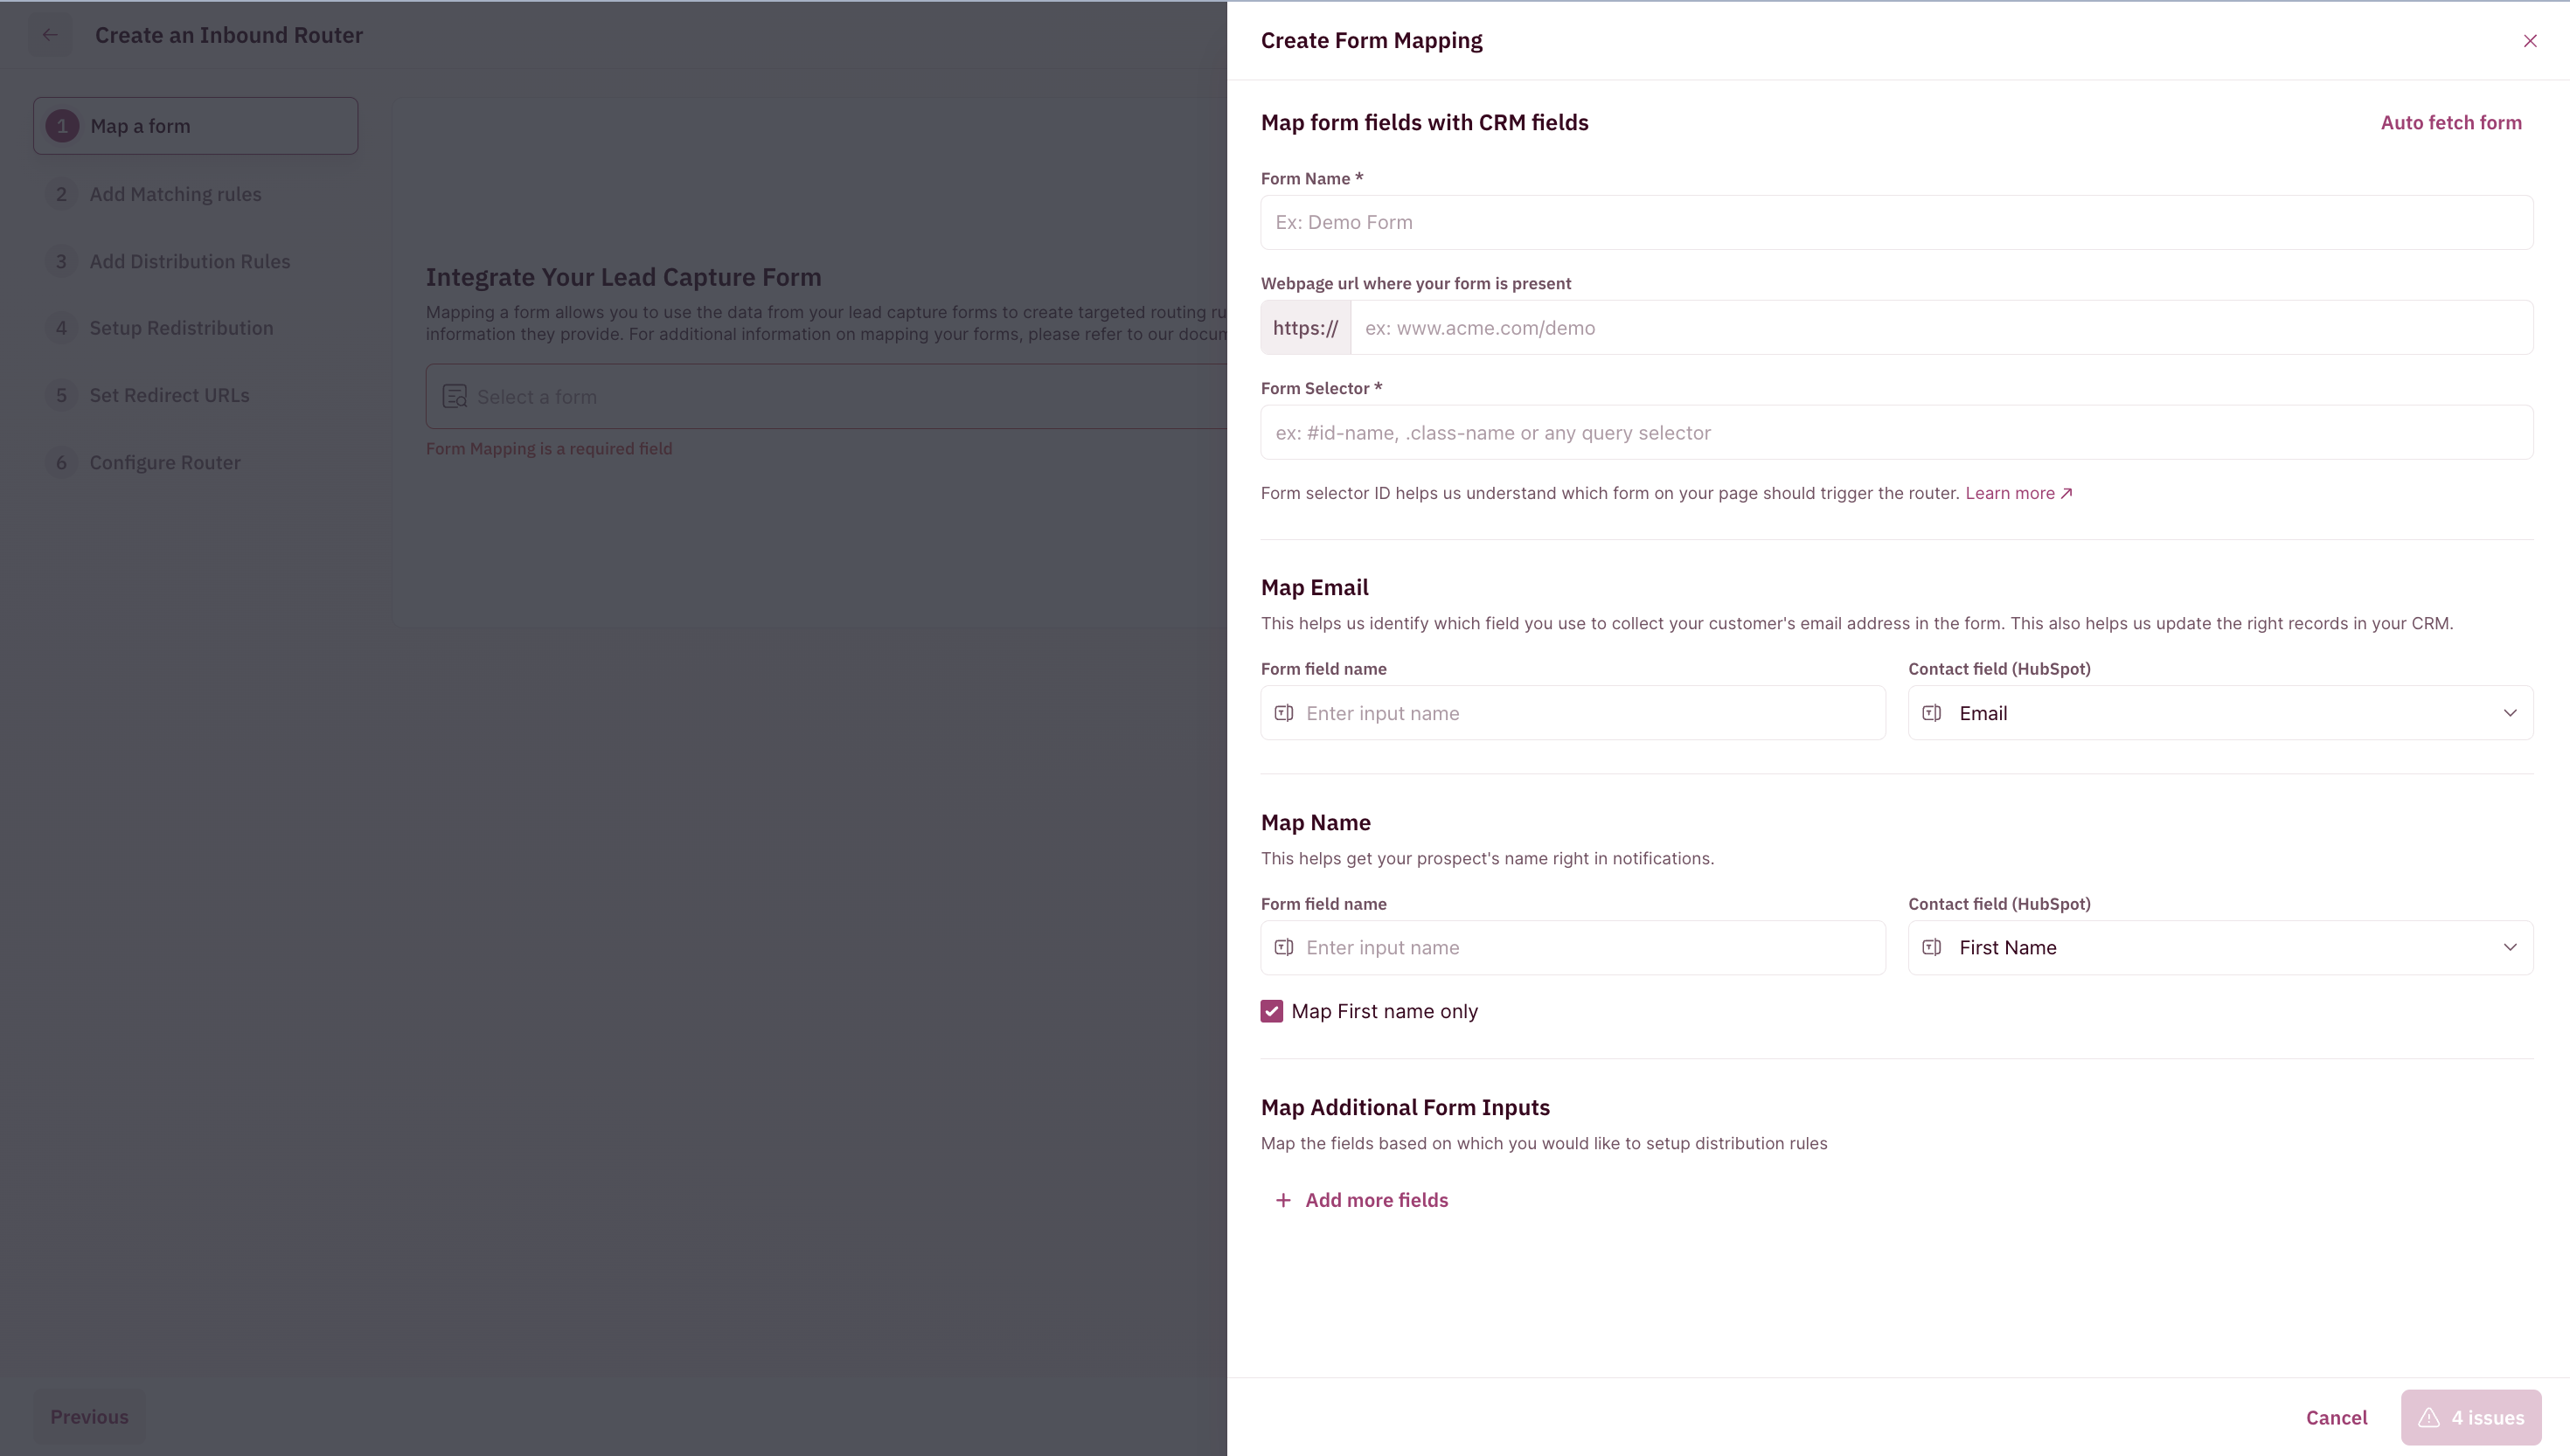
- It automatically identifies and shows you the form fields.
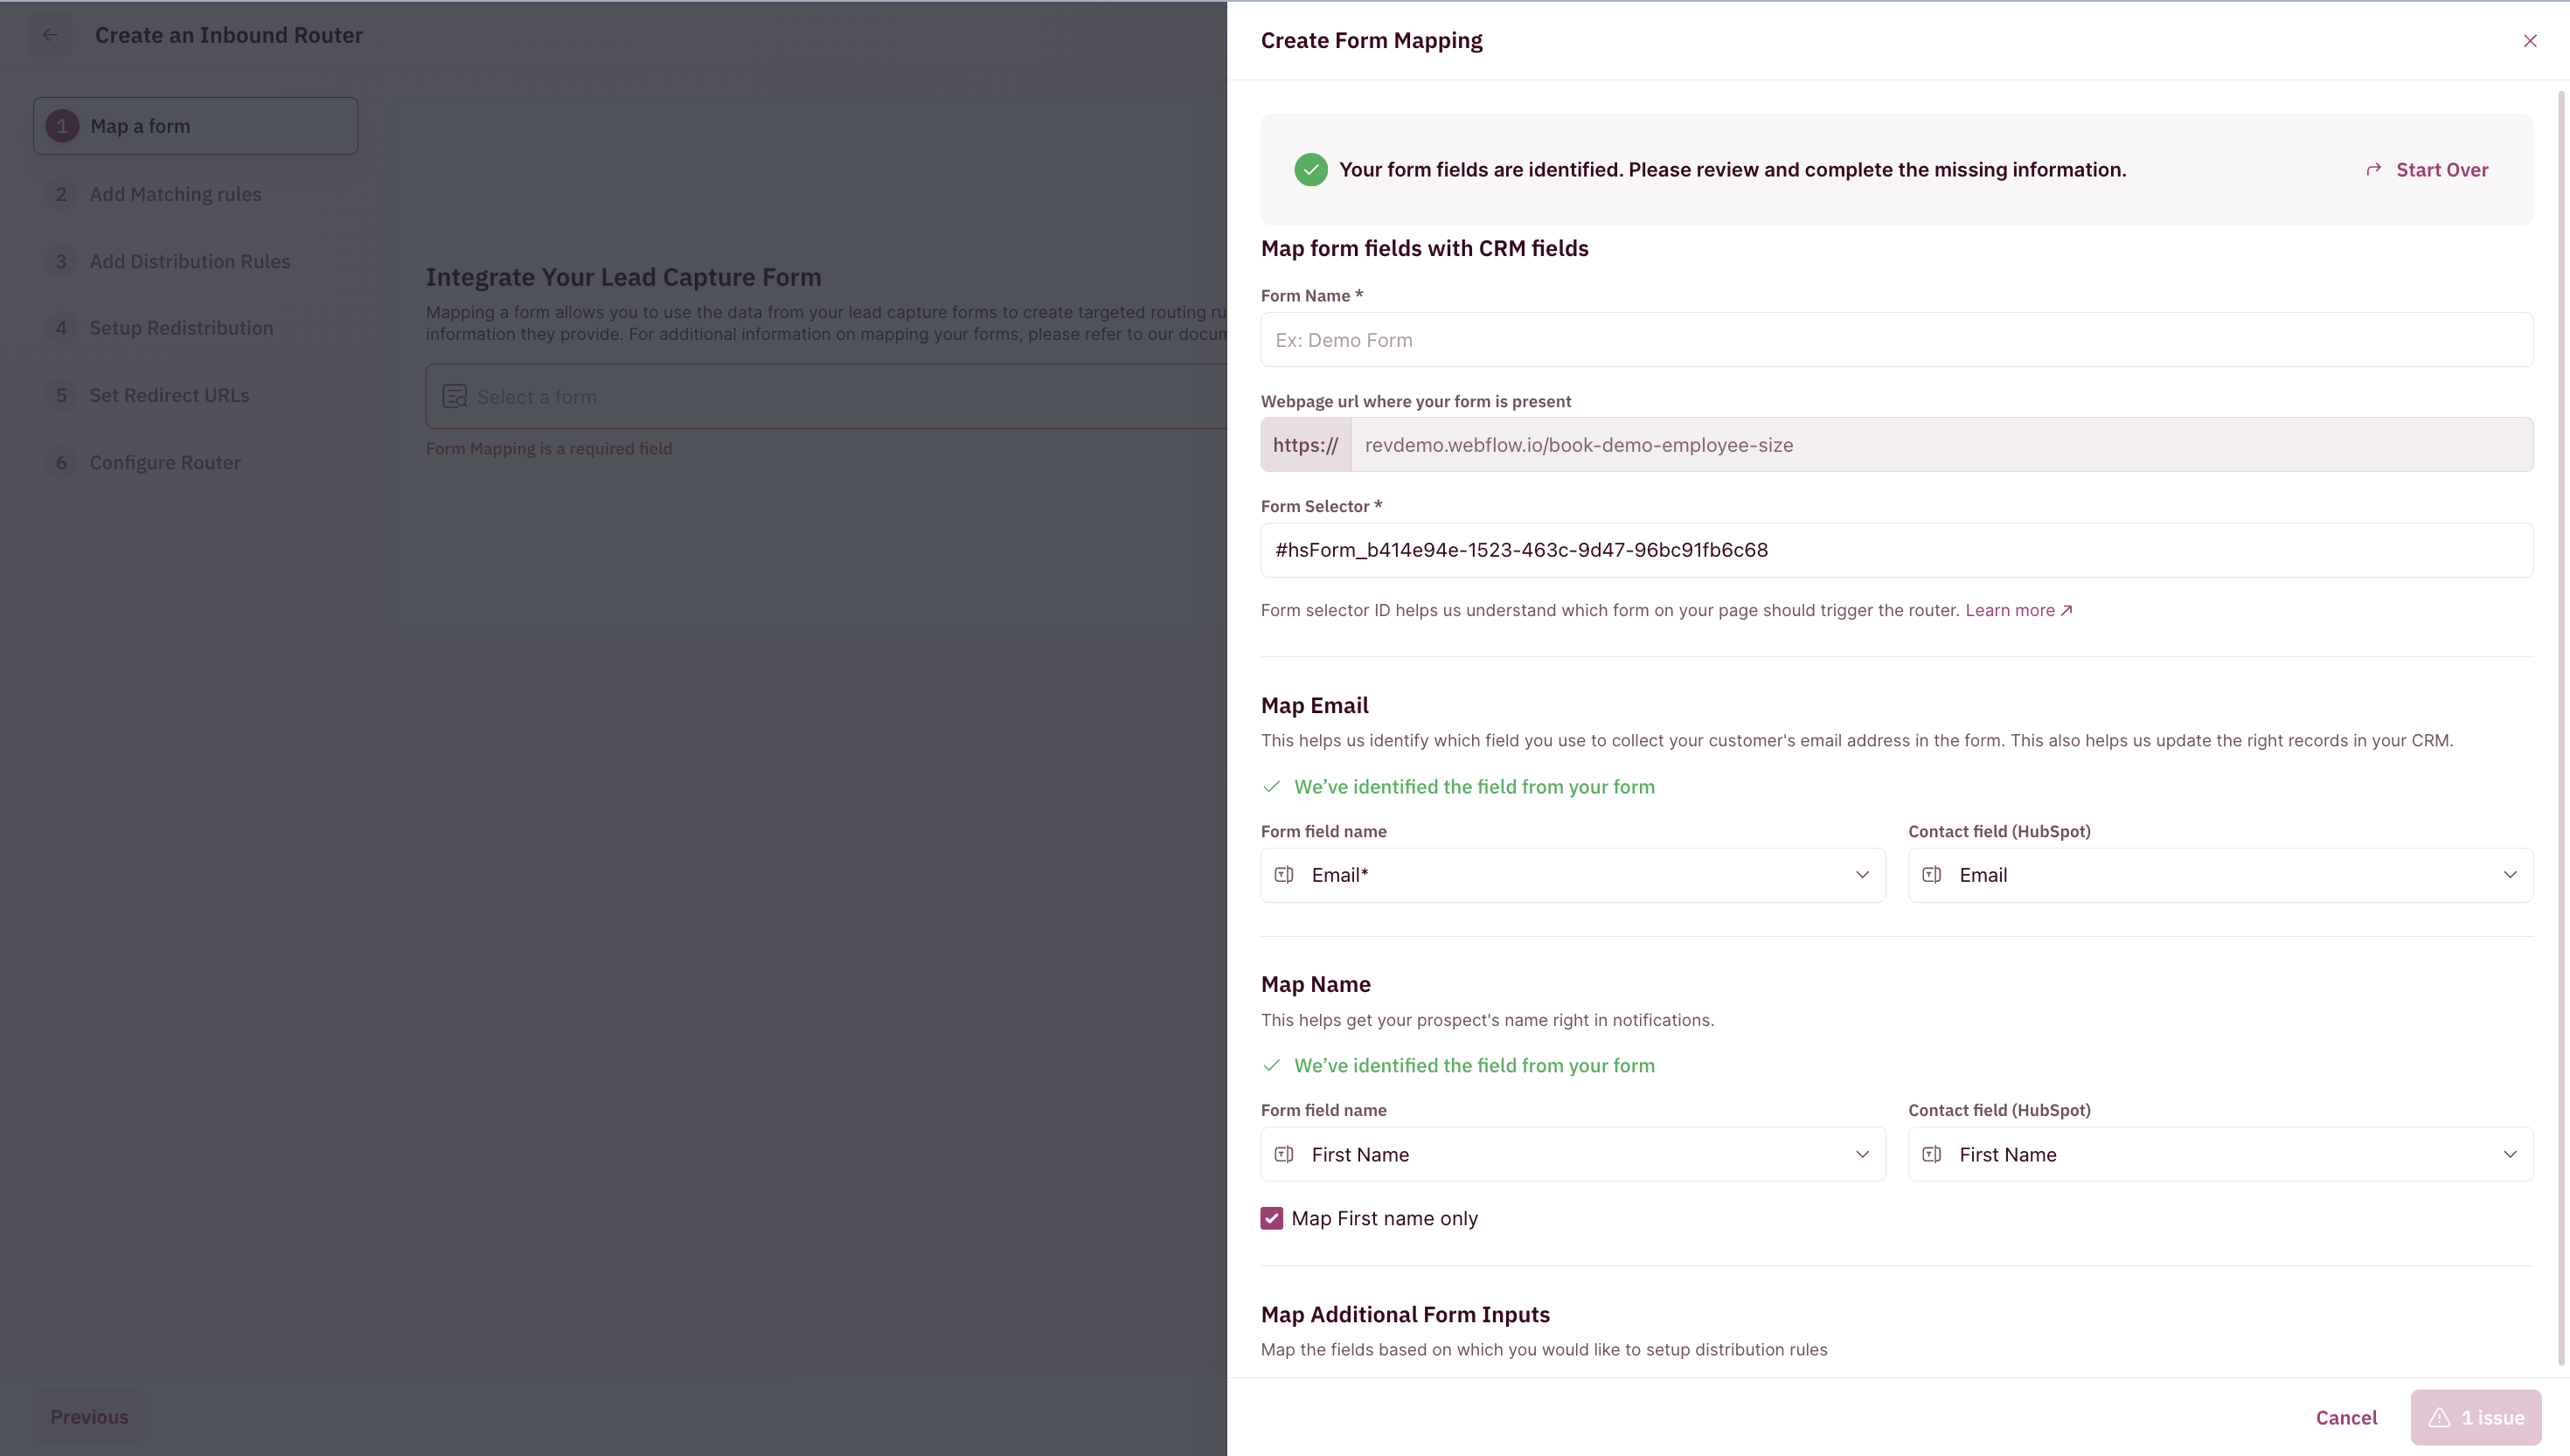
- Here you are required to review and complete the missing information. This includes Form Details, Map Email, Map Name, and Map Additional Form Inputs.
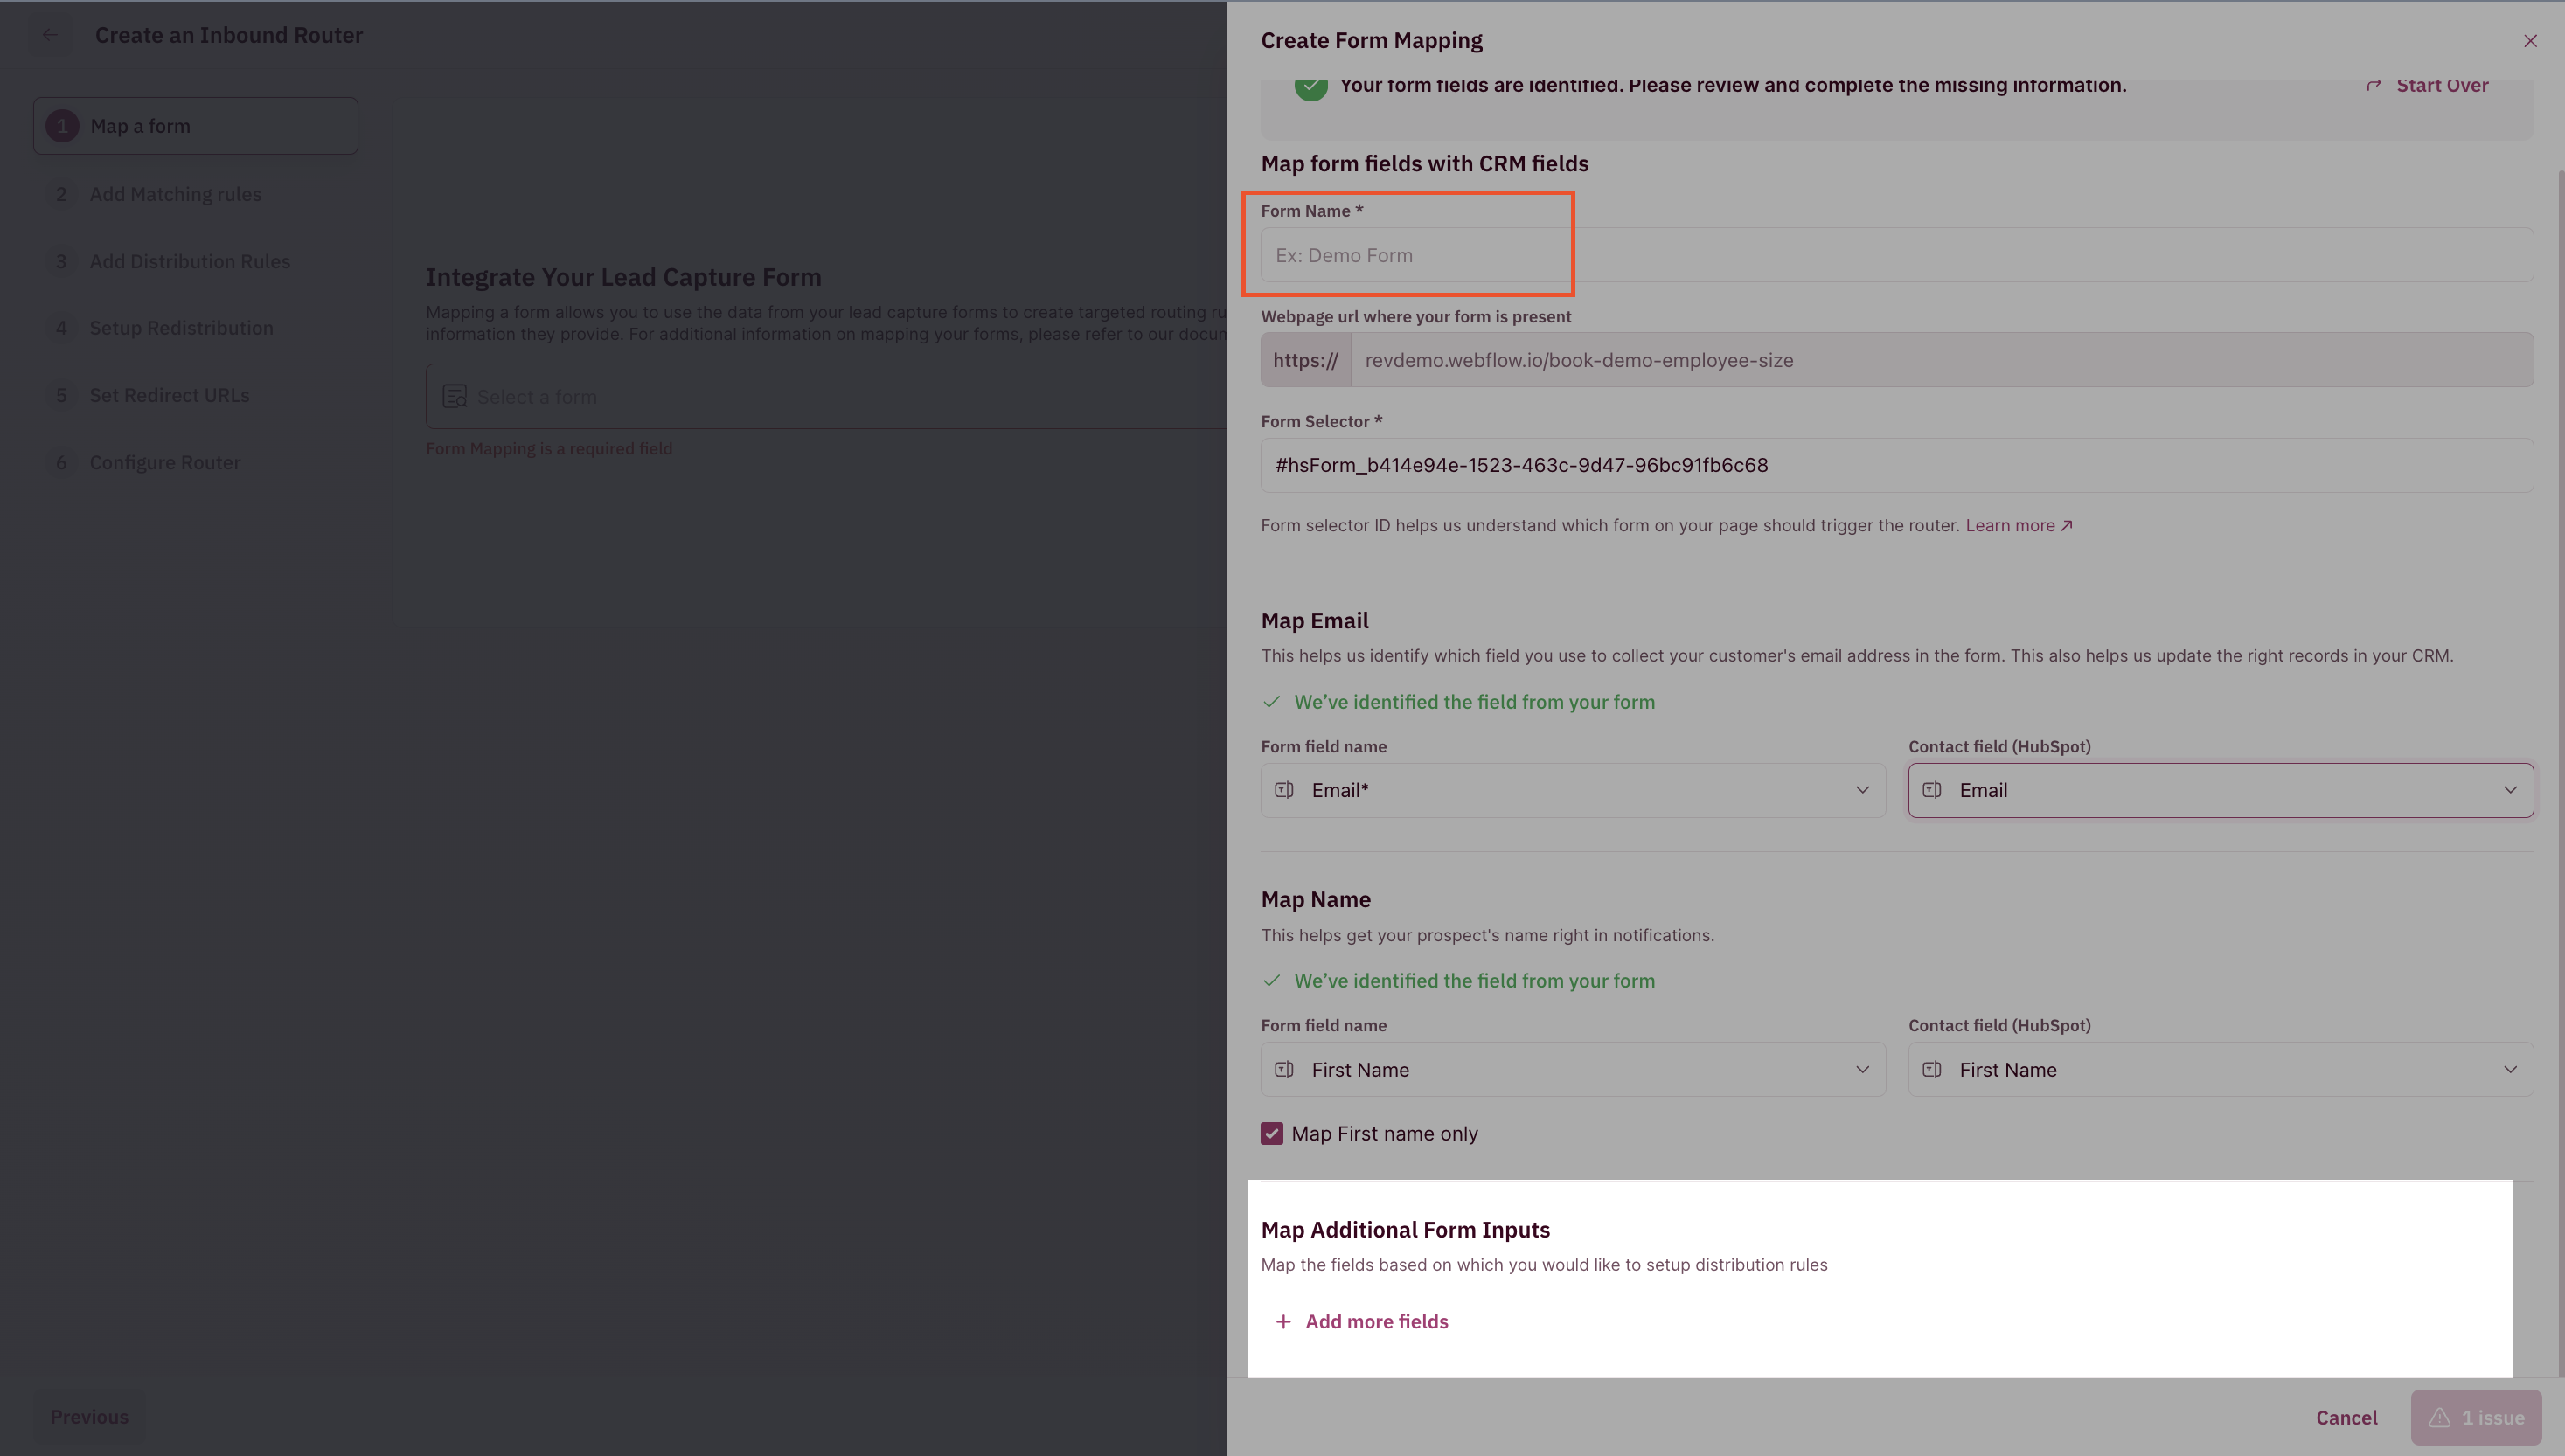
- Once done, click on ‘Save Form Mapping’.
Manual Form Map
- Click on Create form.
- Click on the “I’ll do this manually” button.
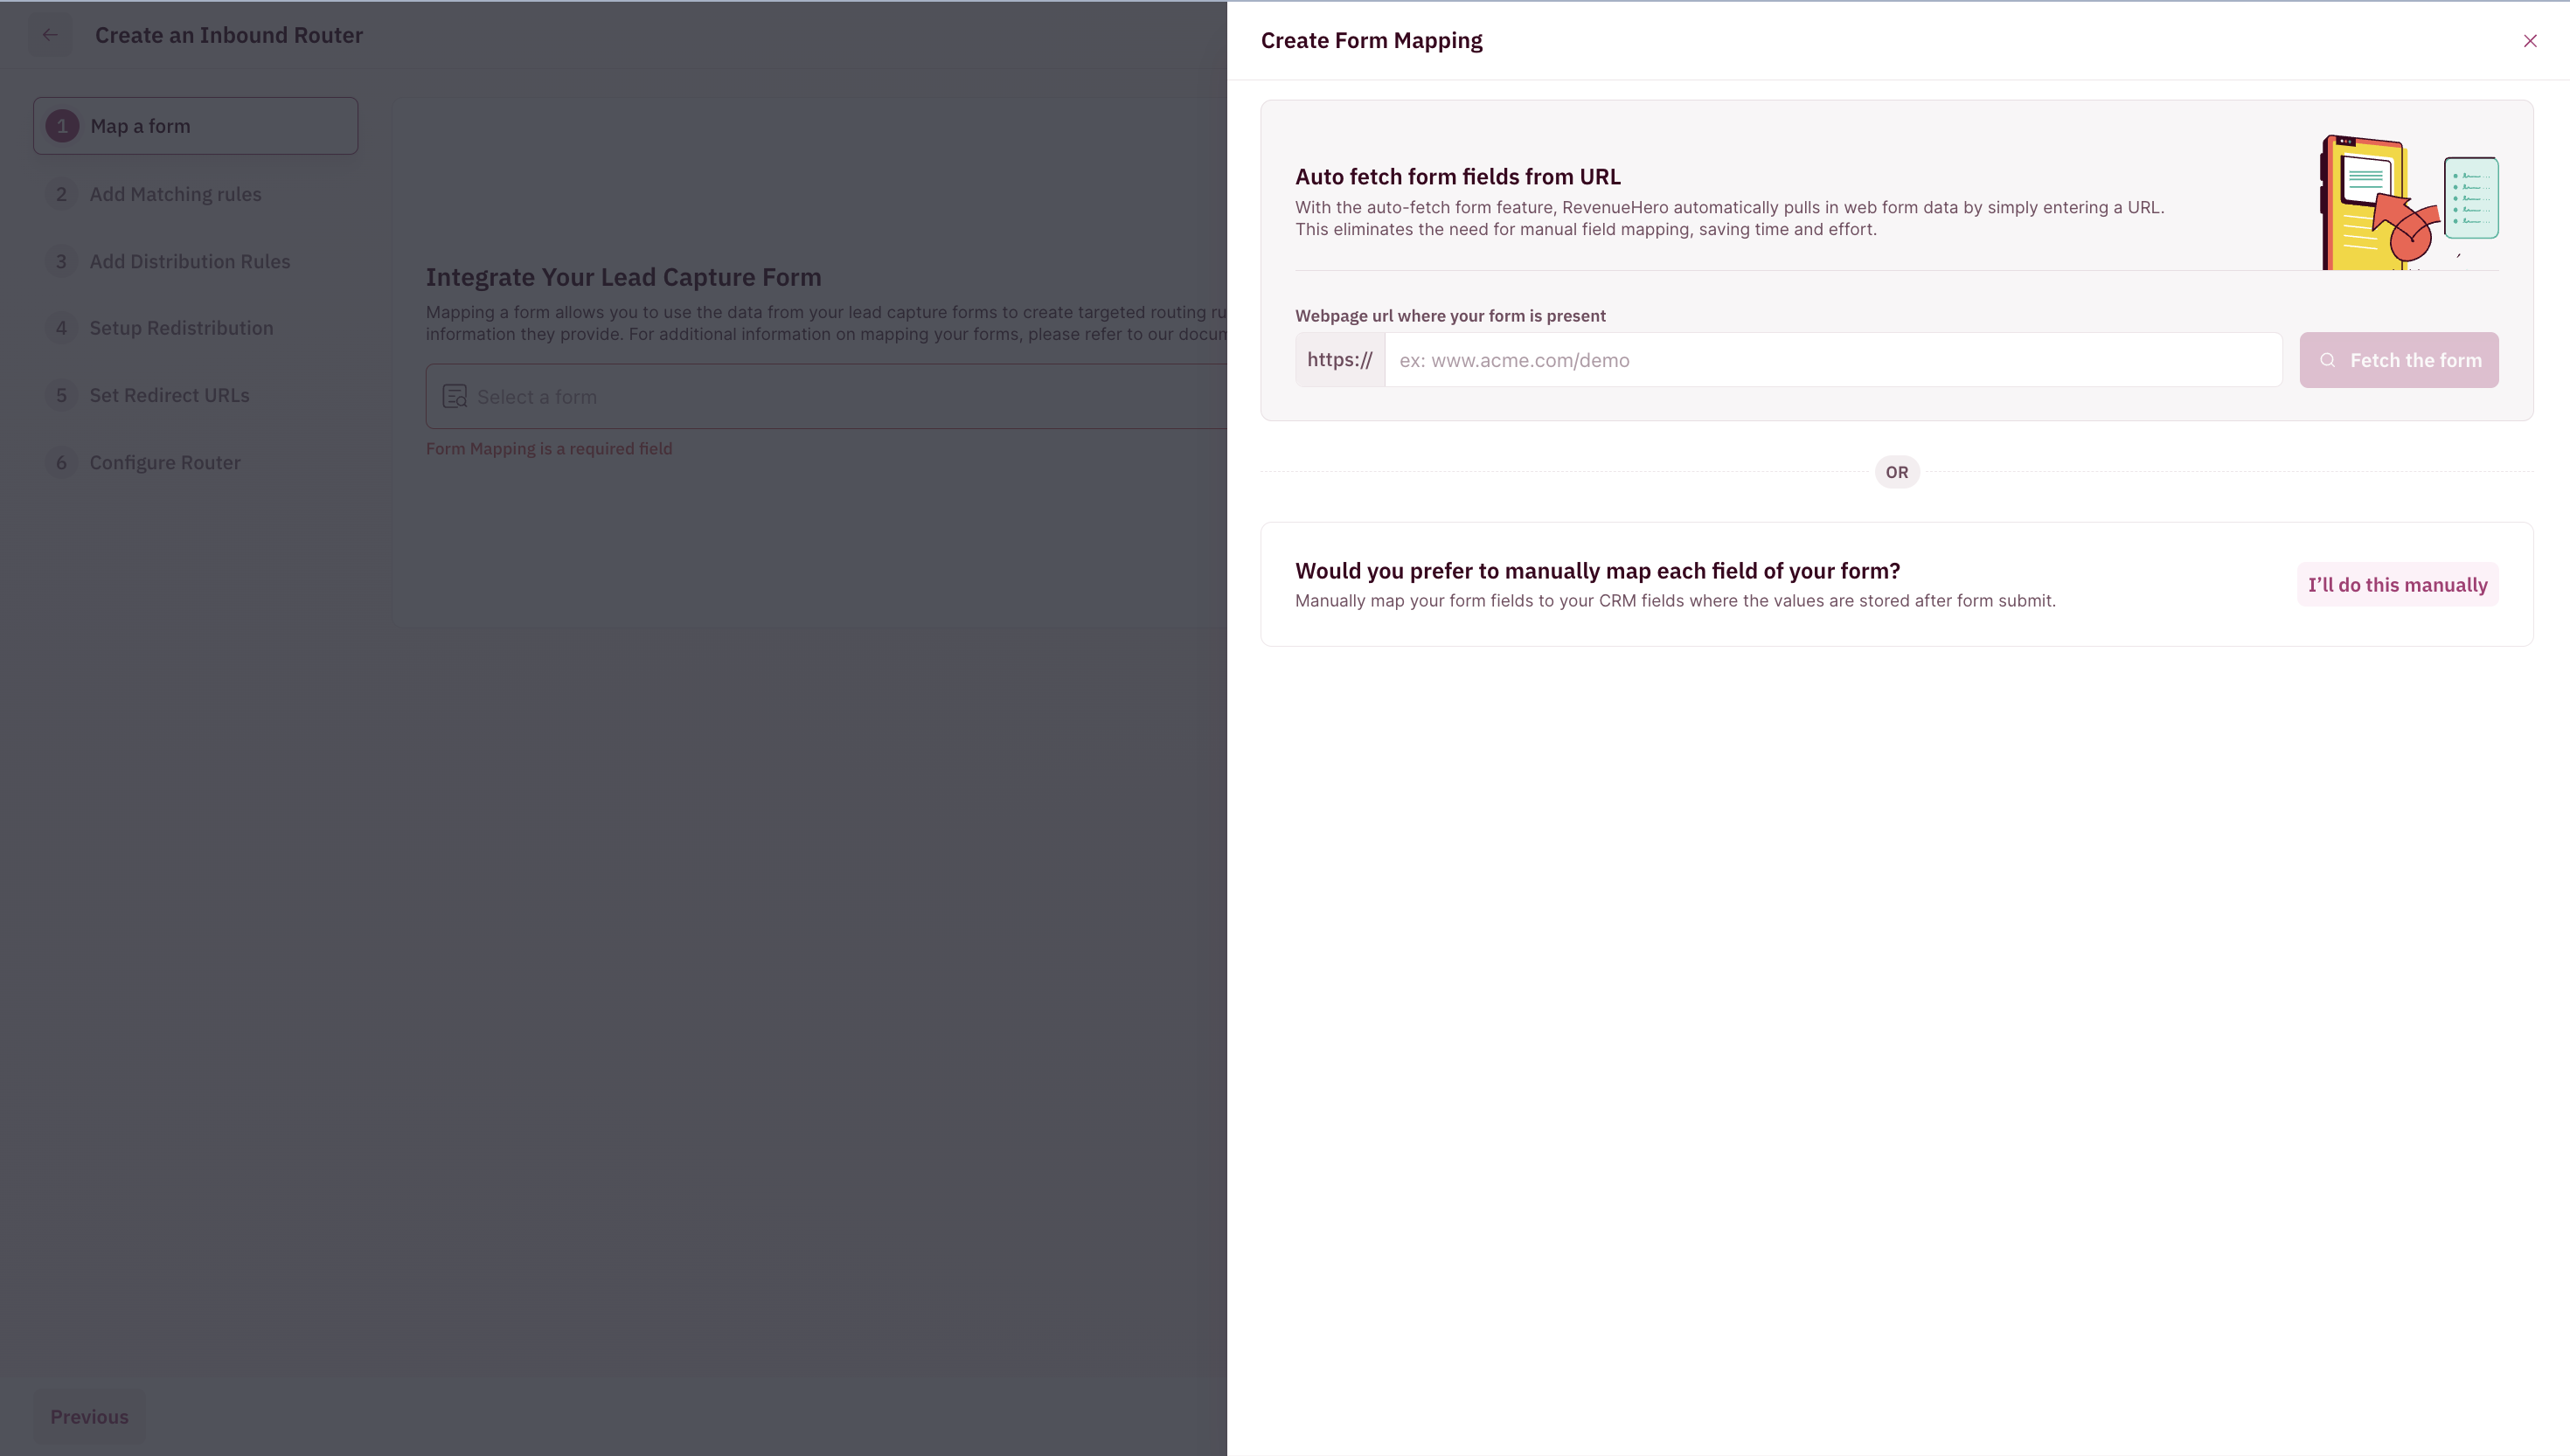
- This will open the fields you are required to fill in with details of the form you want to map.
- Enter all the details, review it, and click on ‘Save Form Mapping’ to proceed.
Disqualify Free Emails
Toggle the button before proceeding to the next step if you’d like RevenueHero to disqualify submissions with free emails.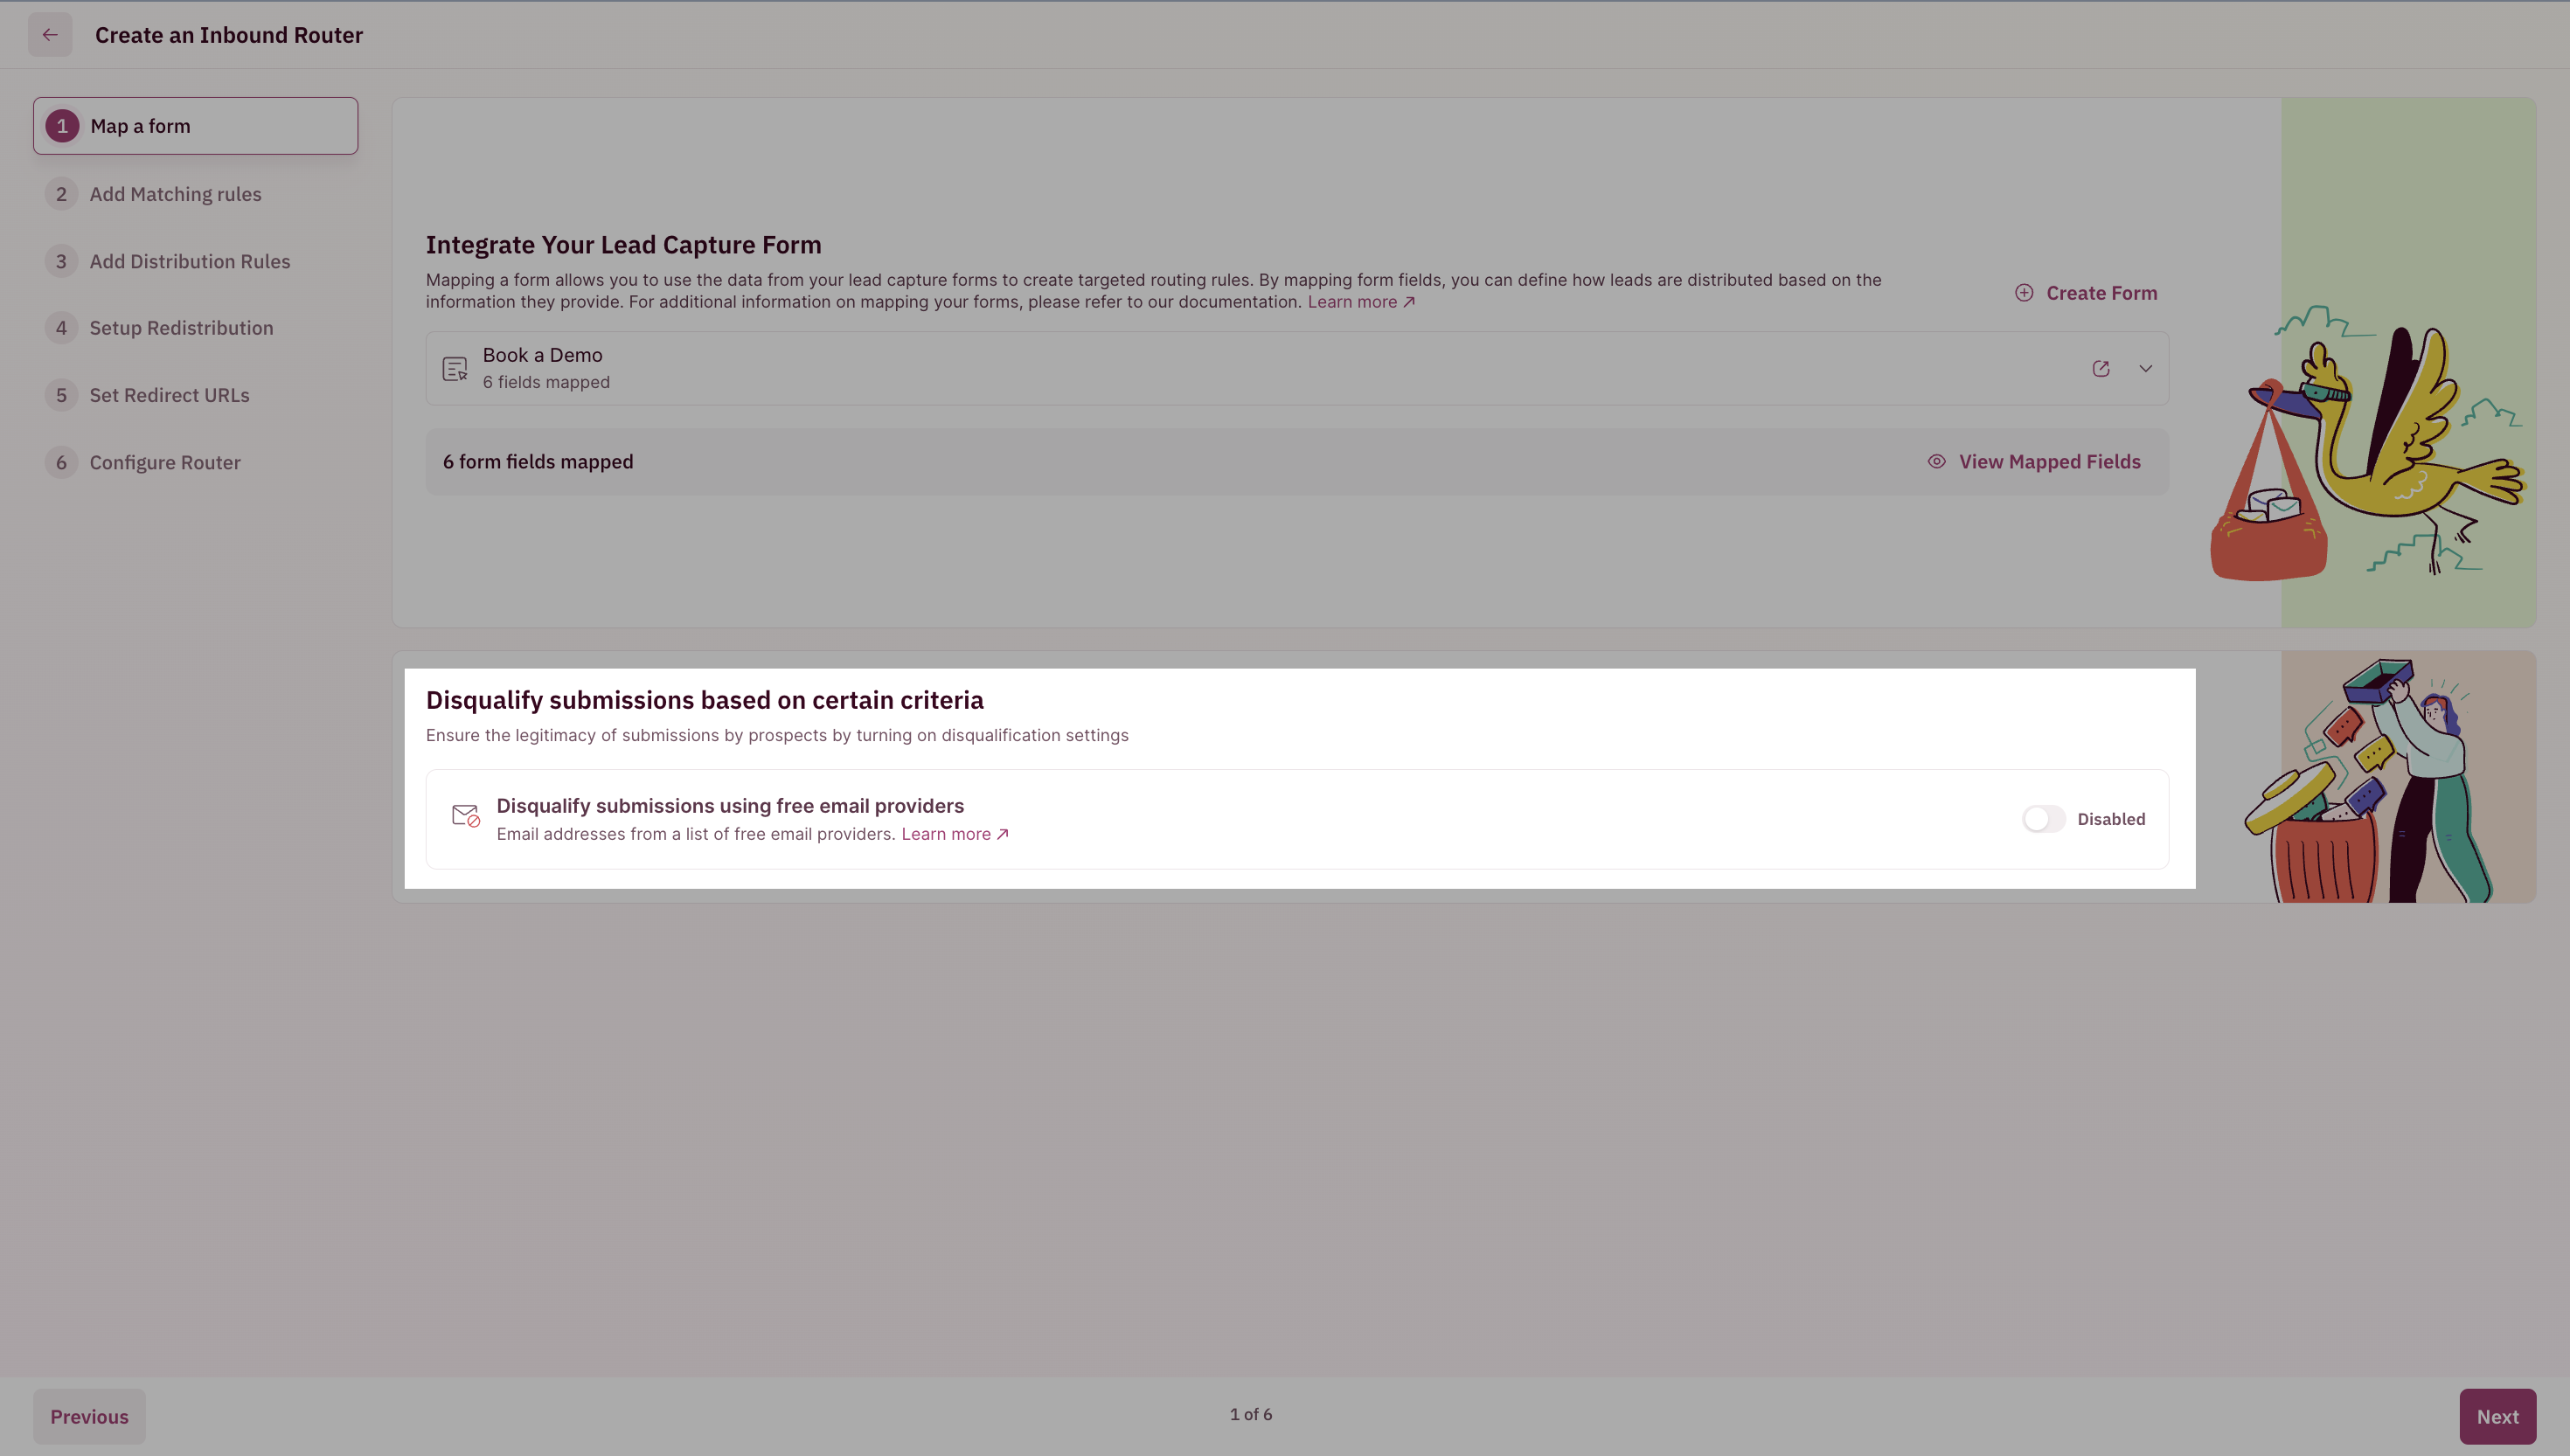
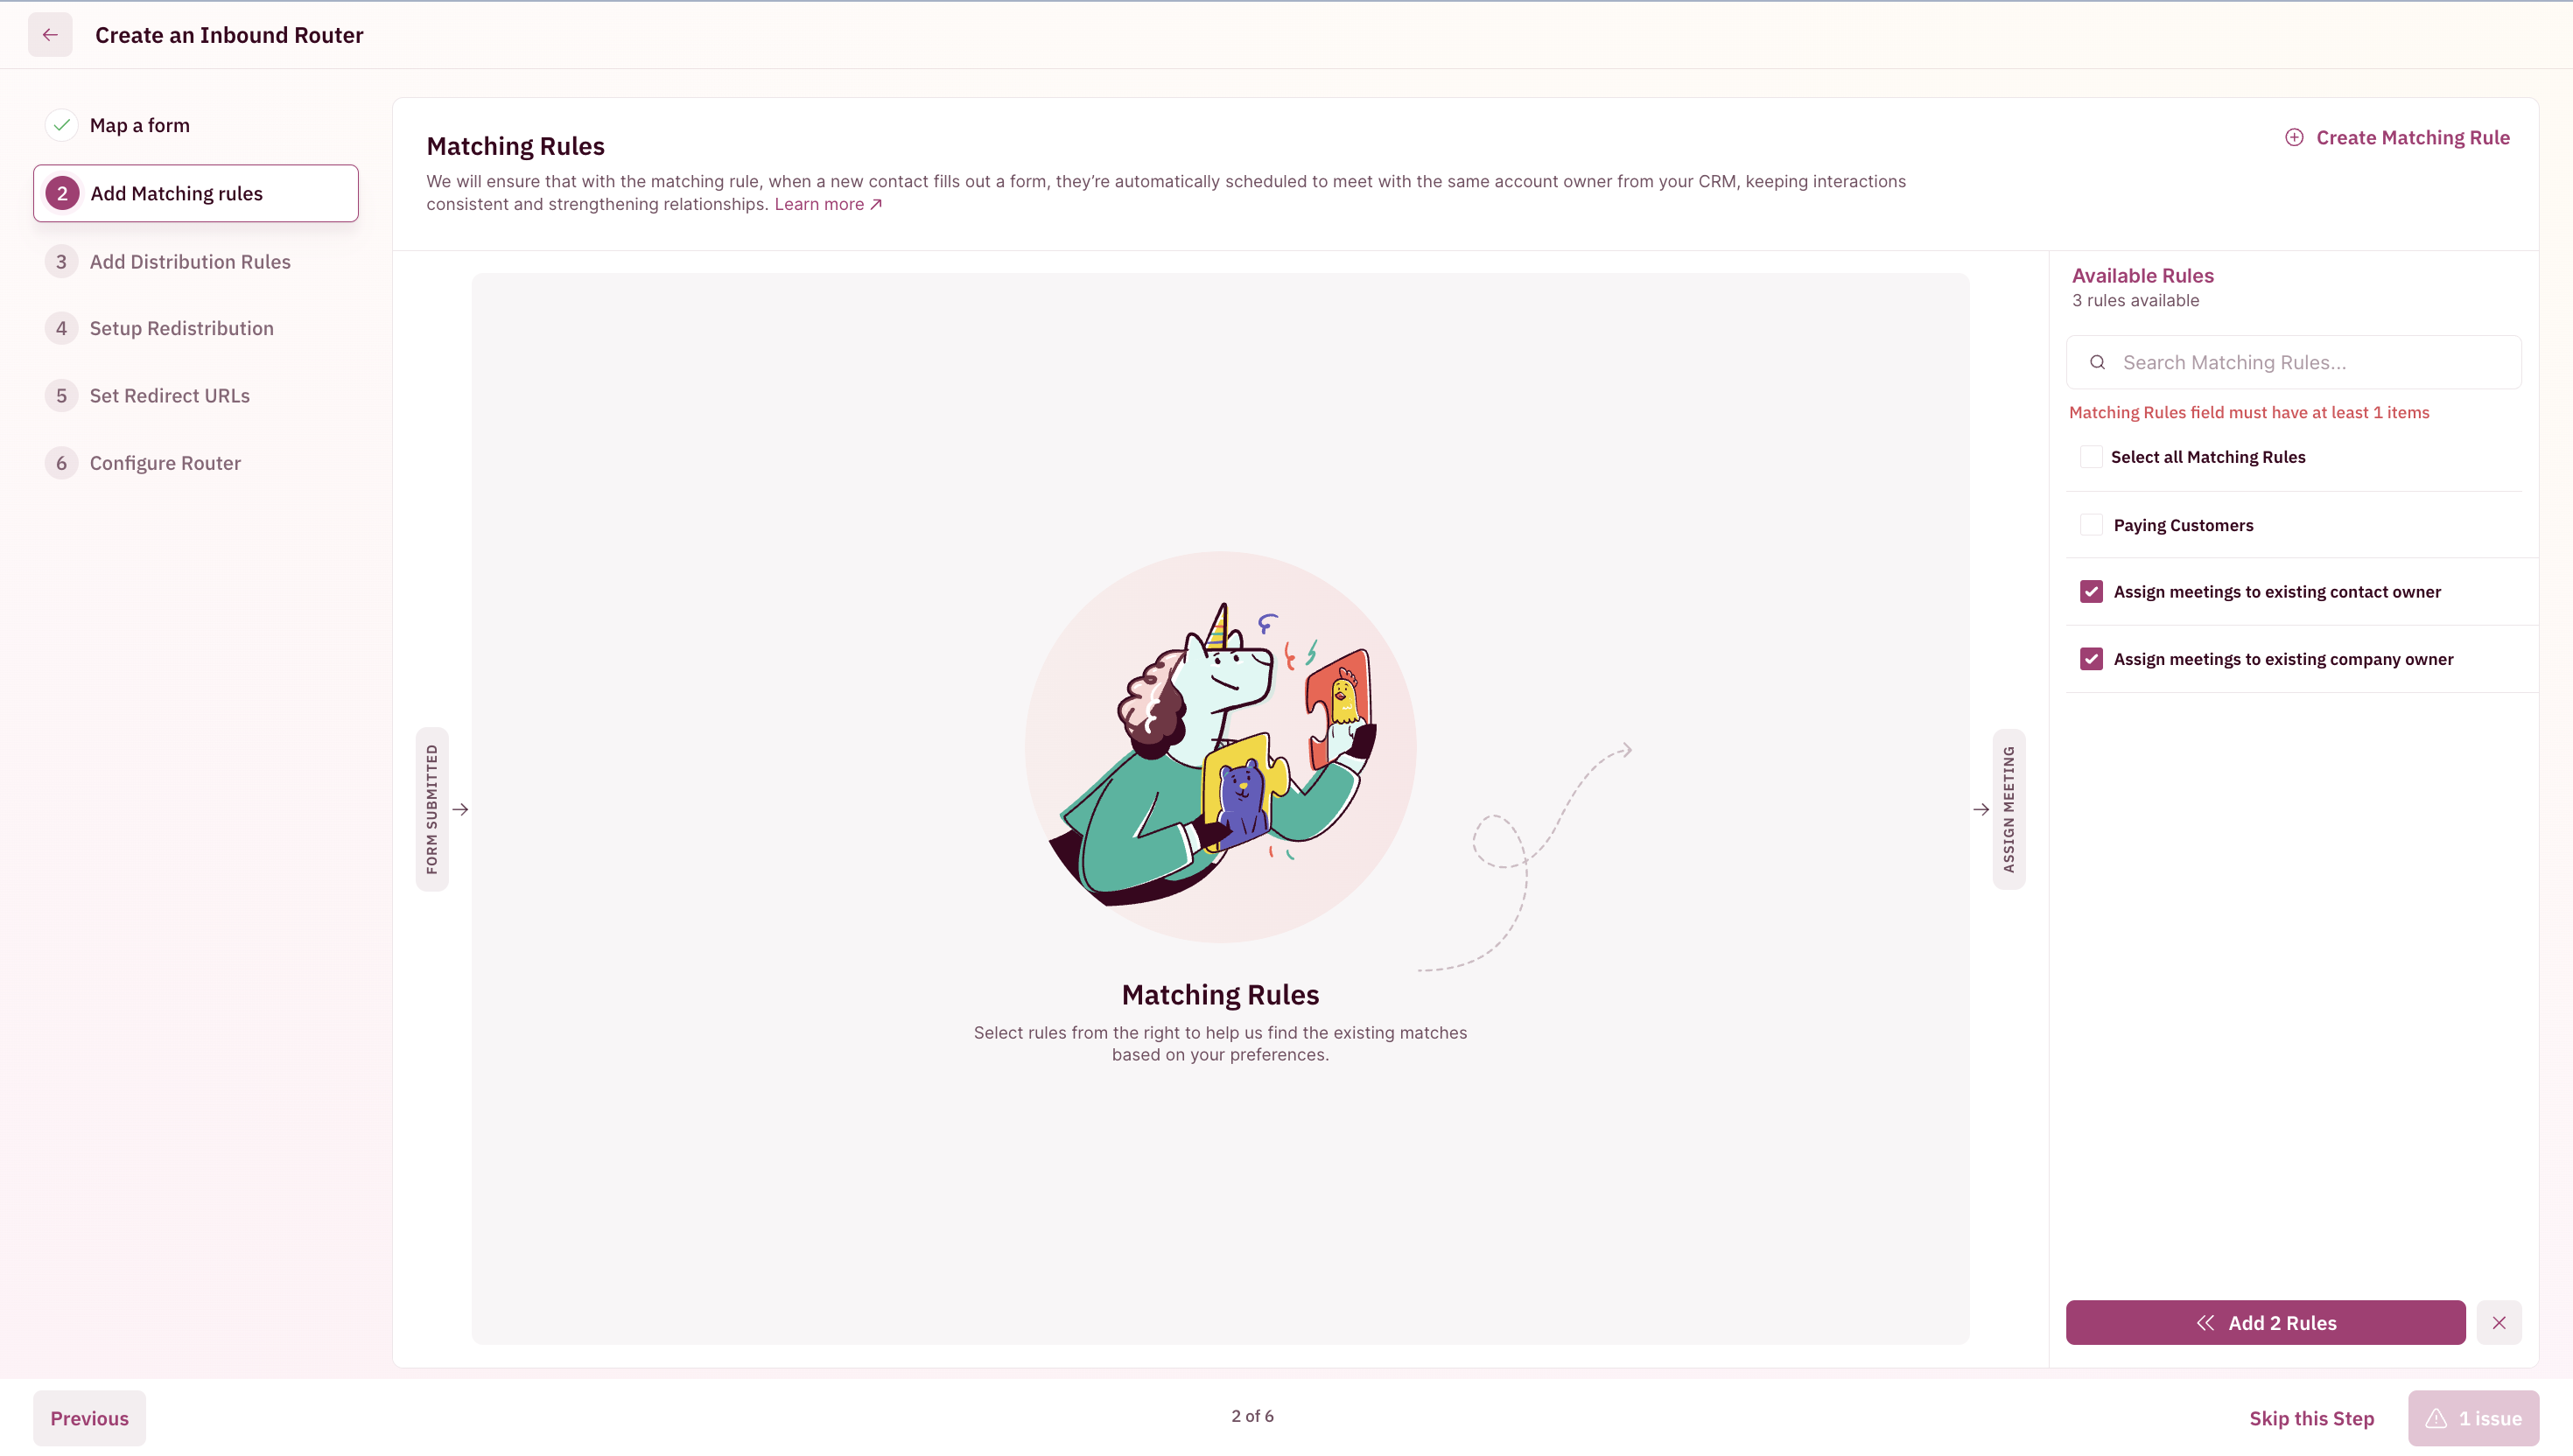
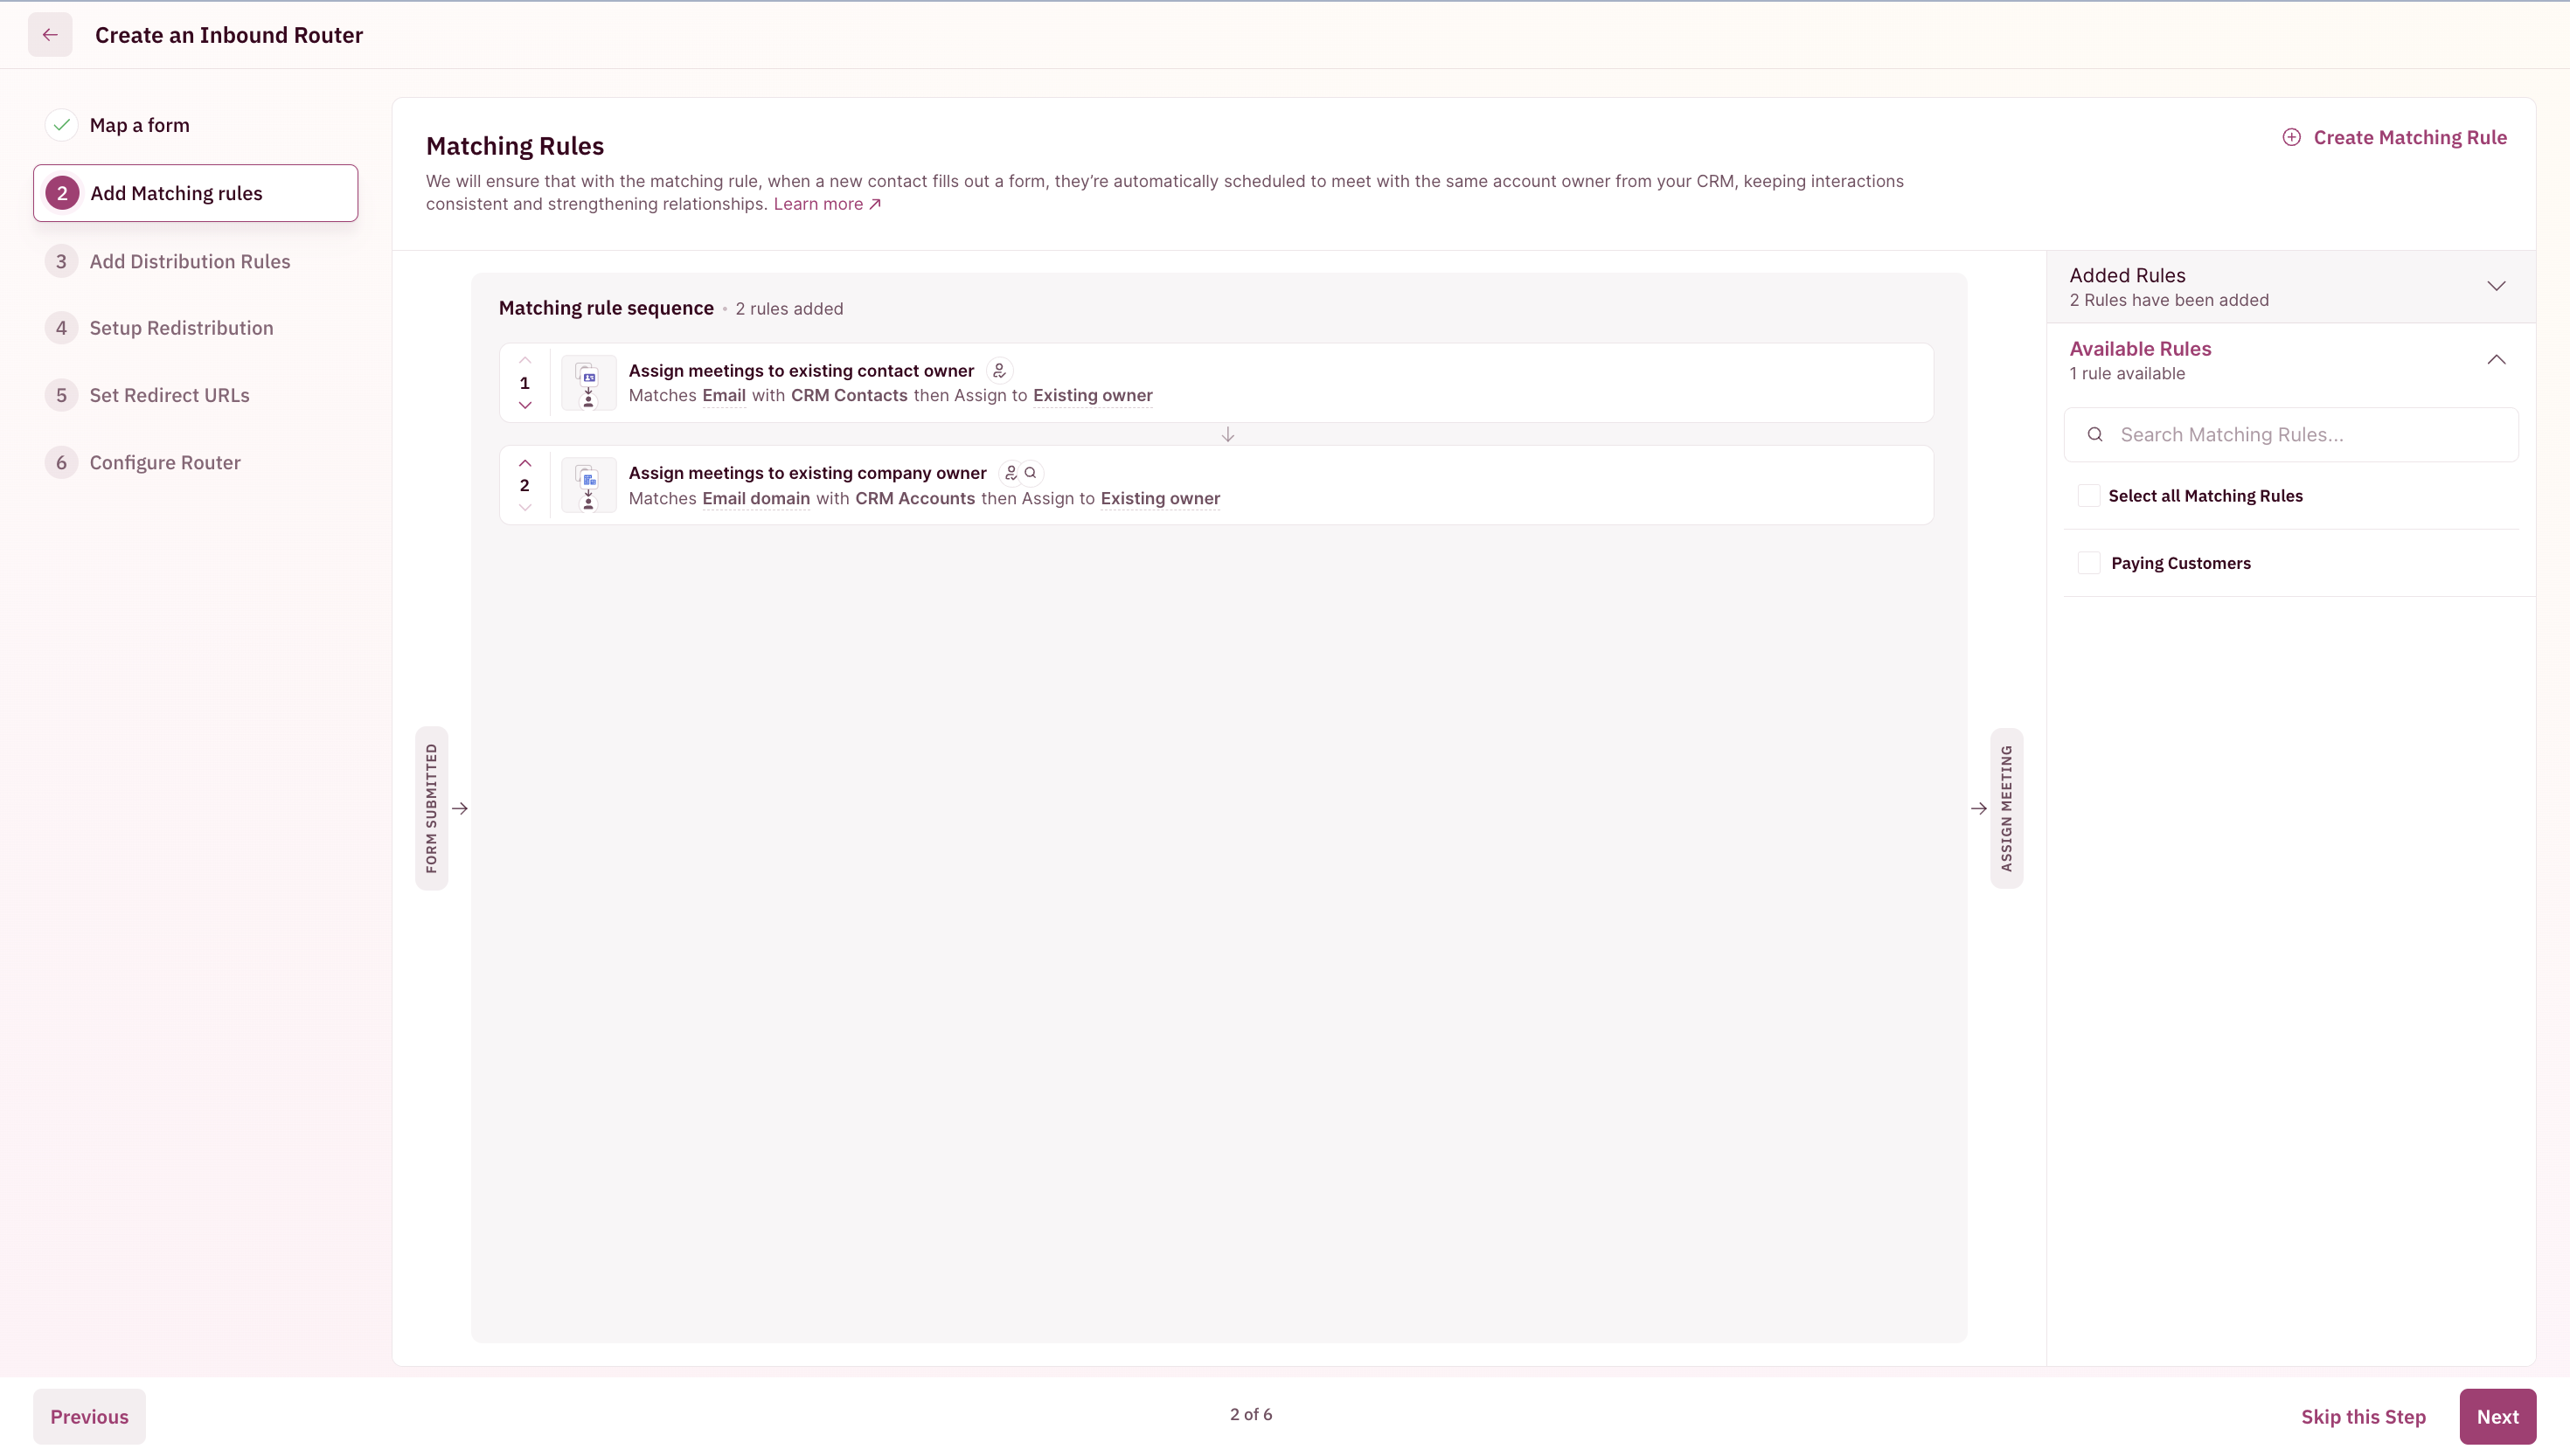
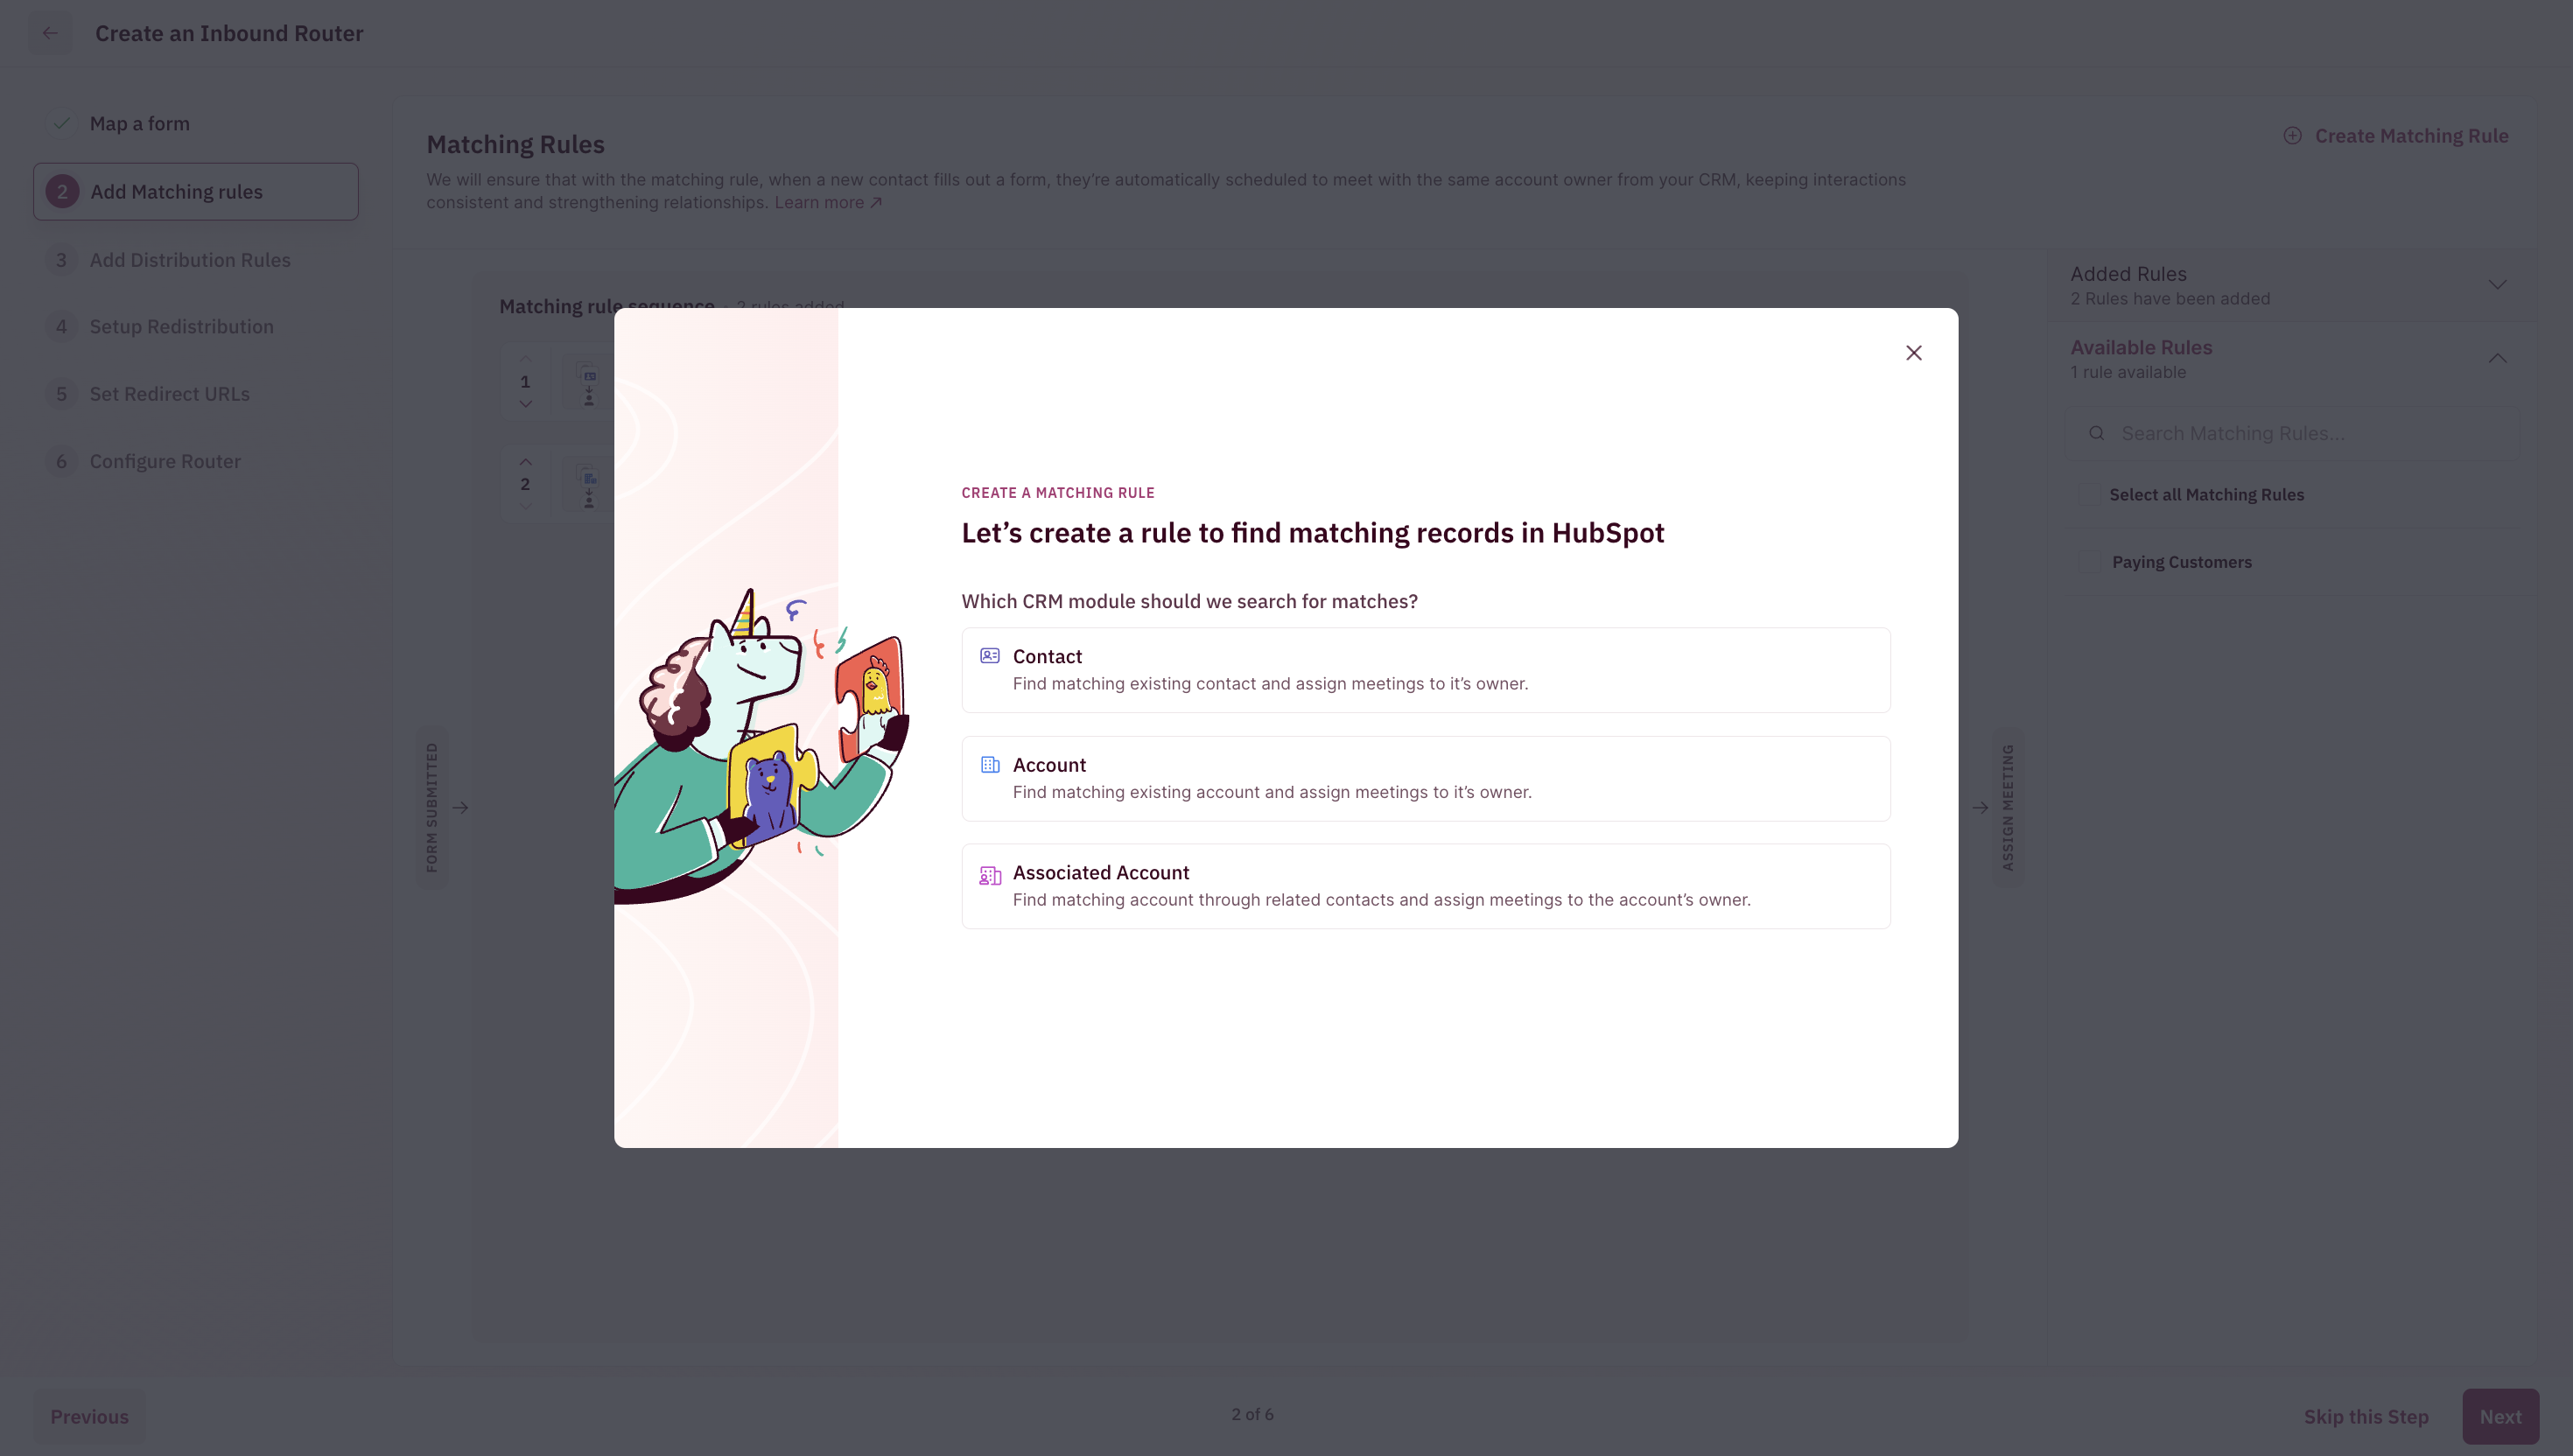
Set up Matching Rules
Matching rules help in routing leads and their meetings to existing owners in the CRM. This ensures your leads talk to the same sales rep and removes the chances of any confusion. By default, your account will have two matching rules: a. Assign meetings to the existing company’s owner. b. Assign meetings to the existing contact’s owner. c. (For Salesforce) Assign meetings to existing lead’s owner.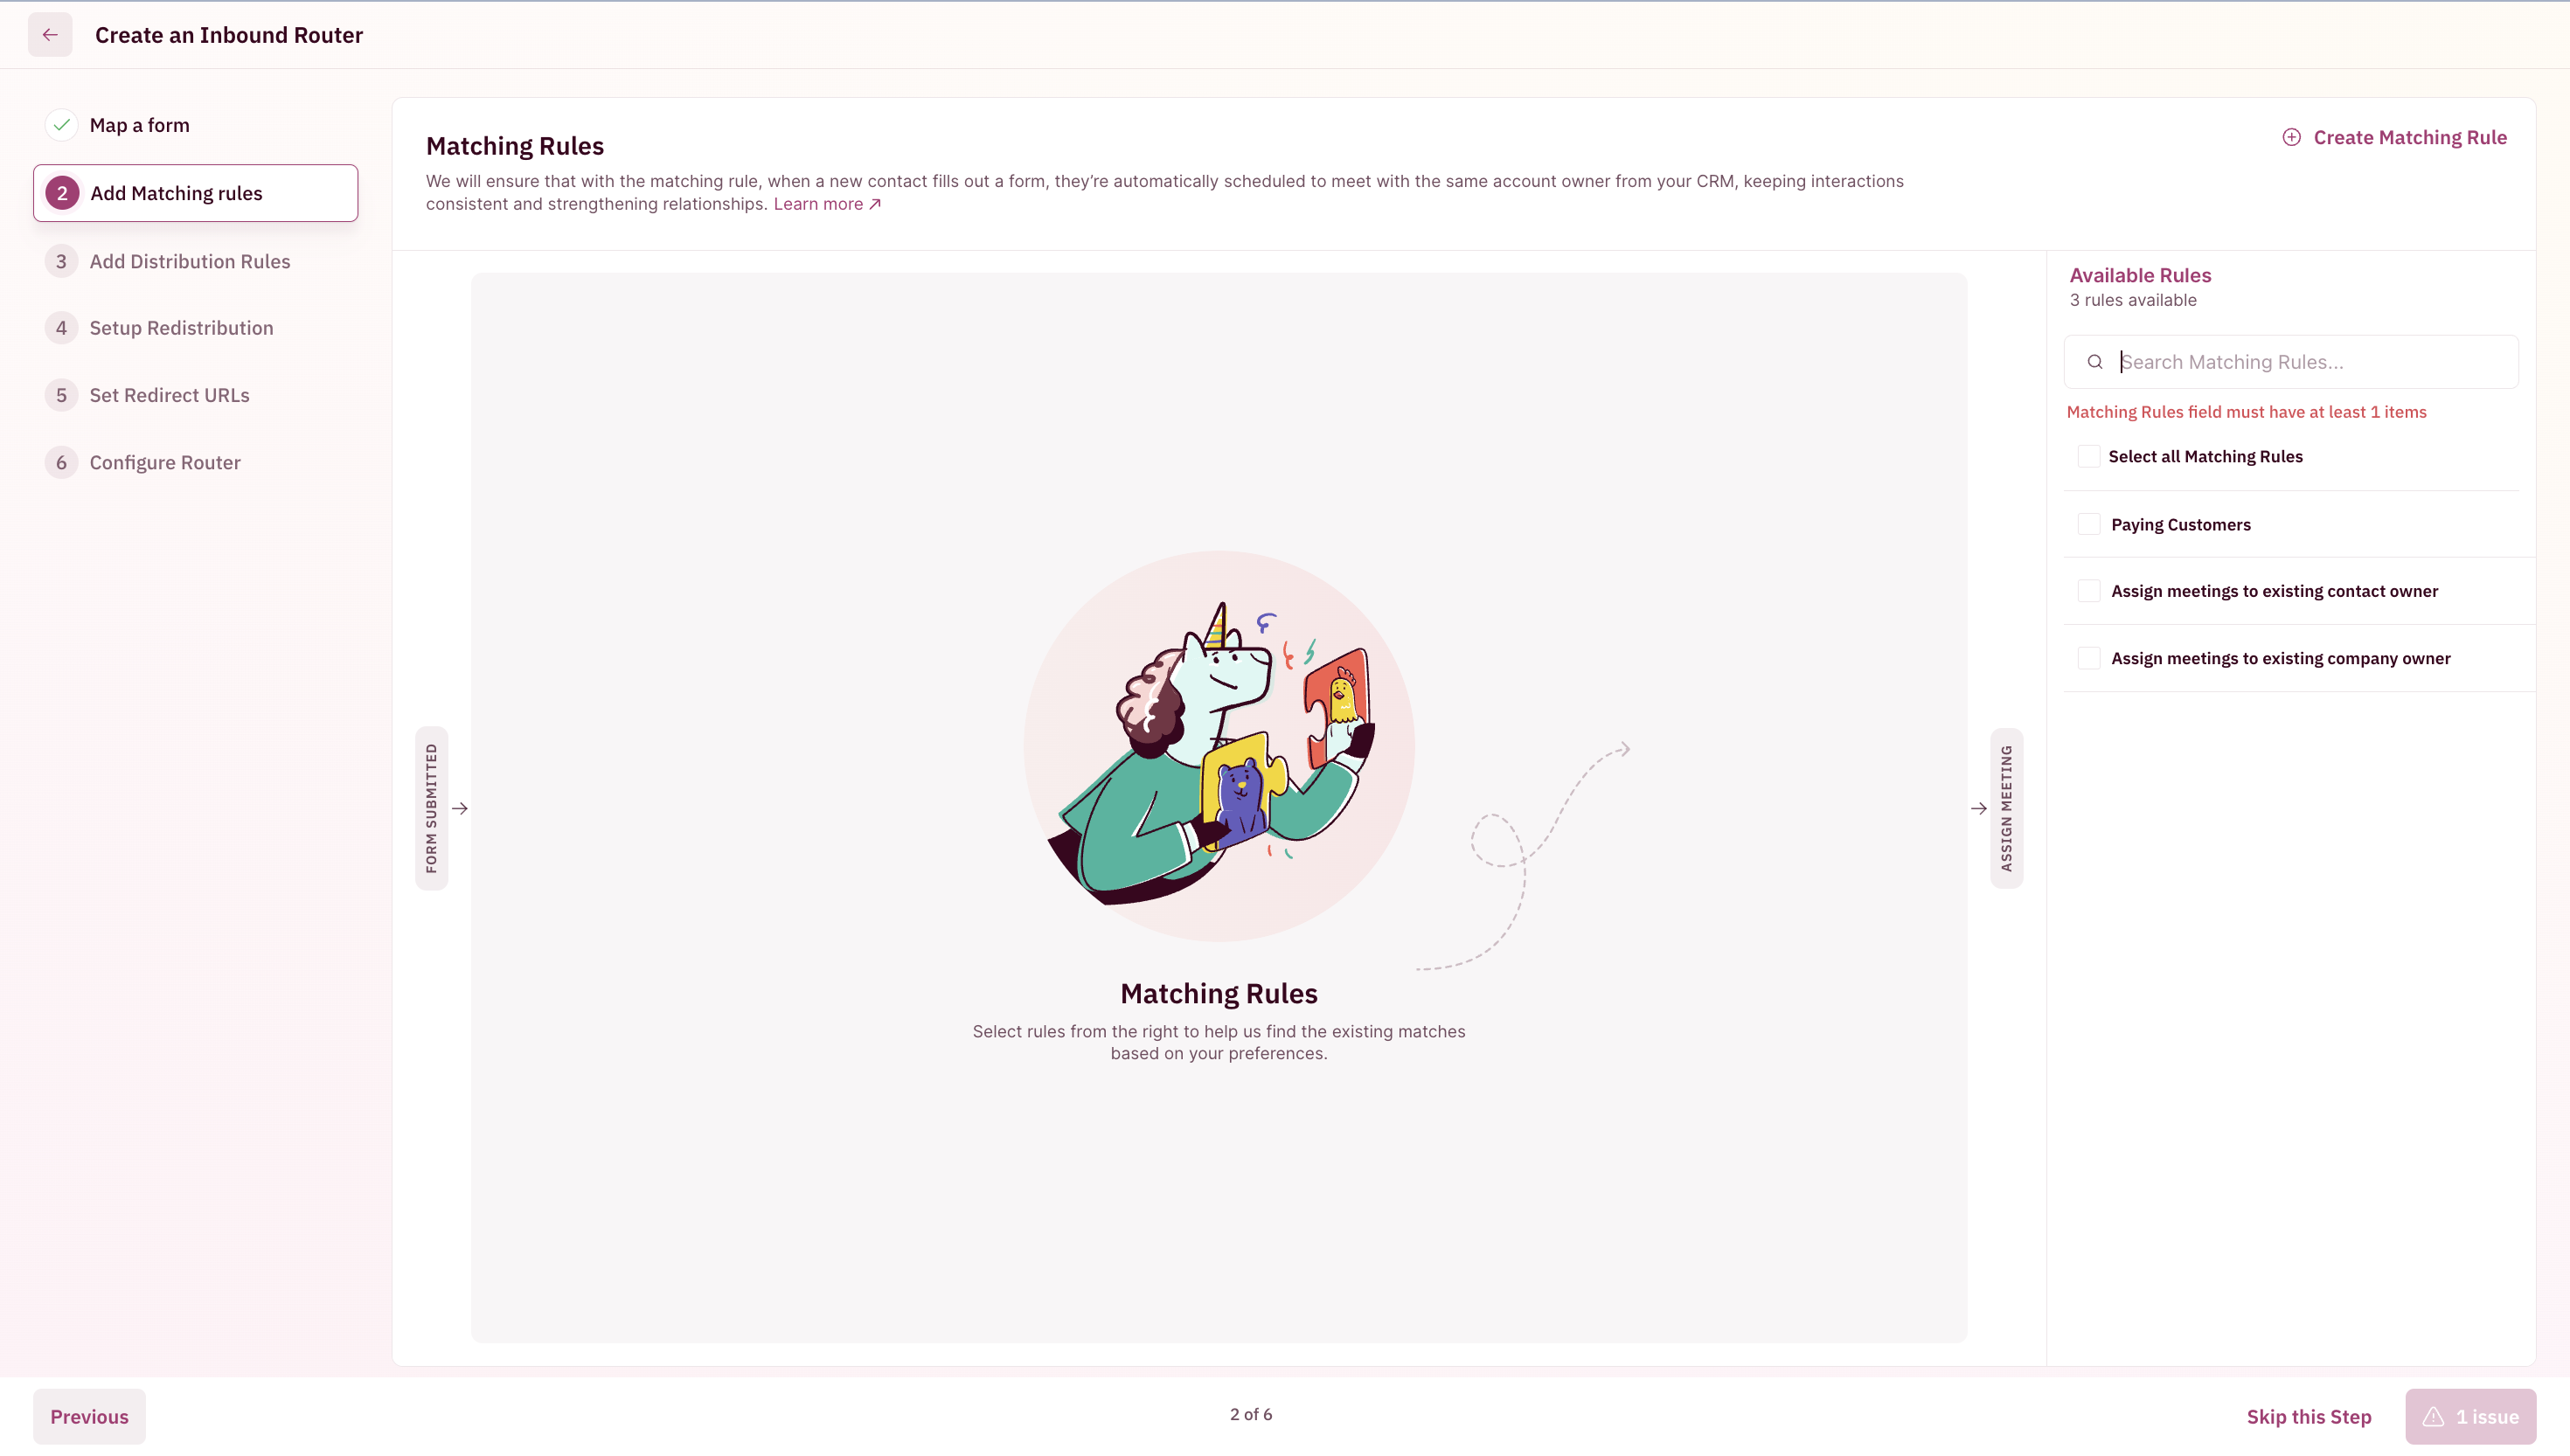
Set up Distribution Rules
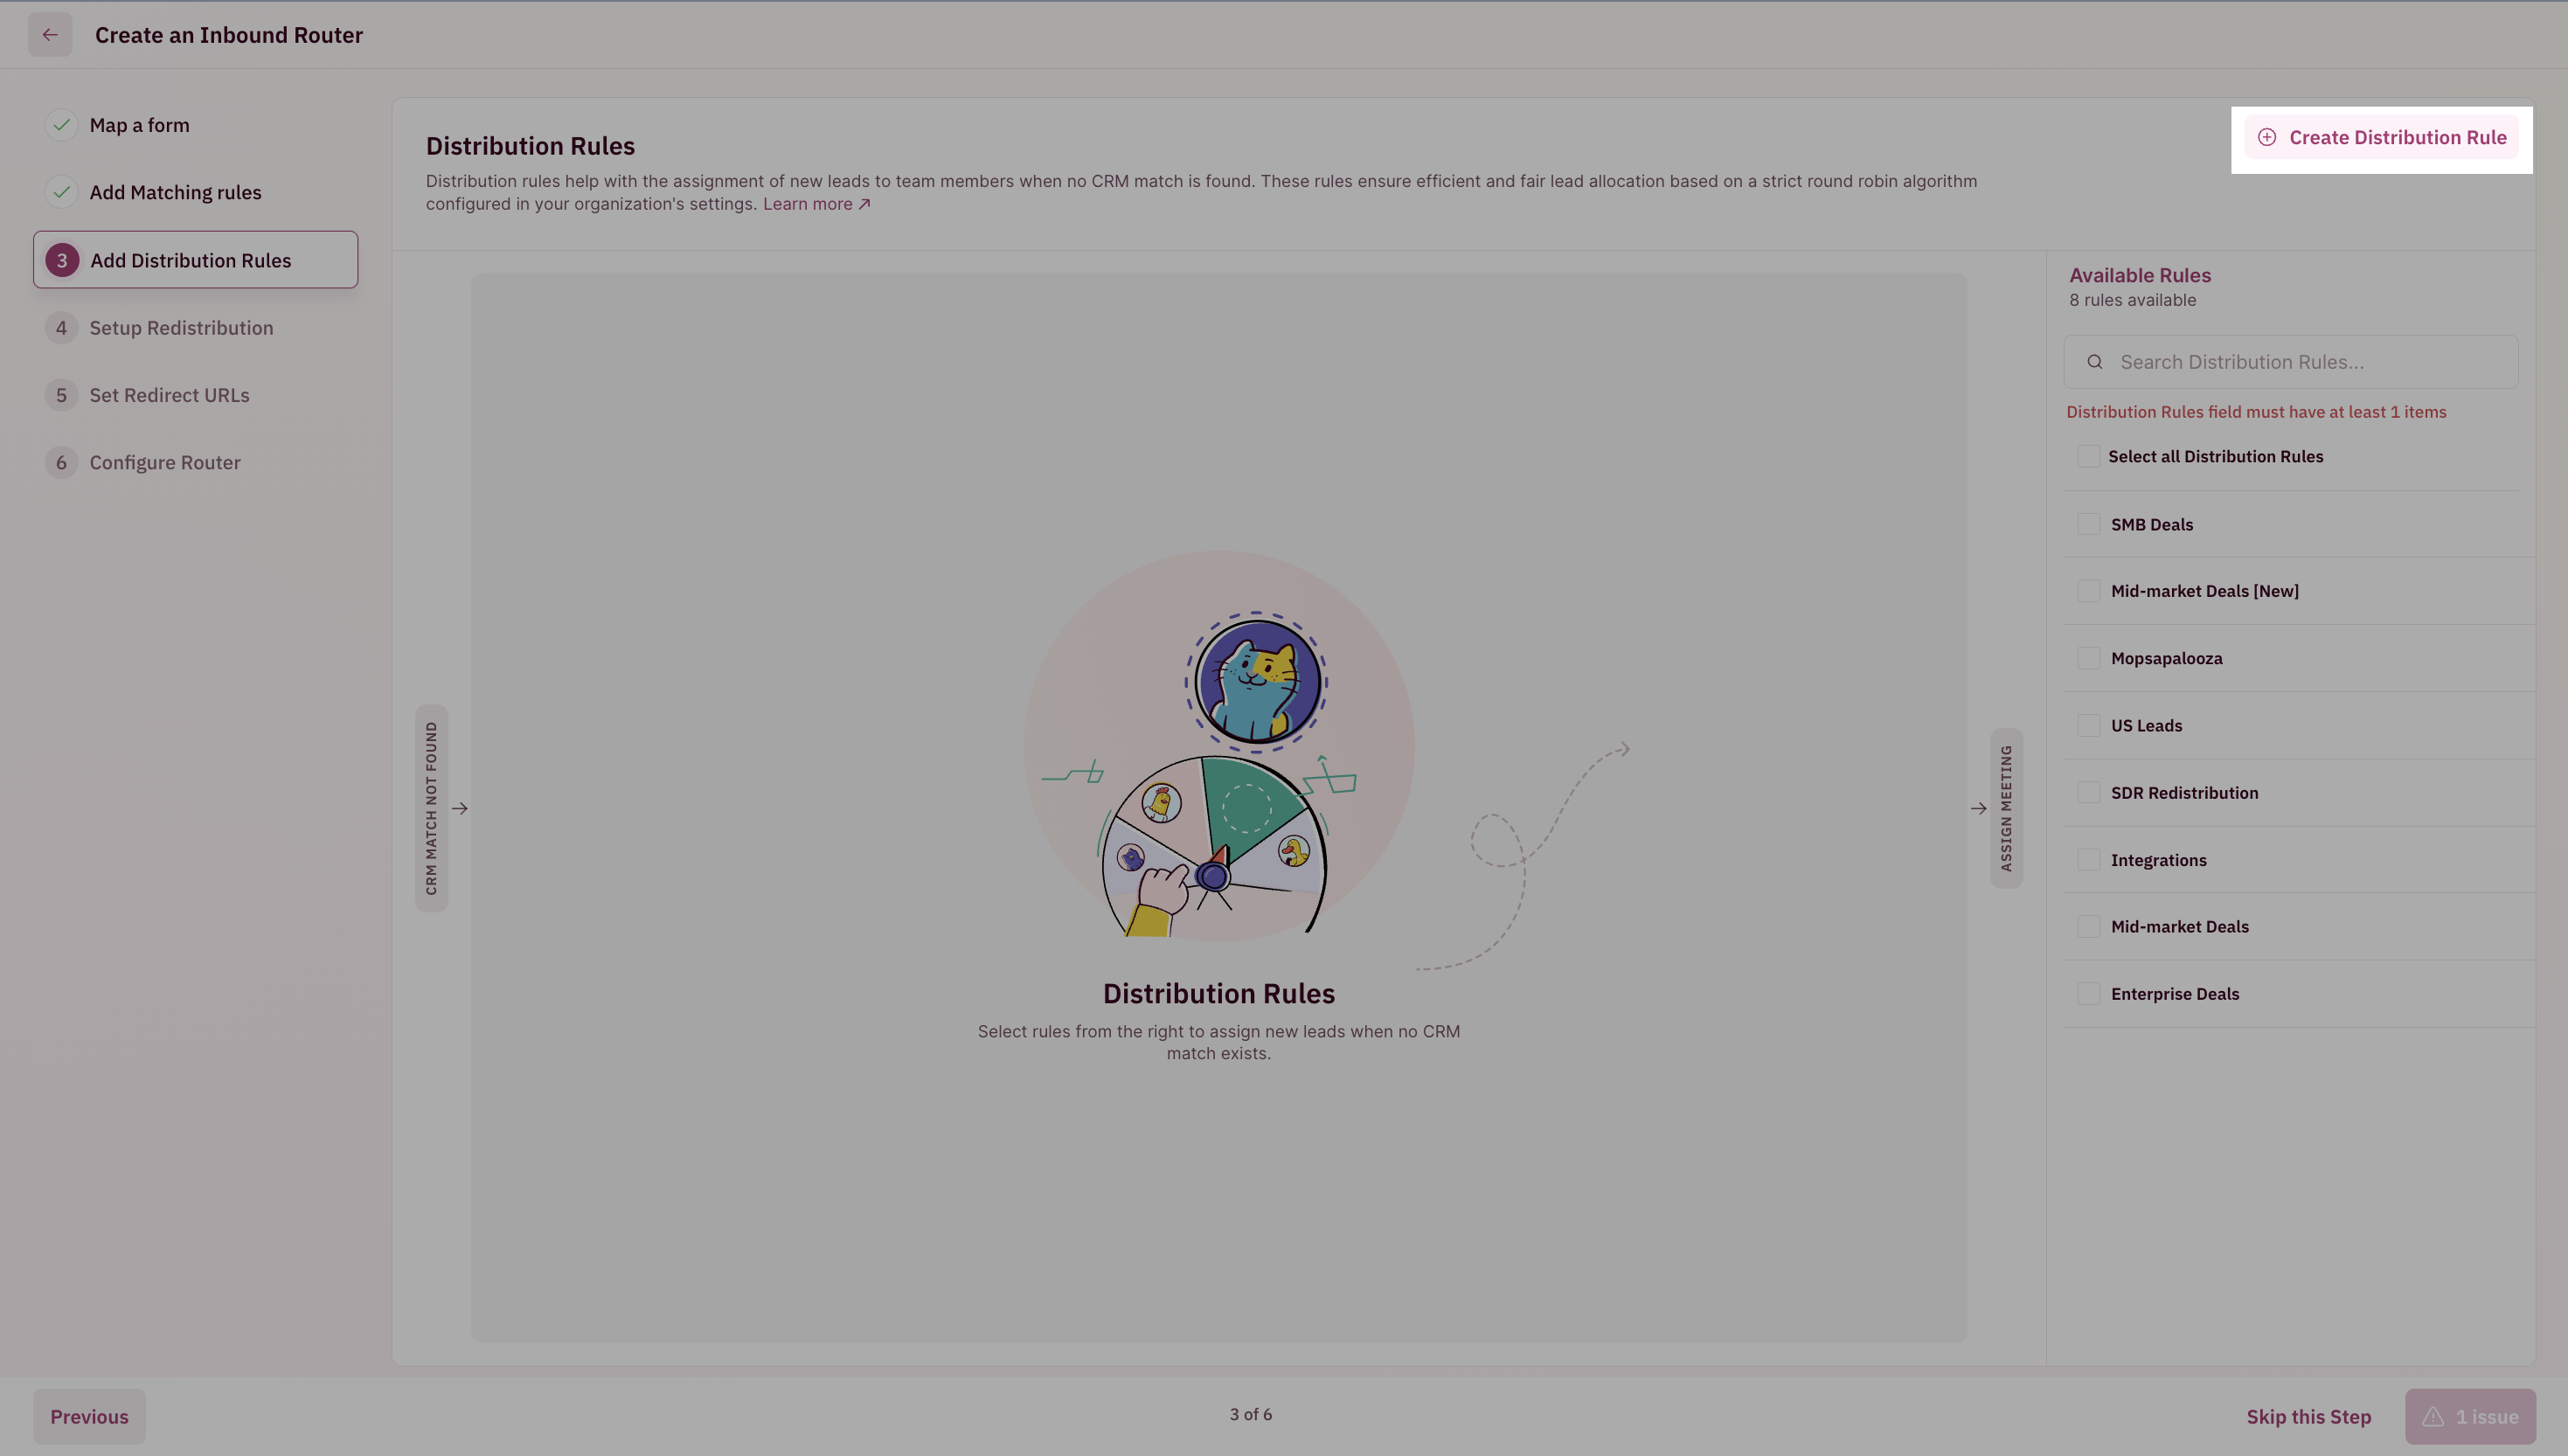
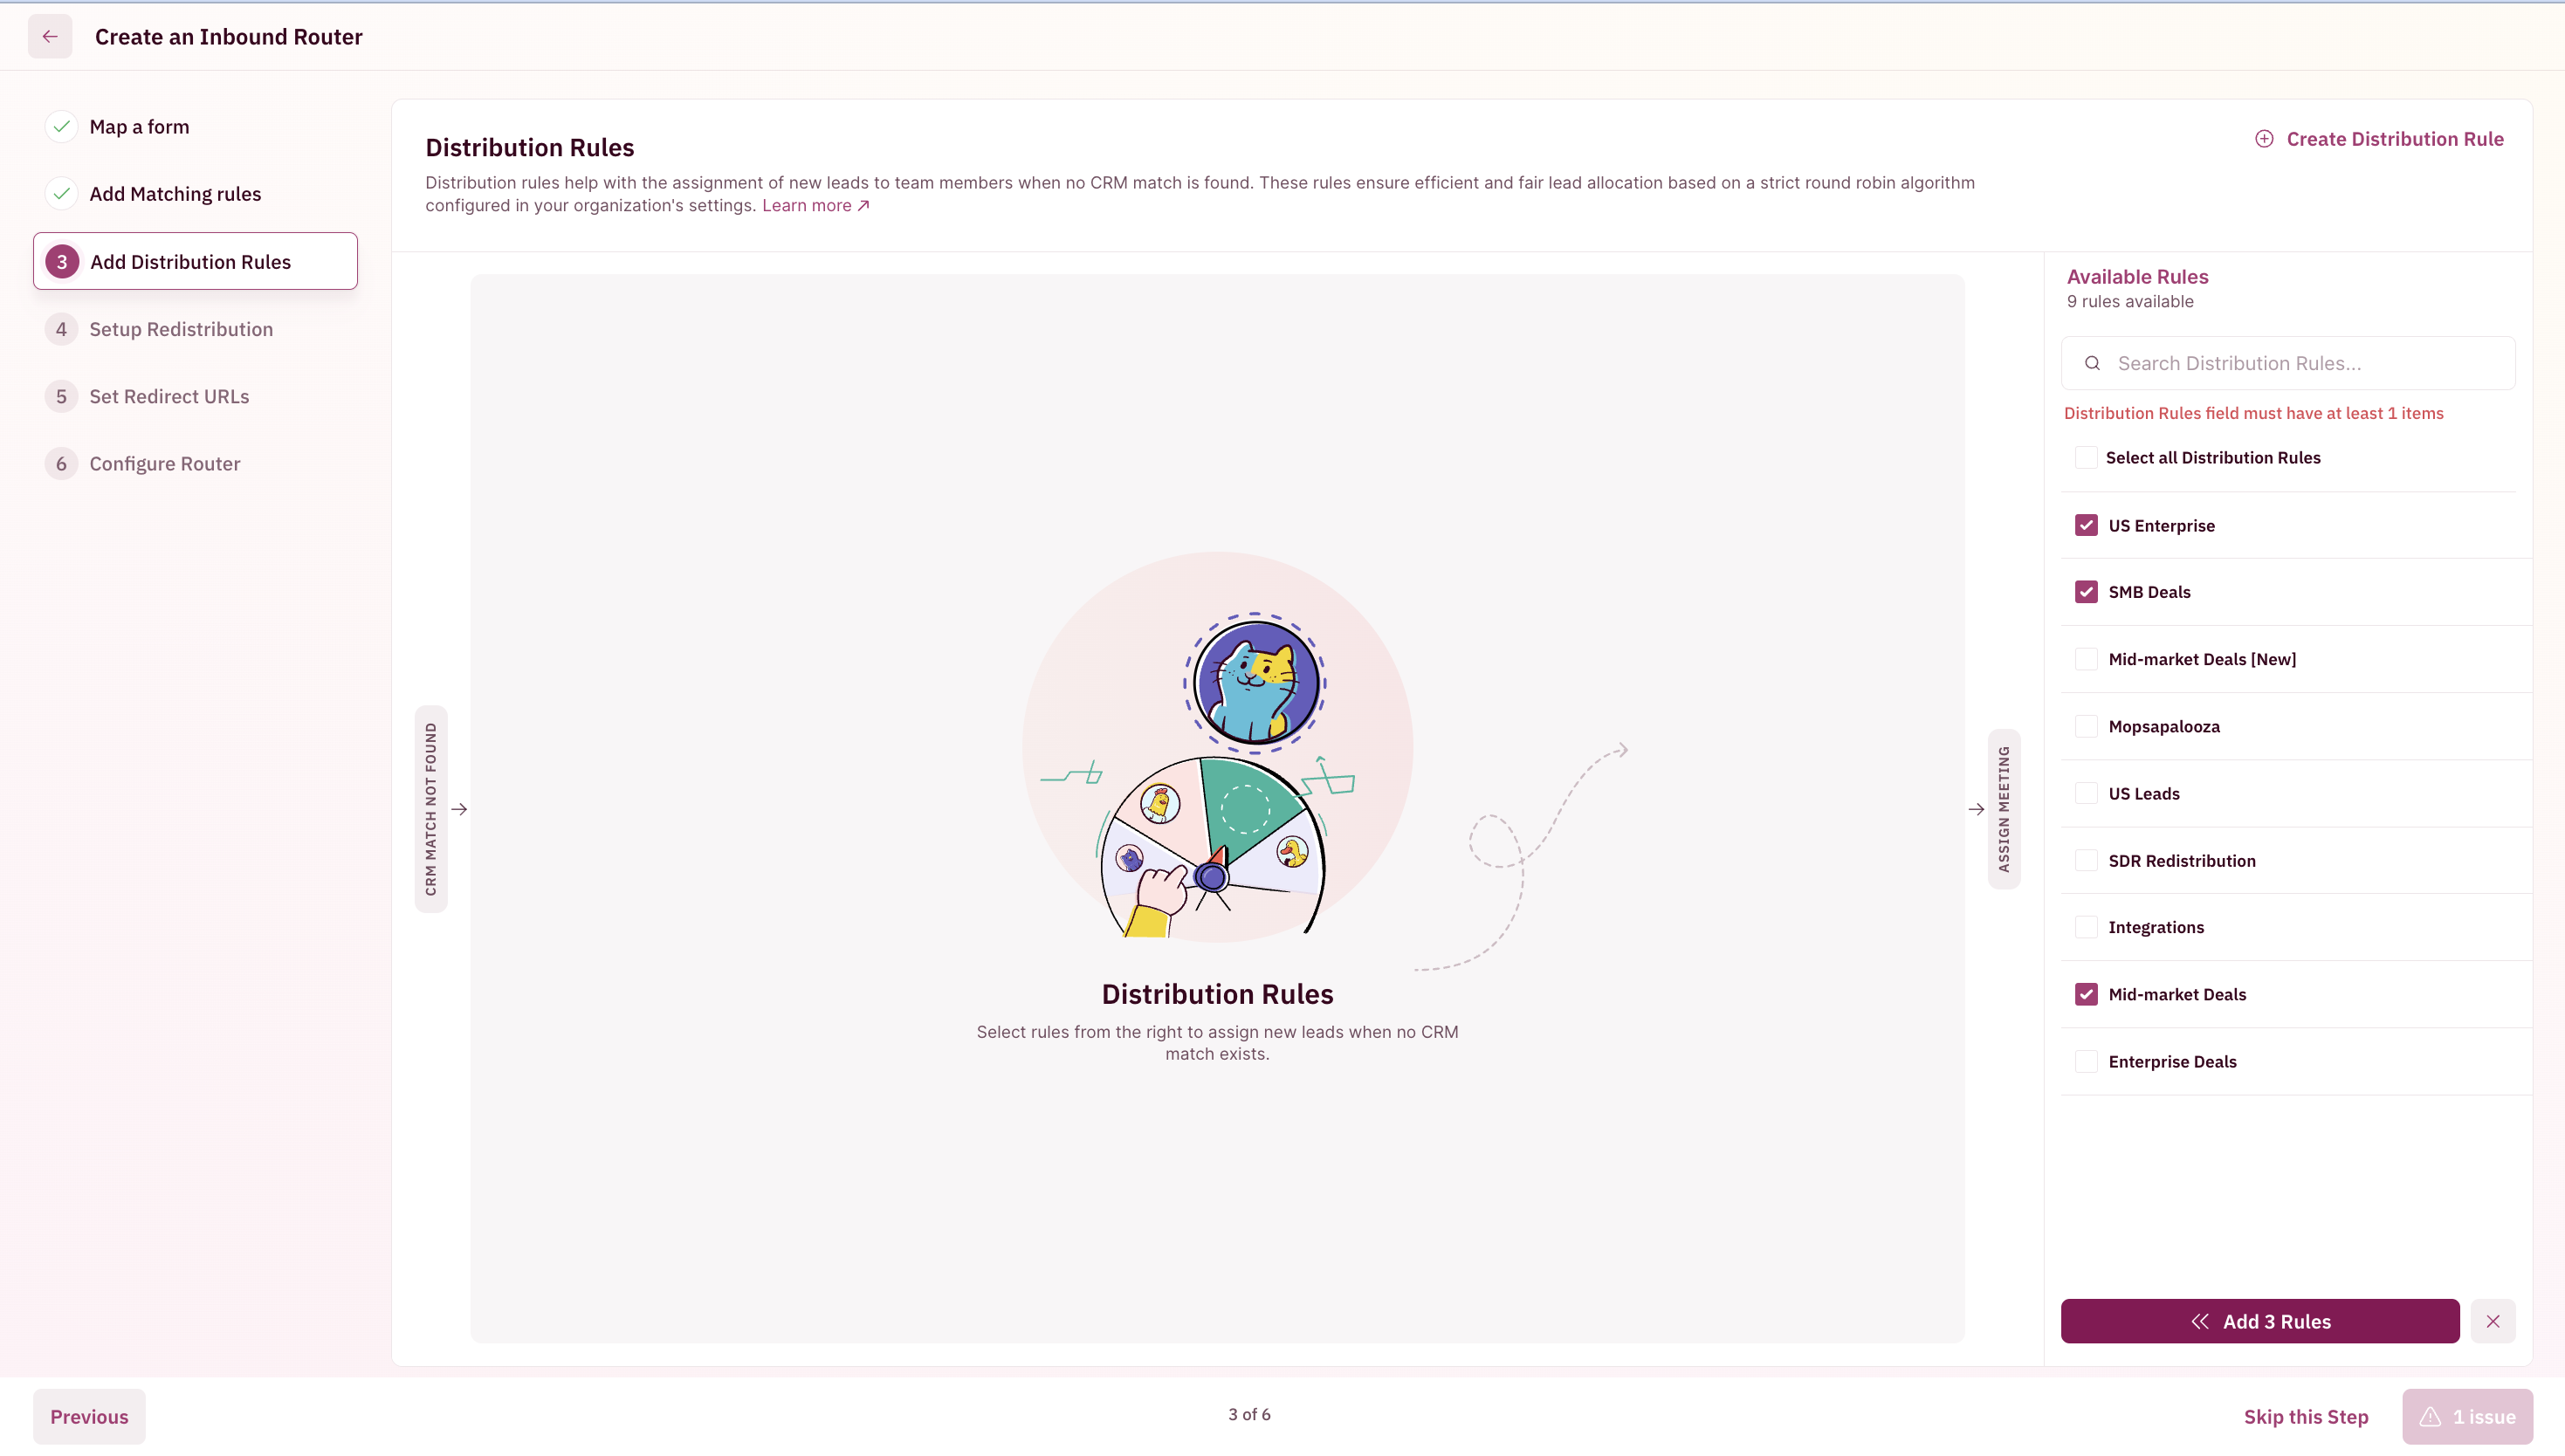
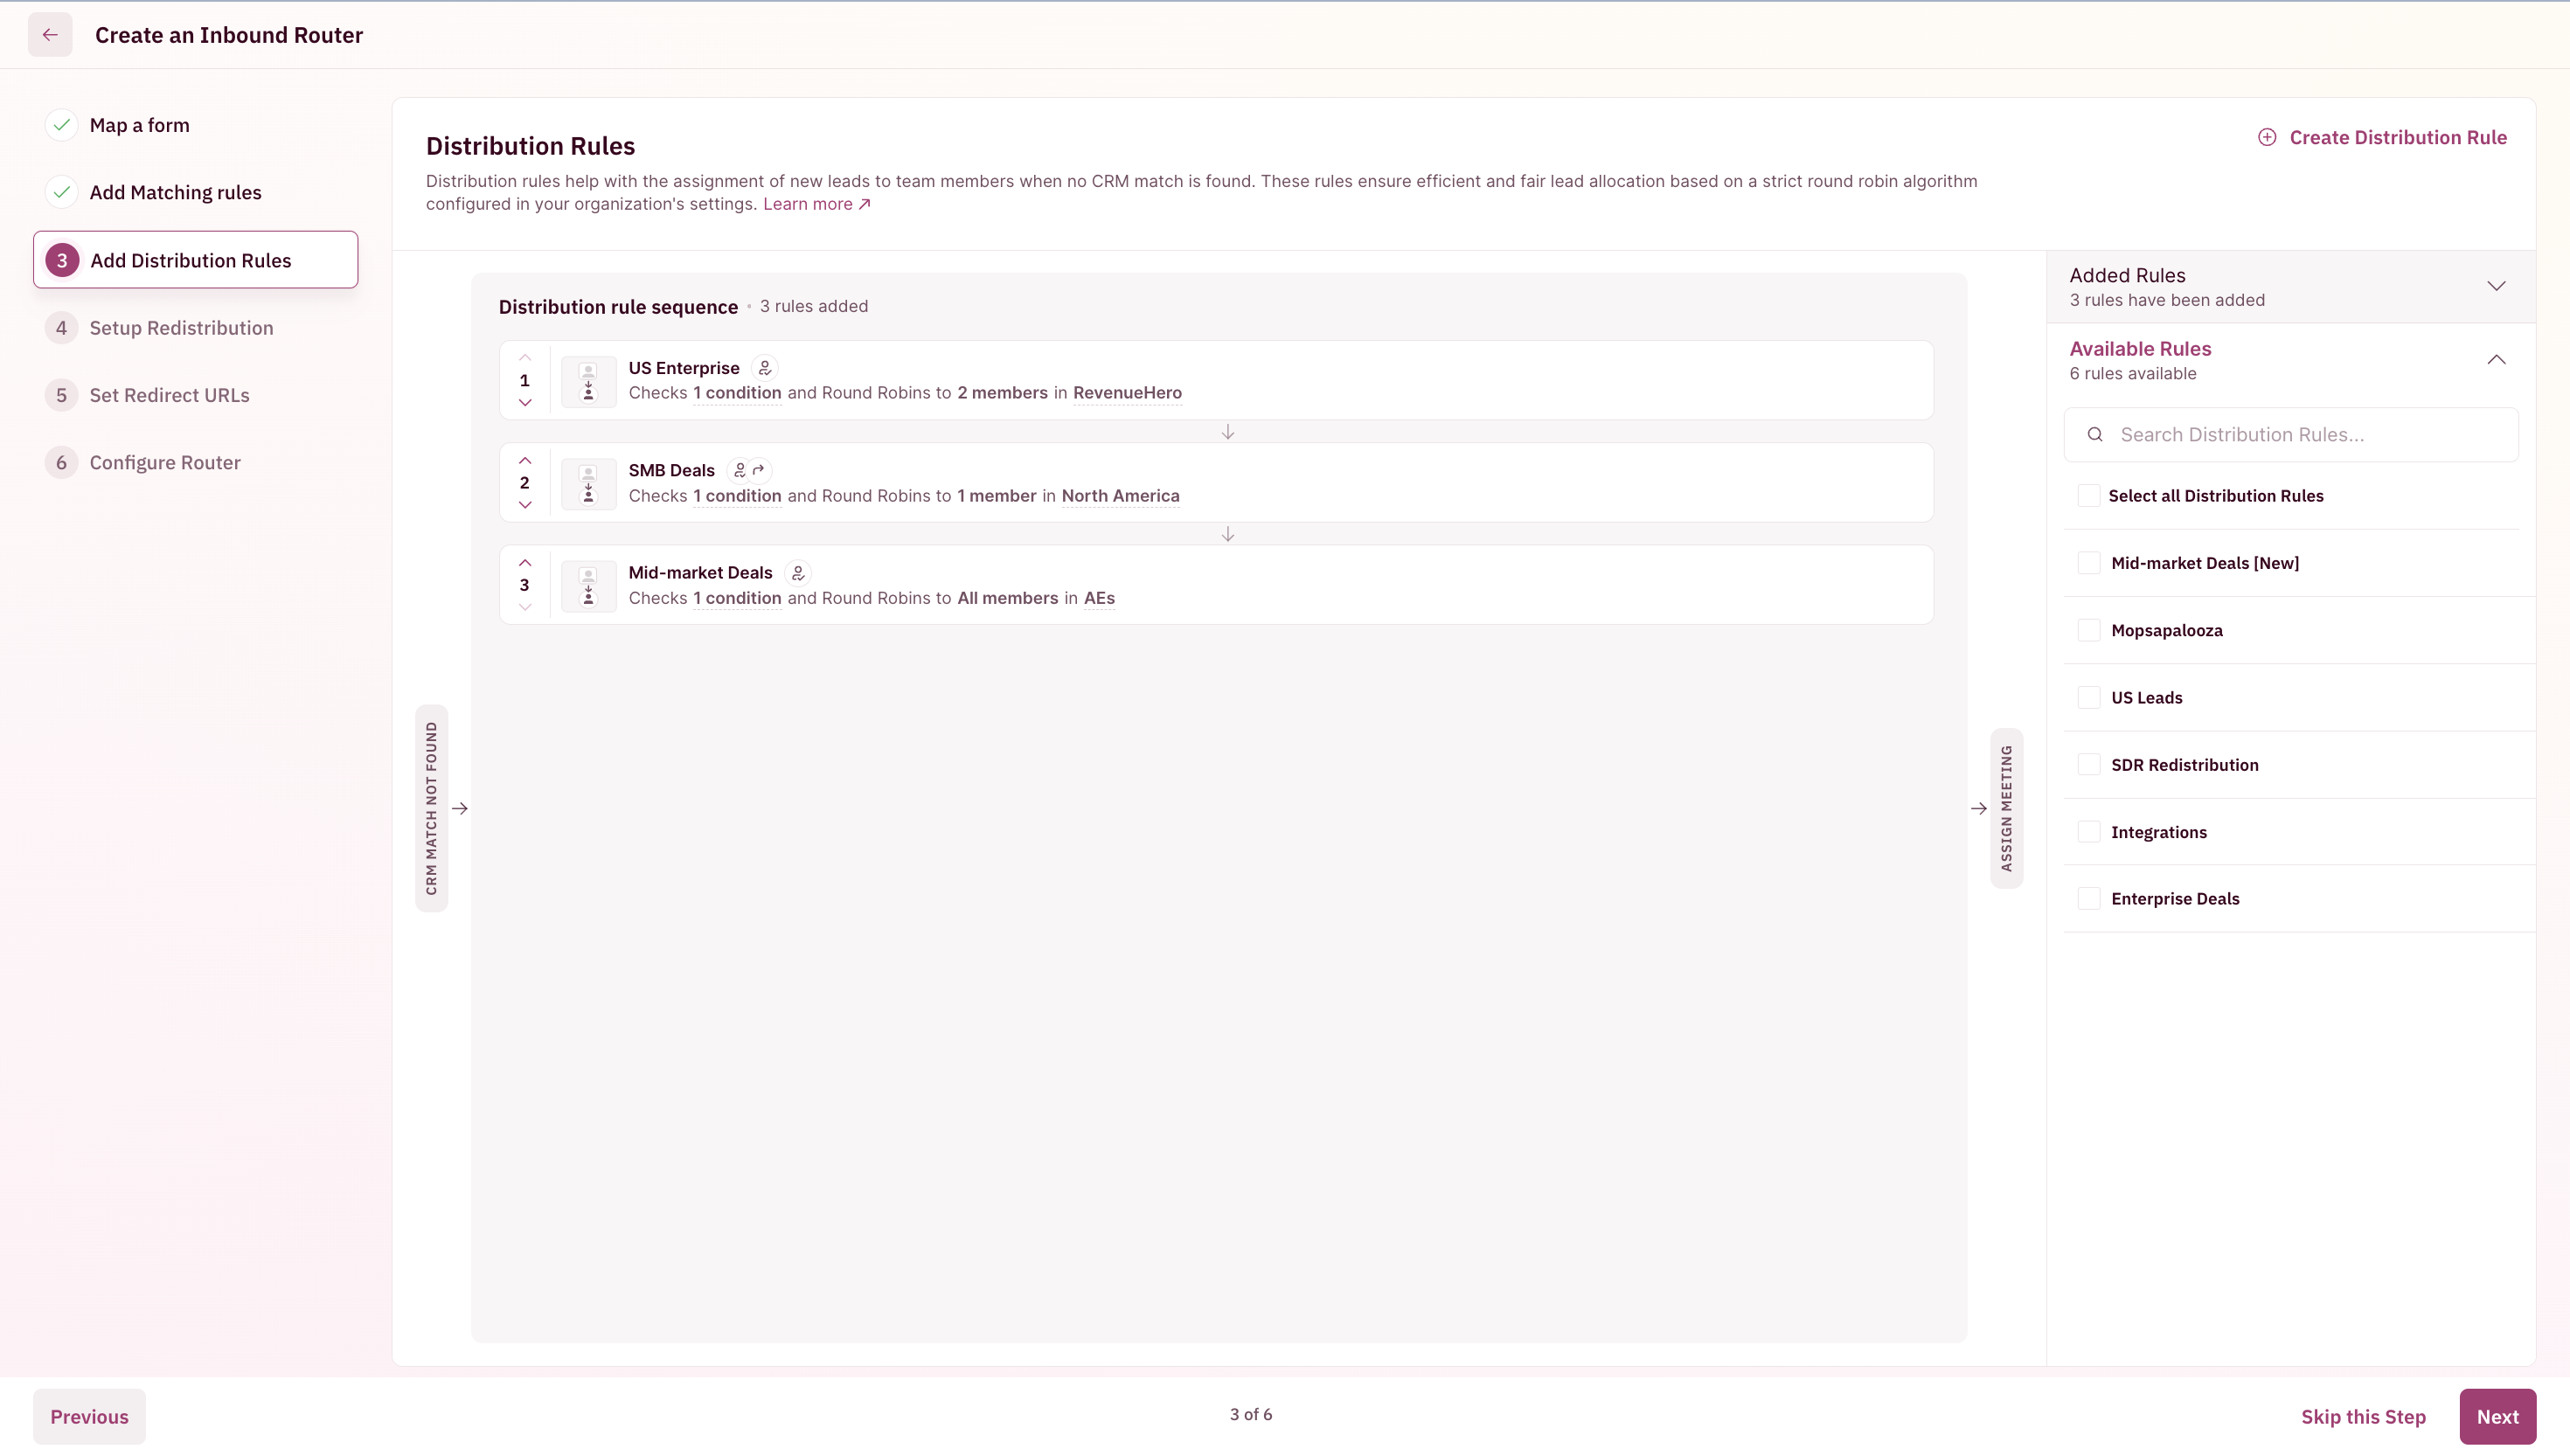
Distribution rules help assign a new owner to an incoming lead and their meeting. You can route based on a round-robin or your custom logic. You can keep it as simple or complex as you’d like and distribute it across all or specific members of a team. If you’ve already created a Distribution Rule, you can select the rule you’d like by clicking on the “Select Distribution Rules”. You can use the search functionality to look for a specific rule that you’d like to add to this router.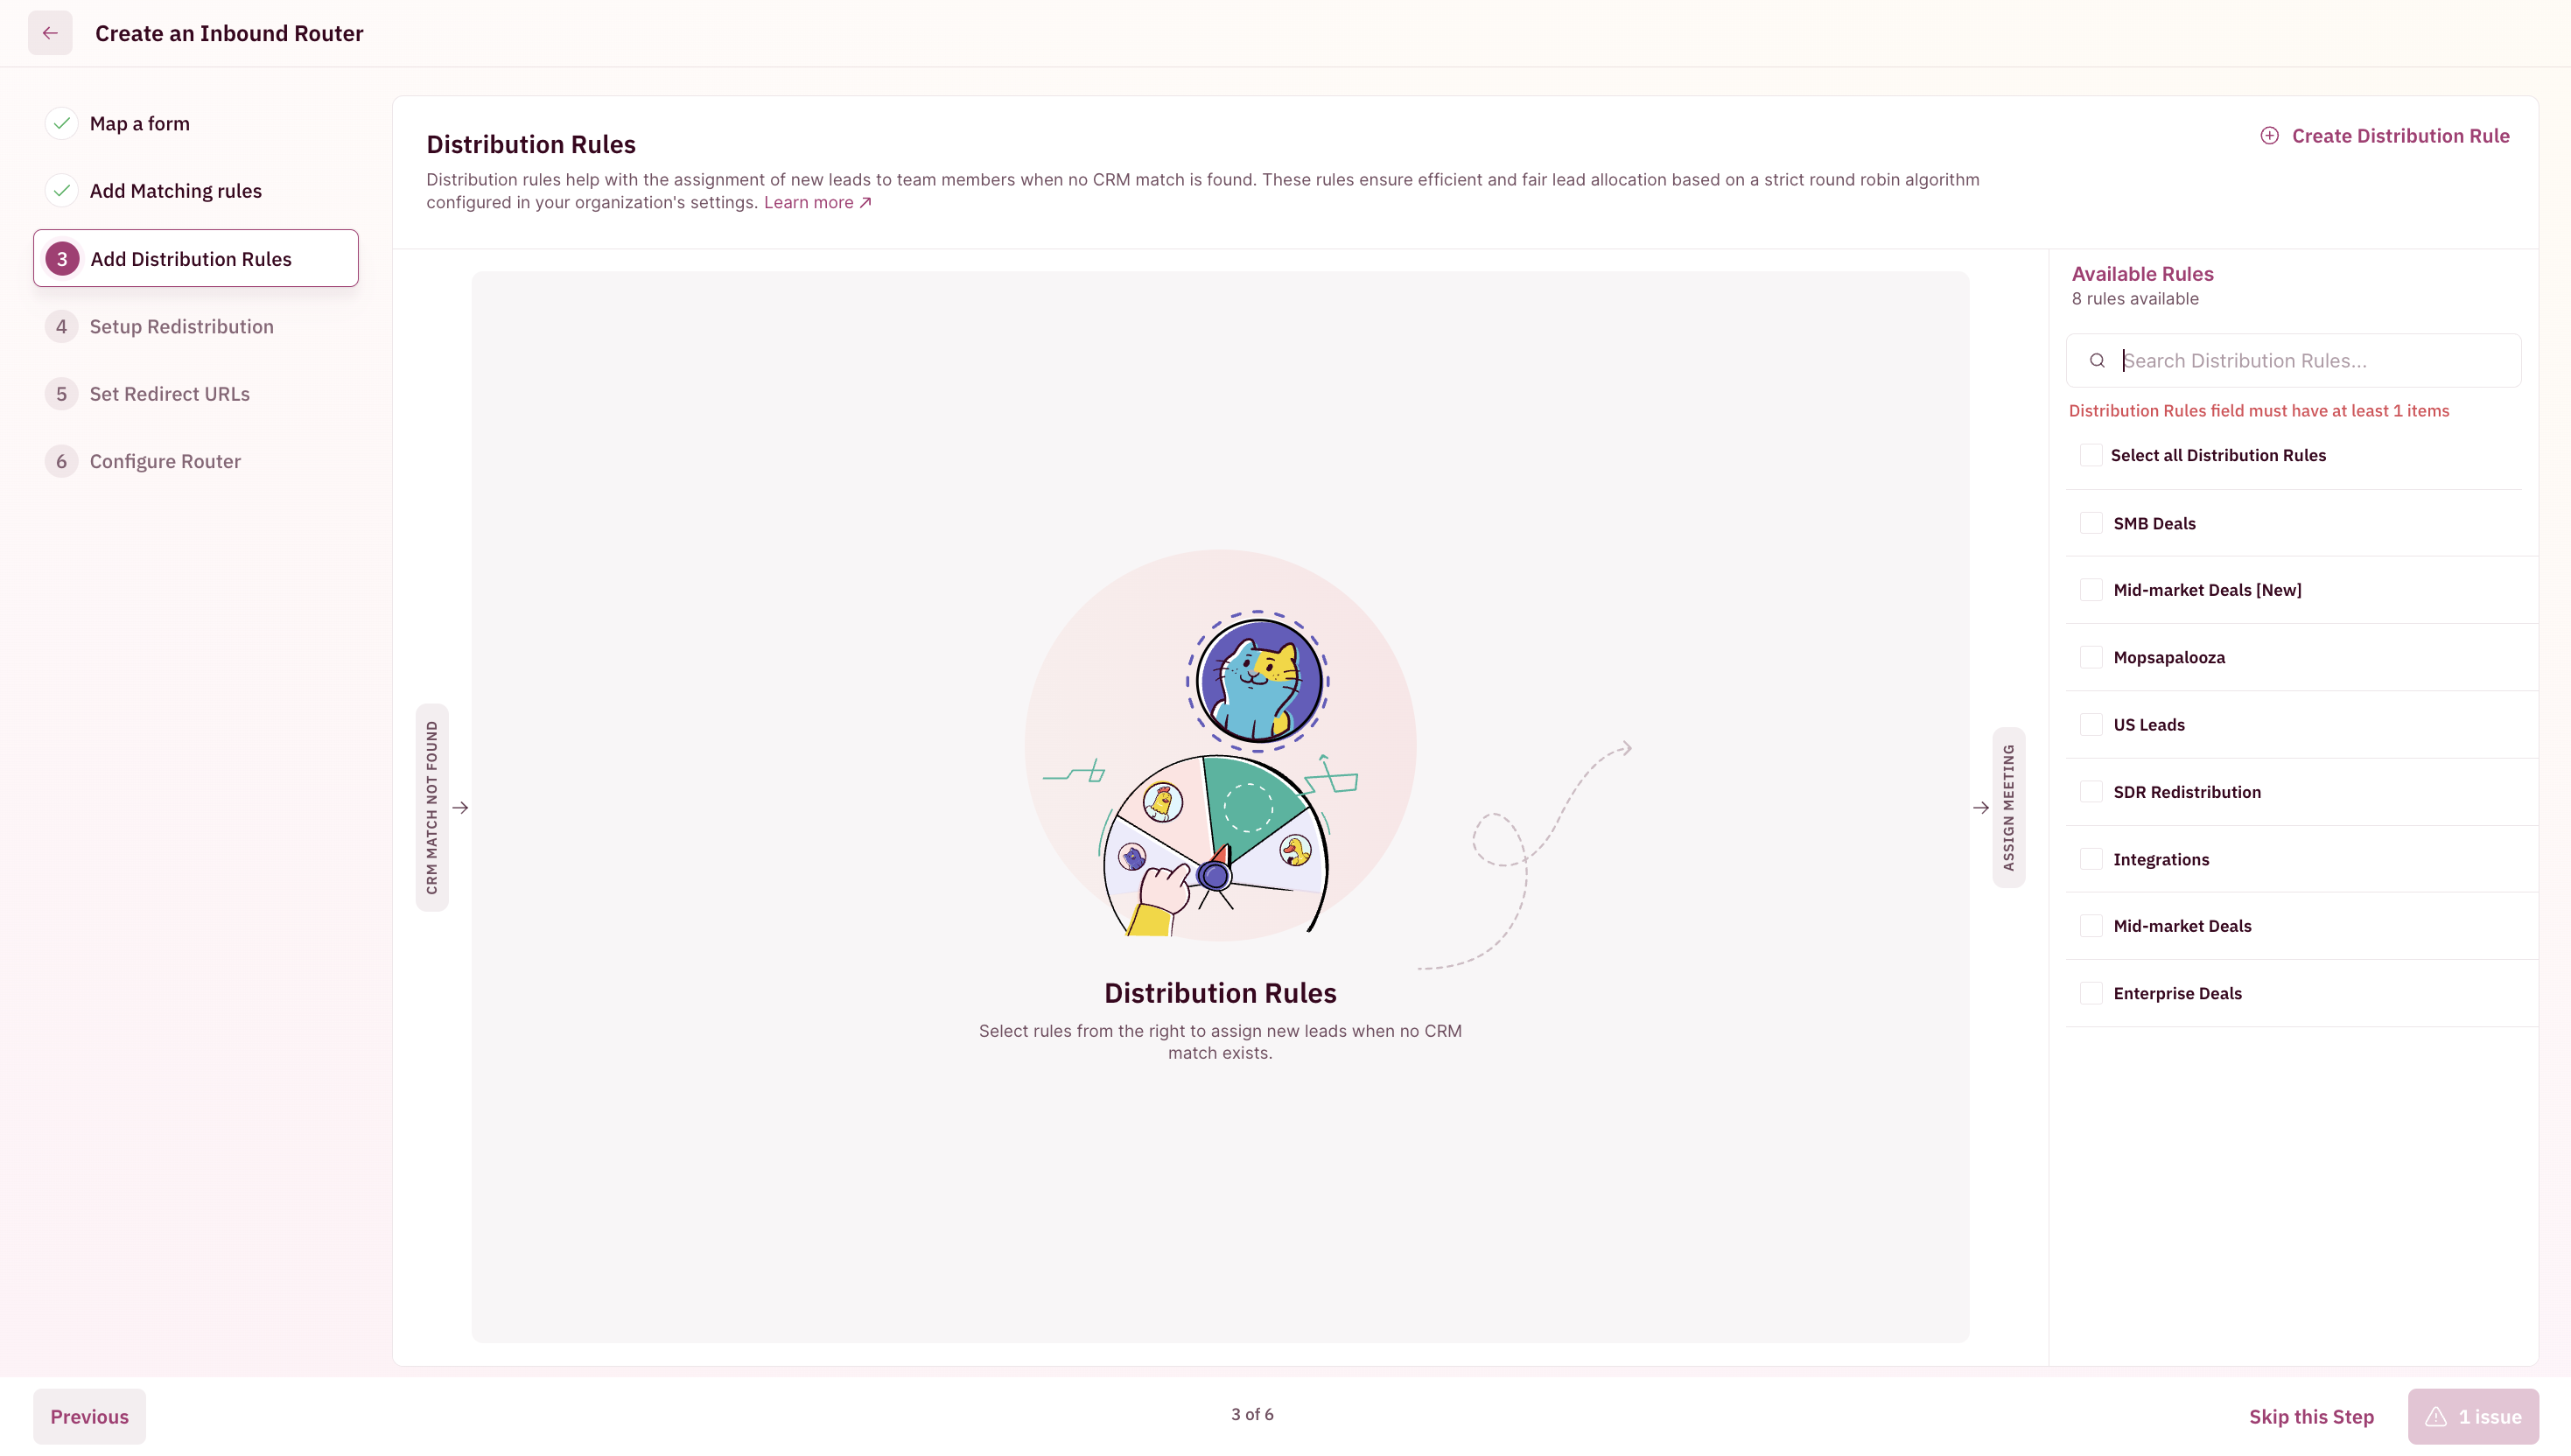
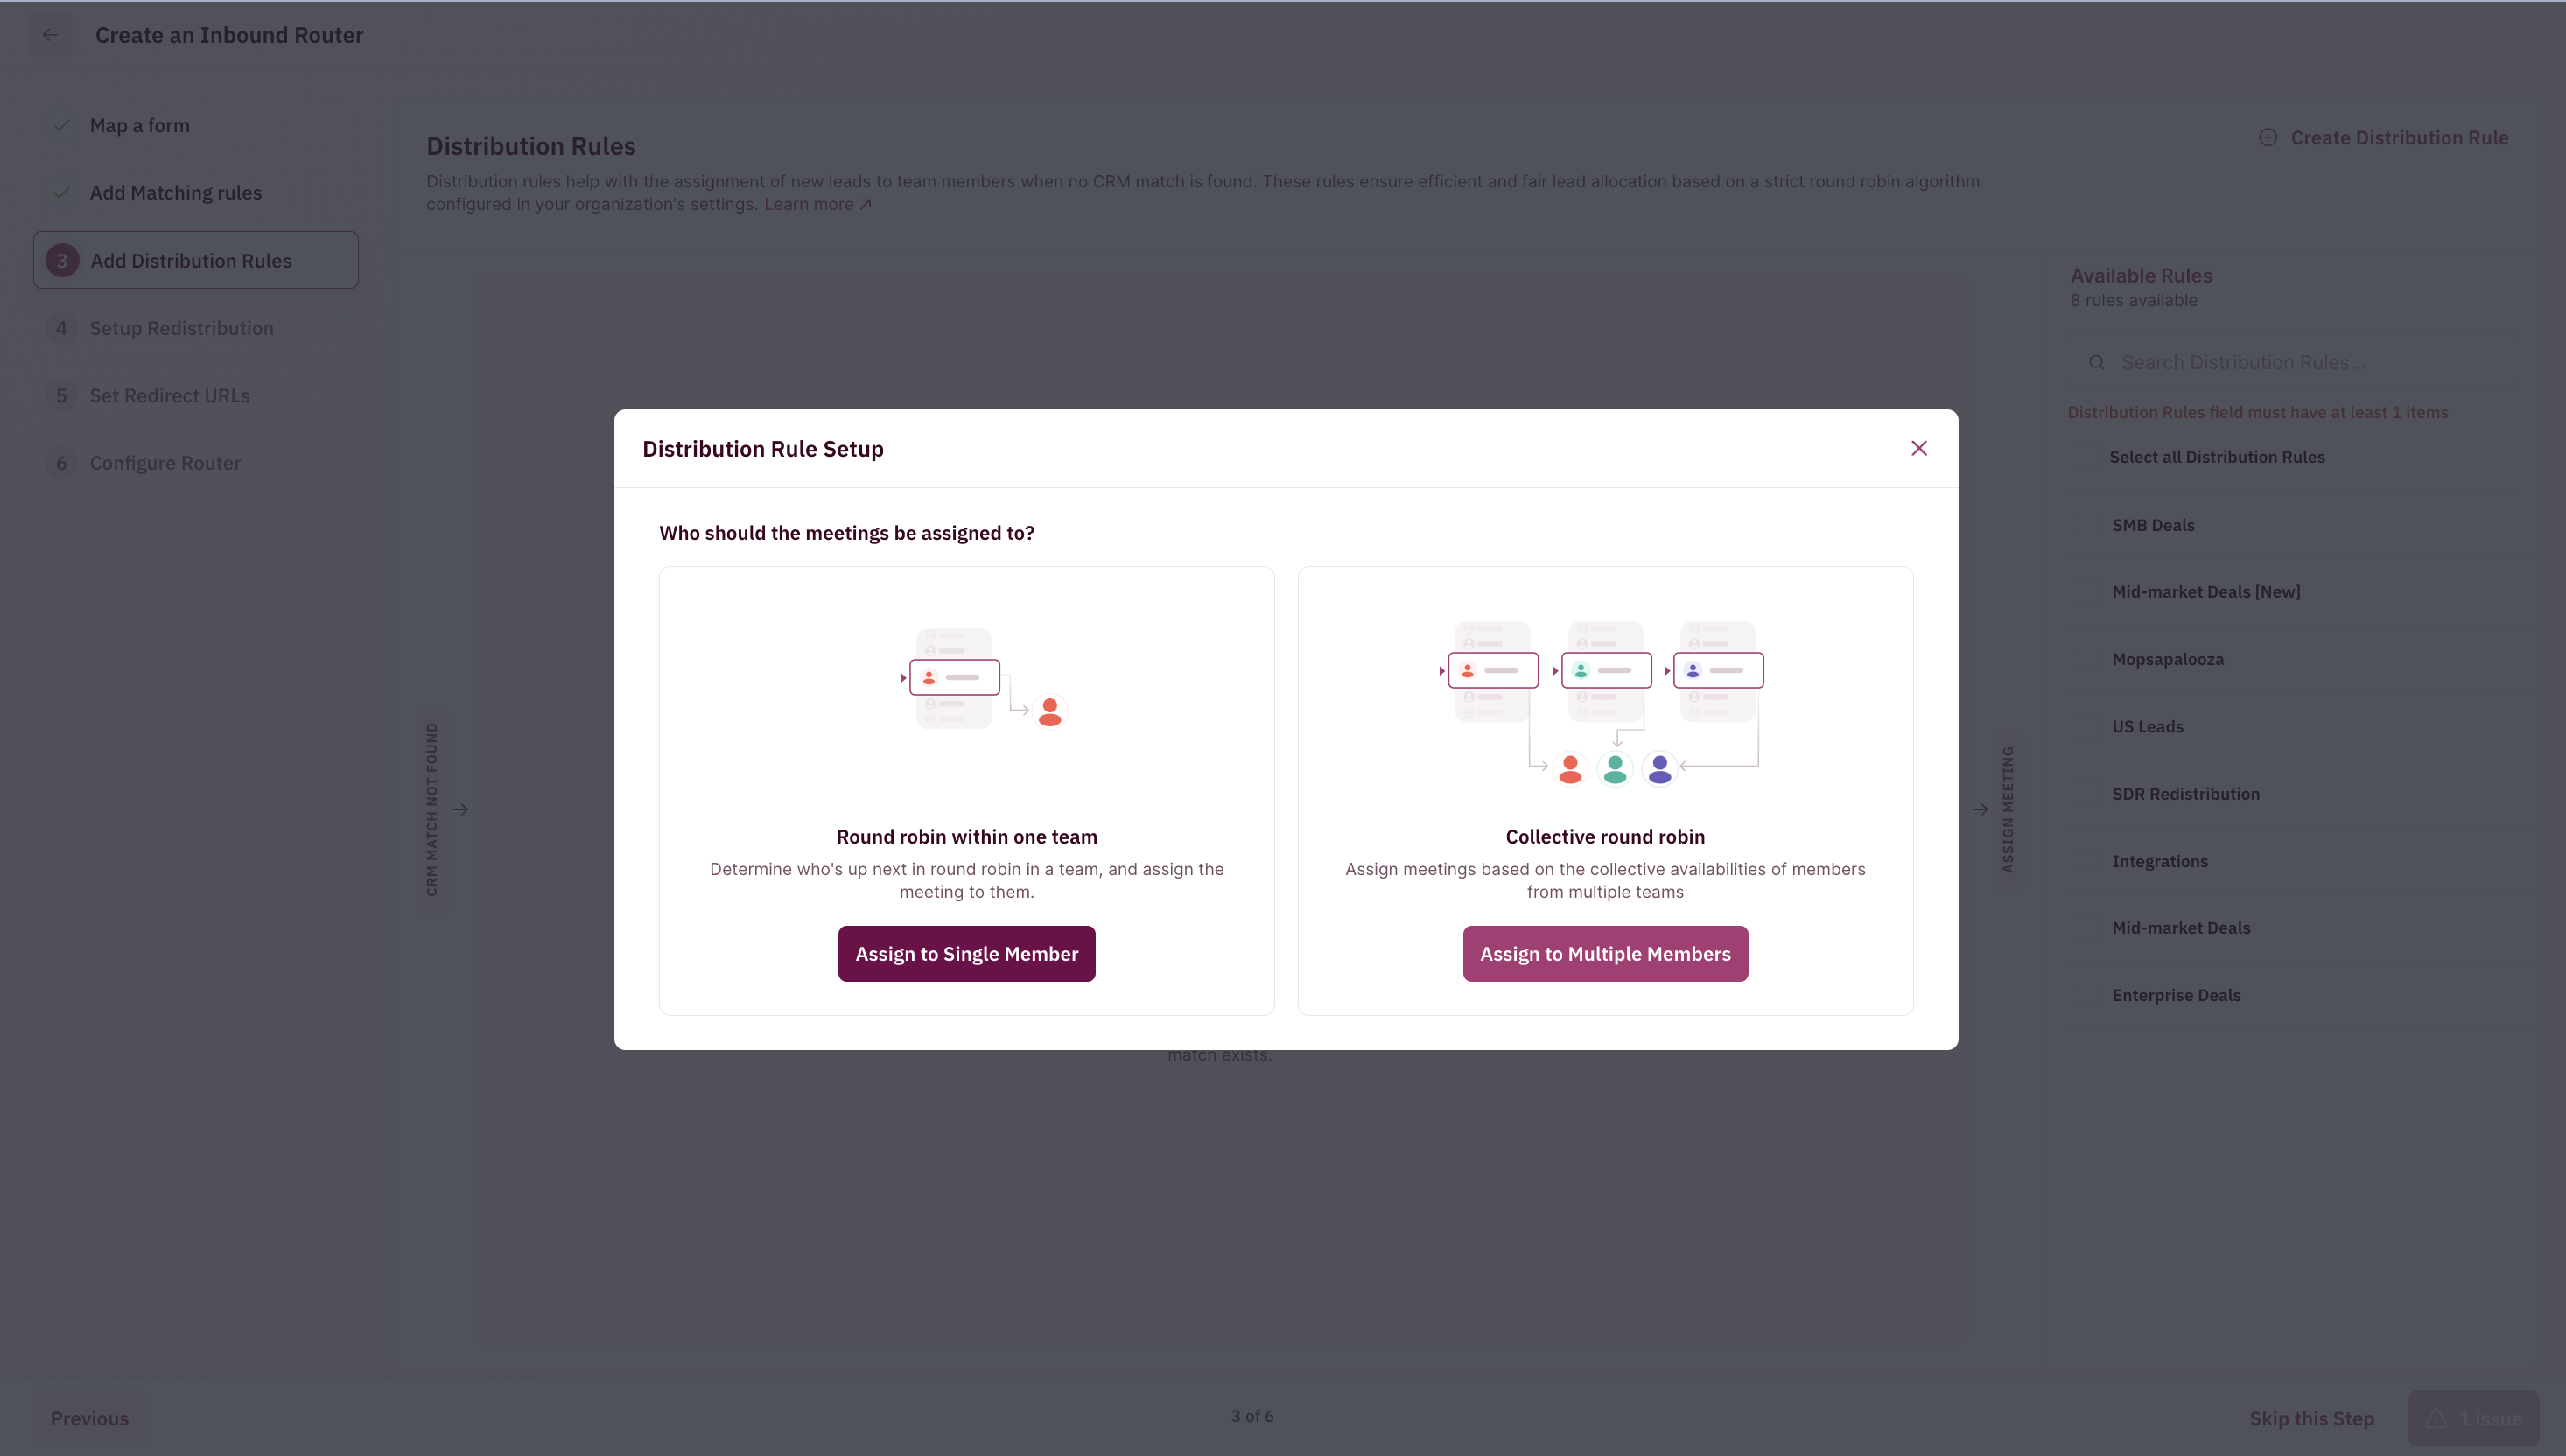
- Once you’ve clicked the ”Create New Rule” button, you’ll see a pop-up for the Distribution Rule Setup.
- Click on “Assign to Single Member”. This means the meeting will get assigned to a single member who is available at the chosen time, from a single Round Robin list.
If you’d like to assign the meeting to members from two different teams, click here for steps to set-up Group Round Robin.
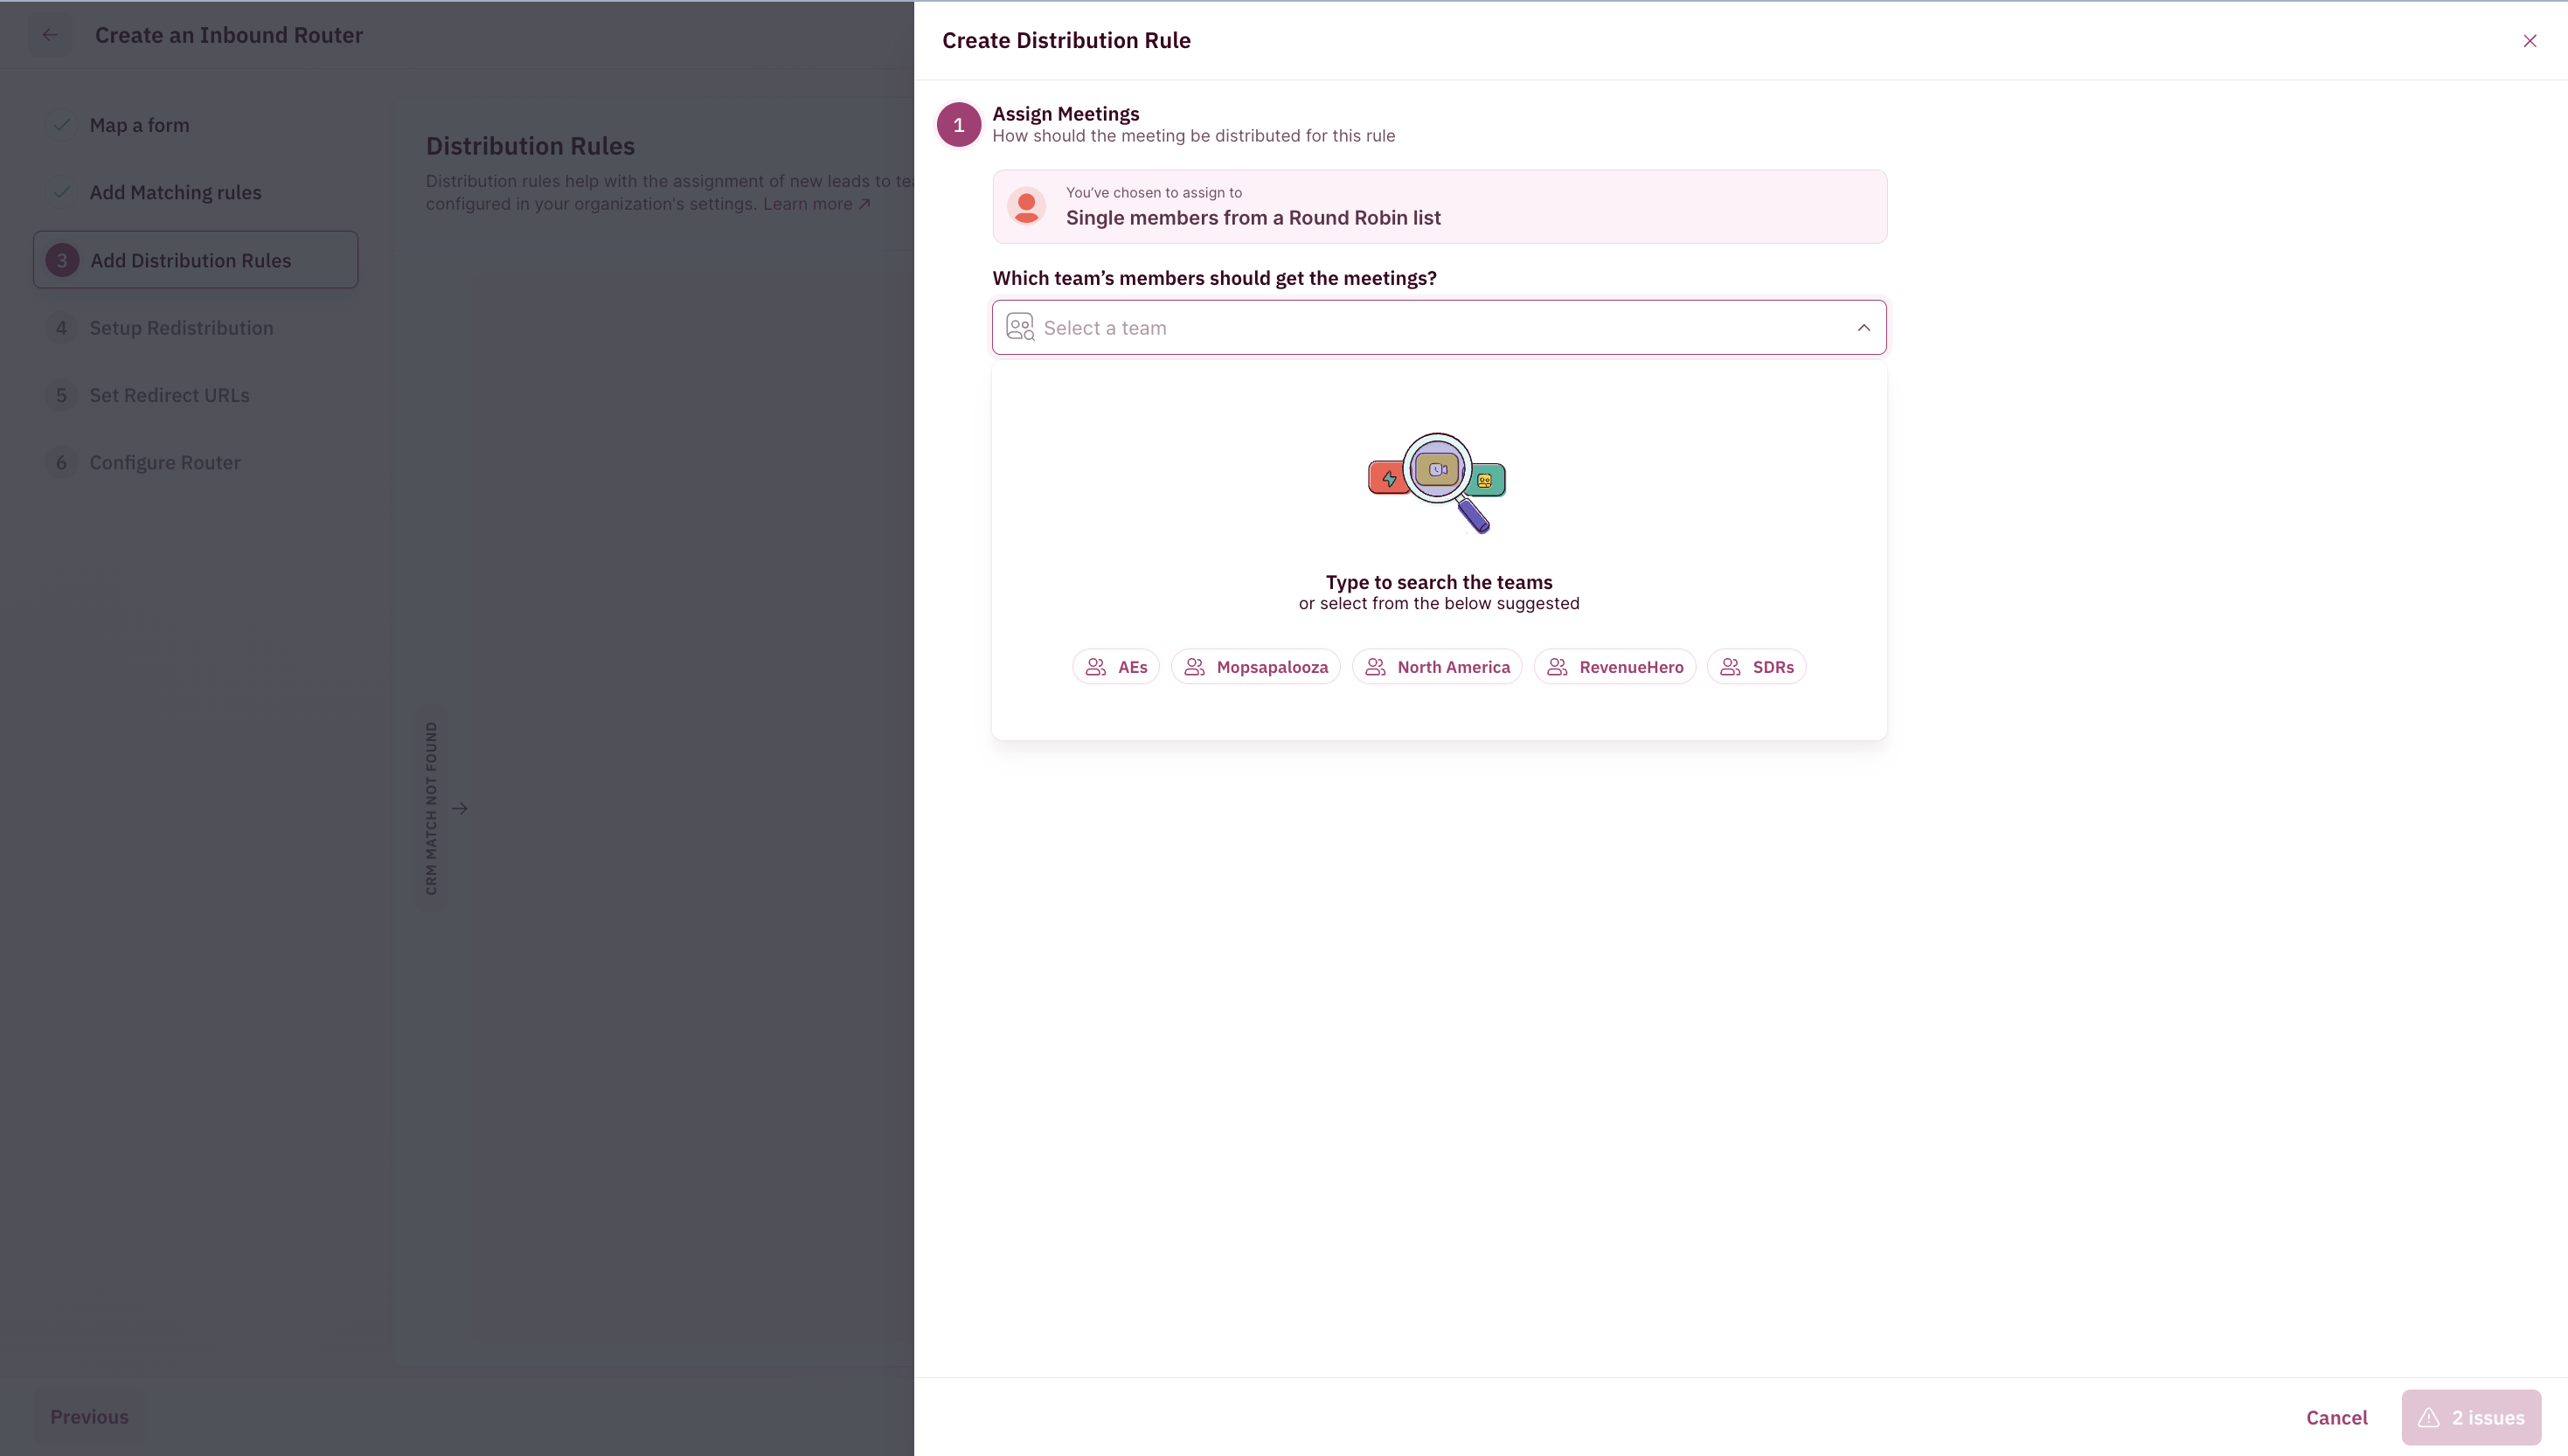
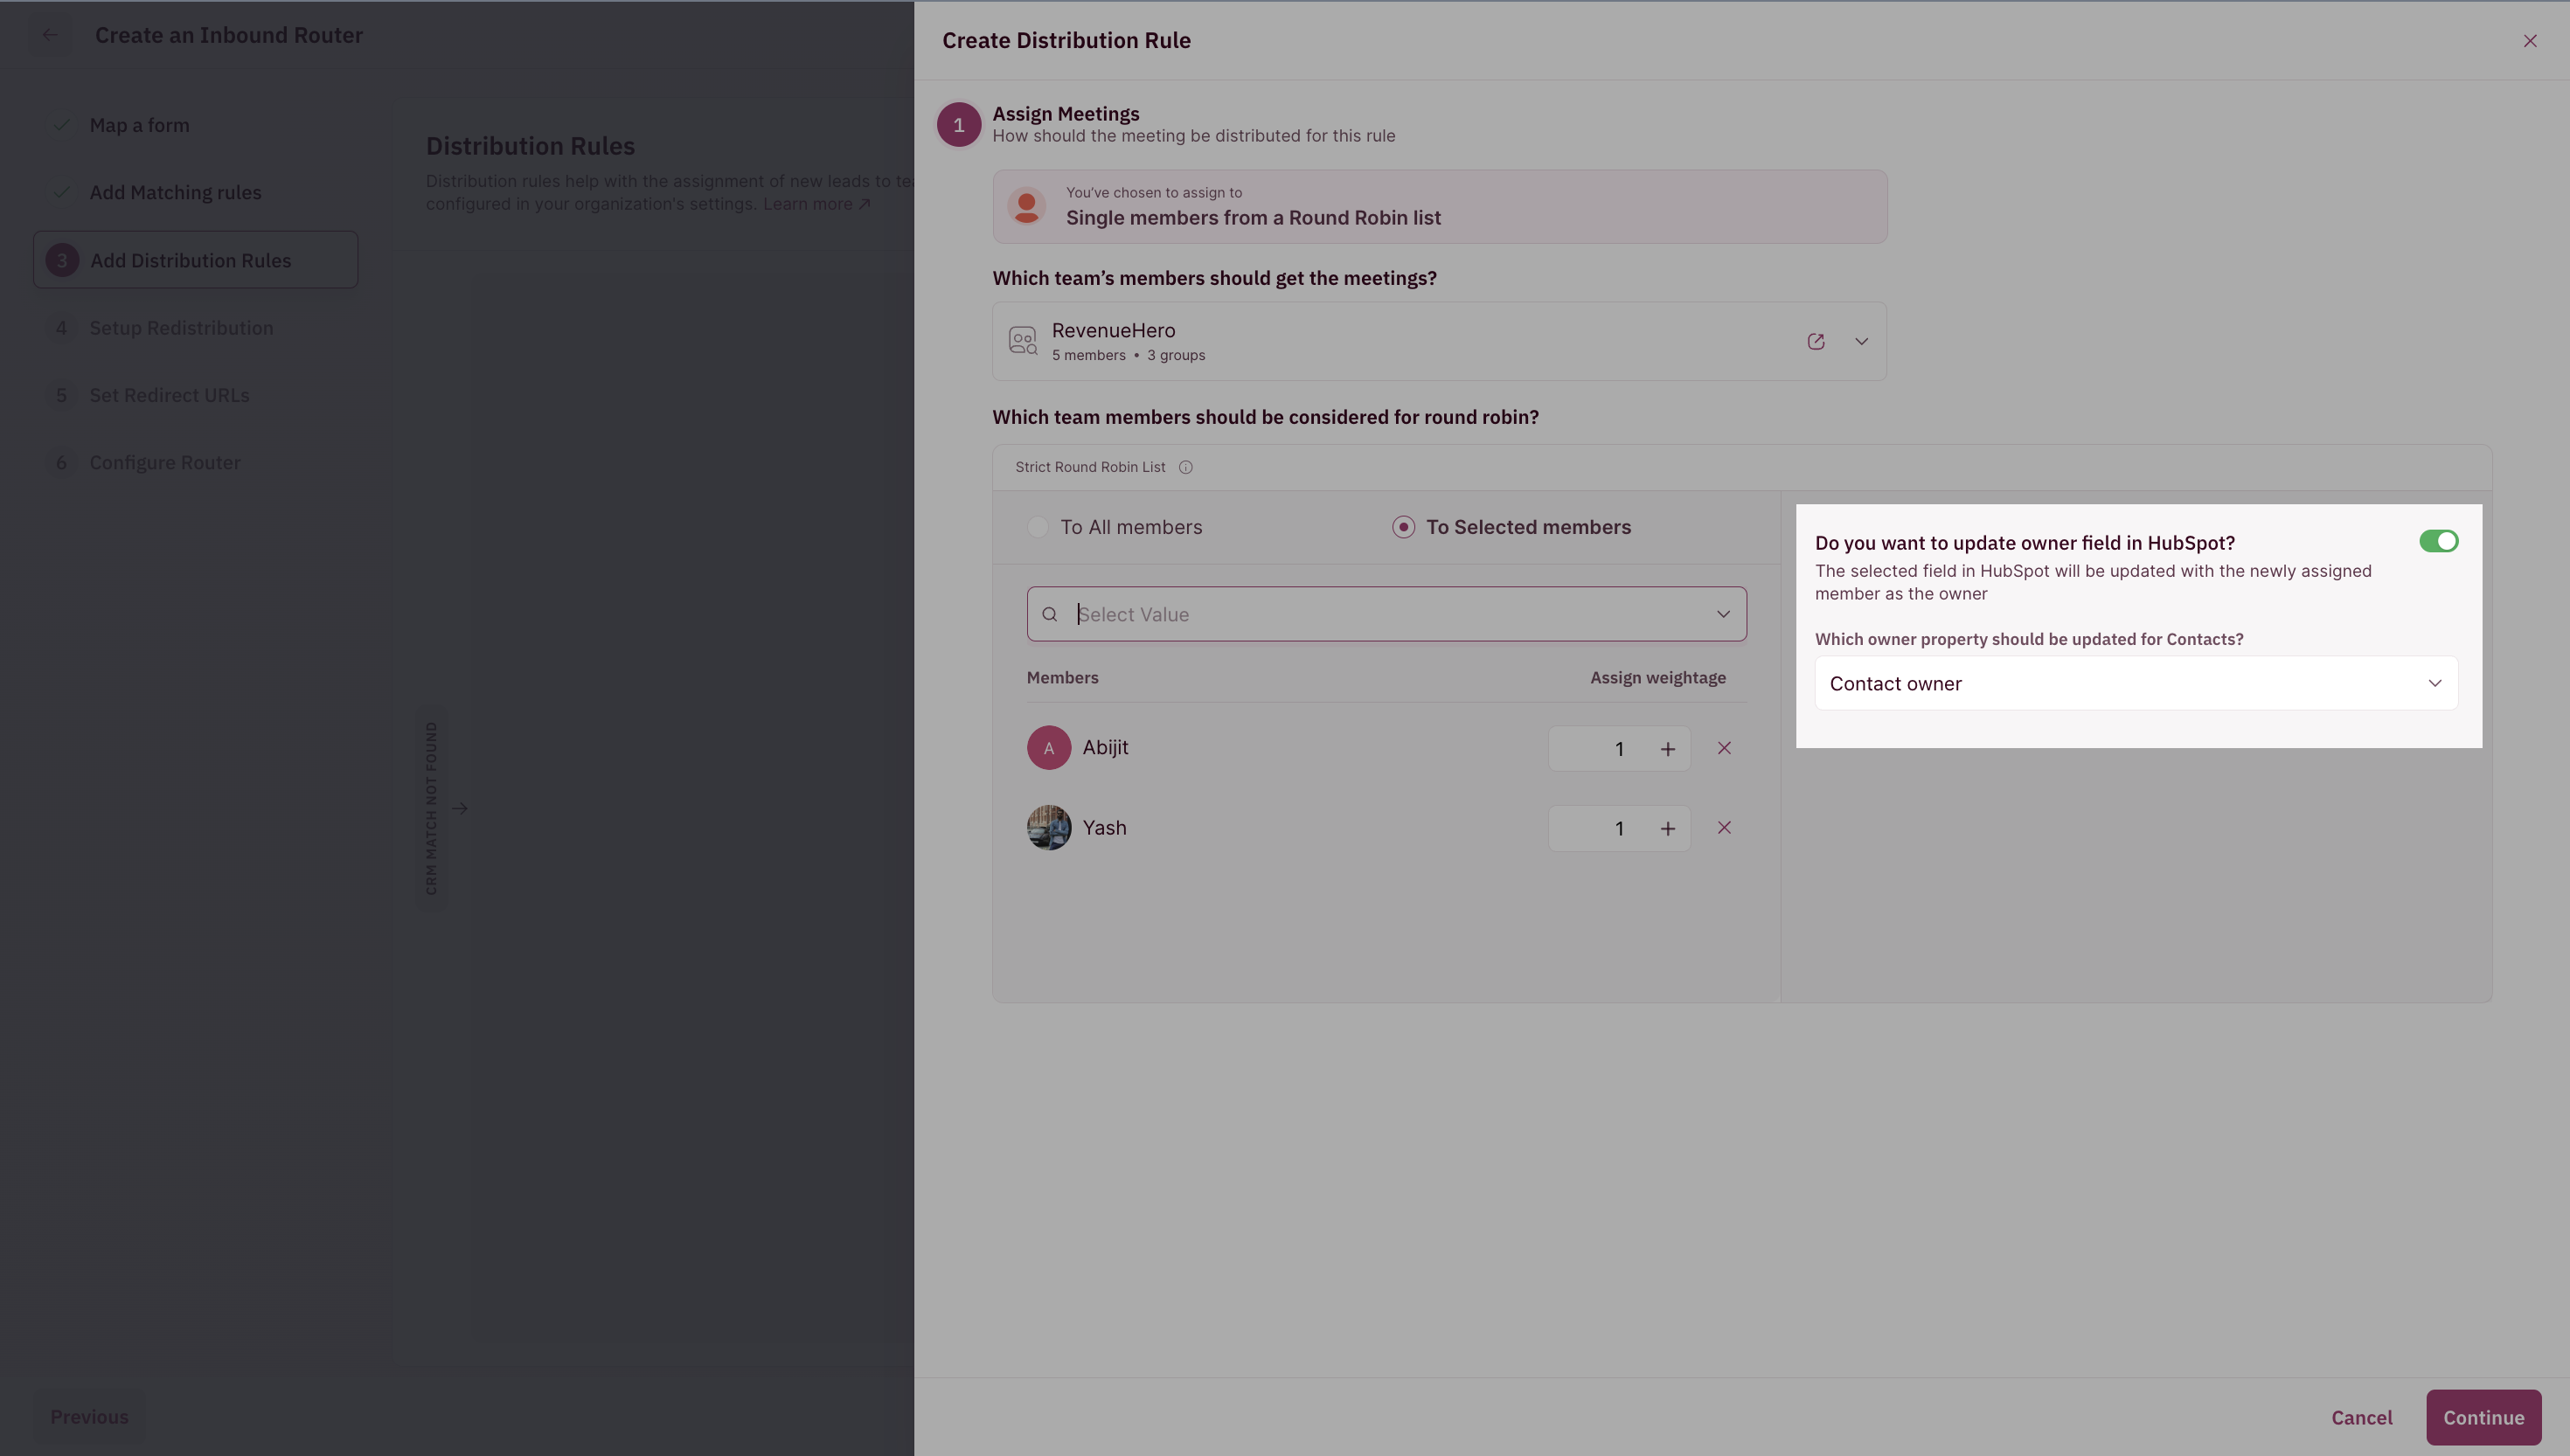
- Now, you need to decide how you want meetings to be distributed for this particular rule.
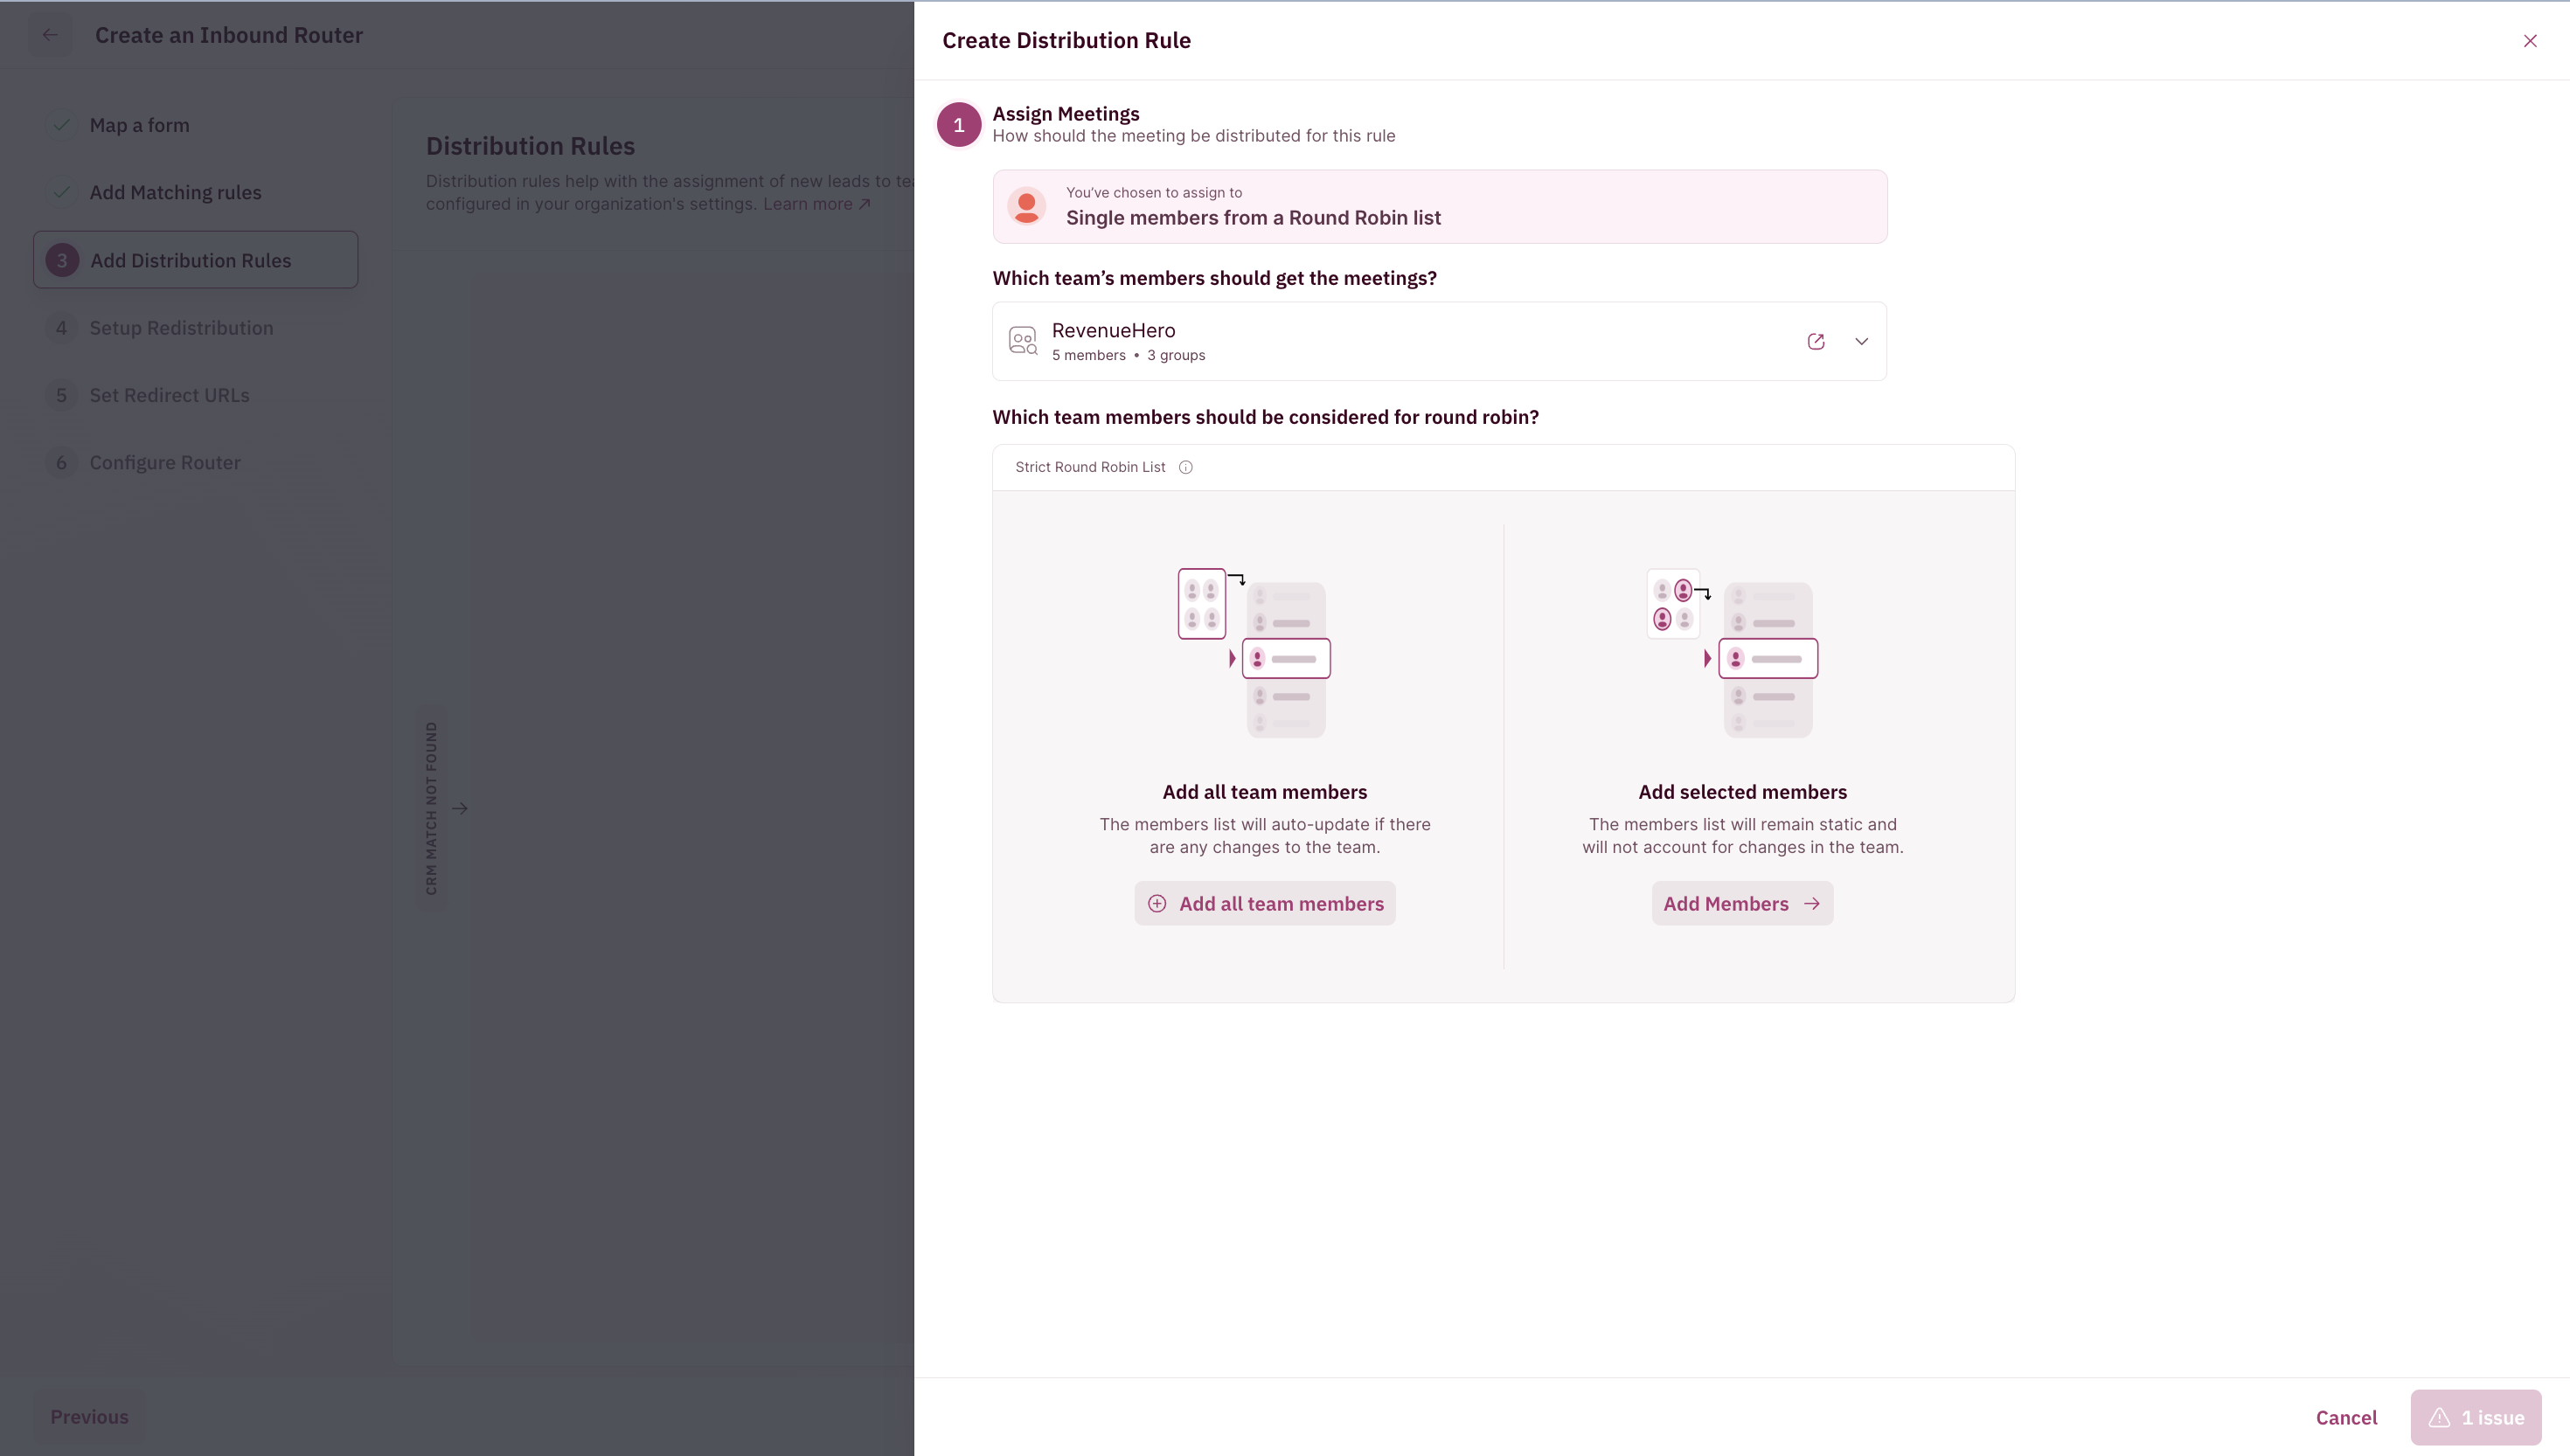
- In the drop-down choose the Team from which a single member will be assigned the meeting based on a flexible round-robin.
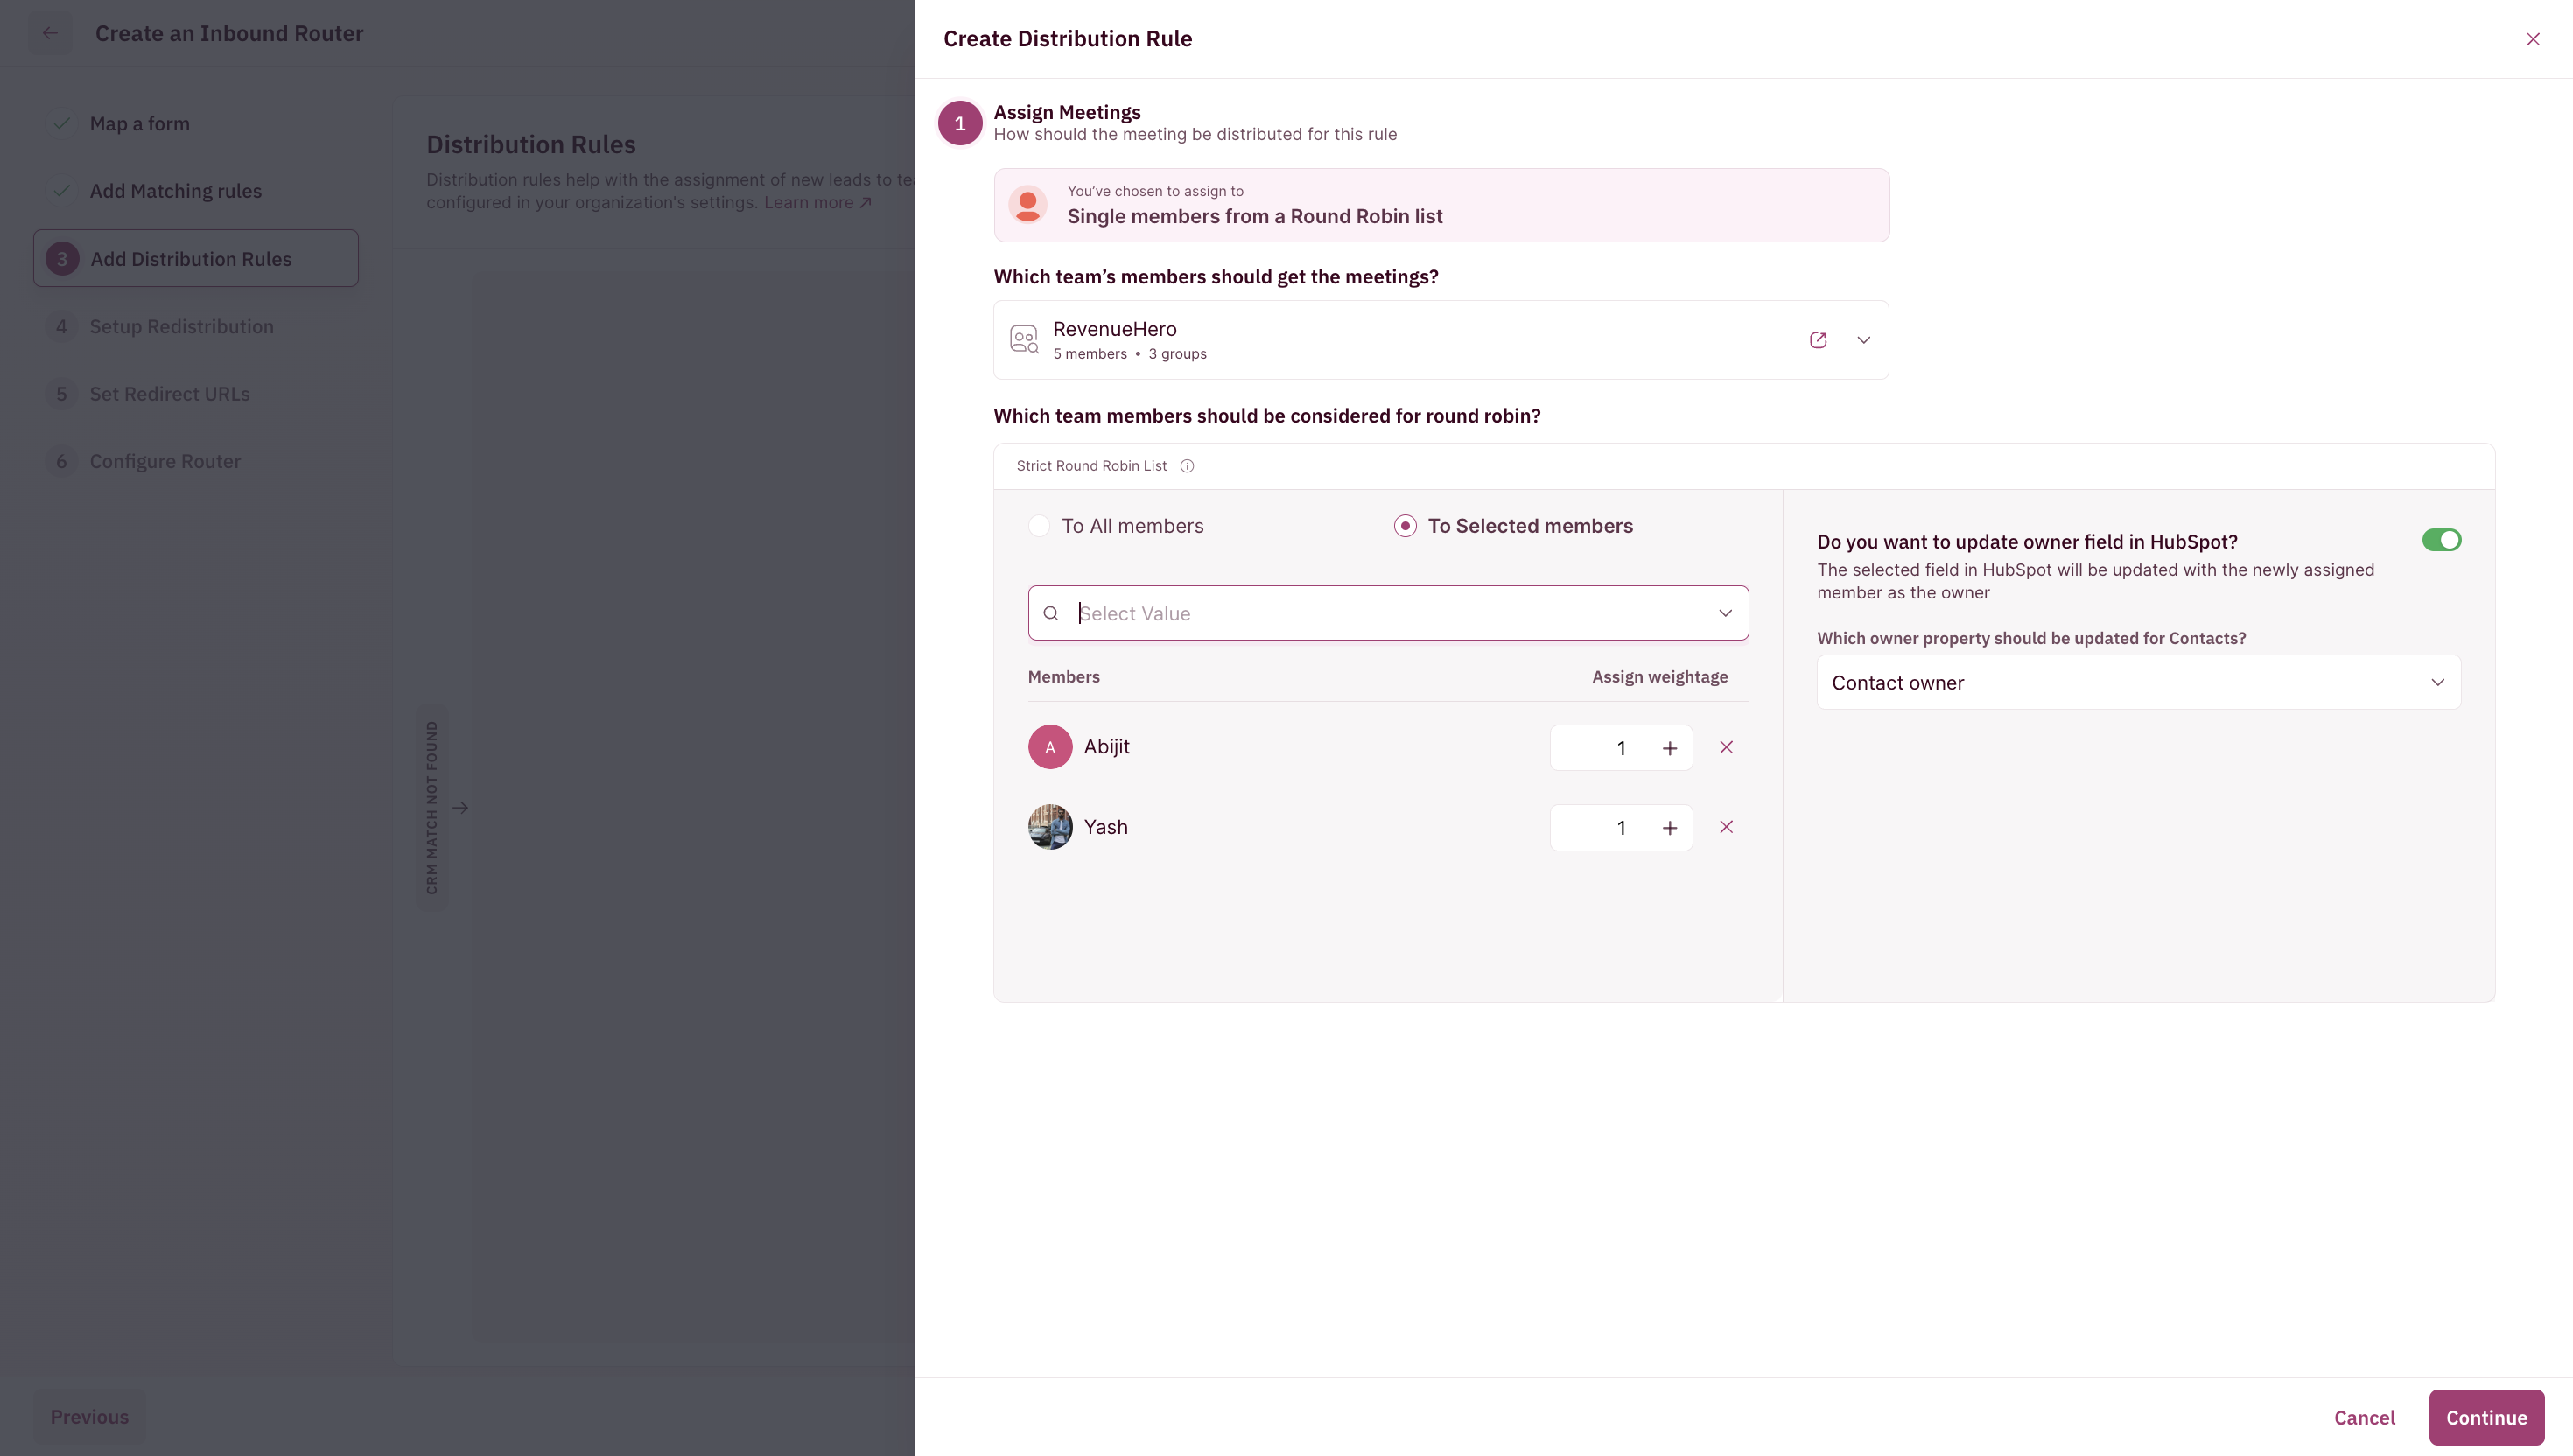
5. Toggle on/off the option to update the meeting owner in your CRM. Choose a user field if you’d like to change it from the default option of Contact Owner .
- Next, you’ll have to set the conditions you want to check. This is where you tell RevenueHero which property in your CRM to look up to set this condition.
- Set conditions based on CRM fields or Form Inputs or Enriched Fields that need to be checked.
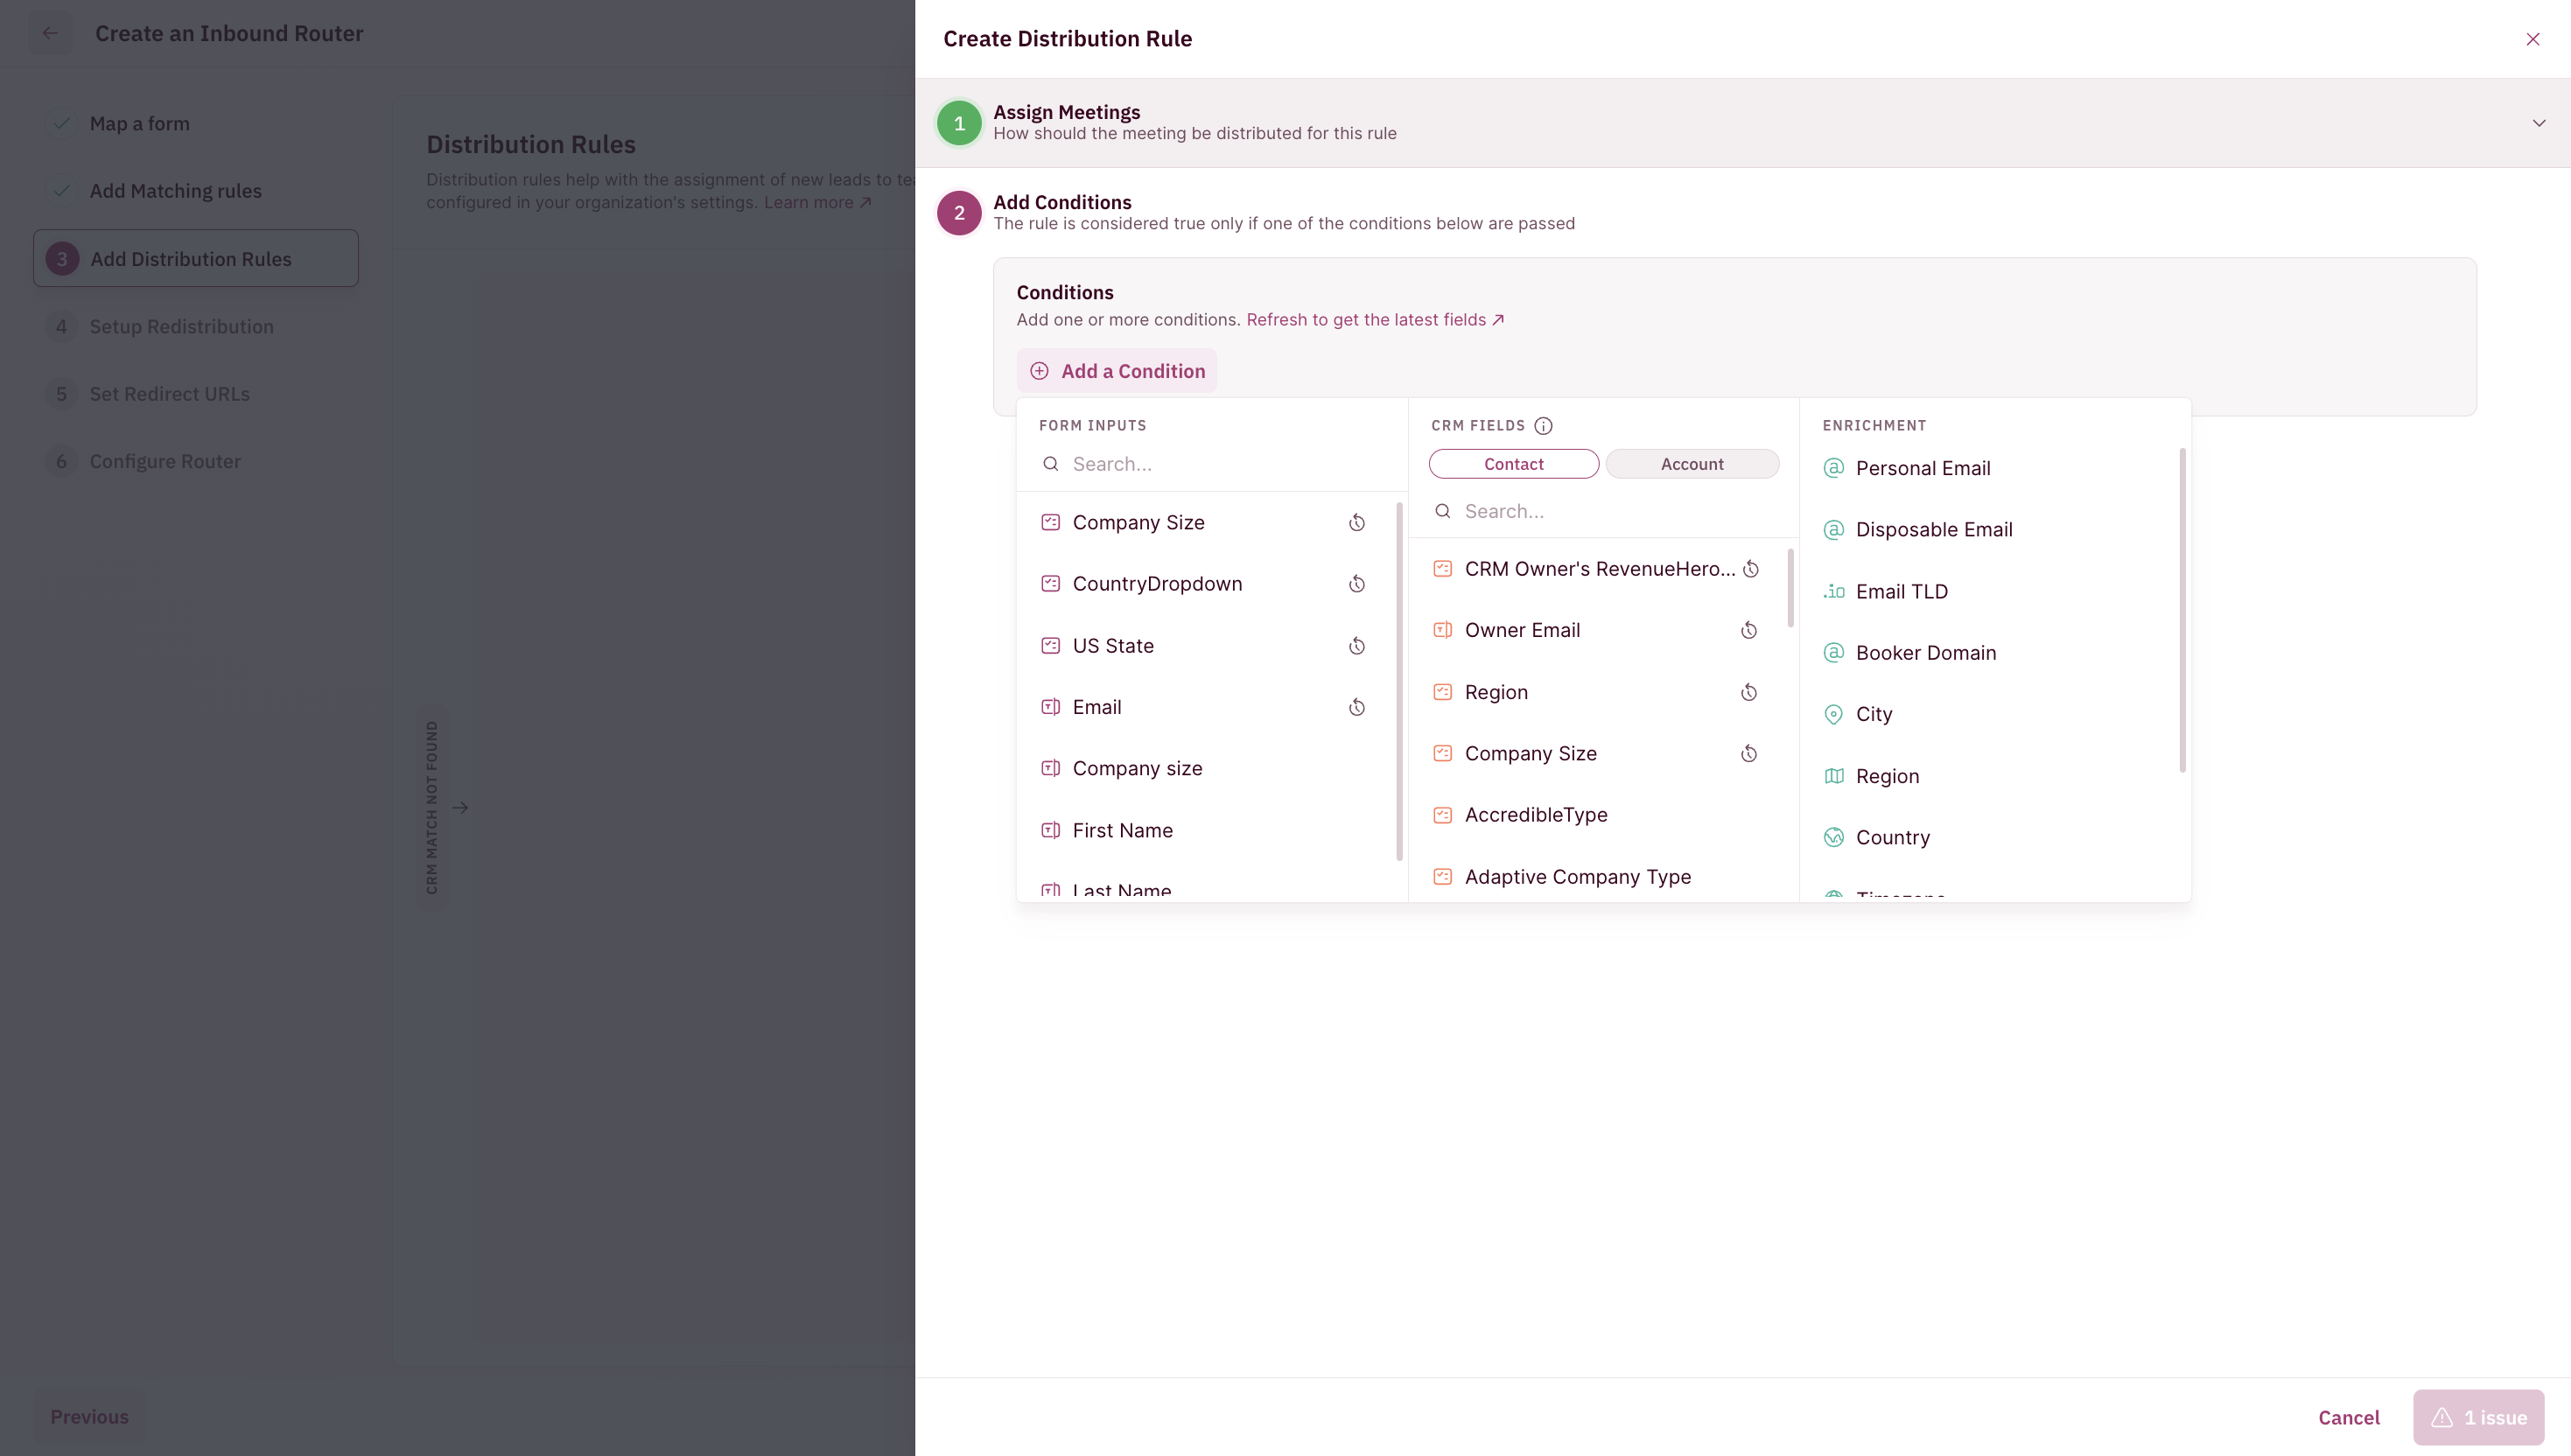
8. Click “Continue”.
9. Give your Distribution Rule a name. For example, if you’re creating a Distribution Rule for your US Enterprise sales, you can name it US Enterprise .
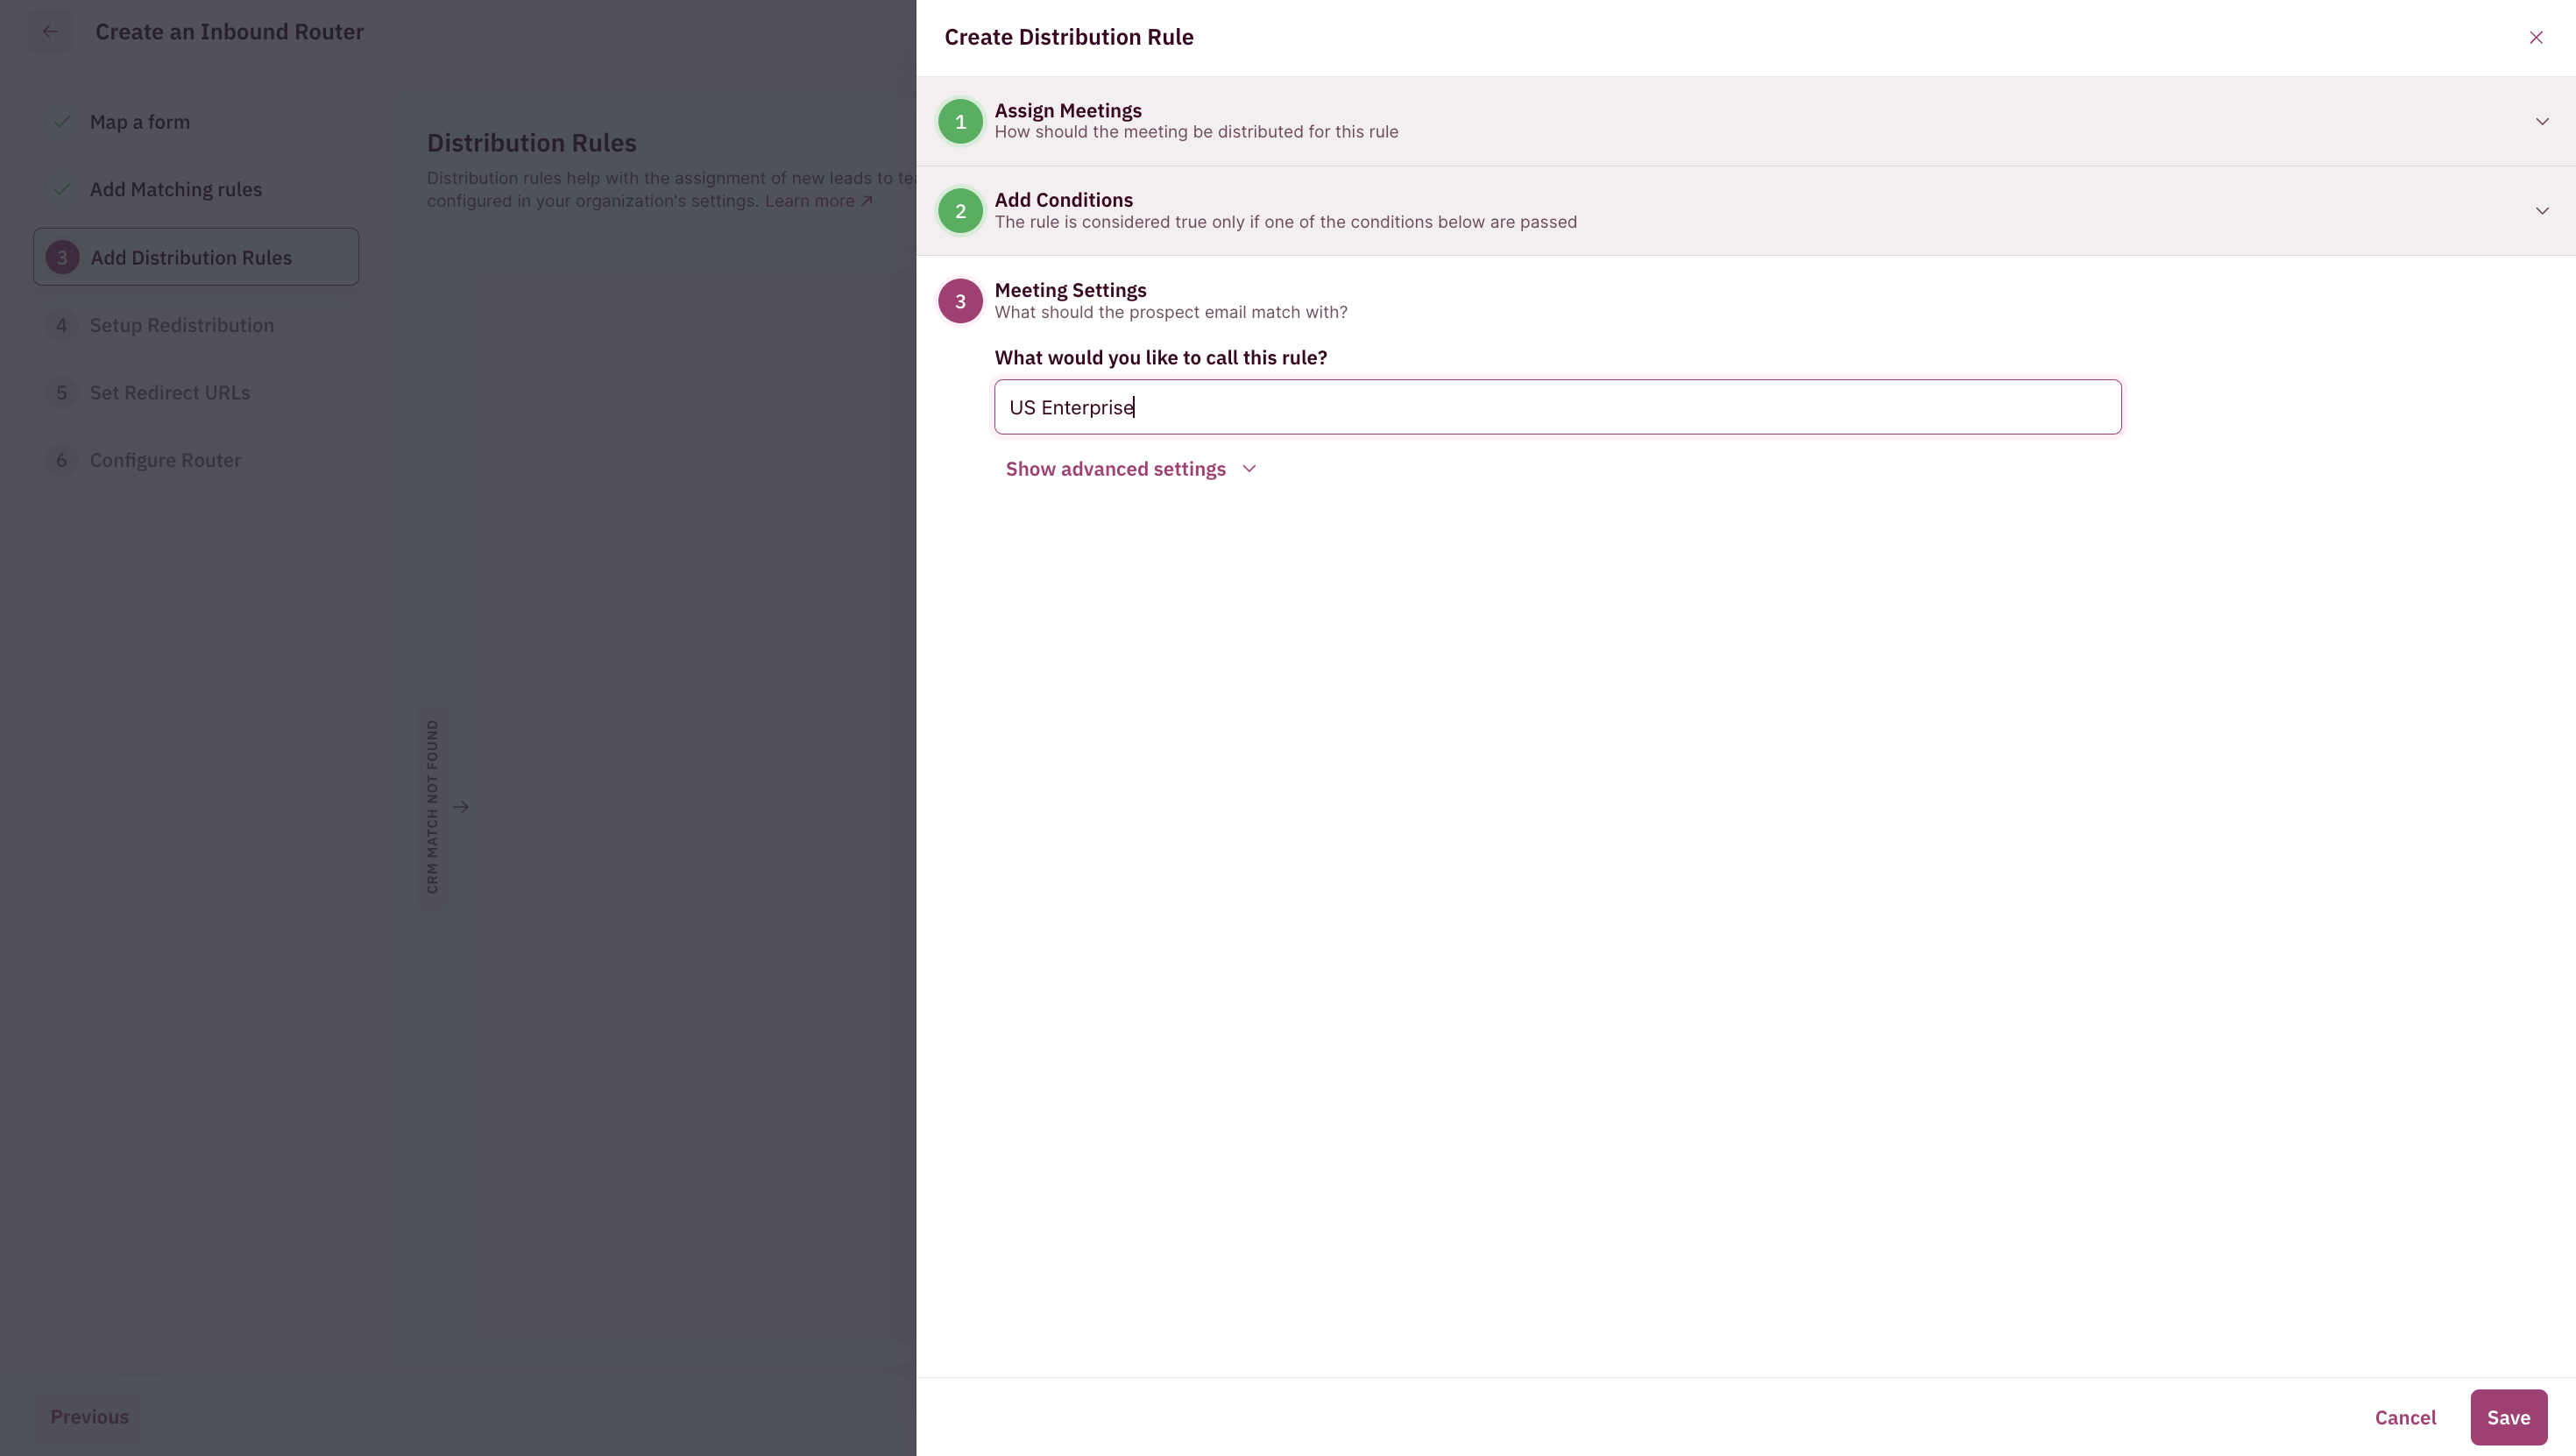
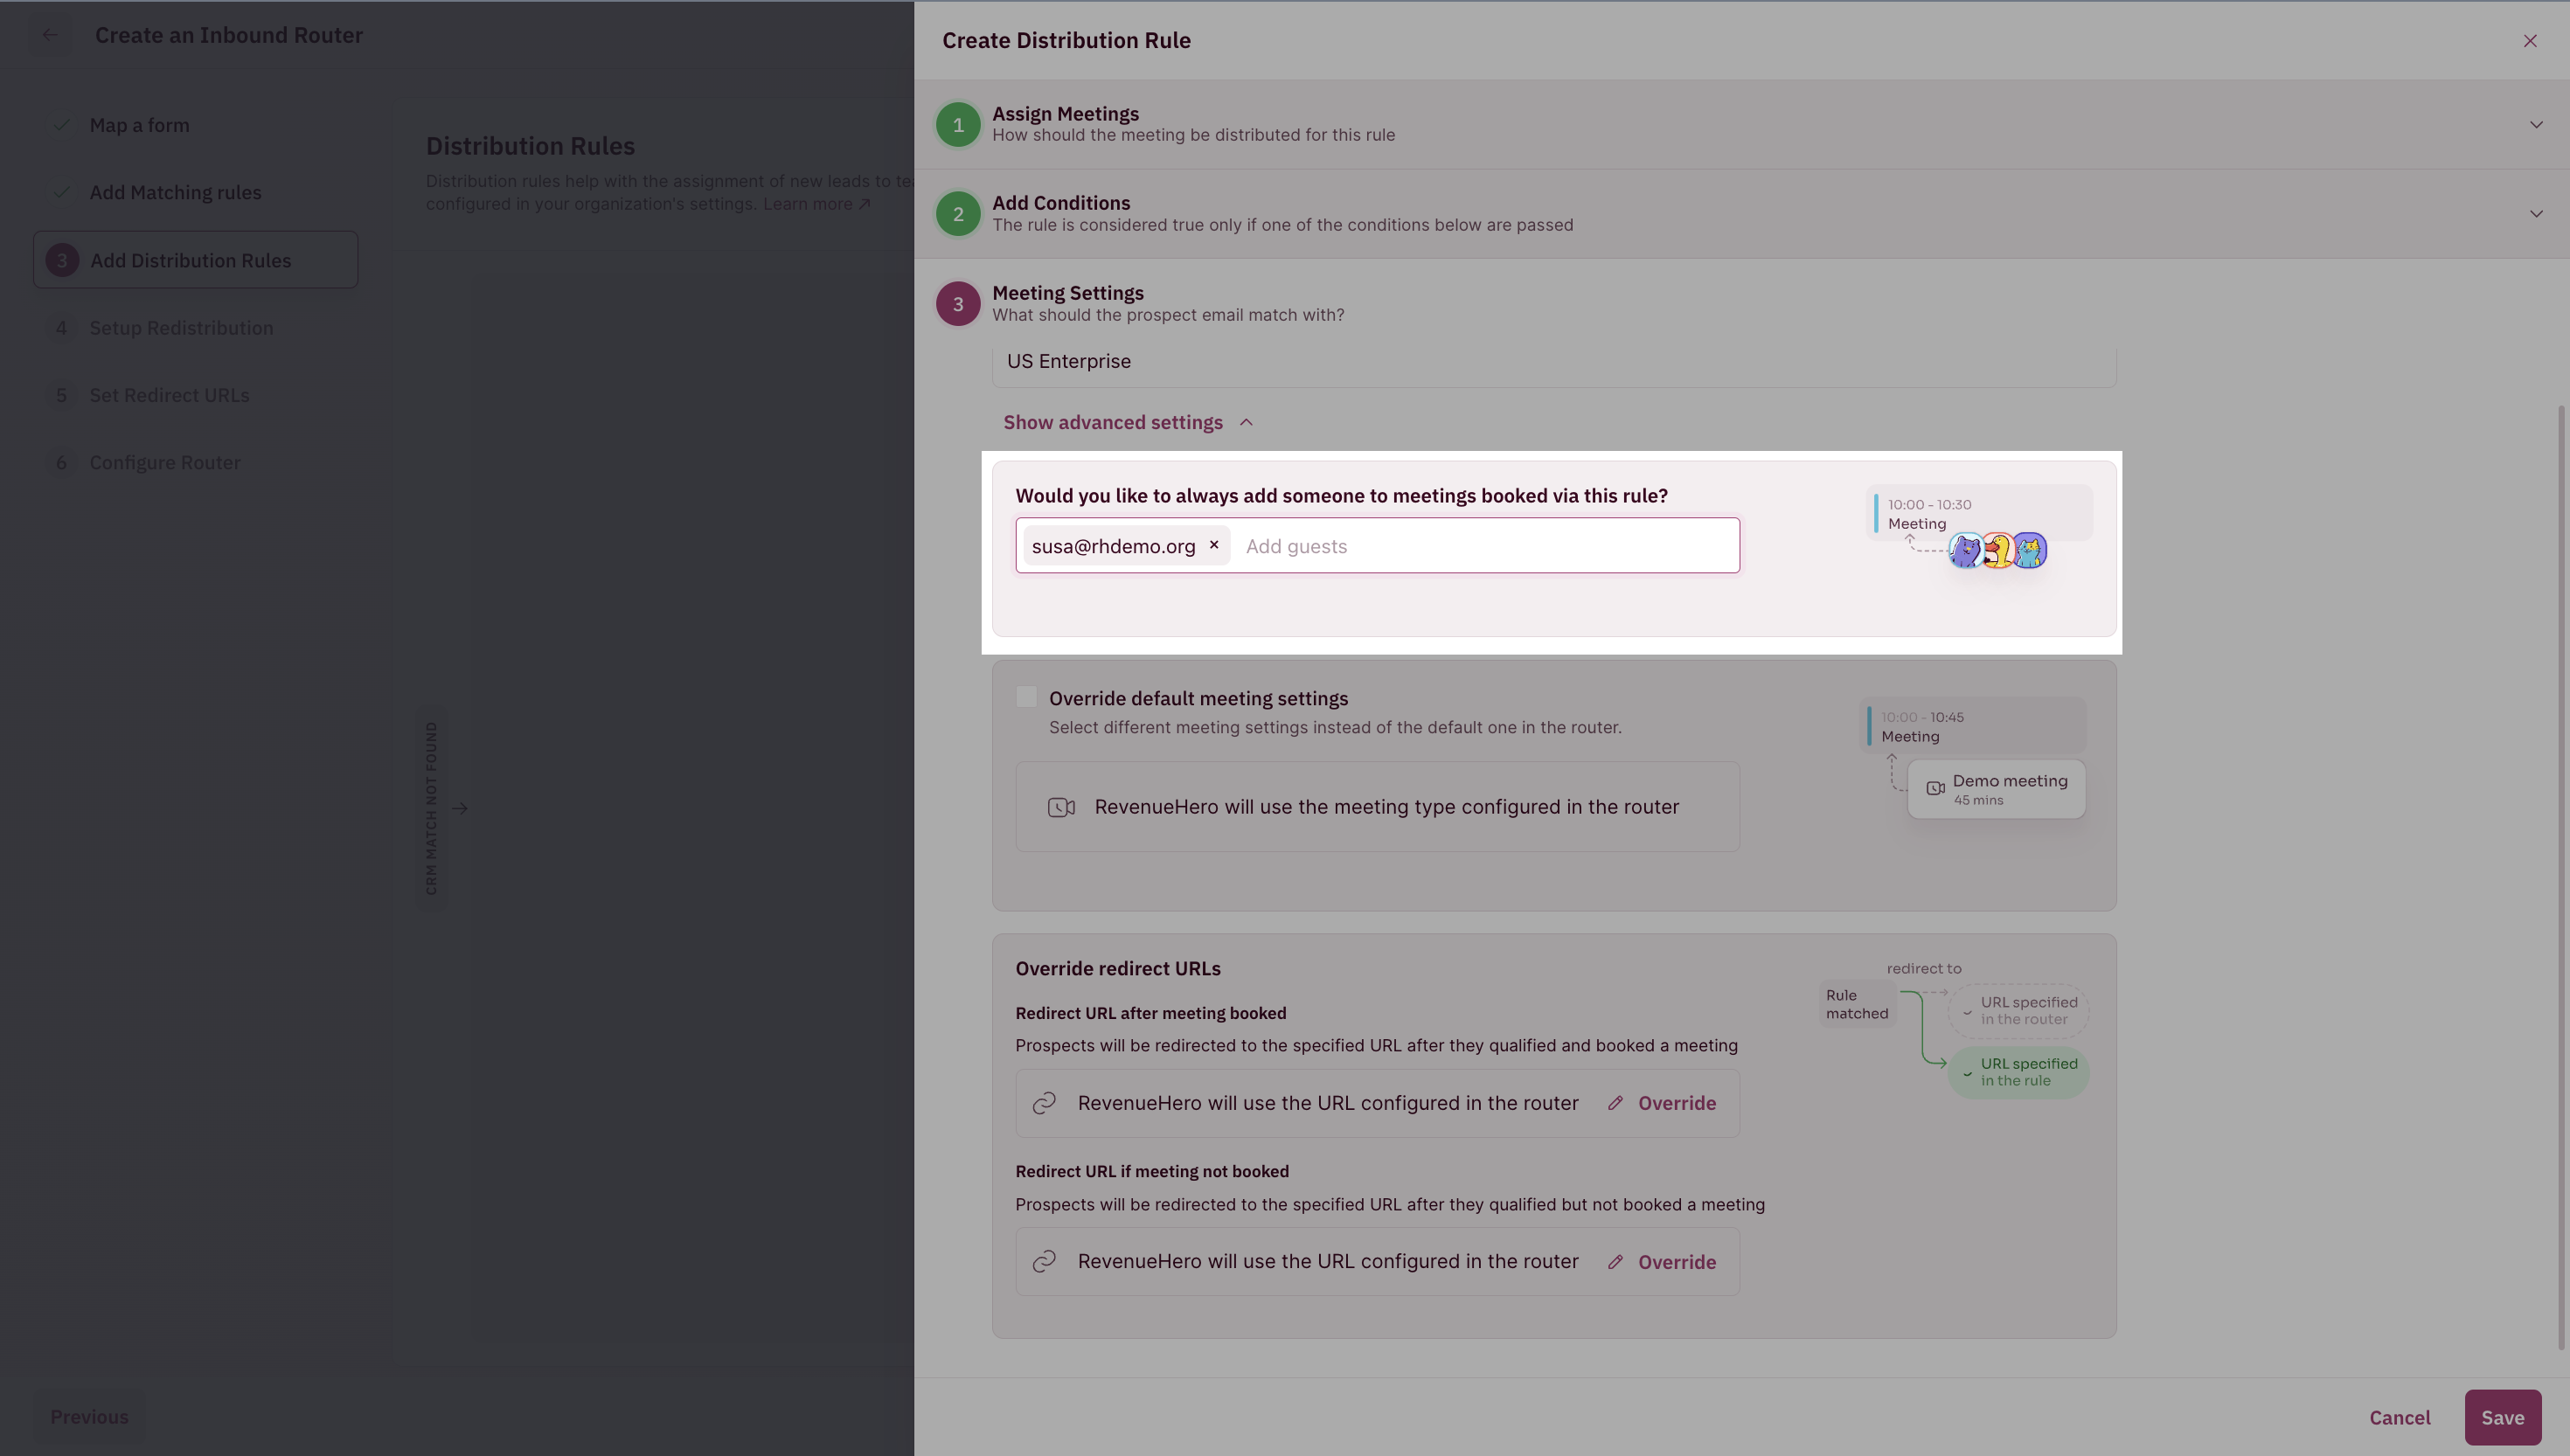
- Lastly, you can override default meeting settings for this specific rule/queue by clicking on Show advanced settings.
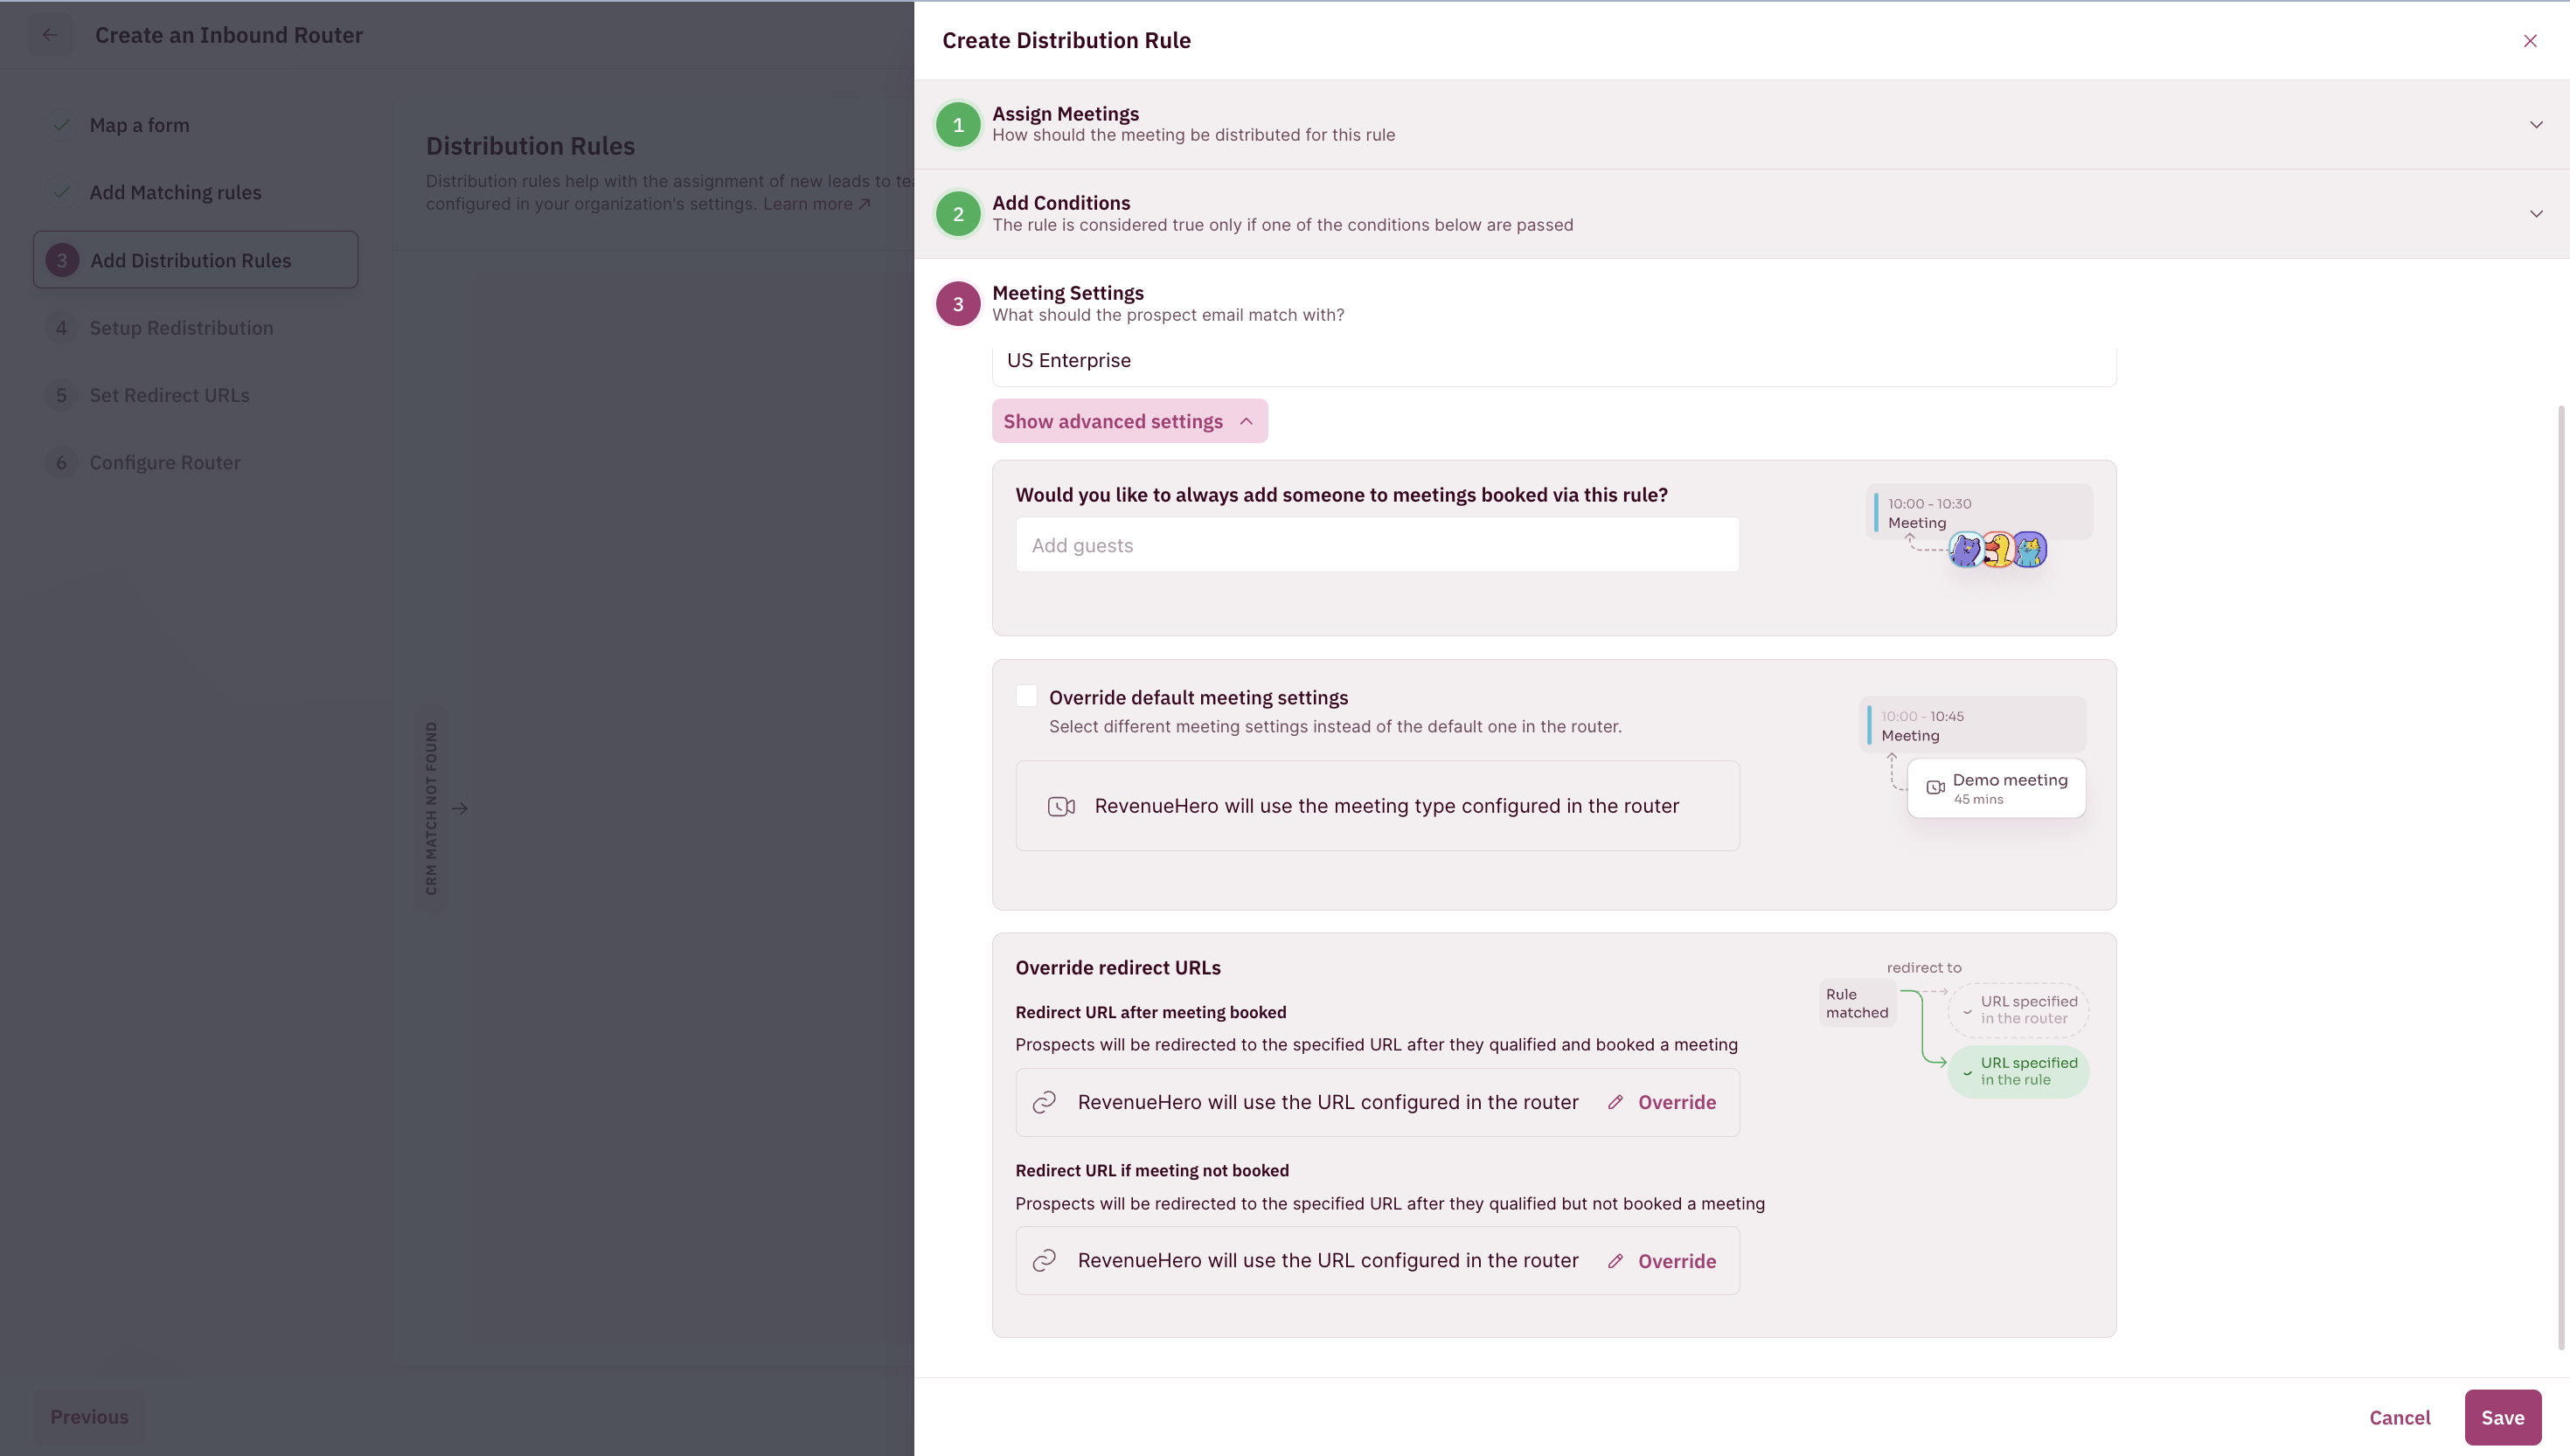
- Add guests to meetings every time a meeting is booked through this Distribution Rule. This is particularly helpful if you’ve recently onboarded a new sales rep and you want their manager to be on calls to guide them, for example.
- You can override the router’s default meeting type or the redirection URLs for prospects who qualify through this rule.
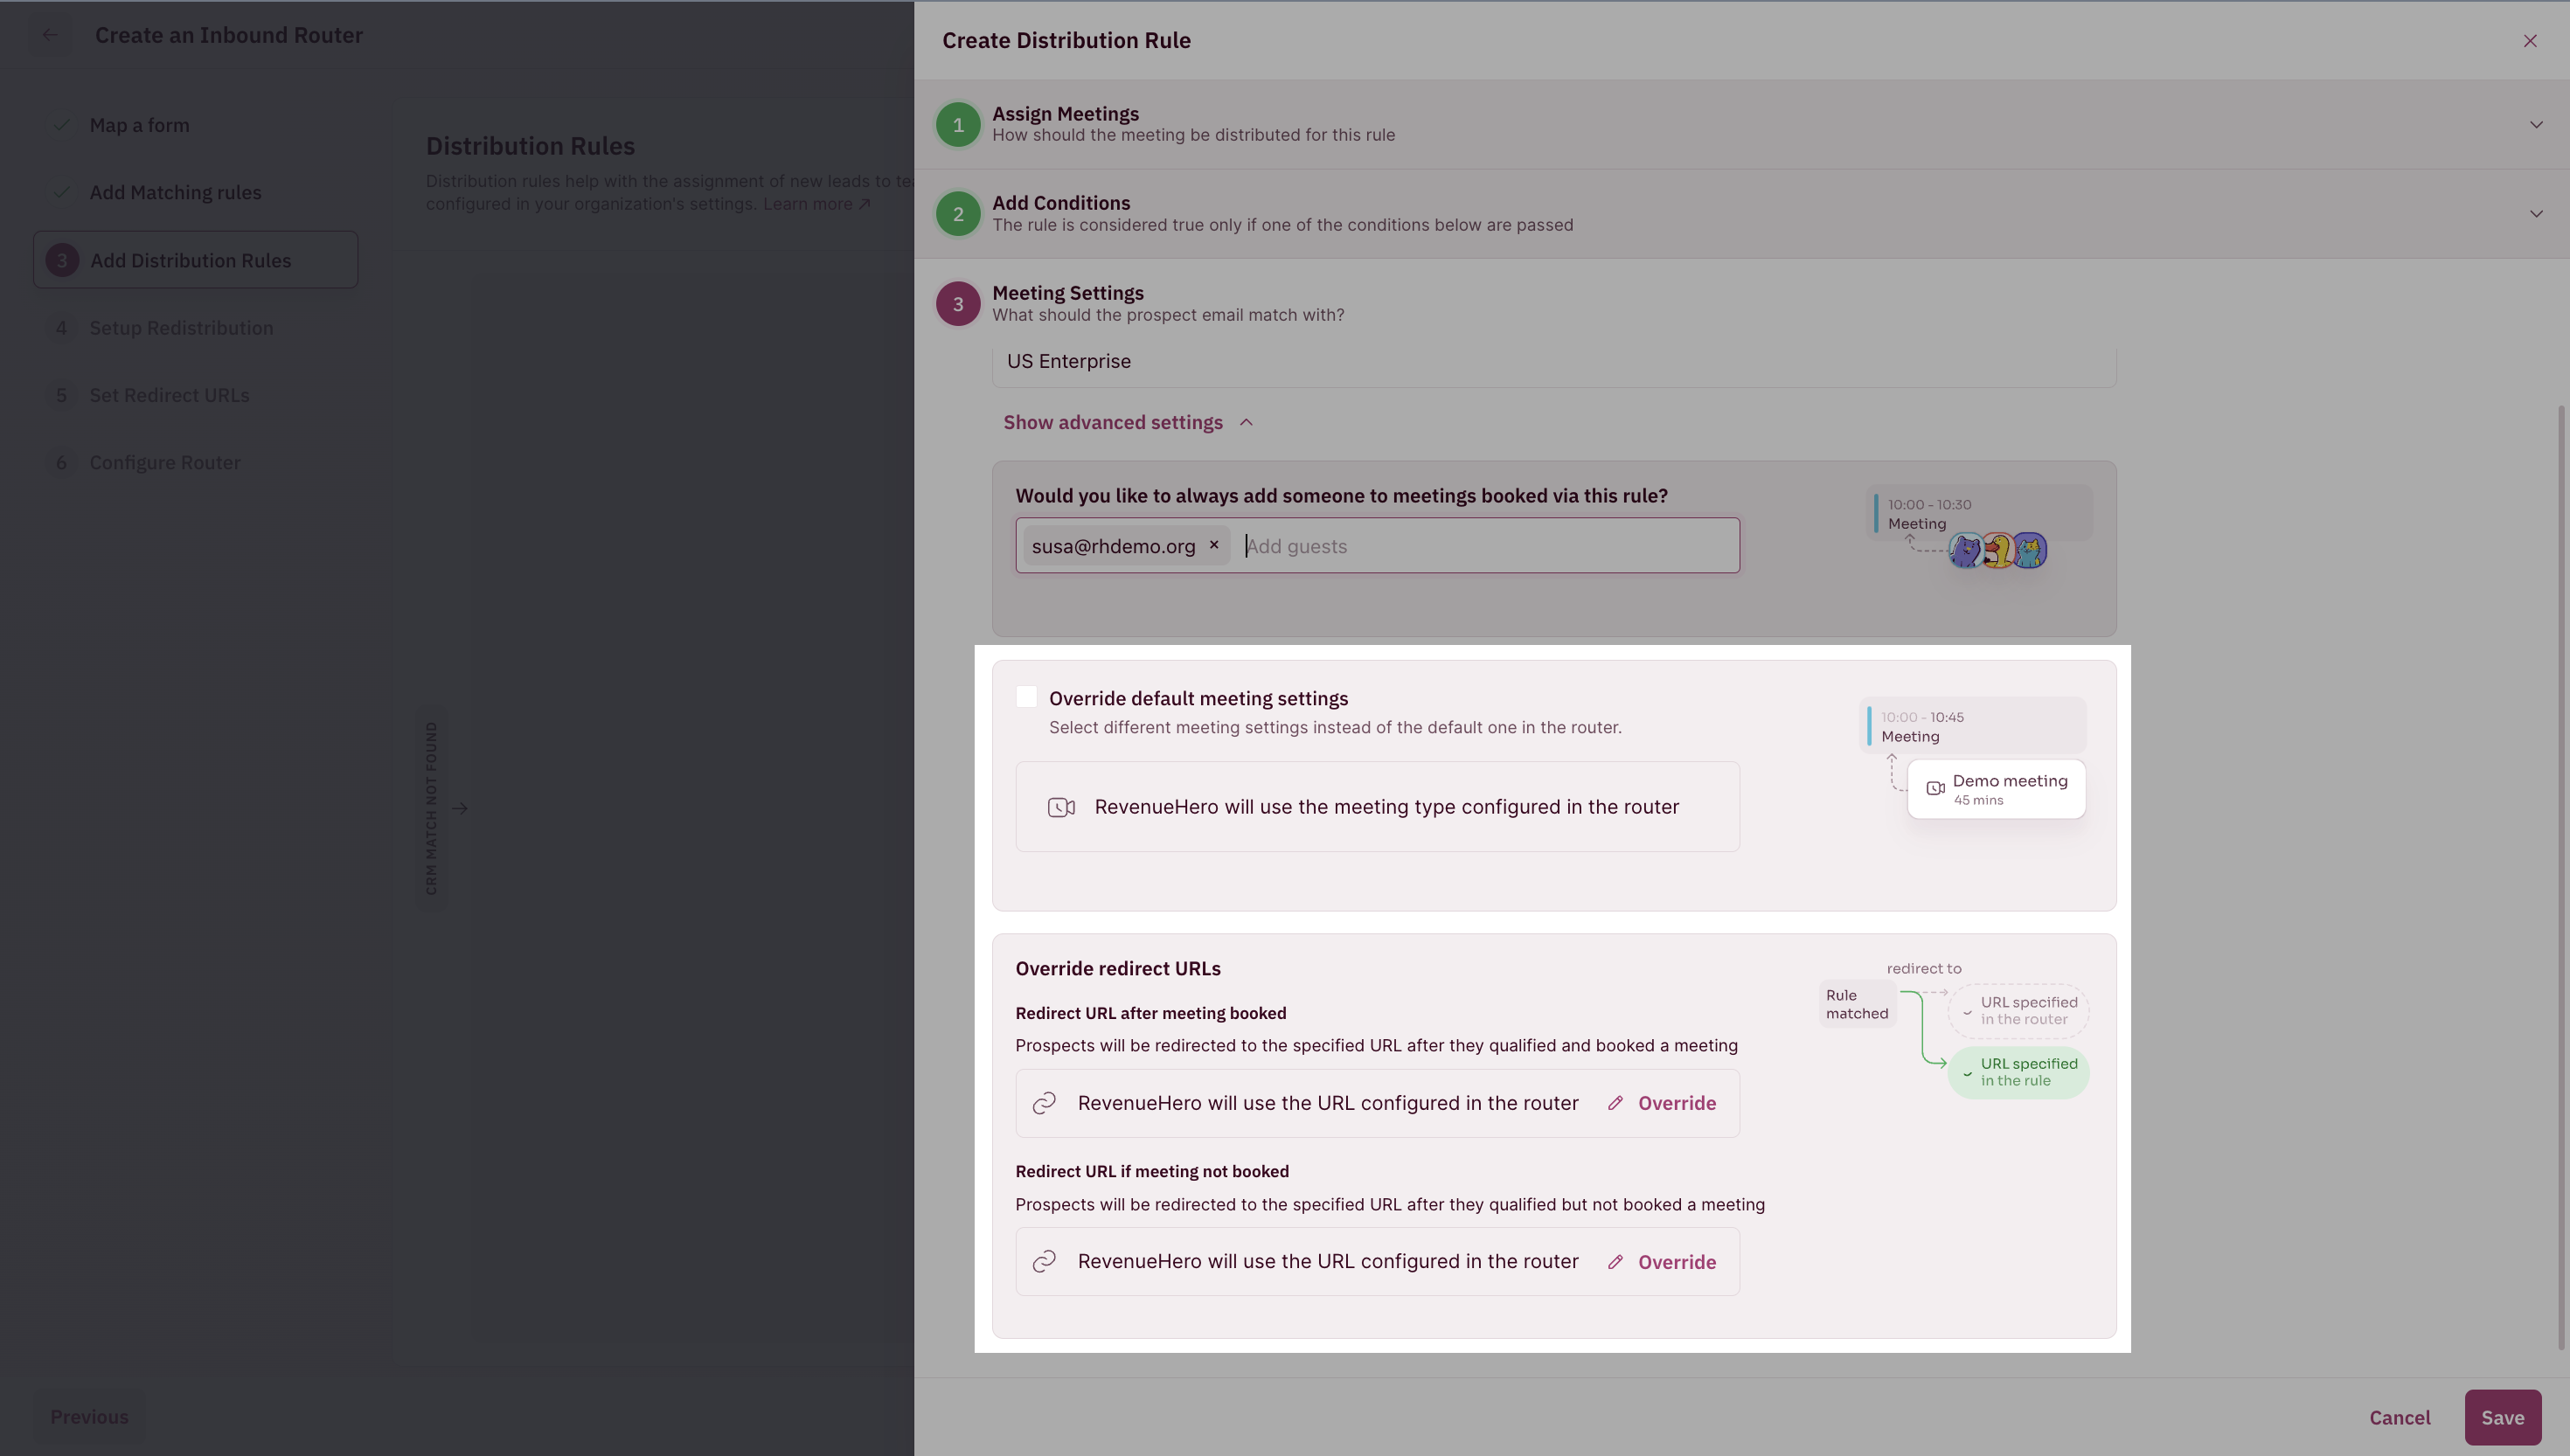
- Once done, click “Save”.
Set up Redistribution
When a prospect fills your form but decides not to book a meeting for some reason, you can set up rules to re-distribute that lead to a new owner who can follow up with them offline.- You’ll be asked if you’d like to redistribute prospects who do not book a meeting. If you select “No”, you don’t have to set up anything. However, we do recommend that you select “Yes” and set up Redistribution rules.
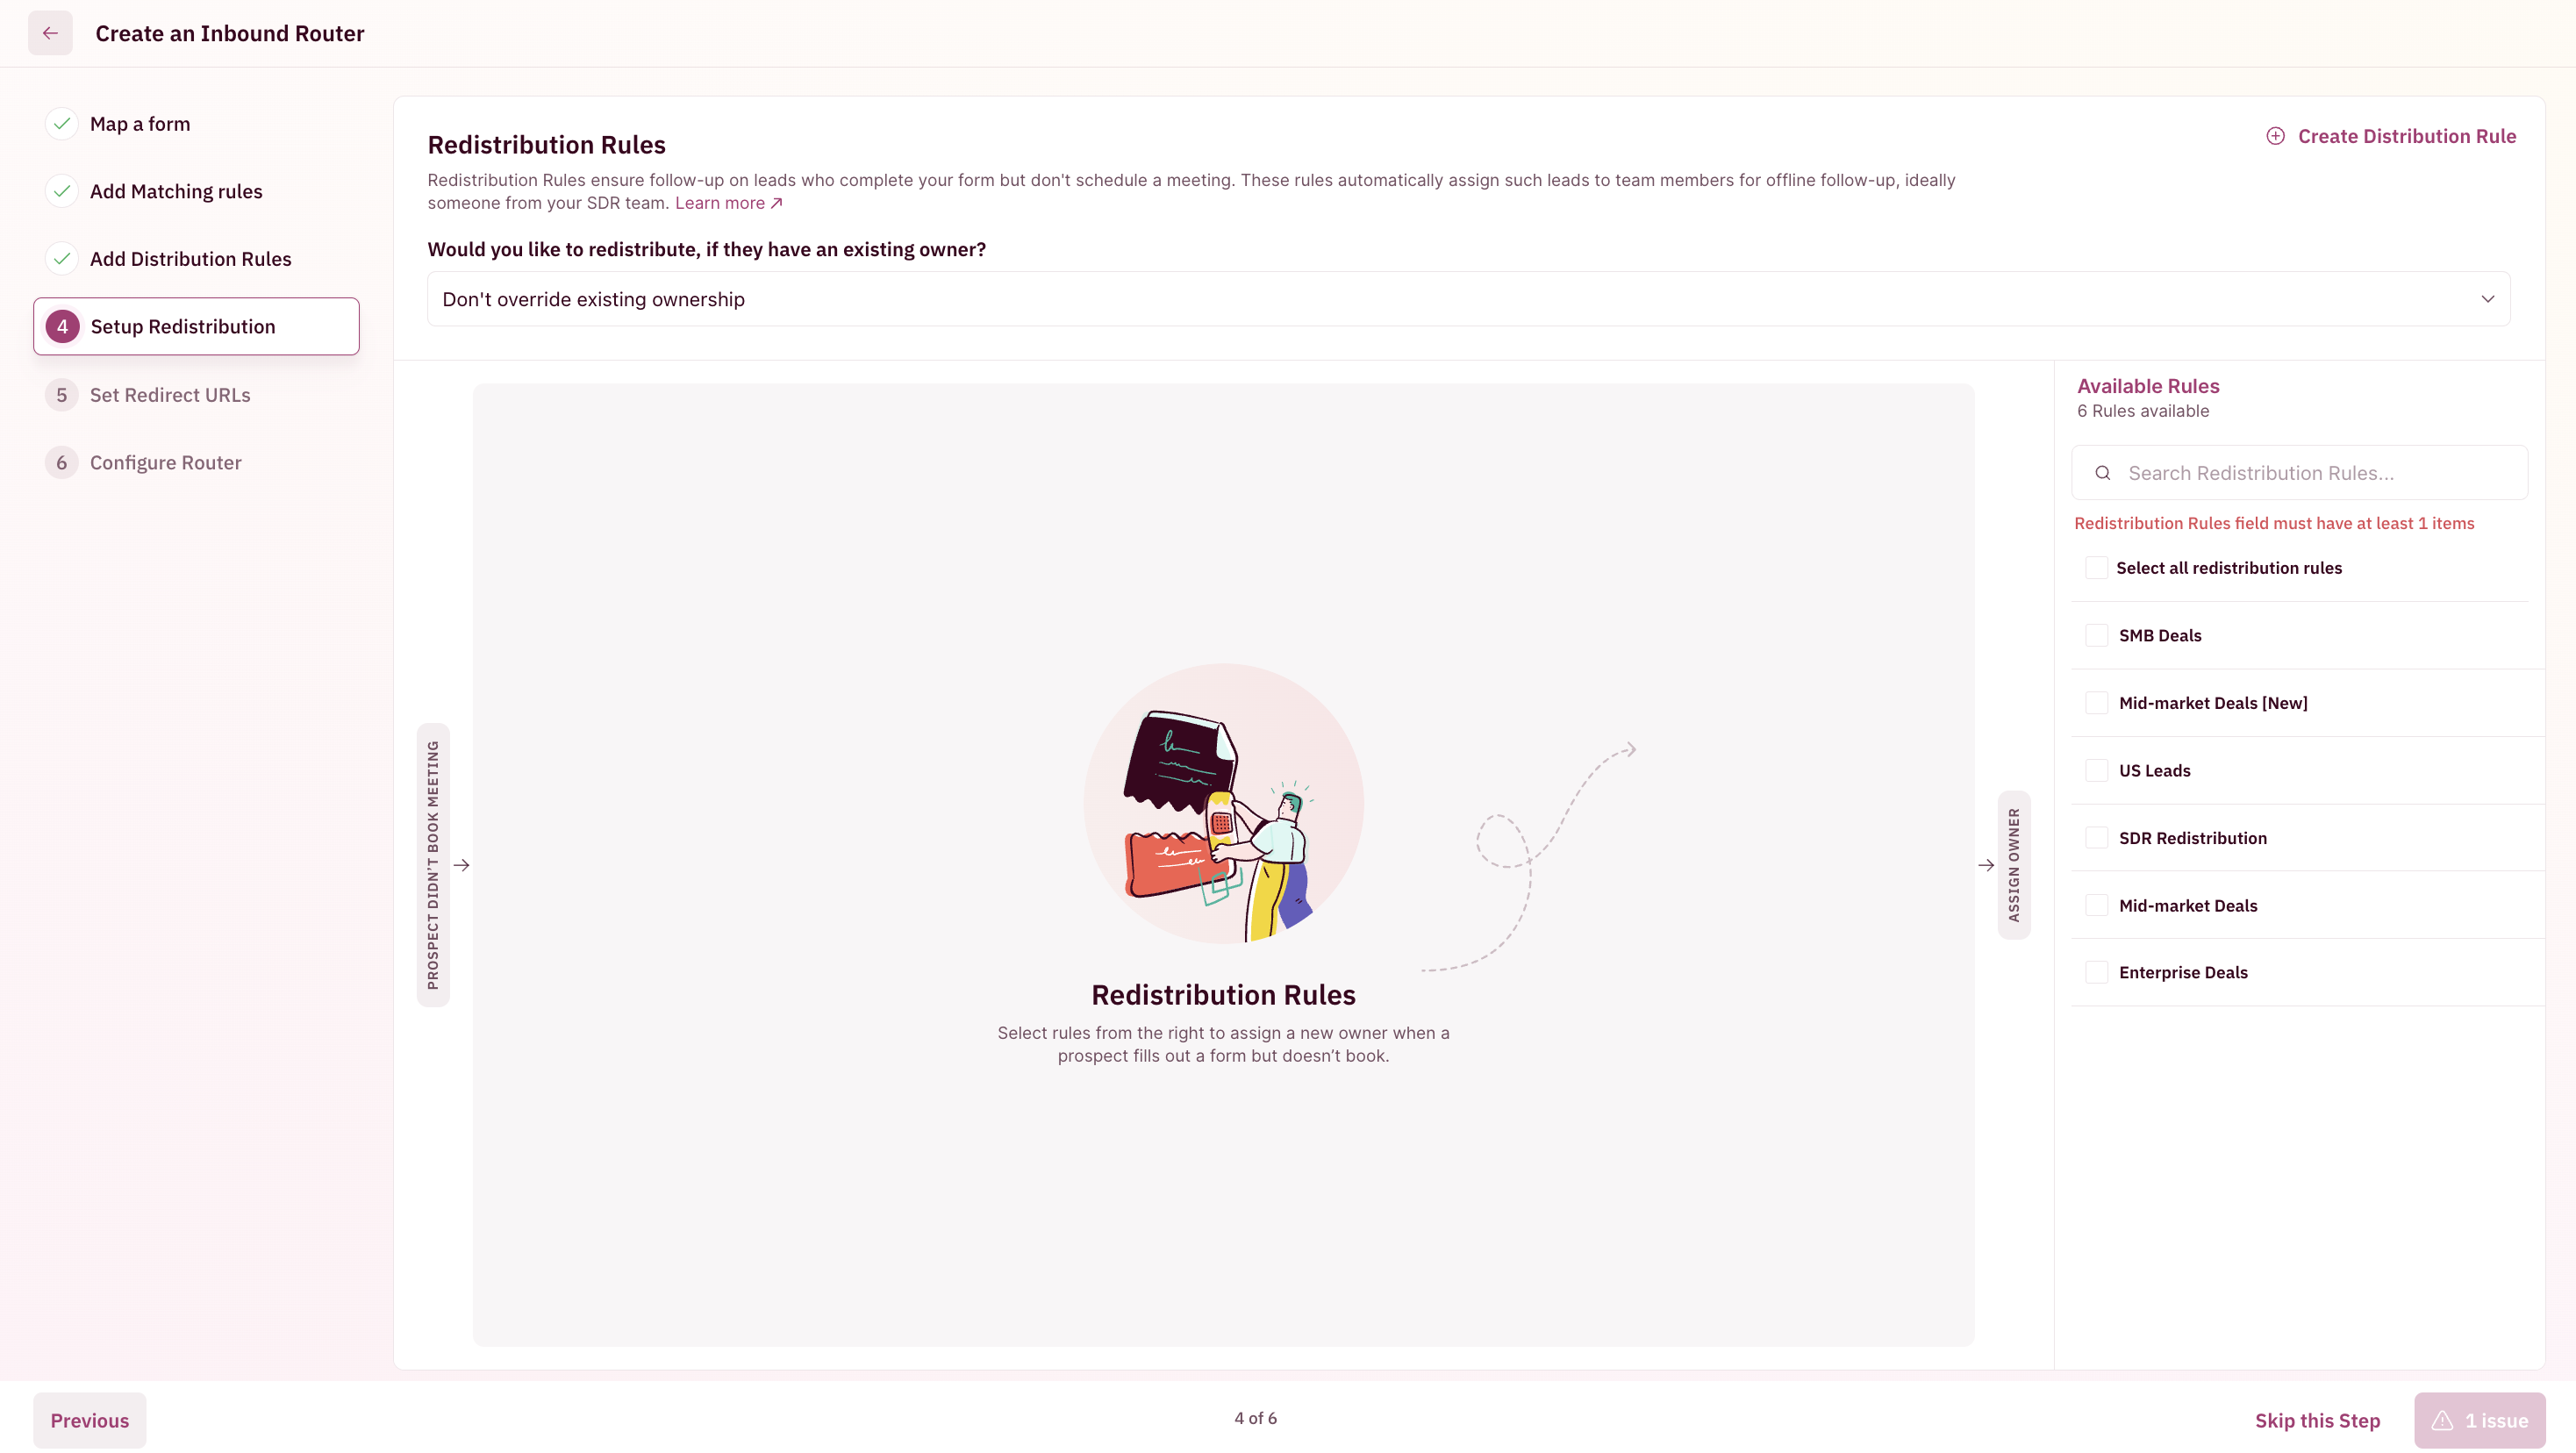
- If you select to redistribute your leads, you’ll be asked to choose between overriding existing owners and retaining existing owners for the contacts in the CRM.
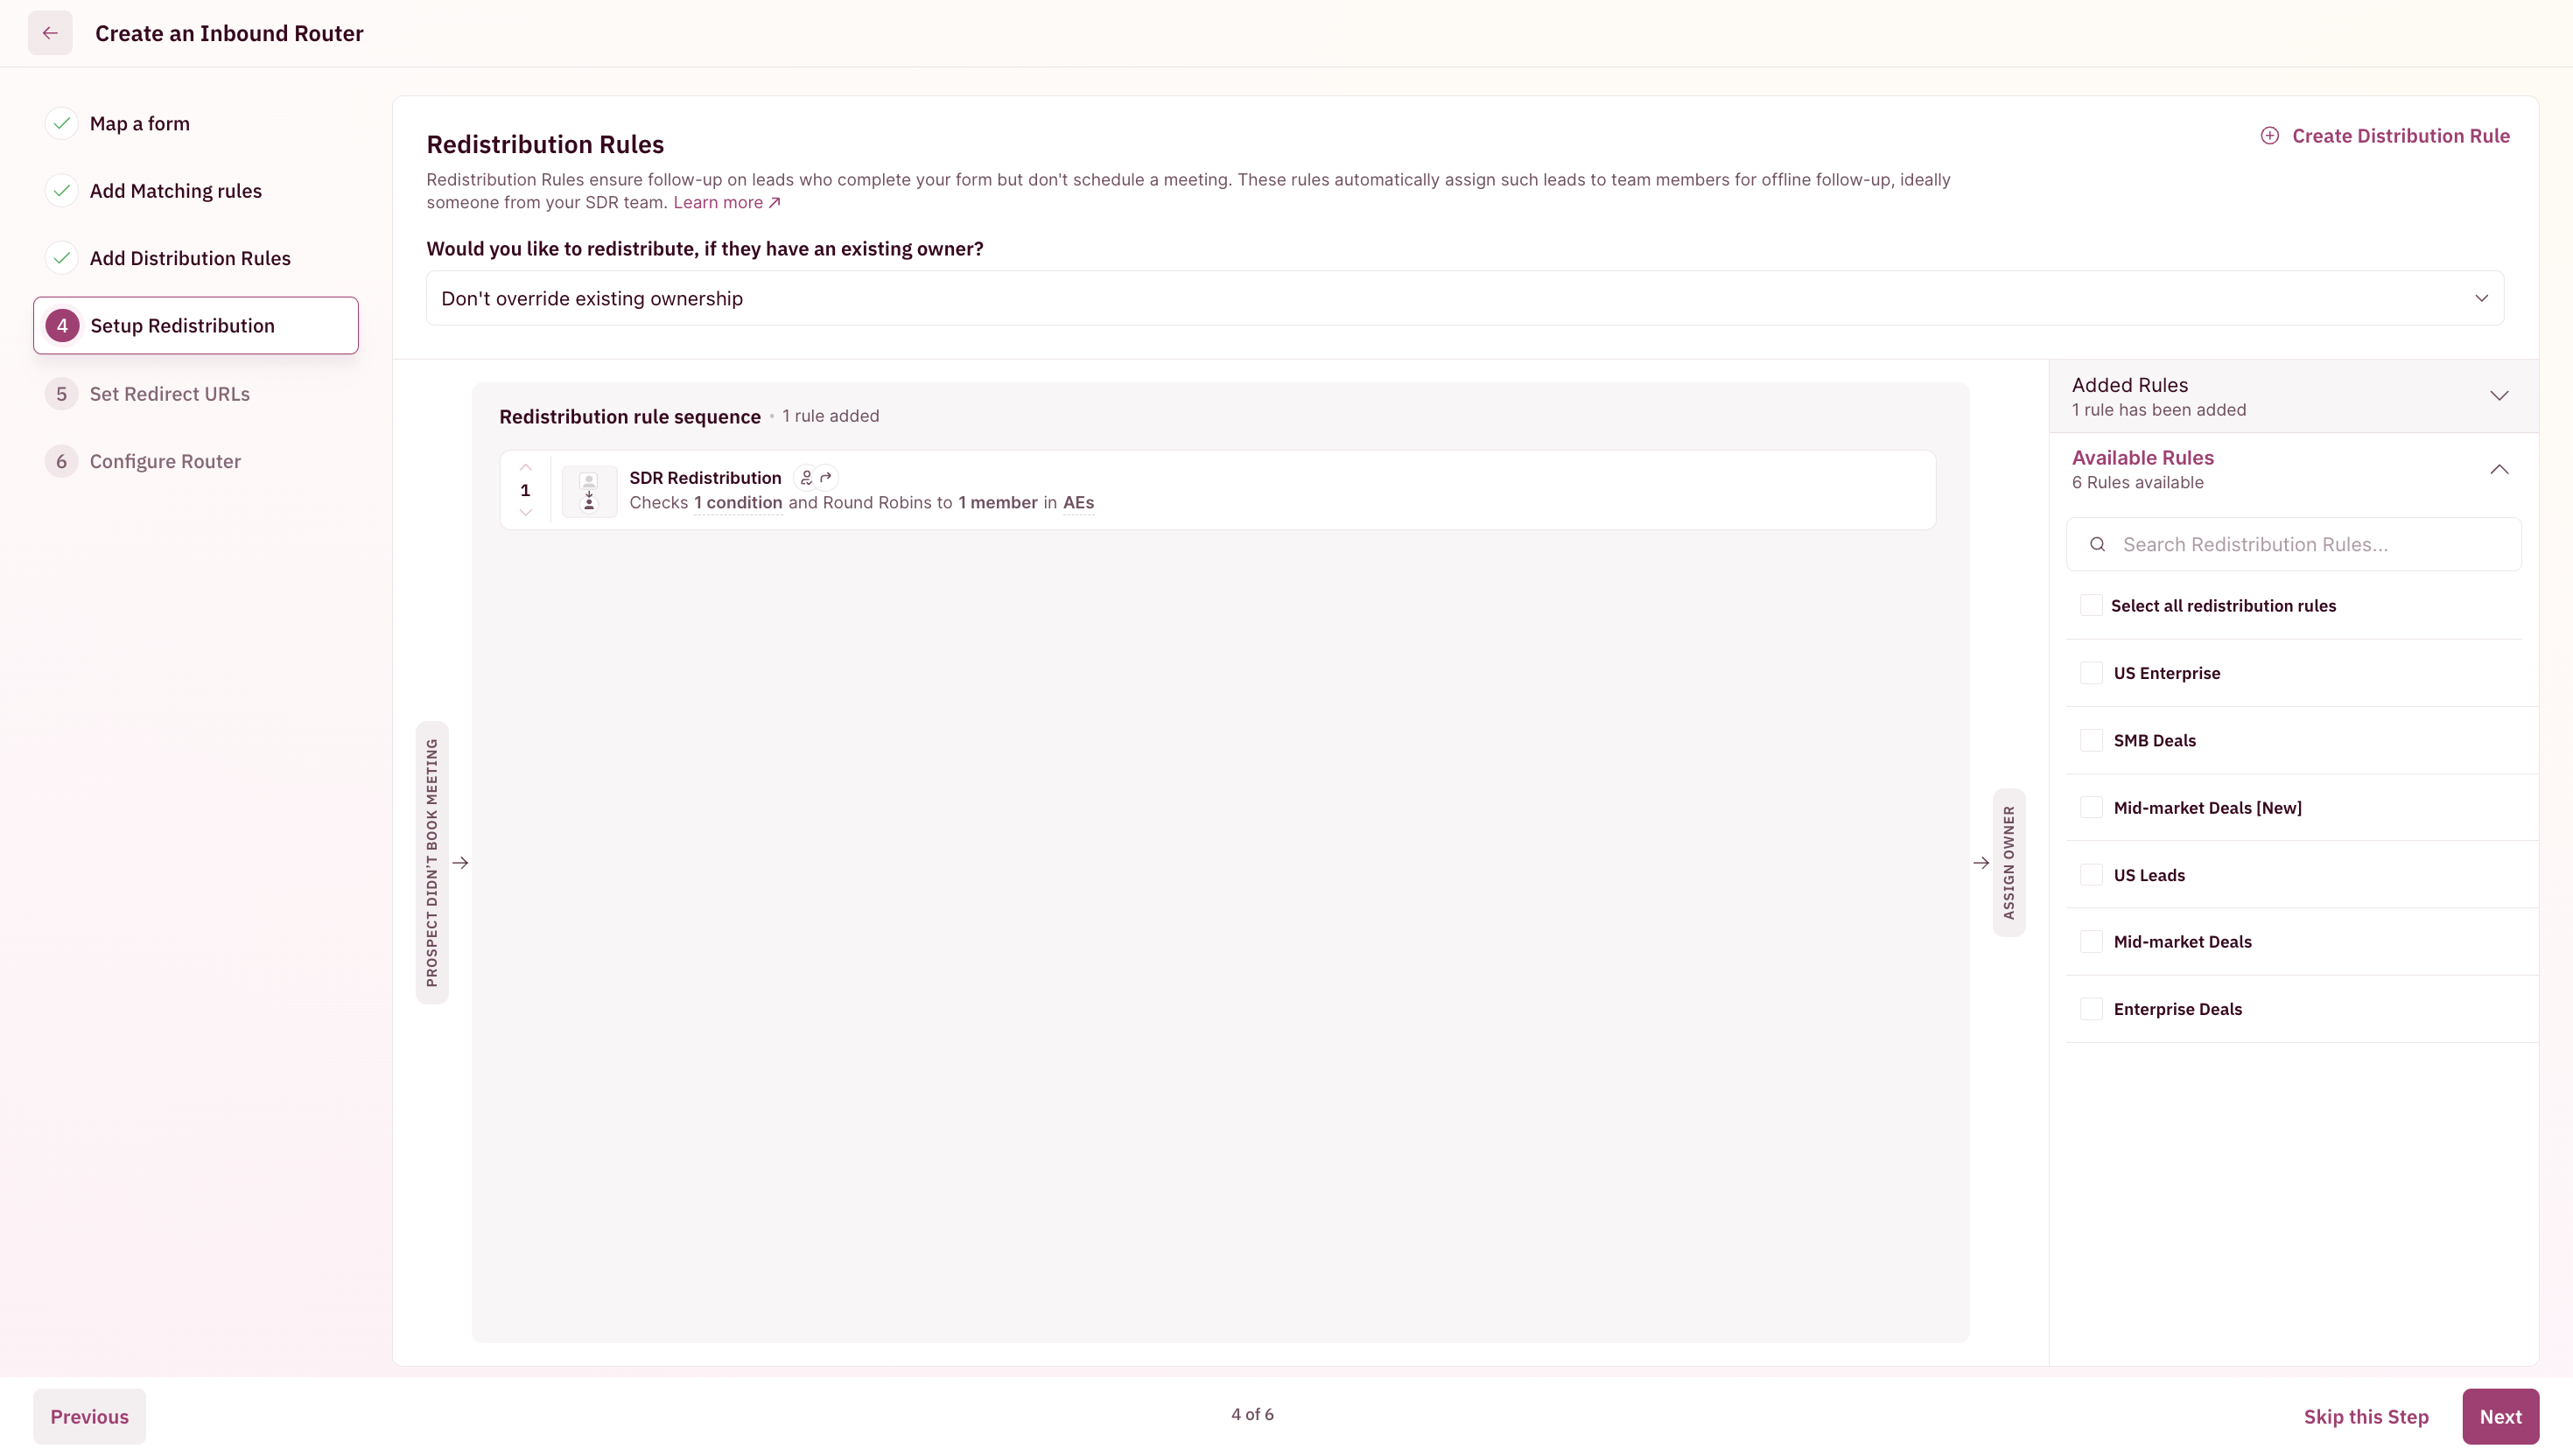
- Finally, you can select Redistribution rules for your router. Setting up the Redistribution rule is similar to how you set up your Distribution rule. You can follow the same steps as above to create a new Redistribution rule if you haven’t already.
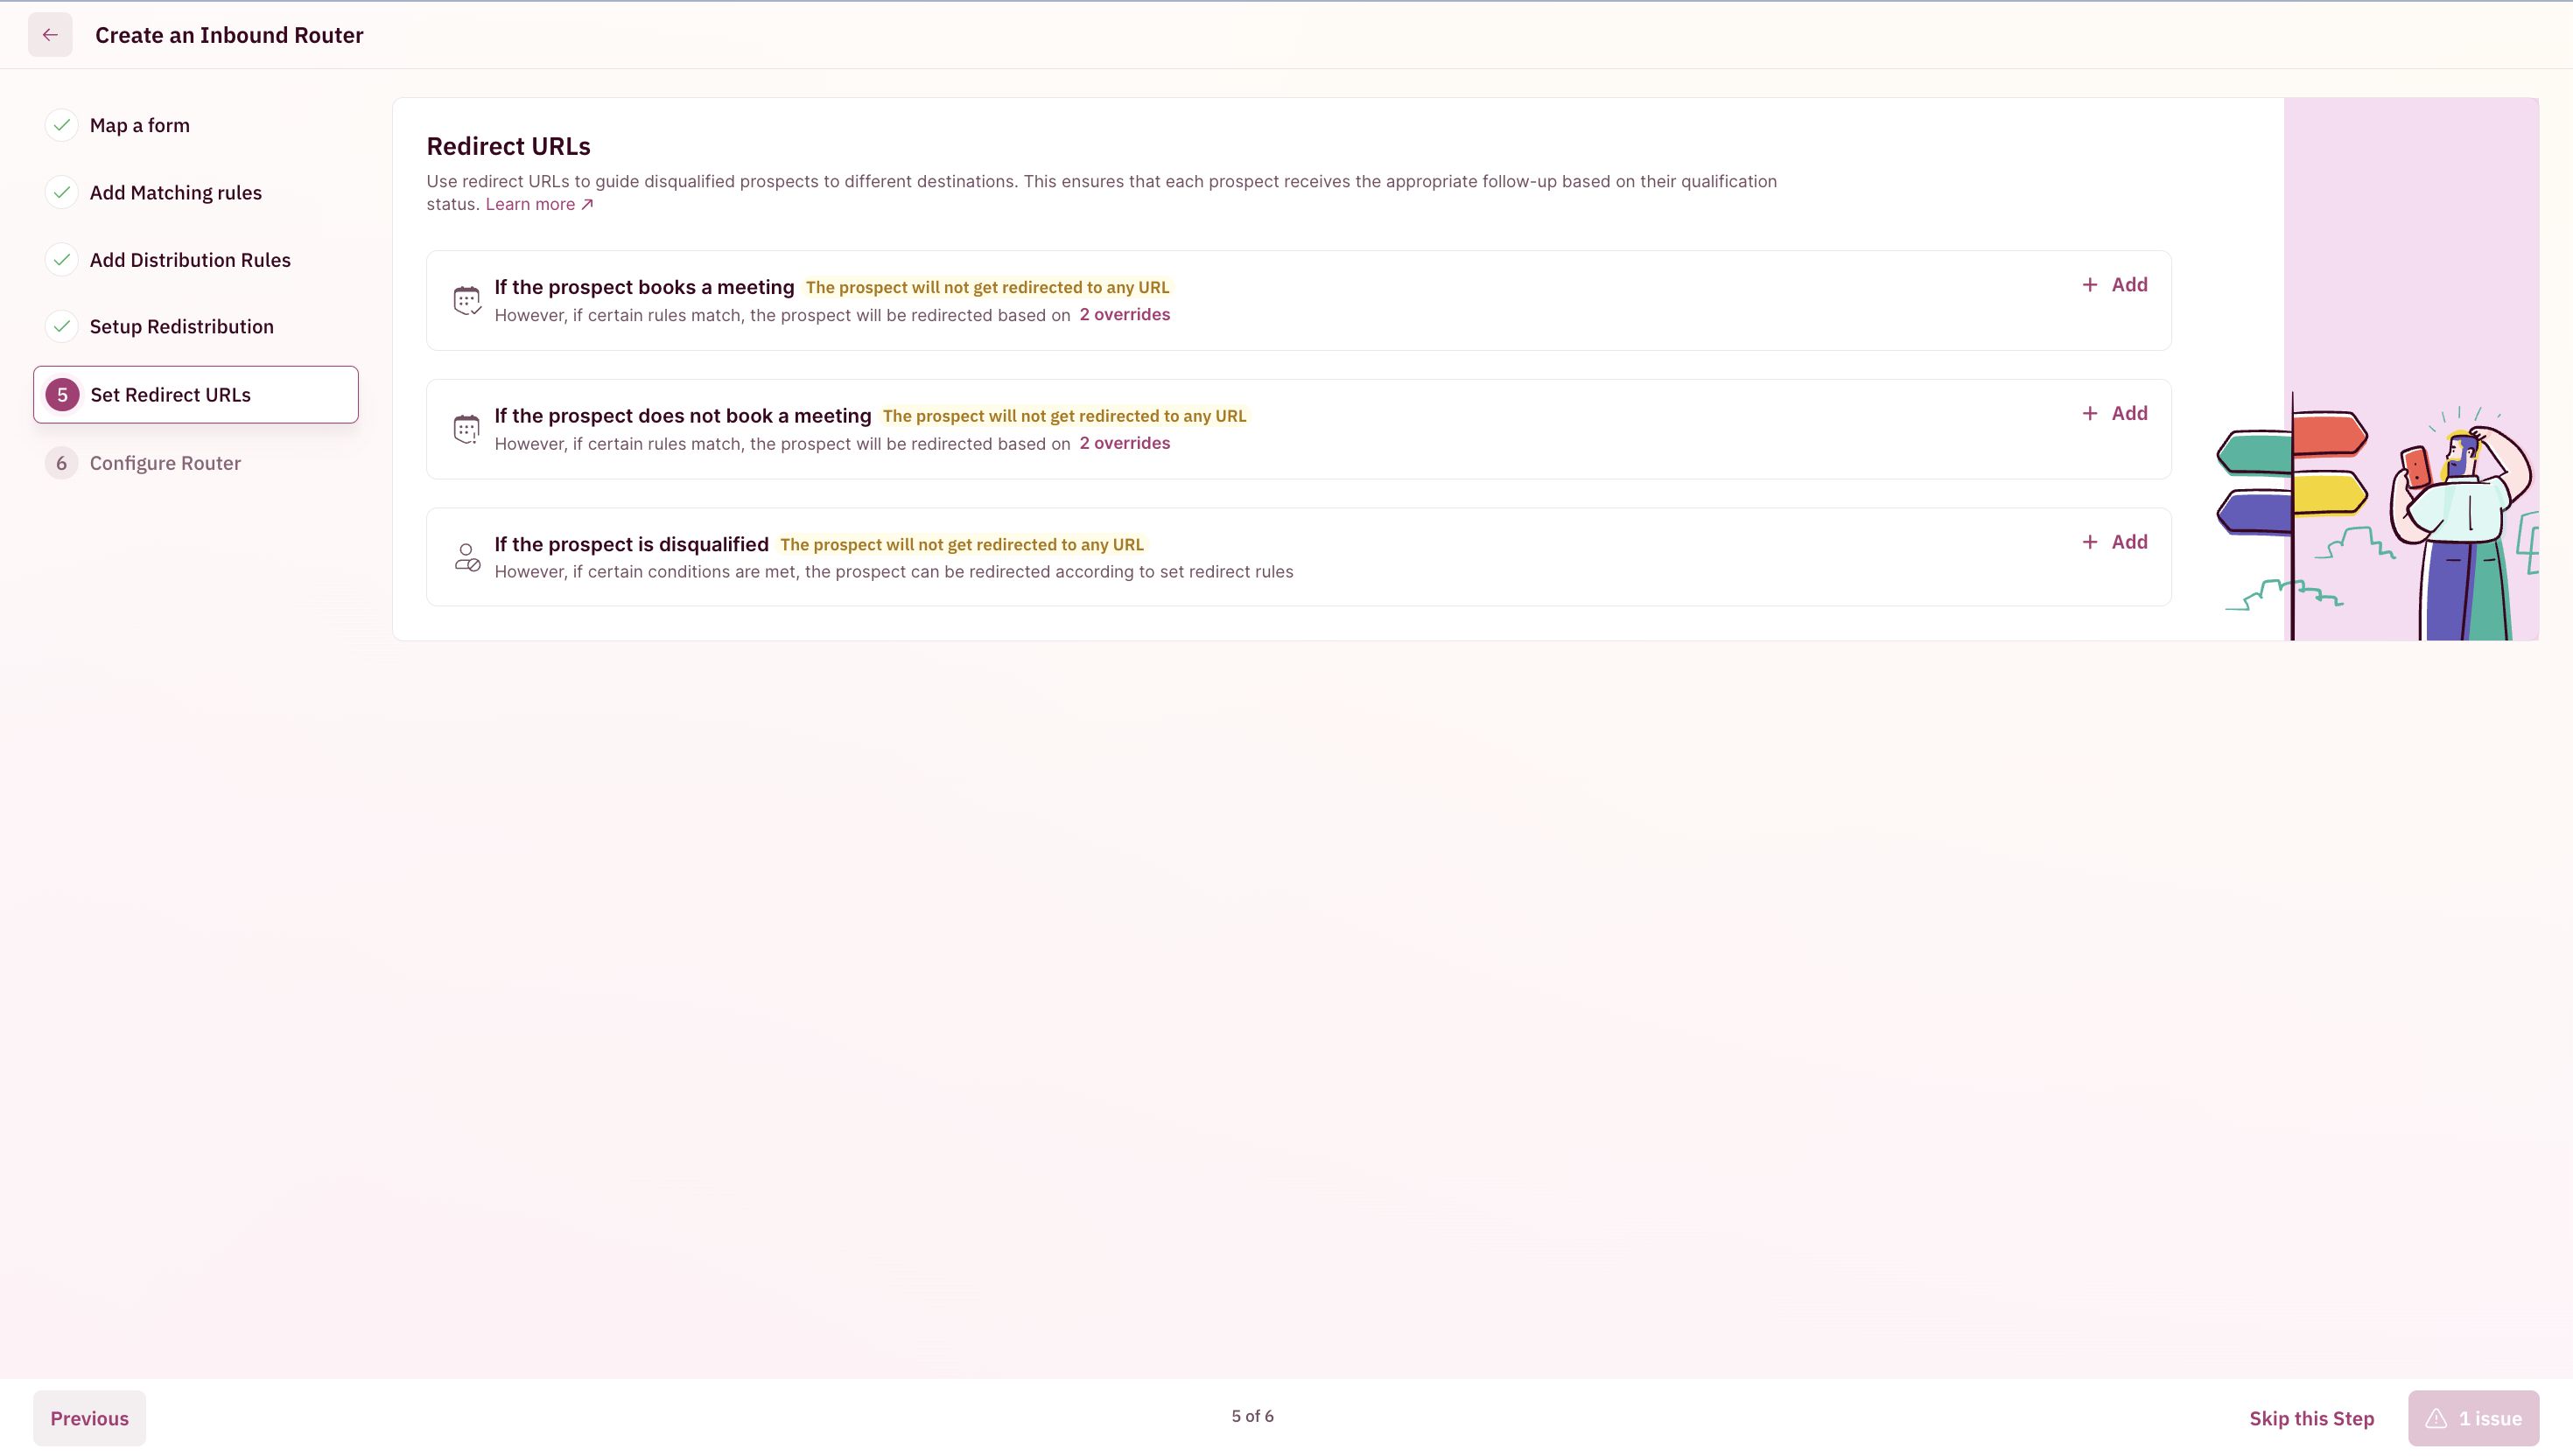
Set up Redirection
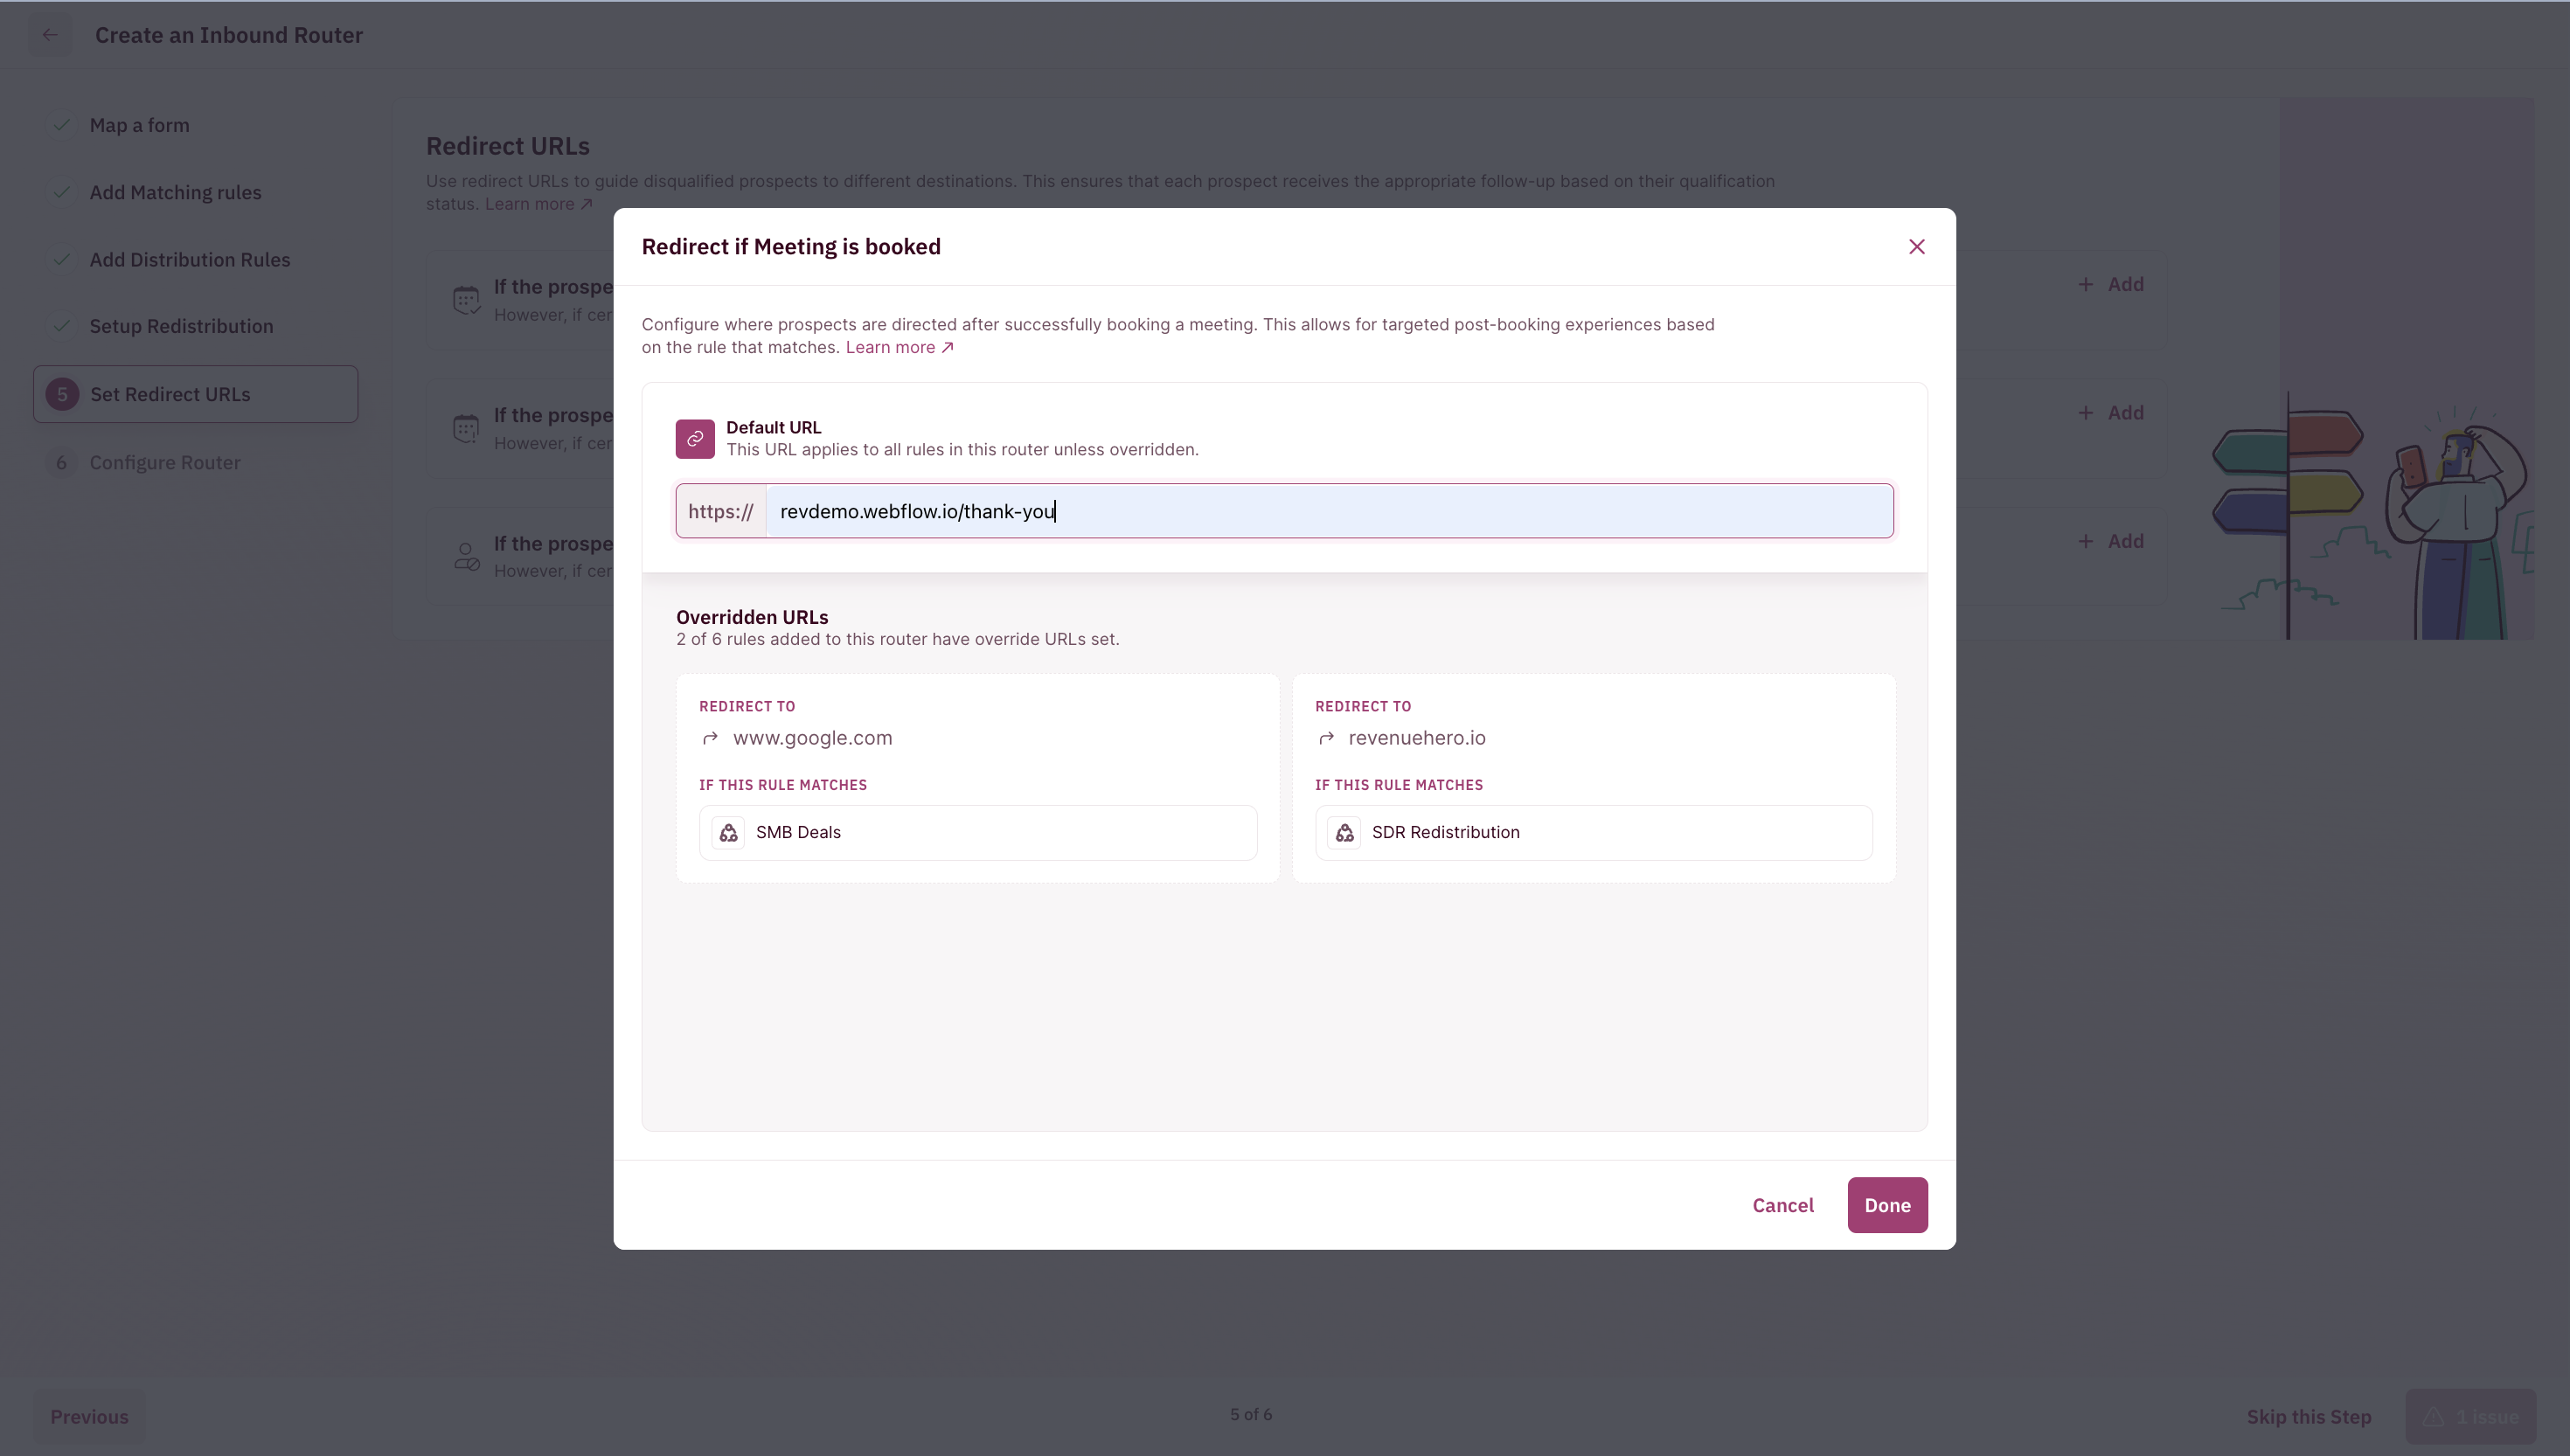
Redirects help with marketing attribution. You can choose to set up the following redirects:- On successful booking take them to a thank you page
- On disqualification take them to a specific page
- On not booking but staying on the page for a specific time, take them to a specific page
Configure Router
Configuring your router includes naming your router, selecting the type of meeting, and setting up redirections.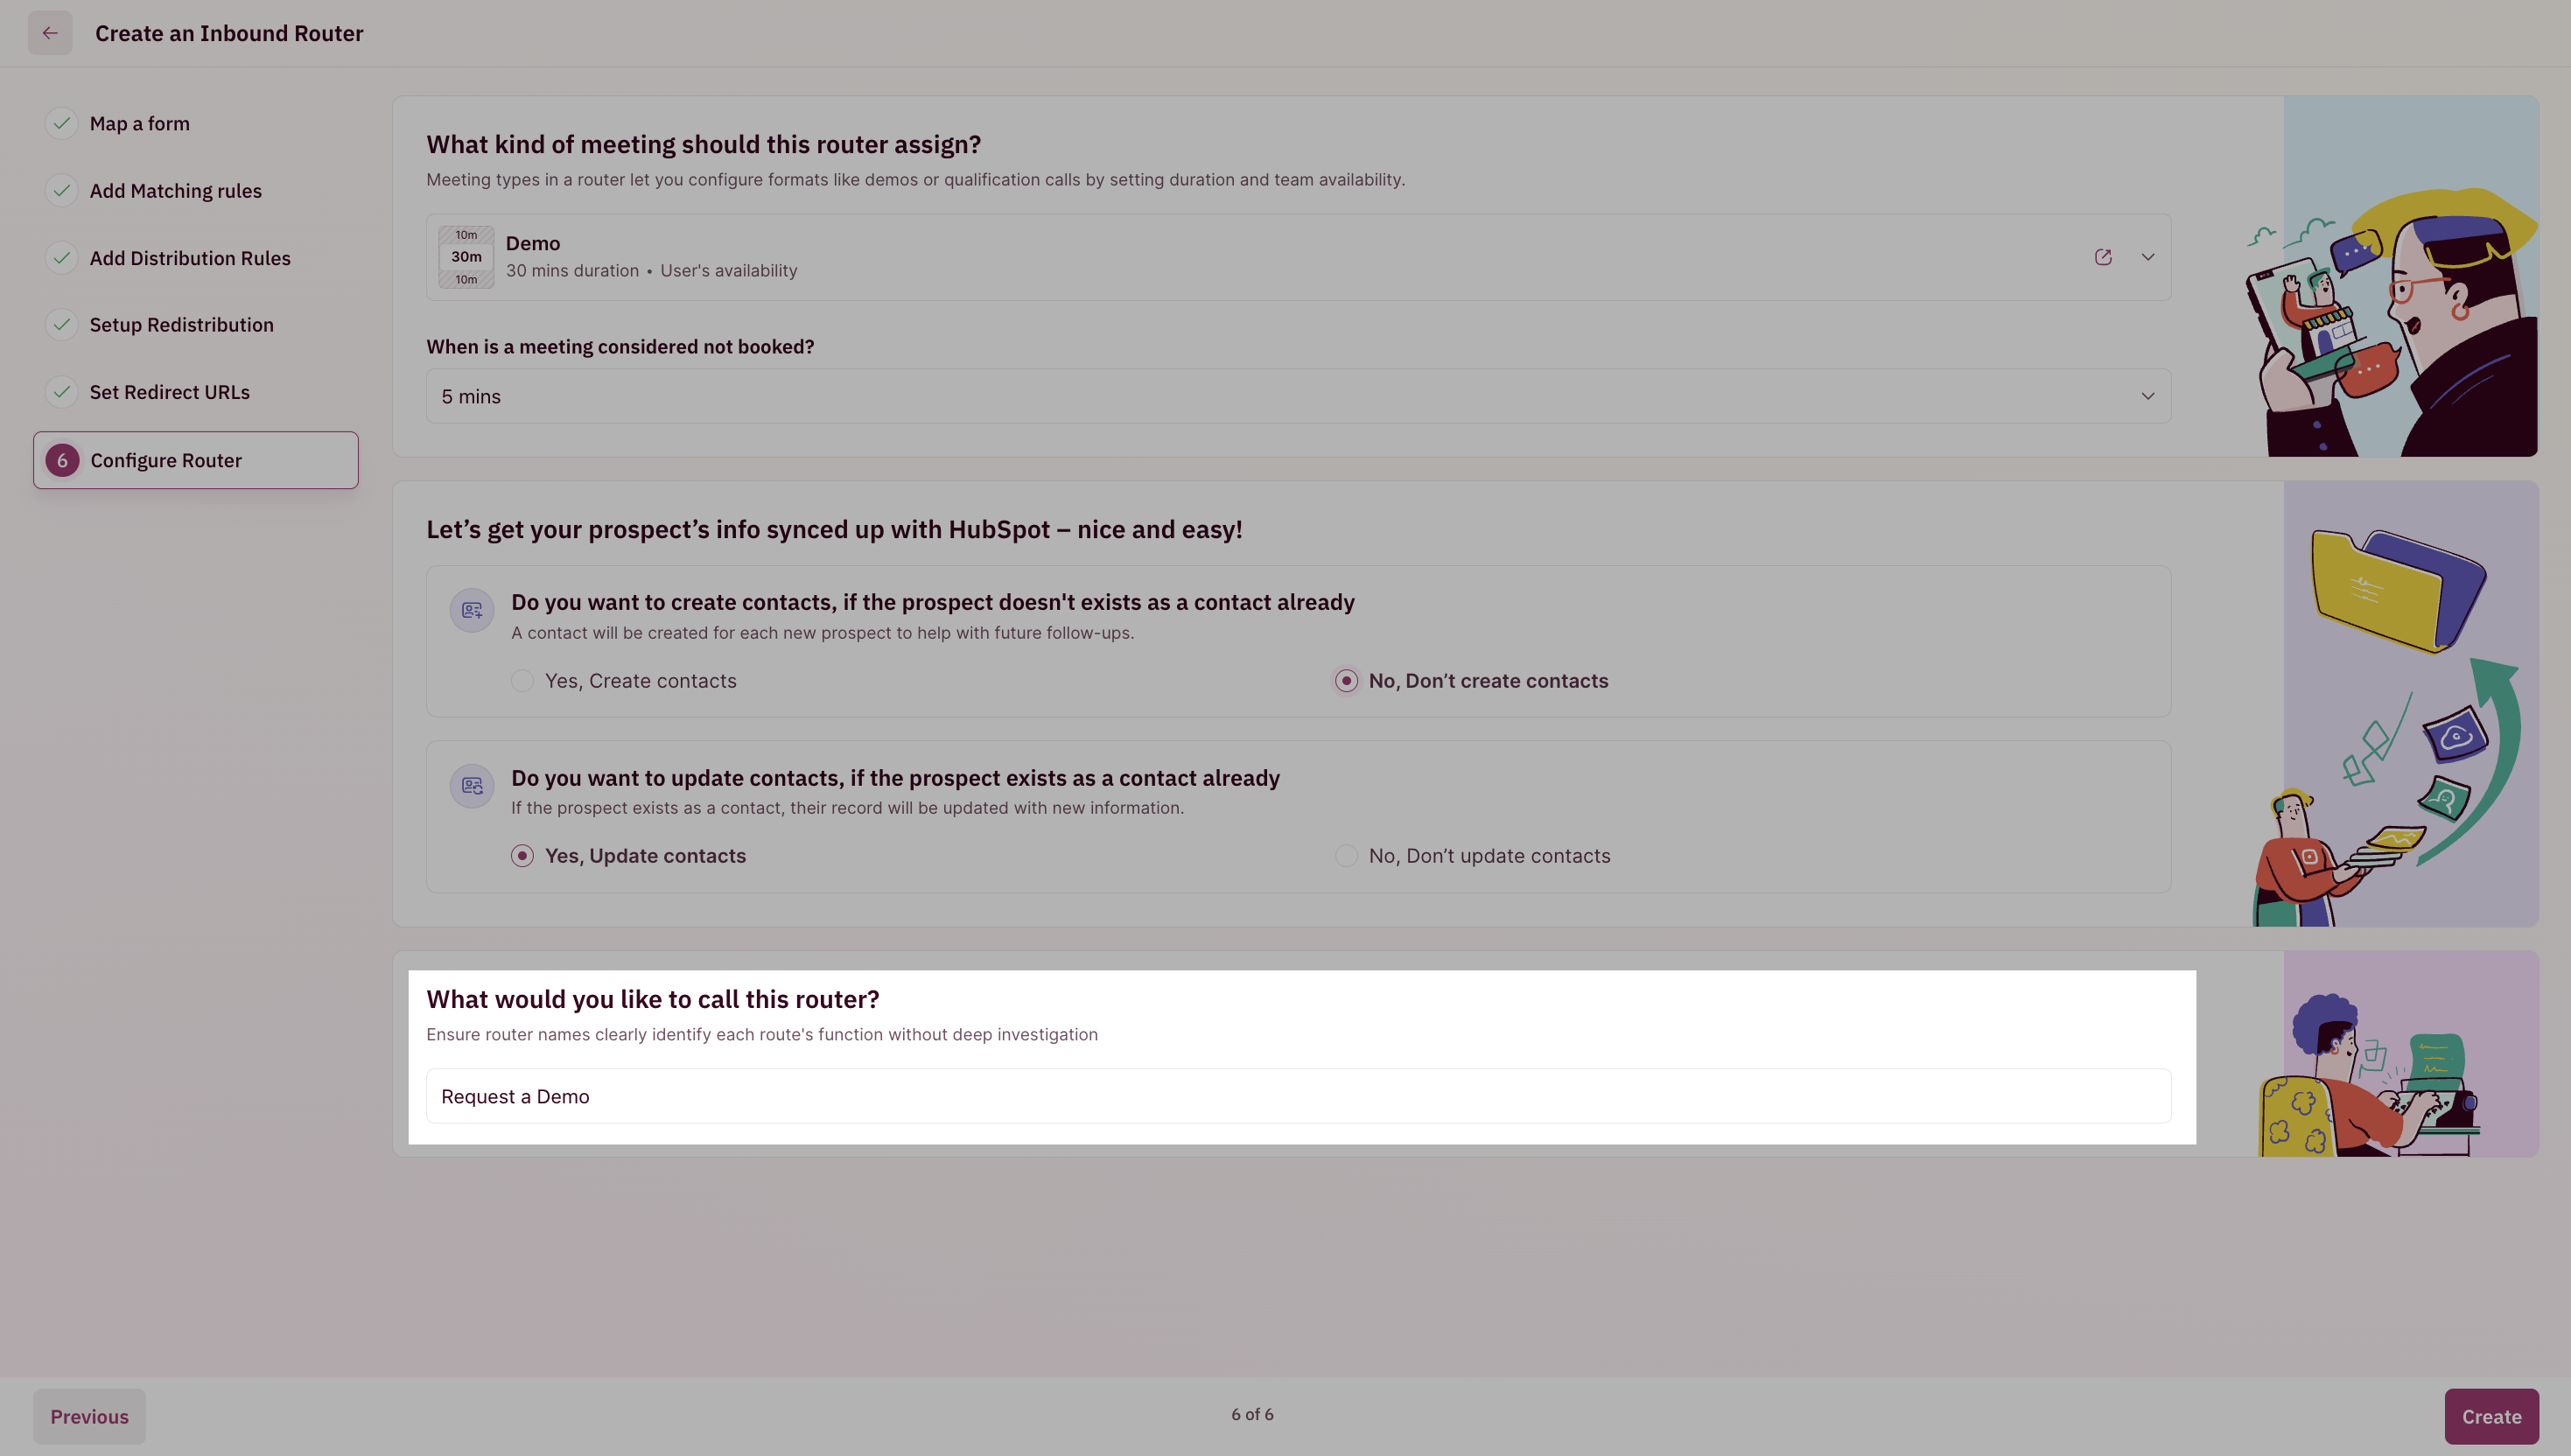
Selecting Meeting Type
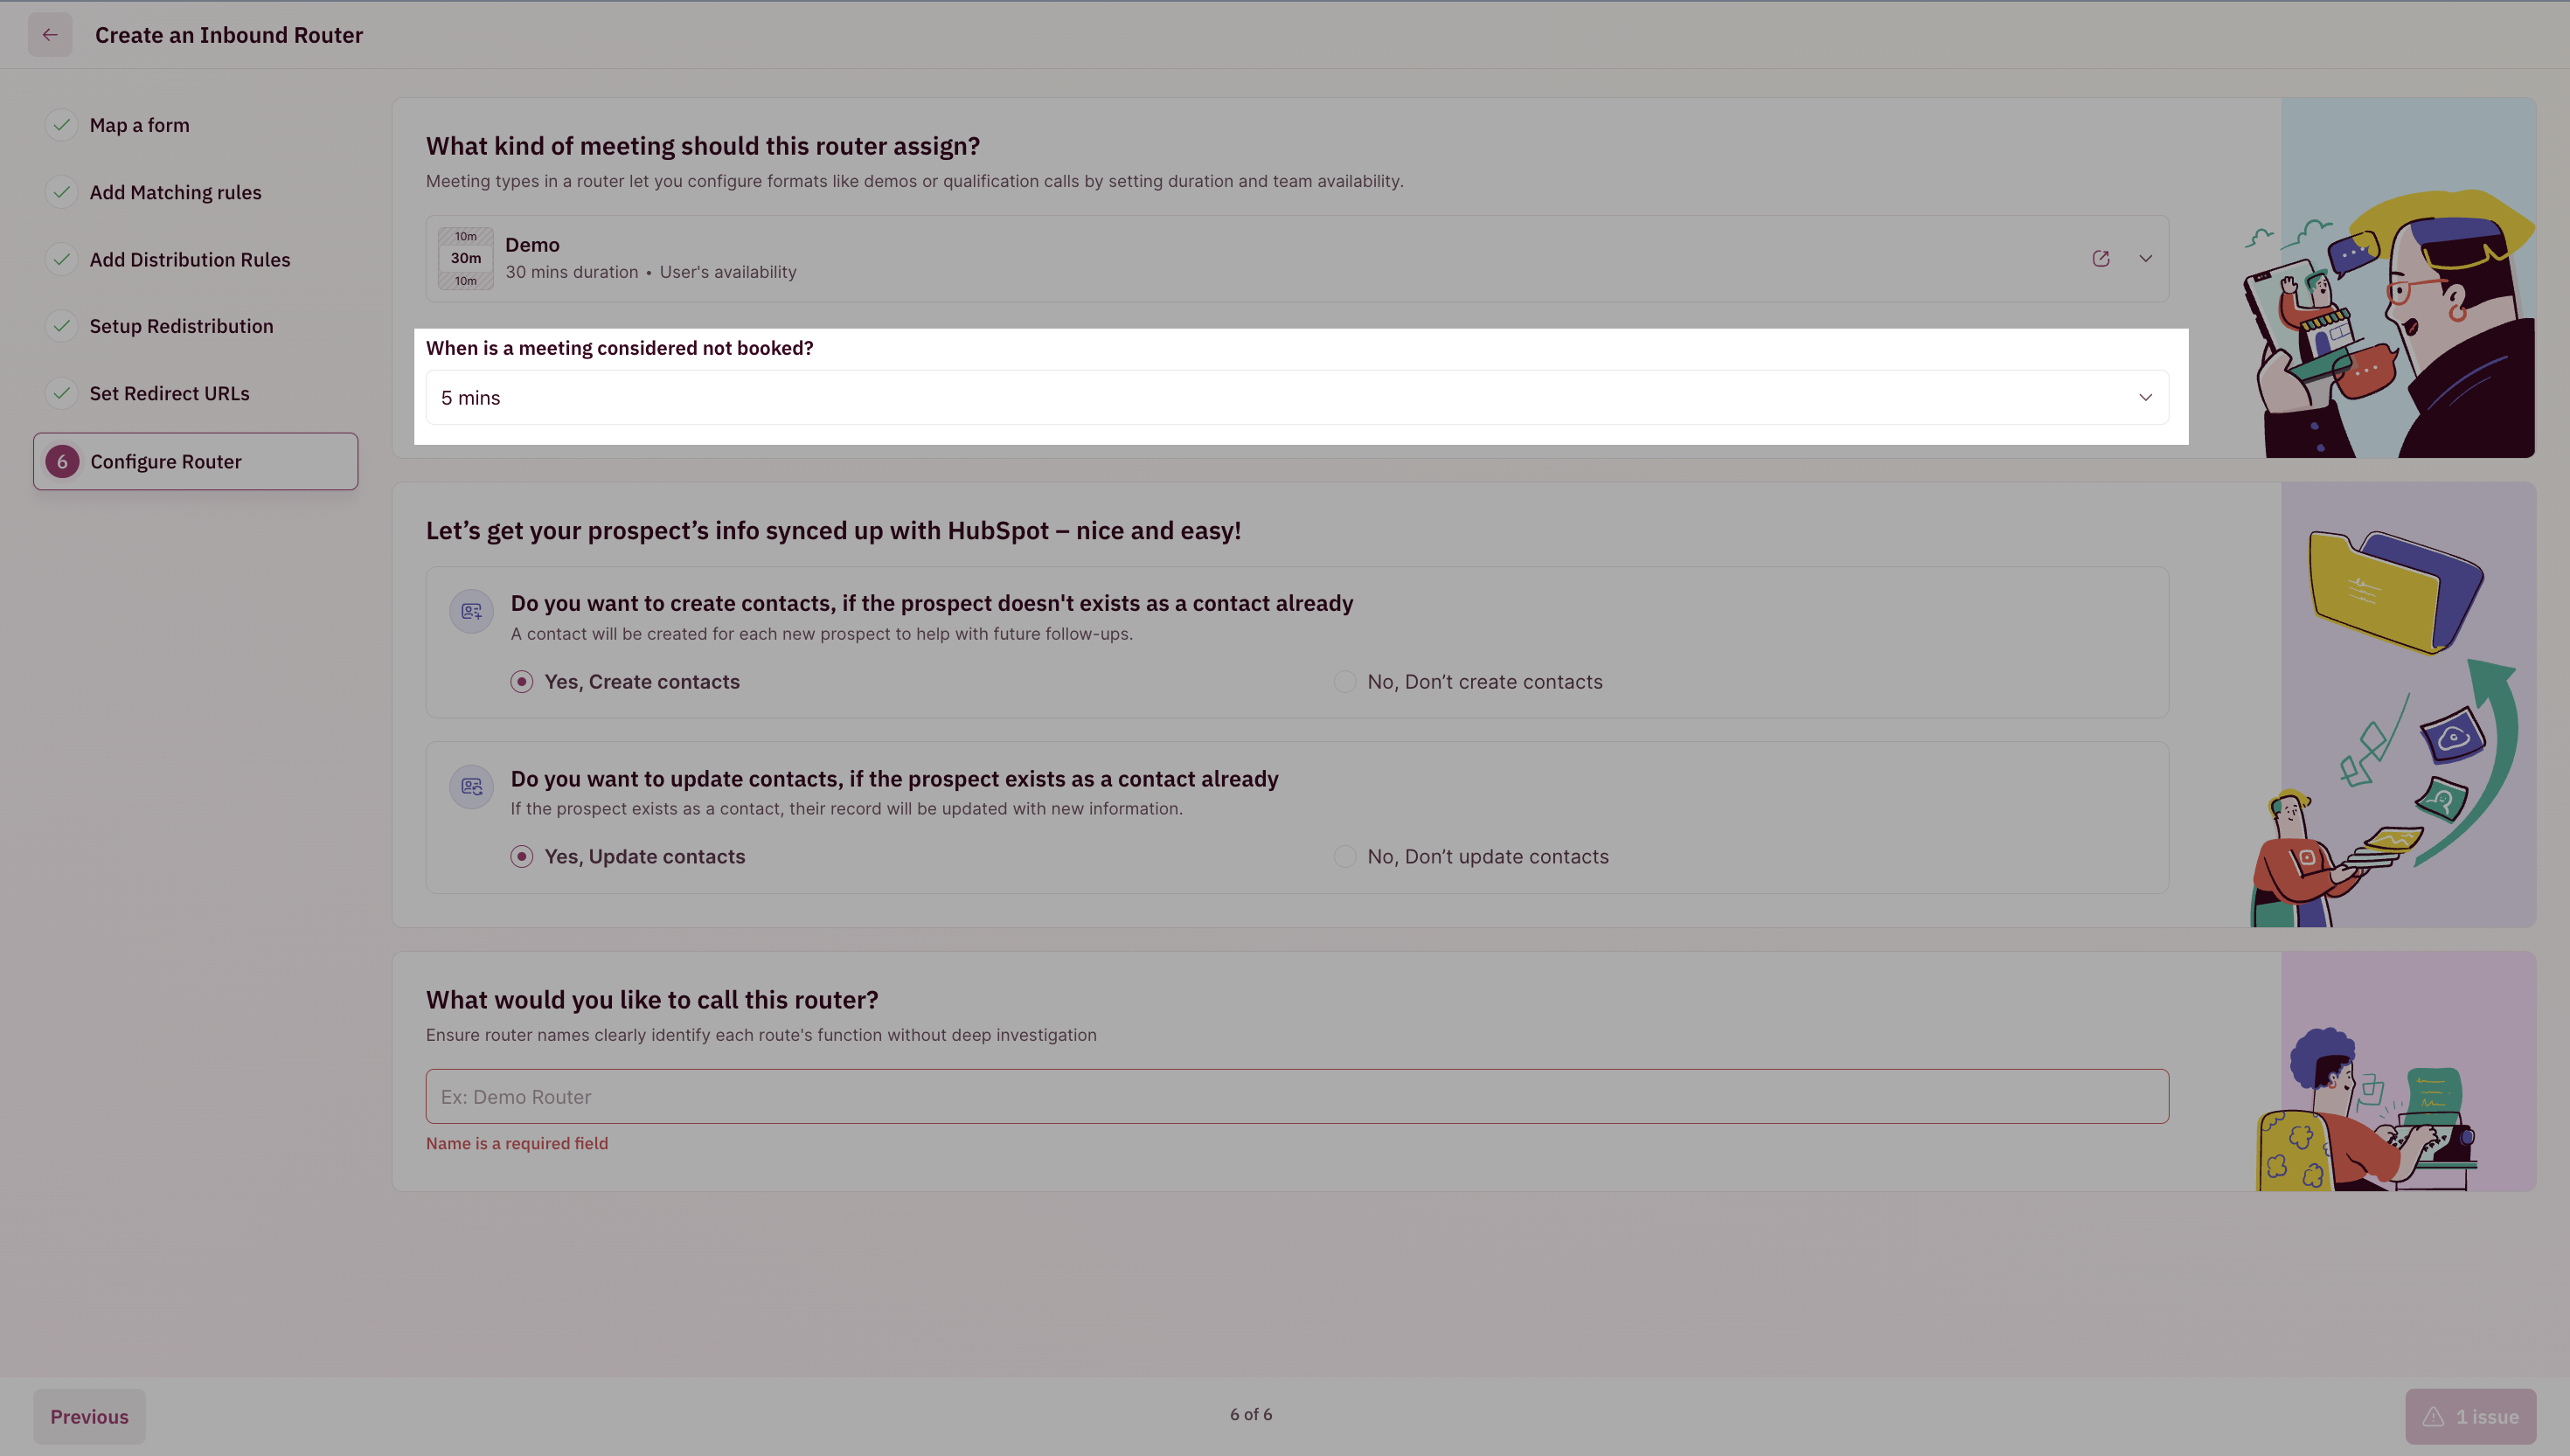
- Use the “What kind of meeting should this router assign?” field to select the meeting type for this router.
- Set when a meeting should be considered as “Not booked” using the drop-down field under “Meeting considered ‘not booked’ after”. You can choose between “5 mins”, “10 mins”, or “15 mins”.
CRM Settings
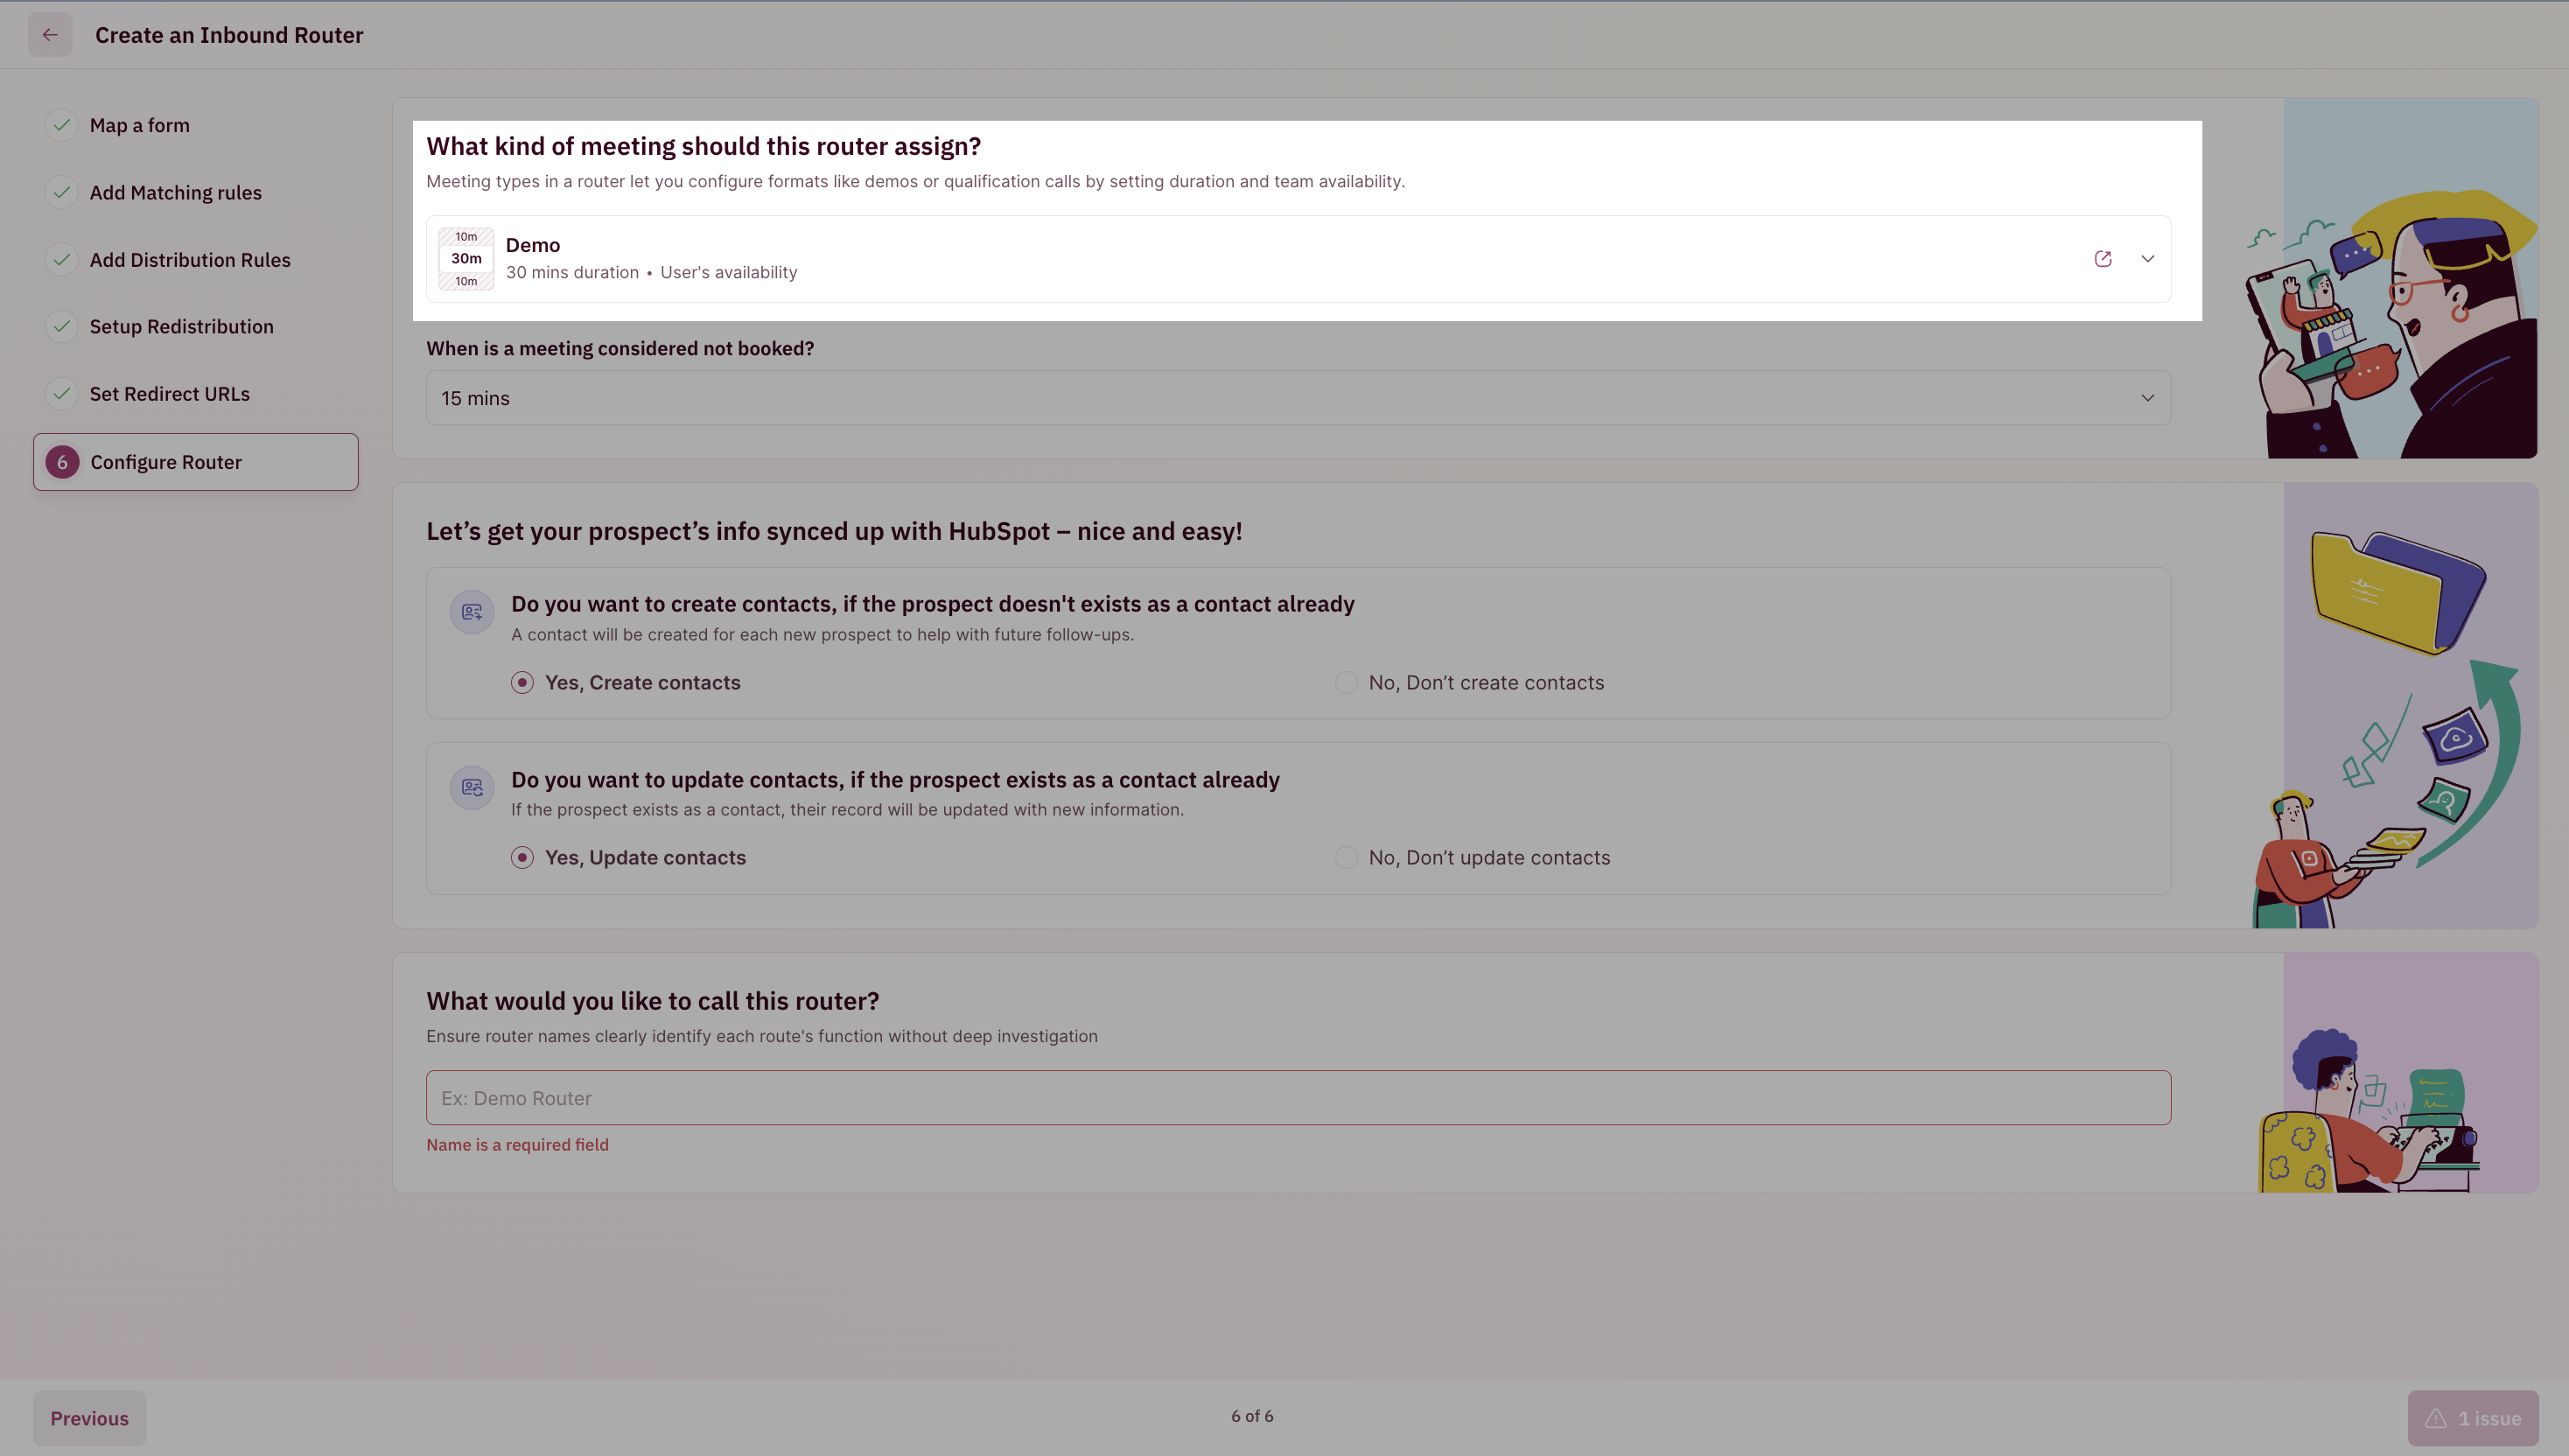
Here you can choose to disqualify submissions if the email address uses a free email provider.Naming your router
Use the “What would you like to call this router?” field to give your router a name. Using the same example we’ve used throughout this article, we’ll name our router USA Router.Install the script
Pop-up on form submit
Install the scheduler as a pop-up upon form submit.
Embed Scheduler on page
Install the scheduler as an embedded element after form submit.
In-app scheduler
Install the scheduler as a pop-up inside your application.
Thank-you page scheduler
Install the scheduler as a pop-up inside your application.
Hubspot Pages
Install the script on a Hubspot Page.
Webflow Pages
Install the script on a Webflow Page.
React based CMS
Install the script on a page that’s built on React.
Through Google Tag Manager
Install the script on a page that’s built on React.
That’s it! Your inbound router is set up. 🎉🎉🎉