Different Matching Rules
Matching rules can be set up to:Match to owner of existing contacts.
Match to owner of existing contacts.
This assigns meetings to the same owner when the same contact submits.Example:john@notion.com submits a demo request form on the 13th of November and is
assigned to Paula from the US sales team, and books a meeting with Paula.If John submits the demo request form again on the 20th of November, RevenueHero will look up John’s account owner in the CRM and ensure that he is presented with the same owner’s calendar.
Match to the owner of similar contacts.
Match to the owner of similar contacts.
This assigns meetings to the owner of related contacts.Example:will@notion.com submits a demo request form.john@notion.com is an existing contact in Hubspot. John’s account owner is Niklas.RevenueHero can look up contacts with the same domain, and assign the meeting to the account owner of the latest contact.
Match to the owner of a company.
Match to the owner of a company.
This assigns the meetings to the owner of the company. This is particularly helpful if you’re running an ABM campaign and going after a targeted list of companies.Example:rachel@notion.com submits a demo request form.Notion is a company that already exists in your CRM and is owned by Michelle. RevenueHero can look up the company associated with the domain of the contact that submitted the form and assigns the meeting to the company owner.
Match to the owner of associated company
Match to the owner of associated company
This assigns the meeting to the owner of the account tied to the contact. This is particularly helpful if you want to ensure meetings are always routed to the account owner managing the relationship, rather than just the individual contact owner.Example:rachel@notion.com submits a demo request form.RevenueHero first searches for Rachel as a contact in your CRM. Once it finds her contact record, it looks up the account associated with Rachel’s contact record. Since Notion is owned by Michelle, the meeting is automatically assigned to Michelle, the account owner.
Steps to create a Matching Rule for Inbound Routers
Navigate to Matching Rule
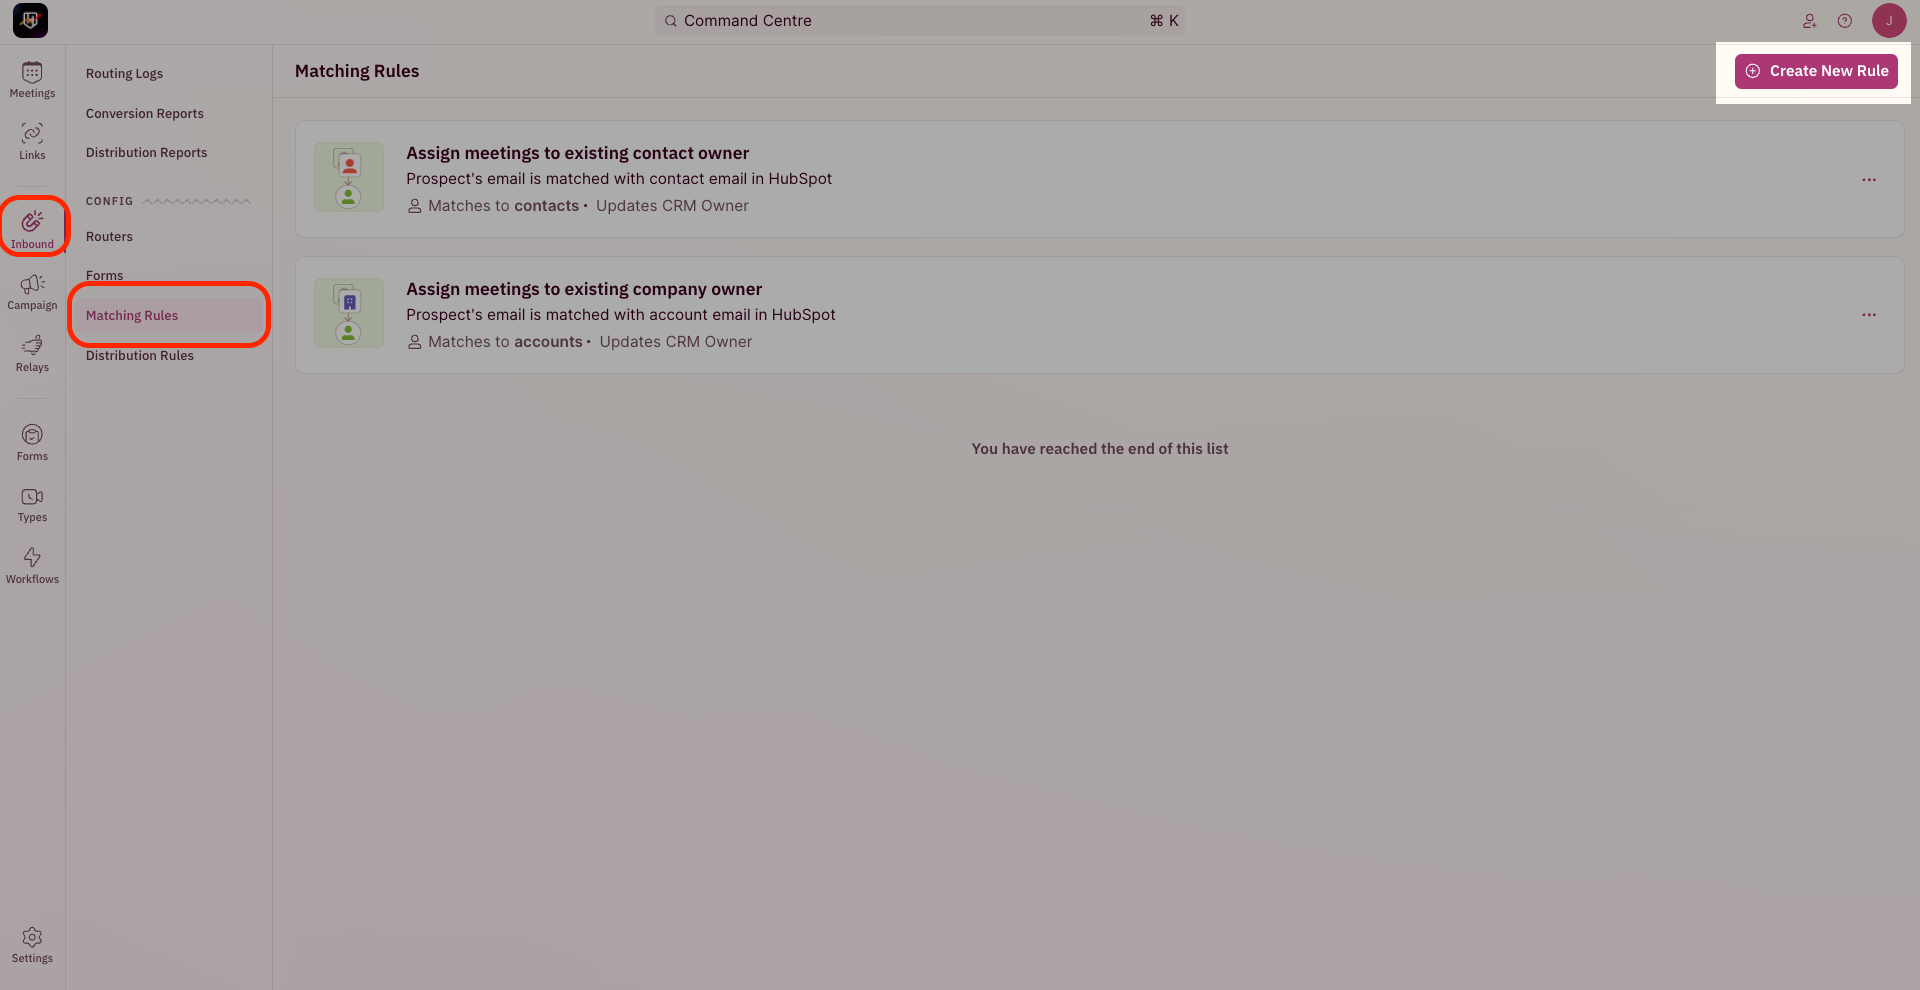
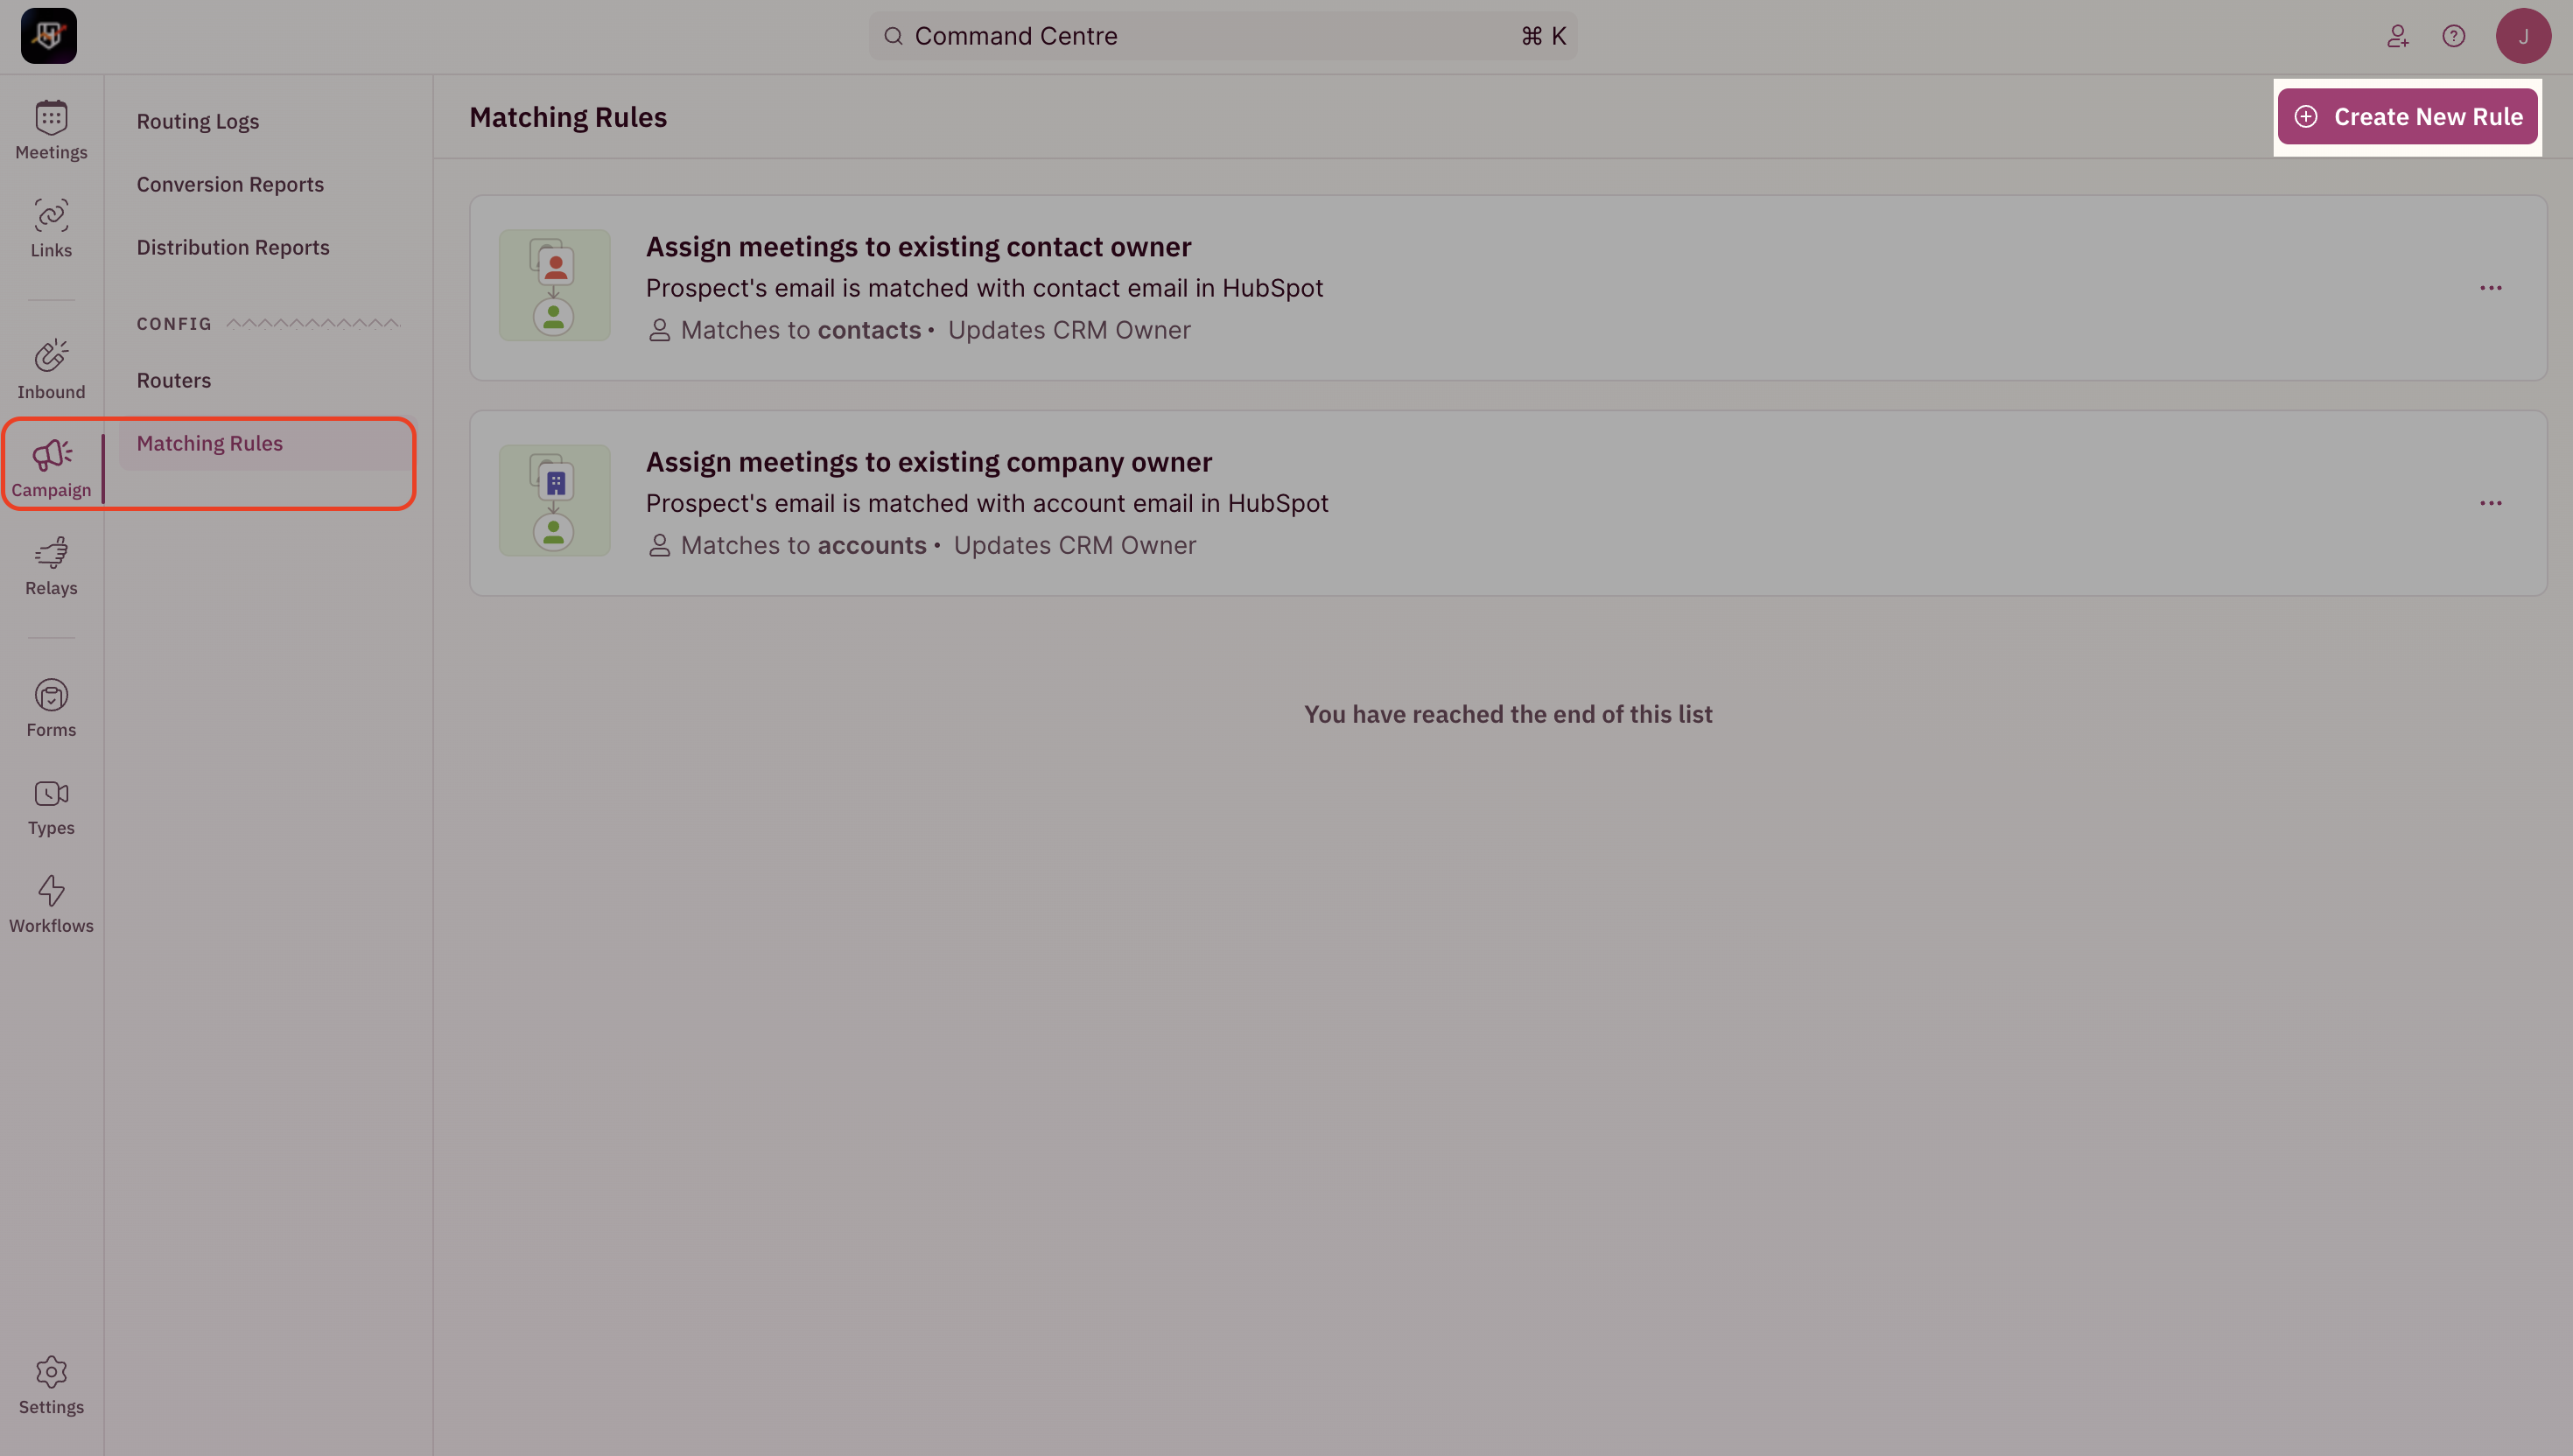
- To create a Matching Rule, use the side nav bar and click on Inbound → Matching Rules.
- Now, click the ”Create Matching Rule” button on the top-right corner of your screen.
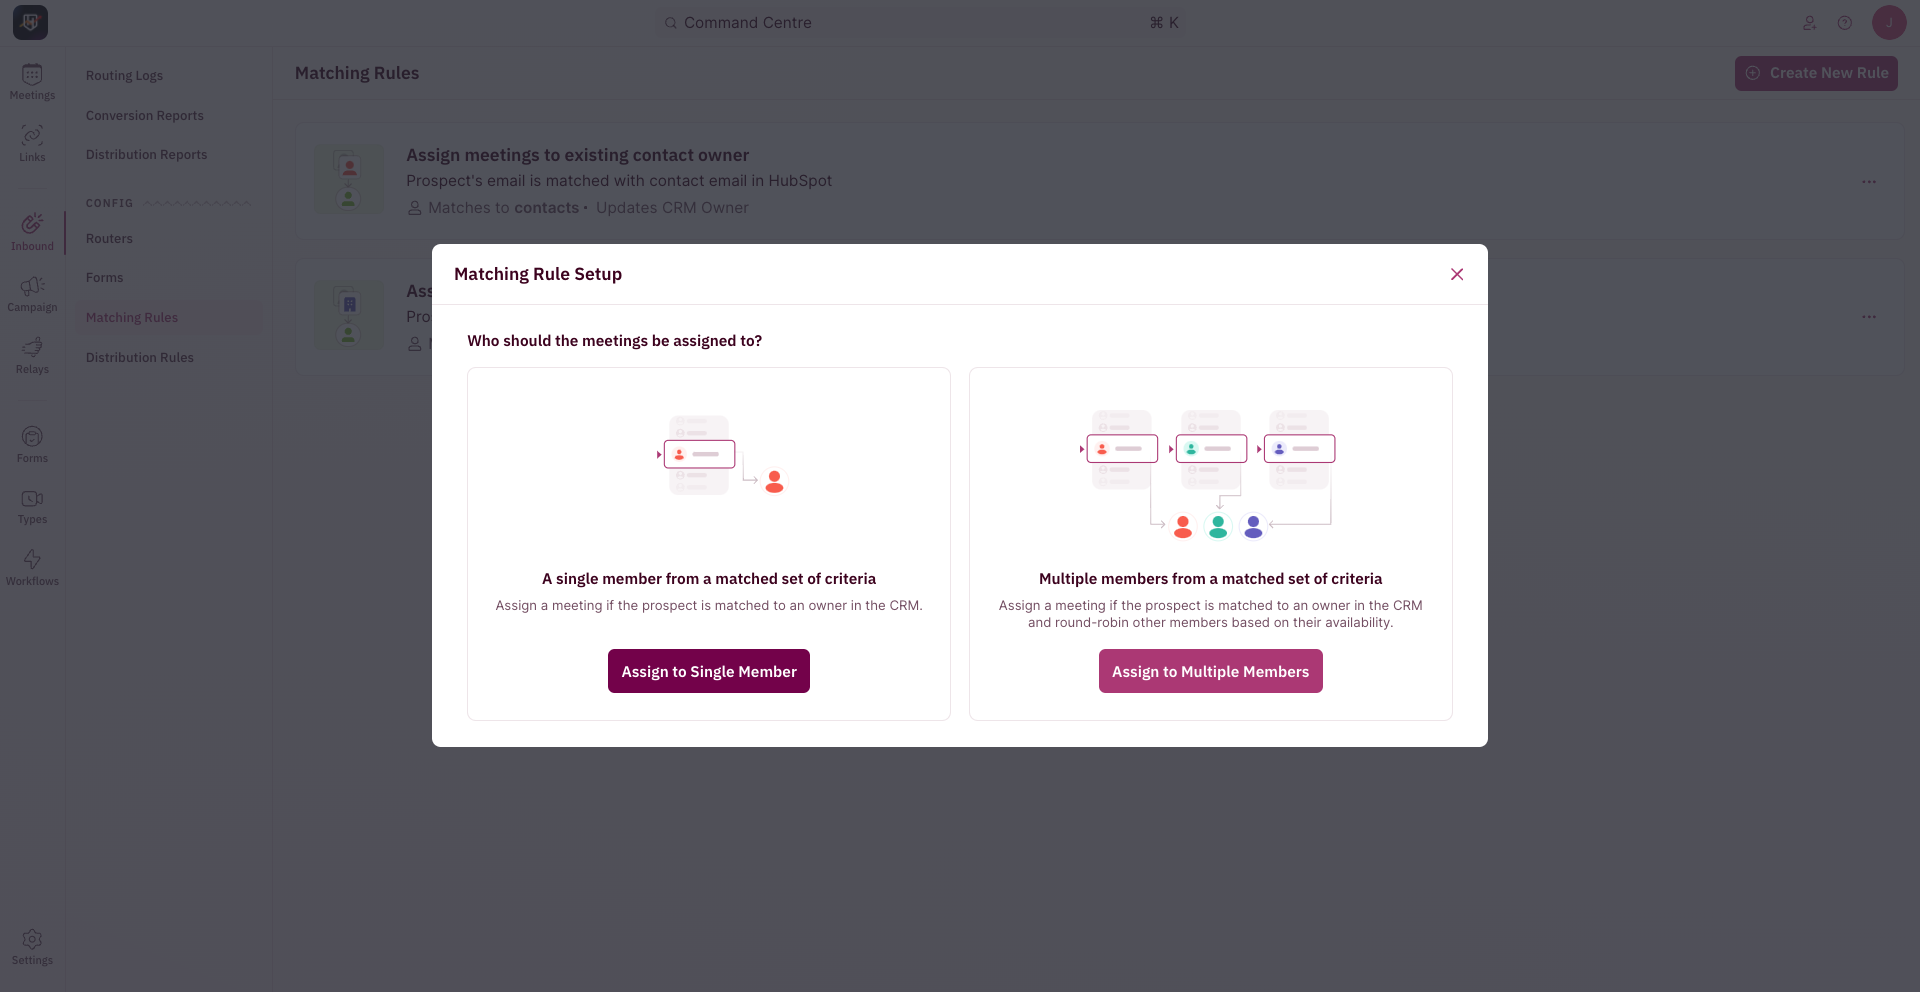
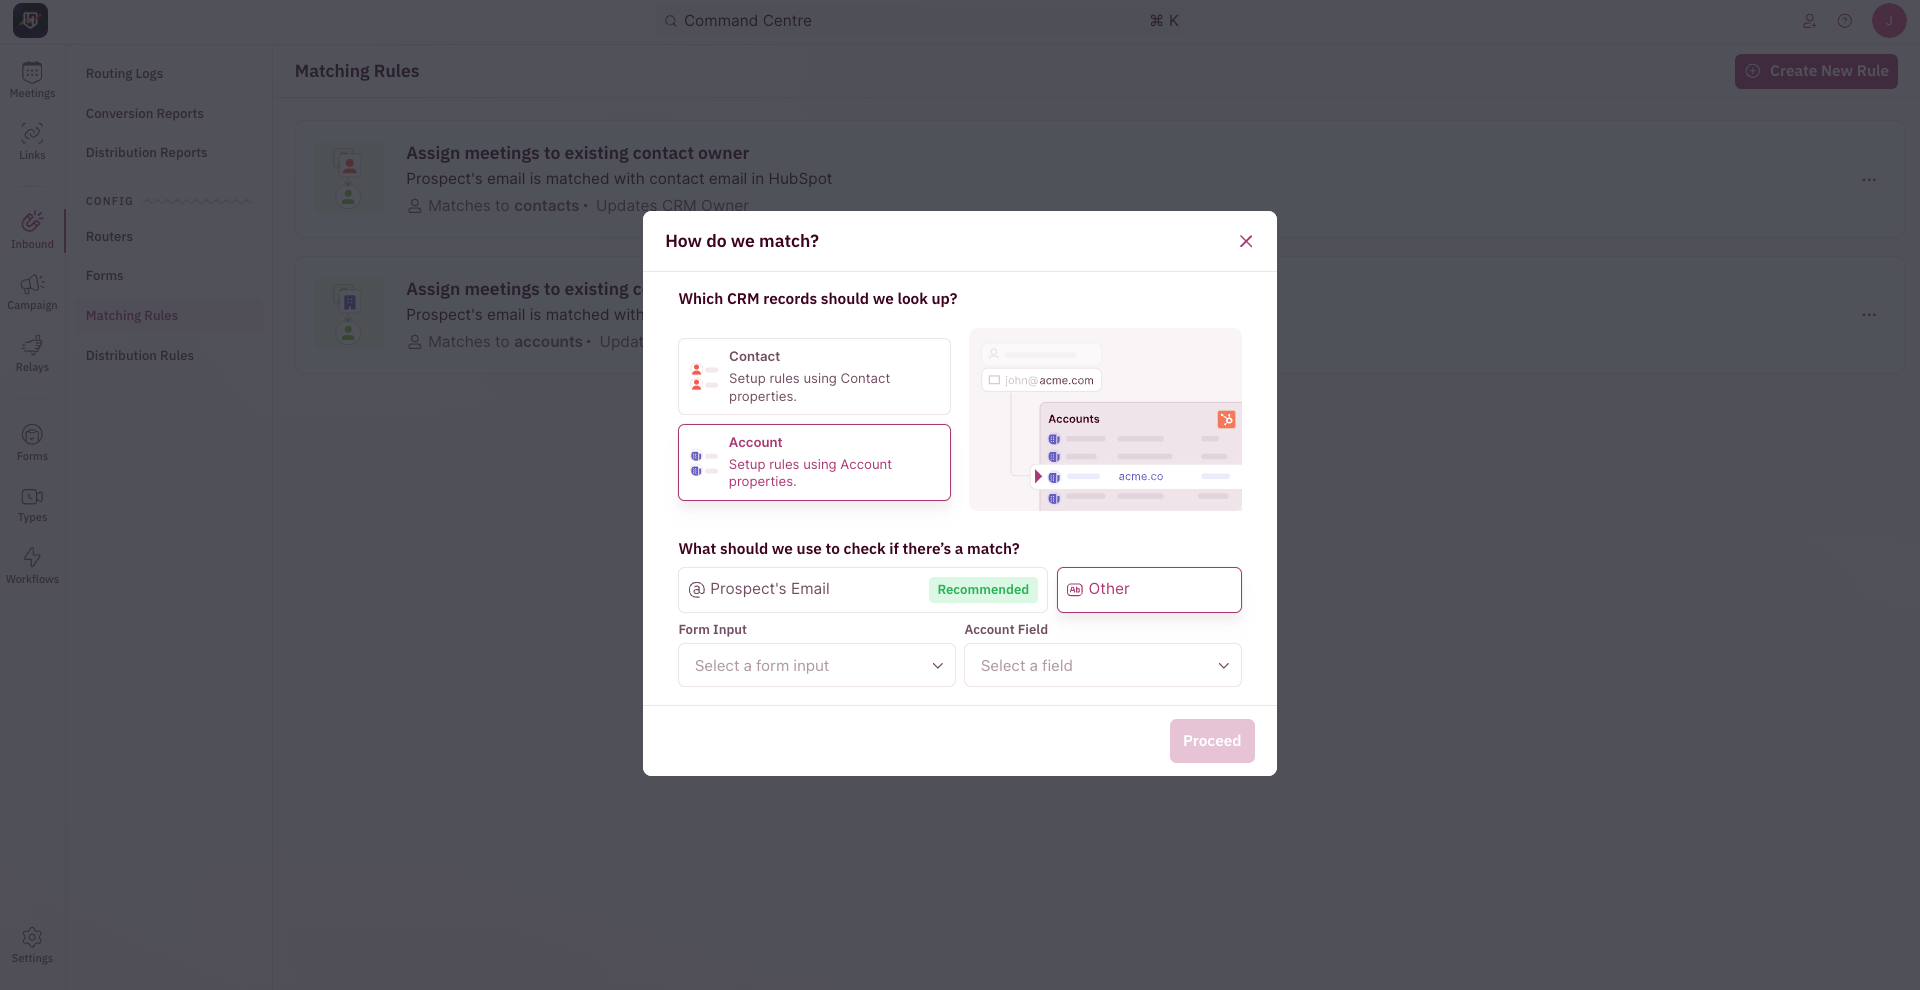
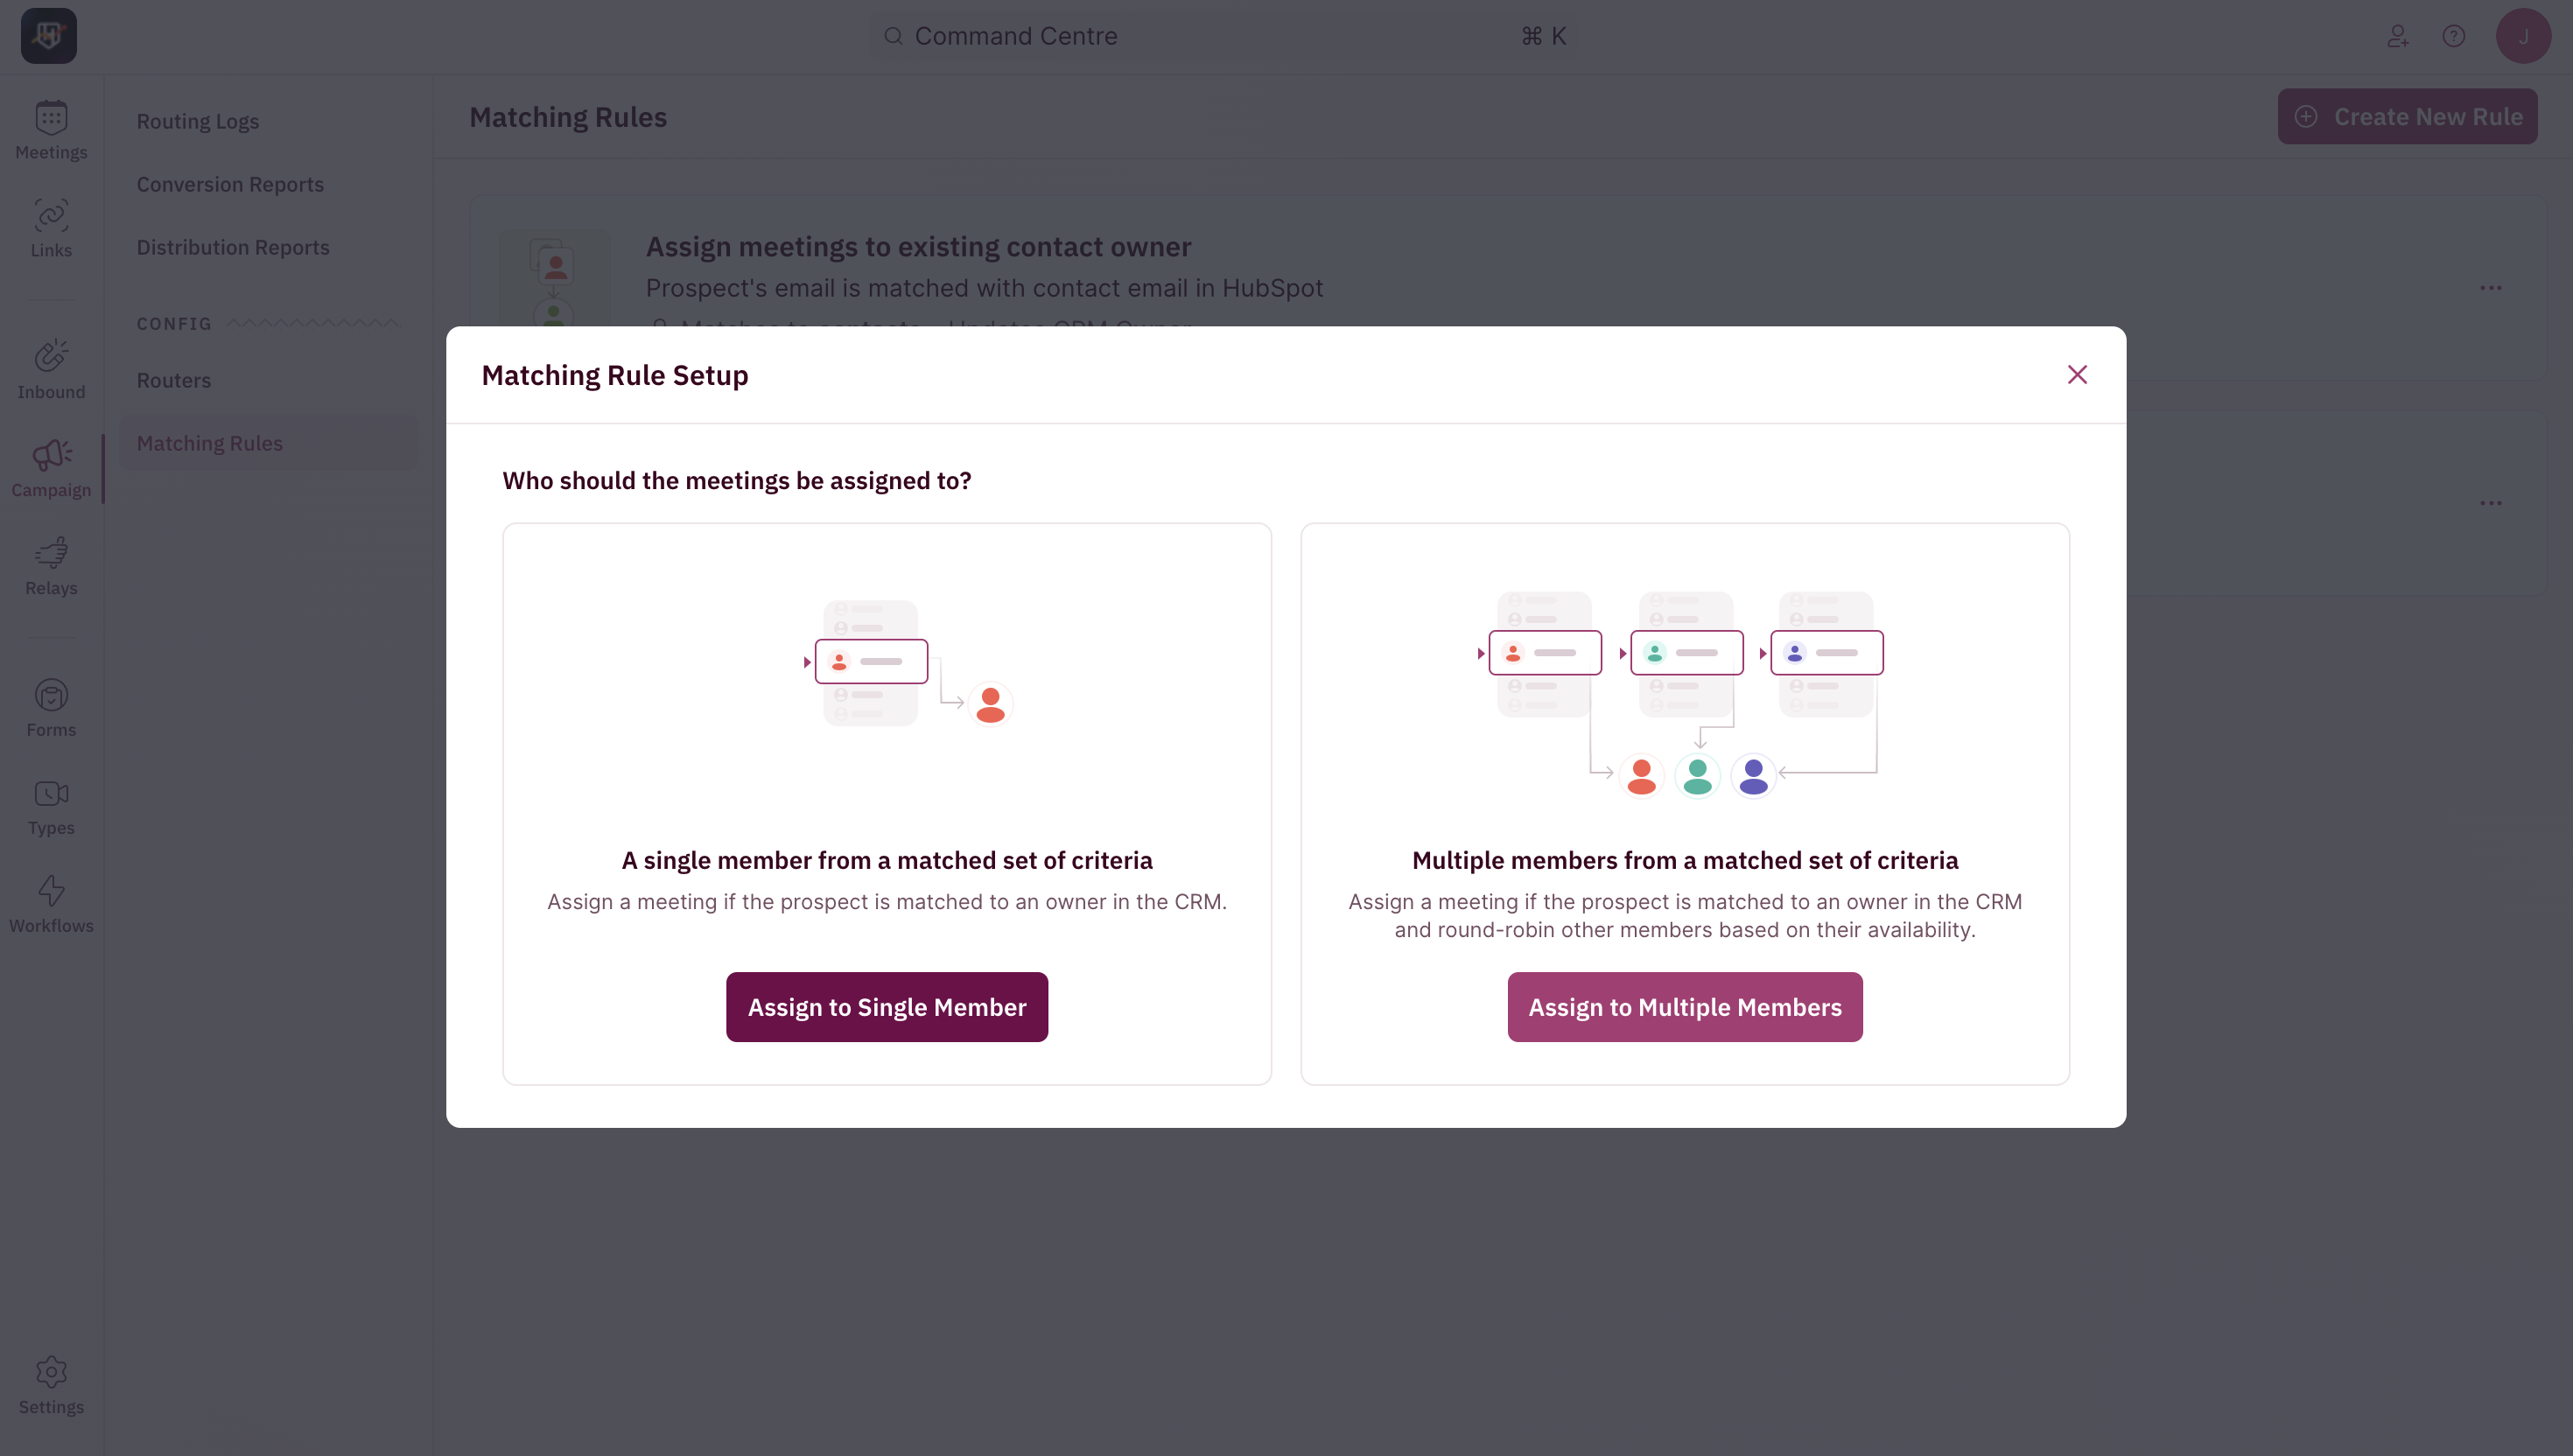
- The pop-up for Matching Rule Setup will first ask you to choose the kind of matching.
- Click on “Assign to Single” in the pop-up for Matching Rule Setup.
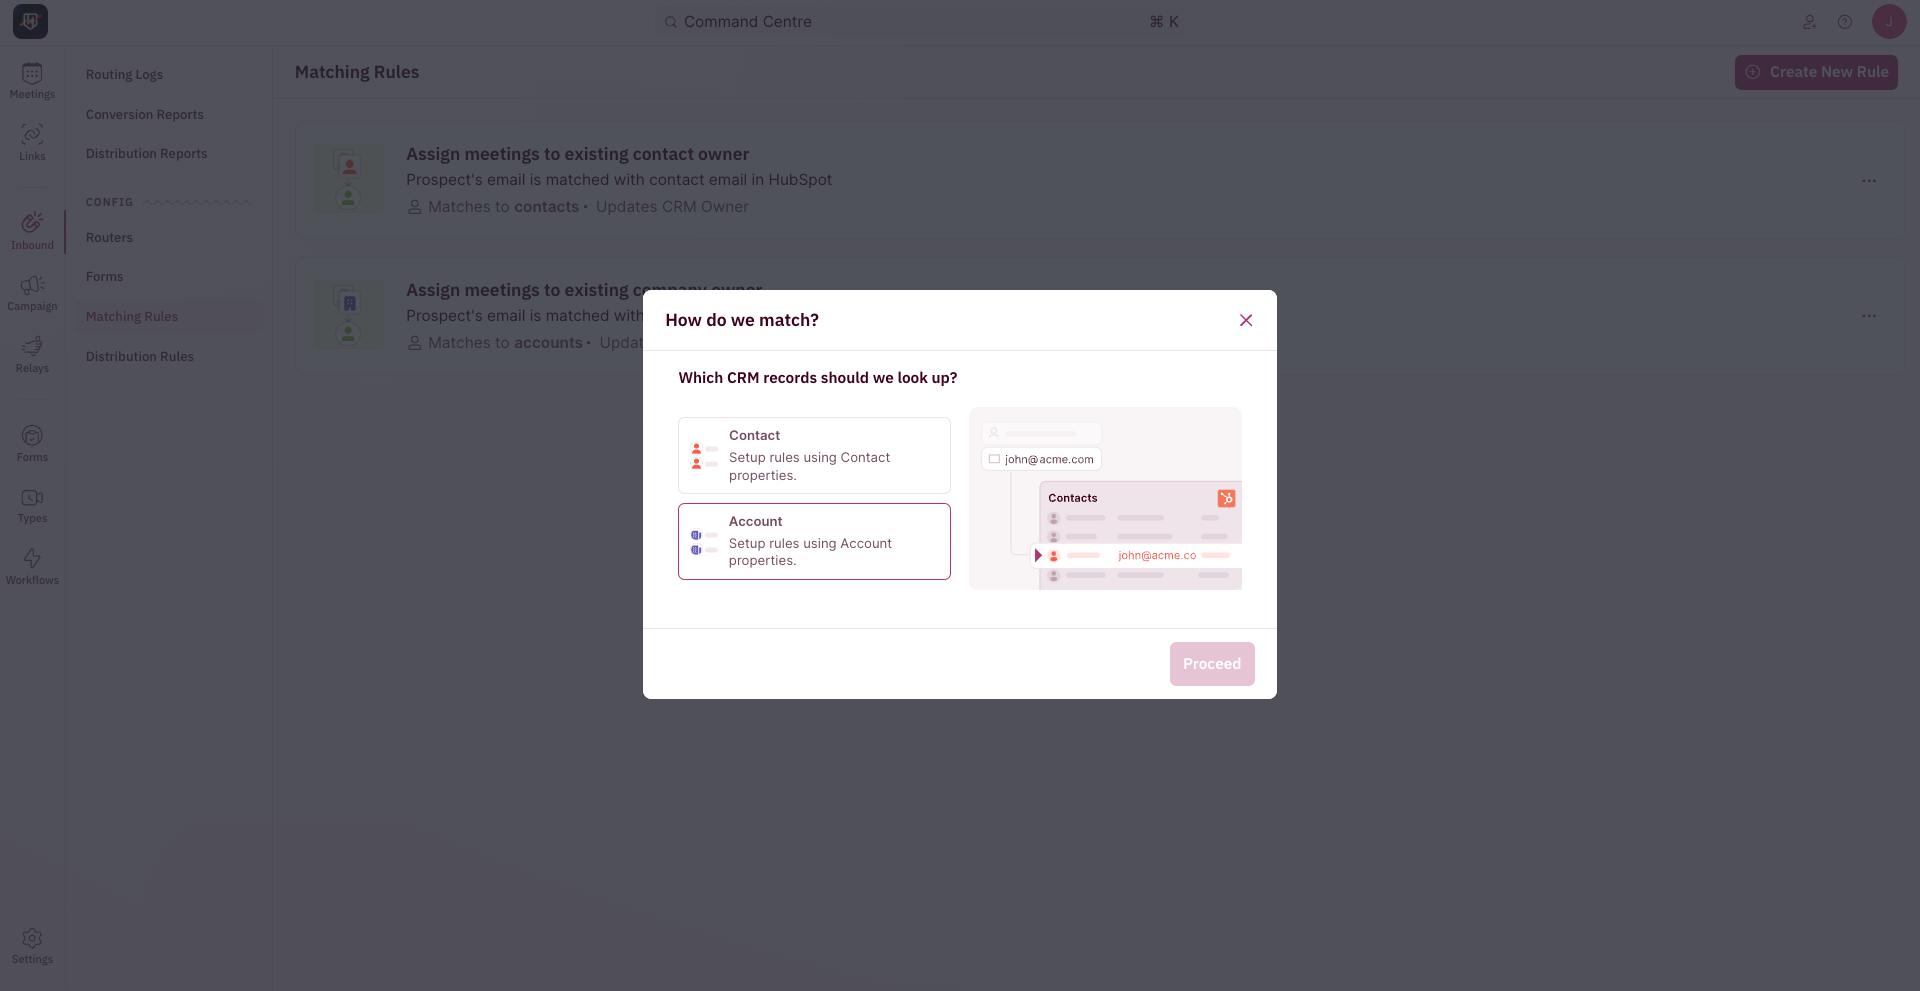
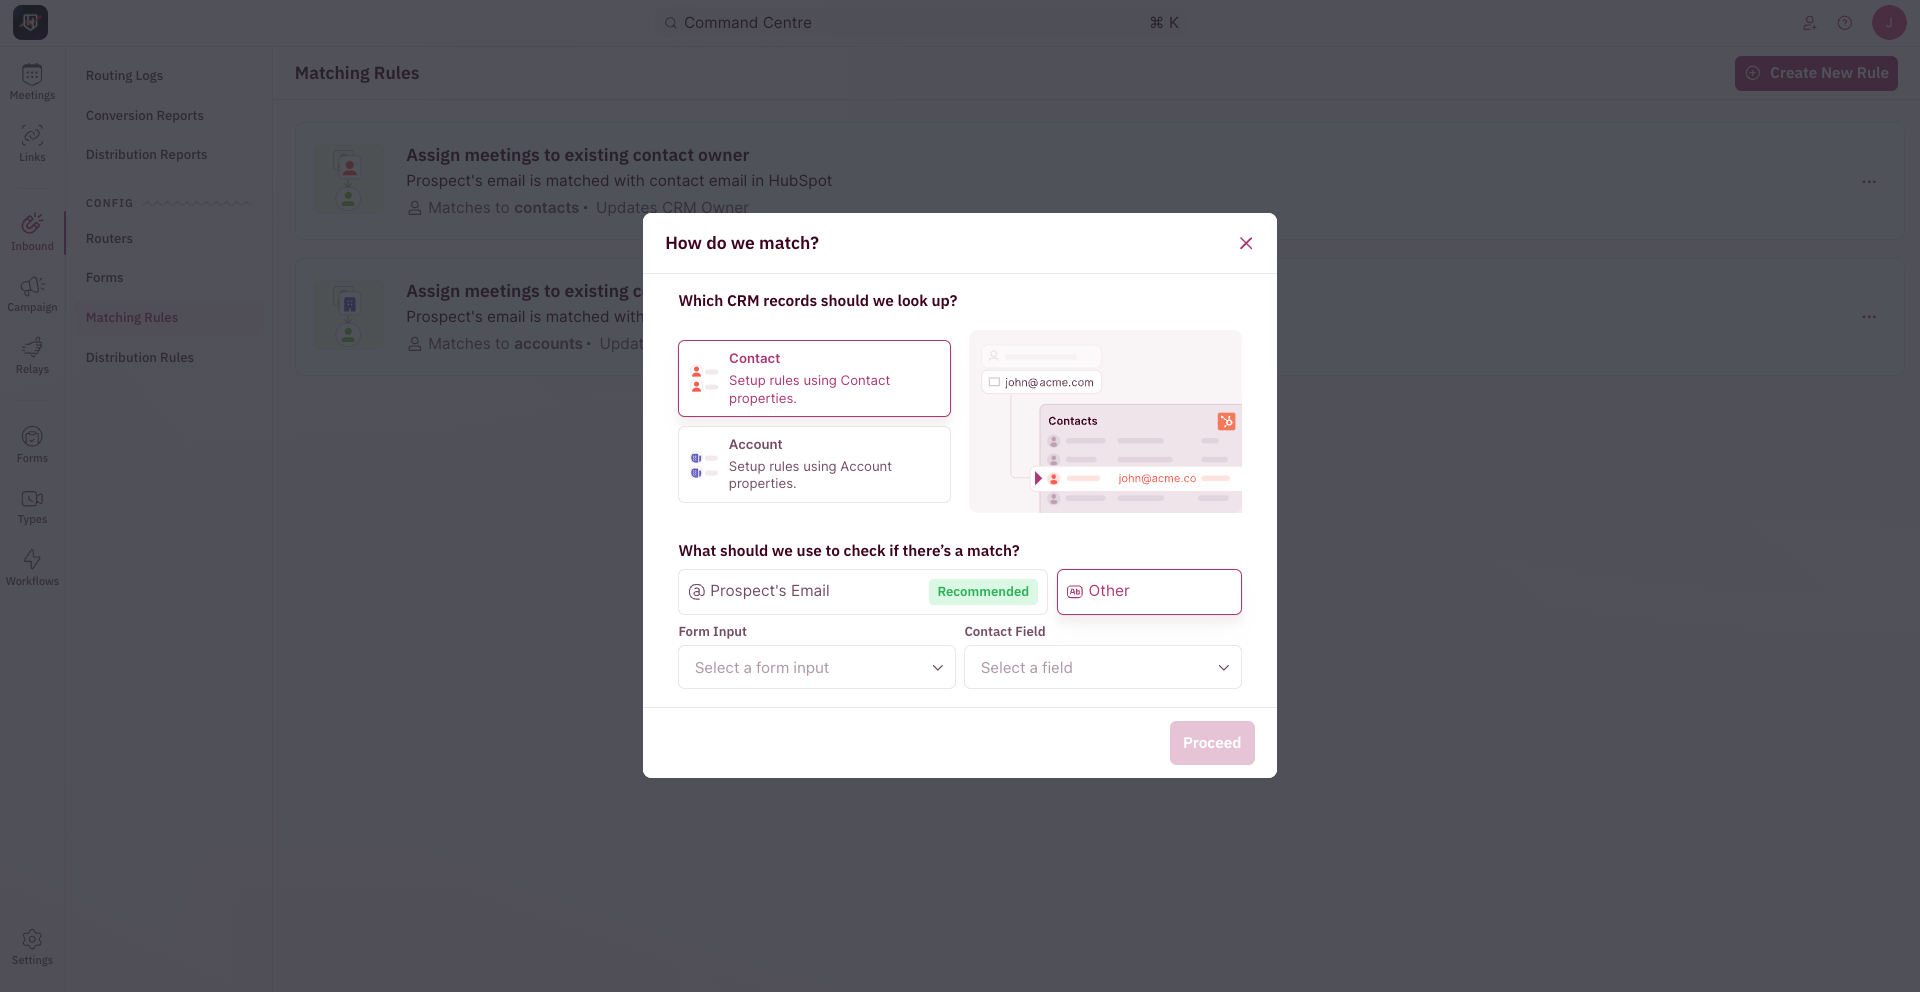
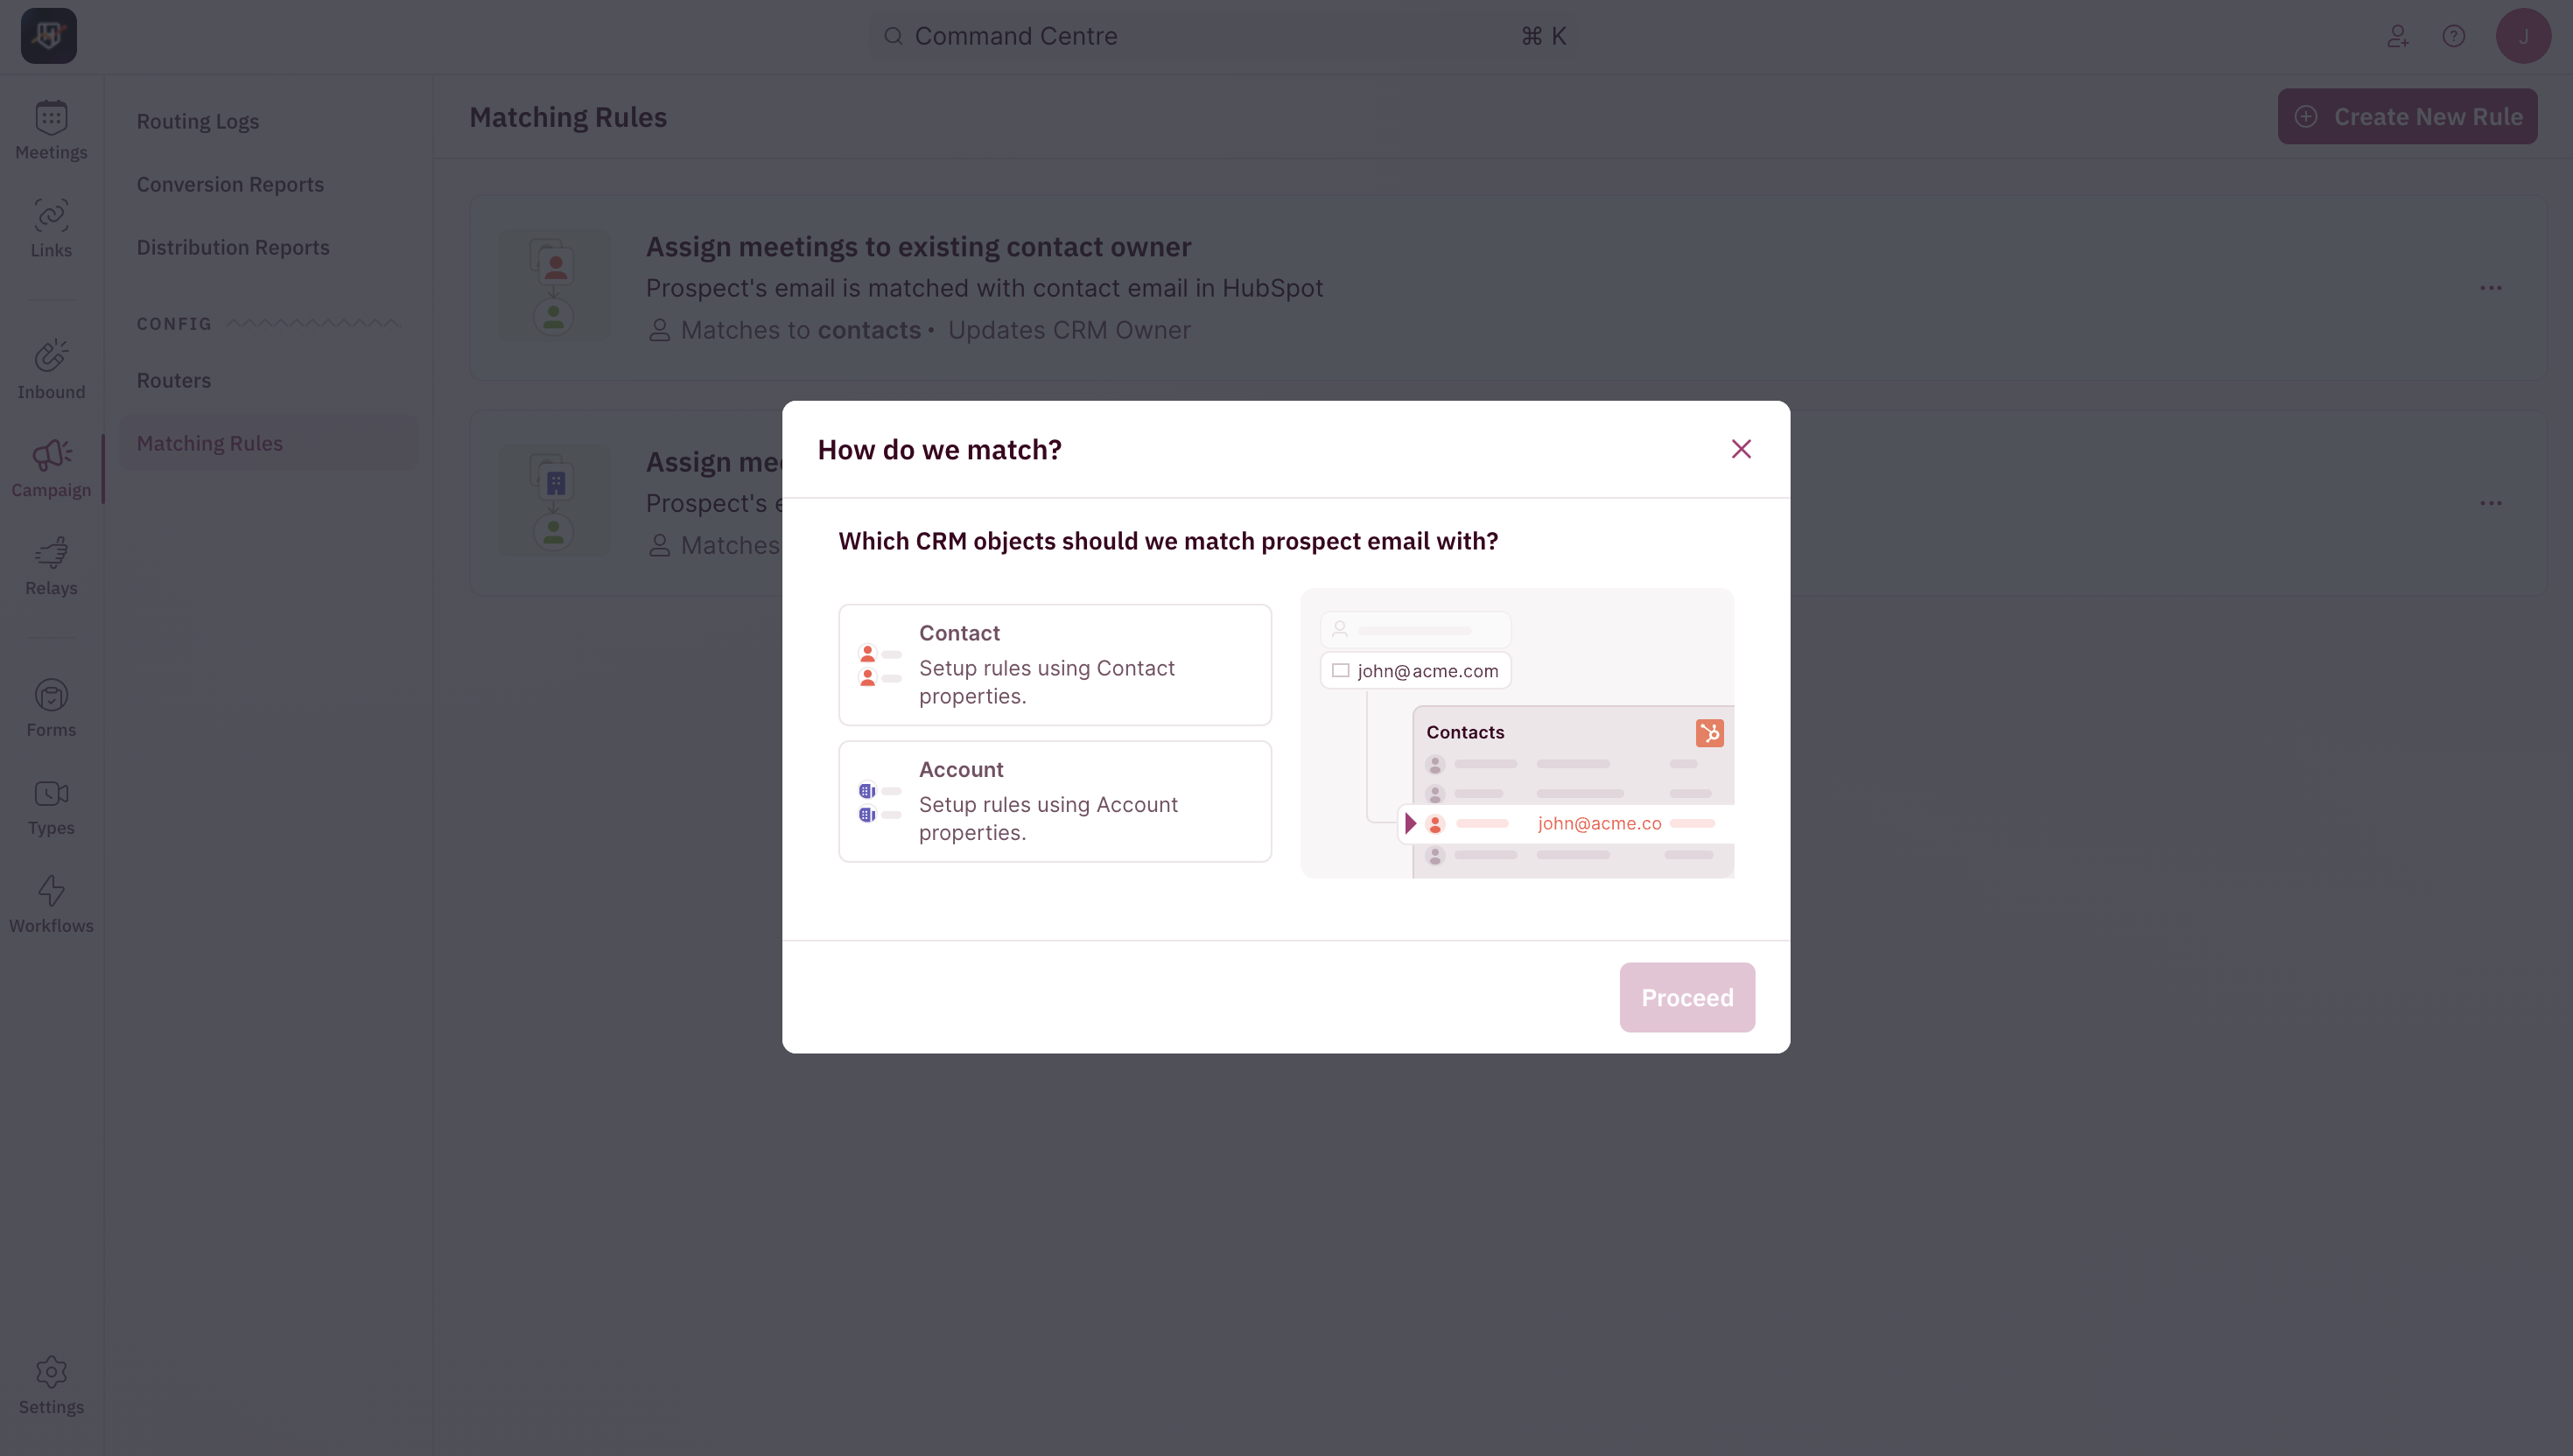
- Choose the CRM object you want to match with - either Contact or Account. Based on the property you select you can set up rules.
- If you choose Contact, you’ll be required to select “What should be used to check if there’s a match?”. The options are between Prospect Email, Prospect Phone, or a custom CRM property of your choice. Once you make your selection, click “Proceed”.
- If you choose Account, you’ll be required to select “What should be used to check if there’s a match?”. The options are between Prospect Email, Prospect Phone, or a custom CRM property of your choice. Once you make your selection, click “Proceed”.
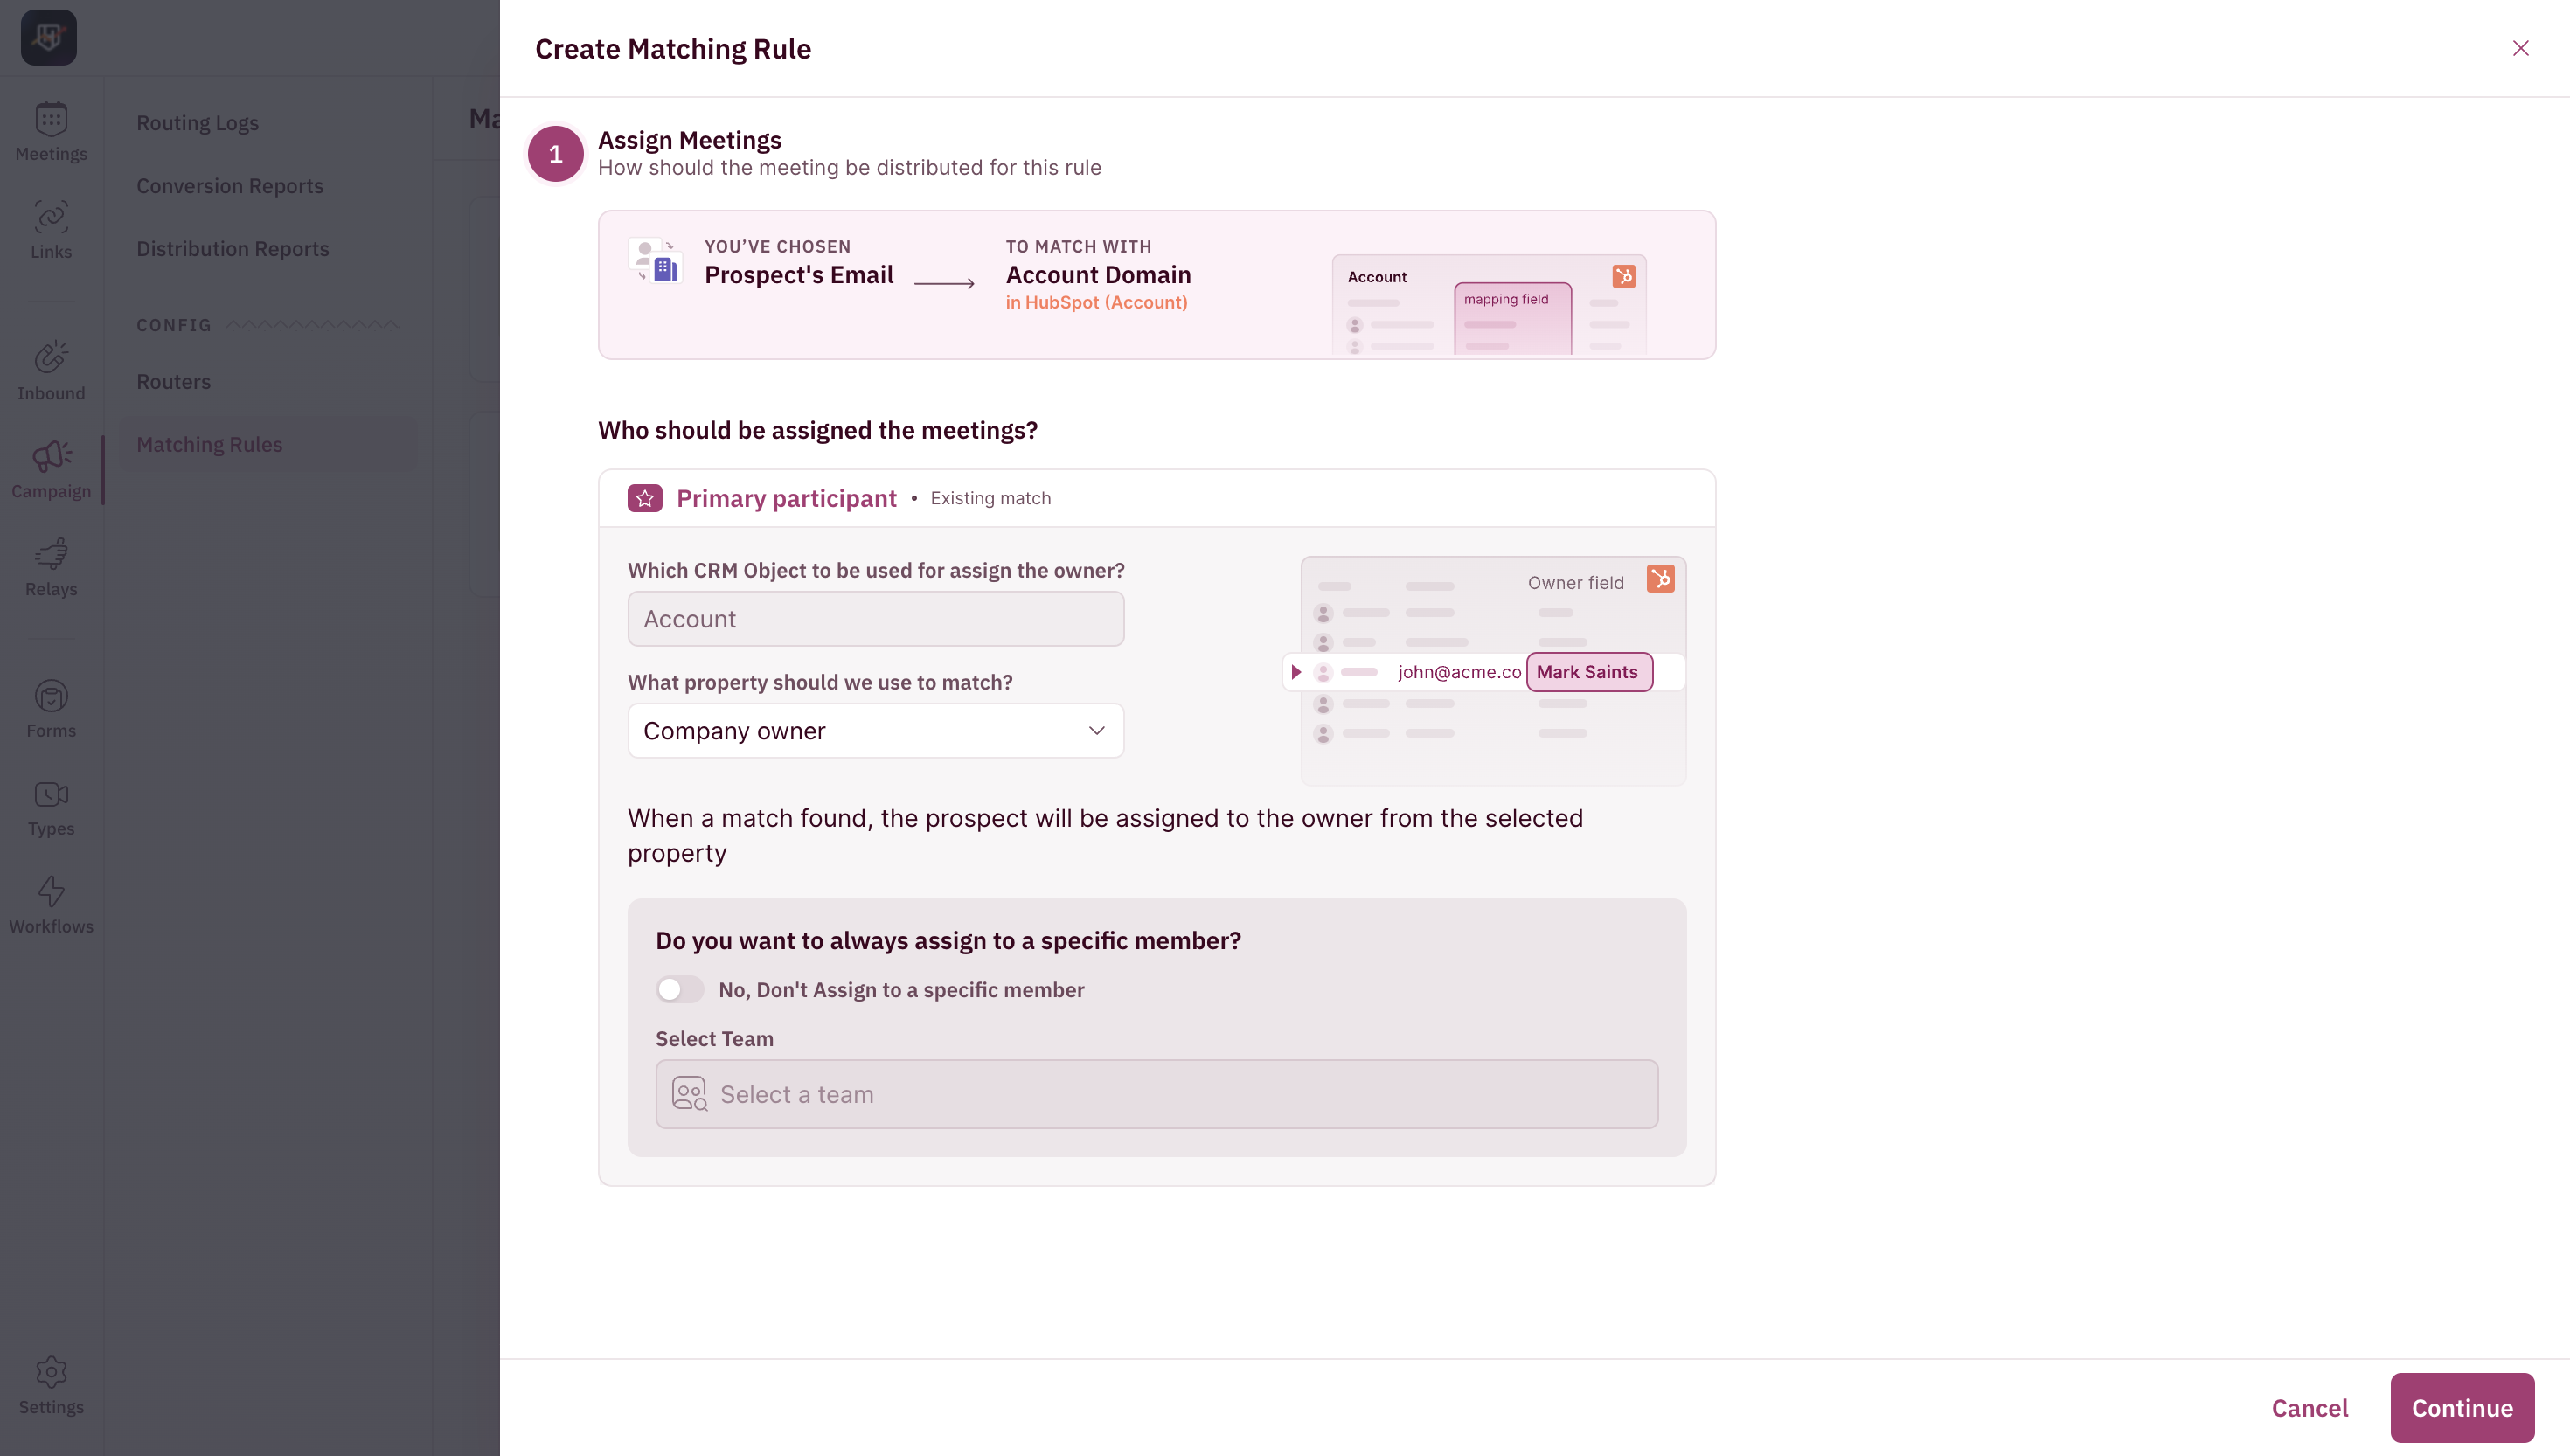
- Next, you need to decide who should be assigned meetings for this particular matching rule.
For the primary participant, choose which property you want to match the CRM object with. When a match is found, the prospect will be assigned to the owner of the selected property.
You can also choose if you always want to assign it to a specific member. If yes, choose the team and the member from the team. Click “Continue”.
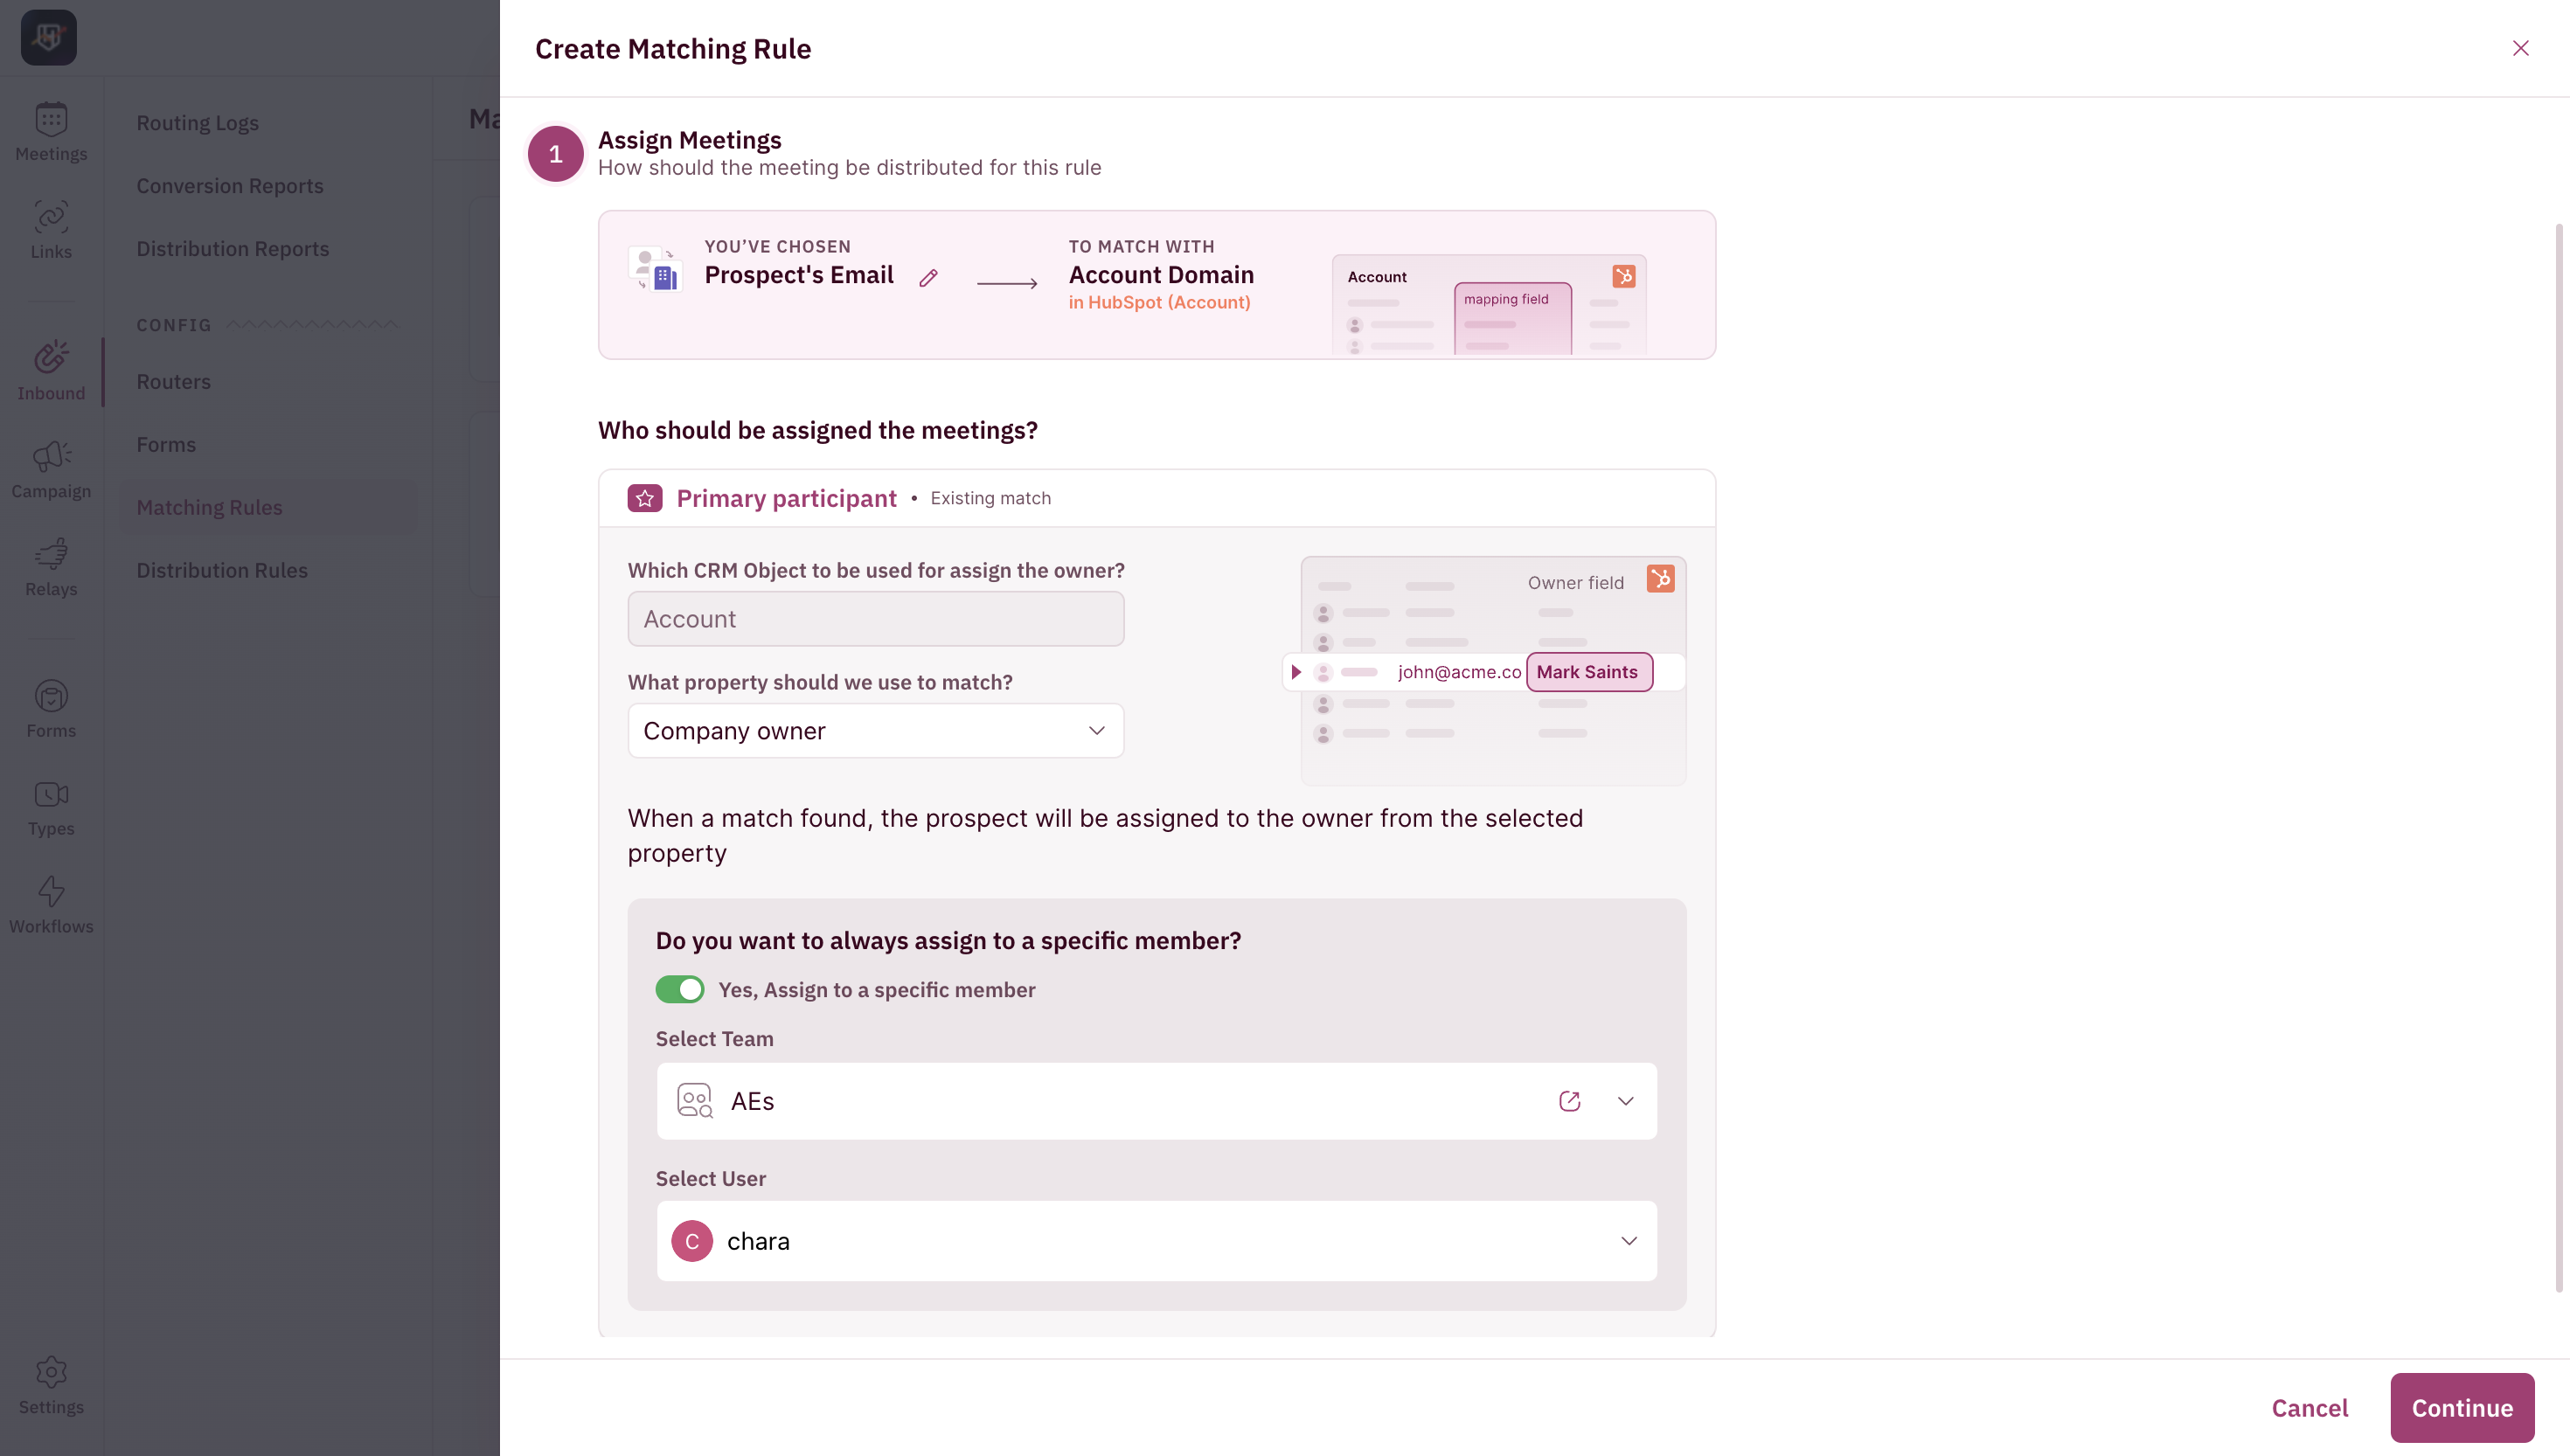
- Click “Continue”.
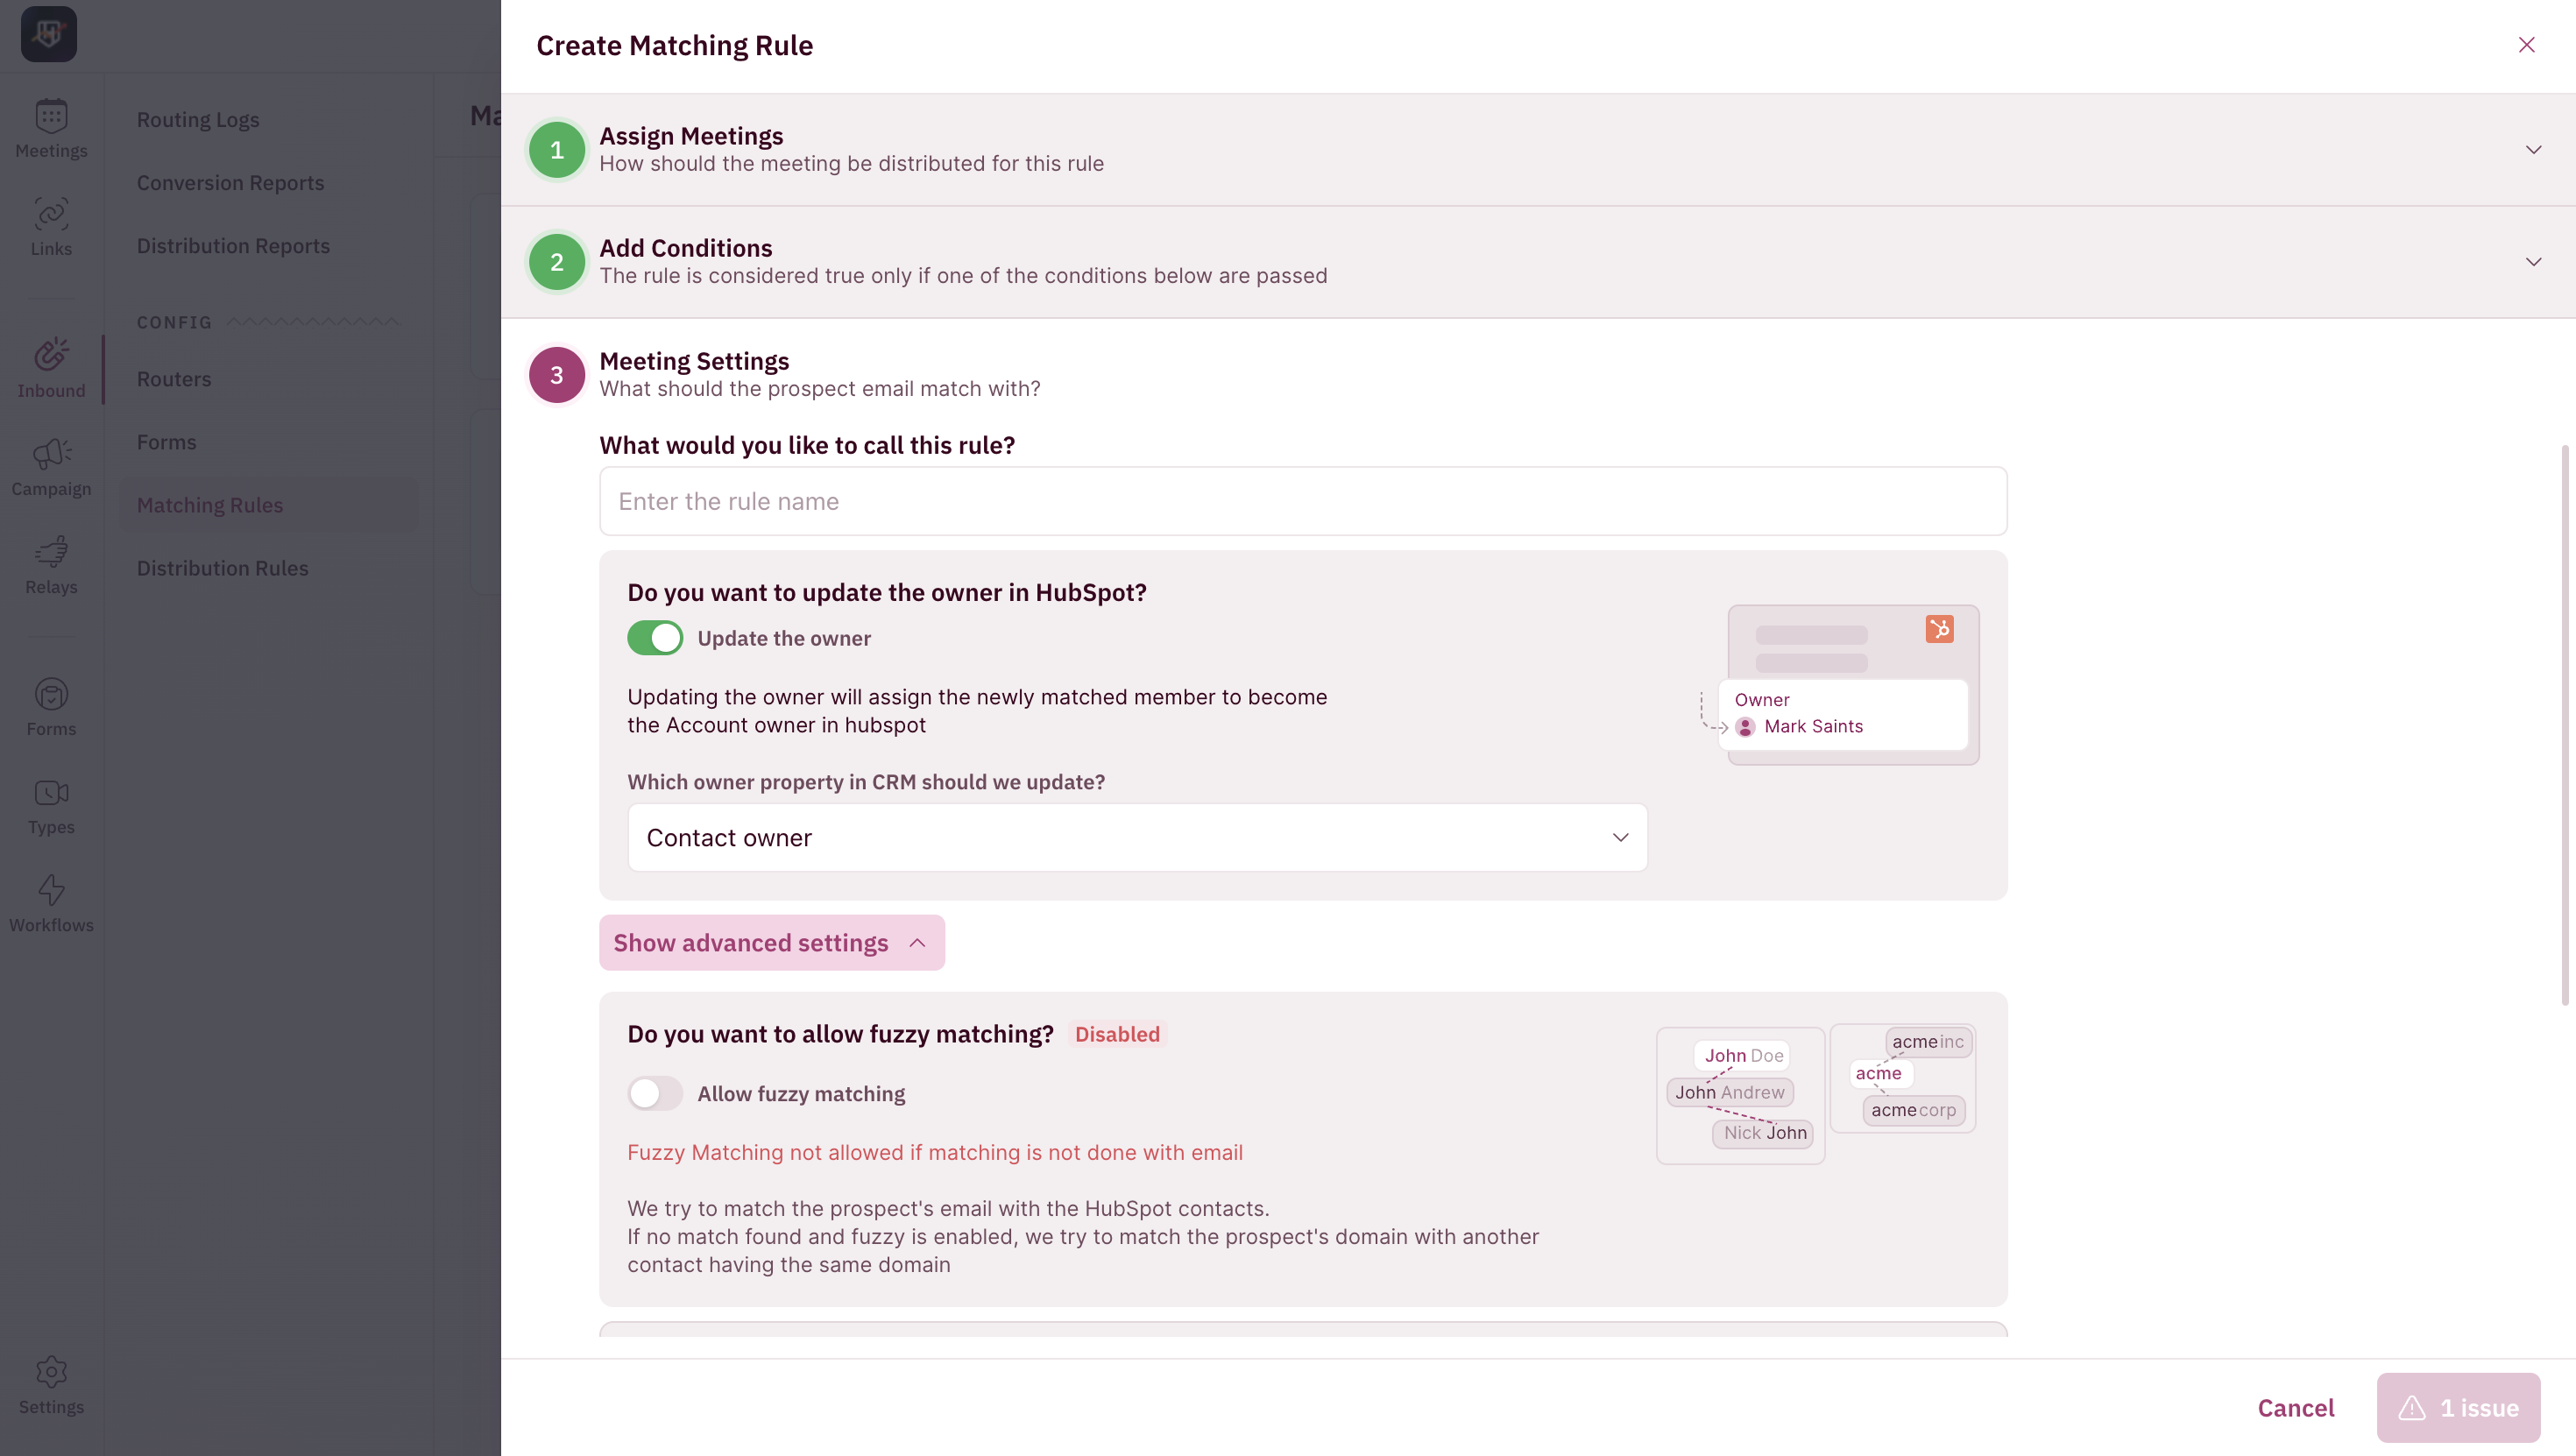
Set Conditions to Check
You can set additional conditions here based on CRM property values or Form Inputs that need to be checked.
Understanding Meeting Settings
- Lastly, you have the Meeting Settings where you’ll need to give your Matching Rule a name.
Steps to create a Matching Rule for Campaign Routers and Relays
Navigate to Matching Rule
- a. To create a Matching Rule for Campaign Routers, use the side nav bar and click on Campaign → Matching Rules.

- Now, click the ”Create New Rule” button on the top-right corner of your screen.
- Click on “Assign to Single Member” in the pop-up for Matching Rule Setup.
- Choose the CRM object you want to match with - either Contact or Account. And click “Proceed”.
- Choose the property you want to match the CRM object with from the drop-down. When a match is found, the prospect will be assigned to the owner from the selected property.
- Next, you need to decide how you want meetings to be distributed for this particular matching rule. You can choose between assigning the meeting to the existing owner by matching the existing CRM object with the owner property. Or you can choose to assign the meeting to a specific user by selecting the Team and User.
- Click “Continue”.
- You can set additional conditions here based on CRM property values or Form Inputs that need to be checked.
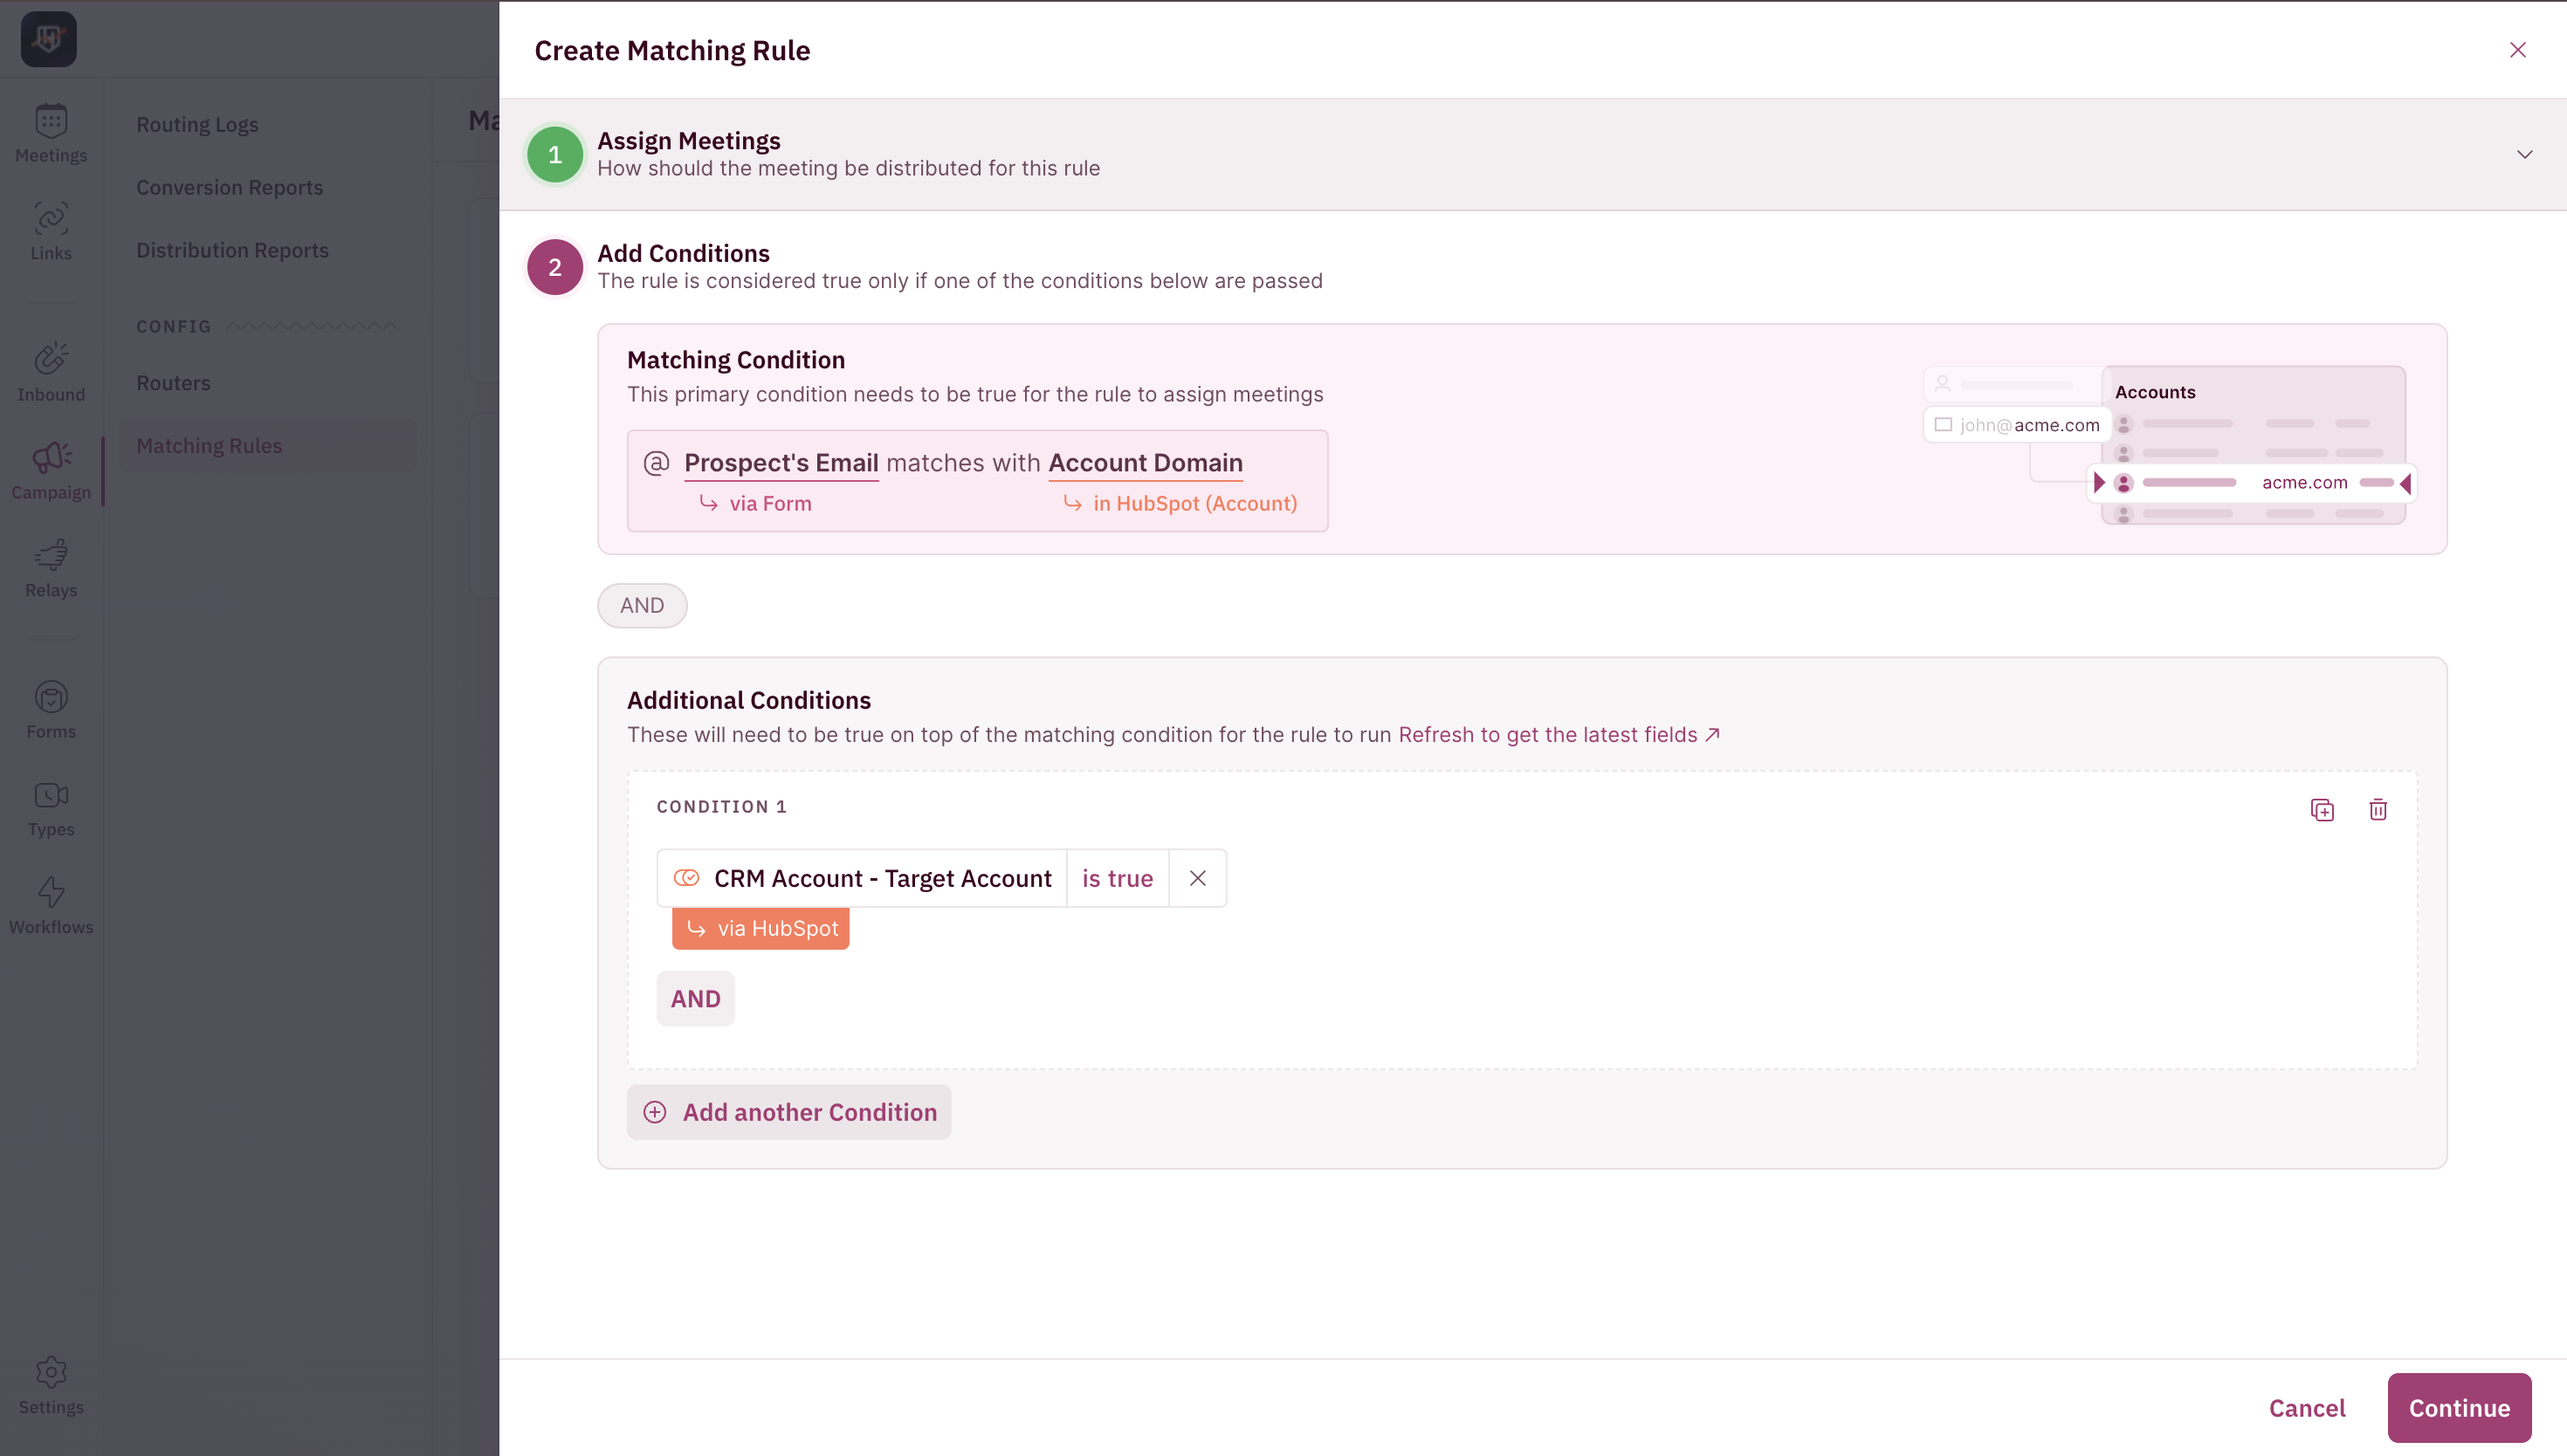
- Some conditions you can check are if a prospect belongs to your ABM list or skip records with empty account owner fields. Our recommendation is to have a chat with your team internally about when you’d like contacts to get matched before setting this up.
- Here you’ll need to give your Matching Rule a name. For example, if you’re creating a Matching Rule to assign meetings to an existing company’s owner, you can name it Match to the existing company owner.
- Next, you have to choose if you want to update the account owner along with the owner property that needs to be updated in the CRM.
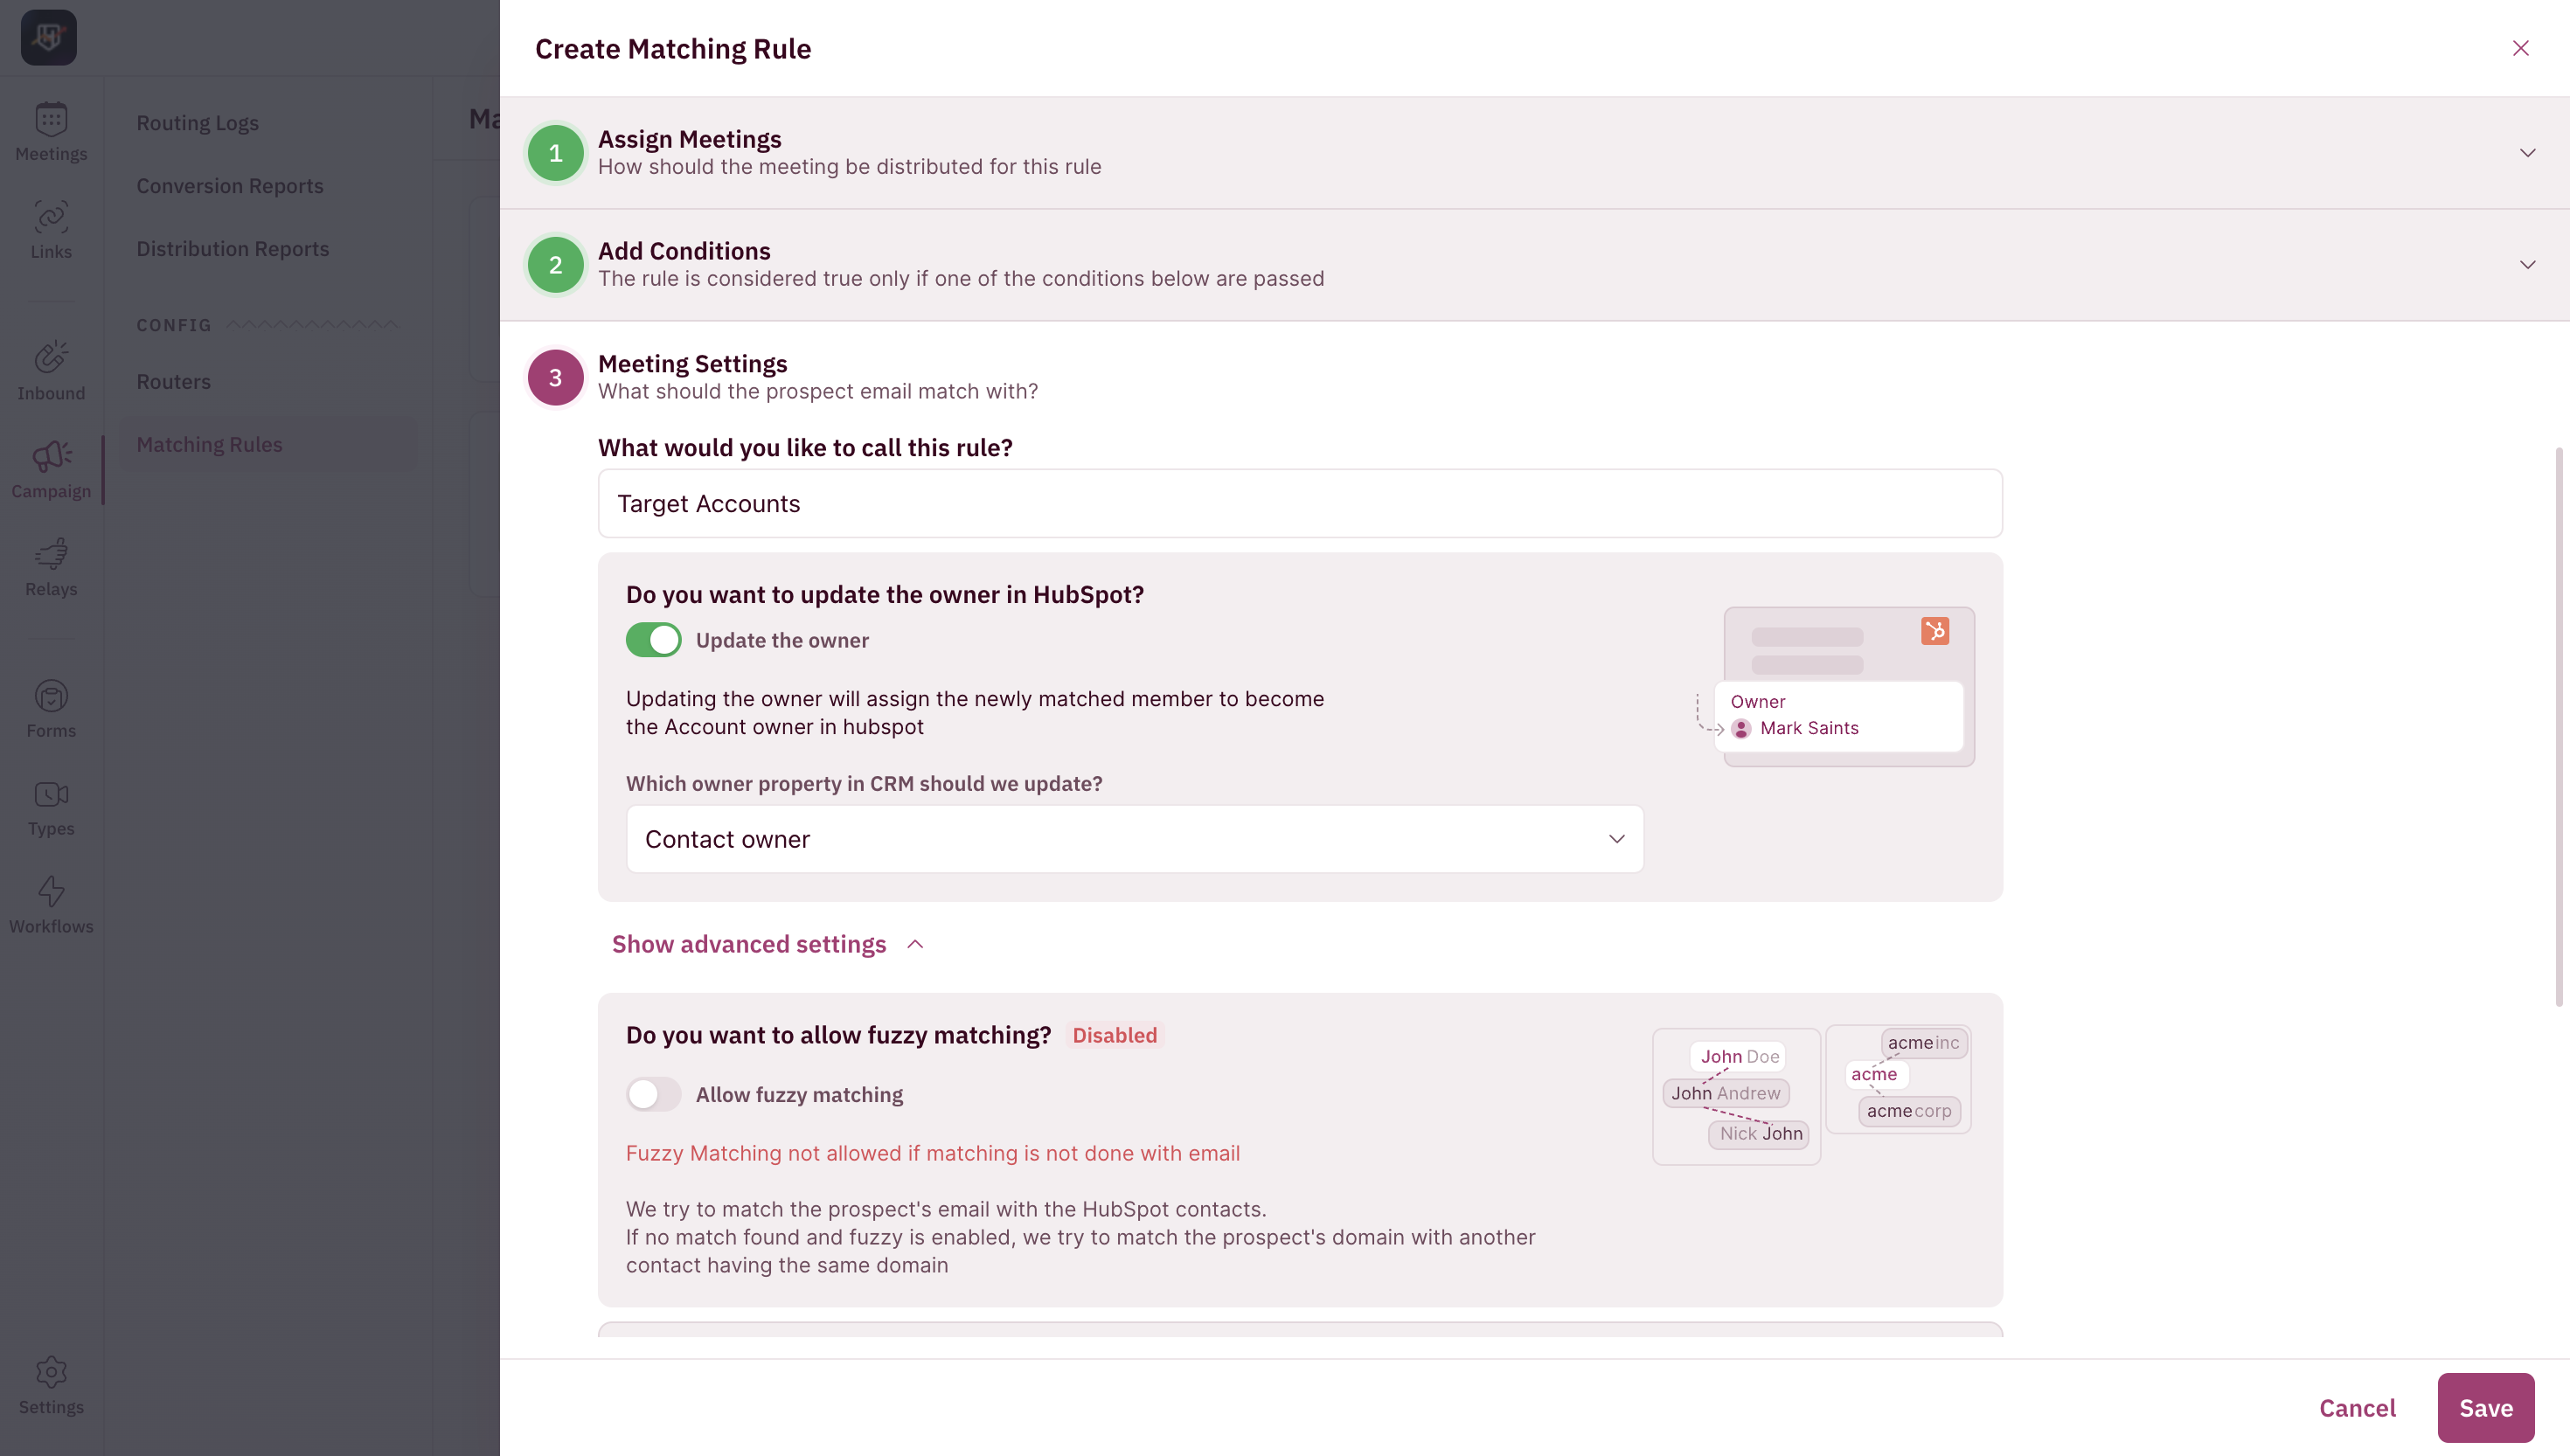
- Click on the Advanced Settings button to enable fuzzy matching along with the CRM property that needs to be used for it.
- Hit the ”Save” button to finish creating your Matching Rule.