Scheduler Widget customization
You can access the Branding section by heading to “Settings” from the left navigation menu and by clicking on “Branding” under the “Organization Settings”.
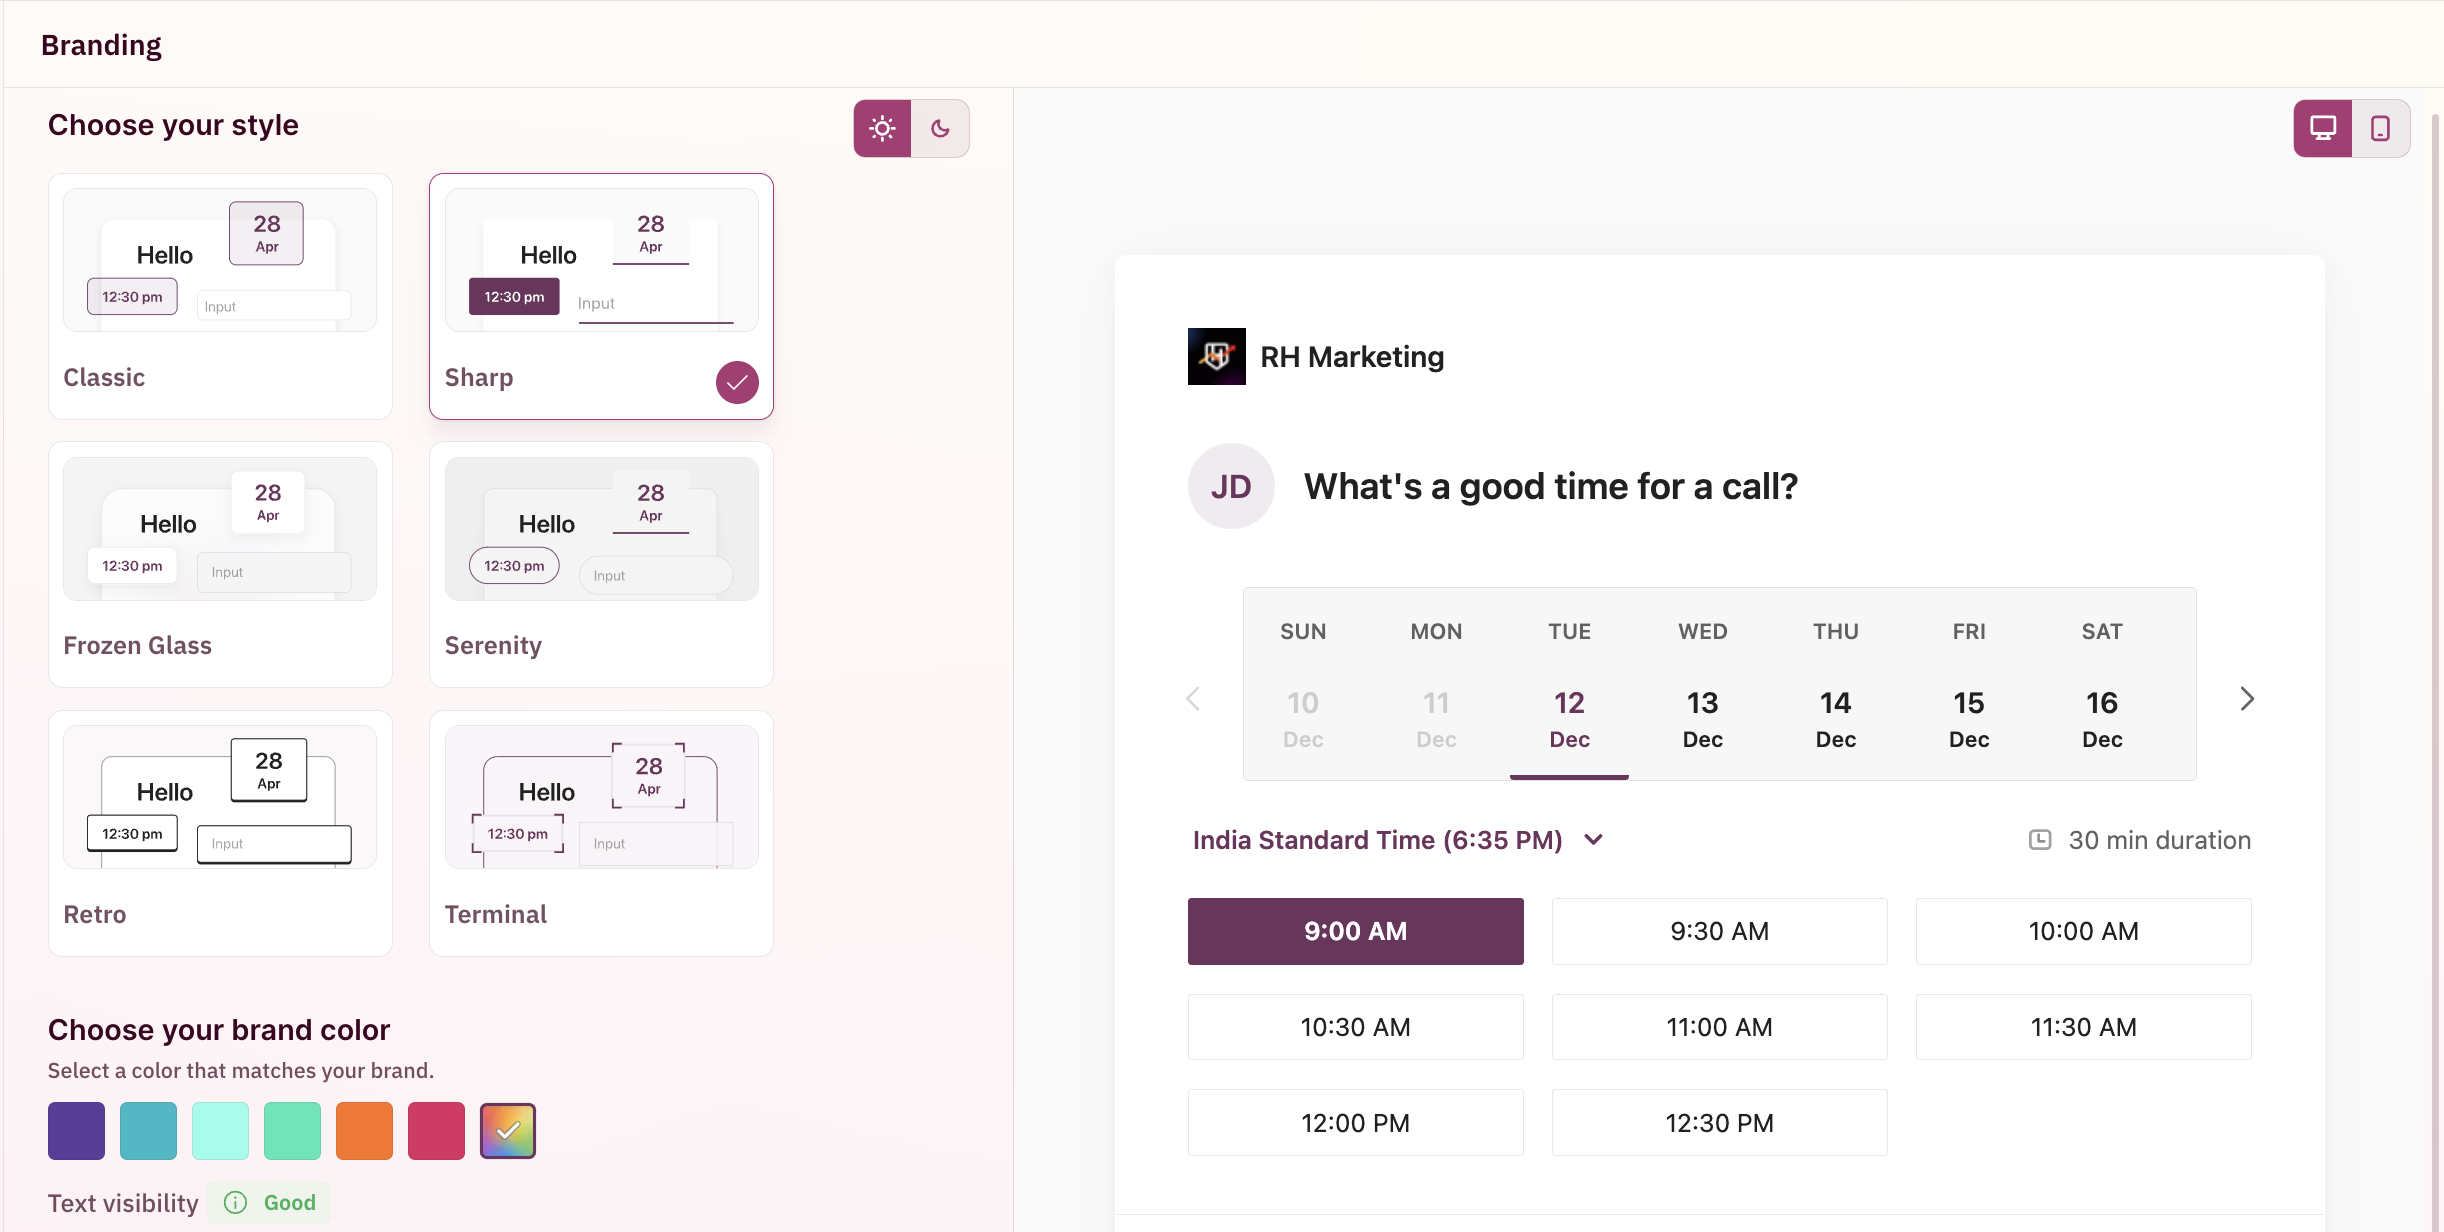
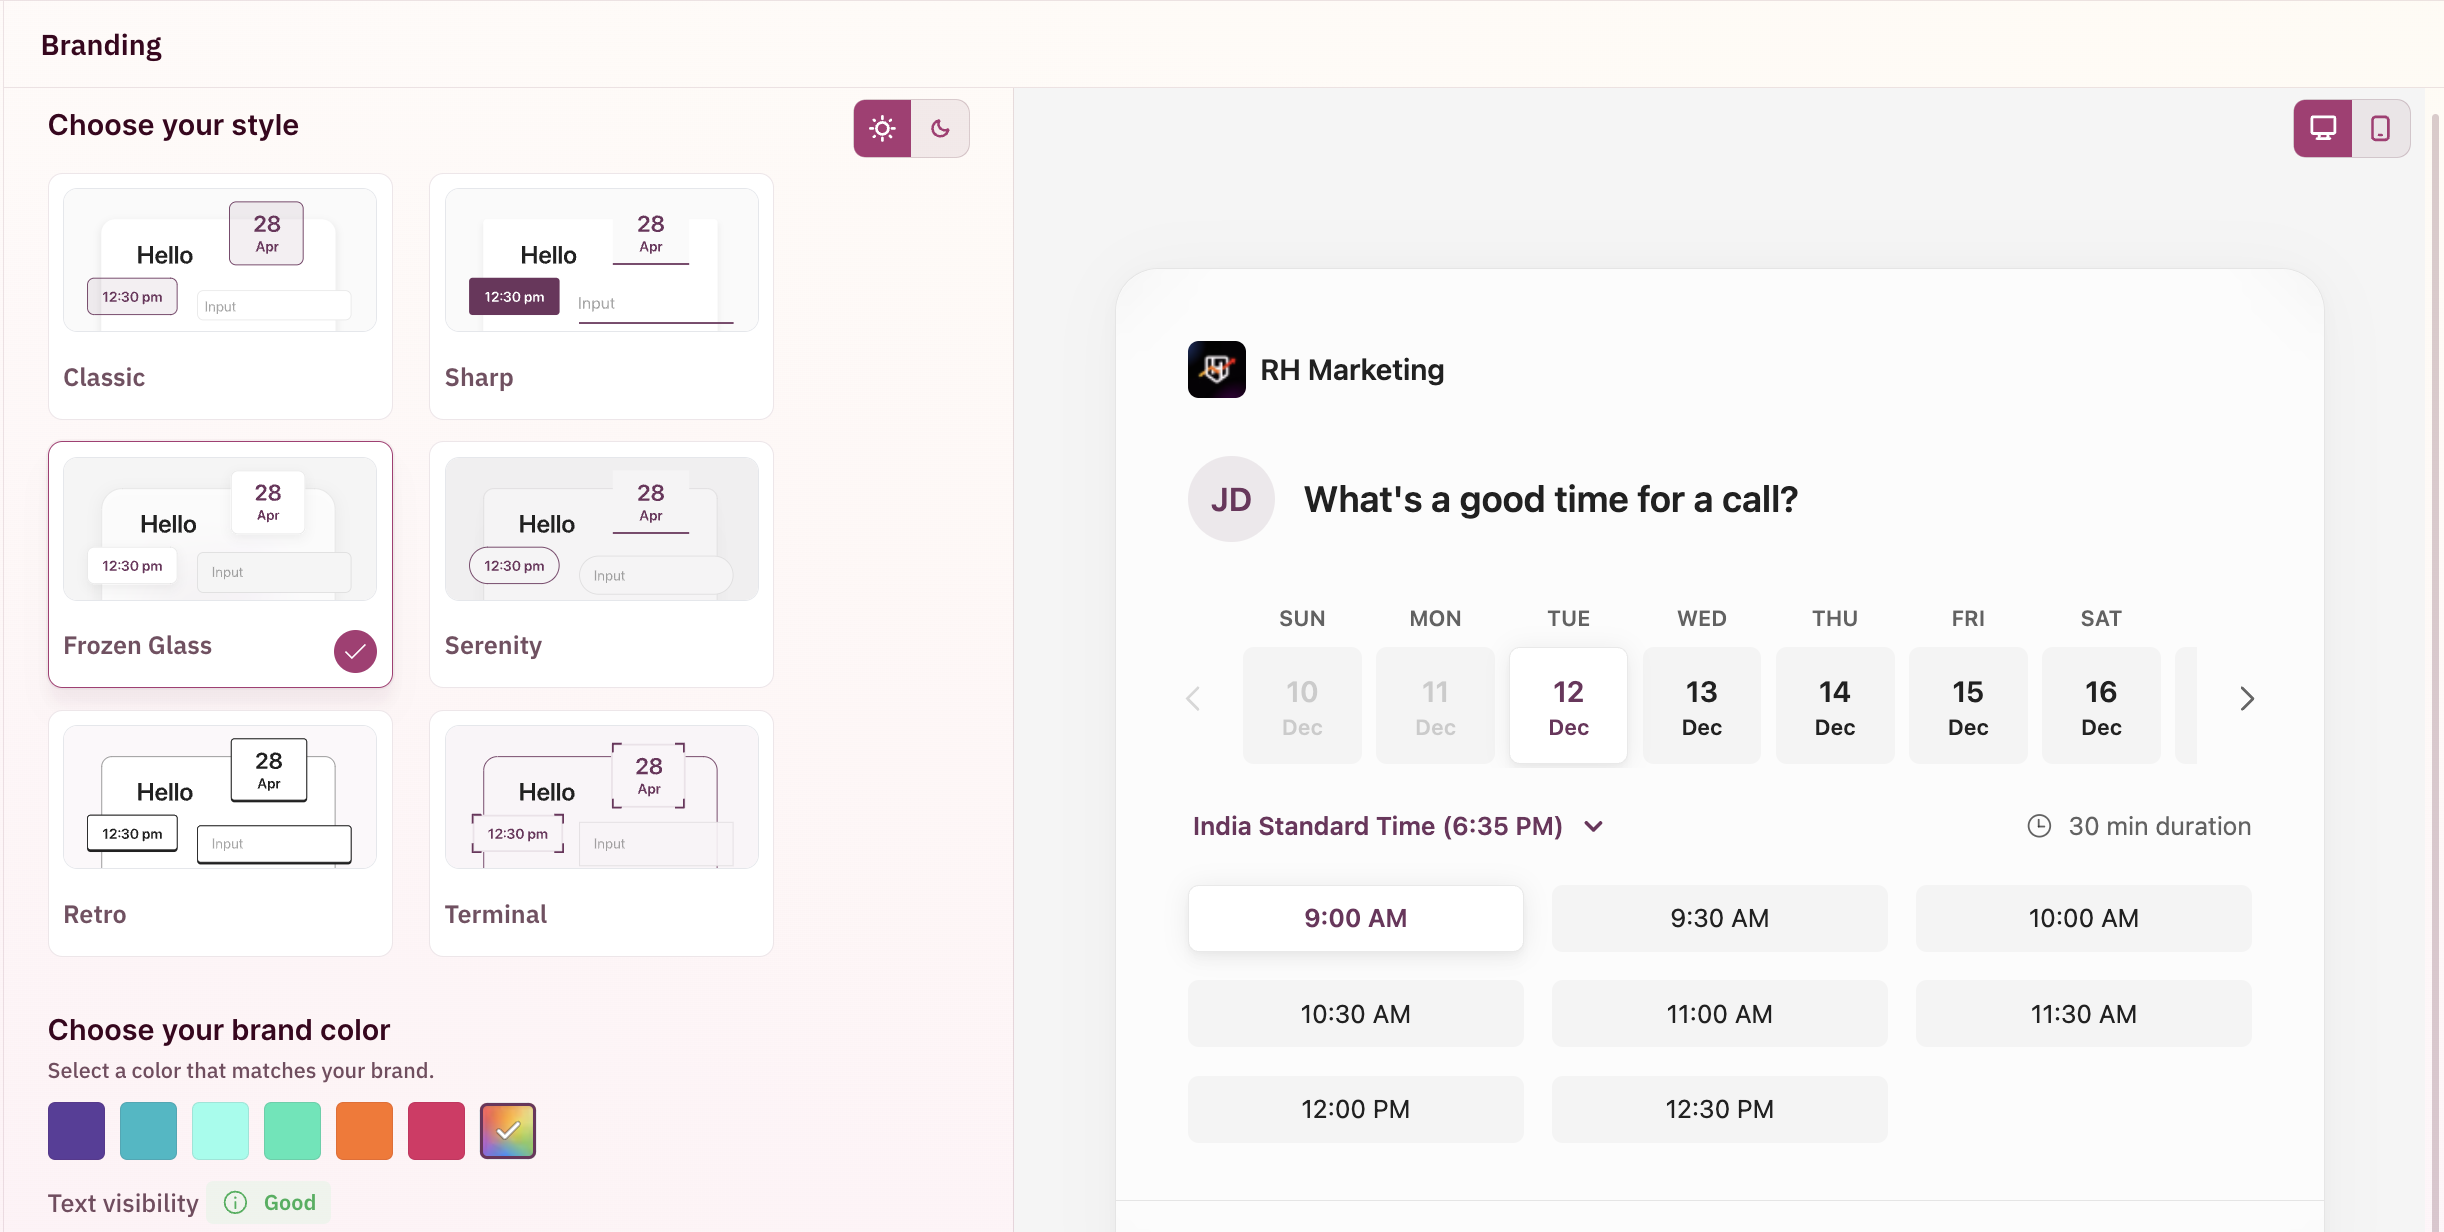
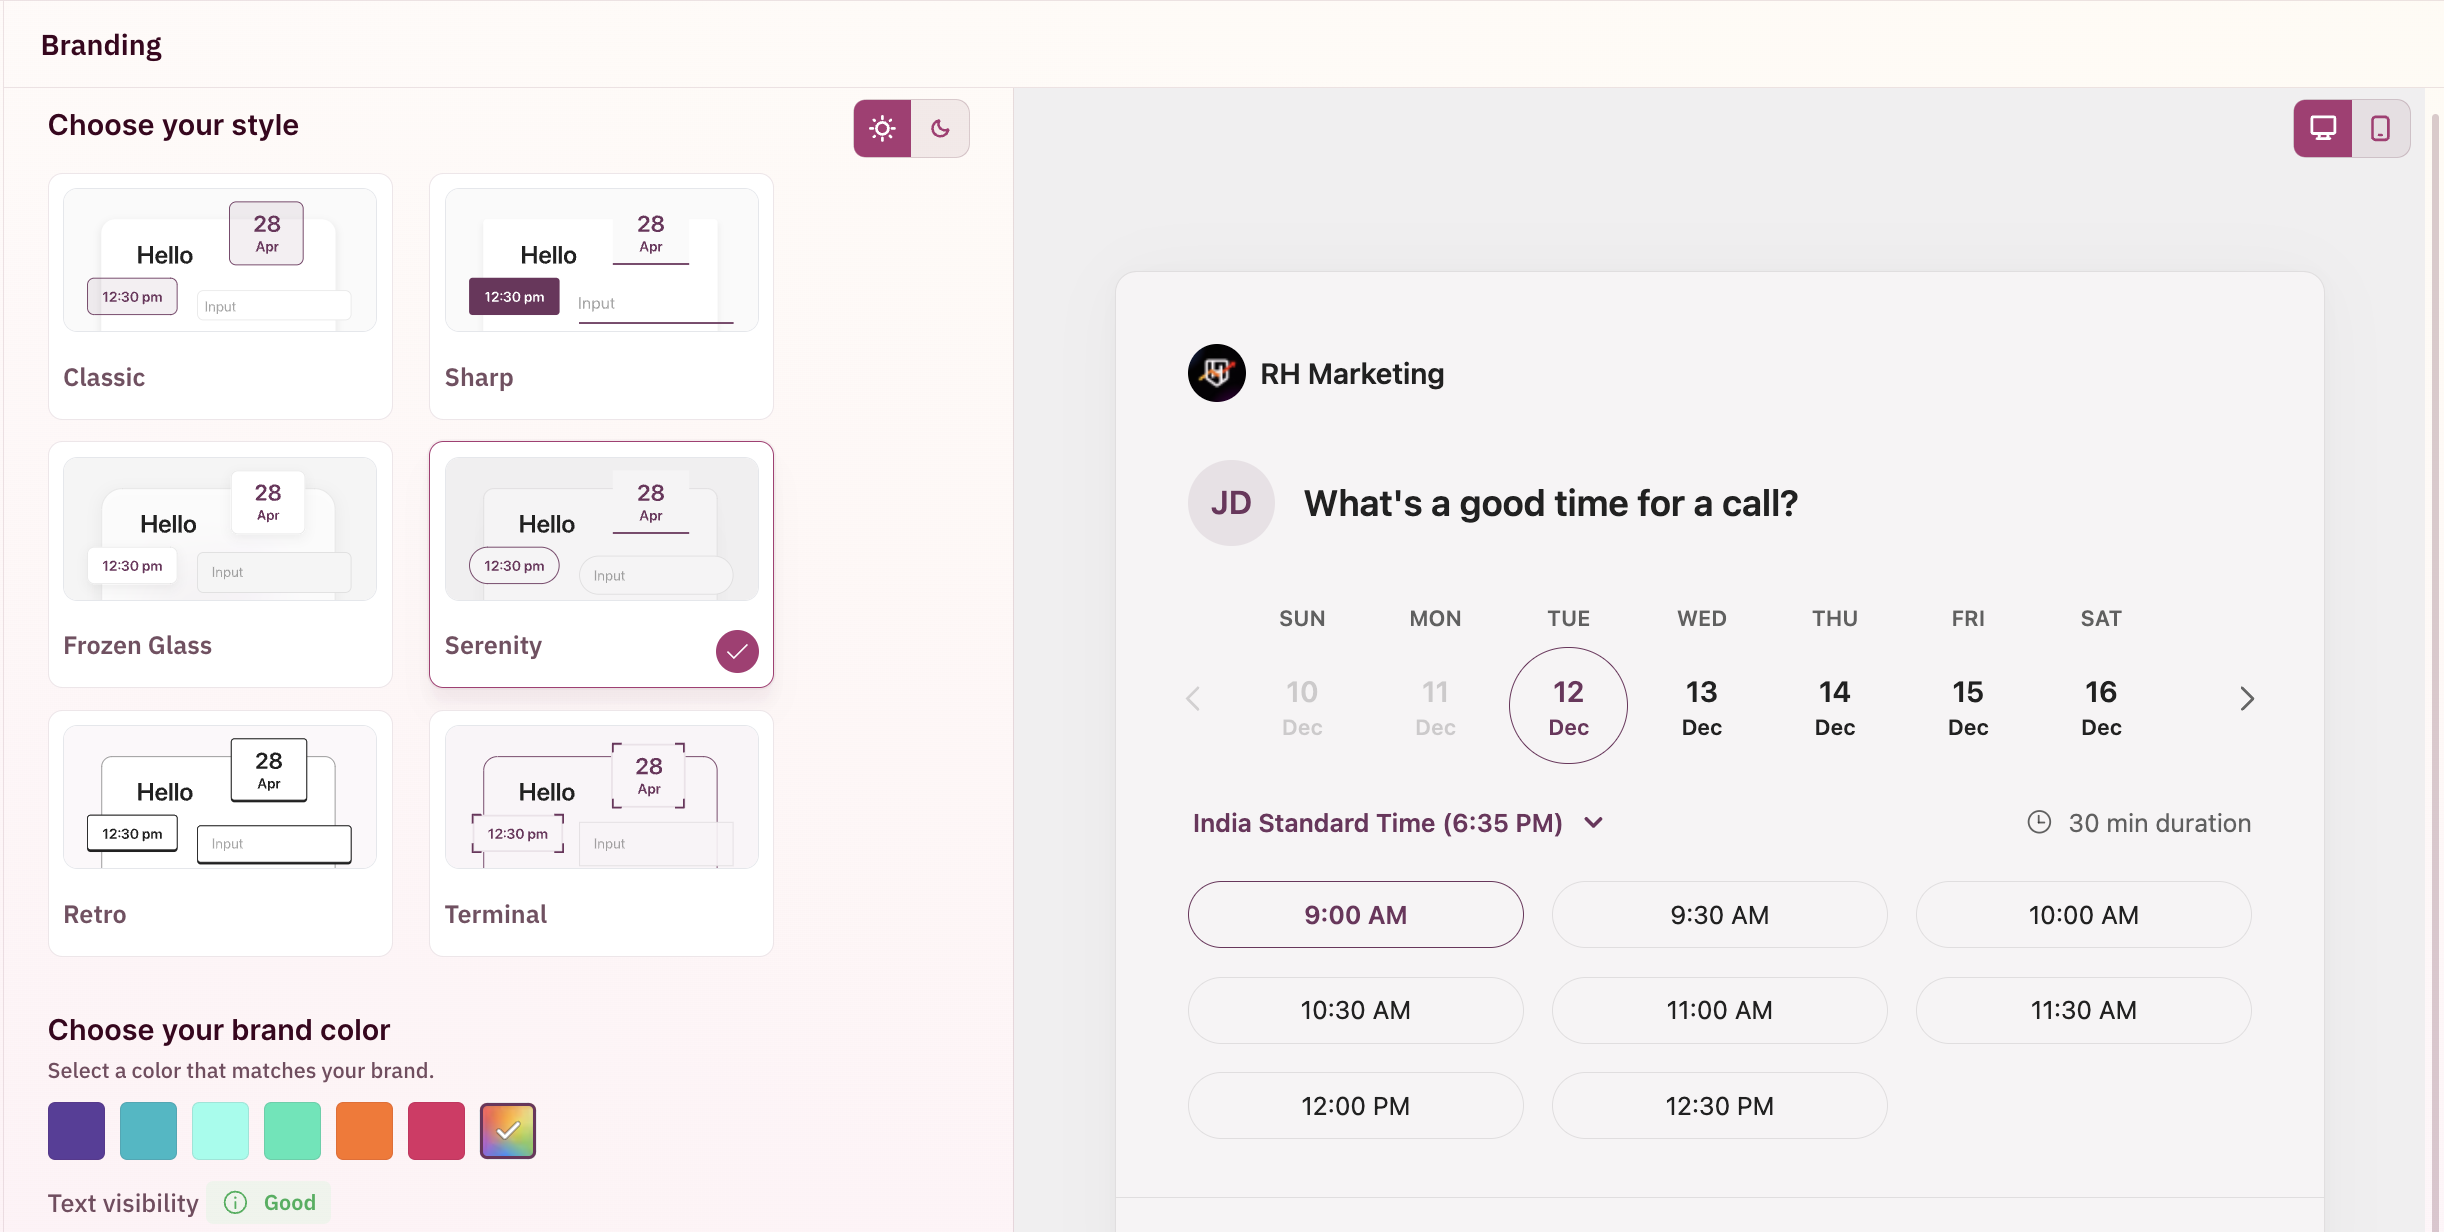
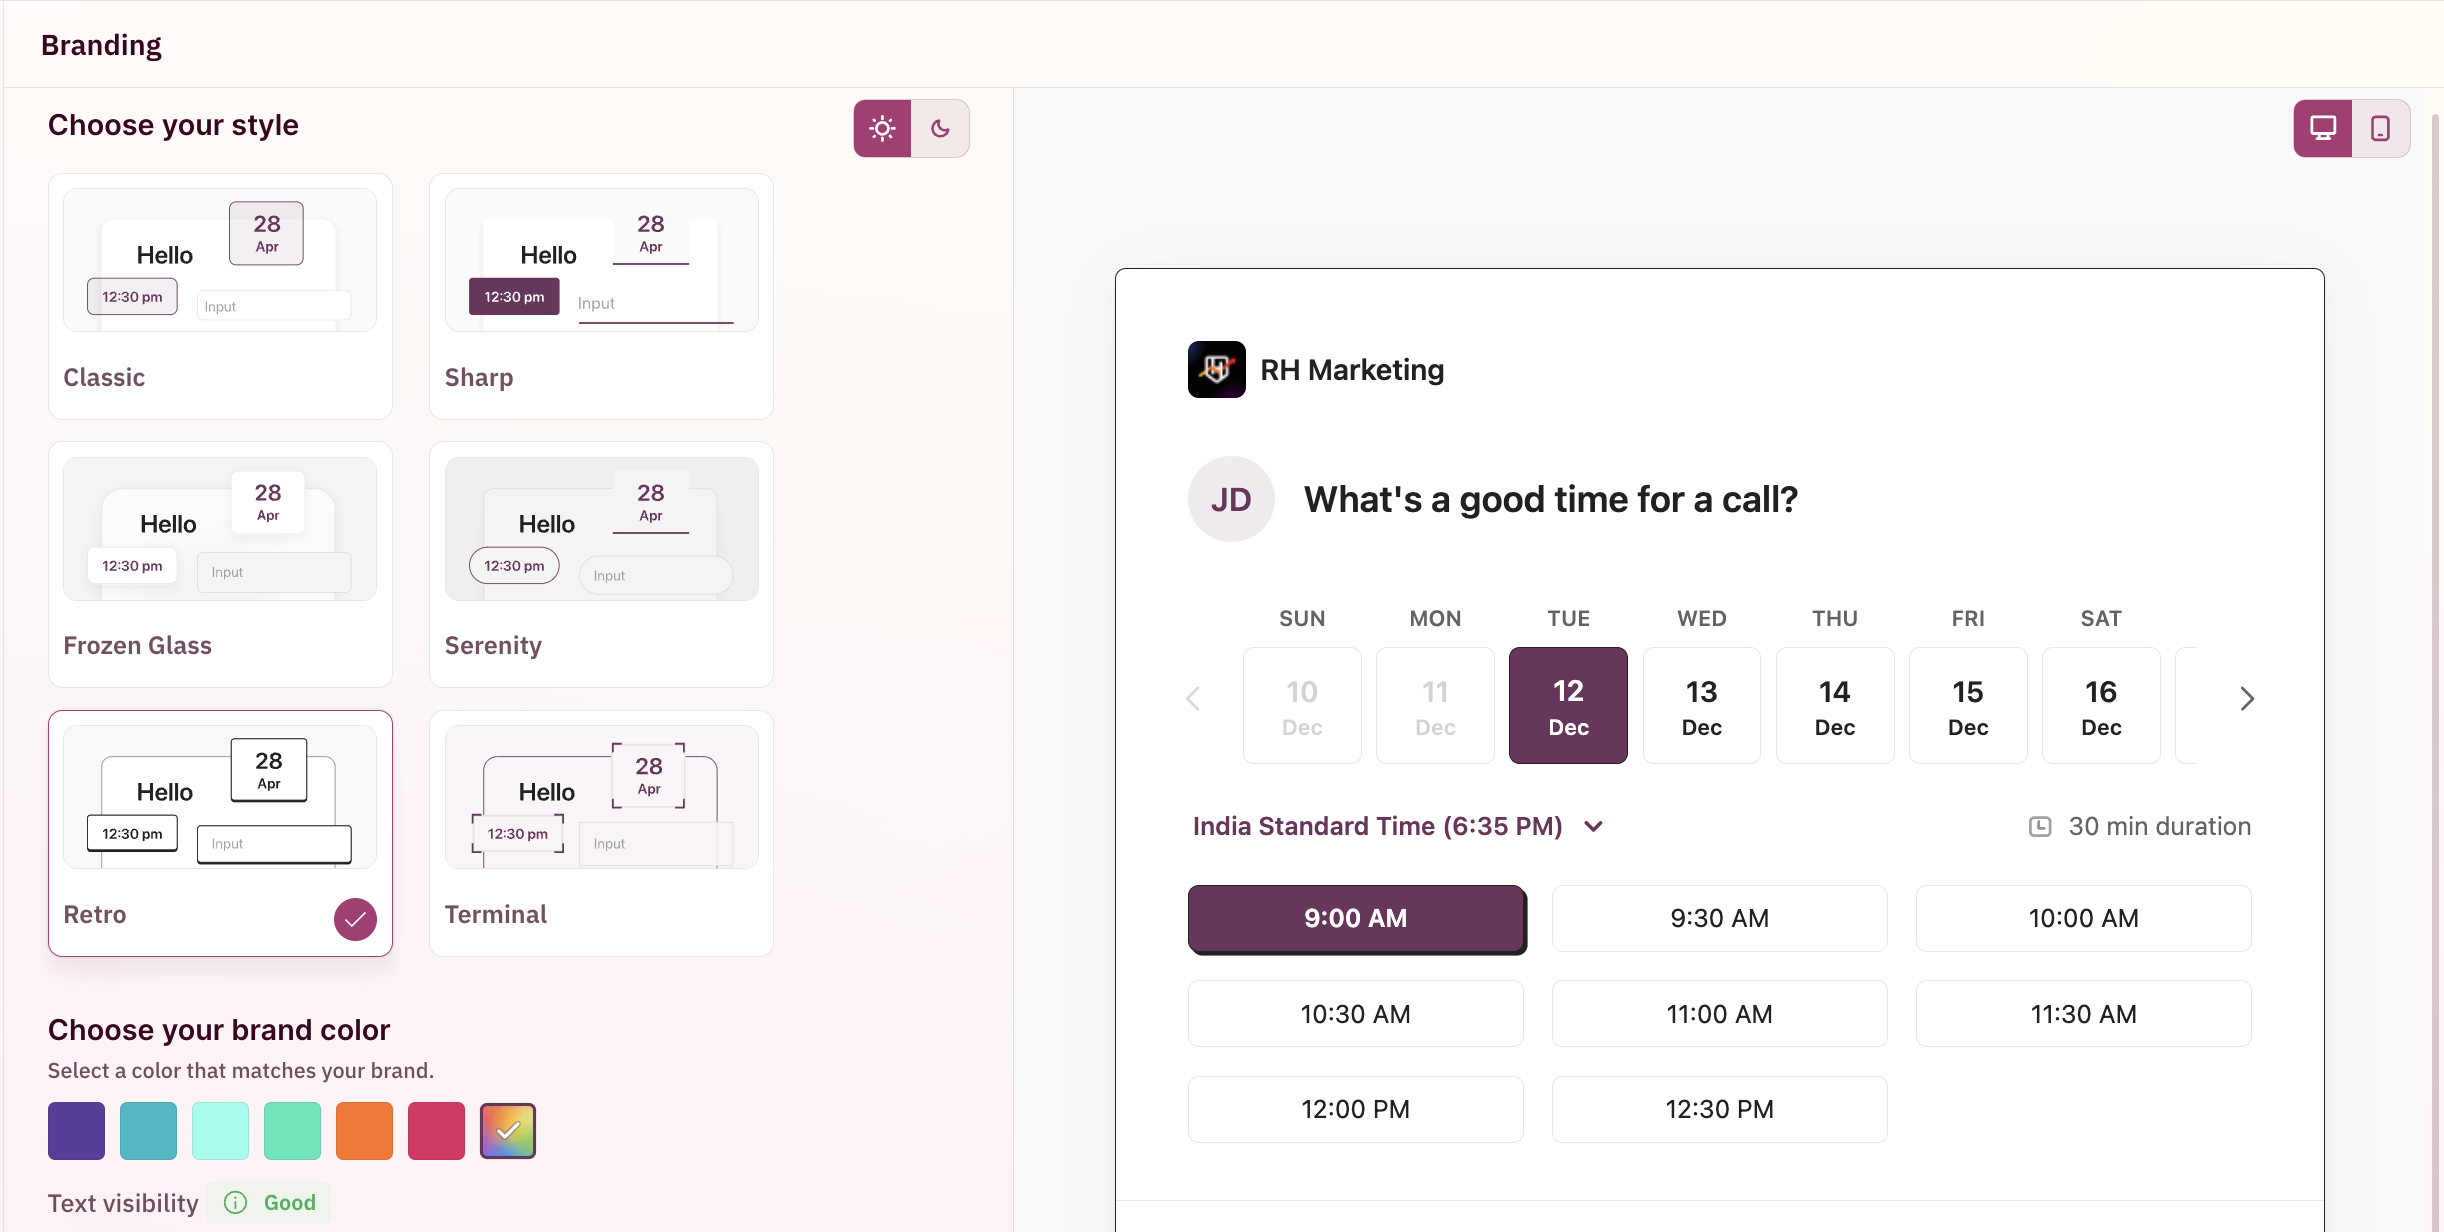
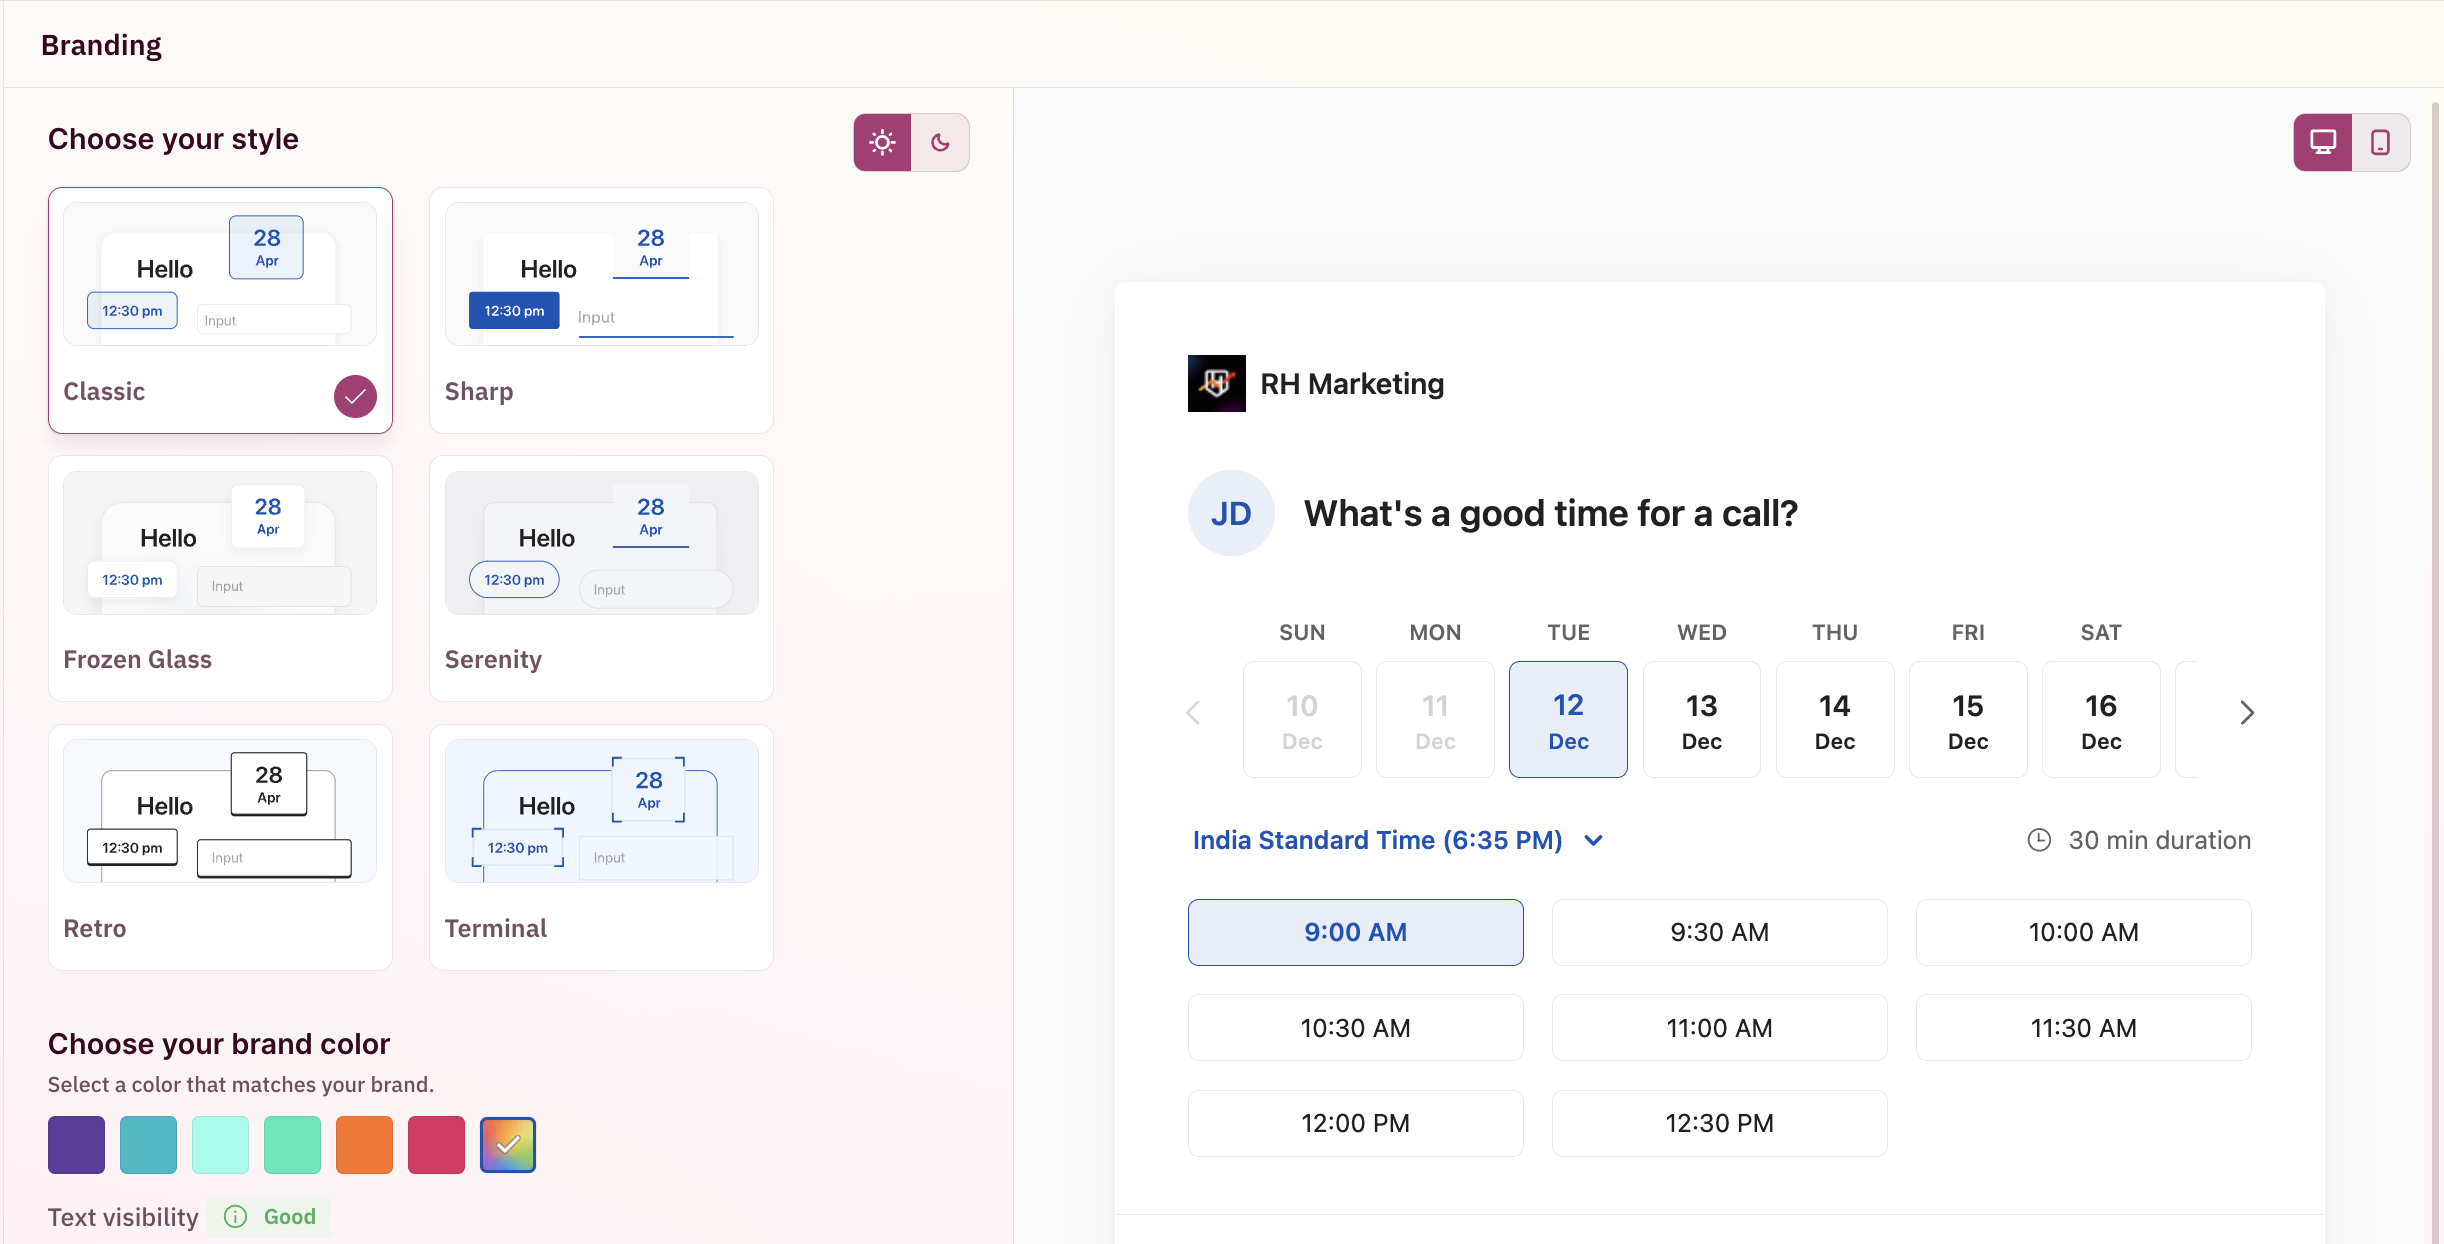
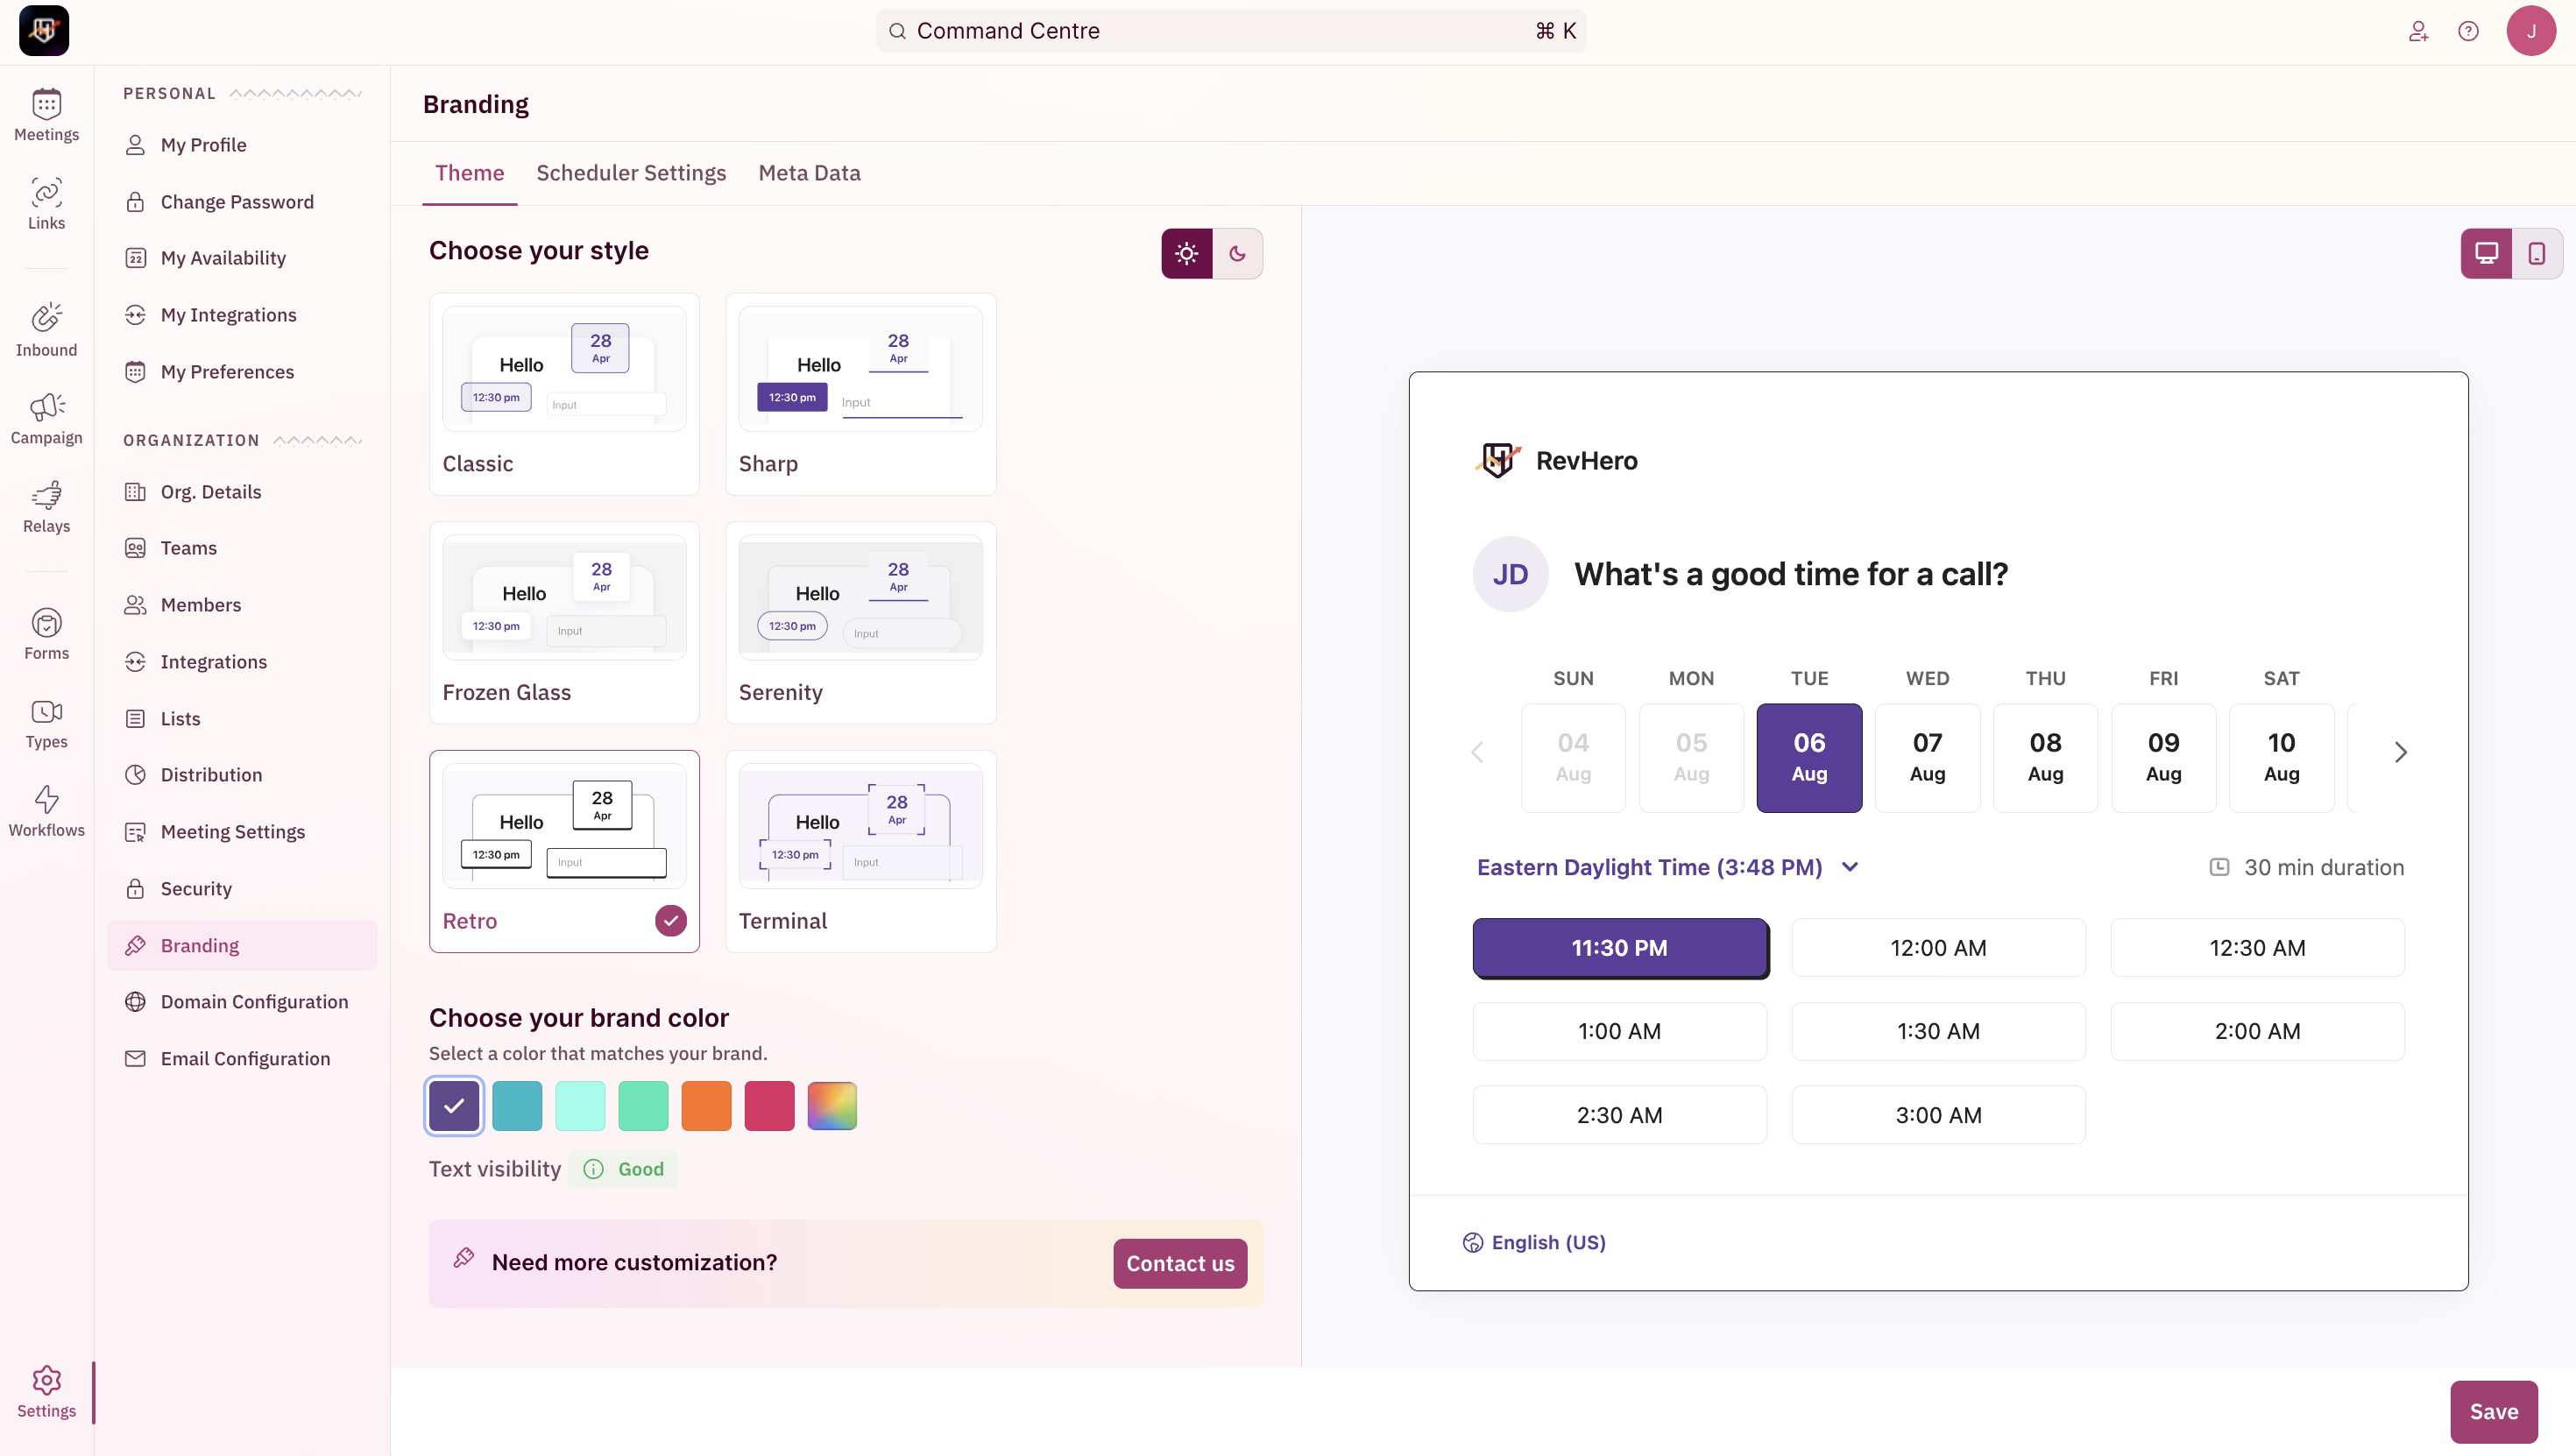
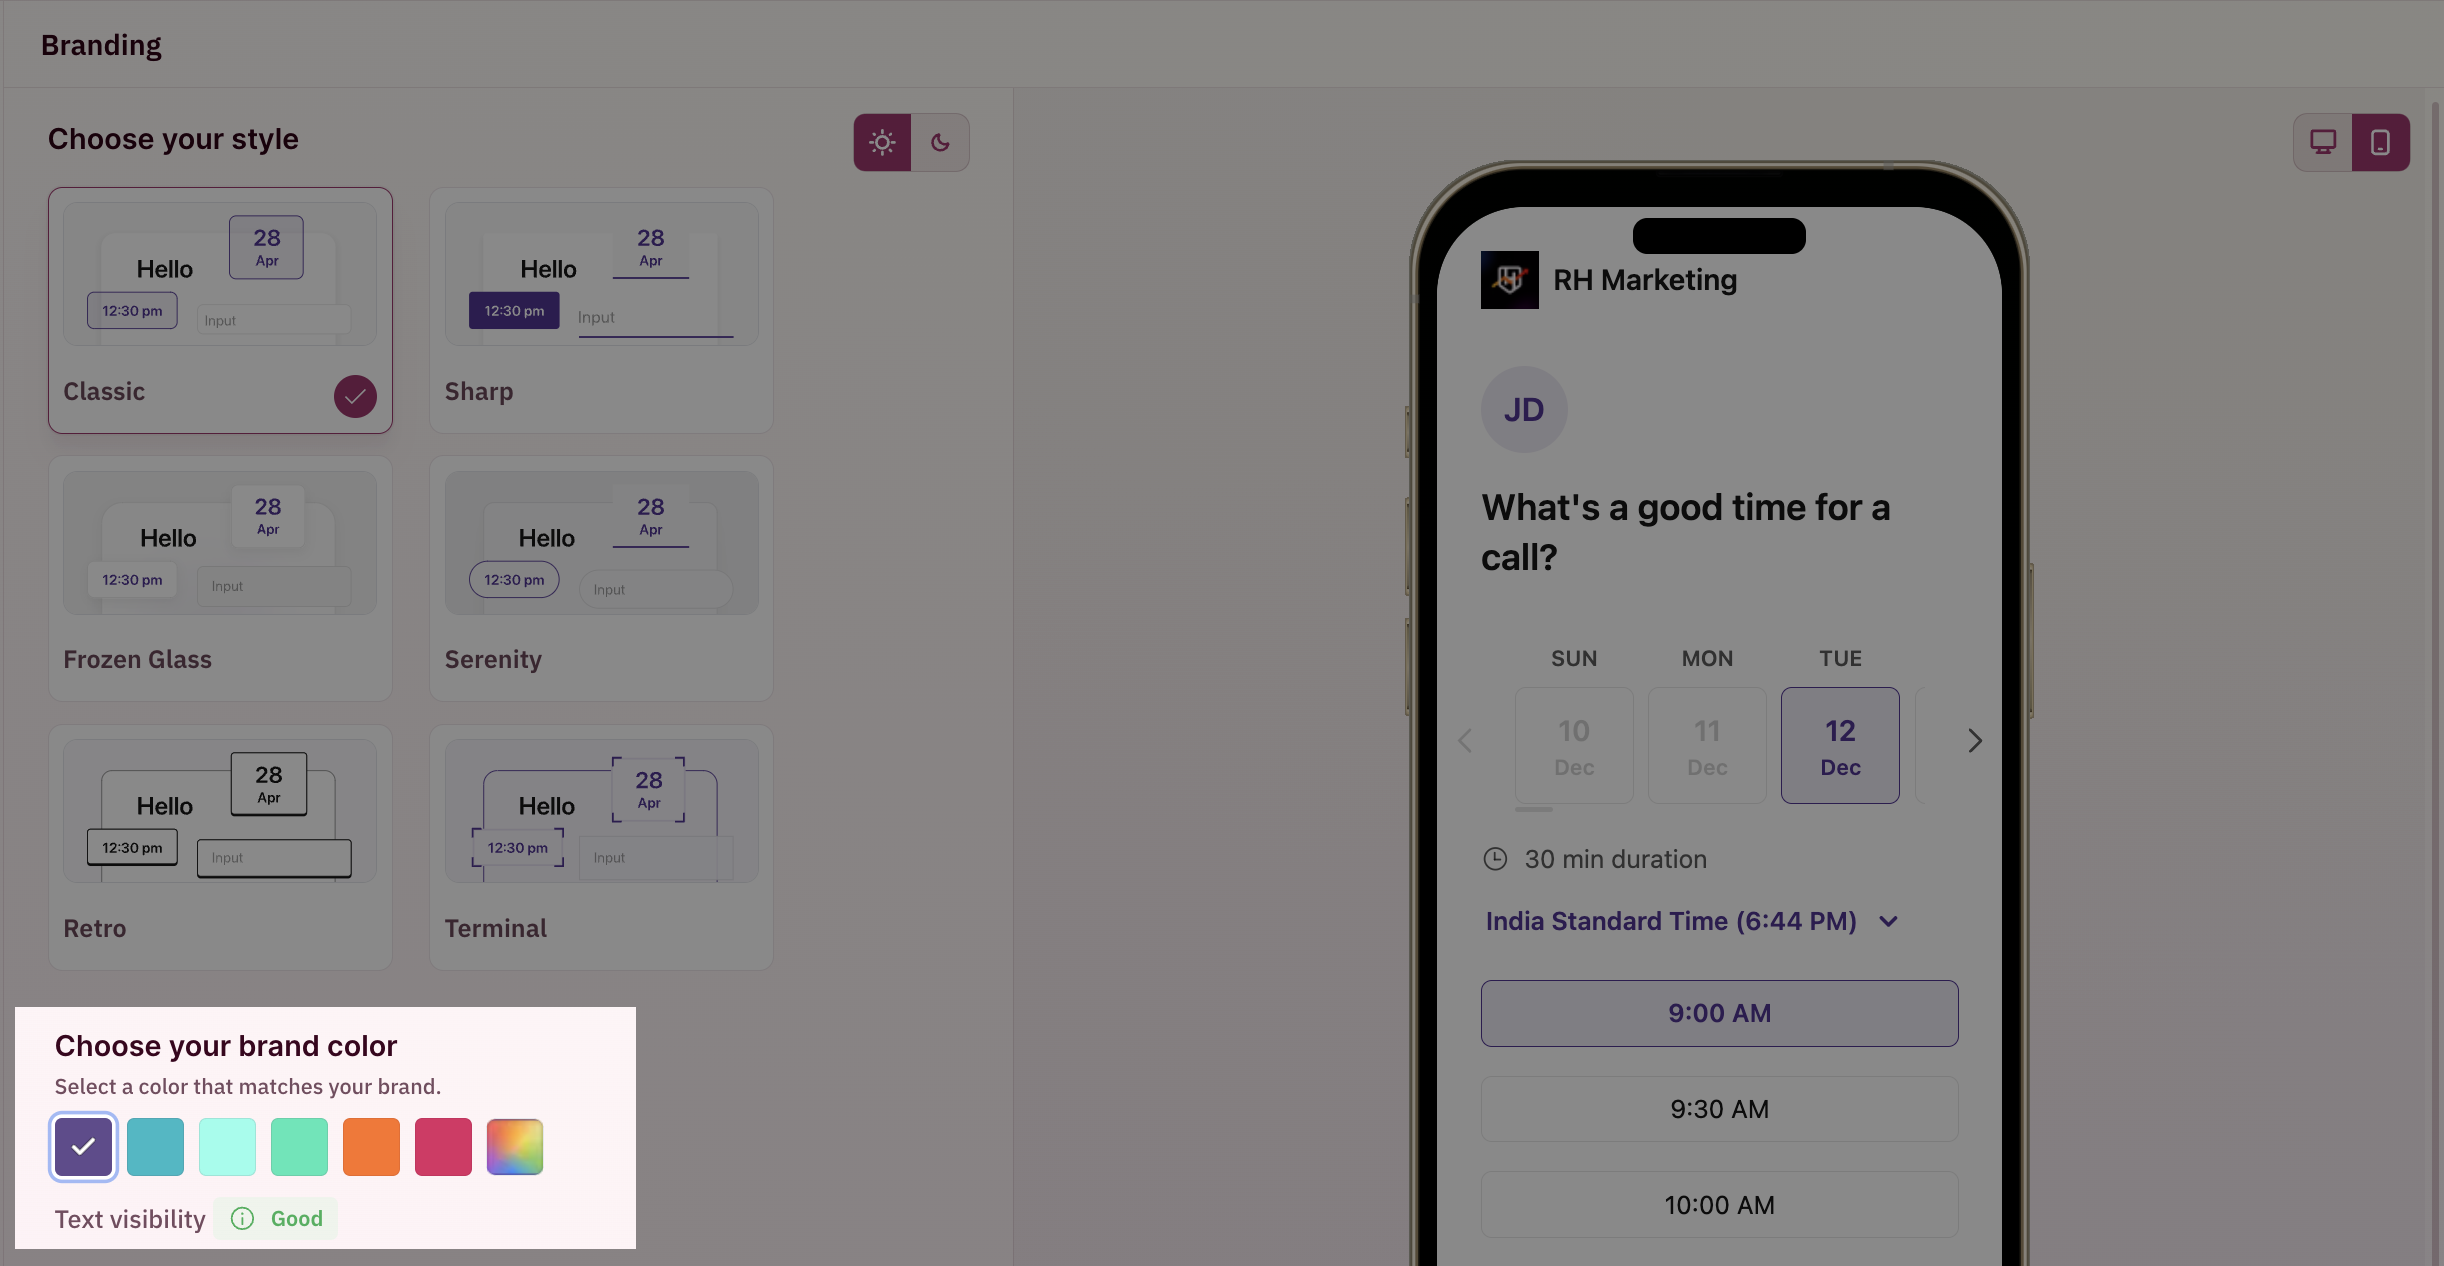
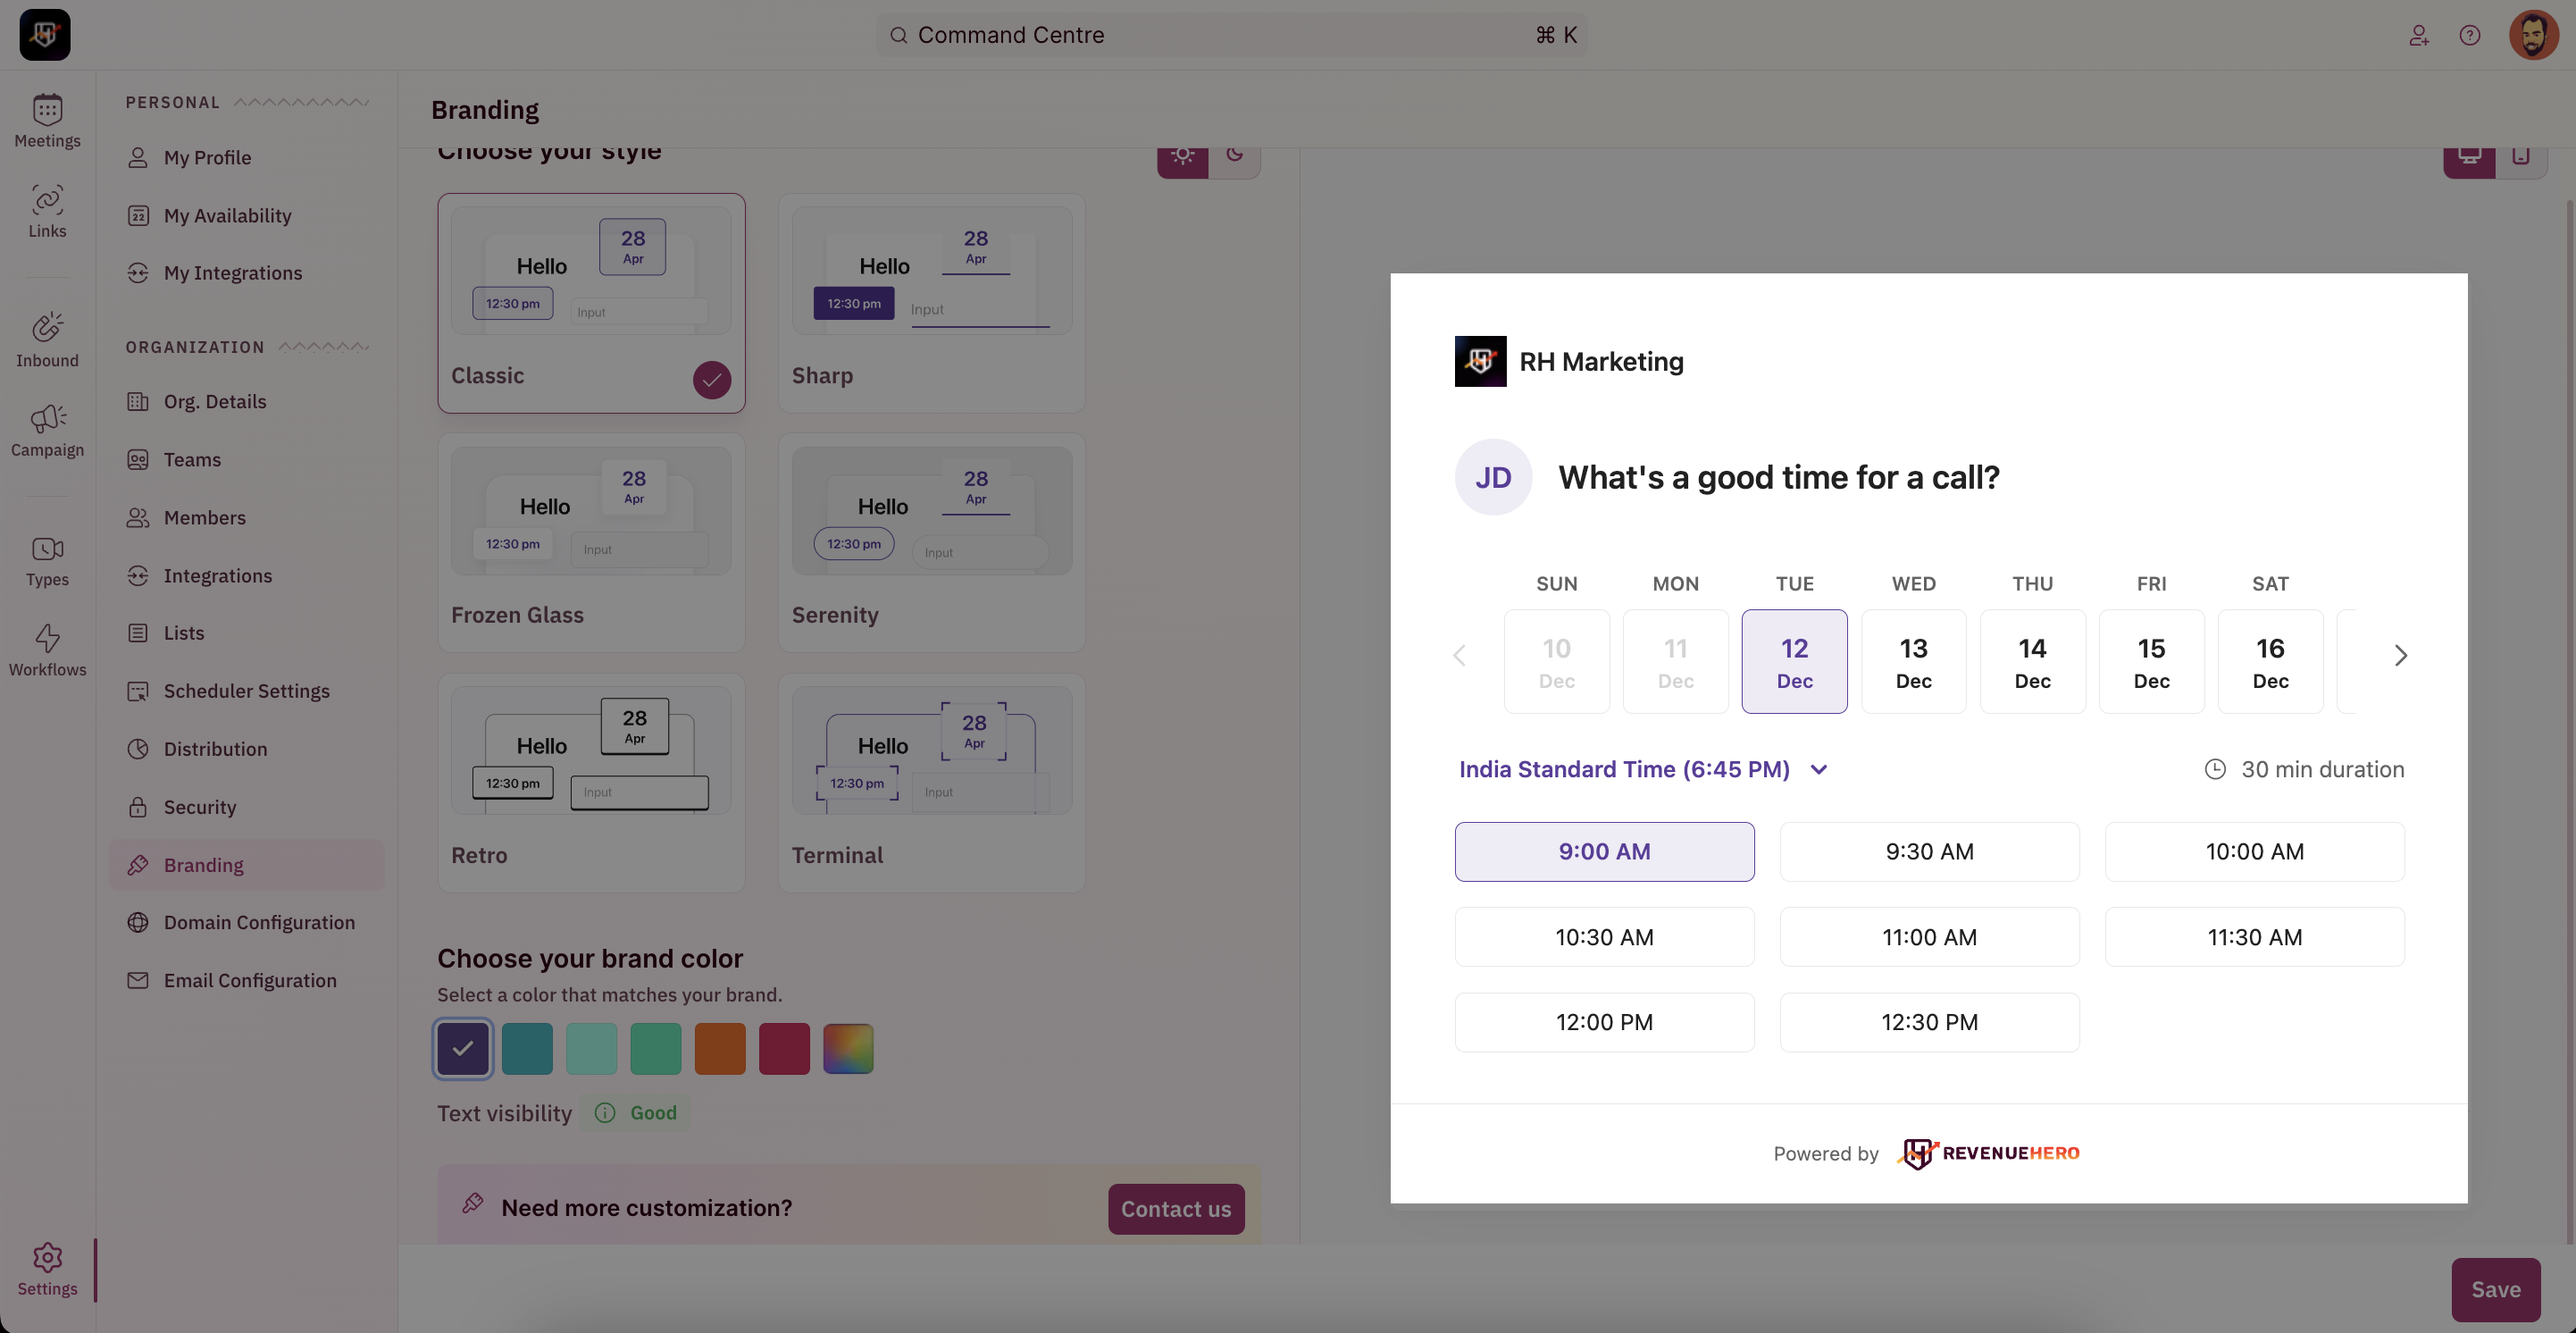
Select your theme
Pick the theme that best suits your organization’s design language. We’ve 6 unique themes that you can choose from to make your scheduler look chic. Classic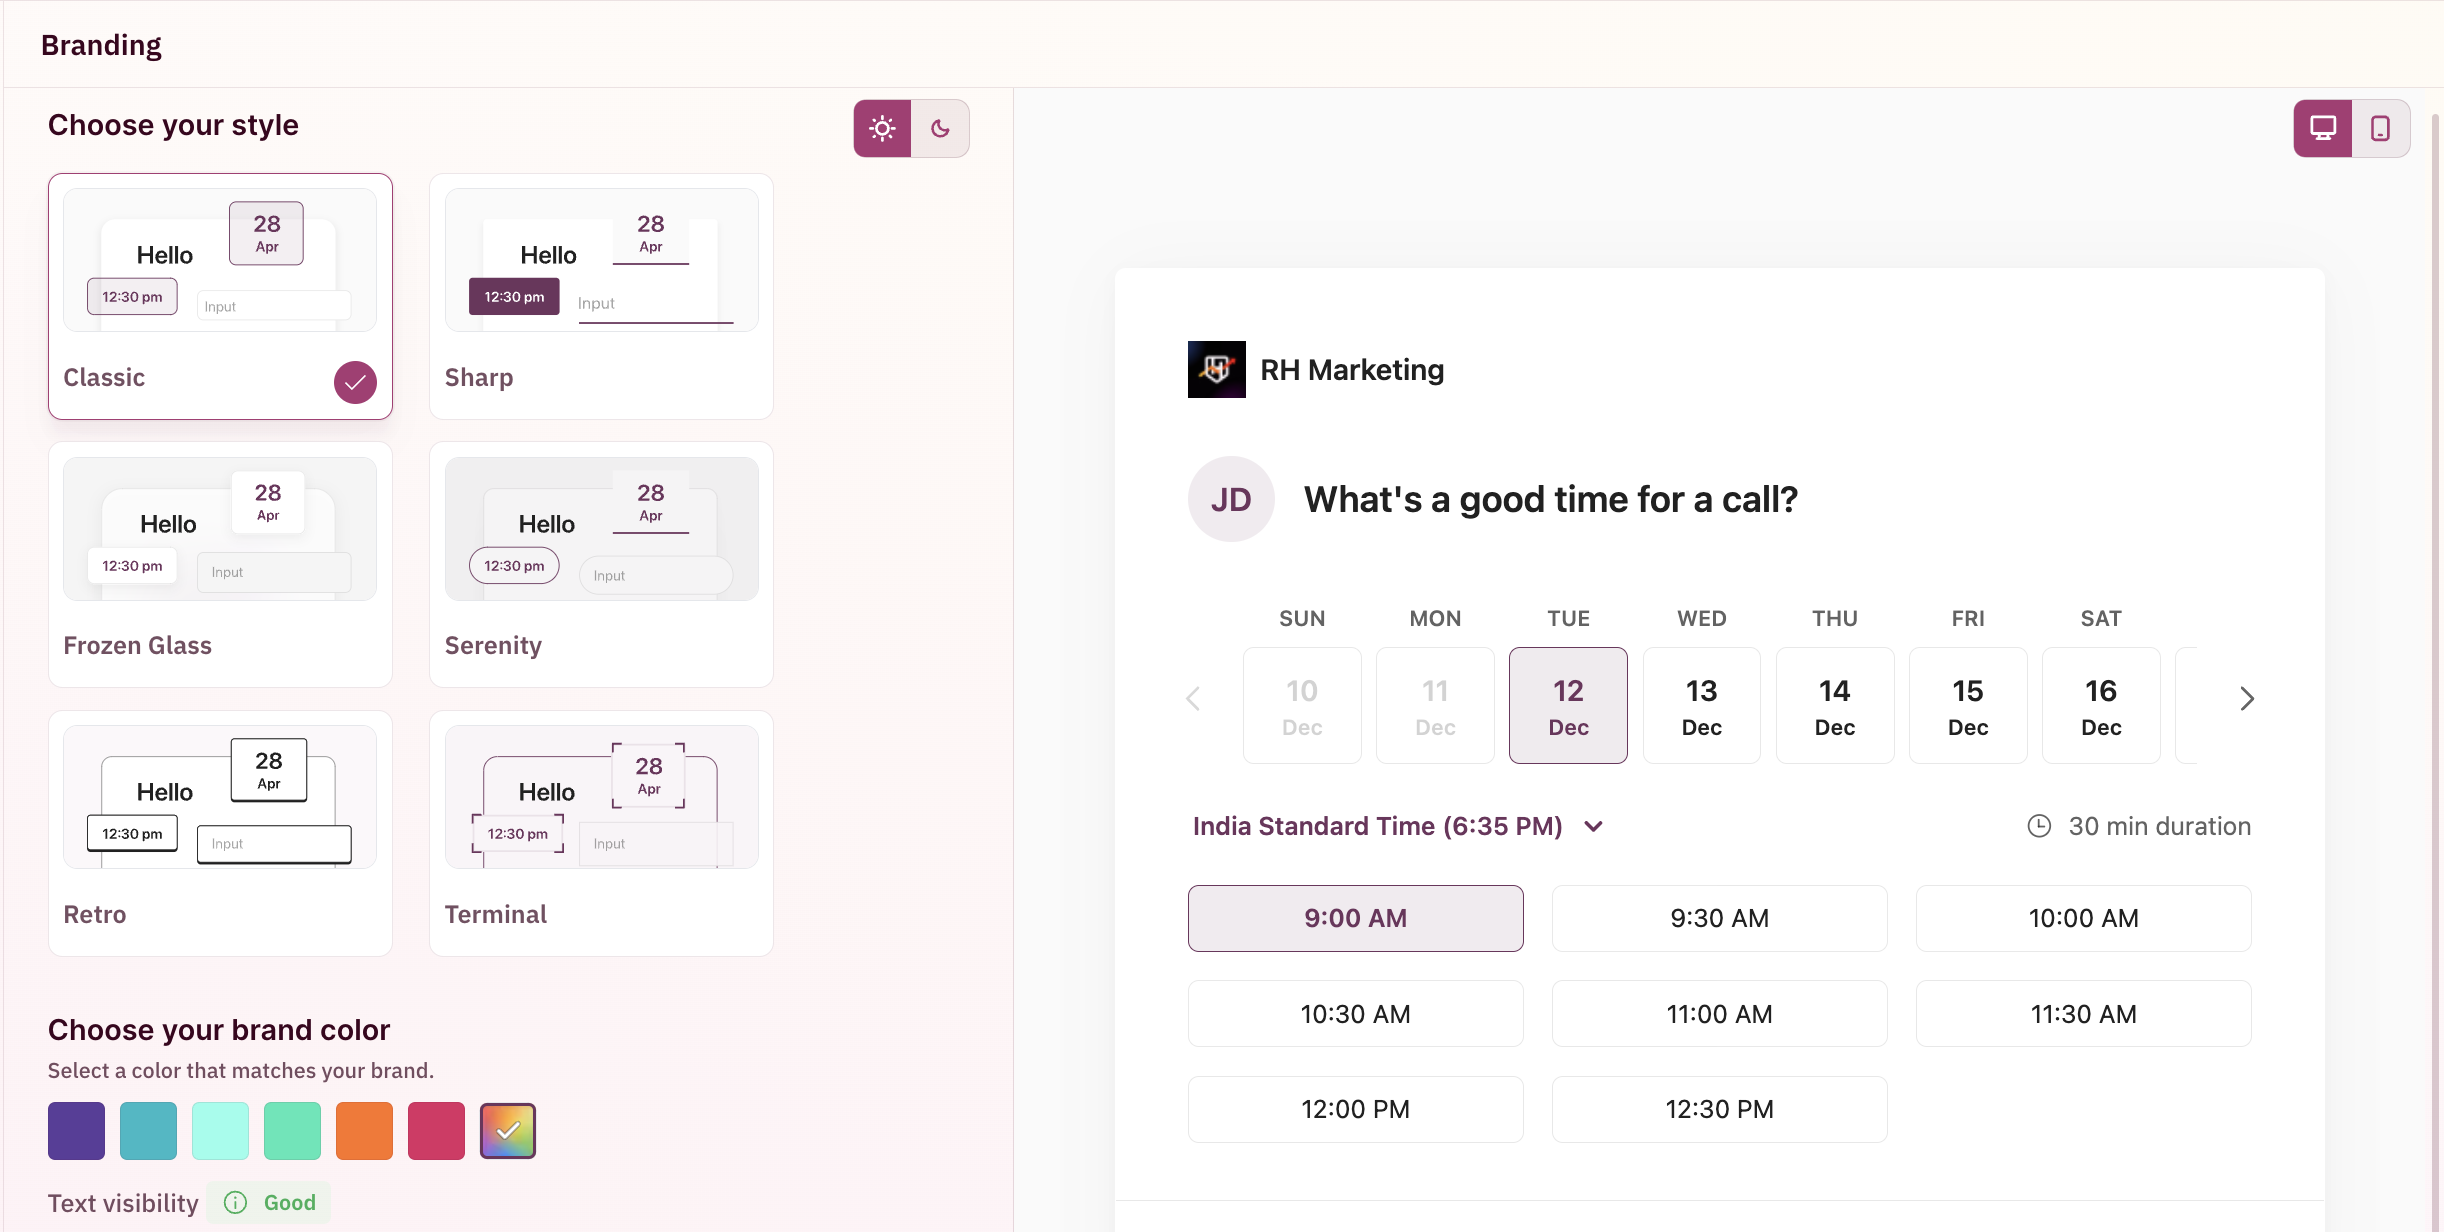

Light themes
Dark themes
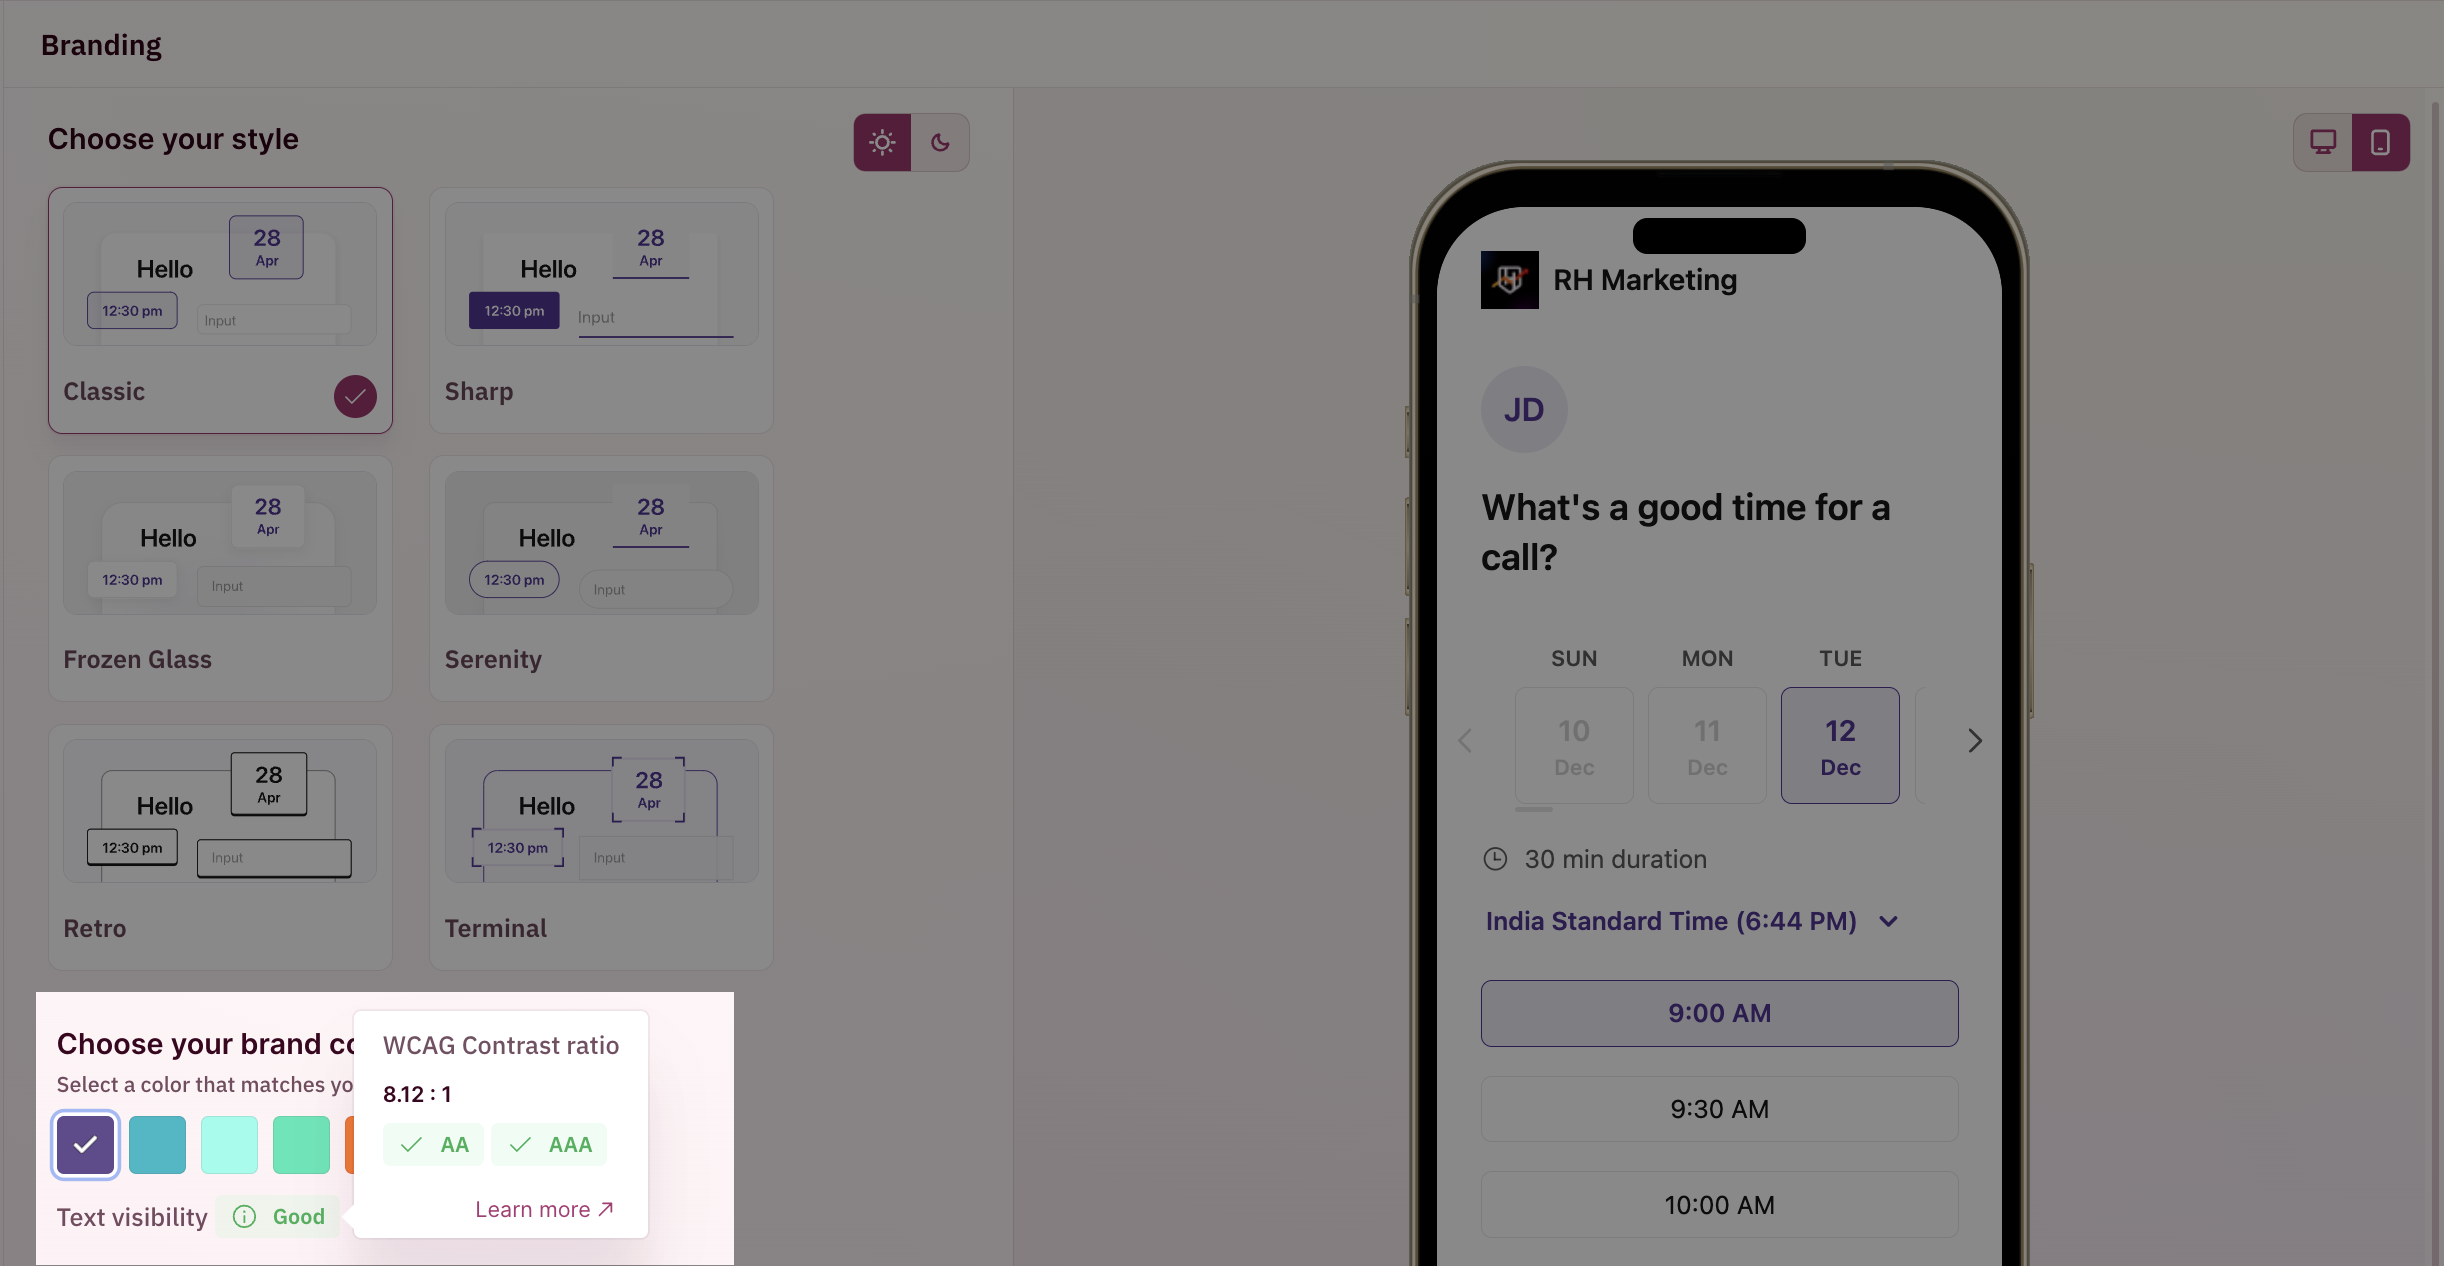
Choose your colors
You can configure the color scheme of the RevenueHero booking widget by using the color-picker option. A real-time preview of the color changes can be seen on the right.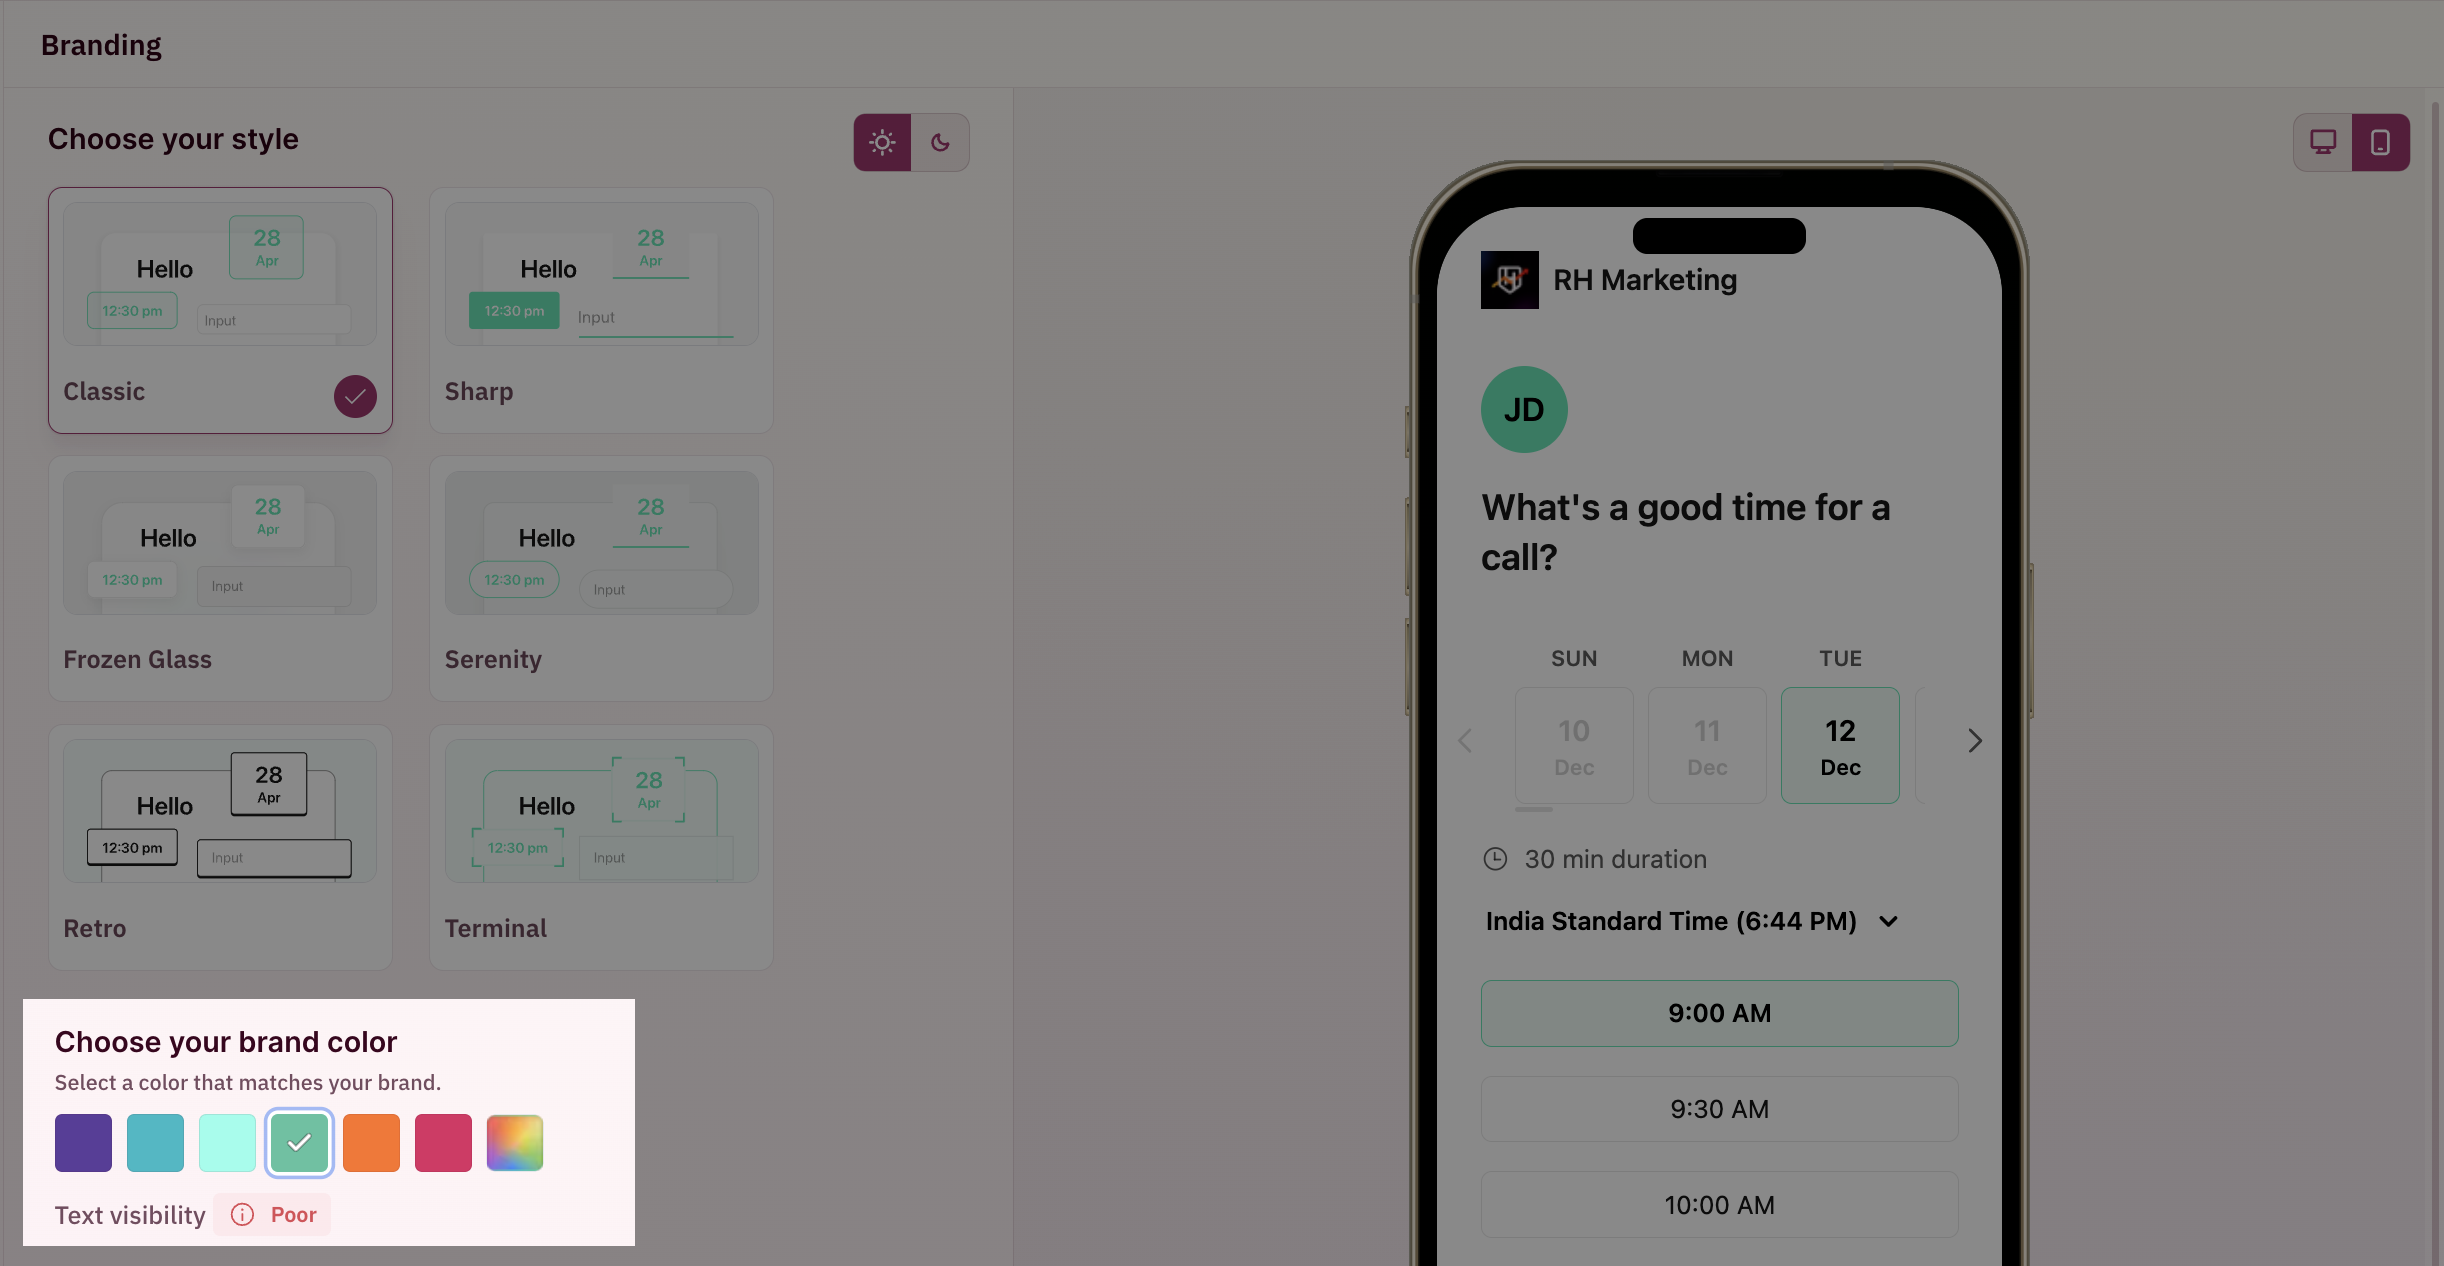
Poor text visibility
Good text visibility
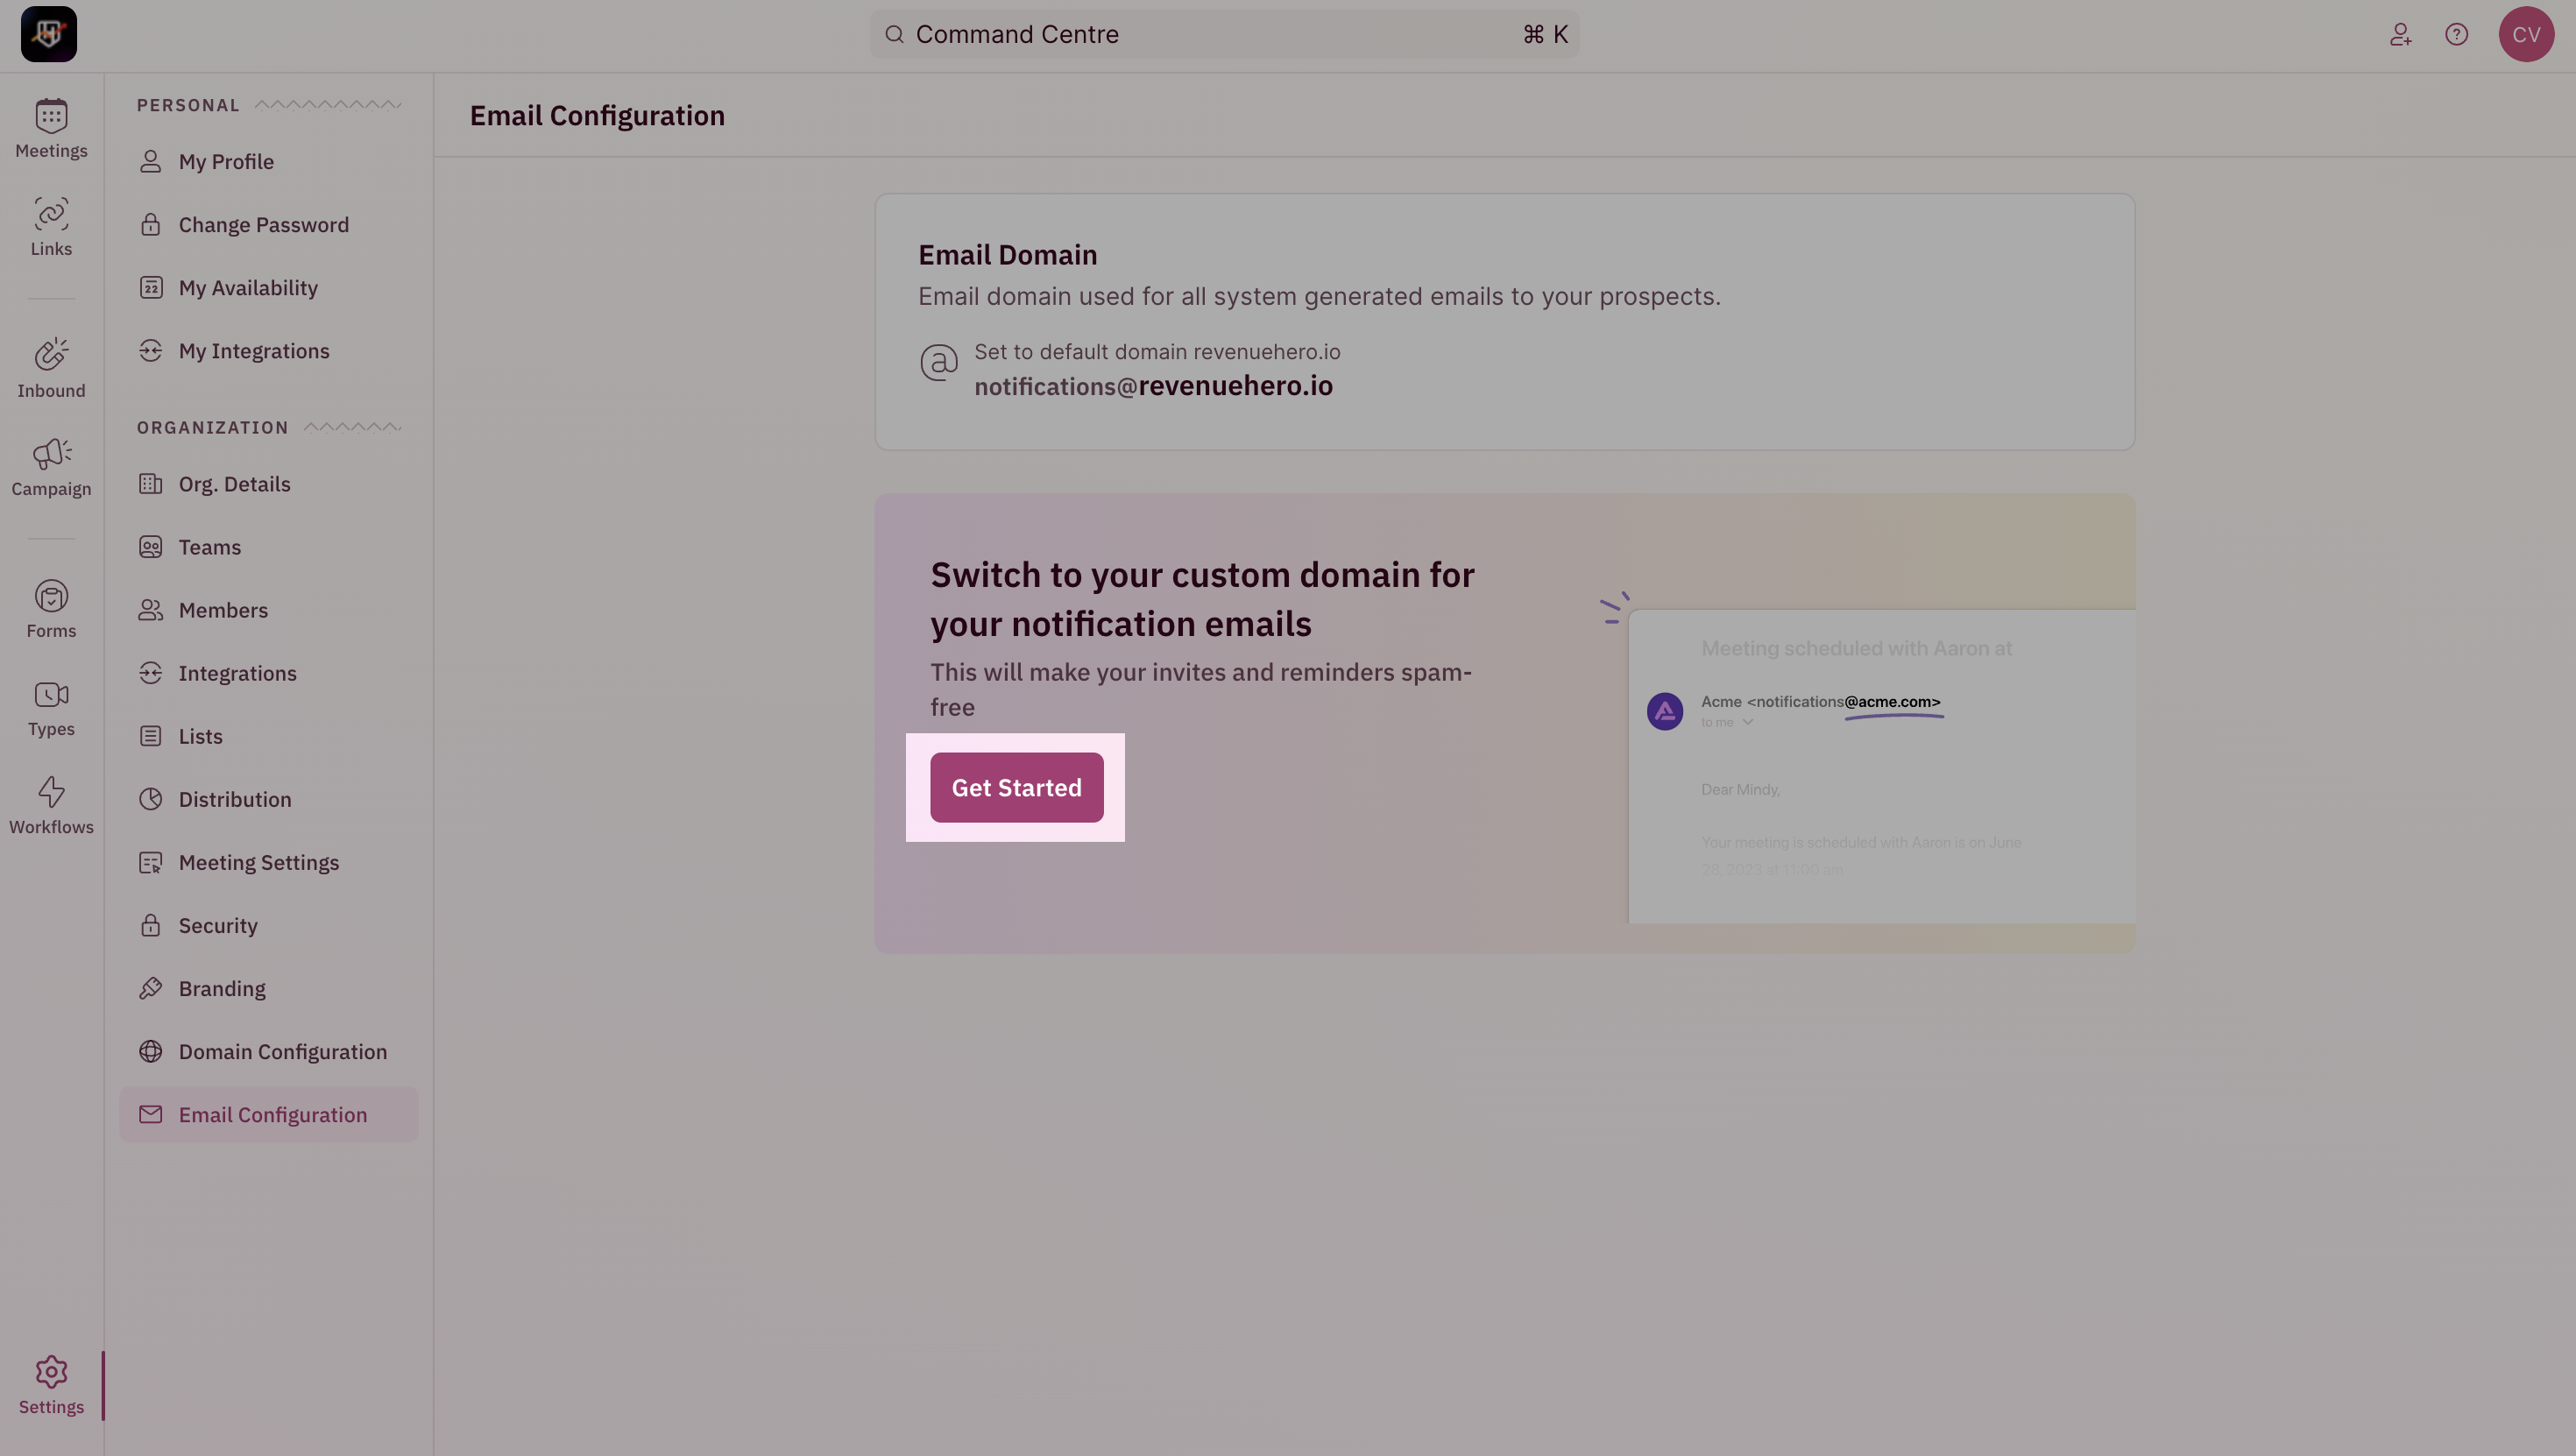
Email Domain customization
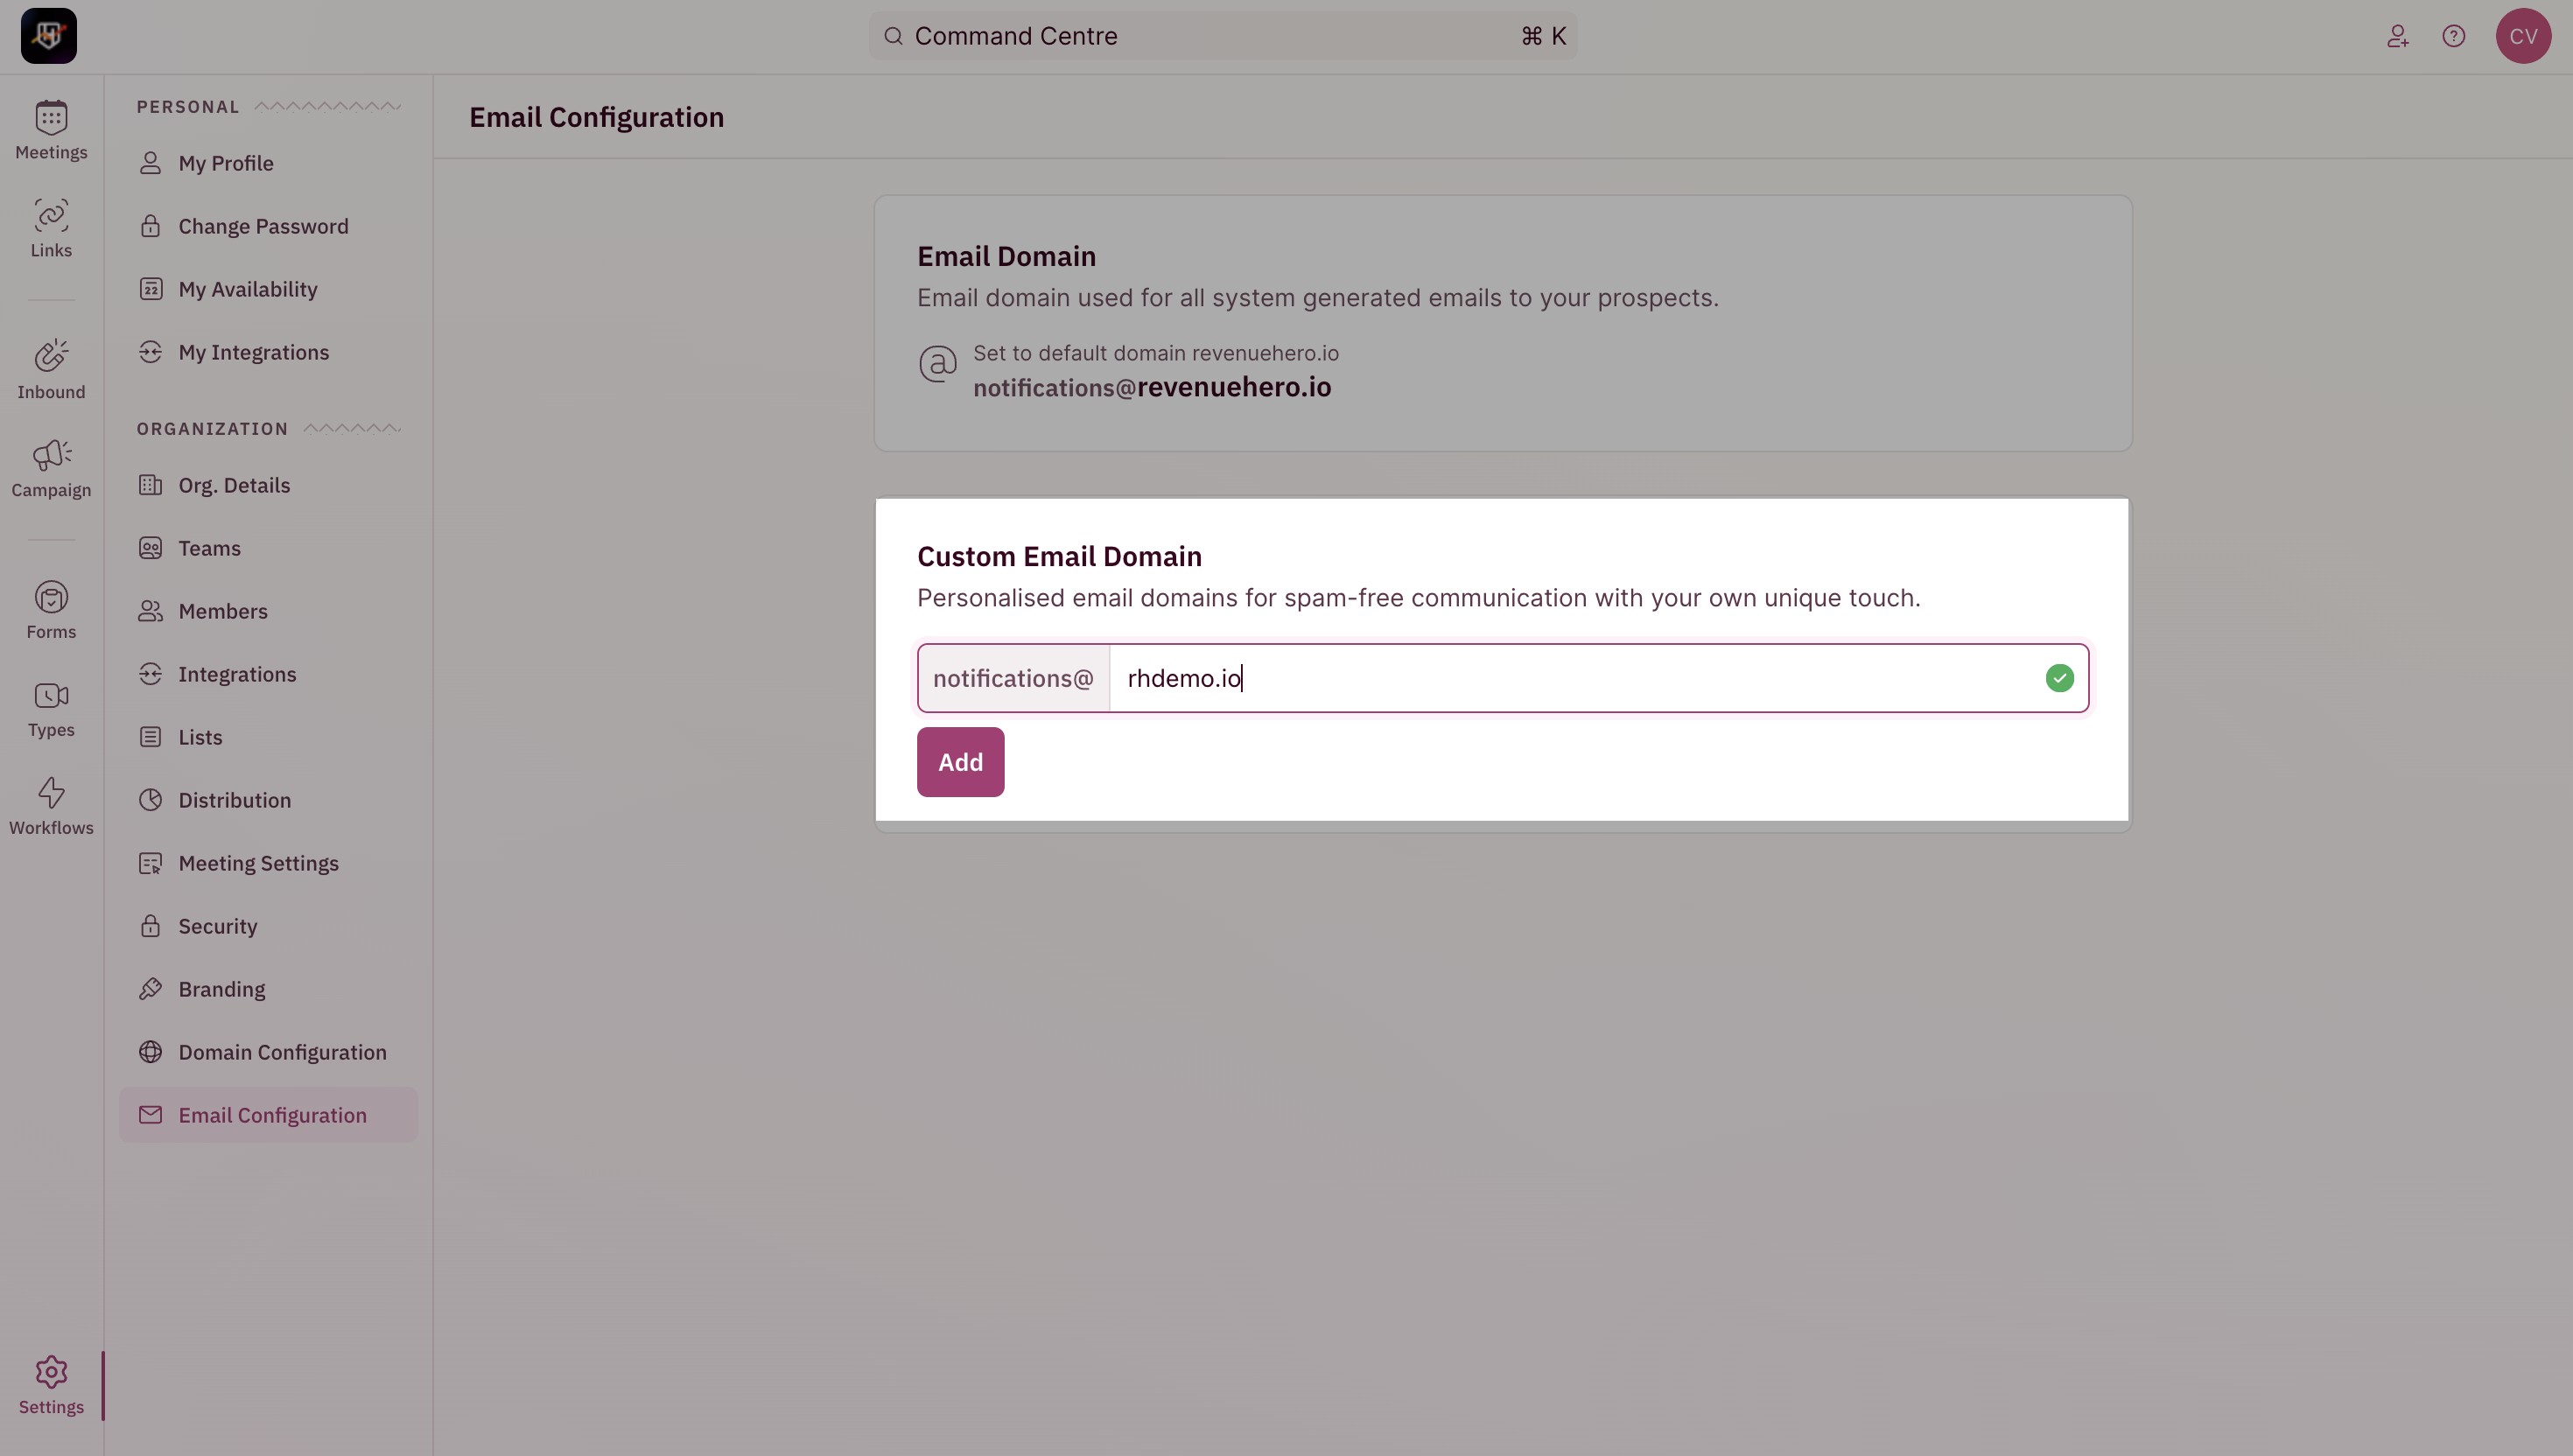
The email domain from which reminder emails are sent to your prospects can be customized by following these steps.- To update your email domain, head to “Settings” from the left navigation menu and click on “Email Configuration” under “Organization Settings”.

- Click on “Get Started”
- Enter the name of your domain and click on “Setup Now”.
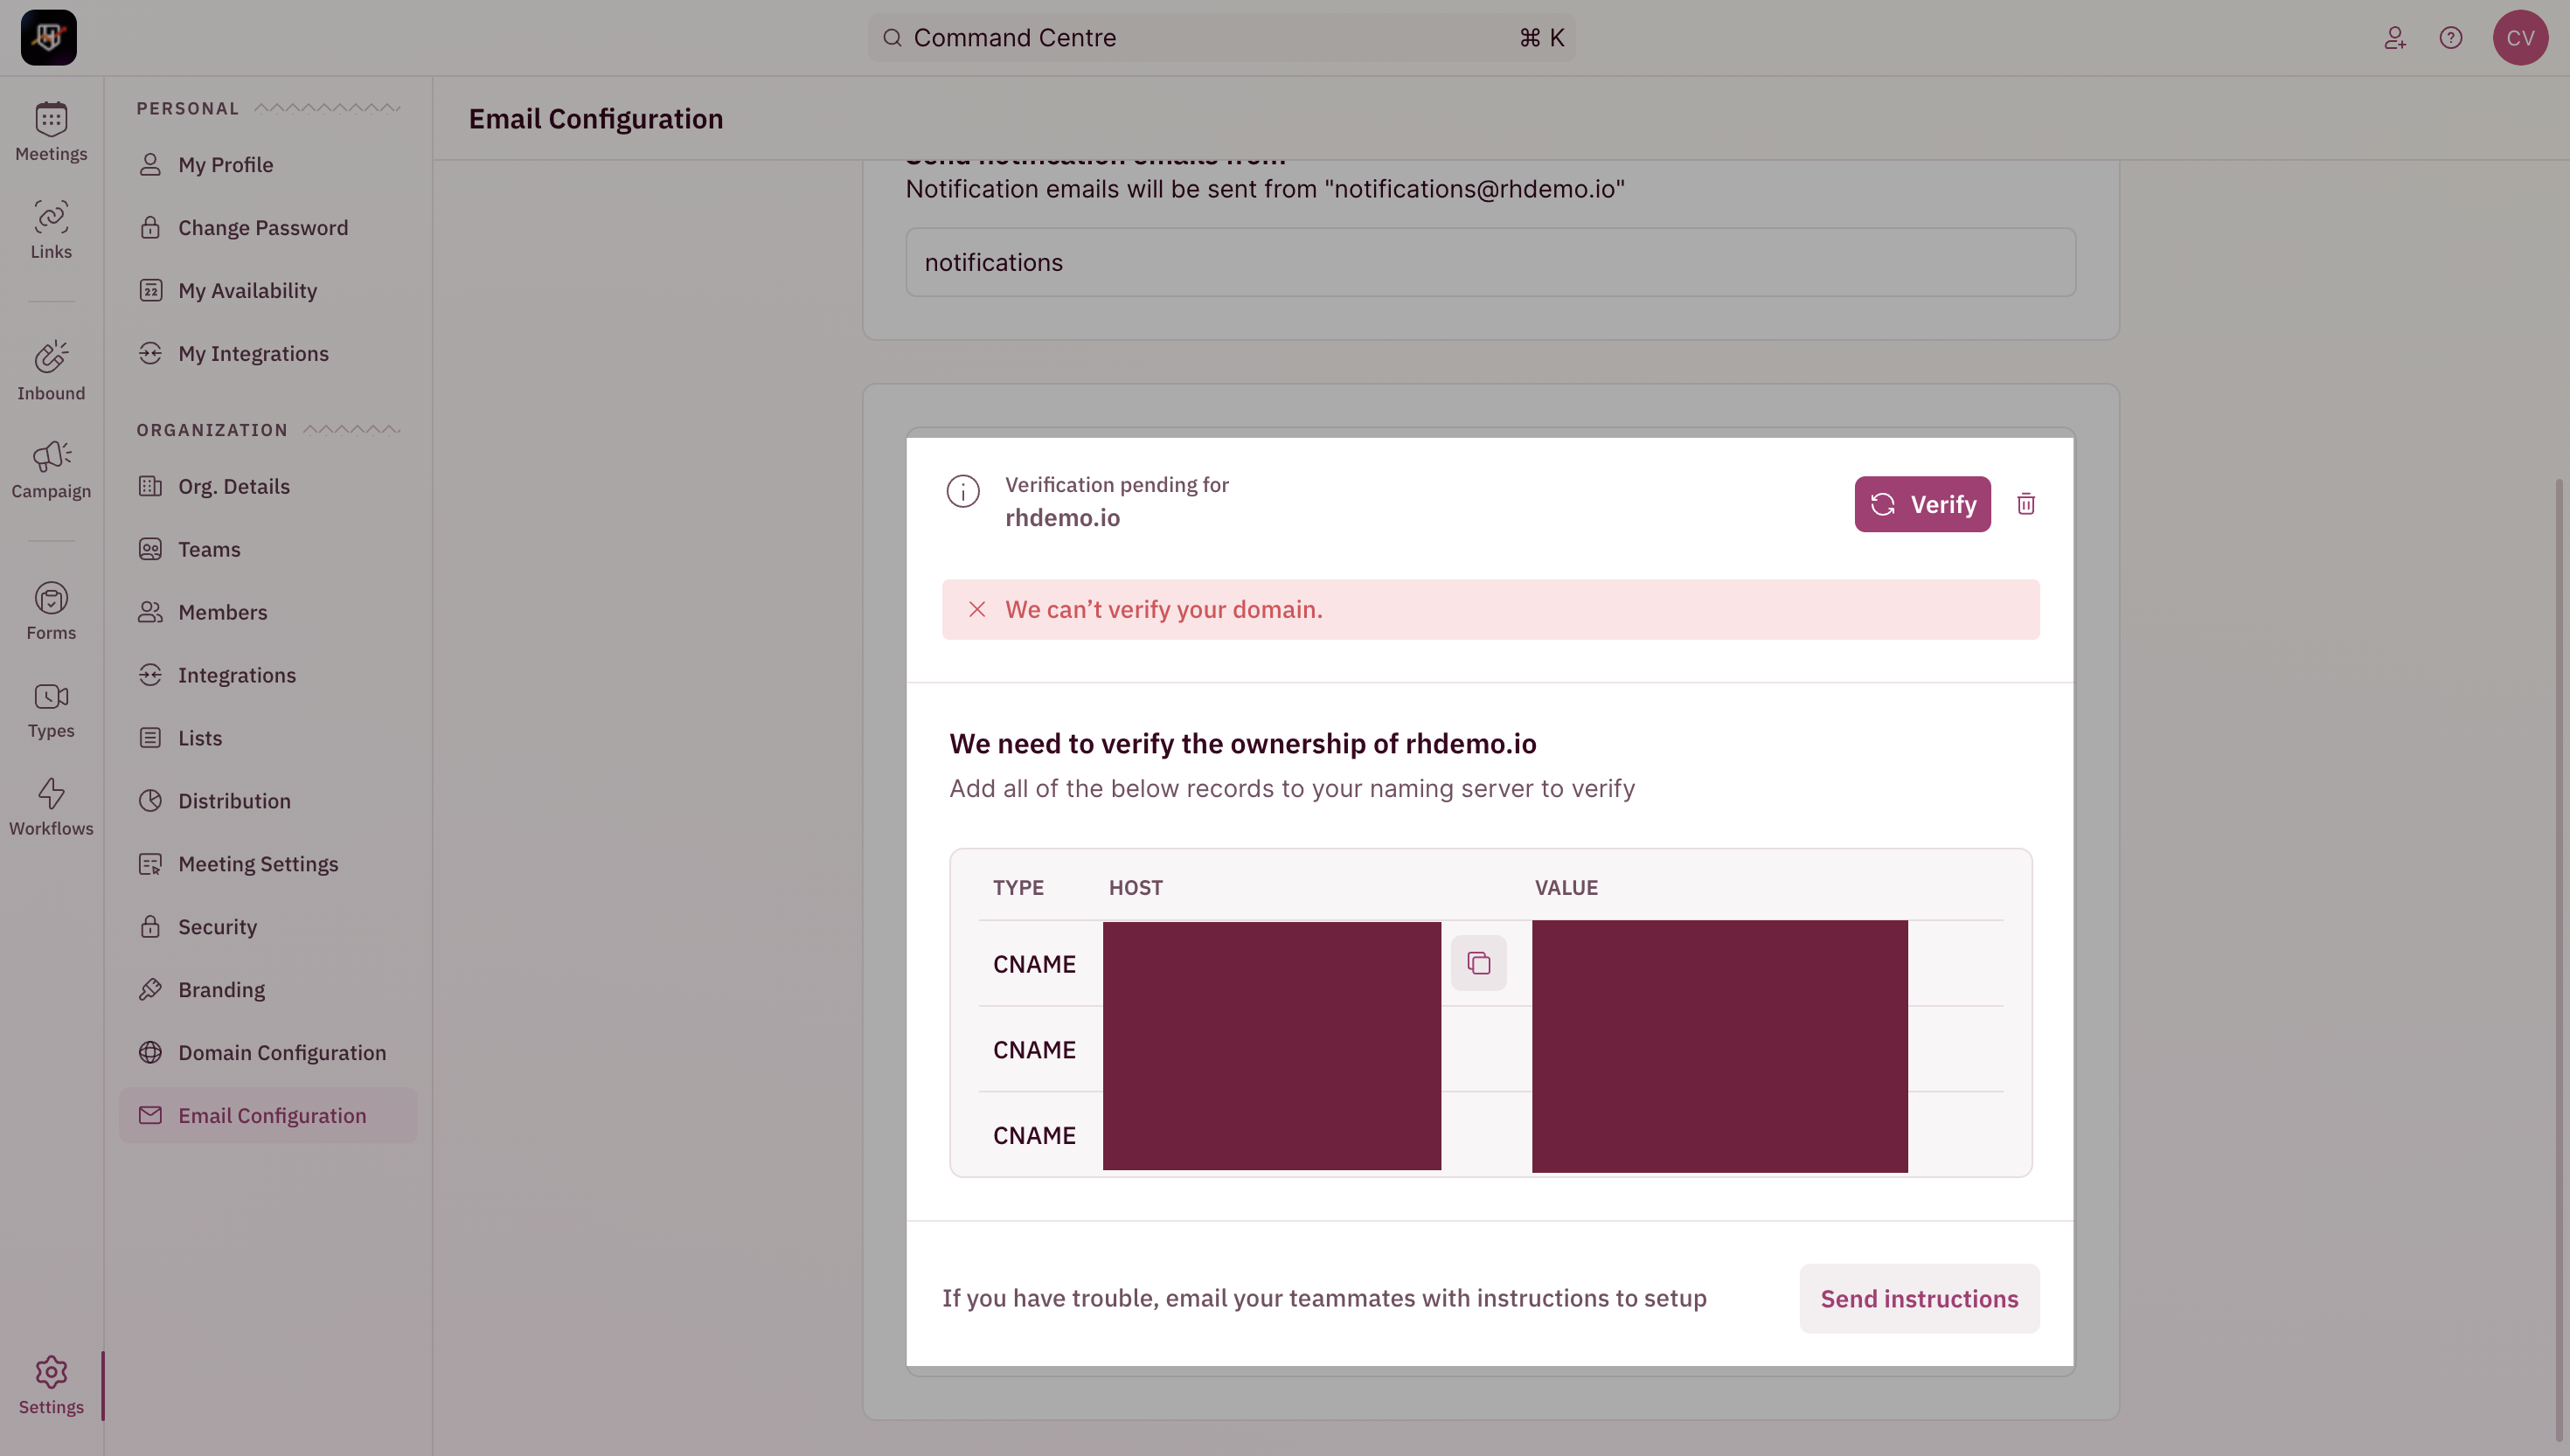
- Add the three CNAME records in your DNS settings and click verify once done.
- Once verified, you would be able to customize the phrase/string before the @
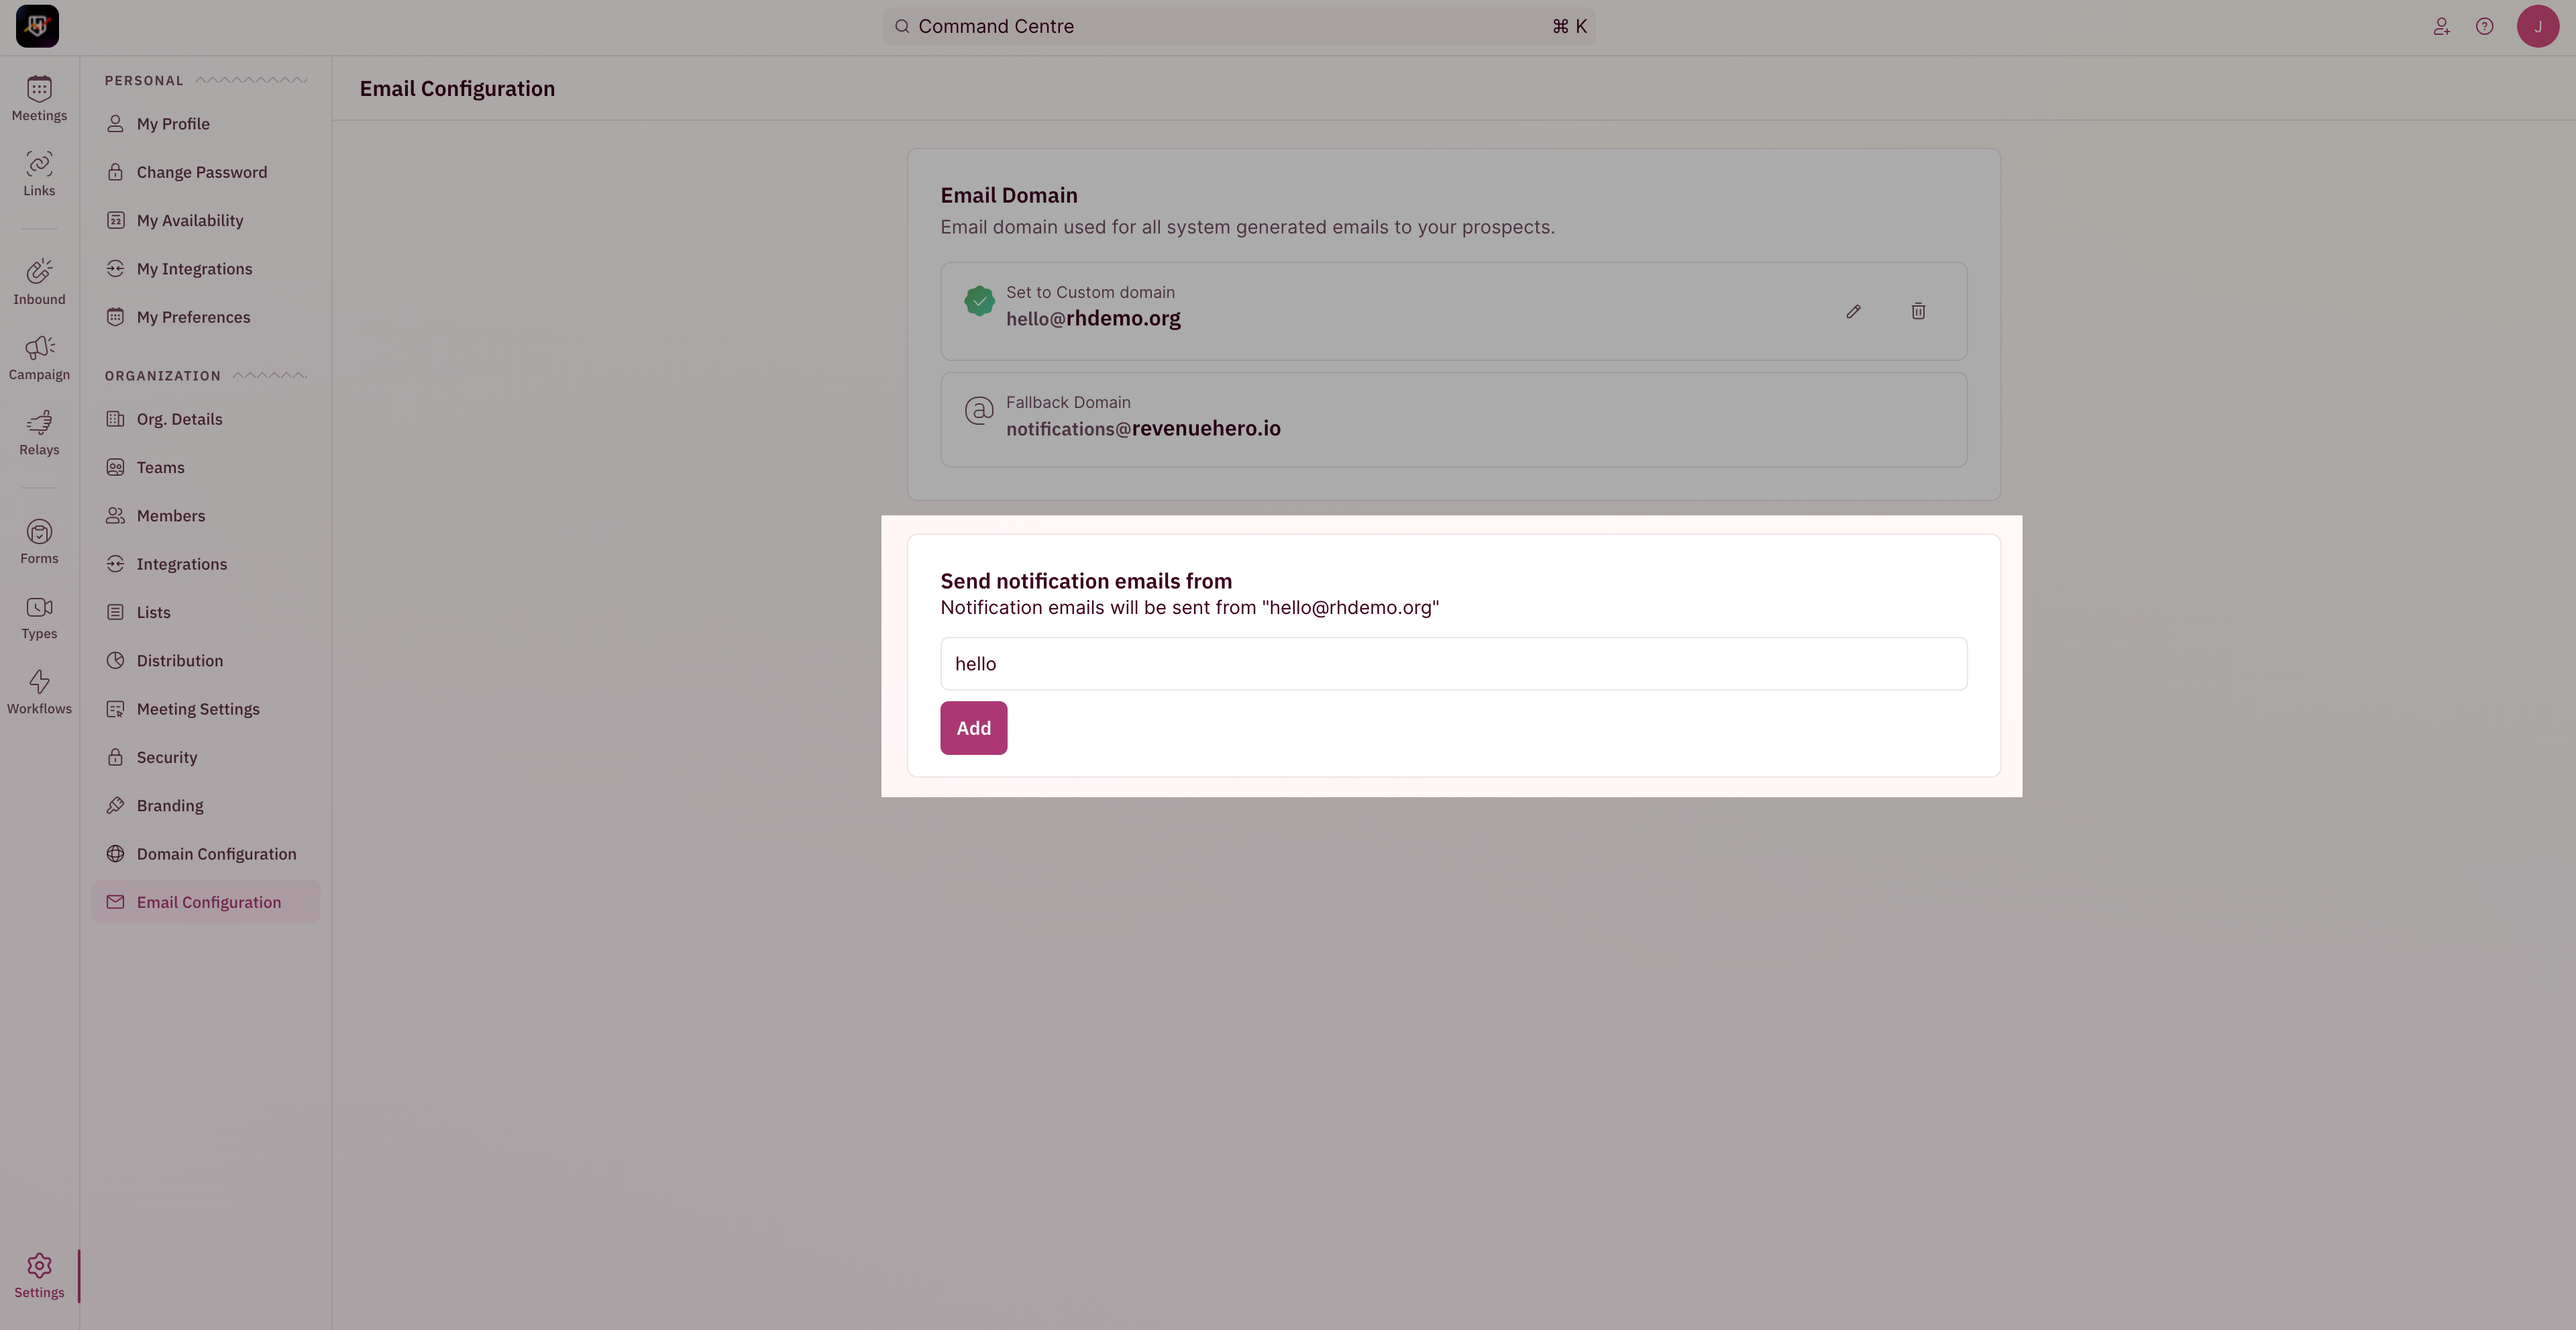
- You’re all set!
In case your domain is down/inaccessable, the fallback domain will be used.

Meeting Link customization
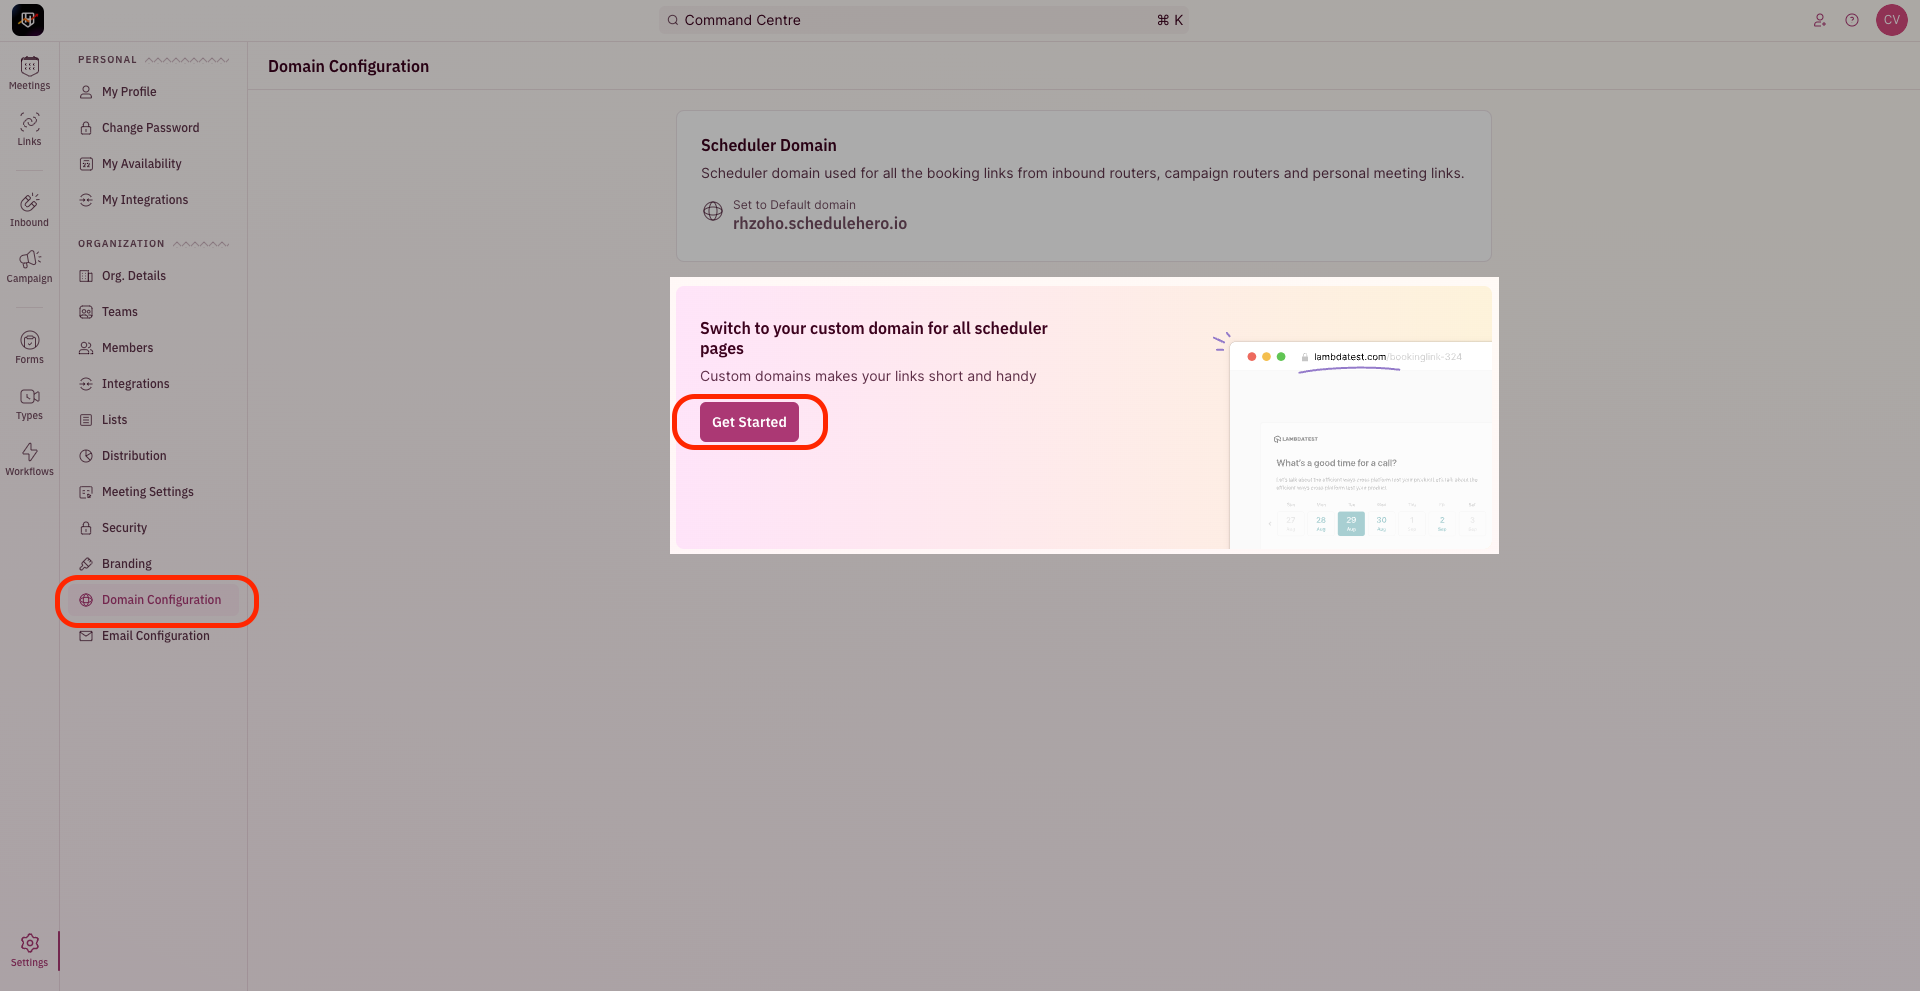
The scheduler domain can be customized with your domain name in RevenueHero. This domain is used for all the booking links from Inbound Routers, Campaign Routers, and Personal Meeting links.- To update your Custom Domain, head to “Settings” from the left navigation menu and click on “Scheduler Configuration” under “Organization Settings”.
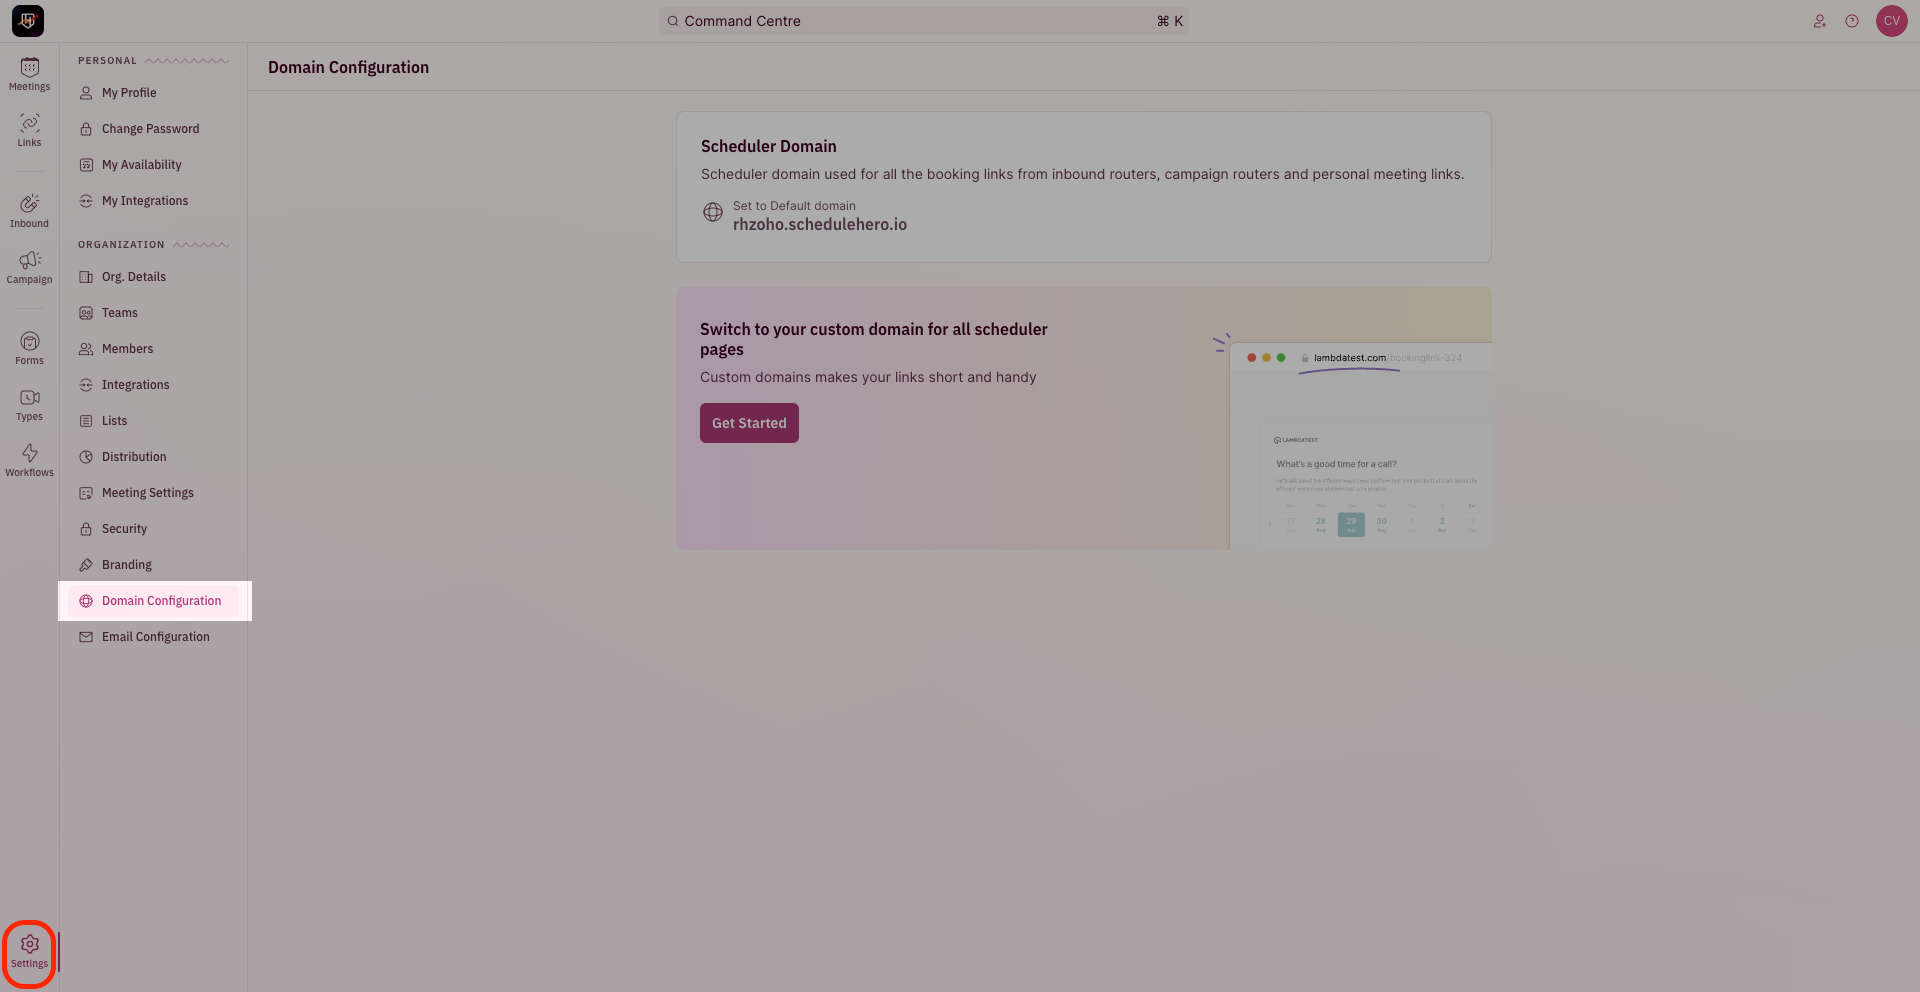
- Click on “Get Started”
- Enter the name of your domain and click on “Setup Now”.
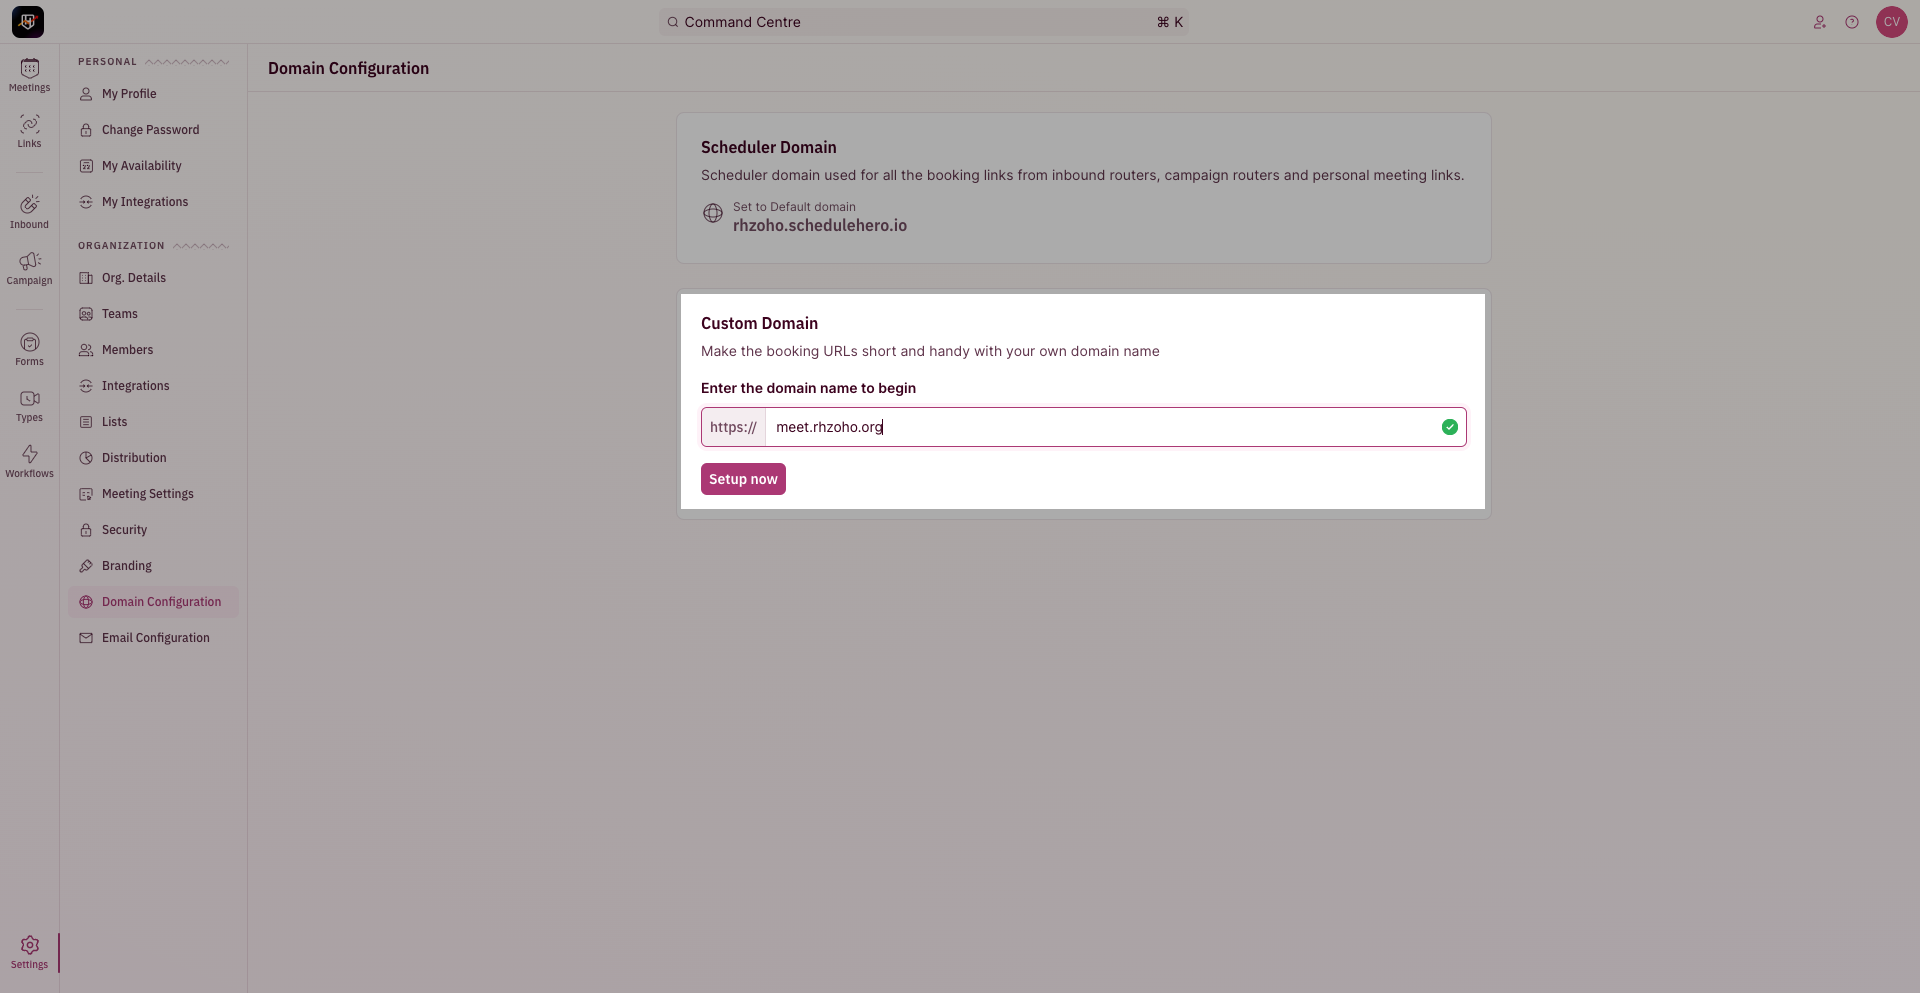
- You will be asked to verify ownership of the domain. Once done, all your links will have your custom domain. In case the domain is down, the fallback domain will be used.