BEFORE WE BEGINThere are a couple of pre-requisites to create your first Campaign Router:
Steps to create a Campaign Router
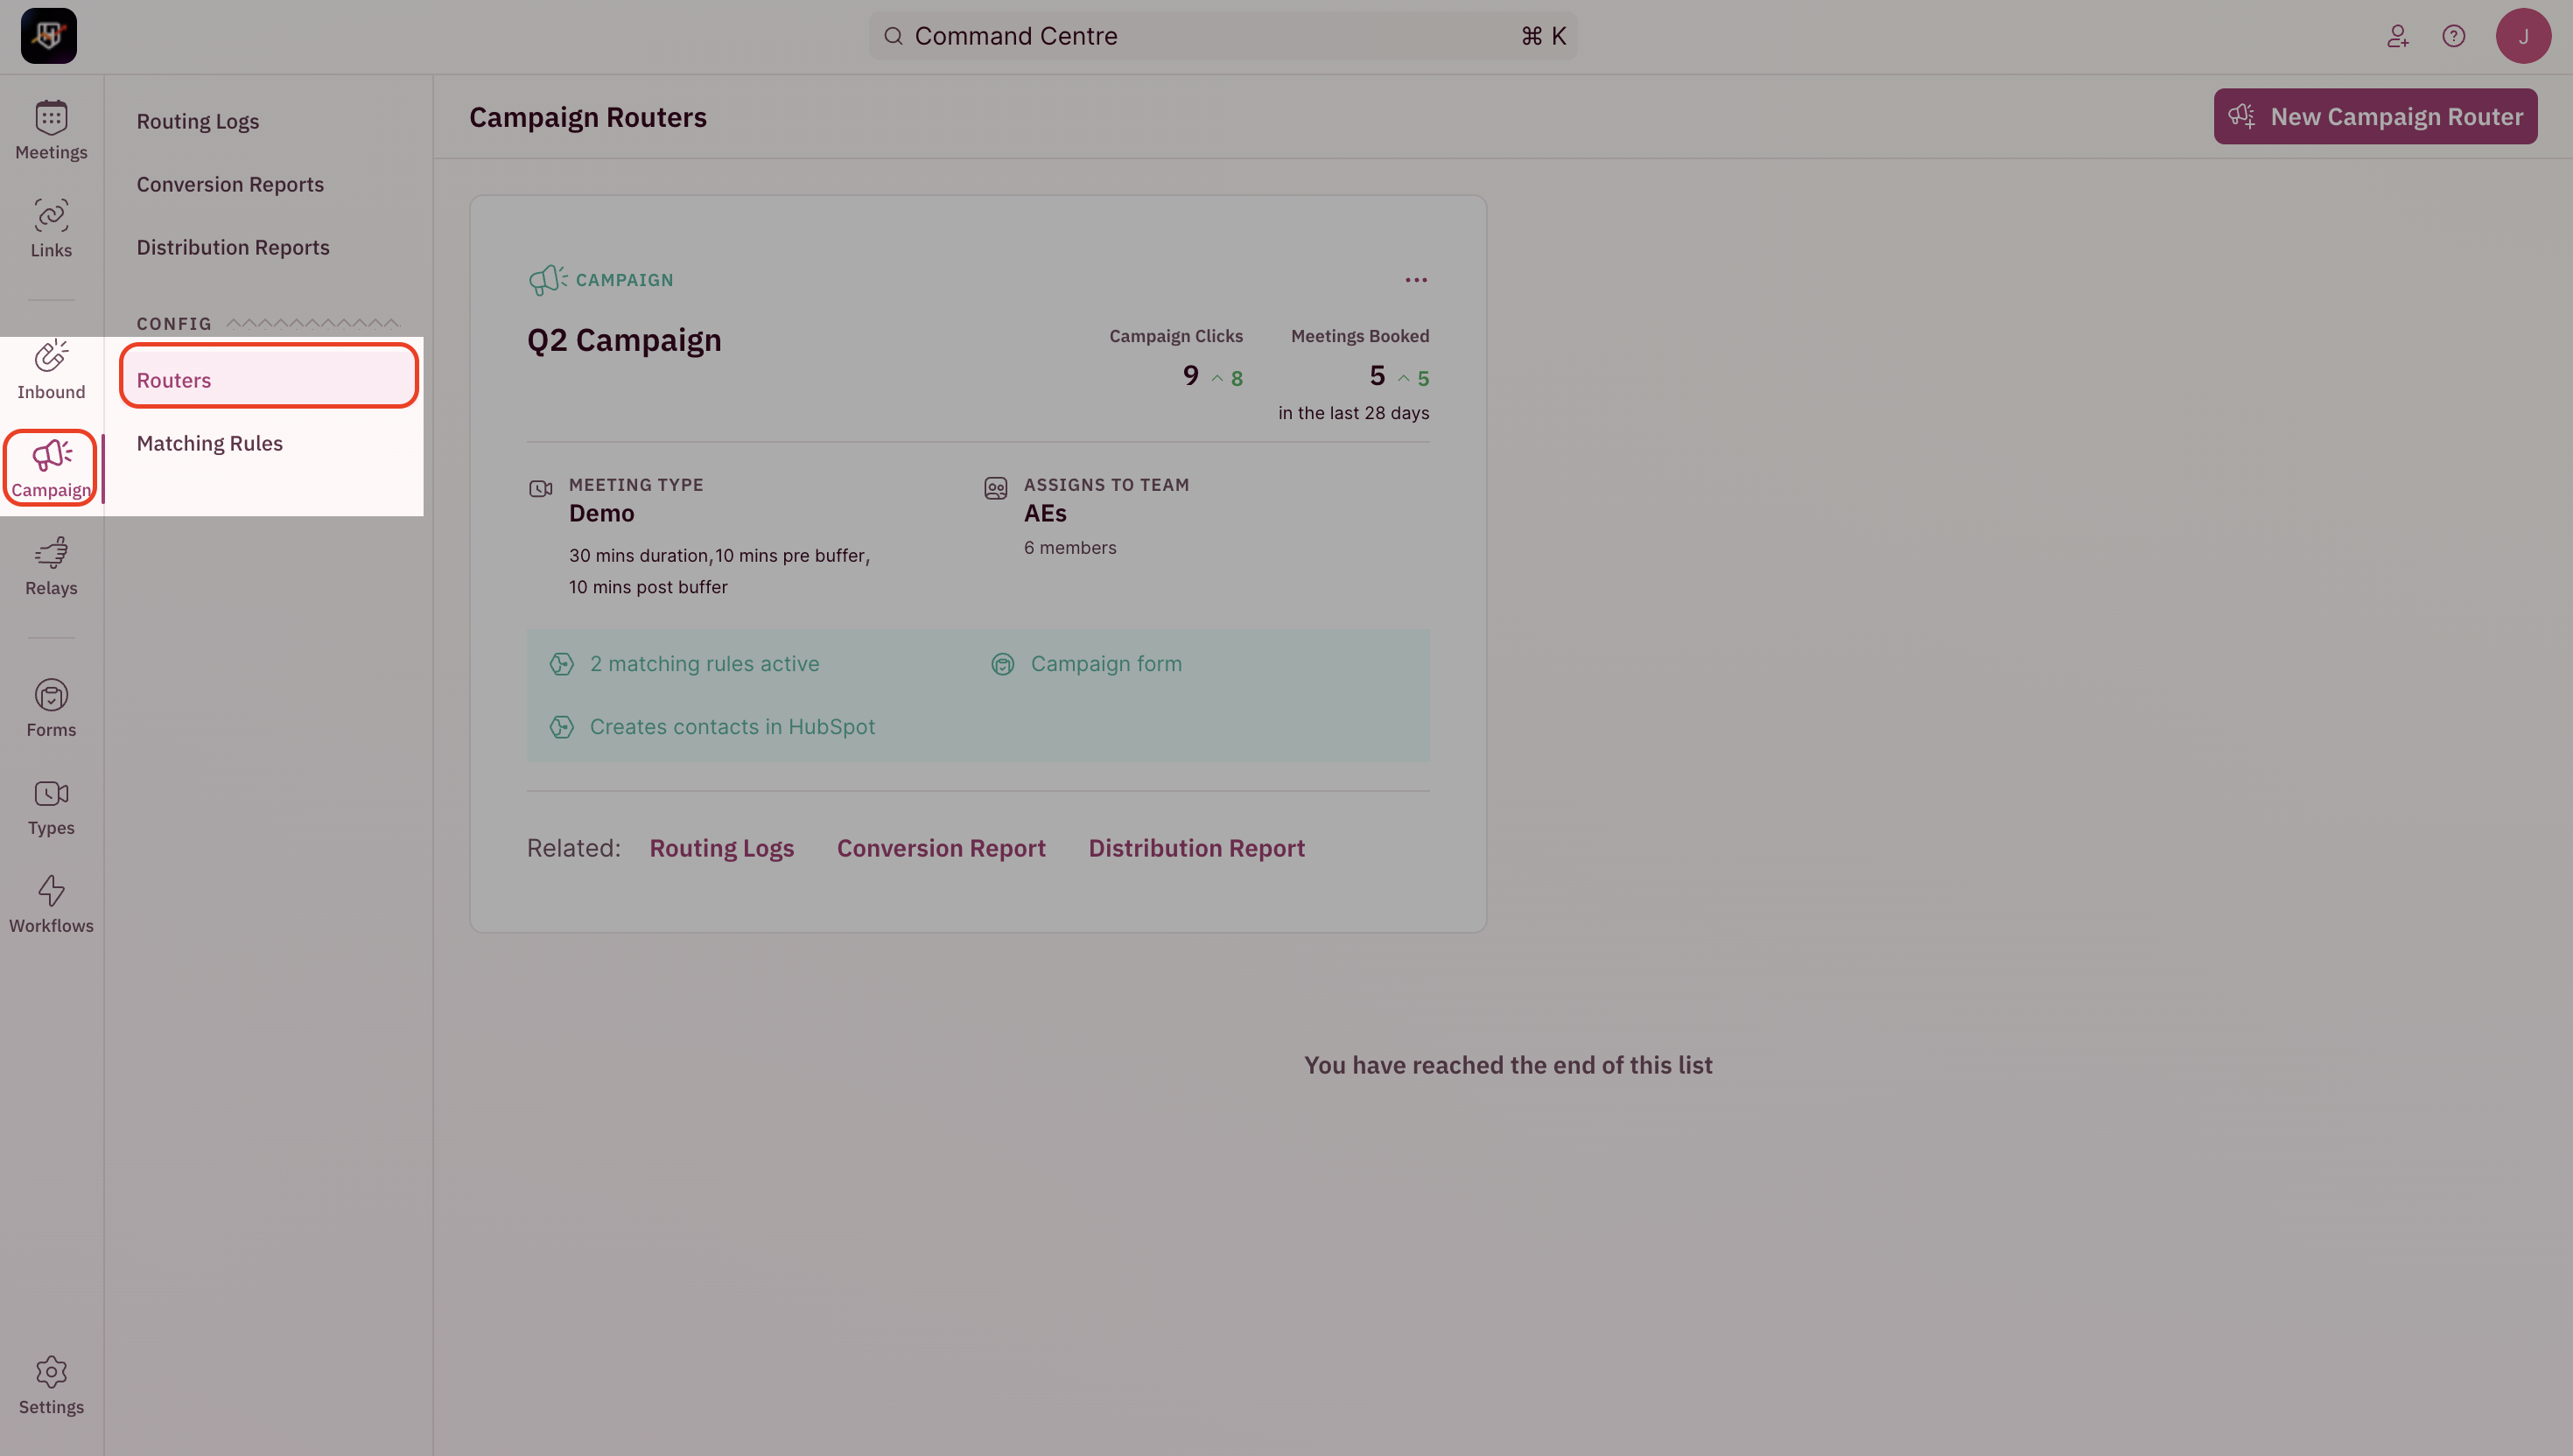
Navigate to Campaign Router
- To create a Campaign Router, use the side nav bar and click on Campaign → Routers.
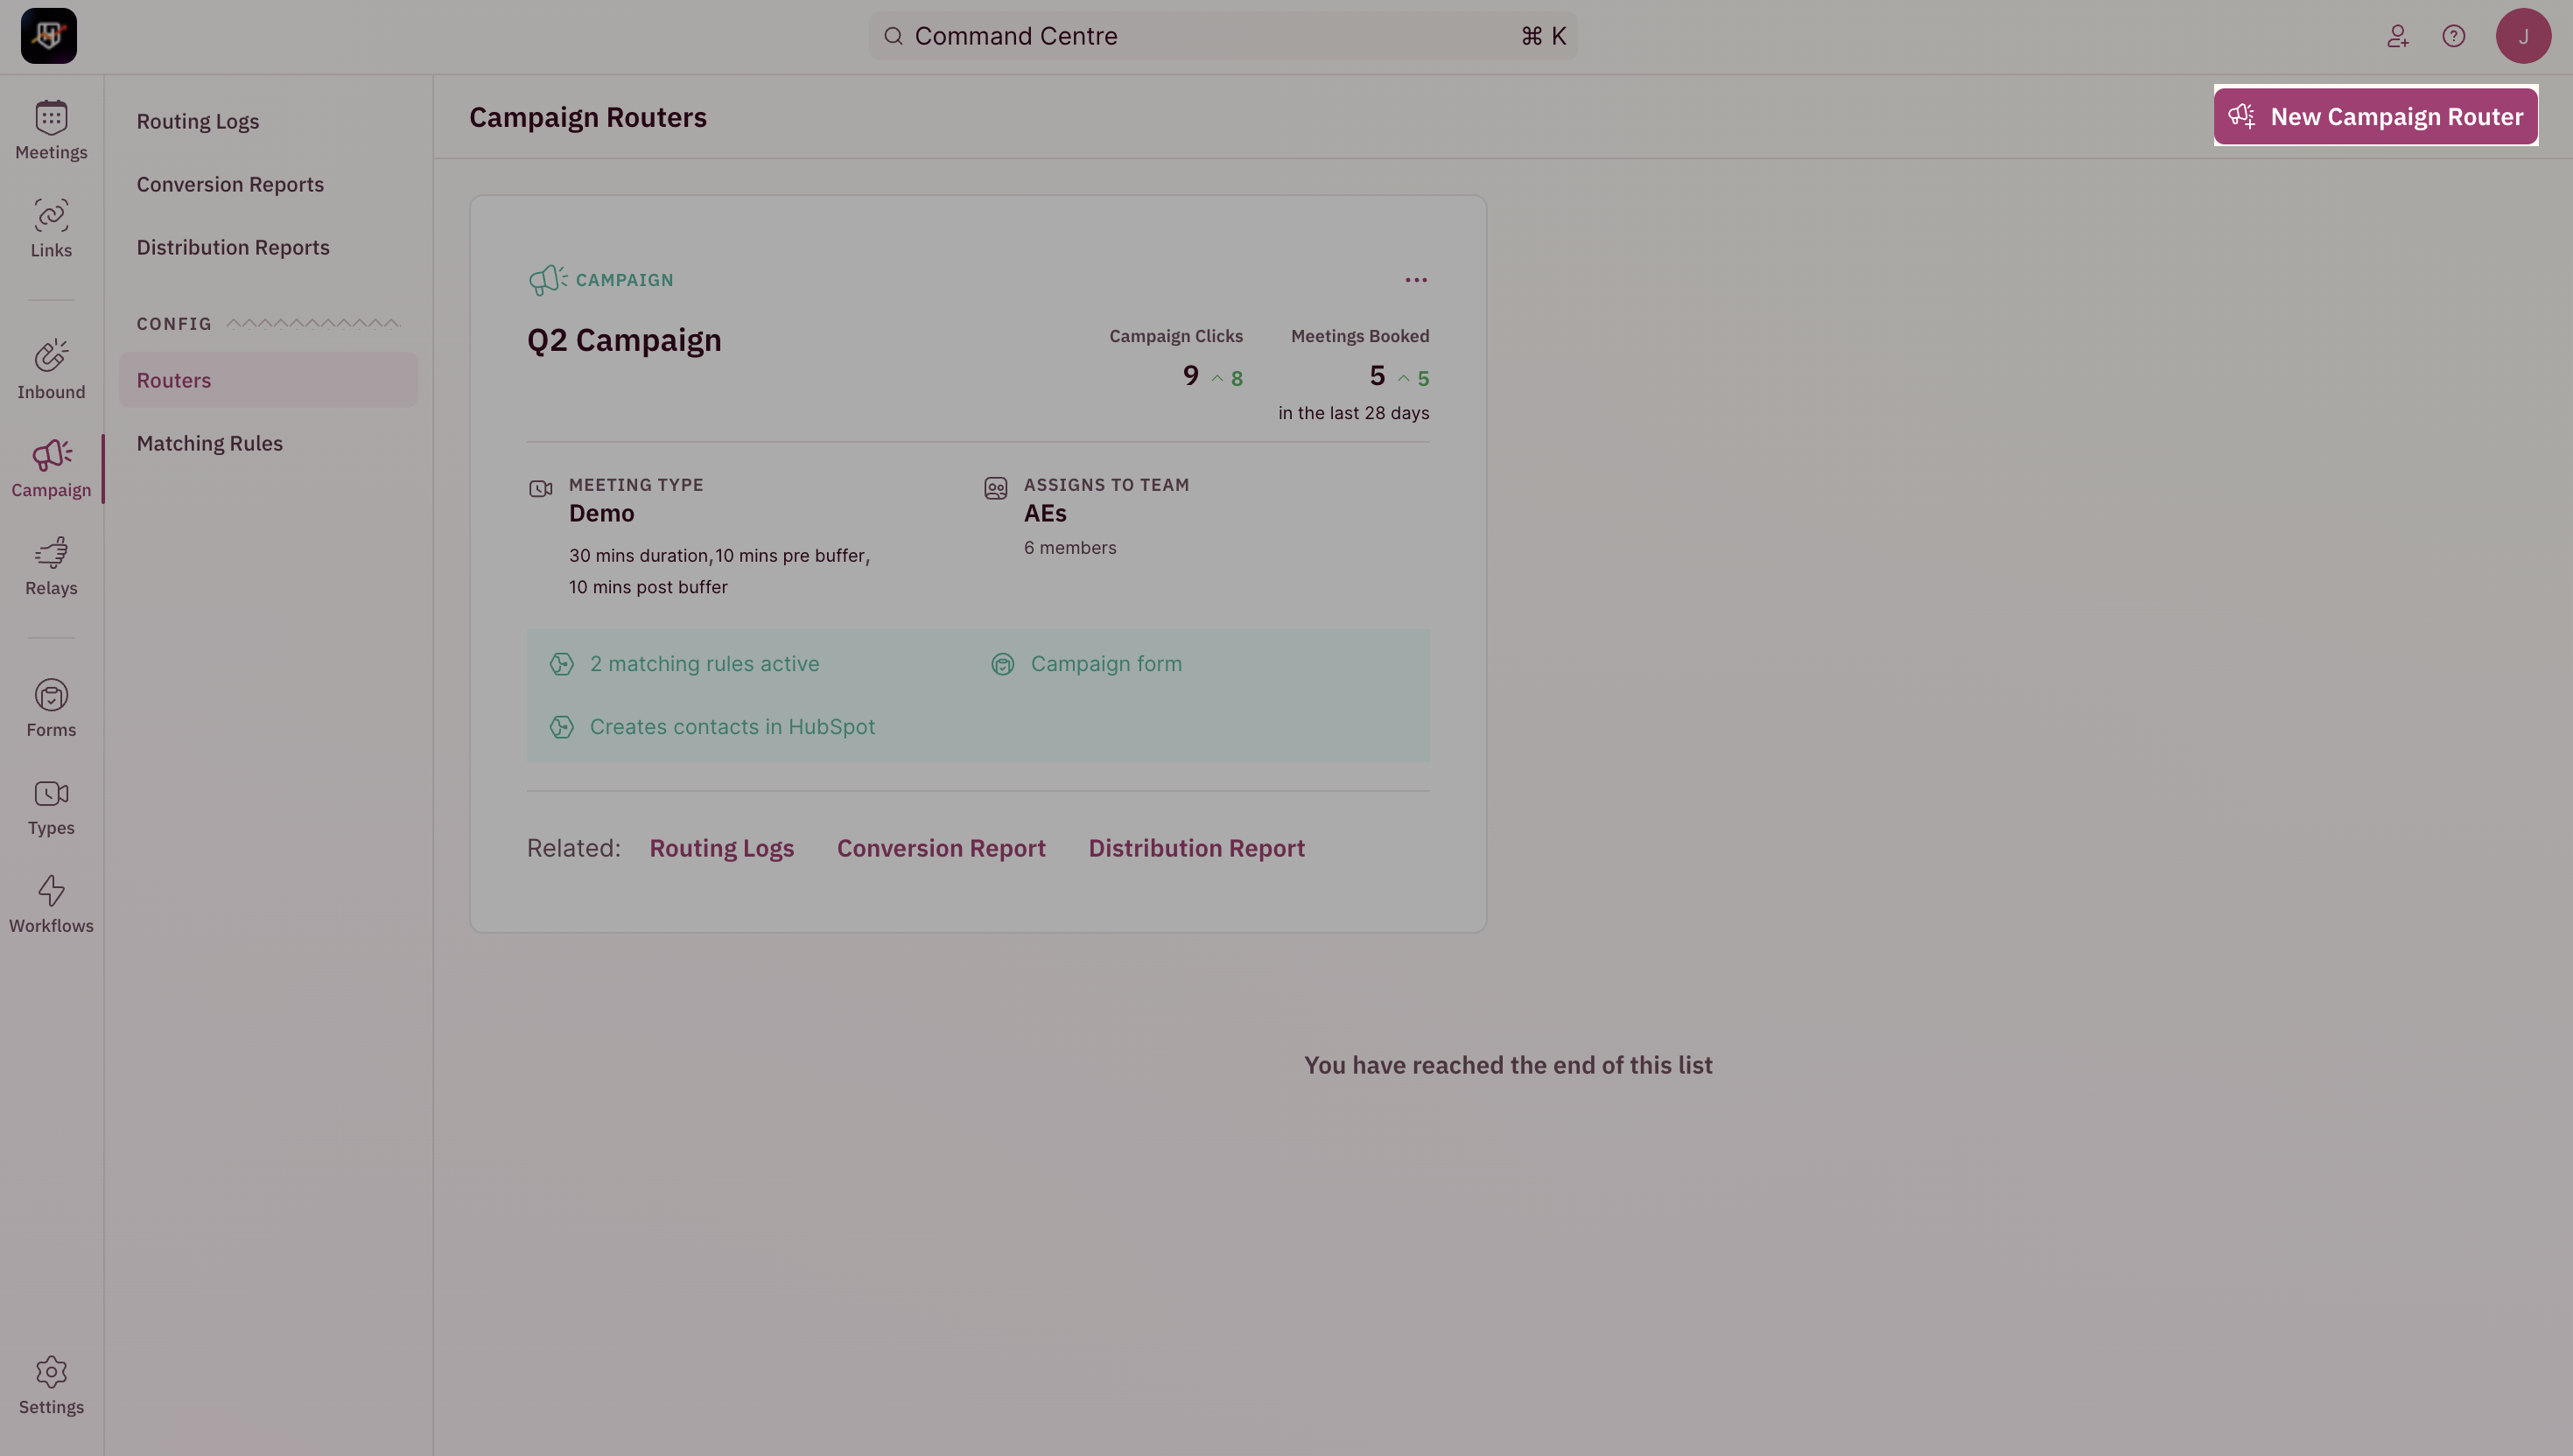
- Once you’re inside the Campaign Router page, click on the Create New Router button.
Set up Matching Rules
Matching rules help in routing leads and their meetings to existing owners in the CRM. This ensures your leads talk to the same sales rep and removes the chances of any confusion. By default, your account will have two matching rules: a. Assign meetings to the existing company’s owner. b. Assign meetings to the existing contact’s owner.
NOTEYou can create a new matching rule if you’d like to match leads based on other criteria.
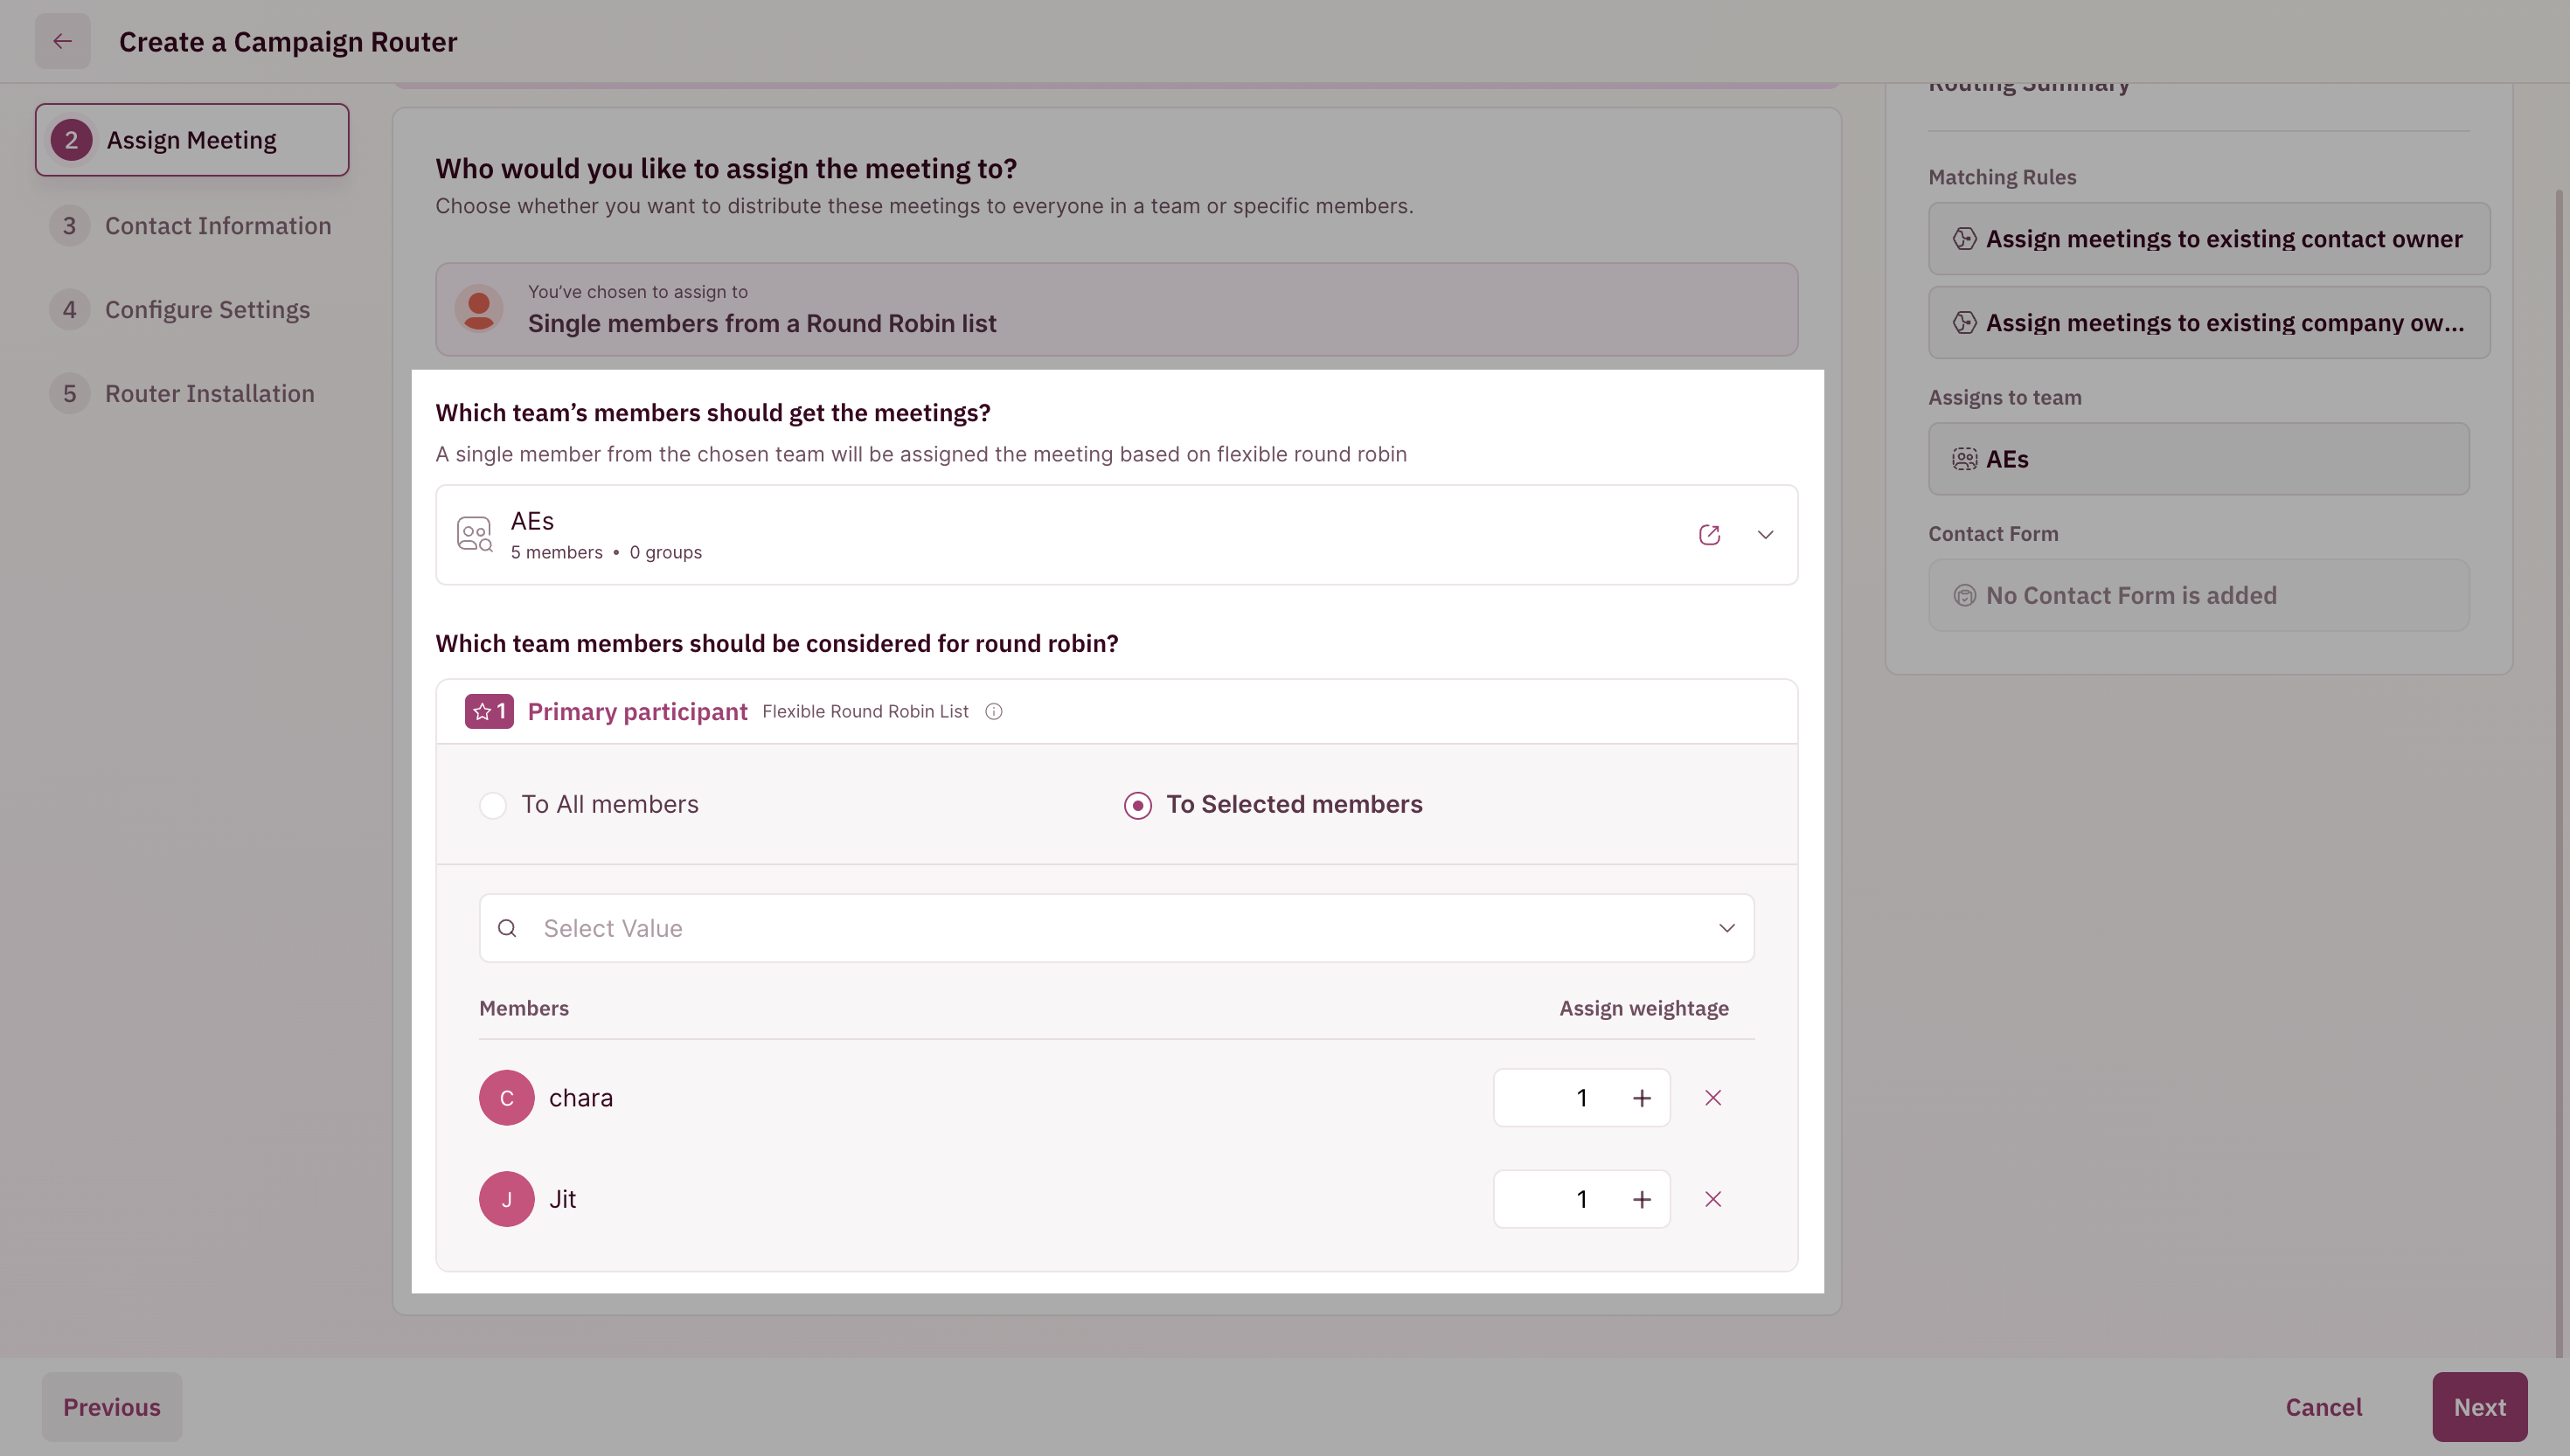
Assign Meetings
Under the “Who would you like to assign the meeting to” field, select a team from the “Team” dropdown. This will tell RevenueHero that you want all meetings to be assigned between members of this team. You can choose to assign the meetings “To all members or only “To selected members”. When you choose to assign meetings “To all members”, you can create and build your own logic for how the meetings should be assigned between team members.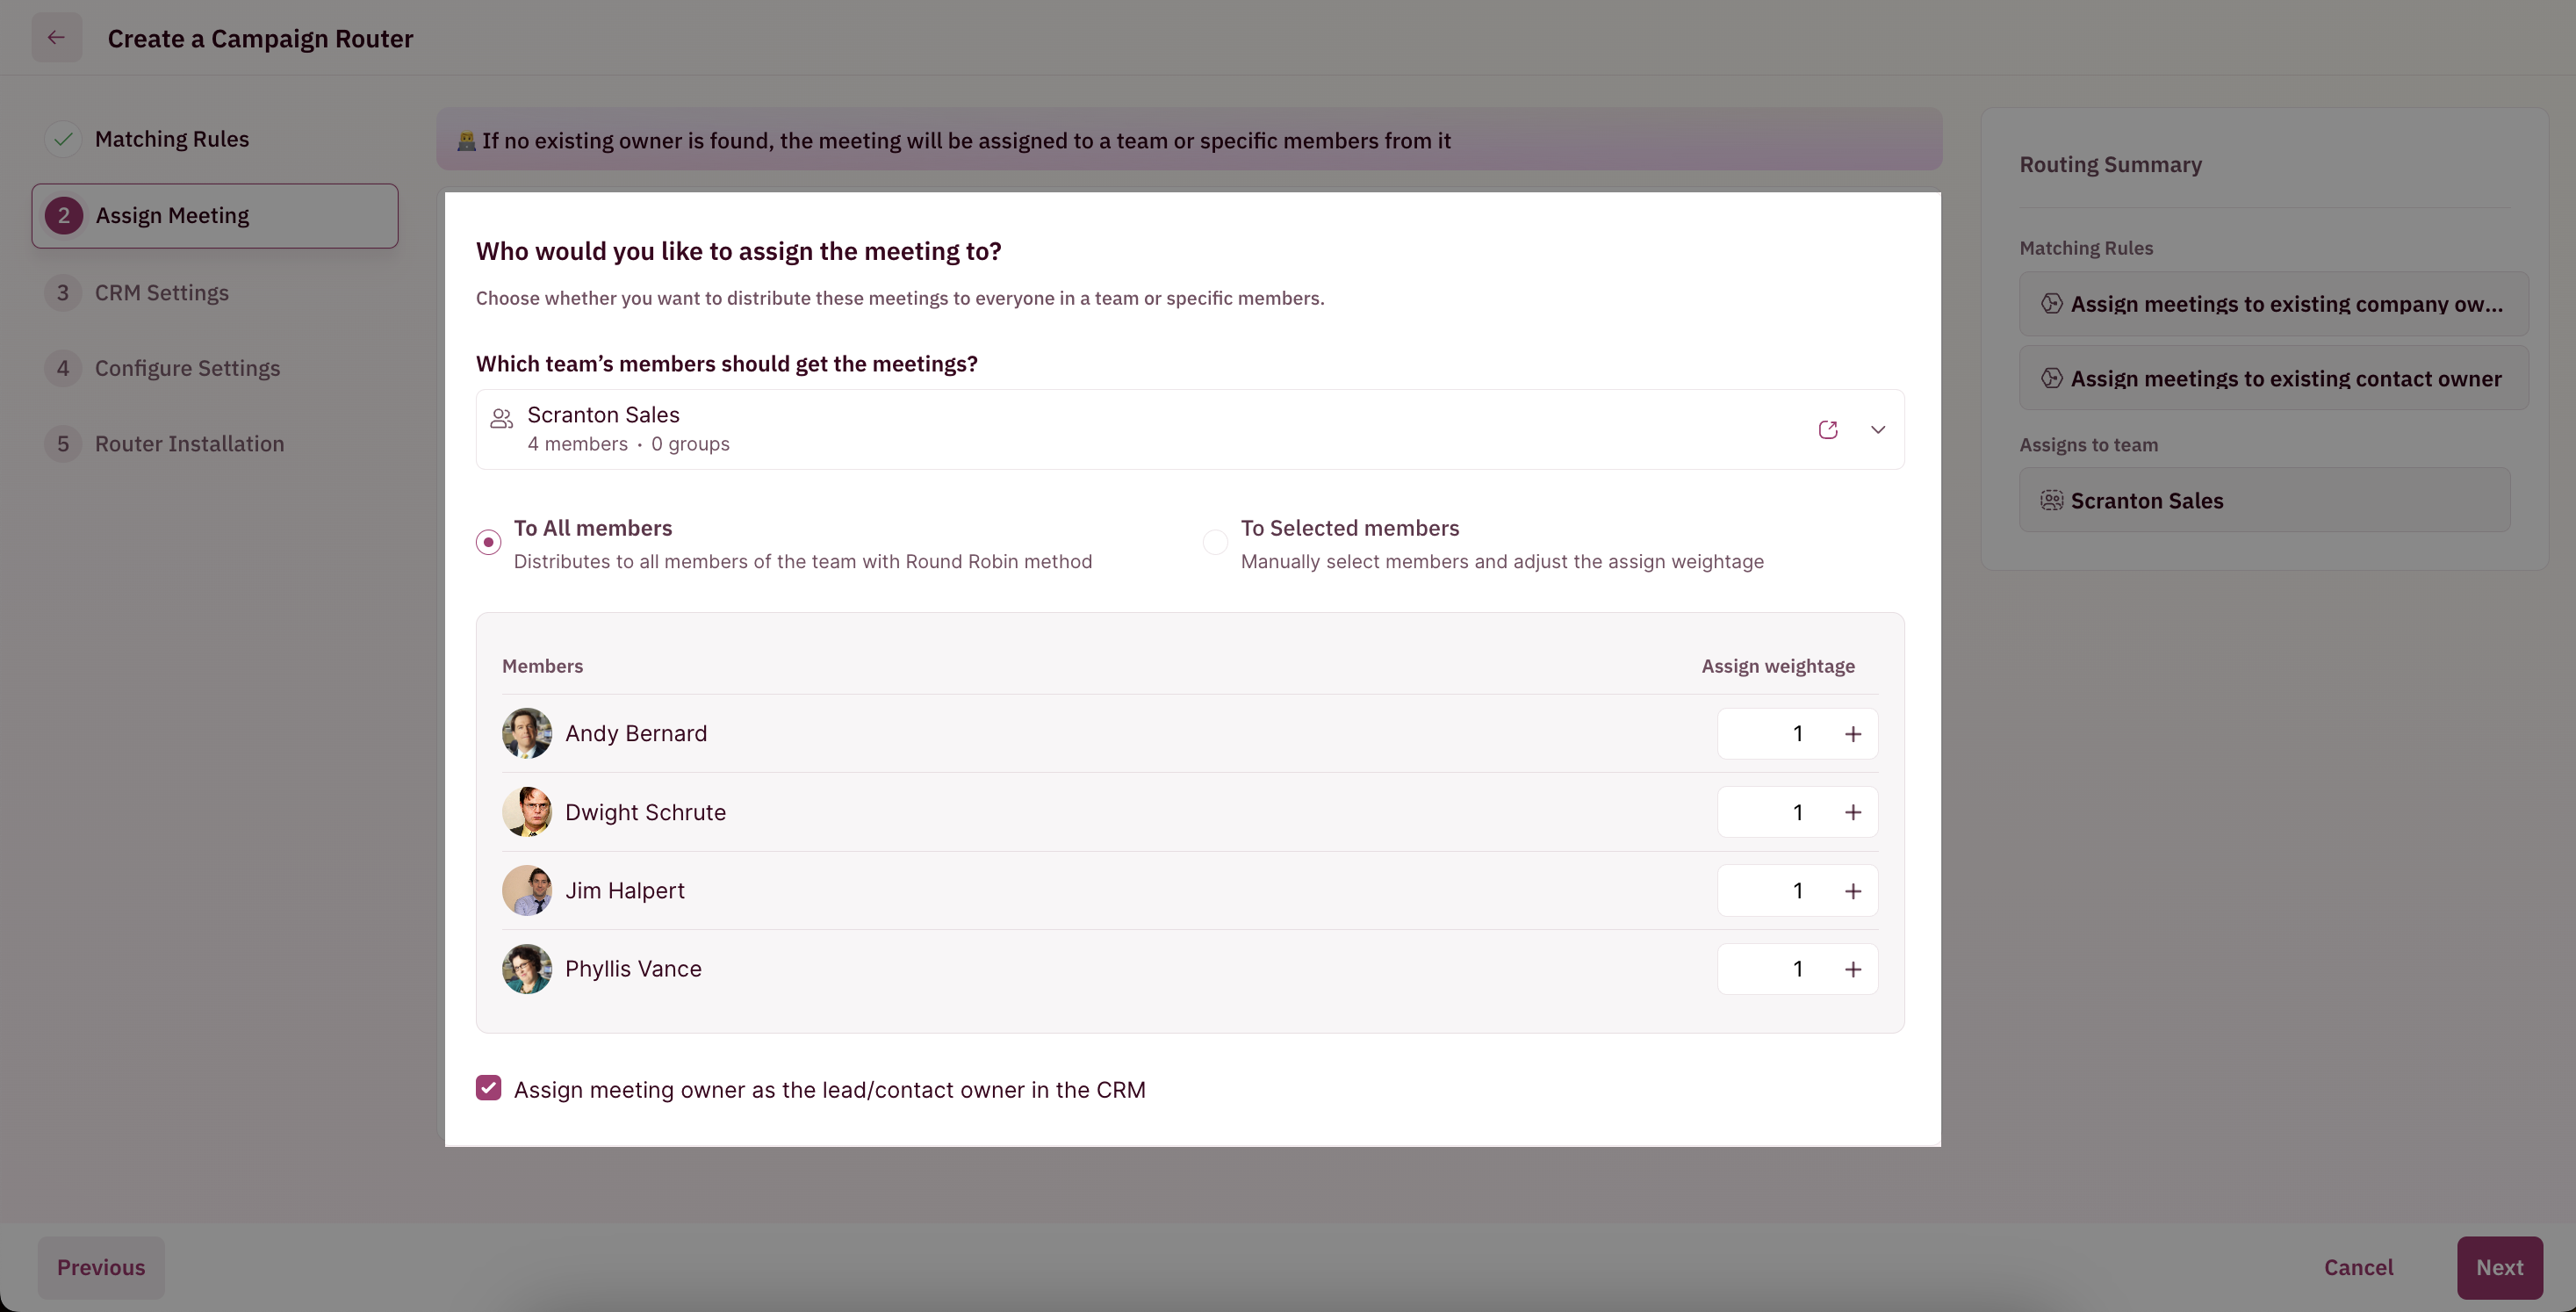
Contact Form
There are 4 fields under the contact form.
Map CRM fields
Mapping fields helps RevenueHero to create or update a prospect’s details in your CRM by mapping the name and email field from the campaign router to that in the CRM. This ensures your prospects get the one-click booking experience. Under the “Should RevenueHero create contacts in your CRM?” field, select “Yes”. This will create new contacts or update existing contacts in your CRM. If you select “No”, you will not have to map the fields to your CRM.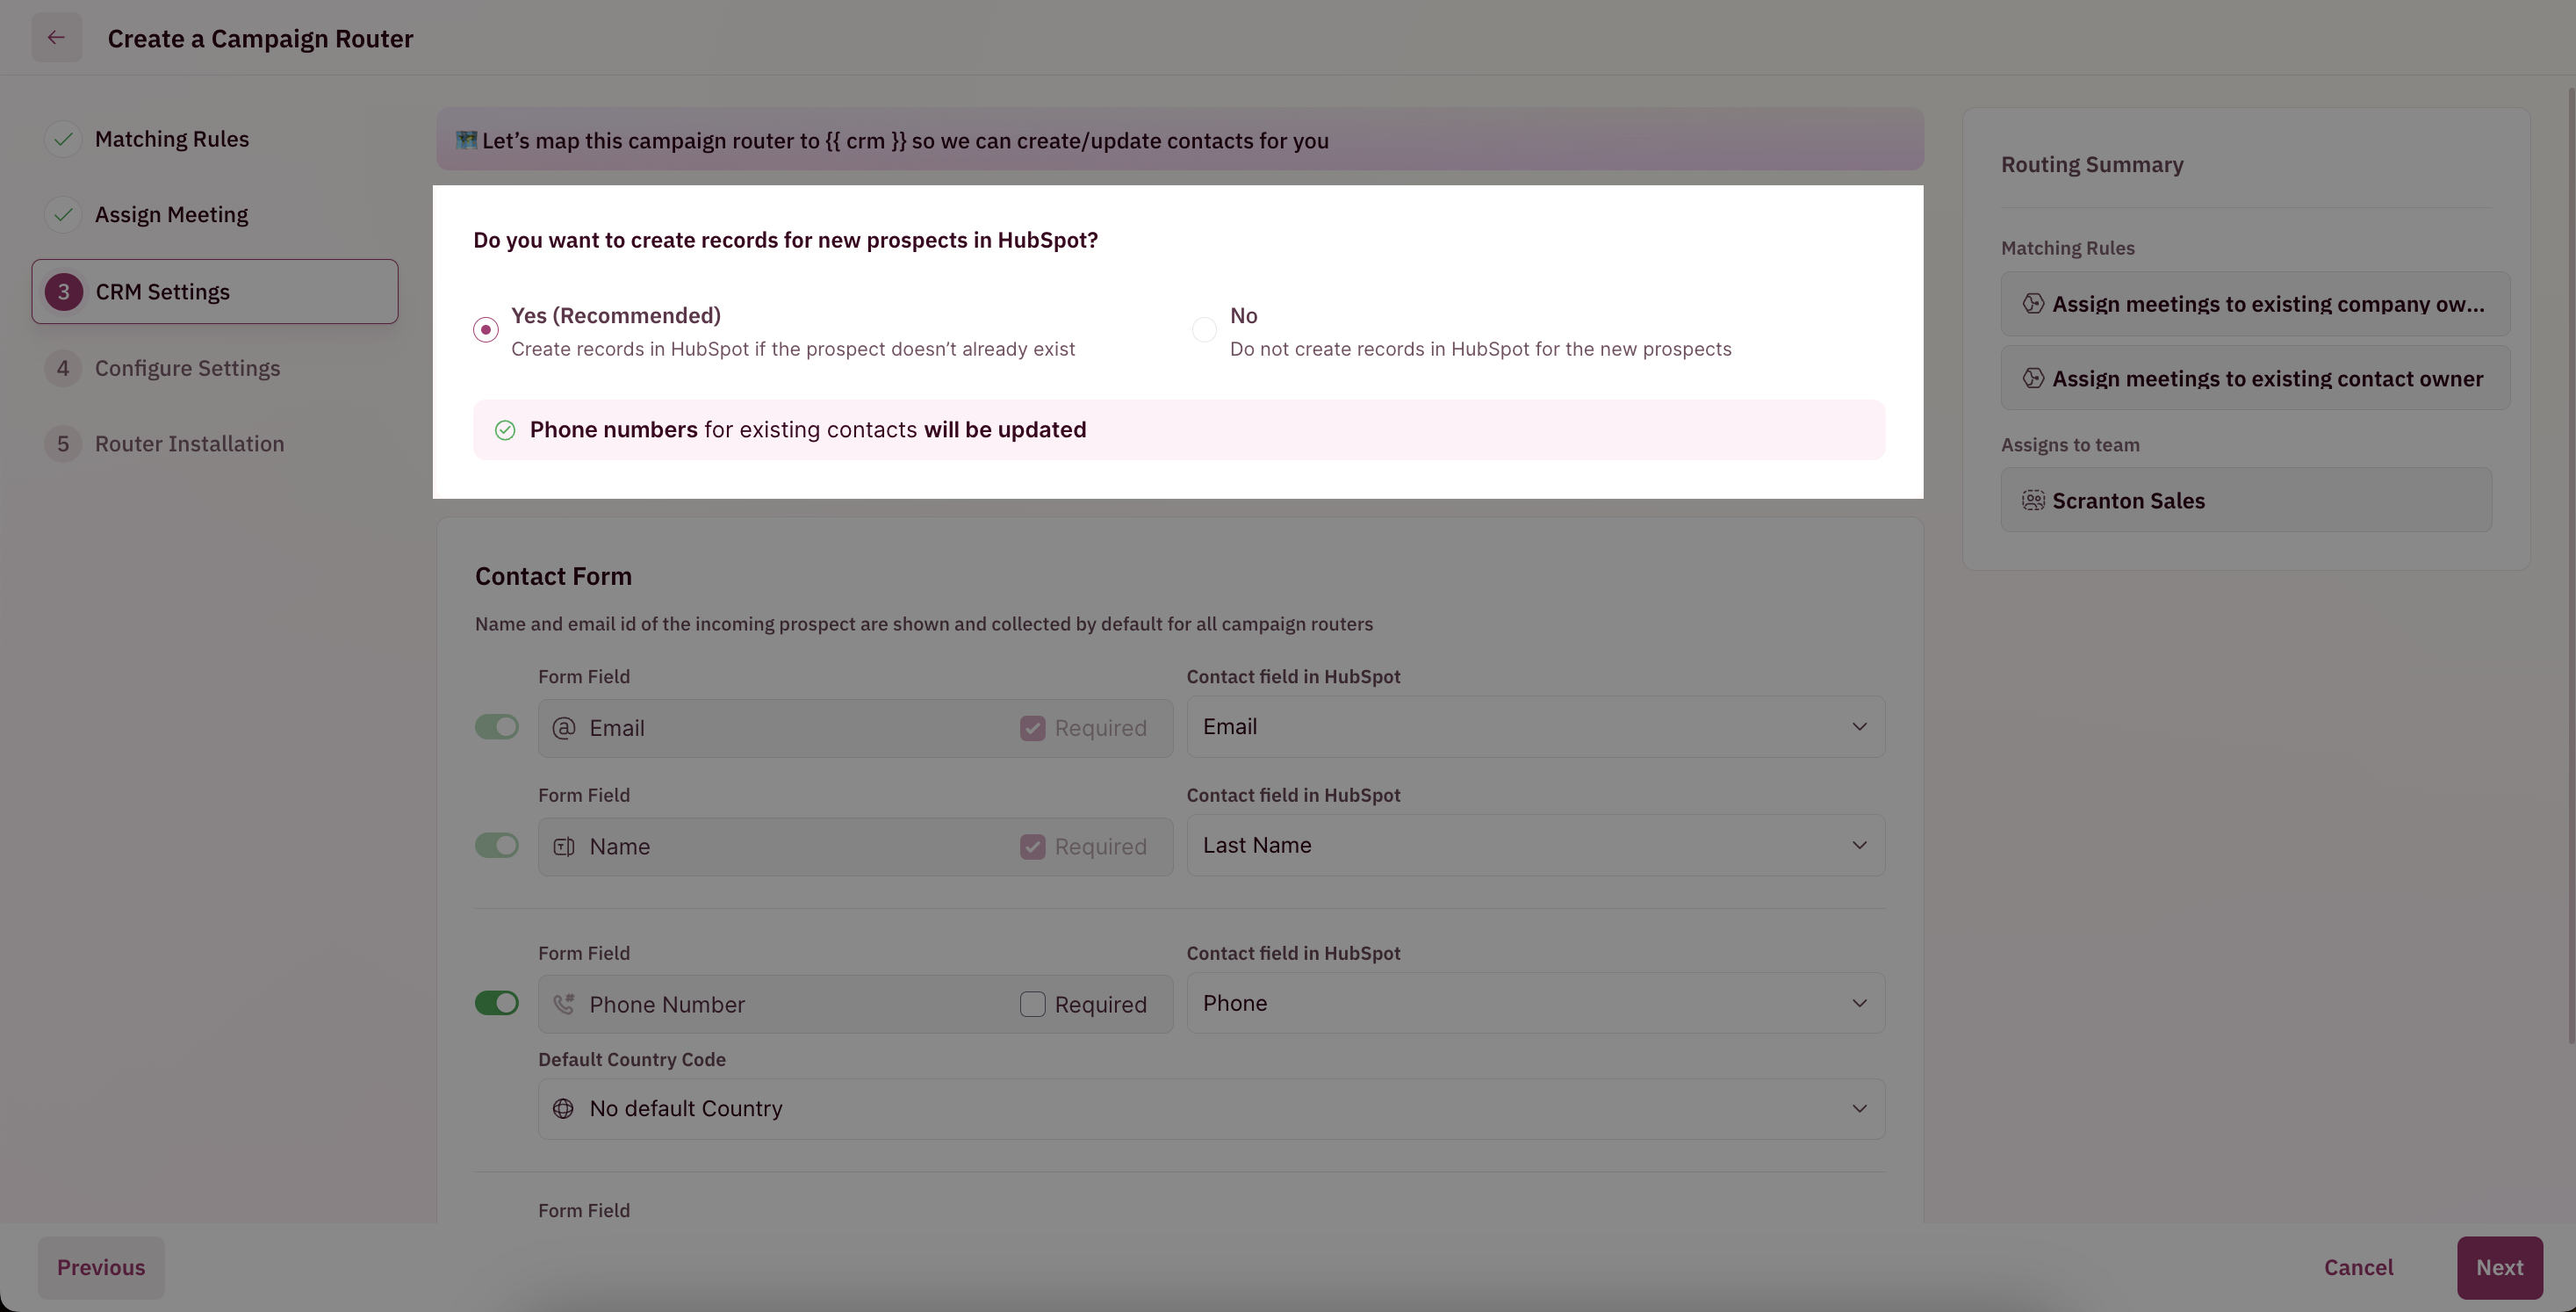
RECOMMENDEDWe recommend you select “Yes”. Since people can forward your email campaigns. This is also helpful if your lead exists in your marketing automation, but not in your CRM tool.
Configure Campaign Router
In this step, all we have to do is name your campaign router, select your meeting type, and tell RevenueHero which page you want to send prospects to after the meeting is booked.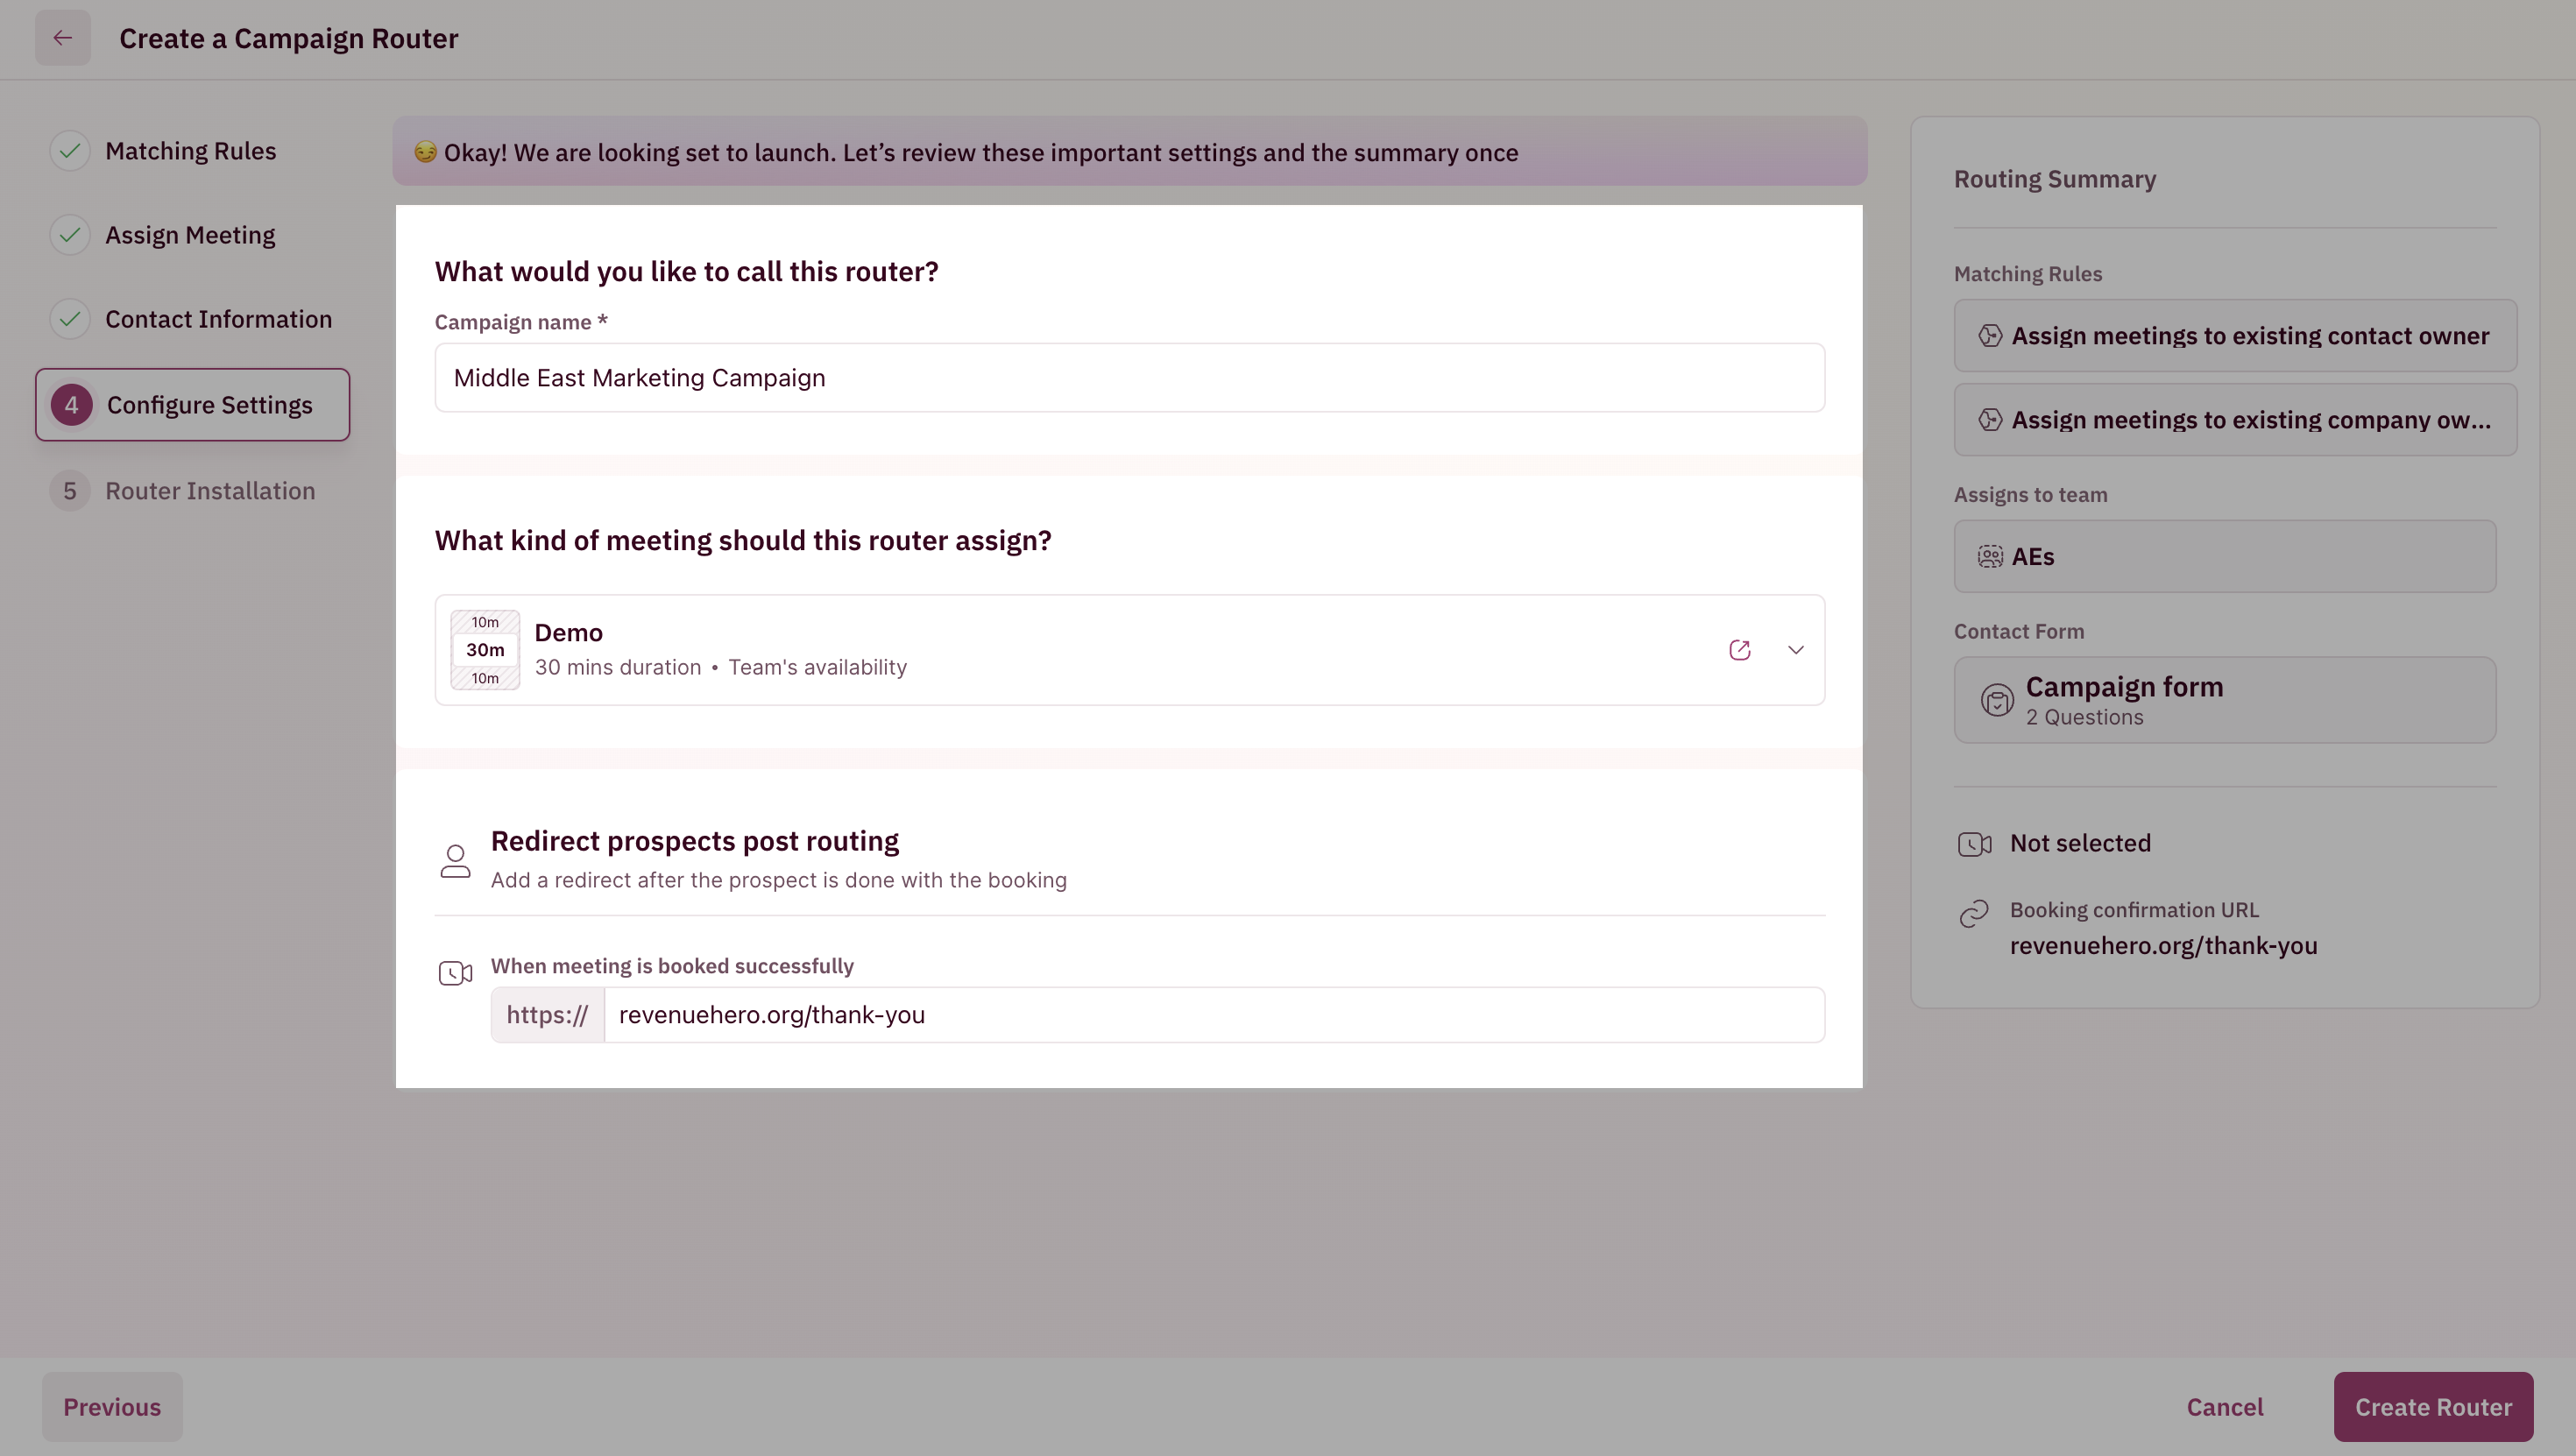
Naming your router
Use the “What would you like to call this router?” field to give your router a name. We’ll name our router as Follow-Up Router since we’ll be using this Campaign Router link in our follow-up emails.Selecting Meeting Type
Use the “What kind of meeting should this router assign?” field to select the meeting type for this router.Redirection
Redirects help with marketing attribution. You can choose to set up redirects when meetings are successfully booked. To set up redirects, enter the URL of the page in the “When a meeting is booked successfully” field. Now, click the “Create Router” button.Campaign Router link with Personalization Tokens
Once you click the “Create Router” button, your Campaign Router link will get generated. It will look like this:Campaign router link example
Campaign router link with tokens example
For HubSpot
You have two ways to personalize your Campaign Router link in HubSpot: using name and email tokens, or using the CRM ID.Option A: Using Name and Email Tokens
Personalization tokens for HubSpot are{{contact.firstname}} and {{contact.email}}. Your Campaign Router link will look like this:
For HubSpot Campaigns using name and email tokens
Option B: Using CRM ID (Recommended)
Instead of passing name and email as separate tokens, you can use the contact’s CRM ID. RevenueHero uses this ID to pull all the contact’s details directly from HubSpot, so you don’t need to pass individual fields in the URL. Your Campaign Router link will look like this:For HubSpot campaigns using CRM ID
{{contact.hs_object_id}} with each contact’s unique Record ID when the email is sent.
Alternatively, if the campaign router link is being shared with a contact directly, copy the exact HubSpot Record ID and append it with the scheduler link instead of {{contact.hs_object_id}}.
You can find the Record ID Via URL: When viewing a record (e.g., a contact), the URL will look like 
app.hubspot.com/contacts/{portalId}/record/0-1/{recordId}. The {recordId} is the unique number you needUsing CRM ID in HubSpot Marketing Emails
HubSpot marketing emails support personalization tokens natively. Paste the CRM ID link into your email’s CTA button or hyperlink: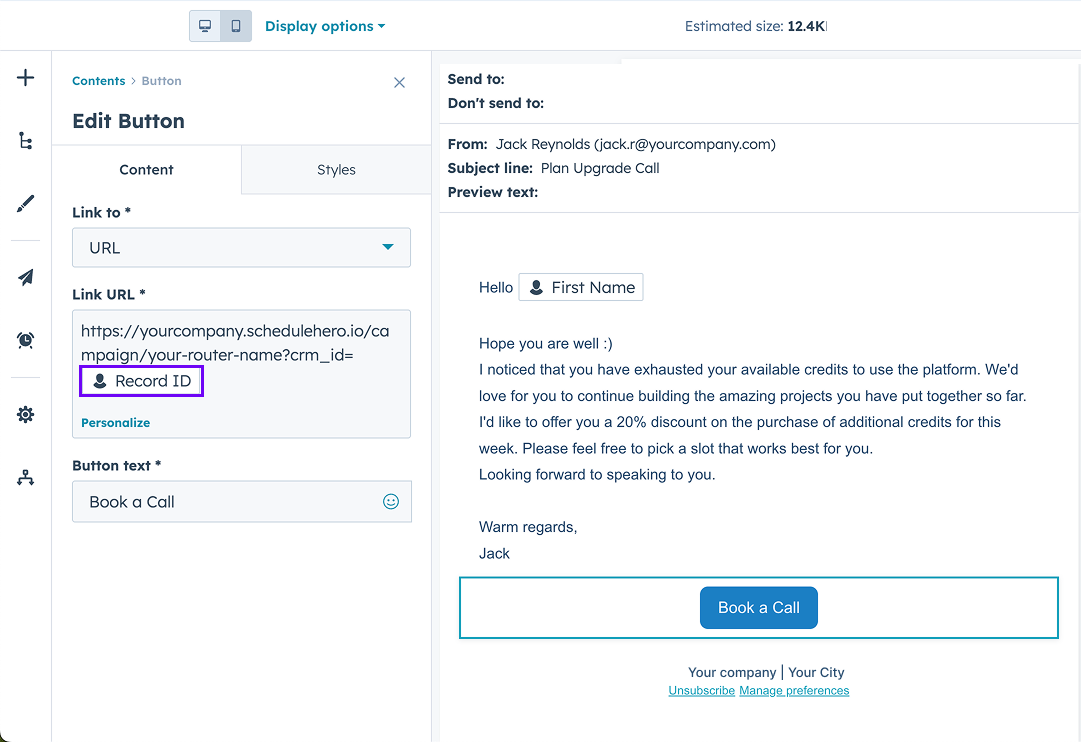
Using CRM ID in HubSpot Sequences
HubSpot sequences don’t have the same drag-and-drop token builder that marketing emails do. You need to construct the URL manually with the token inline. Paste this URL when adding a hyperlink or CTA in your sequence email step: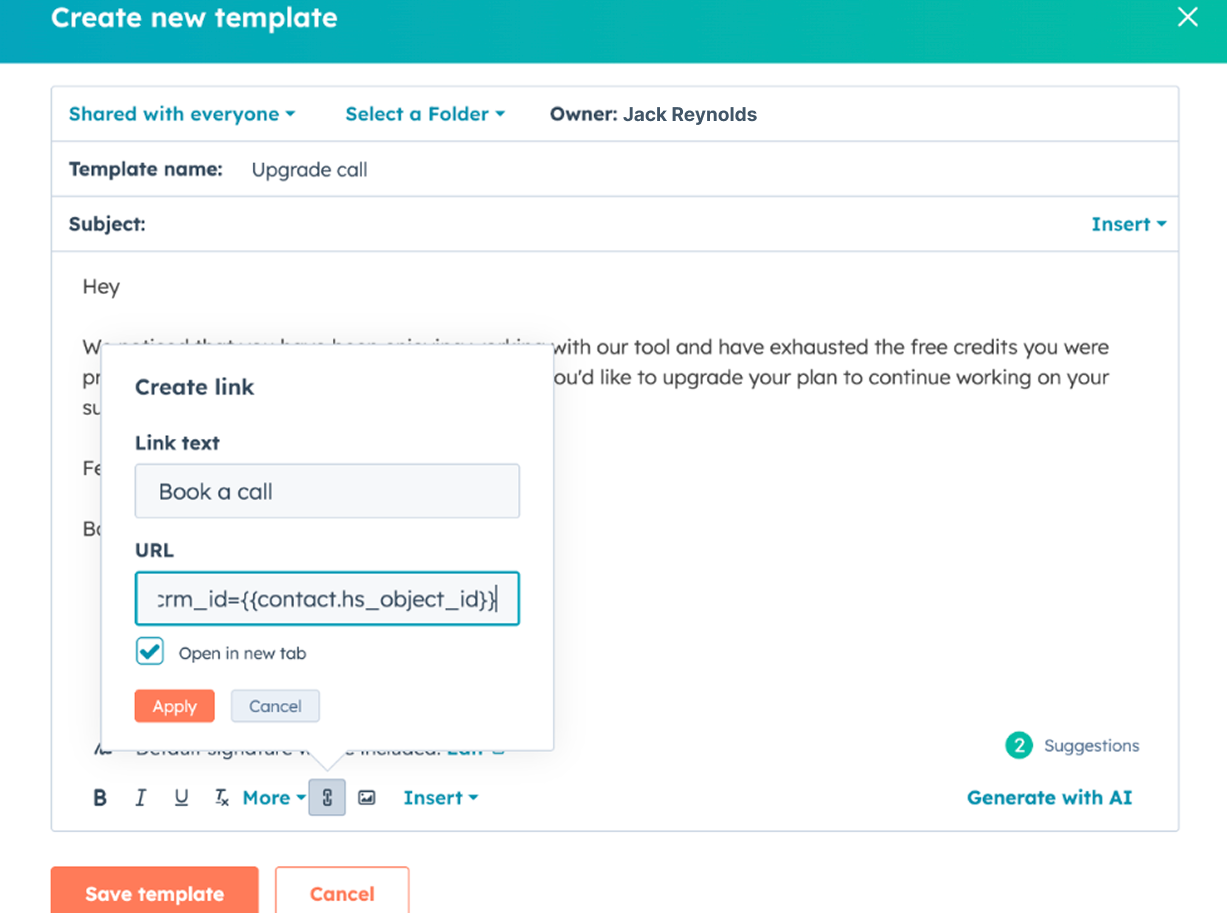
For Salesforce
You have two ways to personalize your Campaign Router link in Salesforce: using name and email tokens, or using the CRM ID.Option A: Using Name and Email Tokens
Personalization tokens for Salesforce are{!Contact.FirstName} and {!Contact.Email}. Your Campaign Router link will look like this:
Option B: Using CRM ID (Recommended)
Instead of passing name and email as separate tokens, you can use the contact’s CRM ID. RevenueHero uses this ID to pull all the contact’s details directly from Salesforce, so you don’t need to pass individual fields in the URL. The personalization token for Salesforce Contact ID is{!Contact.Id}. Your Campaign Router link will look like this:
{!Contact.Id} with each contact’s unique 18-character Record ID (e.g., 0037R00003OyICjQAN) when the email is sent.
You can find the Contact ID in the URL of any Salesforce contact record. For example, in 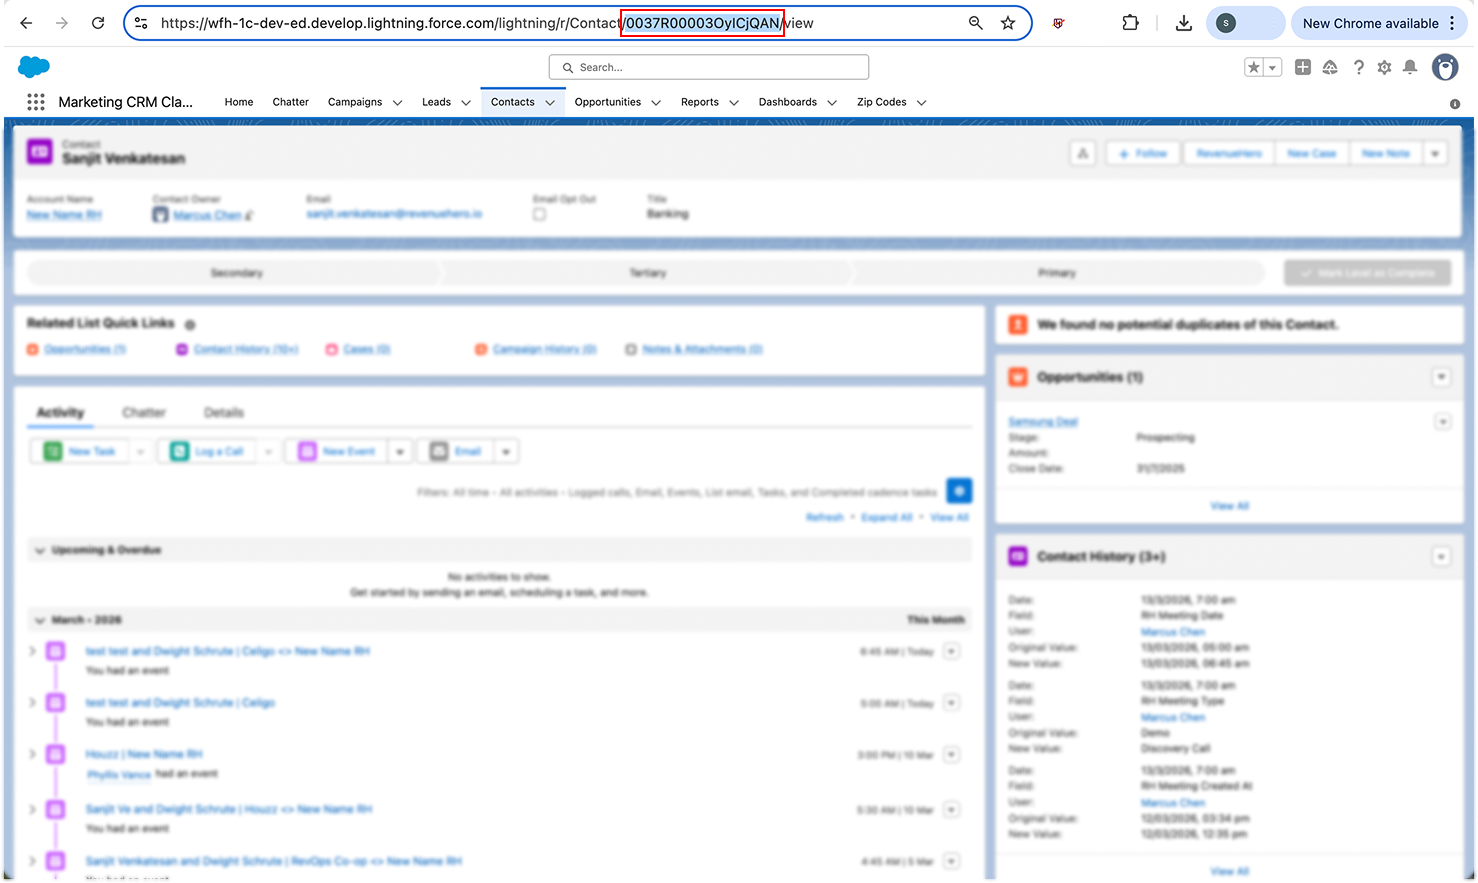
https://yourcompany.lightning.force.com/lightning/r/Contact/0037R00003OyICjQAN/view, the Contact ID is0037R00003OyICjQAN.For Outreach
Personalization tokens for Outreach are{{first_name}} and {{email}}. So your Campaign Router link will look like this:
For Outreach campaigns
For Klenty
Personalization tokens for Klenty are{{FirstName}} and {{Email}}. So your Campaign Router link will look like this:
For Klenty campaigns