BEFORE WE BEGINThere are a couple of pre-requisites to create your first Relay:
Steps to create a Relay
Navigate to Relays
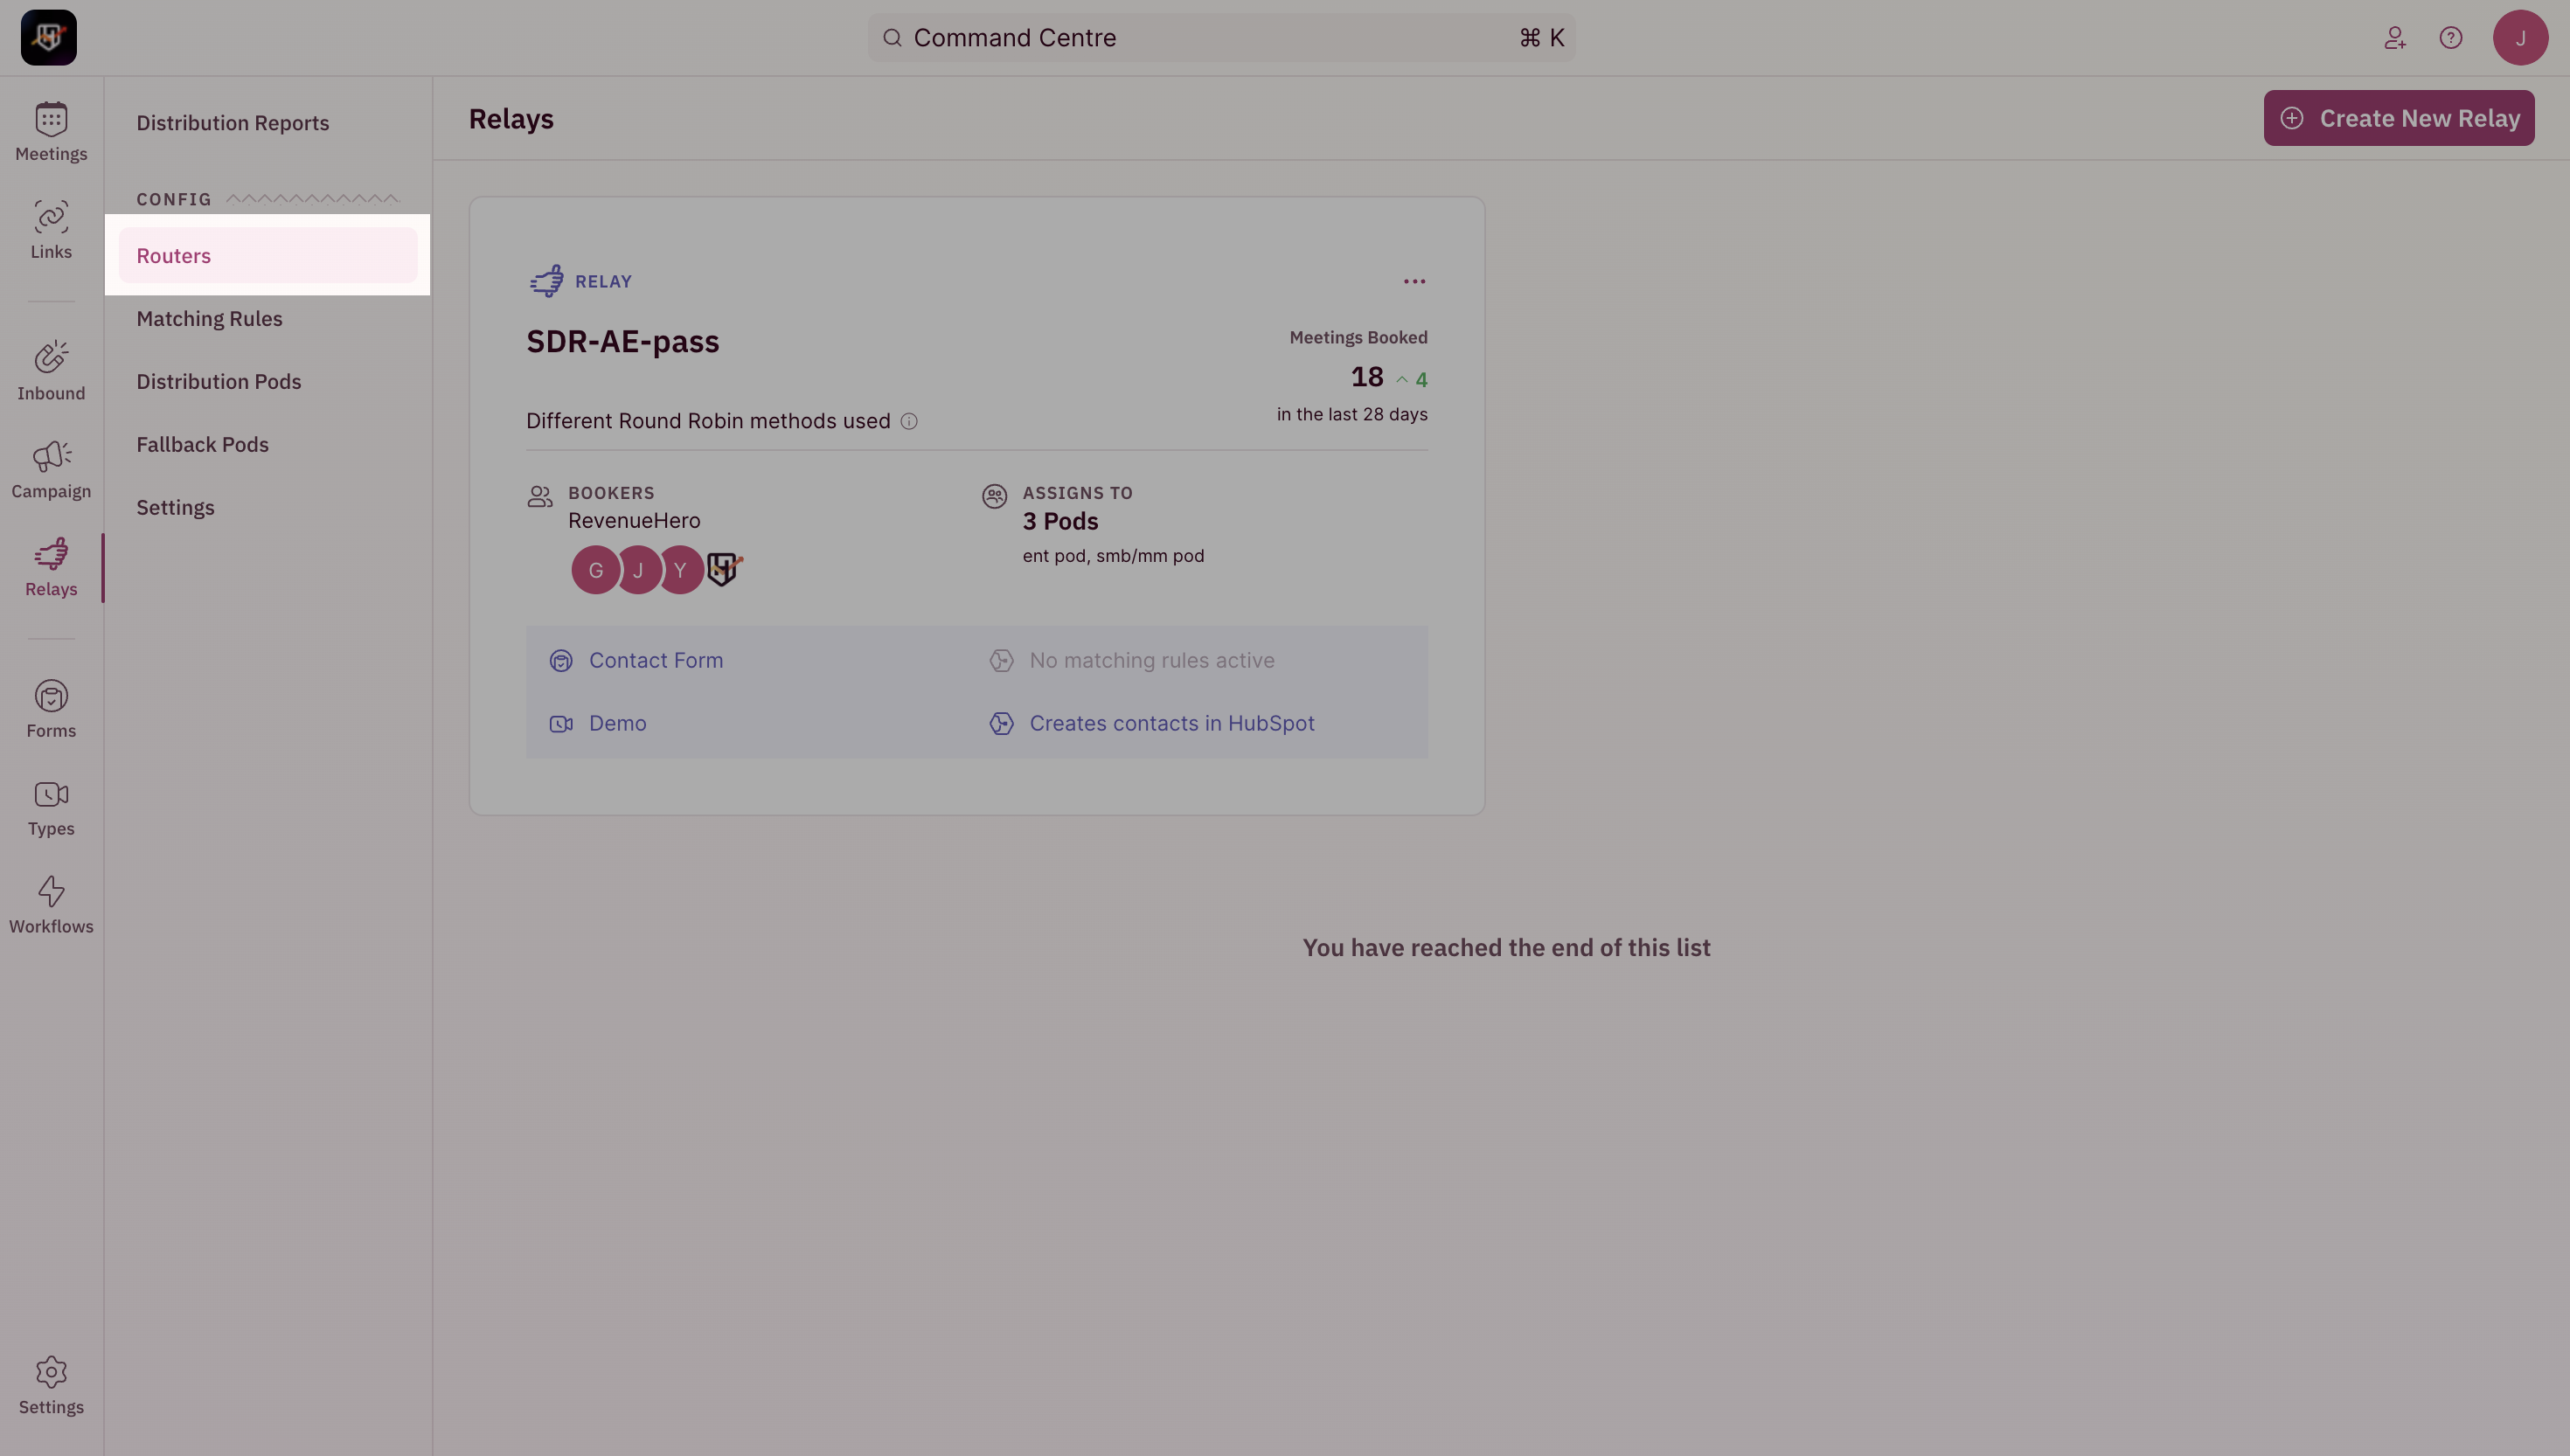
- To create a Relay, use the side nav bar and click on Relays → Routers.
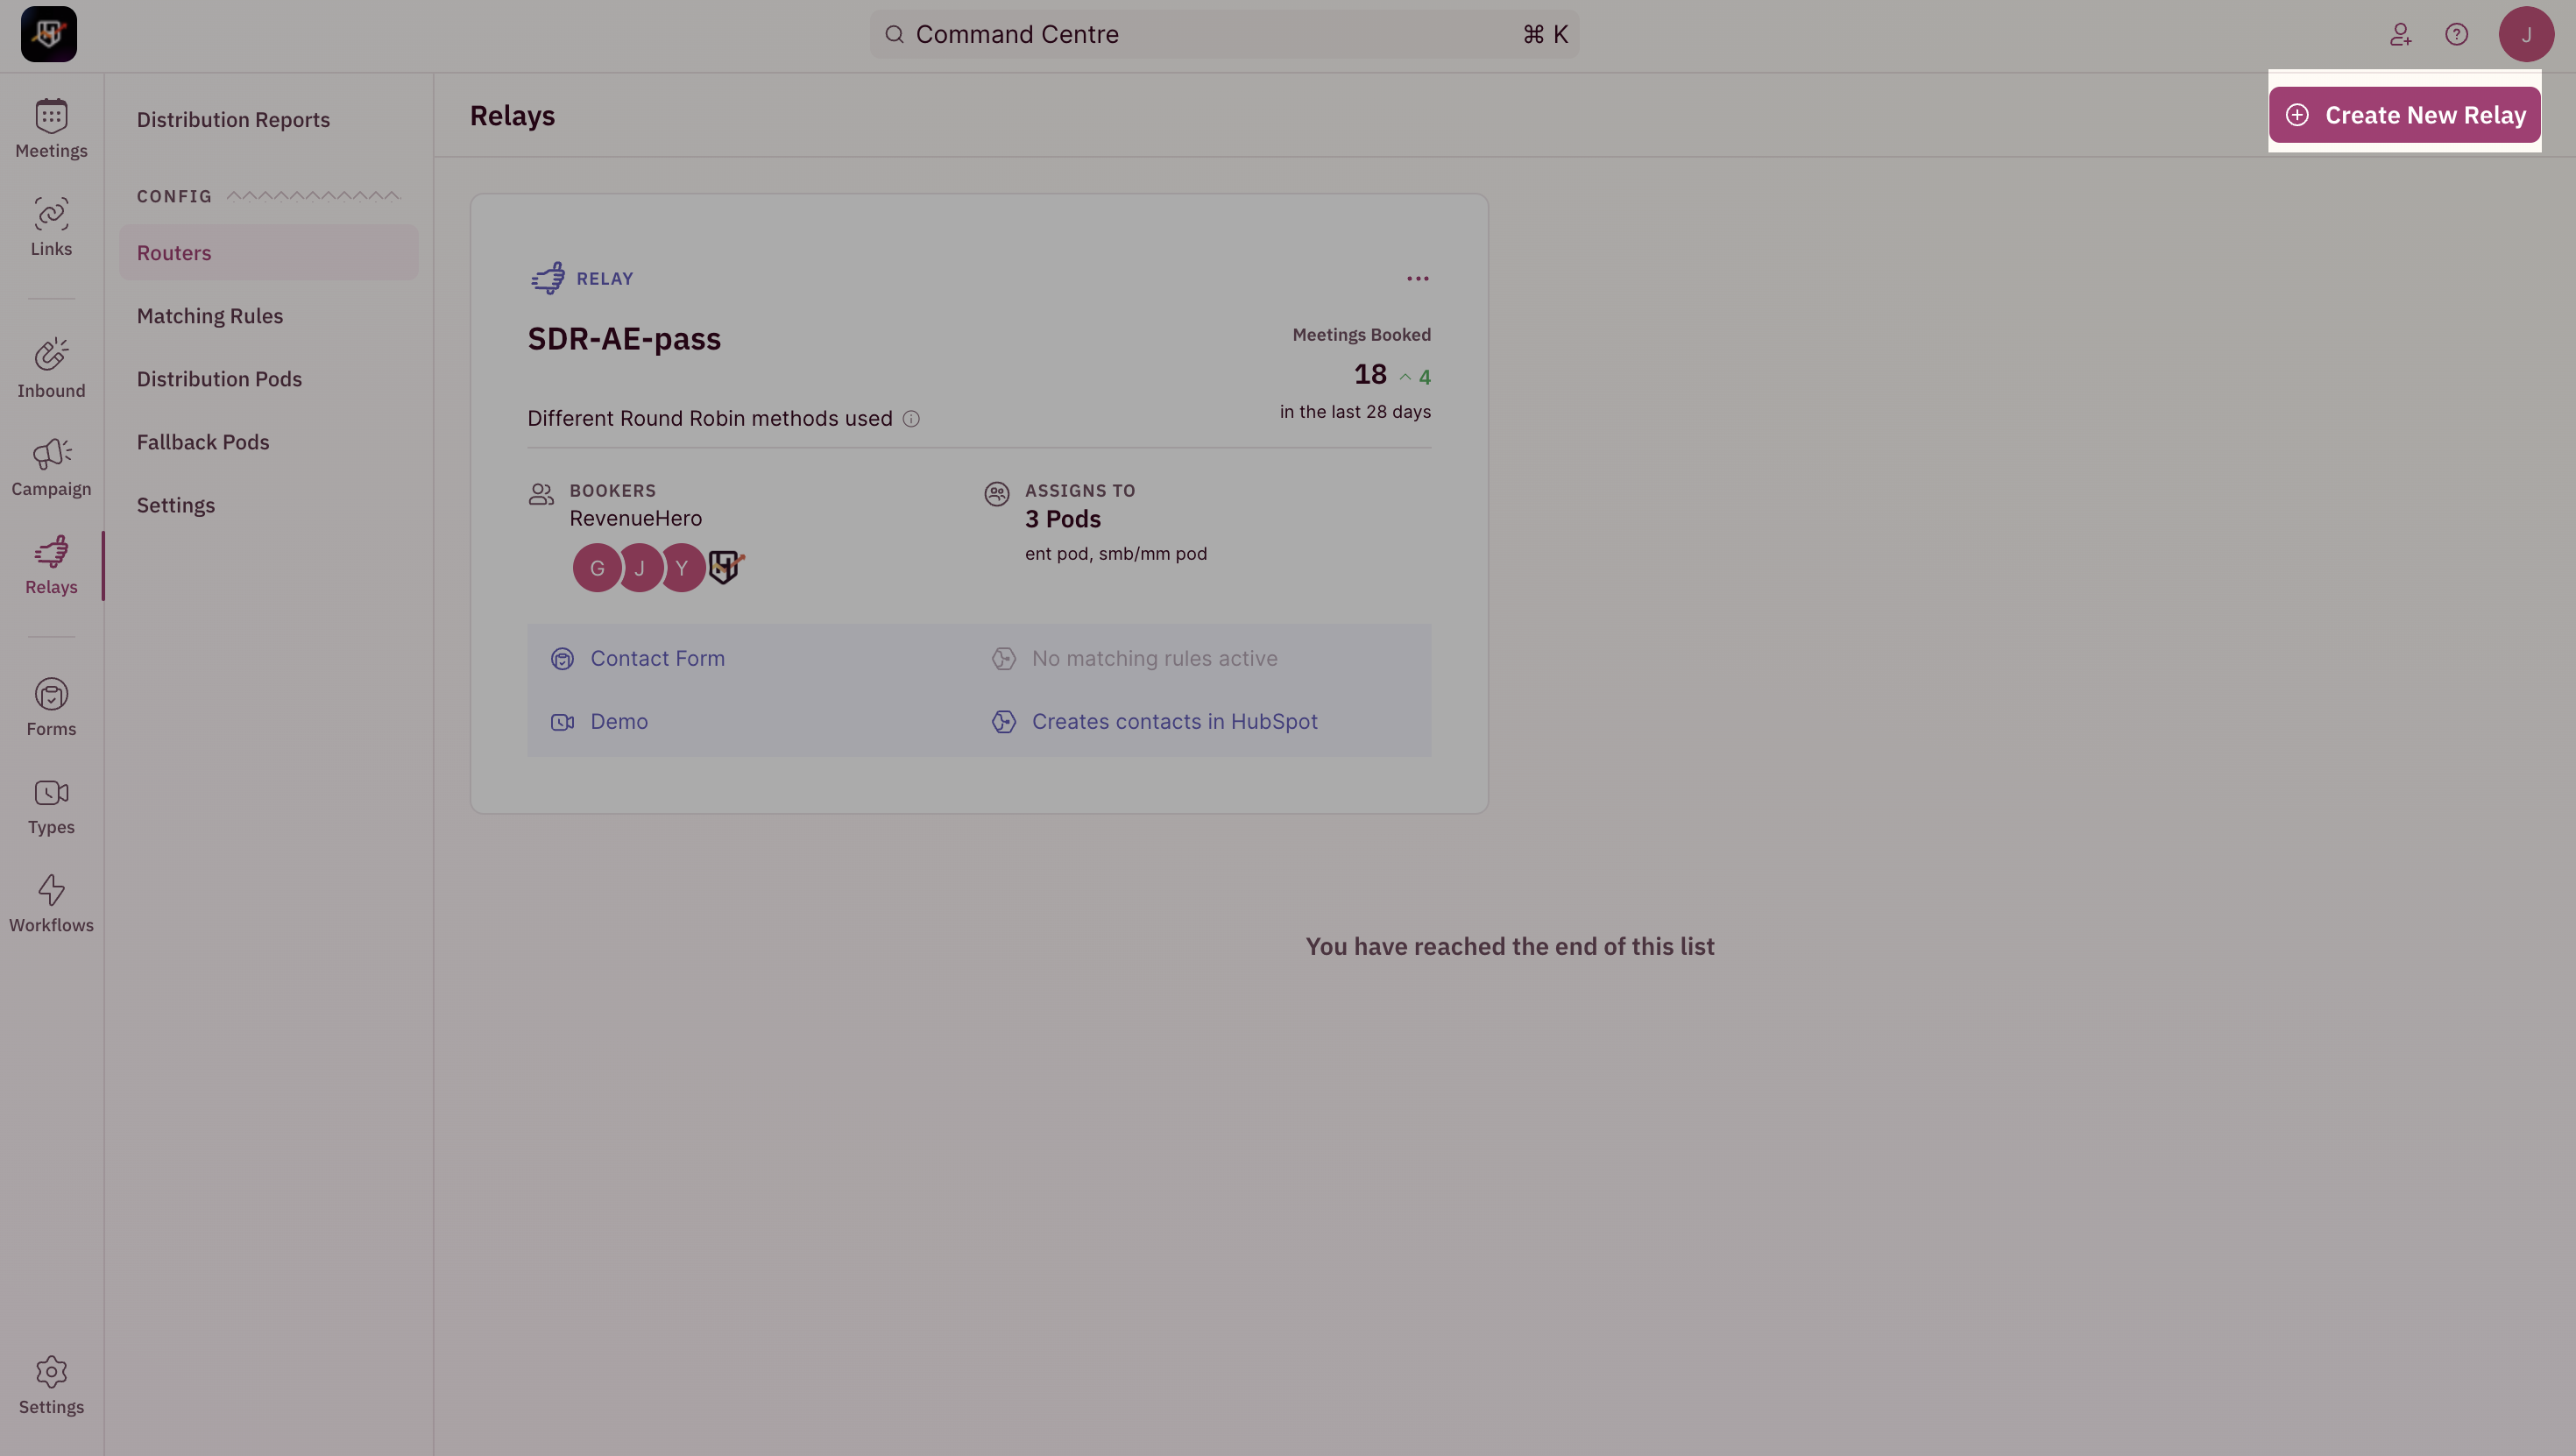
- Once you are inside the Relays page, click on the Create New Relay button.
Select bookers
This is the first step in setting up the workflow. Choose the team that will handoff meetings in this Relay i.e the team that is booking the meeting. You can further decide if you want to select the entire team or just a few specific members.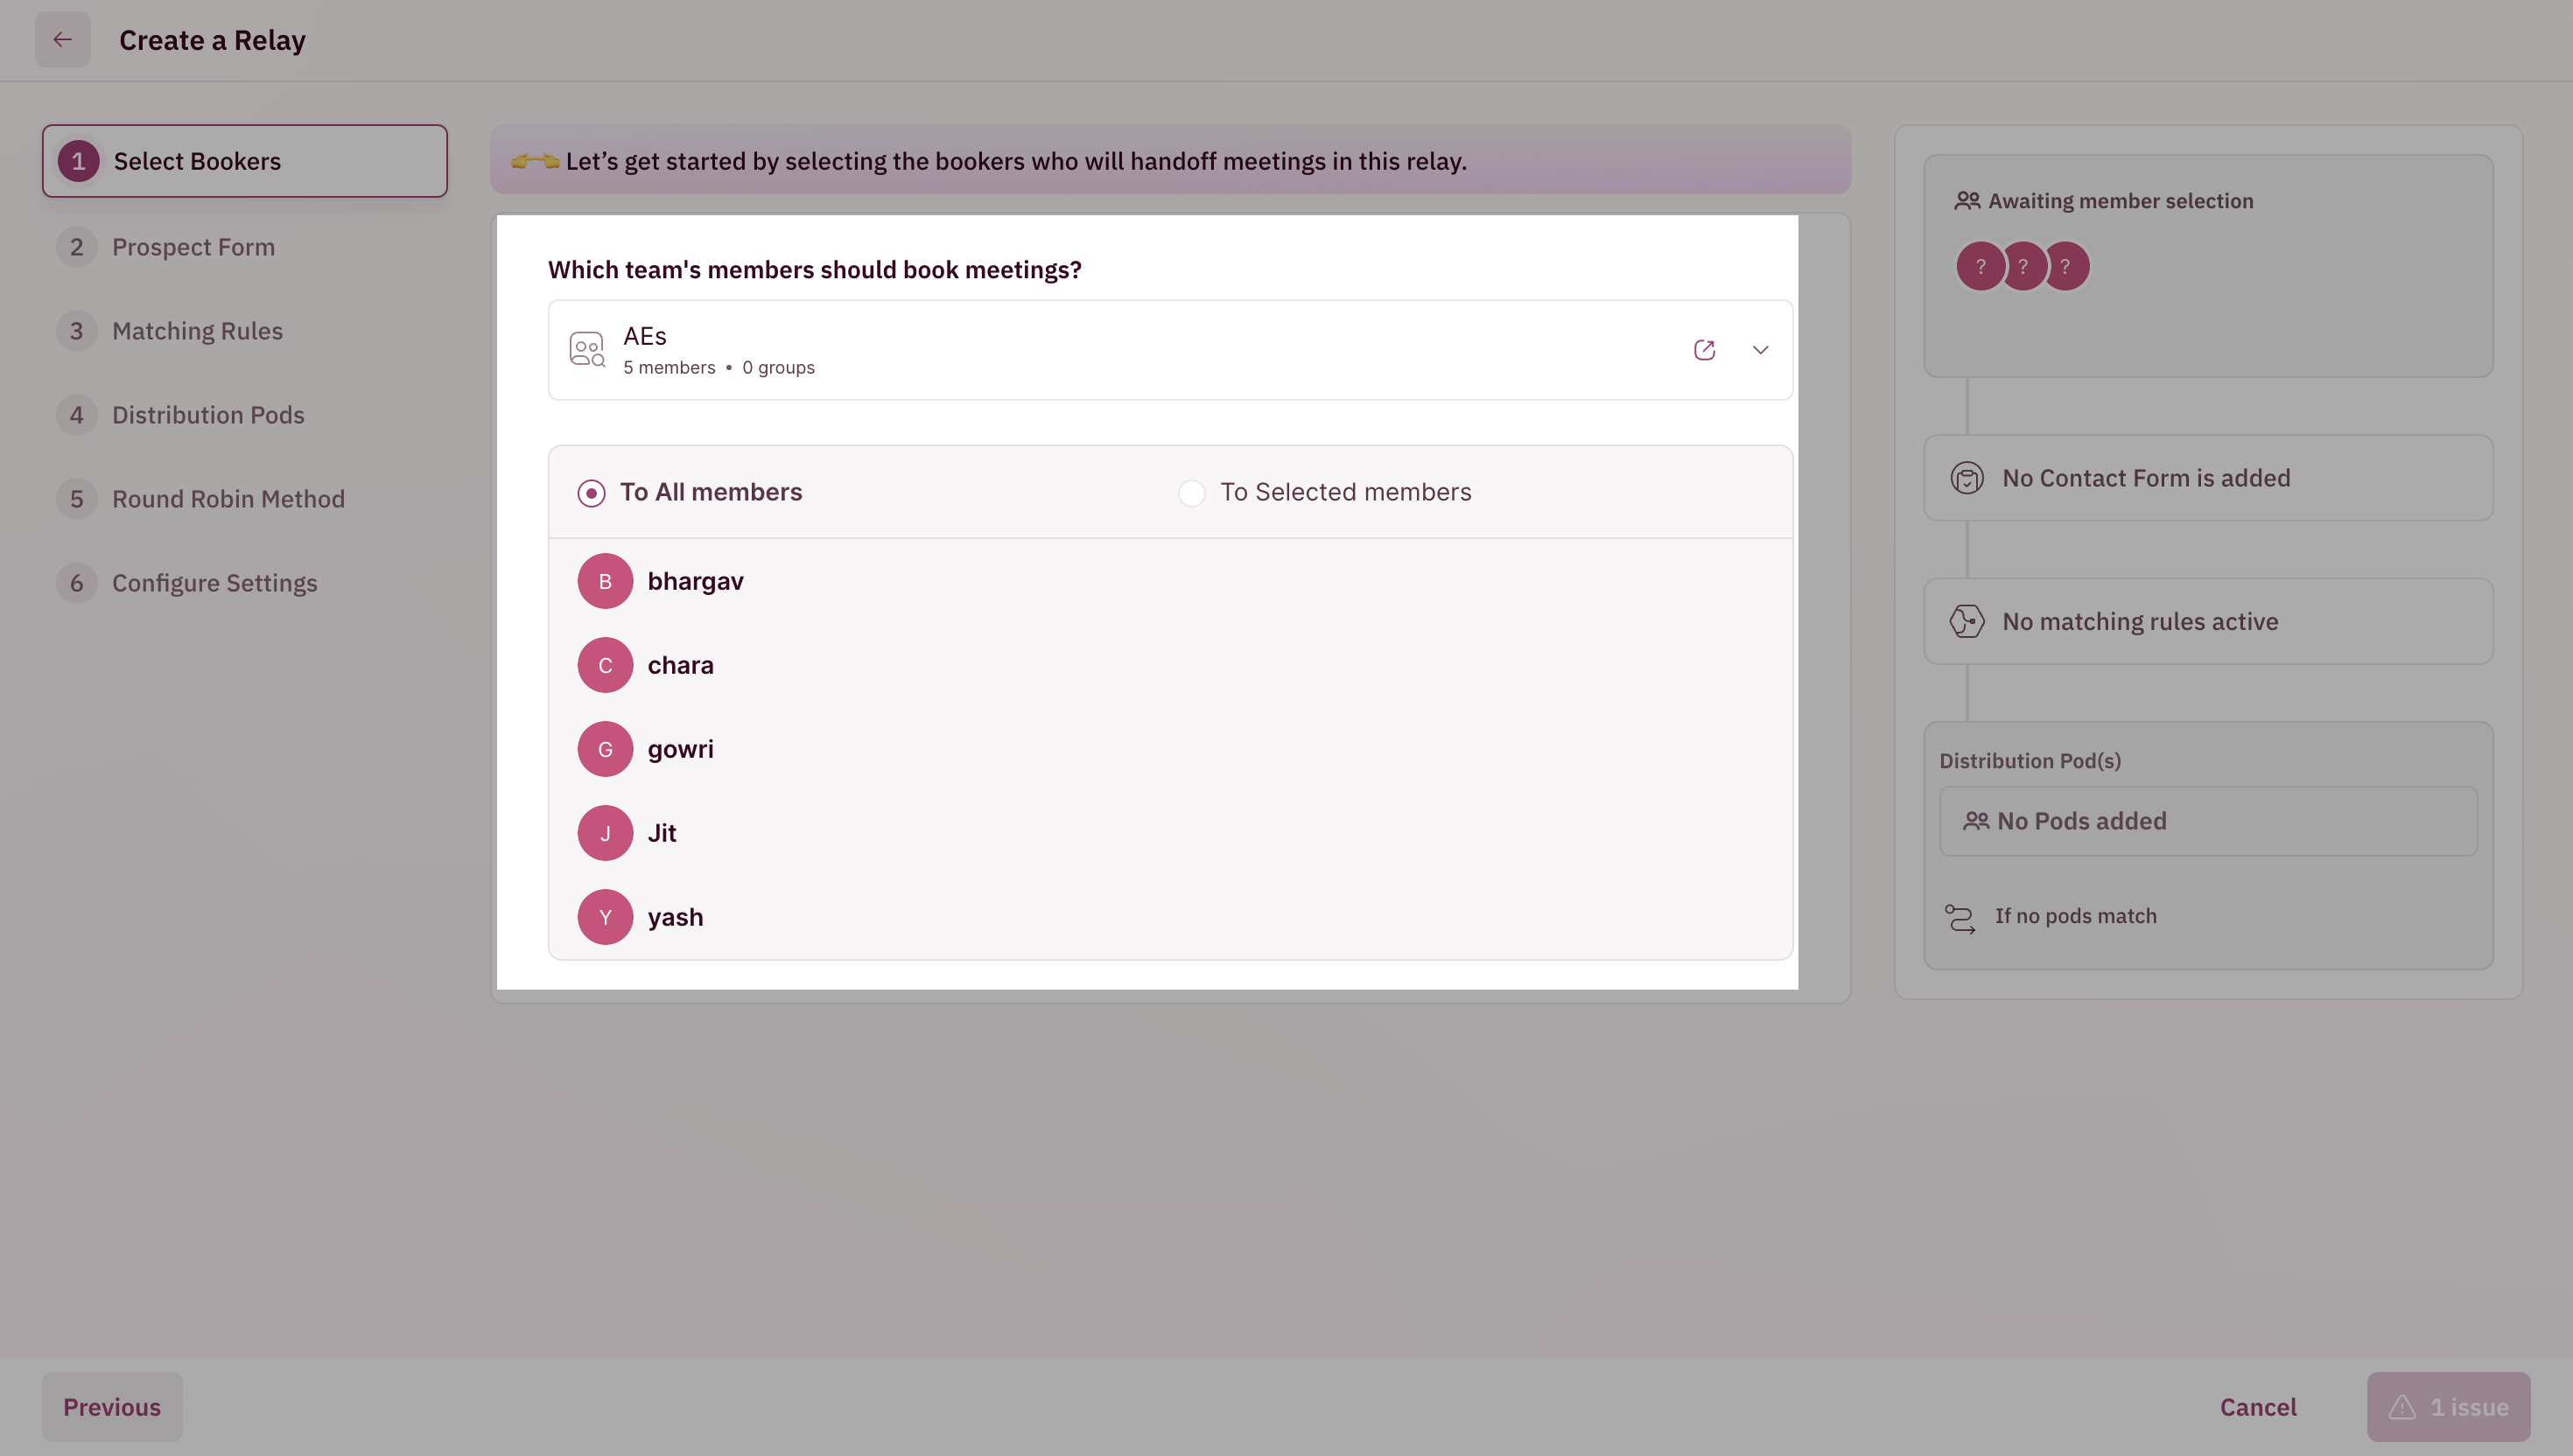
Prospect Form
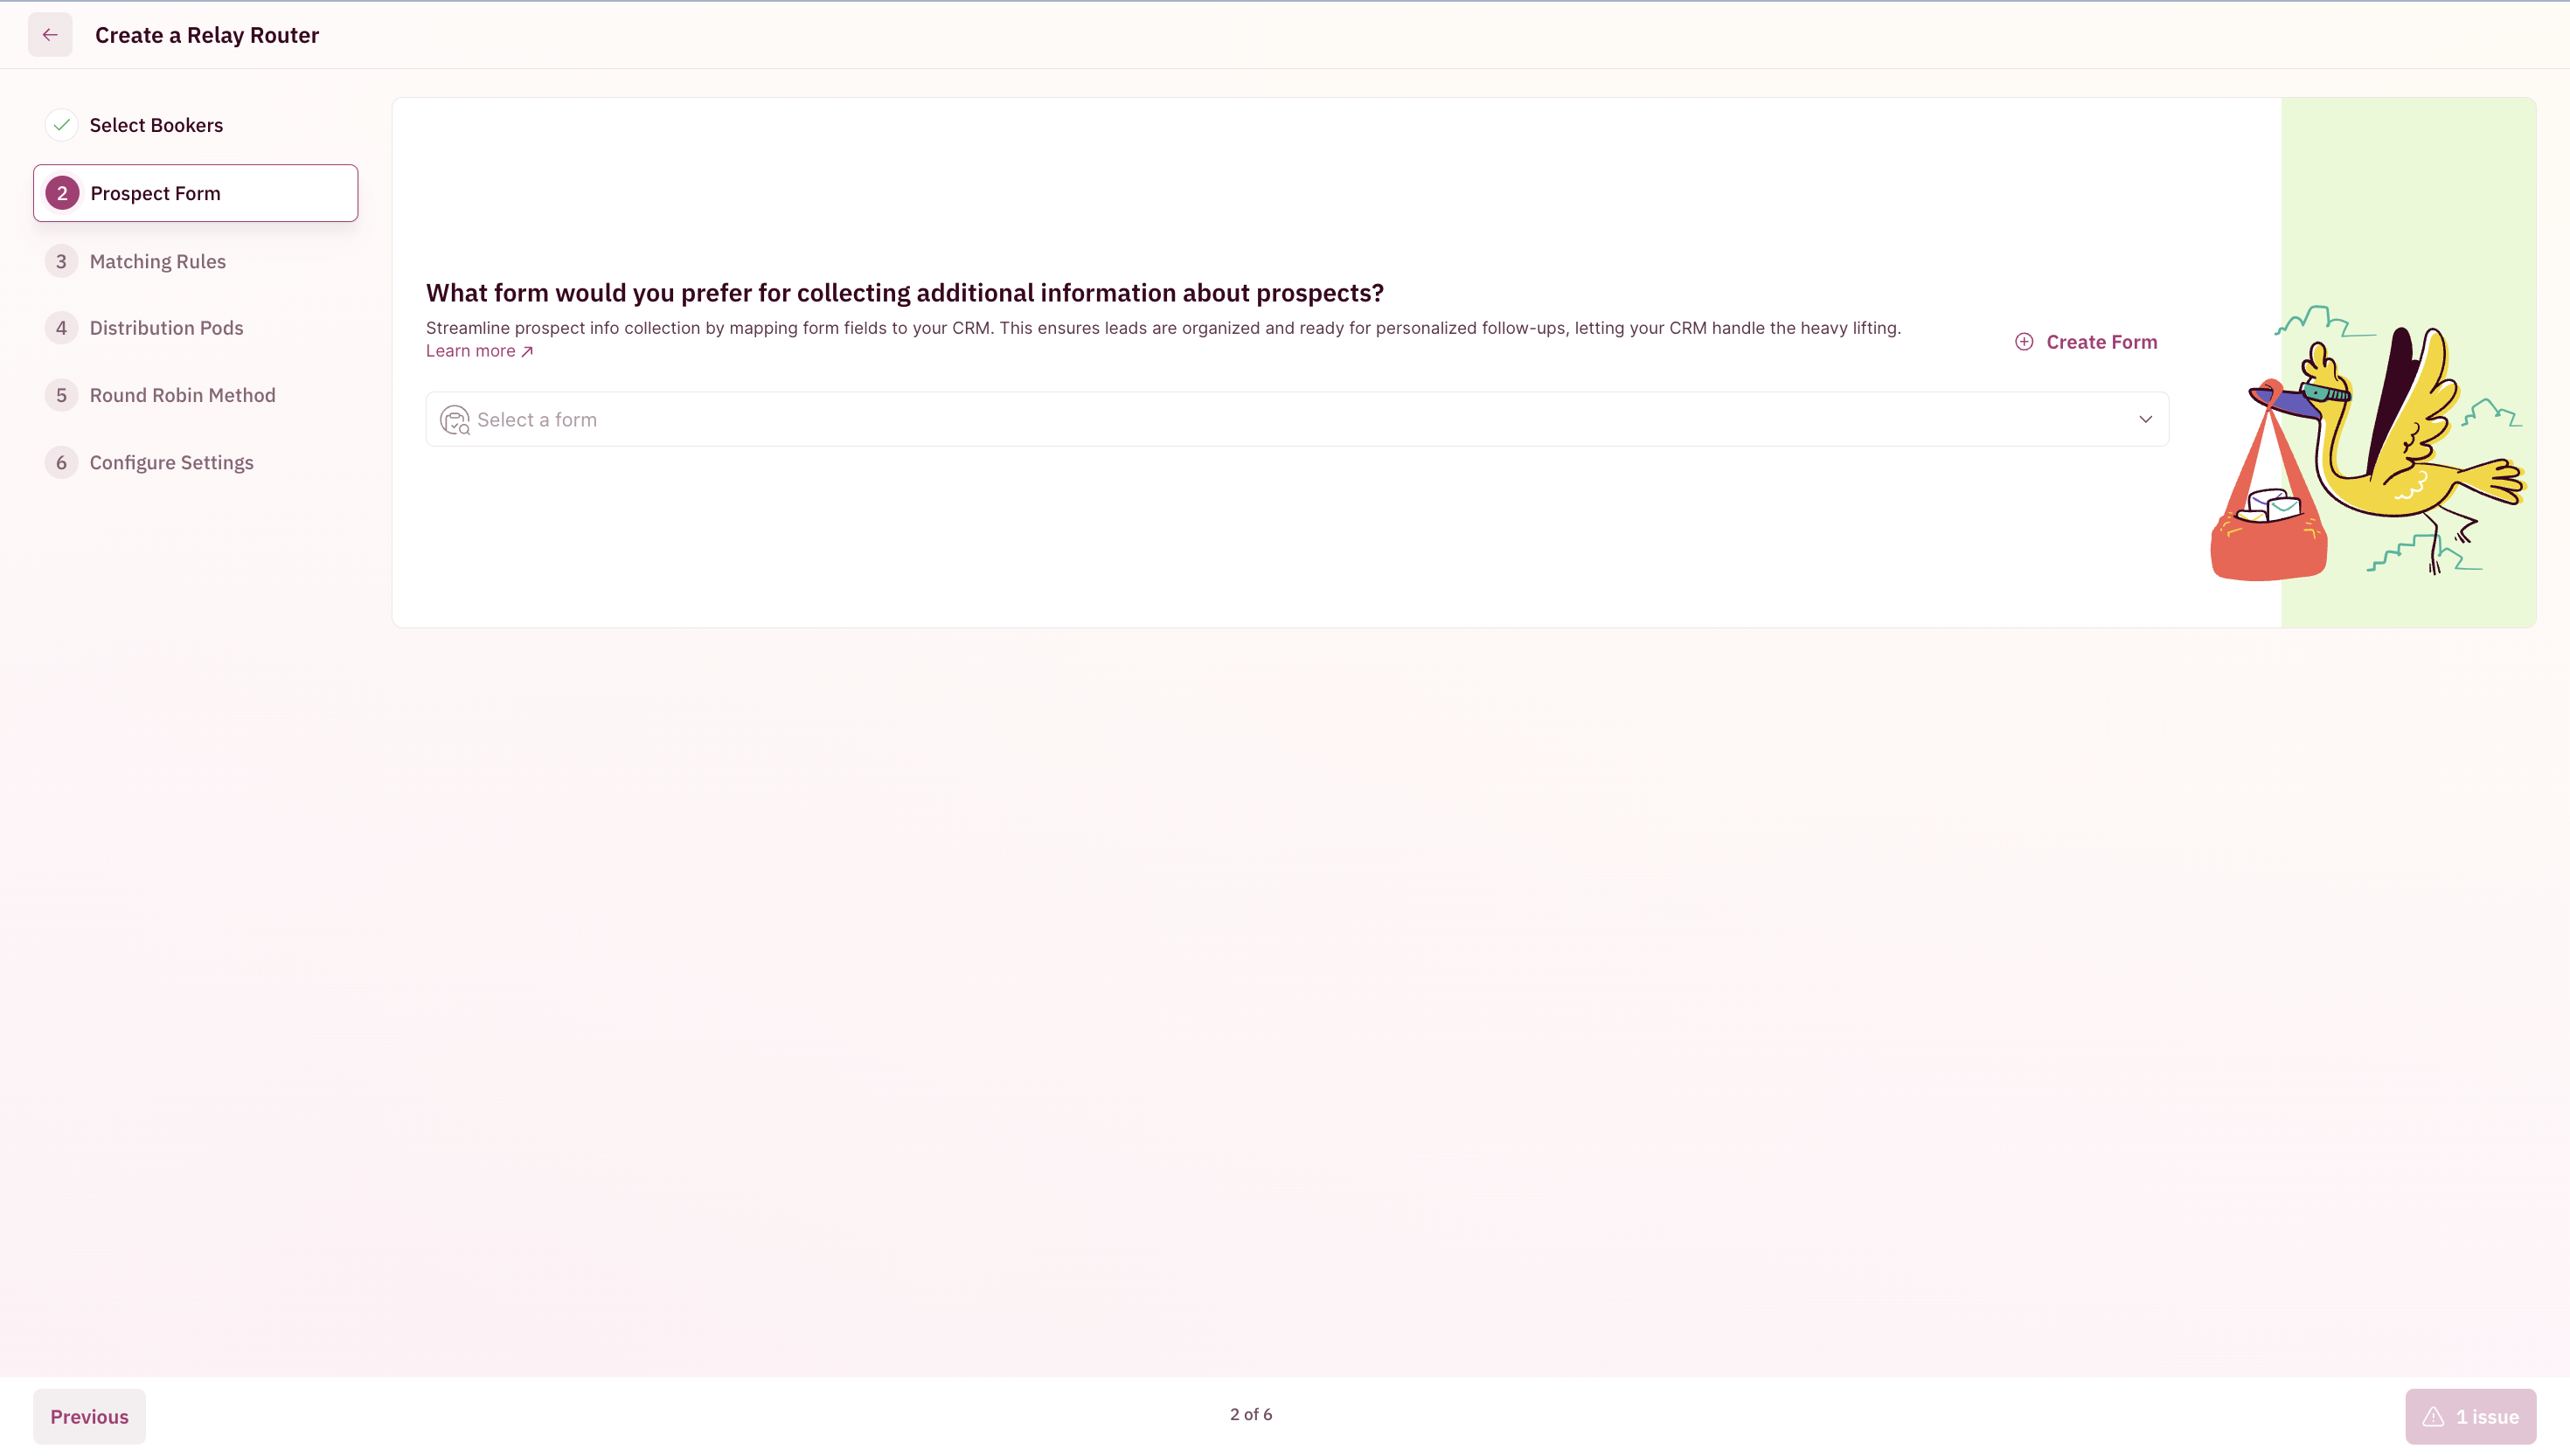
Adding a prospect form to your relay allows for your bookers to collect information that can be used to create conditional routing to assign meetings to the right reps. The same form is also displayed to prospects to fill out information when they book a meeting through a relay link.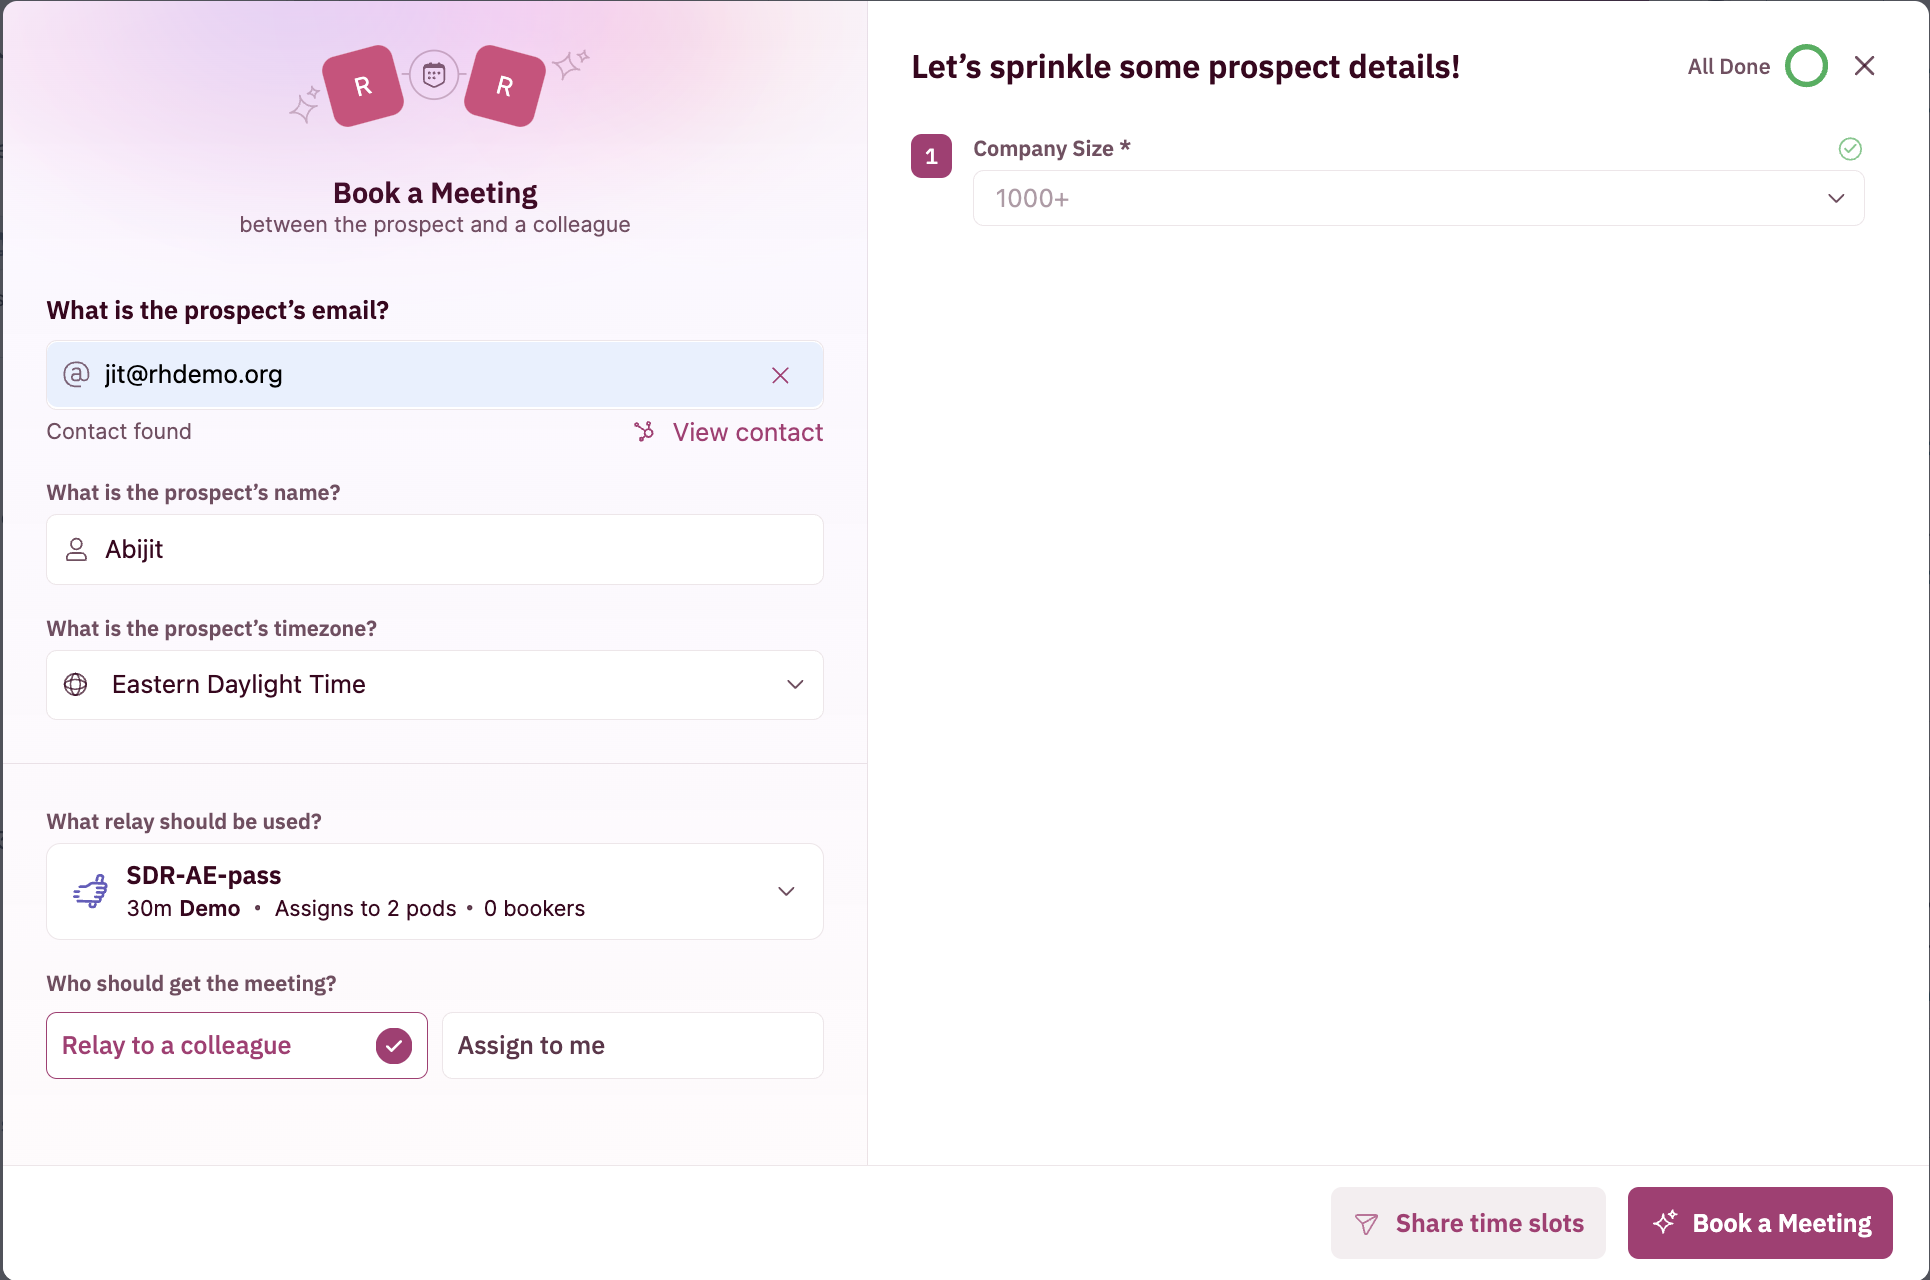
CRM Settings
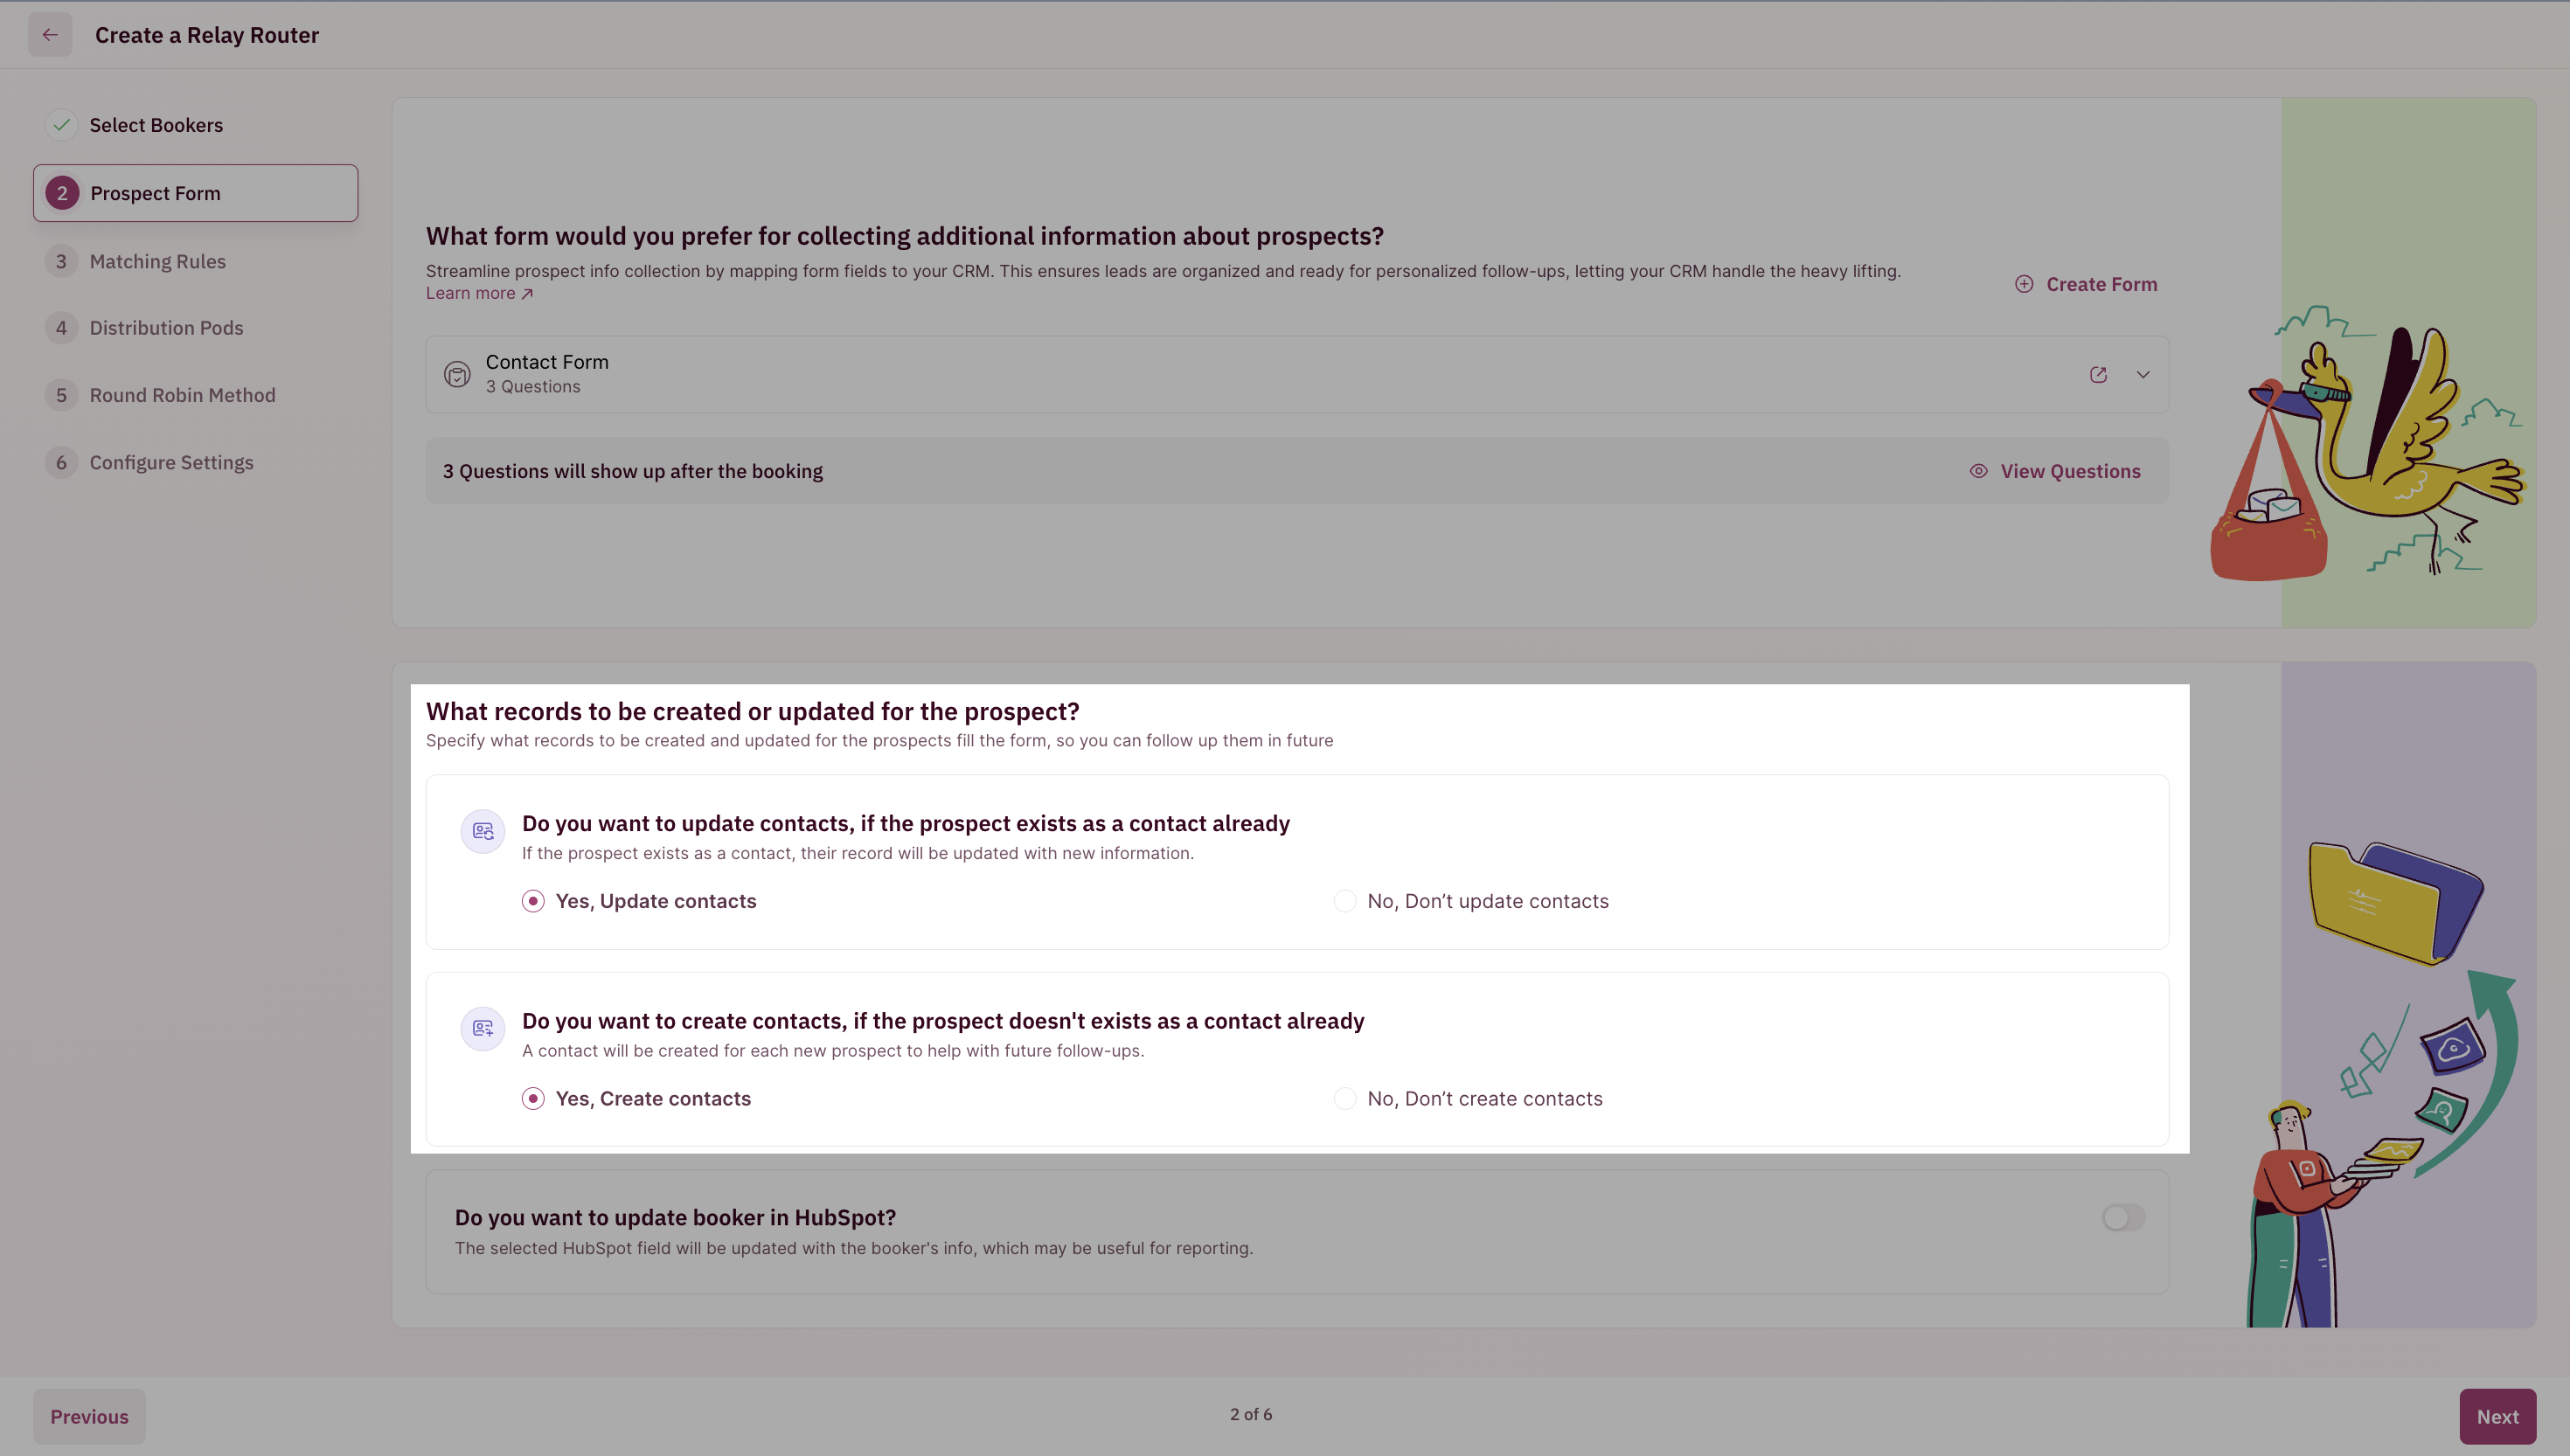
Once you’ve picked the form, you’ll be prompted to set up contact creation/updation in the CRM.- Update contacts, if the prospect exists as a contact already.
- Create contacts, if the prospect doesn’t exist as a contact already.
Update Booker in the CRM
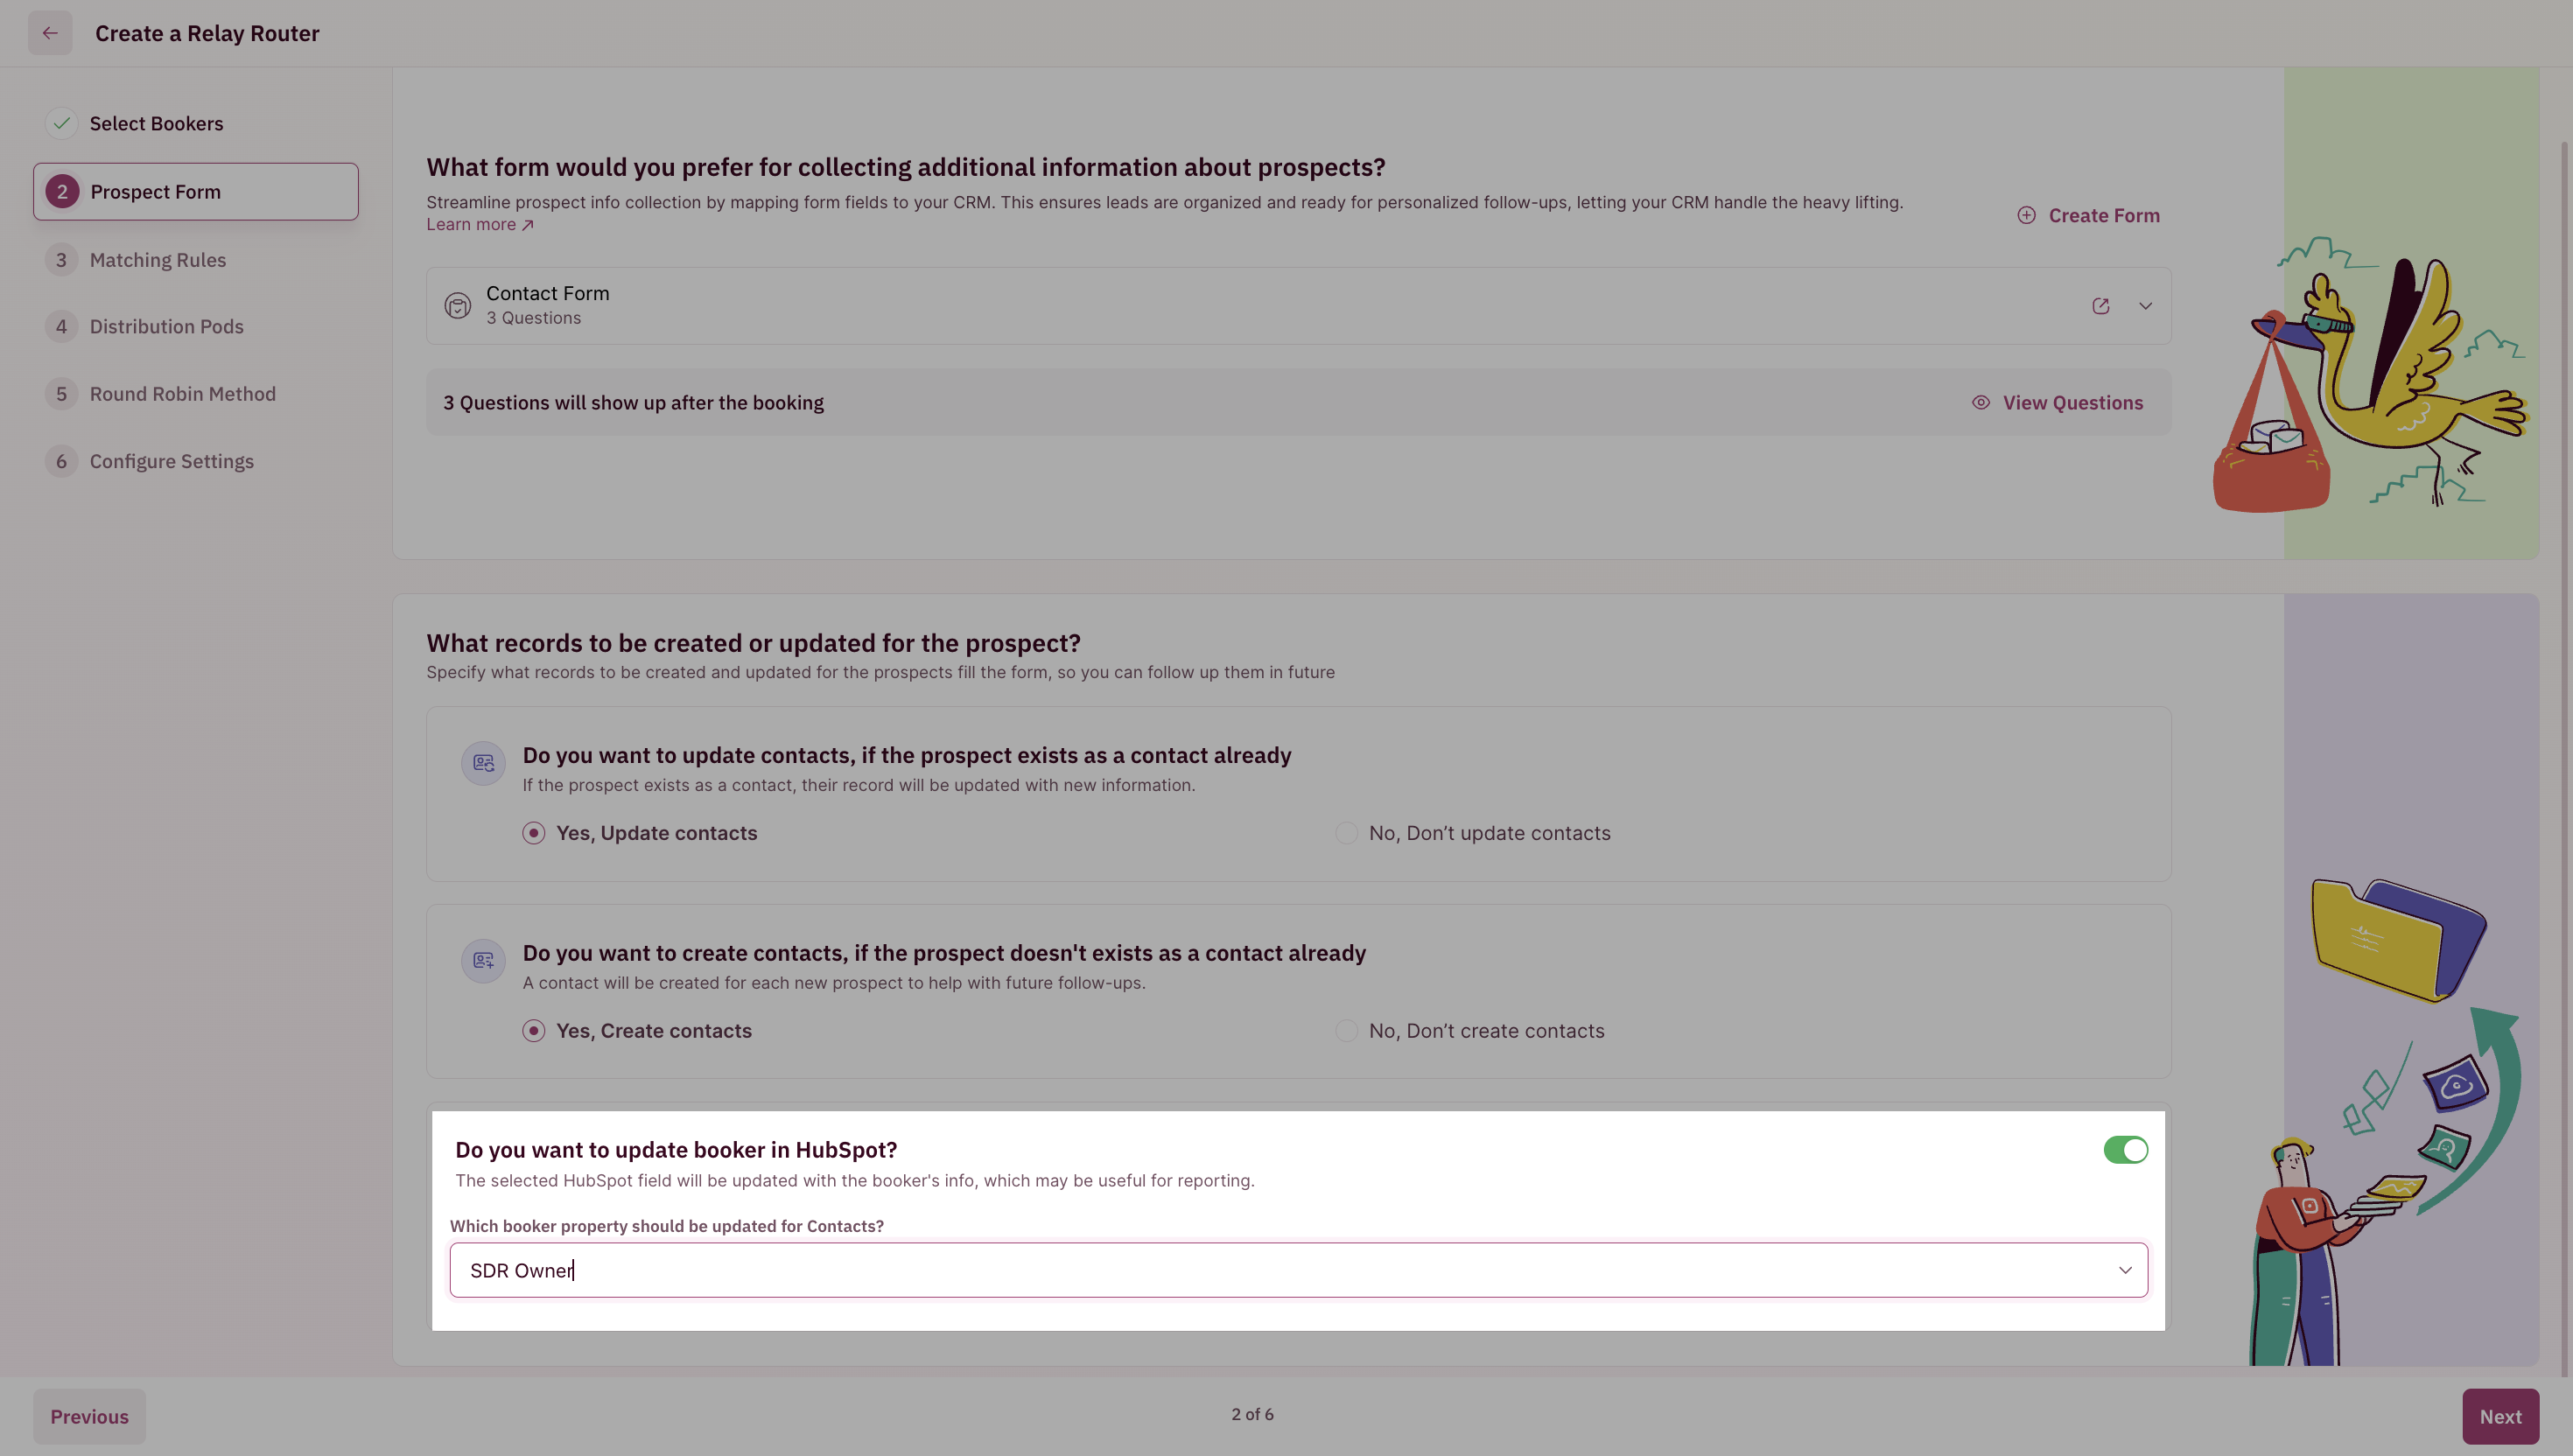
To help track meeting booking/attribution, you can setup RevenueHero to update a specific field in your CRM.The field has to be a Hubspot User field or a Lookup-User field in Salesforce for RevenueHero to update the booker.
Set up matching rules
Matching rules help in routing leads and their meetings to existing owners in the CRM. This ensures your leads talk to the same sales rep and removes the chances of any confusion. Alternatively, you can choose to skip ownership matching and click on Skip this step.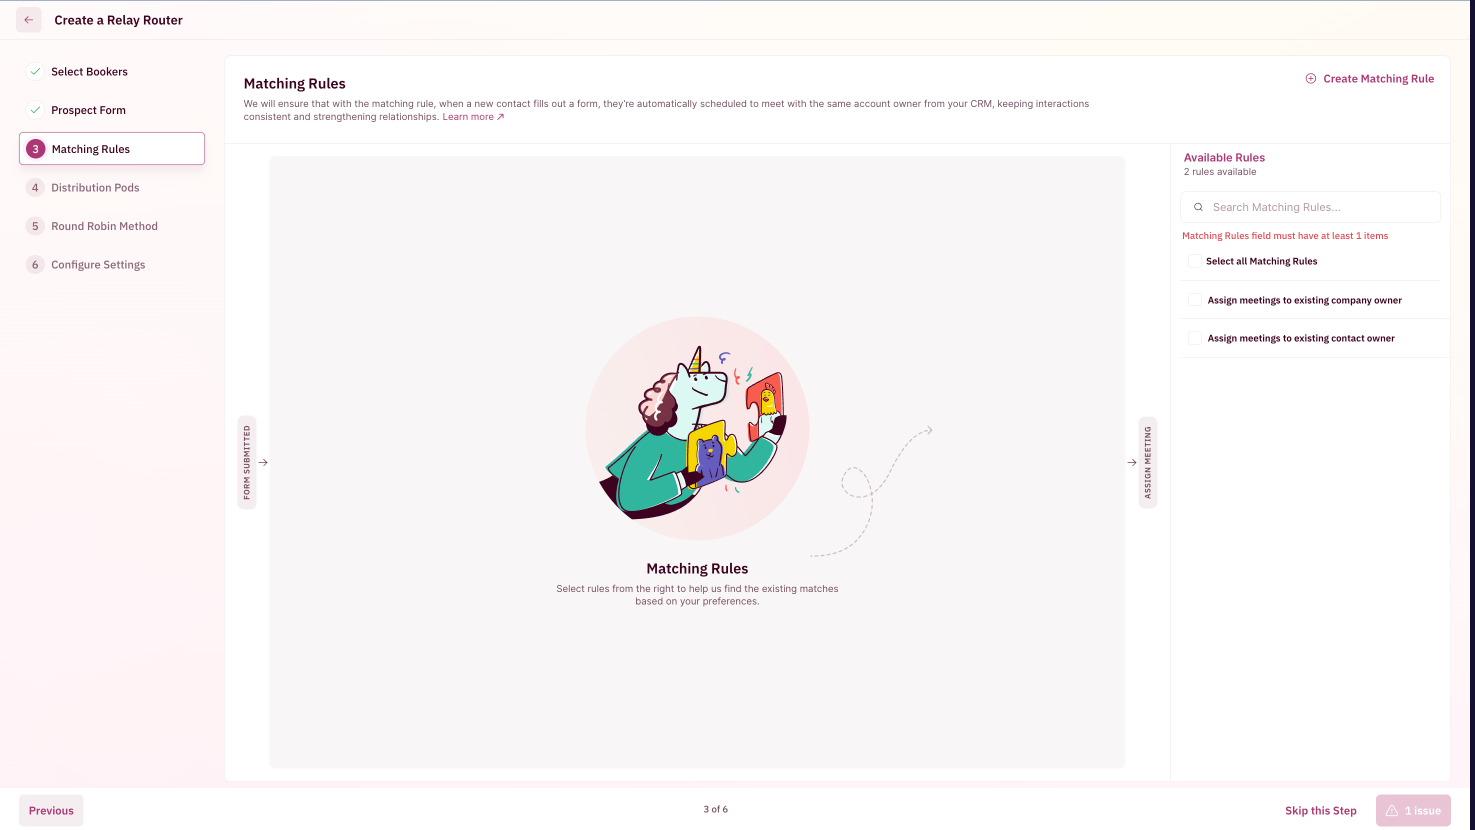
We recommend excluding the booker team from the ownership matching rules to ensure that the booker is not shown their own calendar in case they own the record in the CRM.
Set up distribution pods
Distribution pods decide the rep you want to handoff meetings to. You can choose to route meetings amongst the team members selected within the Distribution Pod based on conditions set. If you’ve already created a Distribution Pod, you can select the pod you’d like by clicking on ”Select Distribution Pods”. You can use the search functionality to look for a specific pod that you’d like to add to this Relay.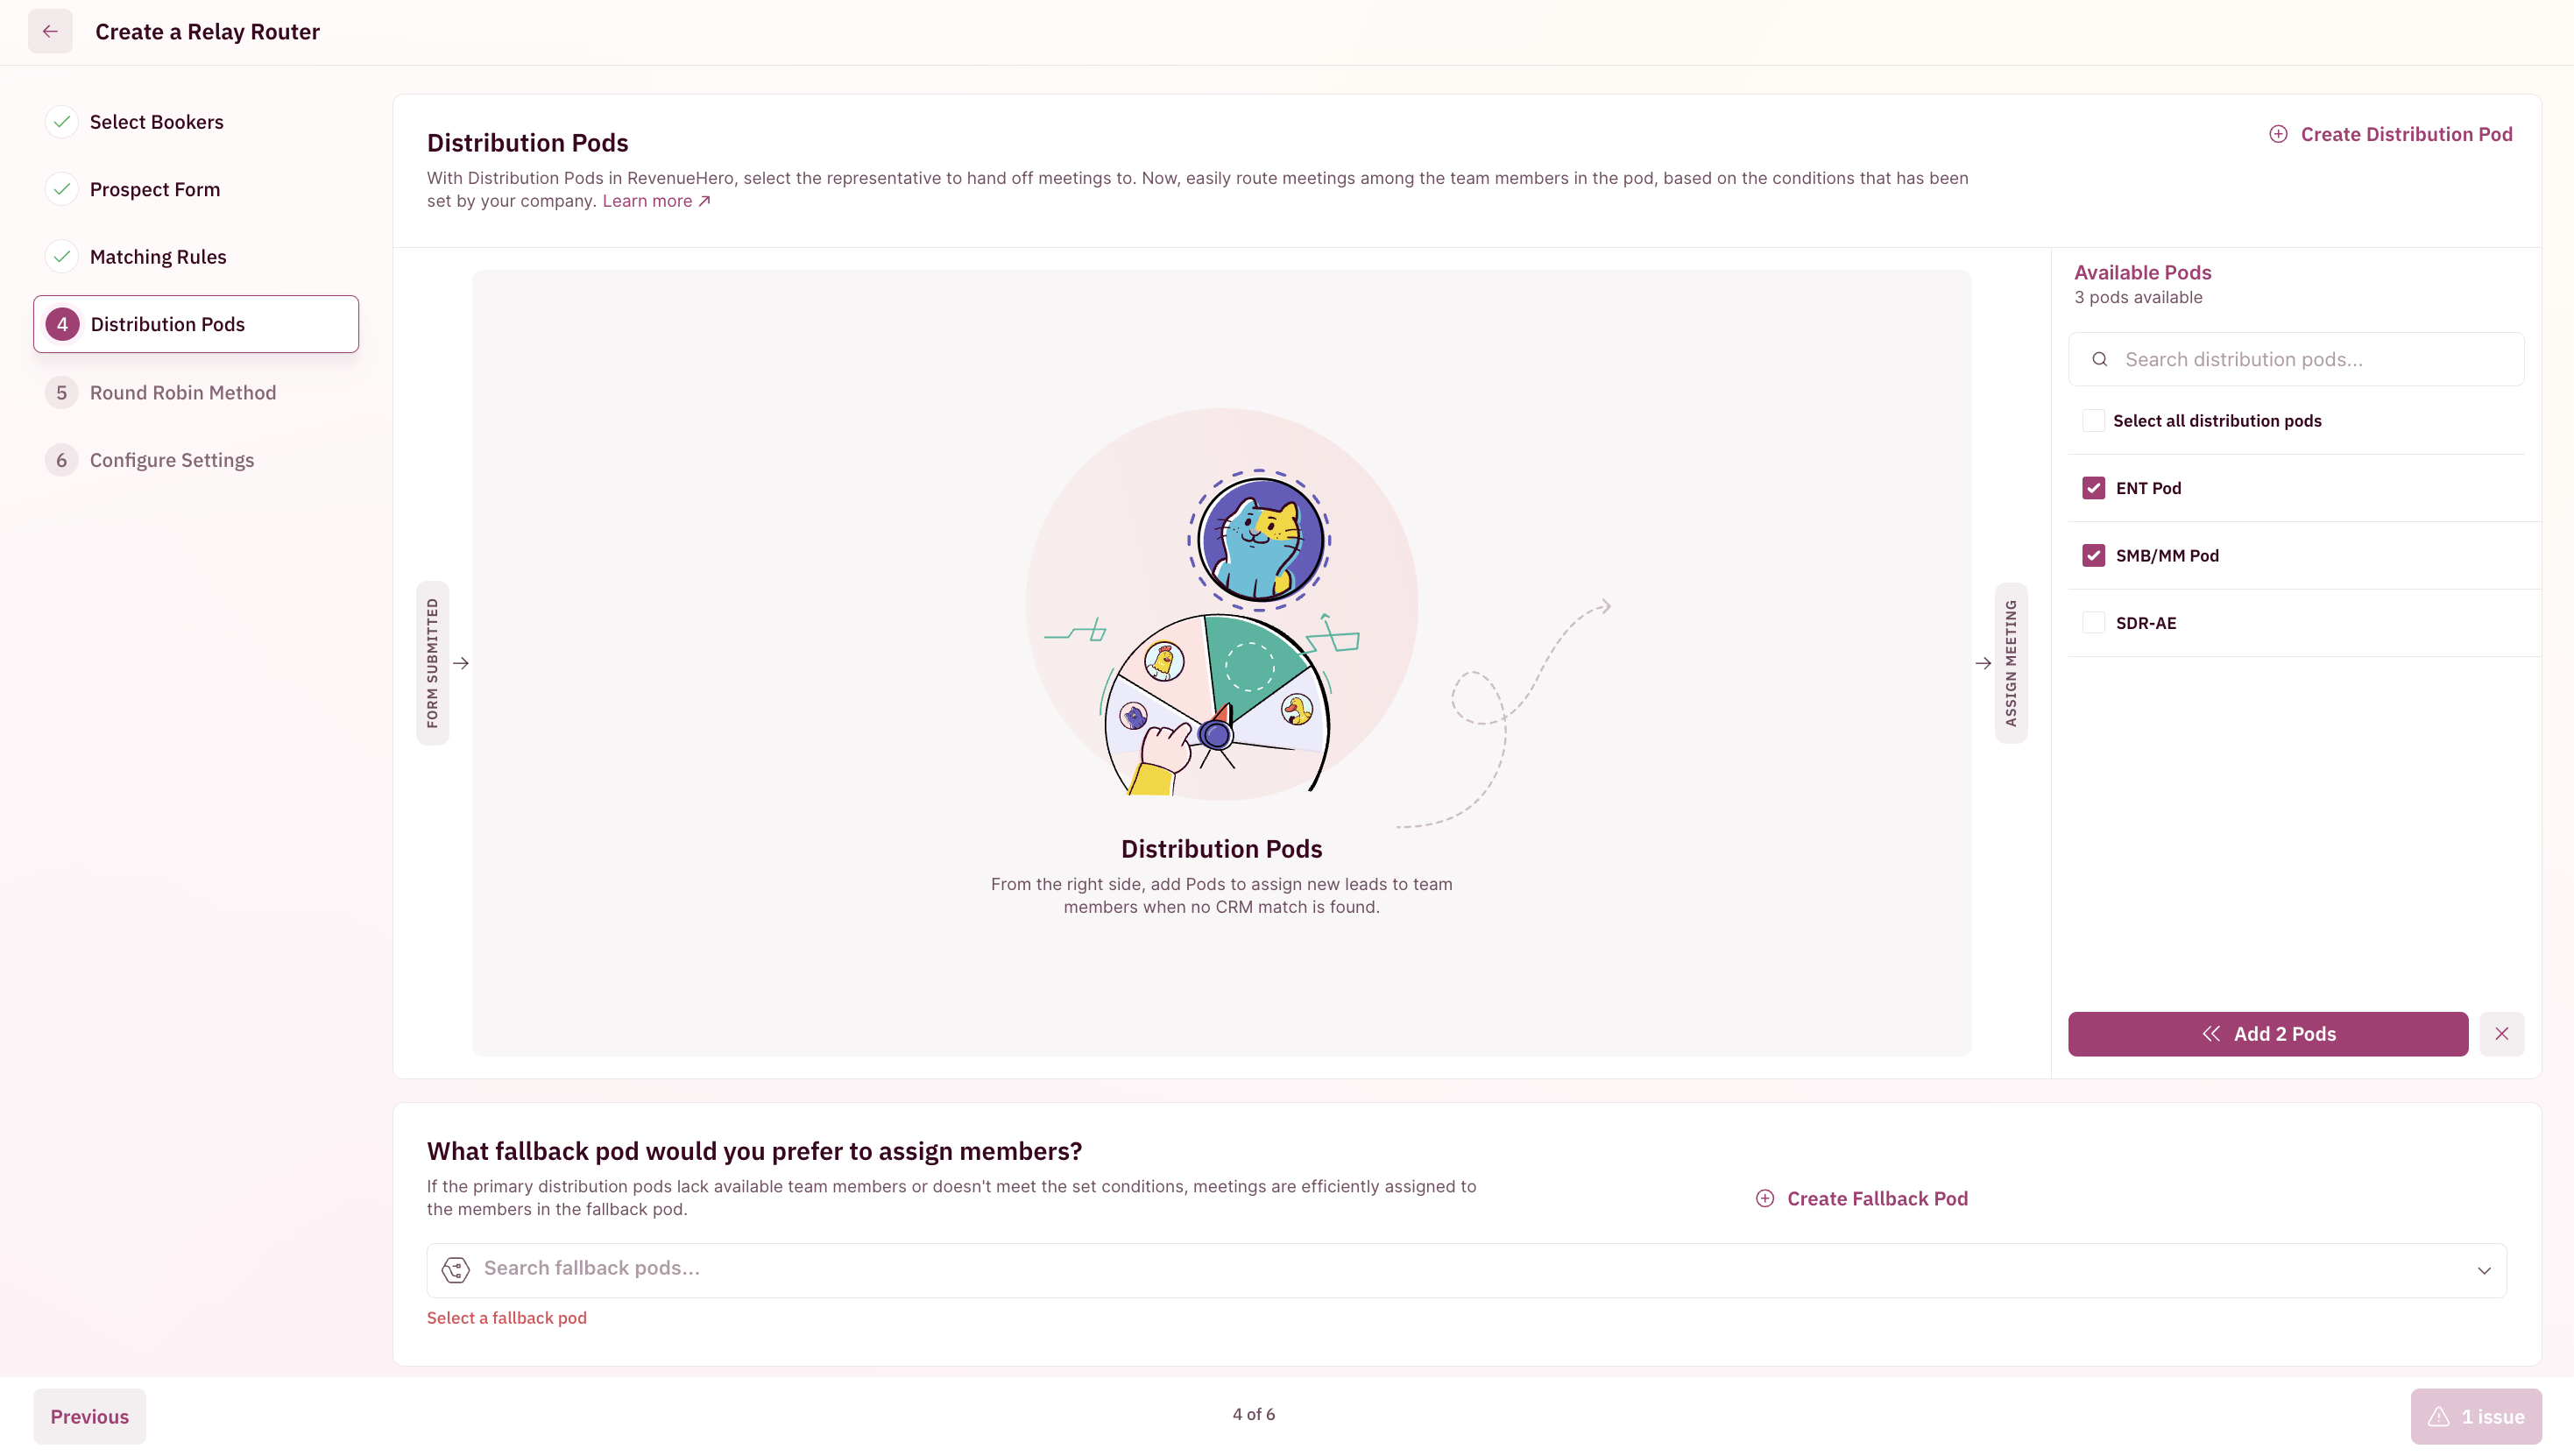
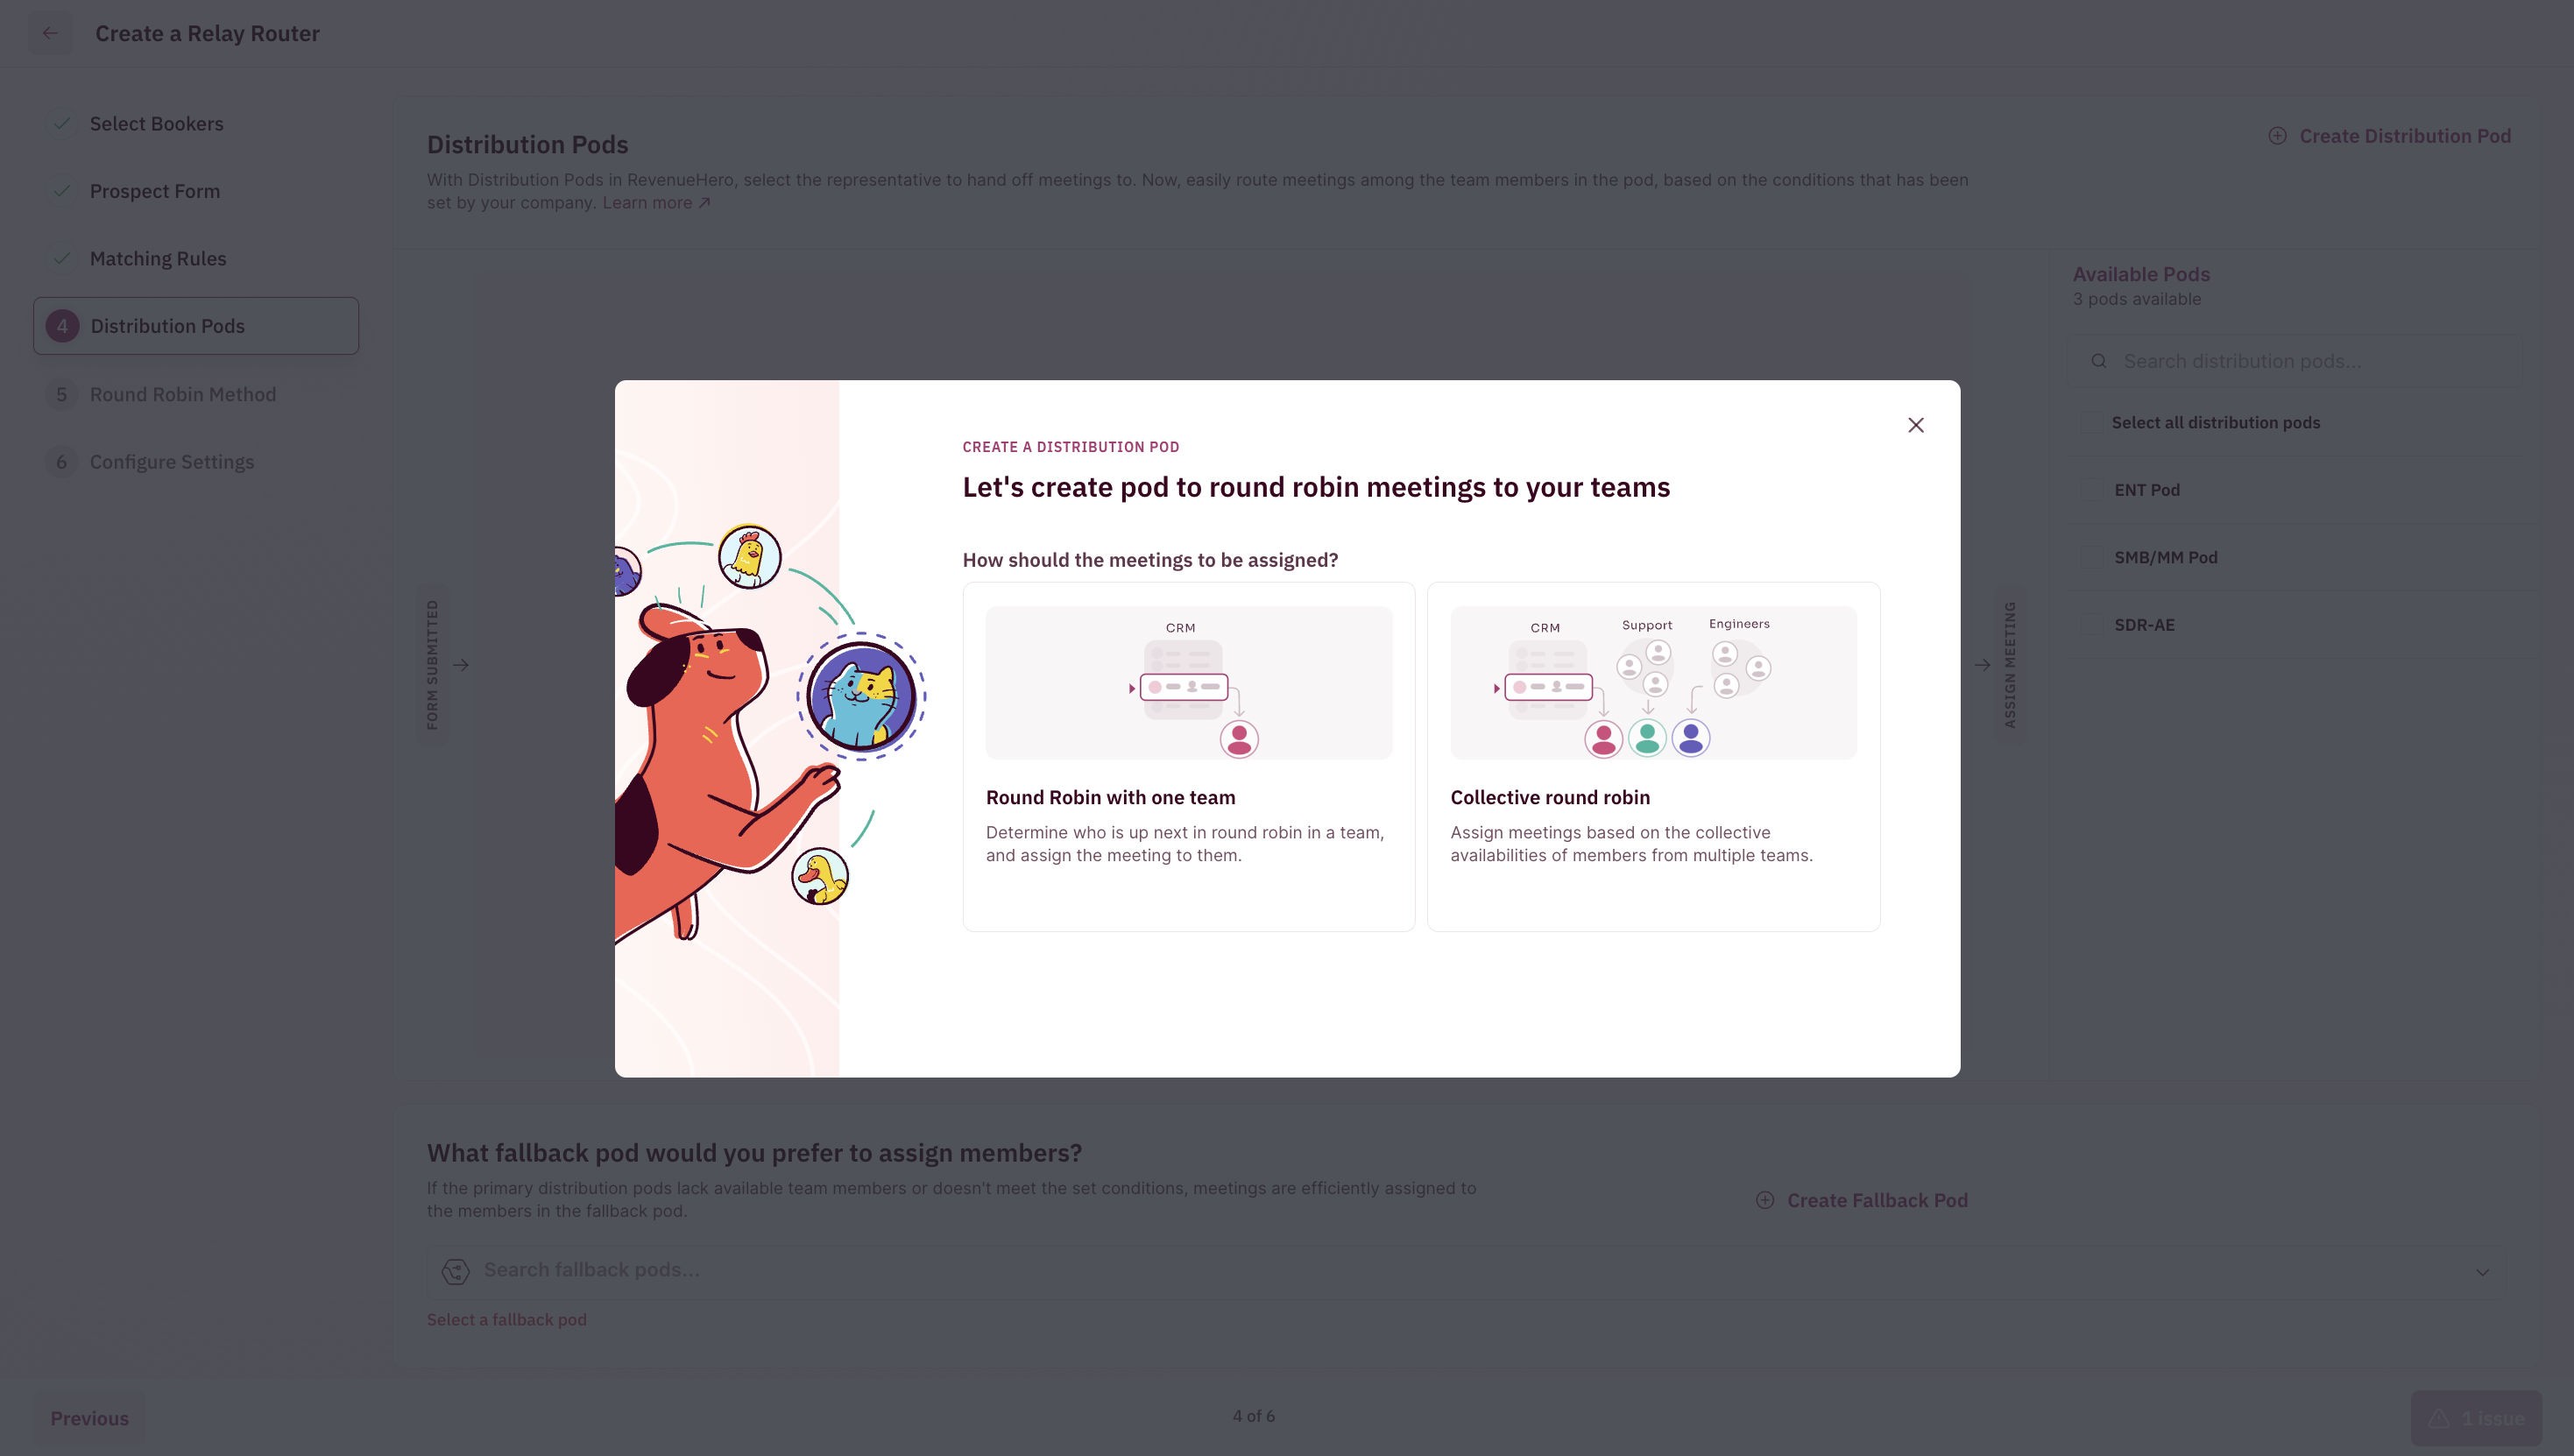
- Once you’ve clicked the ”New Distribution Pod” button, you’ll see a pane open up from the right. Choose if you want to round robin with one team (eg: AE) or collectively round robin among a few teams(eg: AE + SE).
- Choose members that will make up this pod by selecting the Team from the dropdown menu.
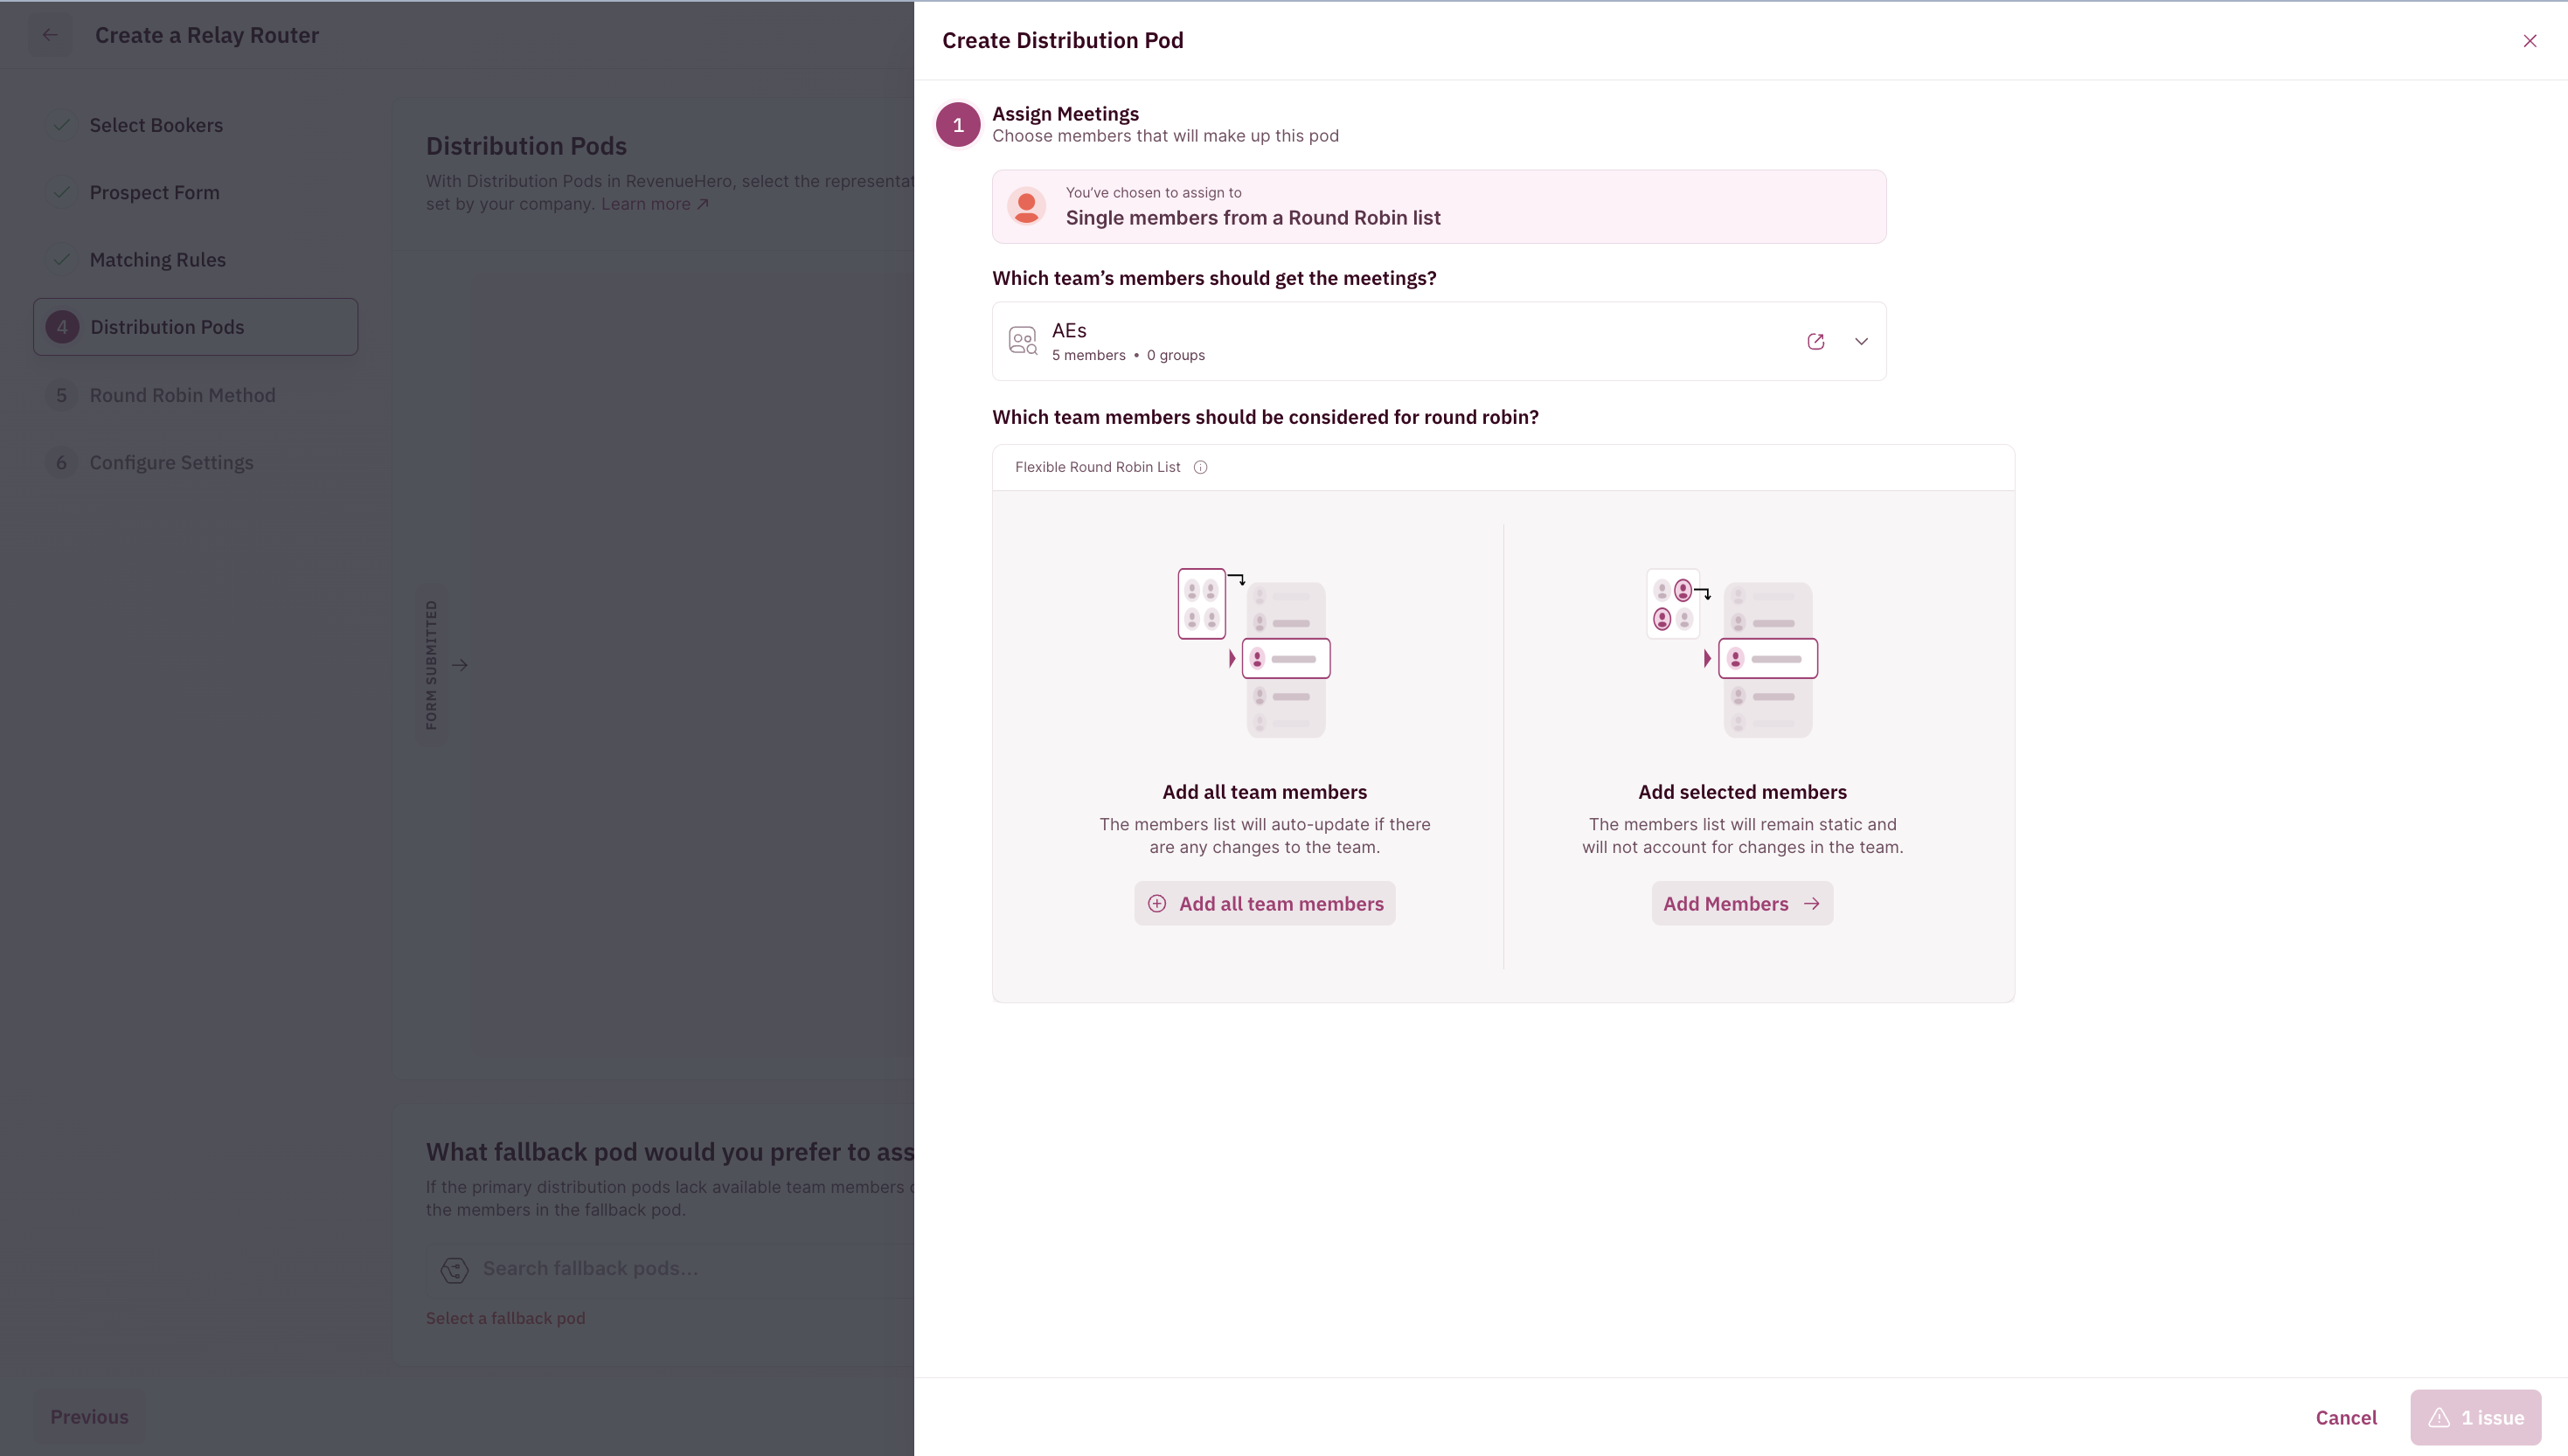
- Next, you have to choose which team members should be considered for a strict round-robin. It can either be all Team Members or select Team Members.
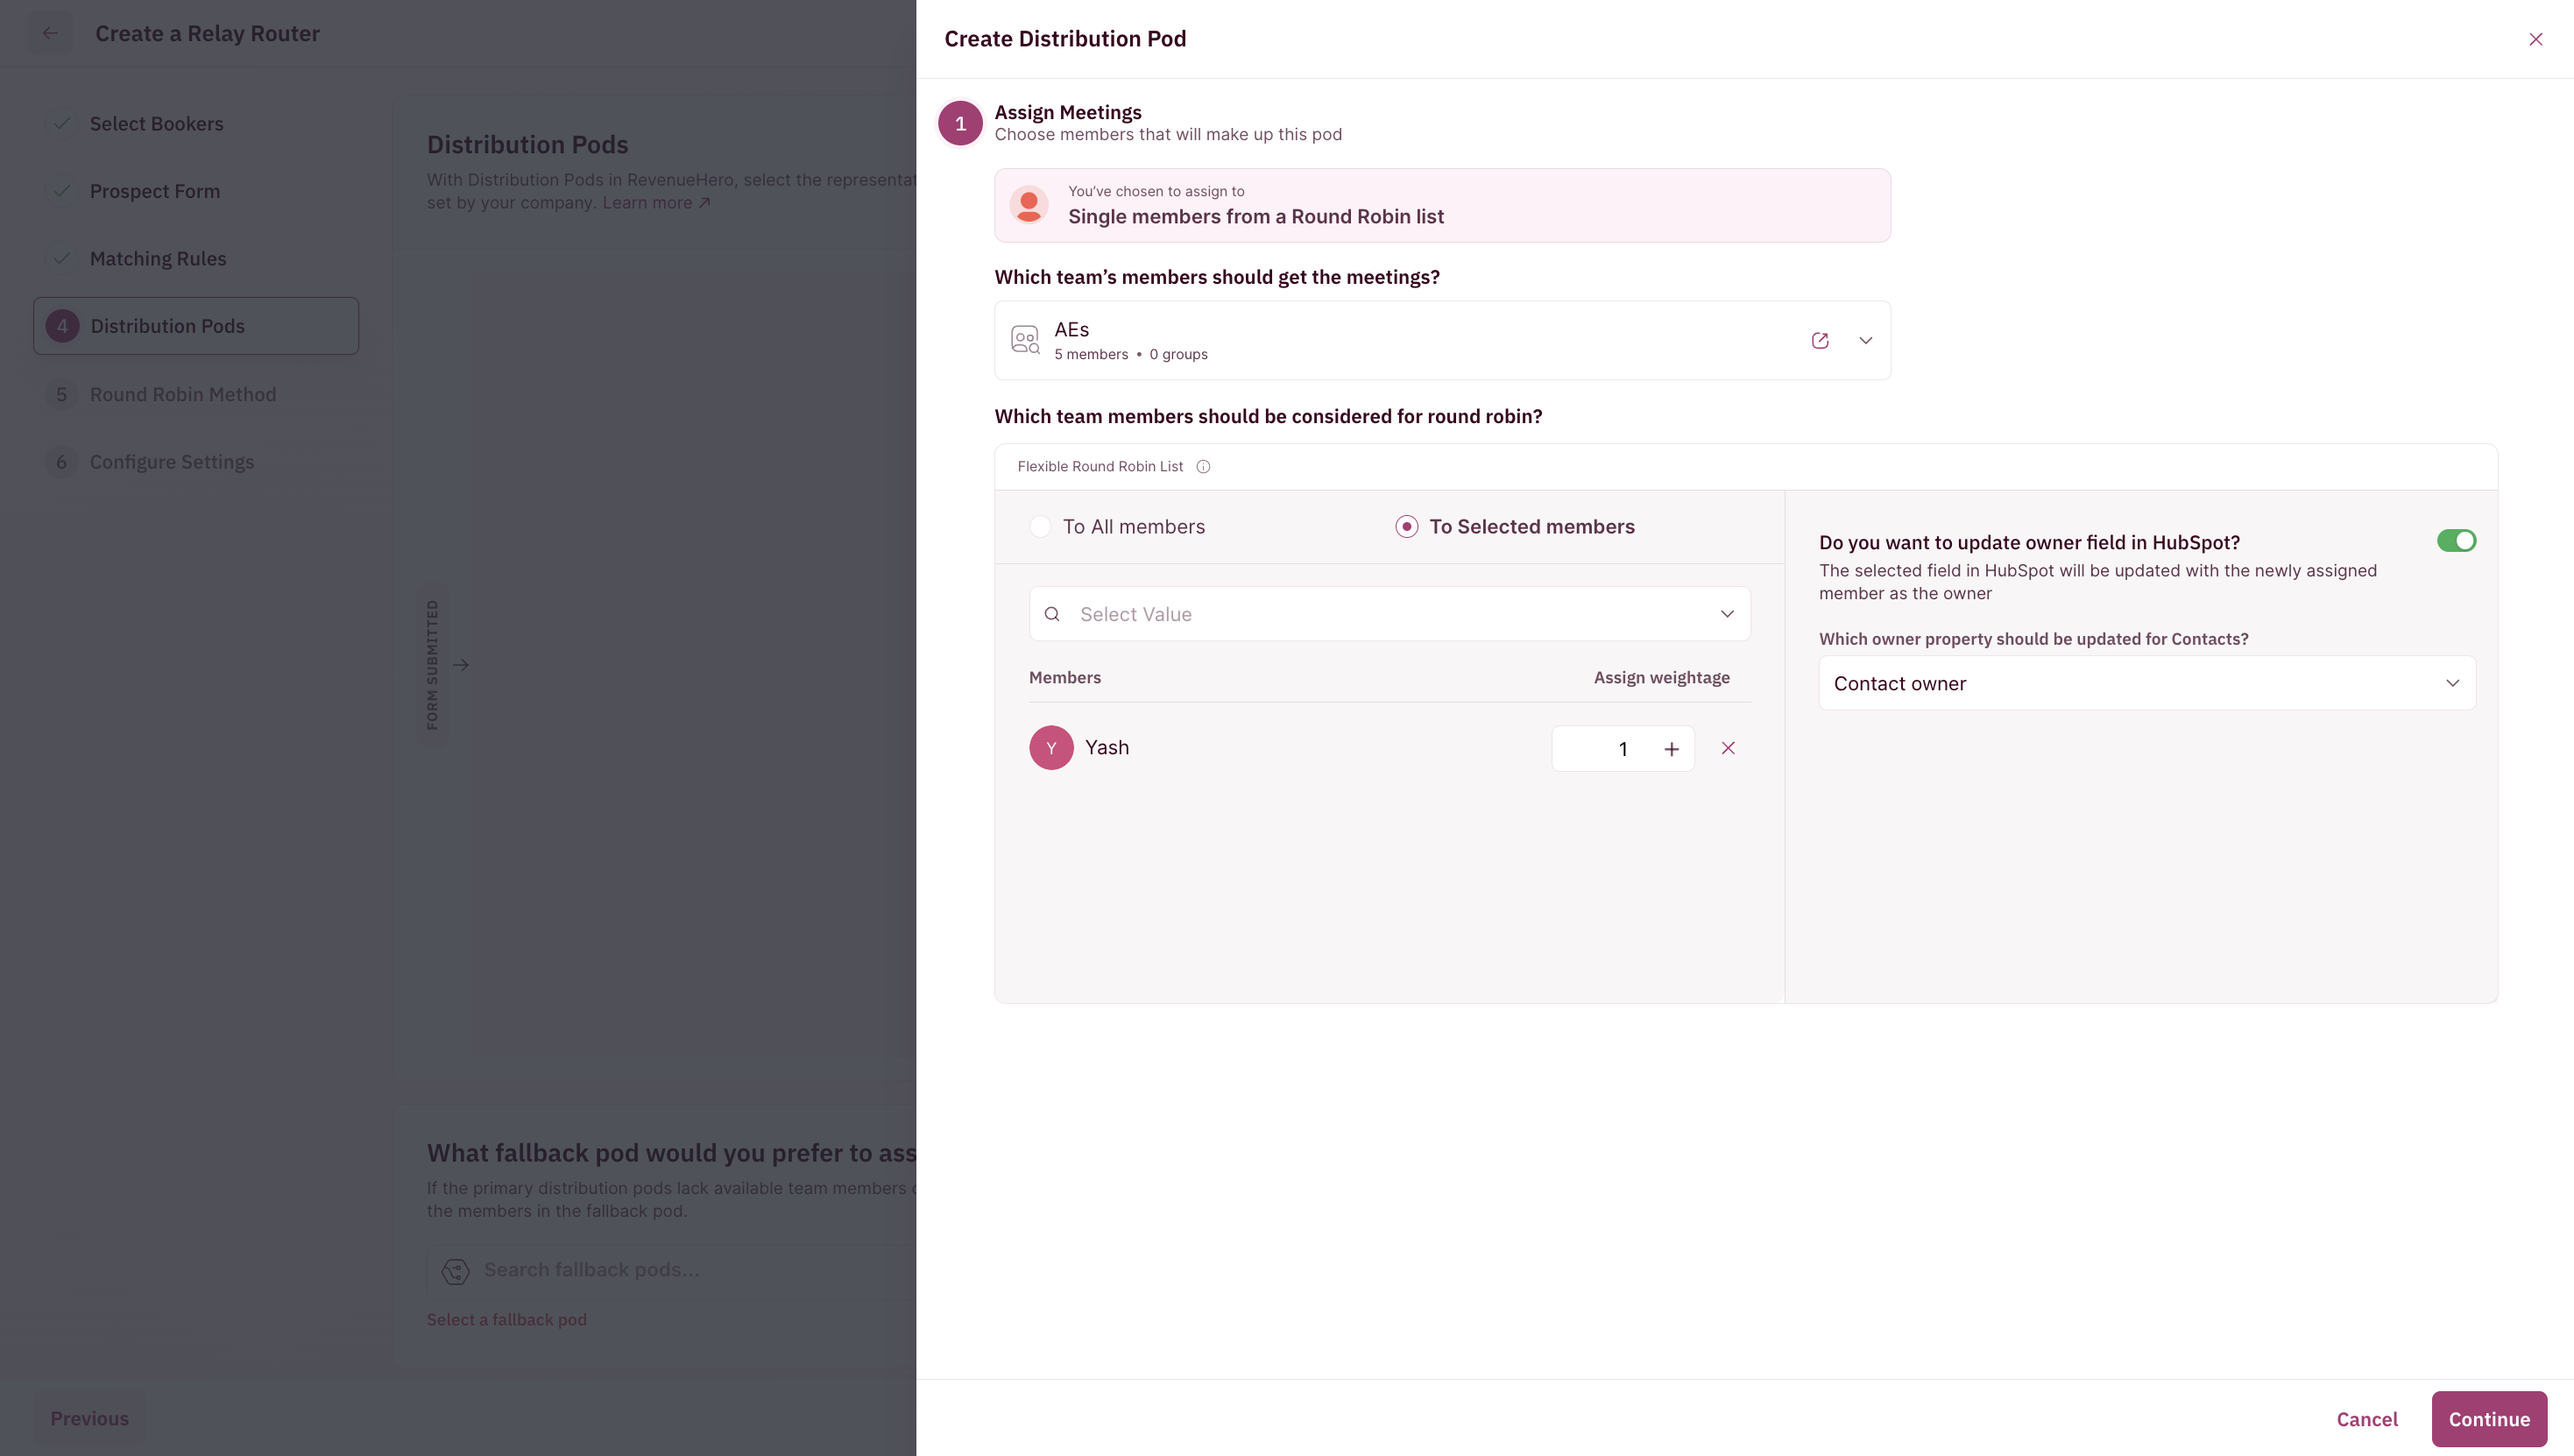
- You can also assign weightage for each member over here.
- The next step is to Add Conditions, which if valid, will assign meetings to the members. (This is an optional step.)
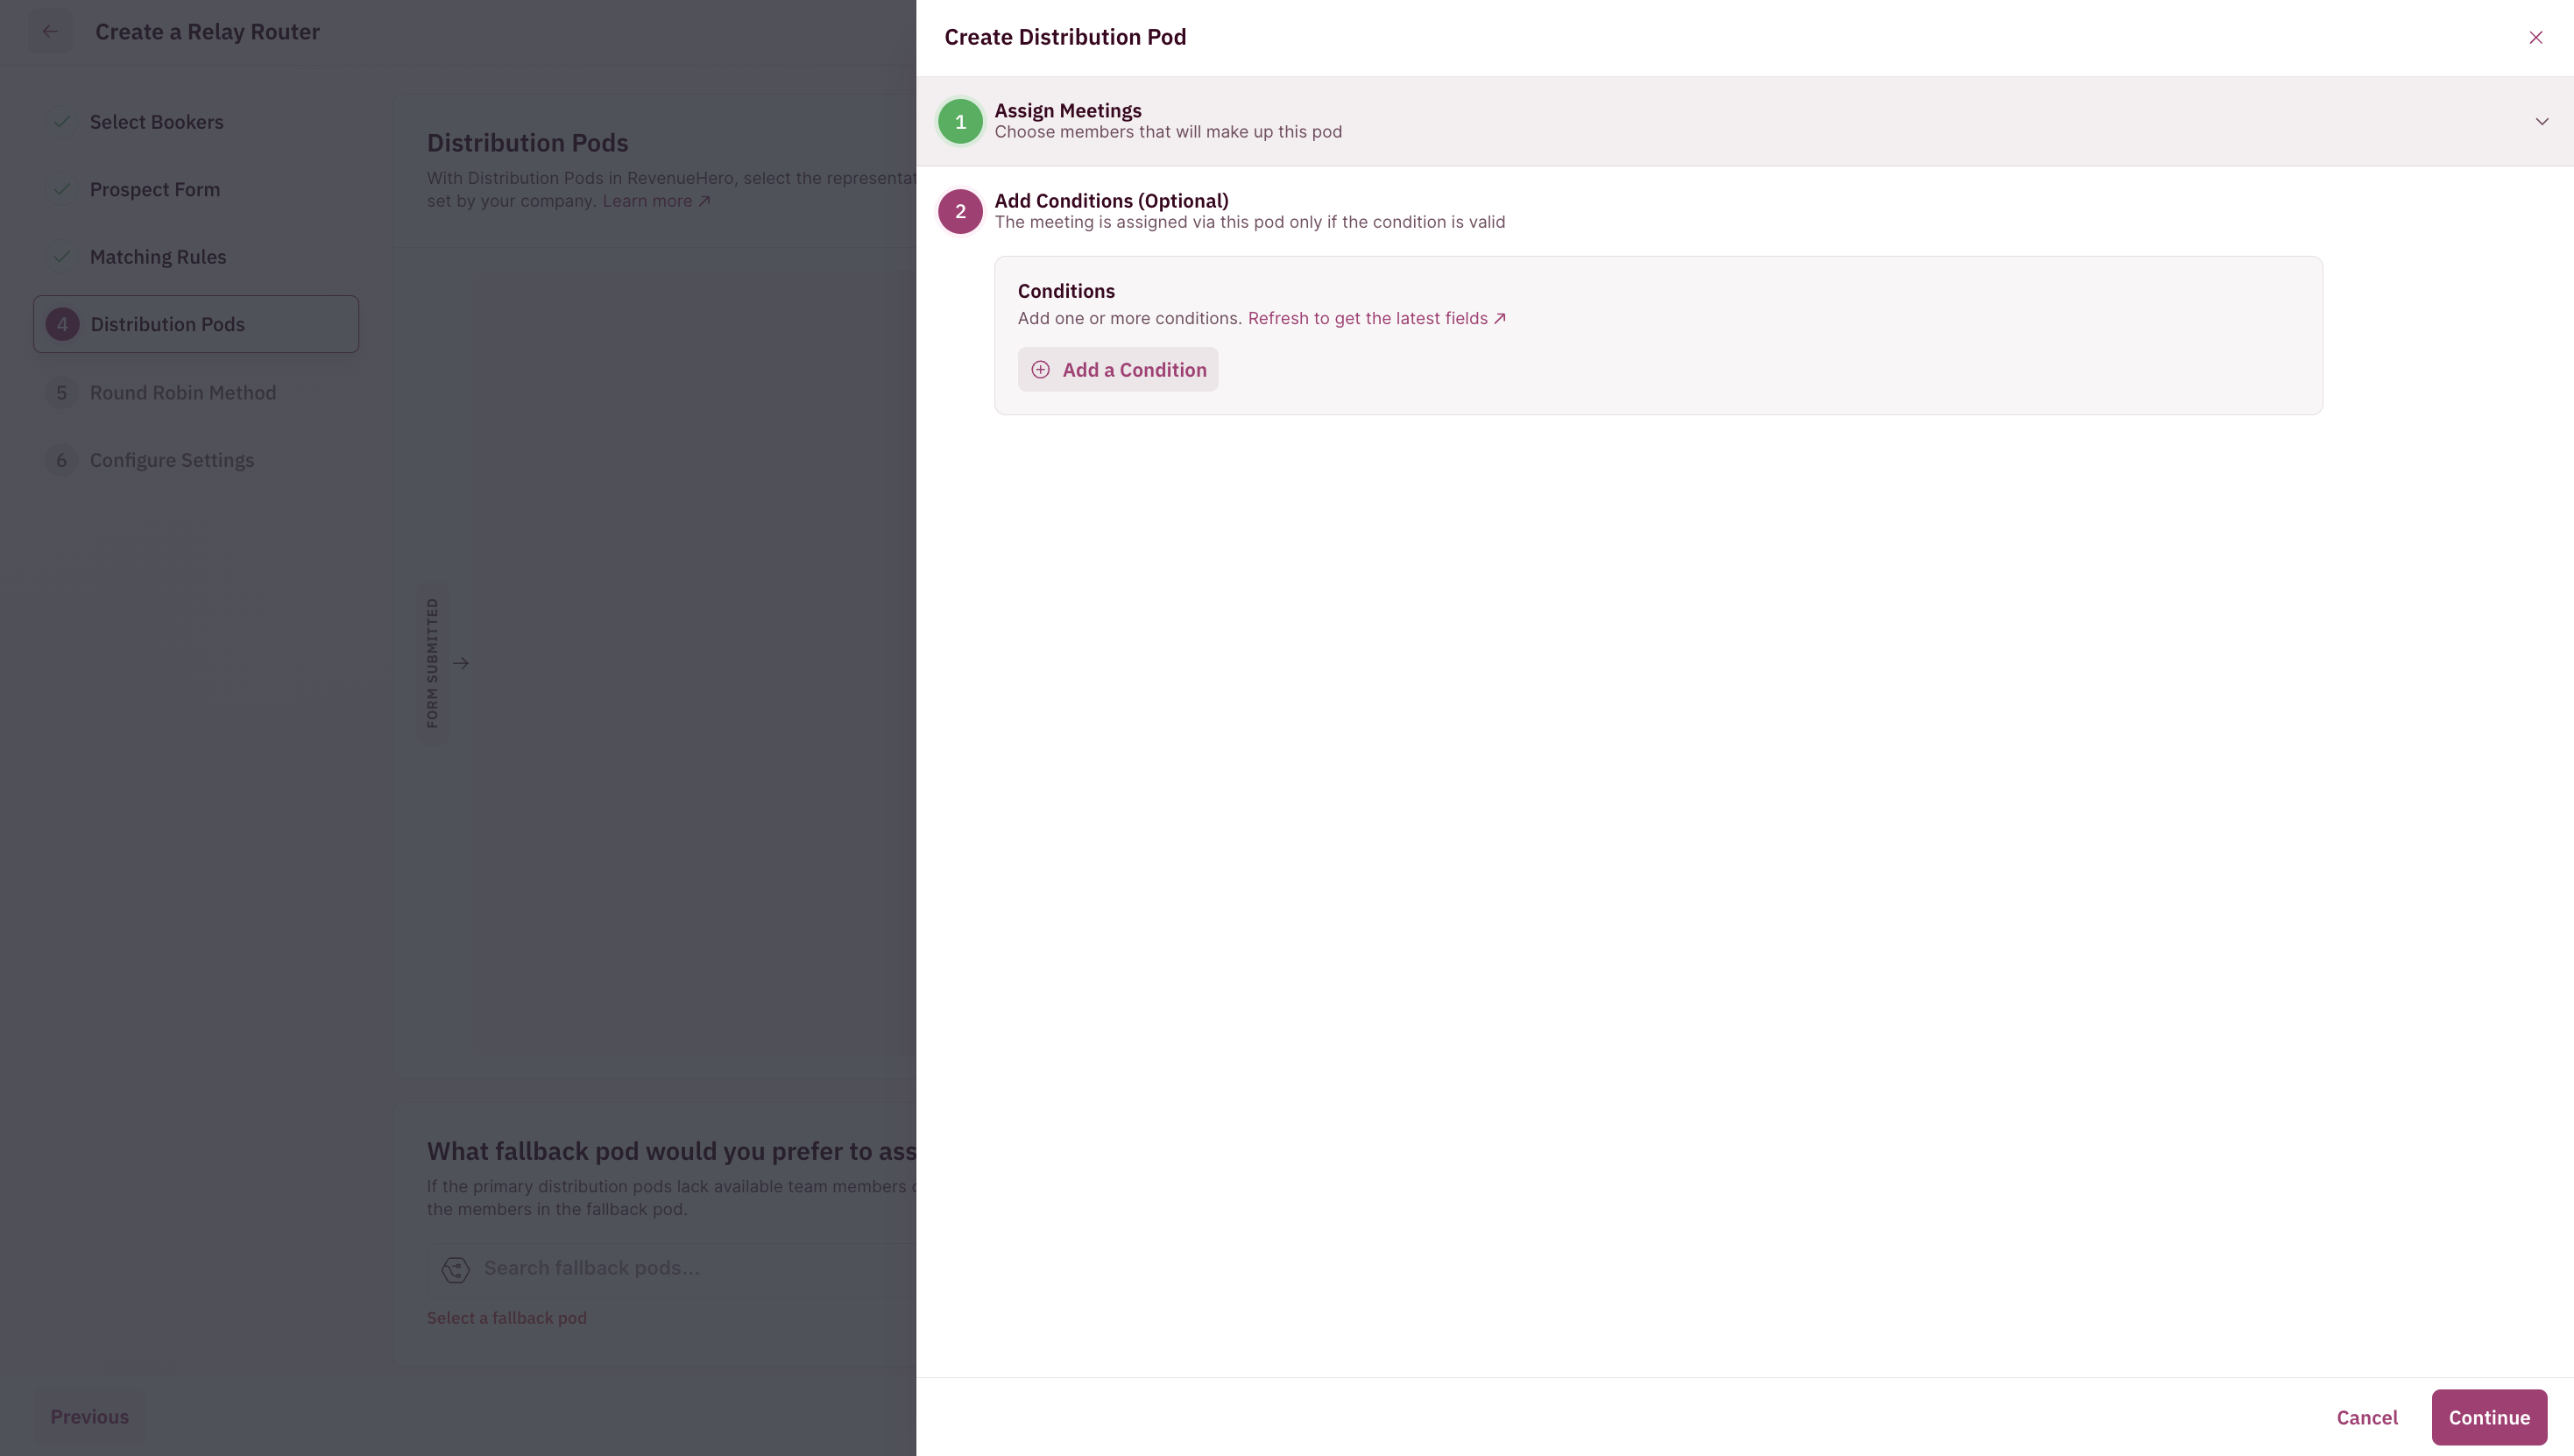
- Click on the ”Add a condition” button and click on ”Add a Property”. This is where you tell RevenueHero which property in your CRM to look up for this distribution pod.
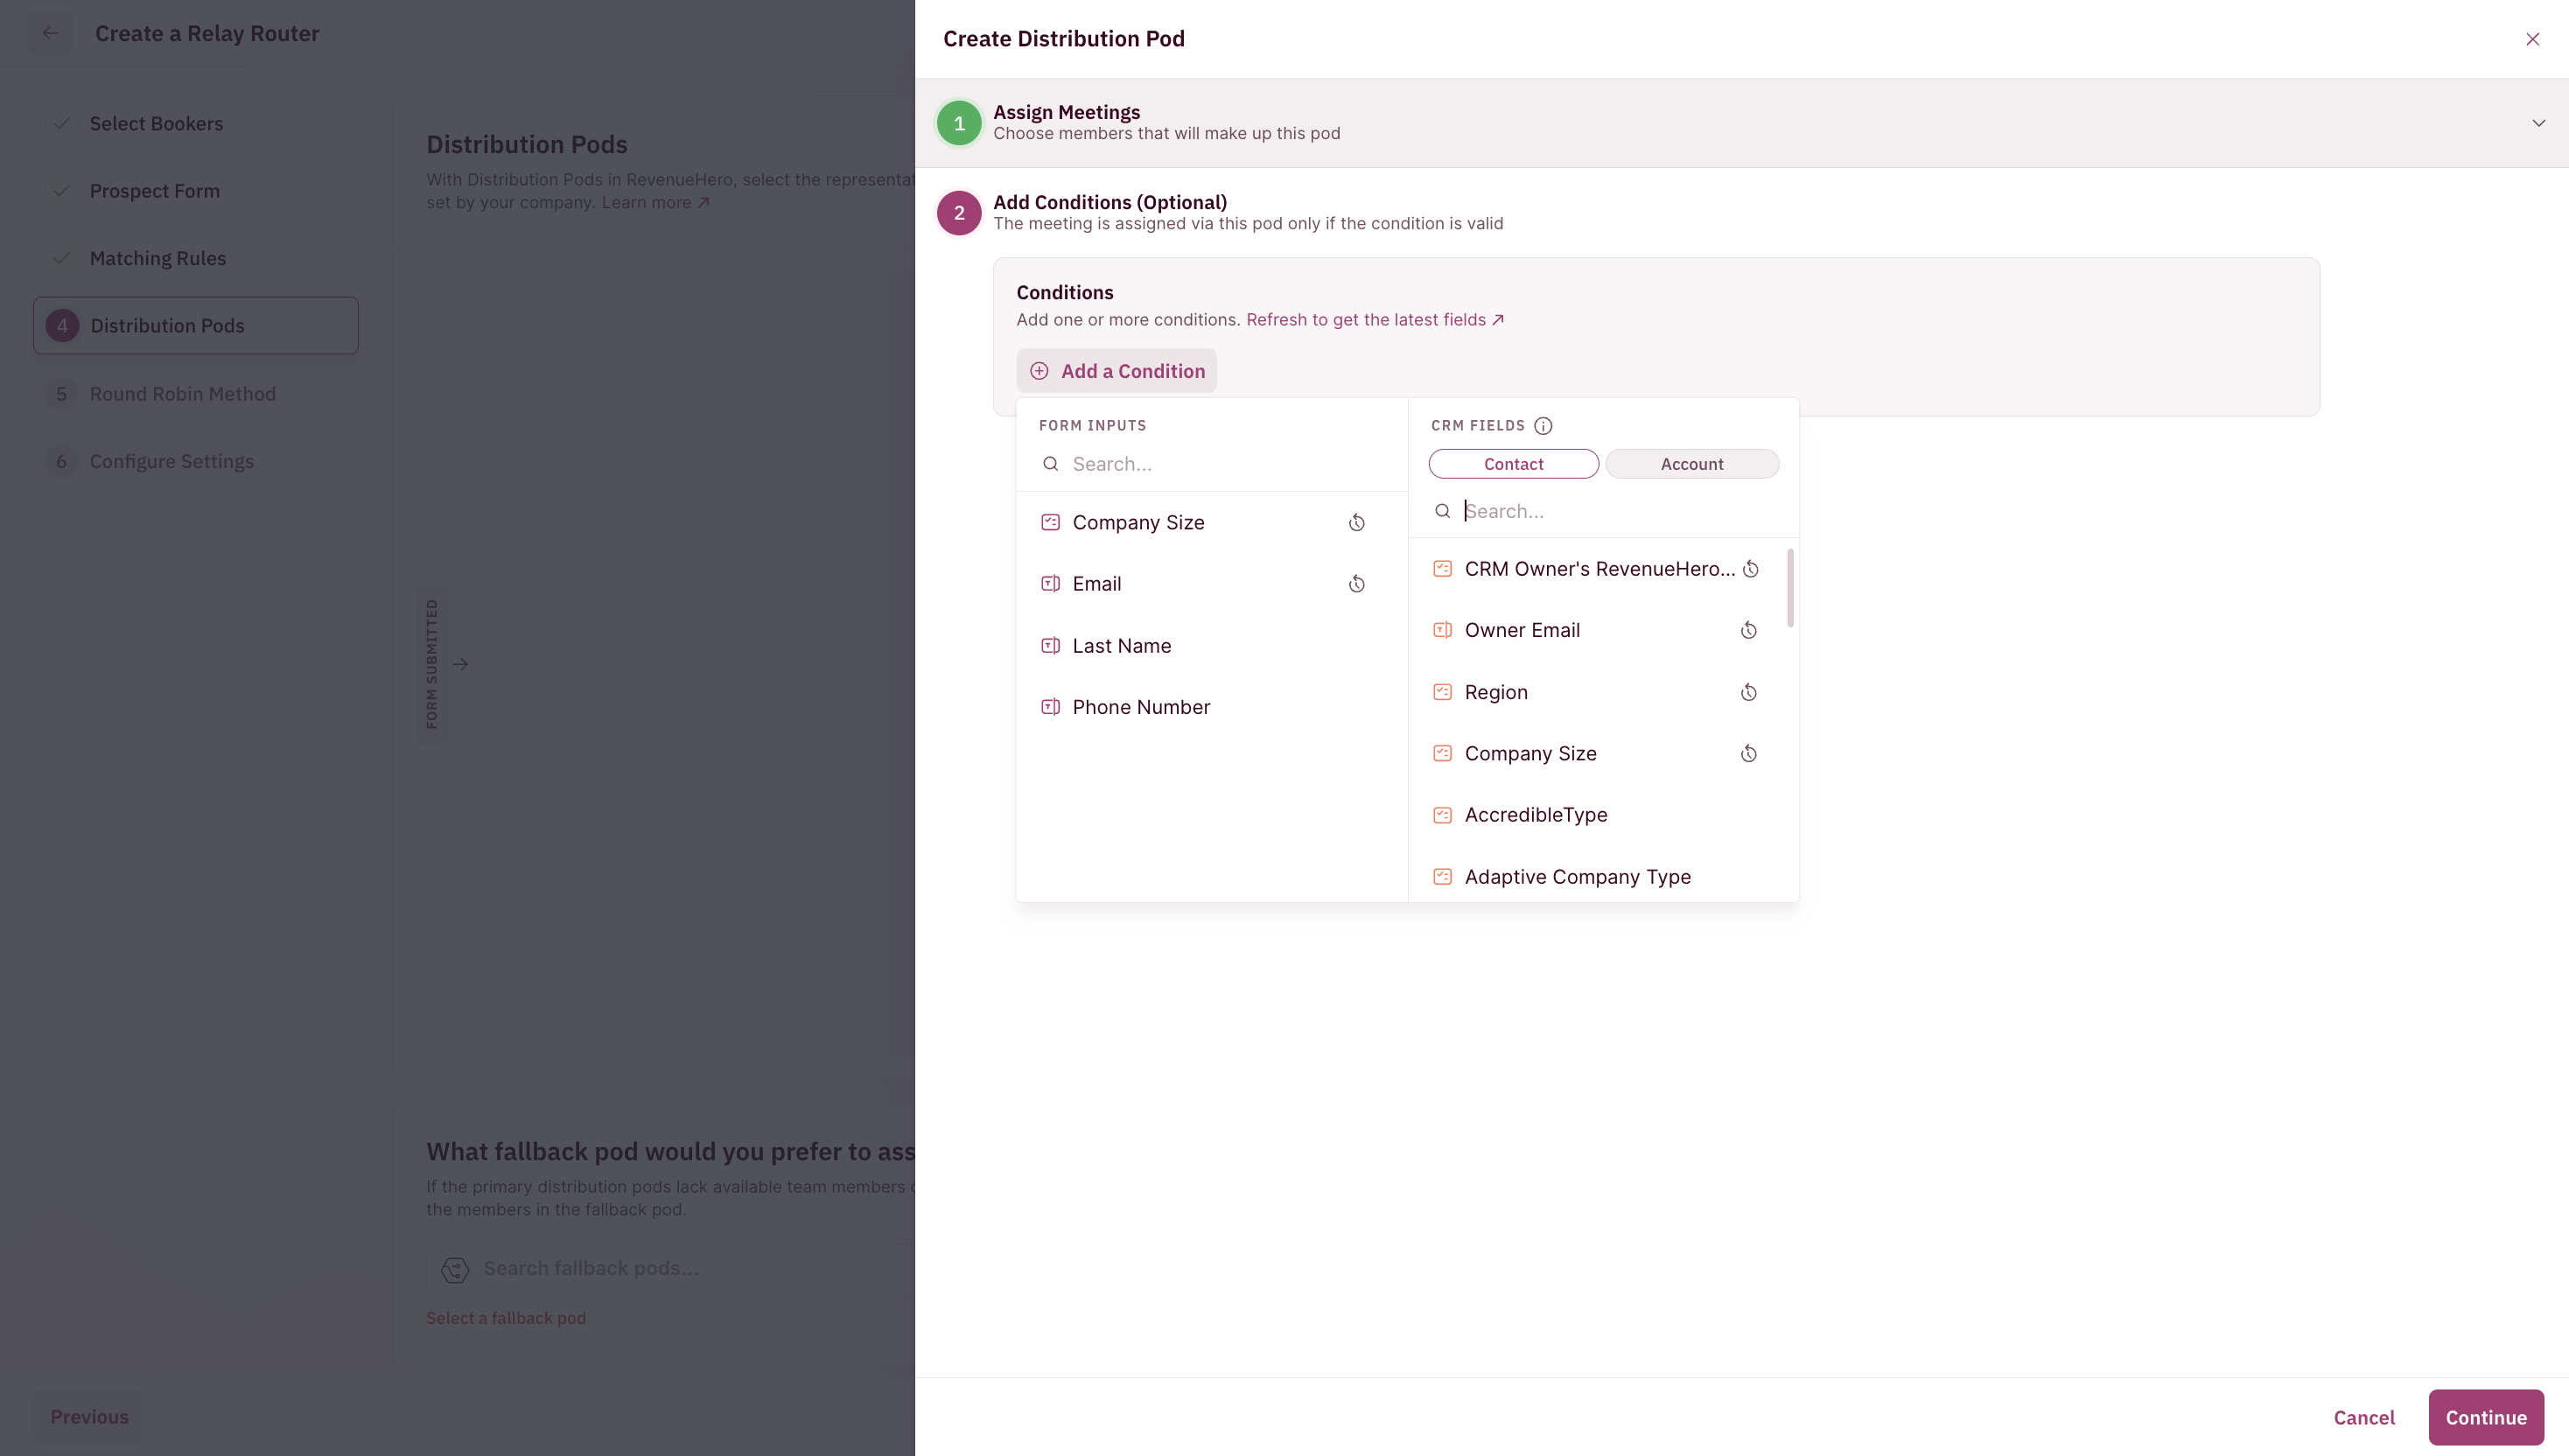
- Route meetings to the reps in the queue by setting conditions in the pod. Choose between
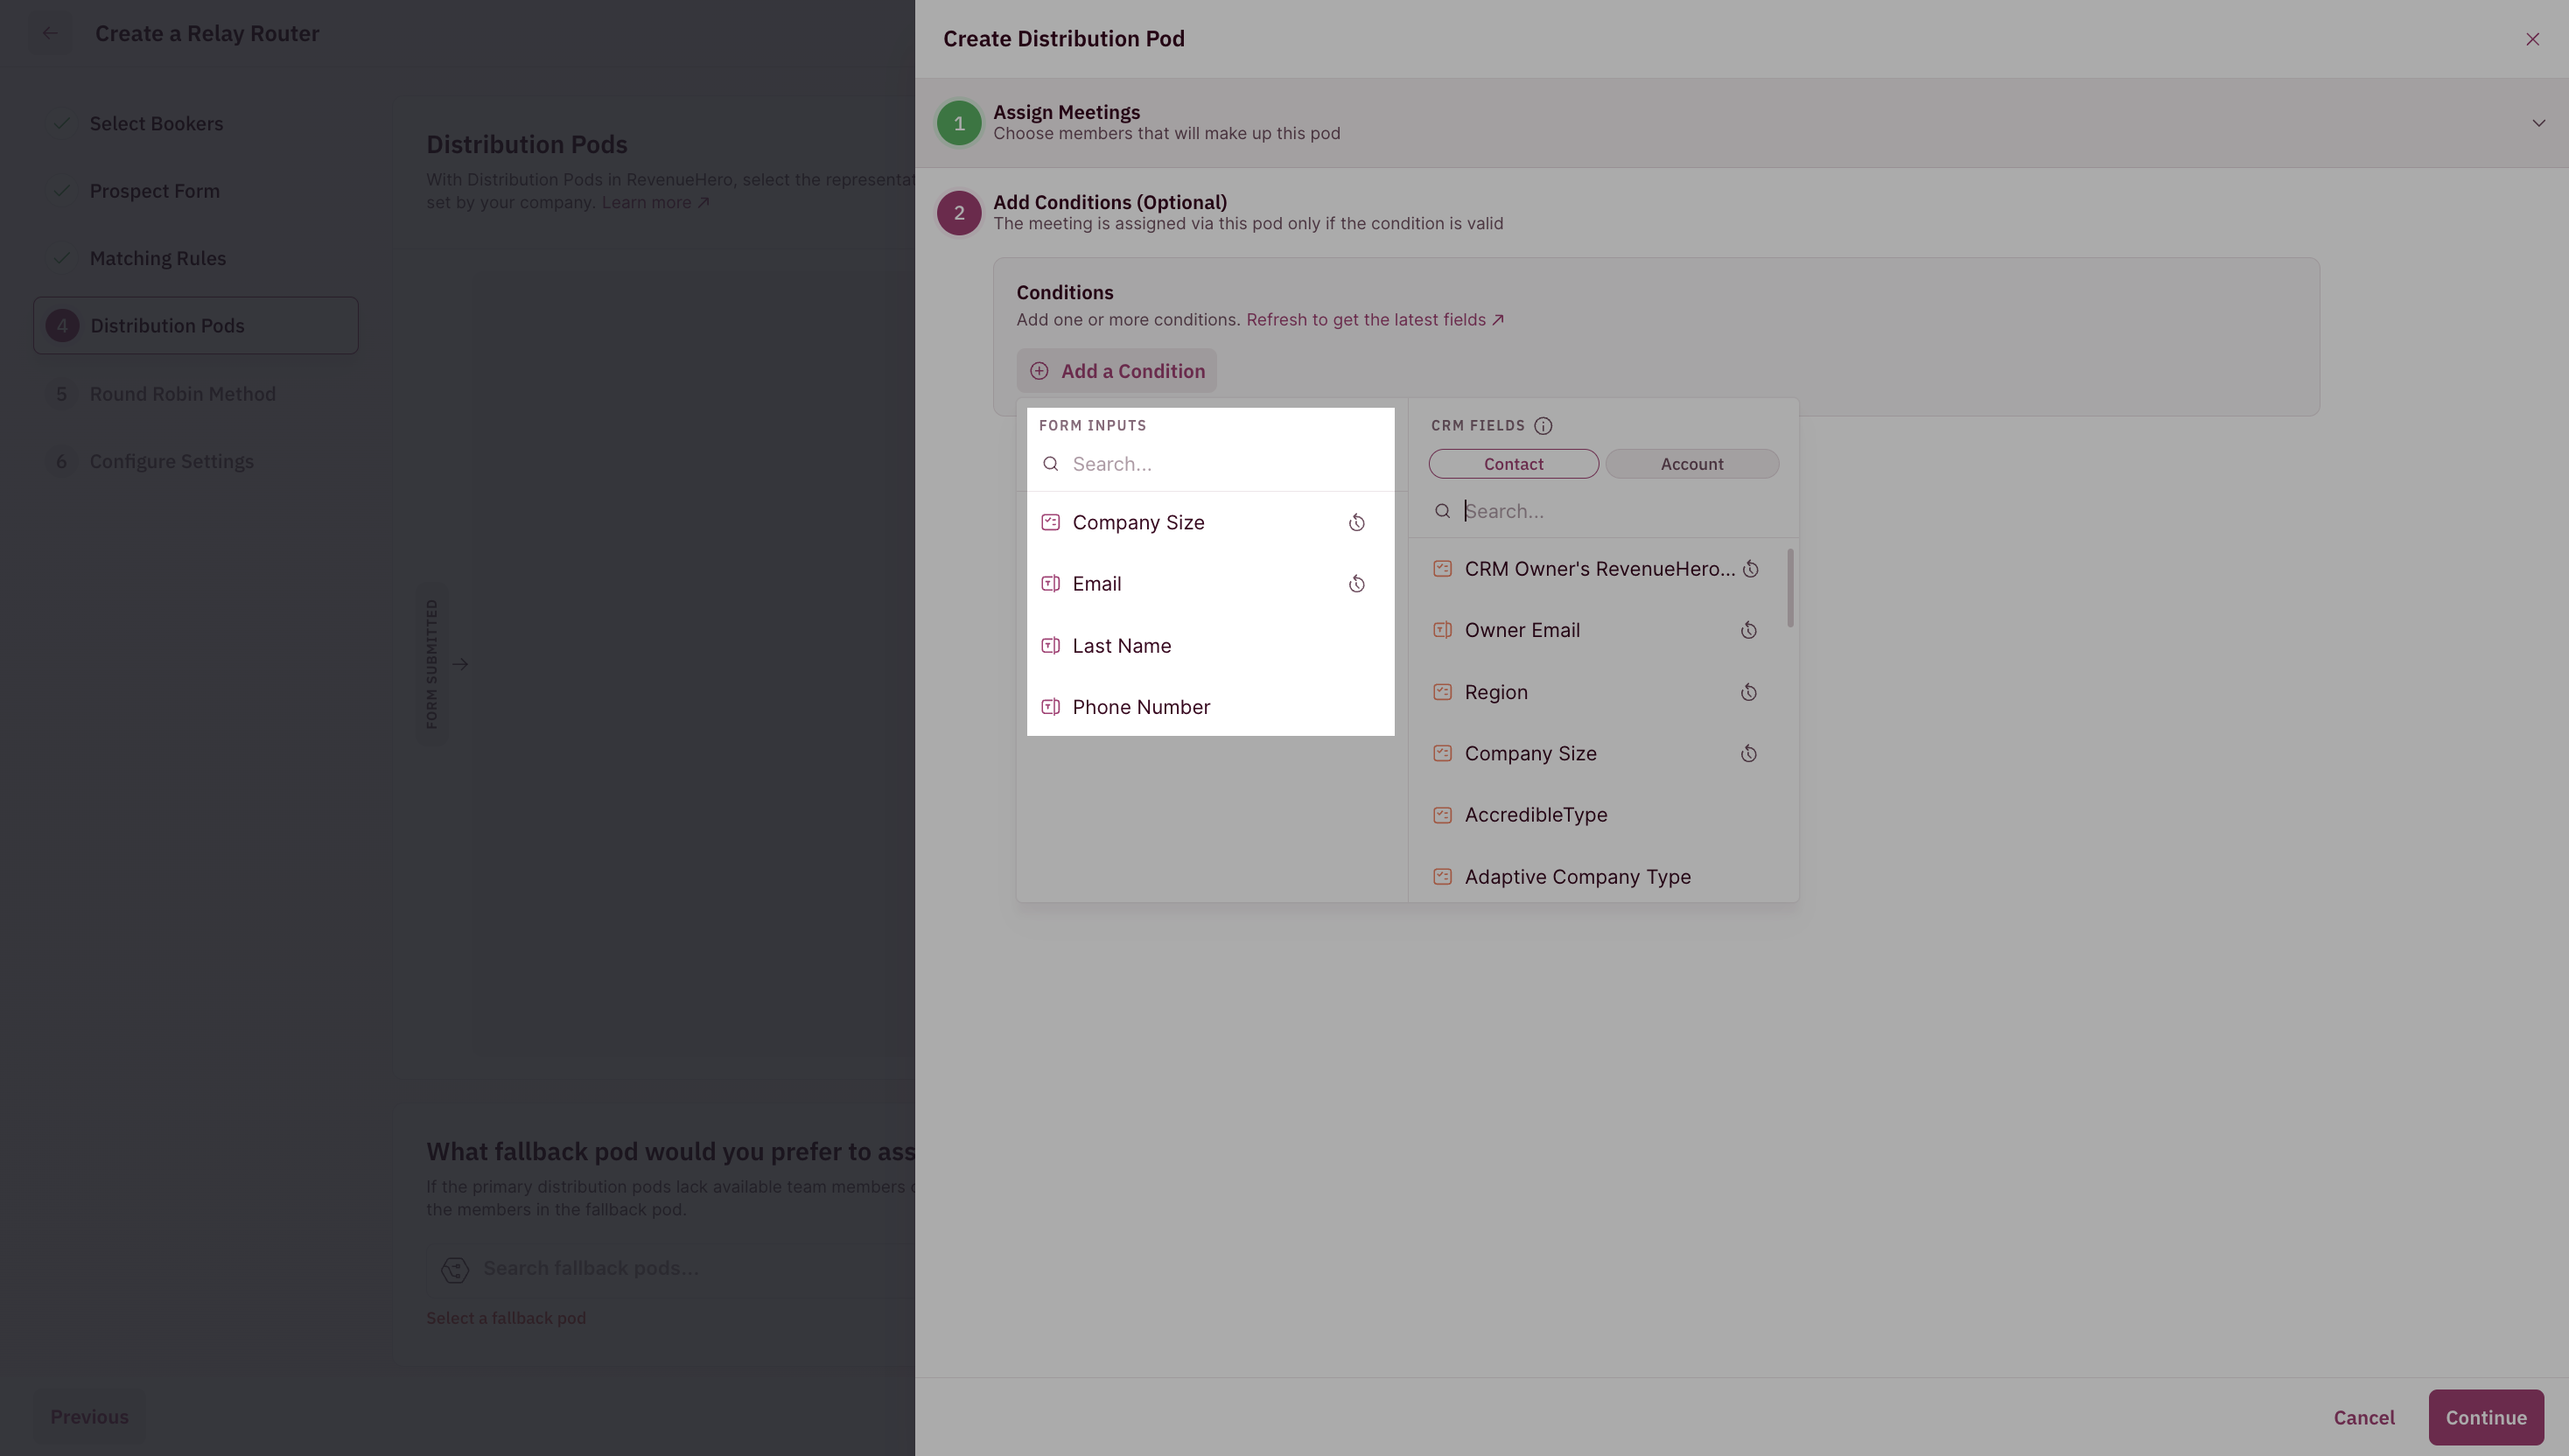
- You can add multiple conditions with a combination of AND or OR for the Distribution Rule to check before meetings are assigned.
- Lastly, you have the Pod Settings. This is where you can name your Distribution Pod. For example, since you’ve created a Distribution Pod for your US West Coast AE team, you can name it US West AE.
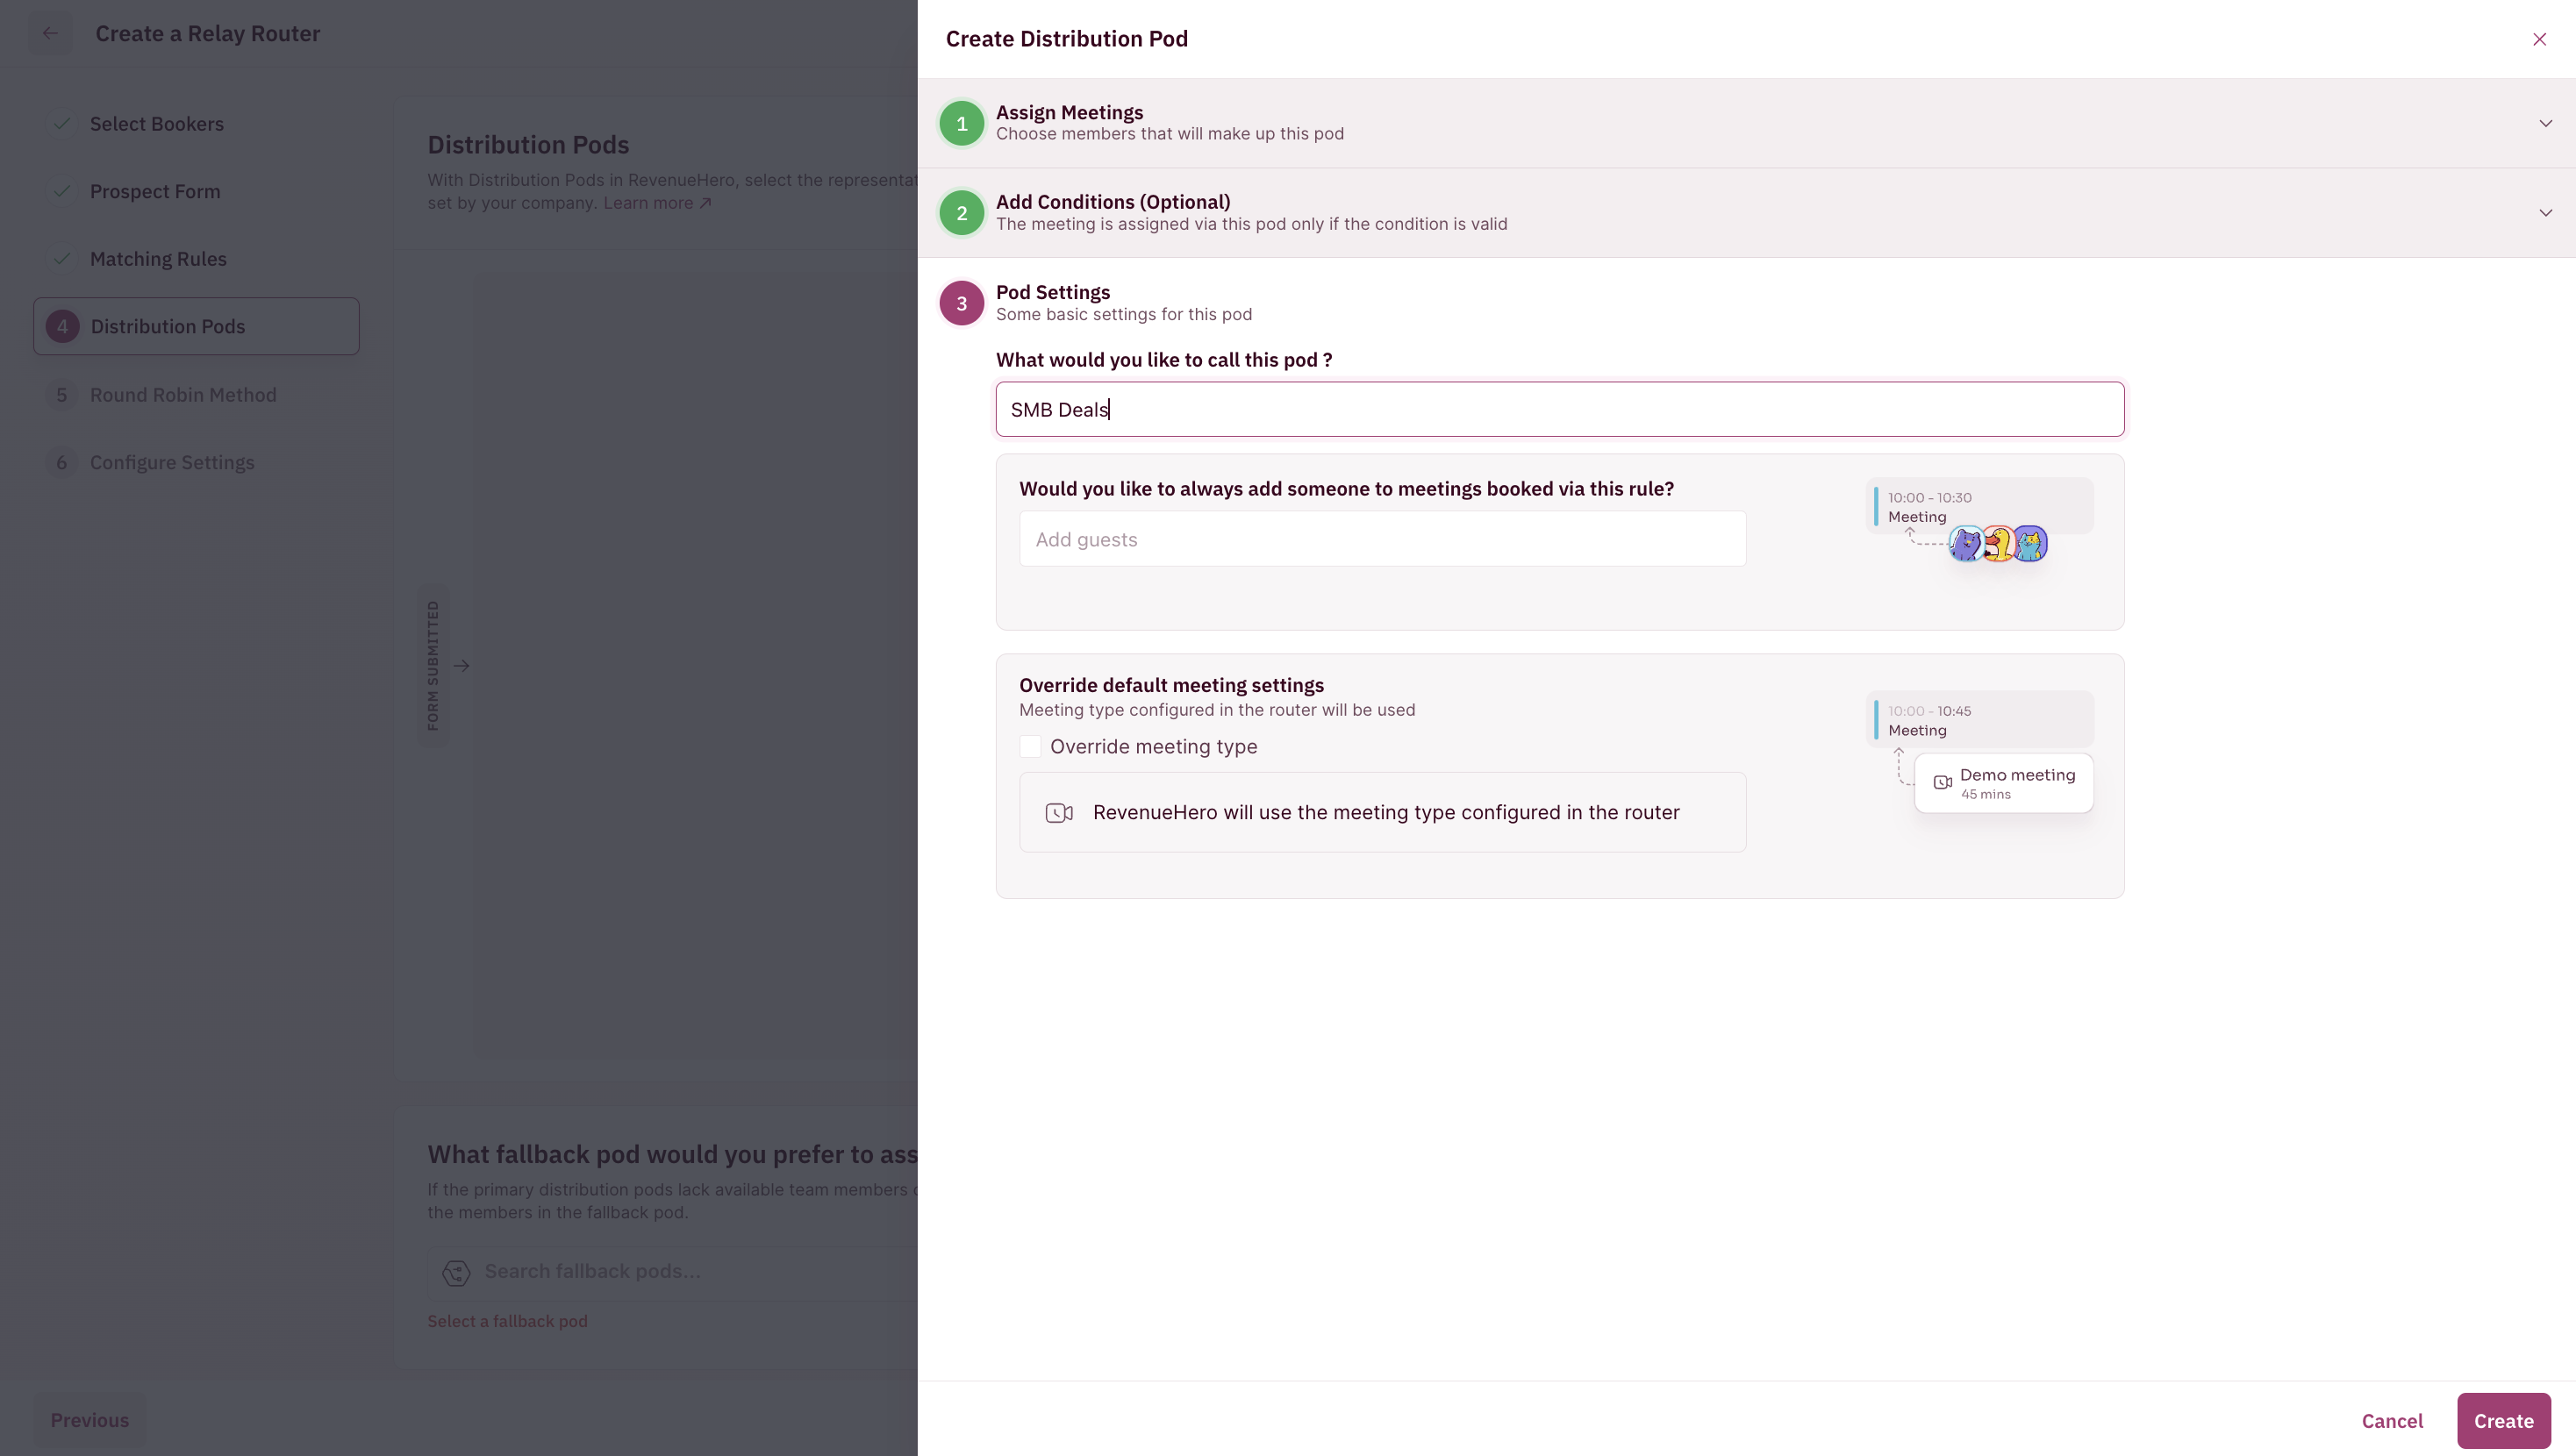
- You have the option to choose if you want to update the account owner. Once you’re done, click “Save”.
- You’ll also be required to select a “Fallback Distribution Pod”, in the event the existing pod selected does not match. This means if there is no team member from the existing pod who is available in the slots you are looking for or does not fulfill your set logic, you need to have a fallback distribution pod to whom the meeting can be assigned.
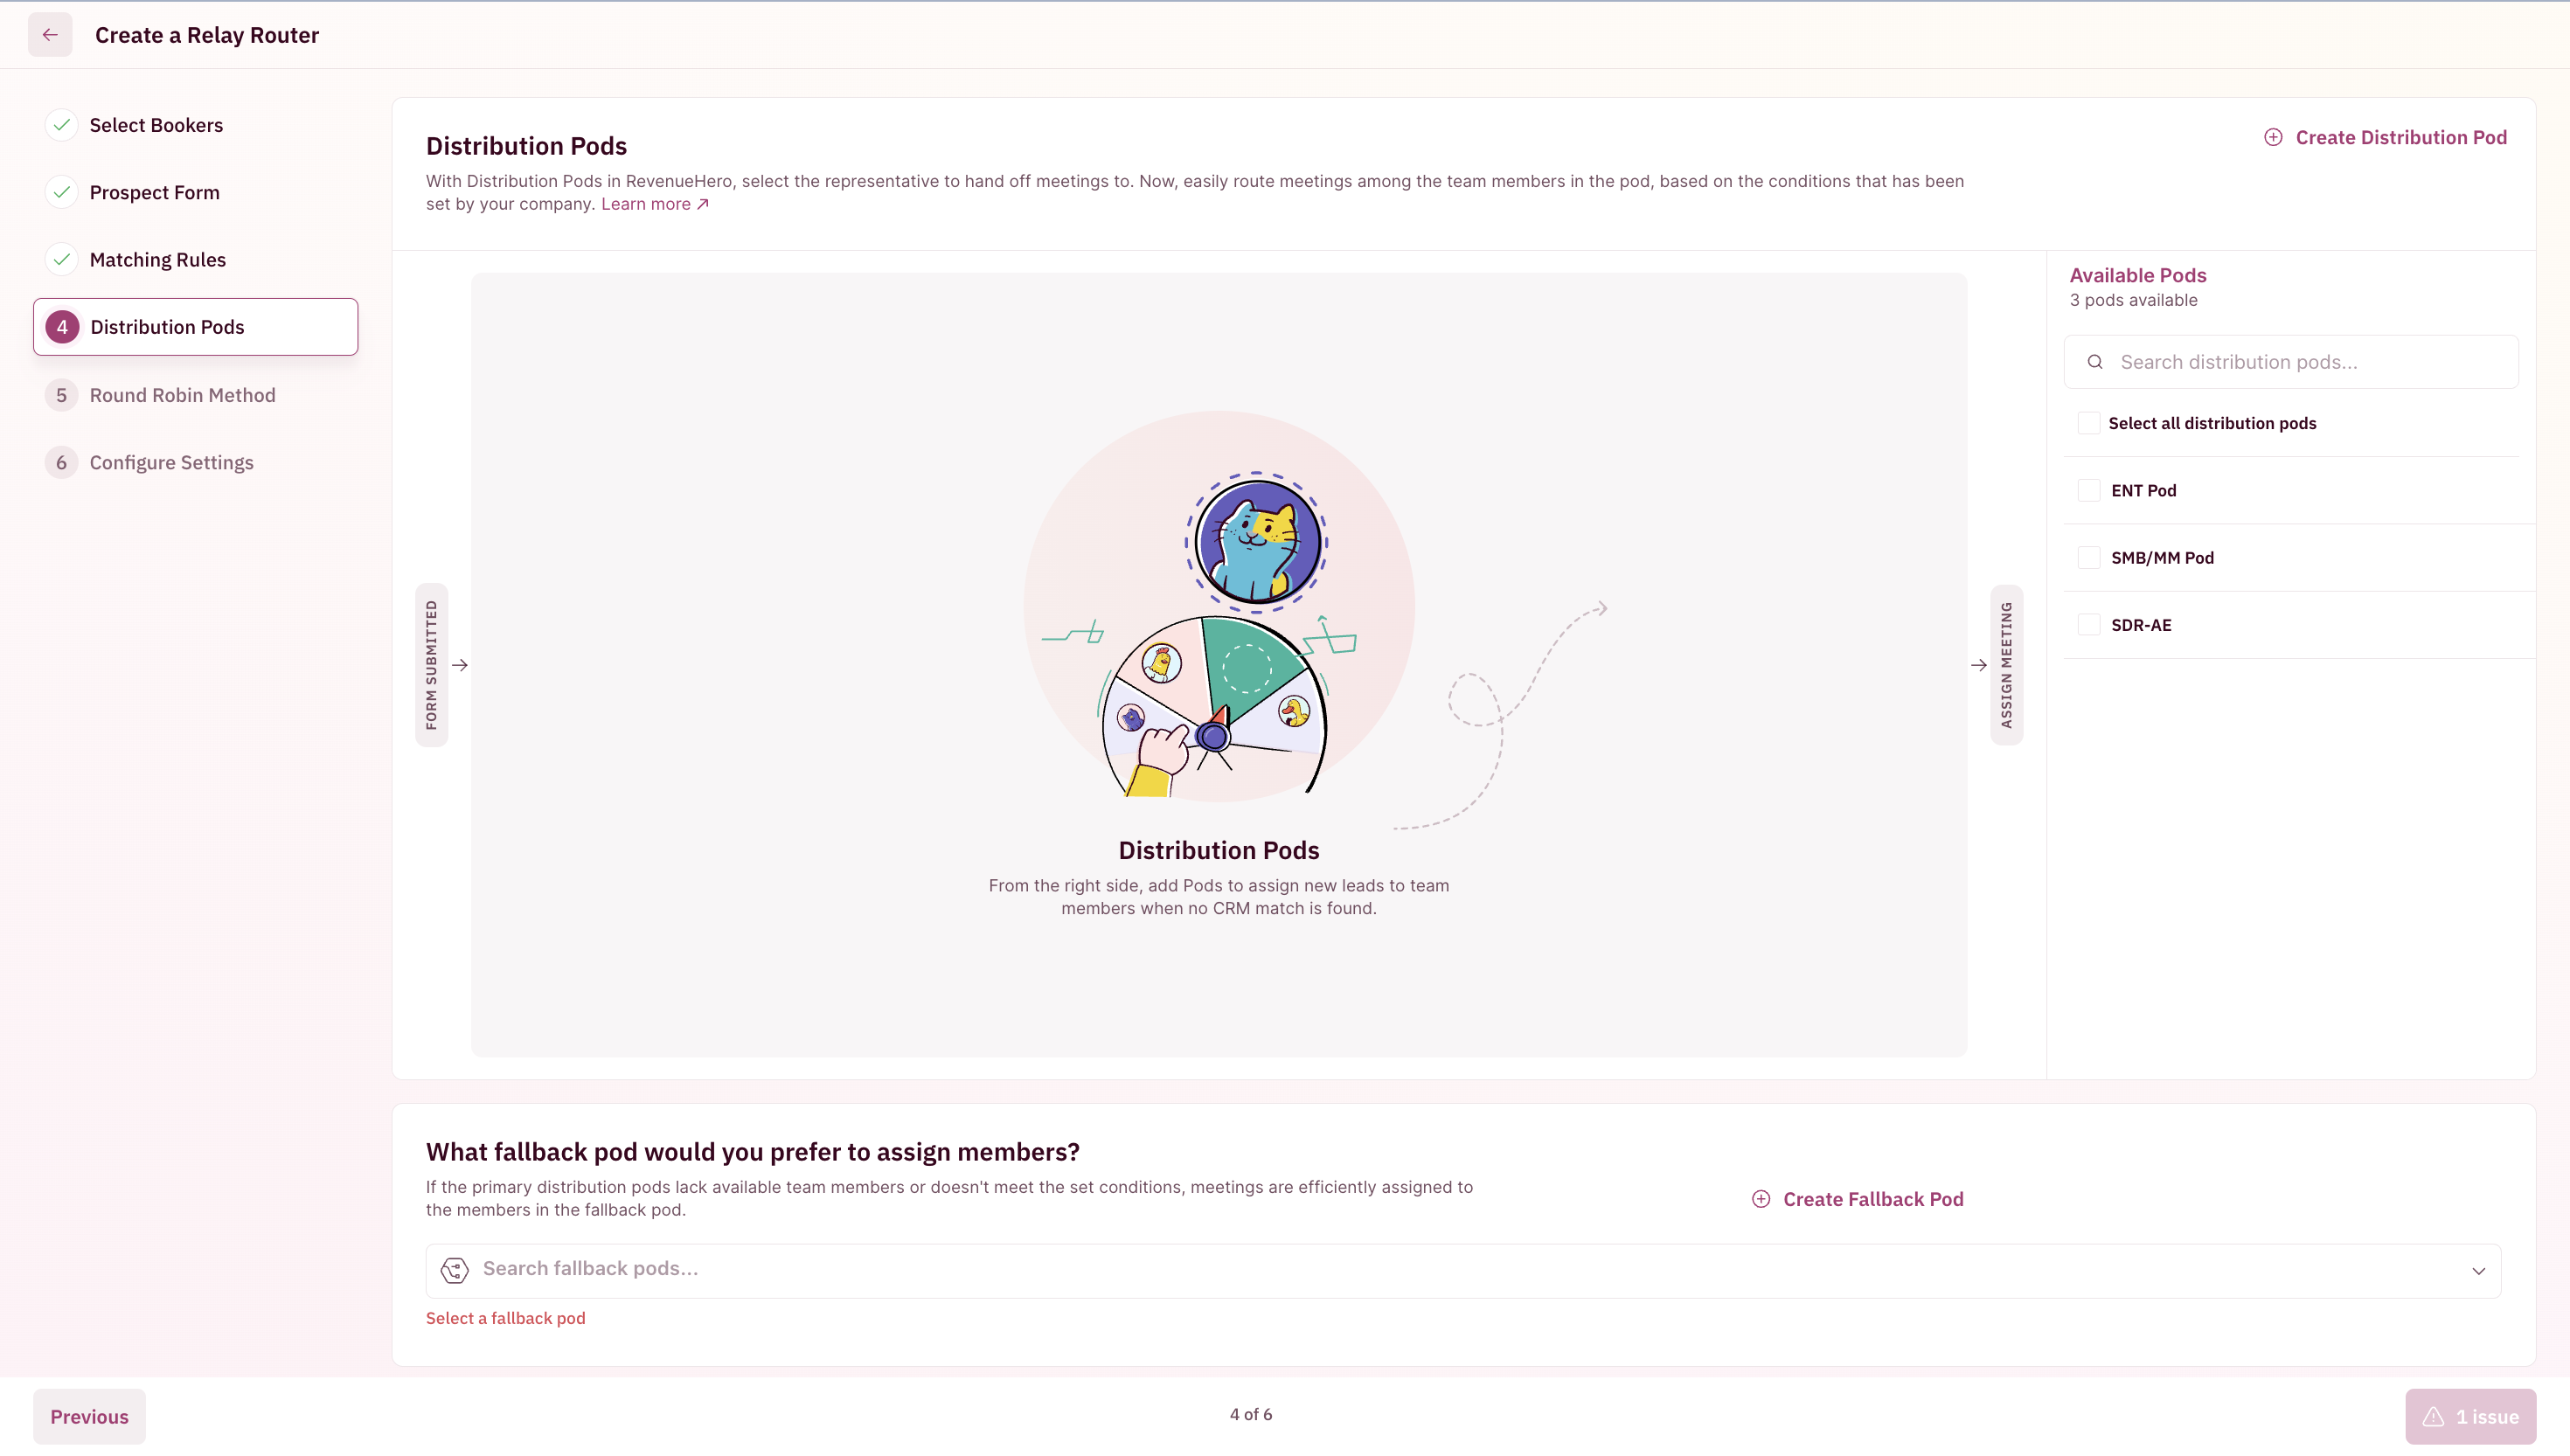
- Click “Select Distribution Pod” to choose your Fallback distribution pod.
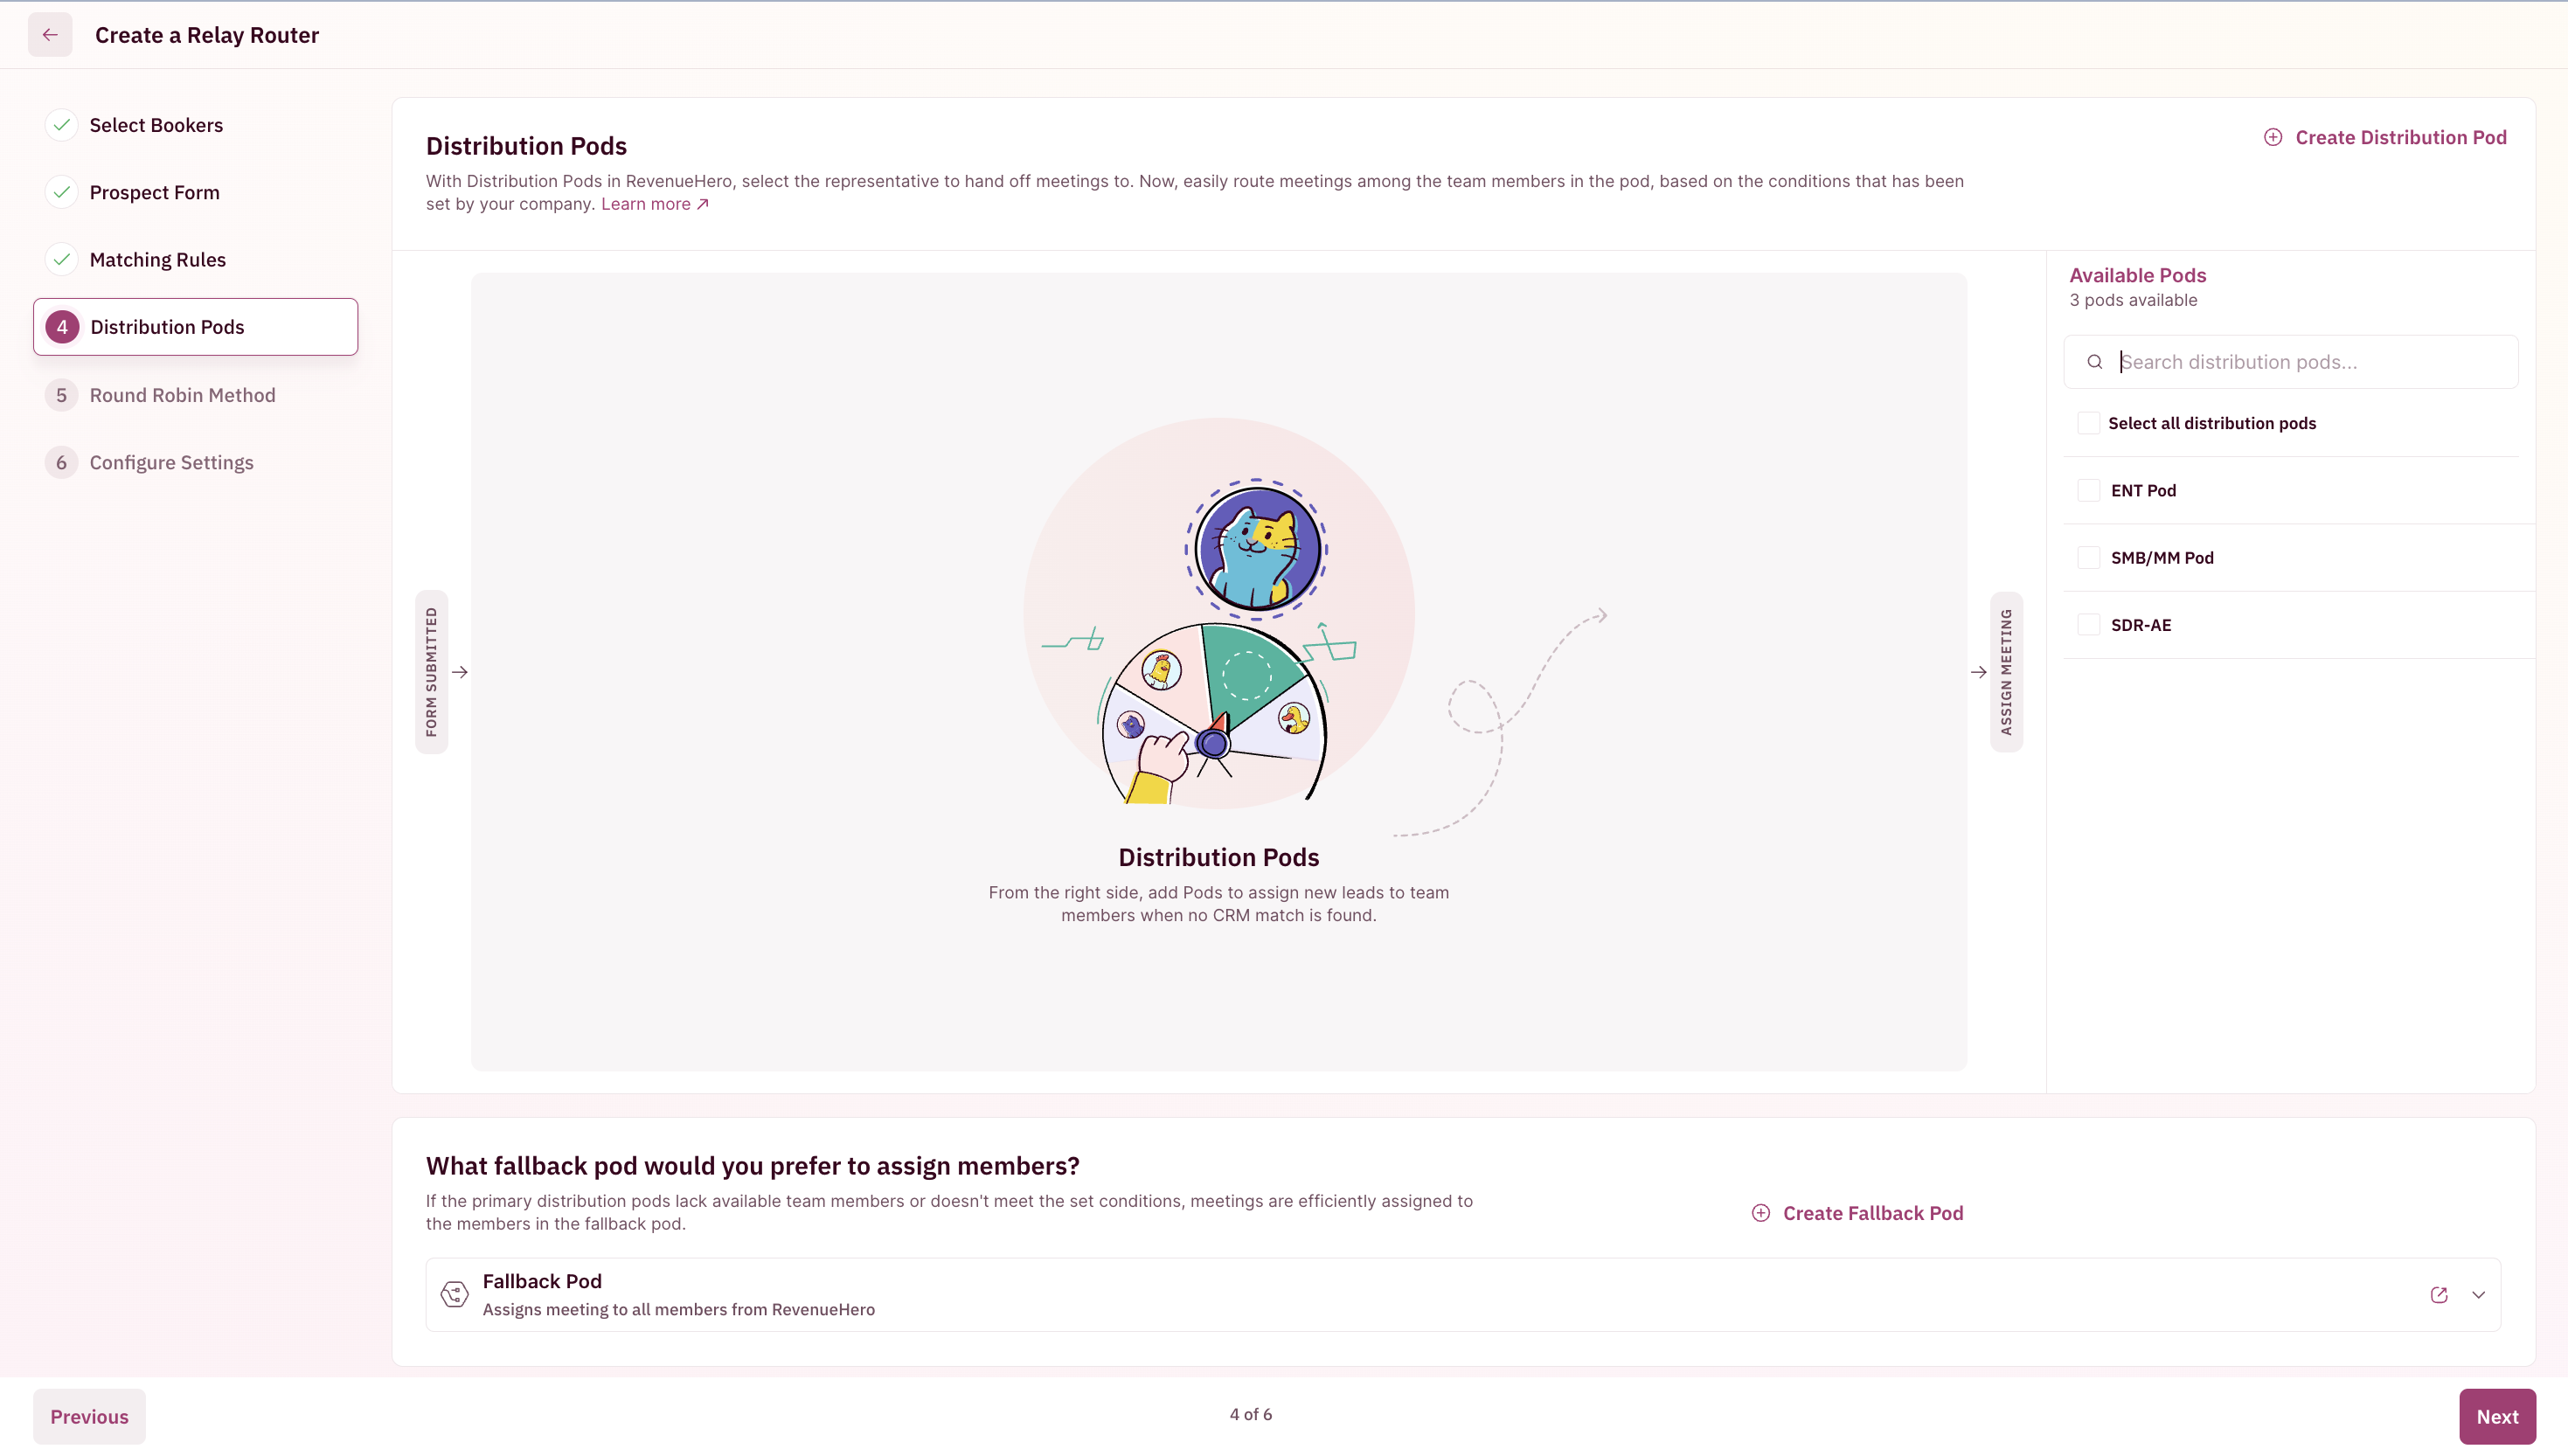
- And click “Next”.
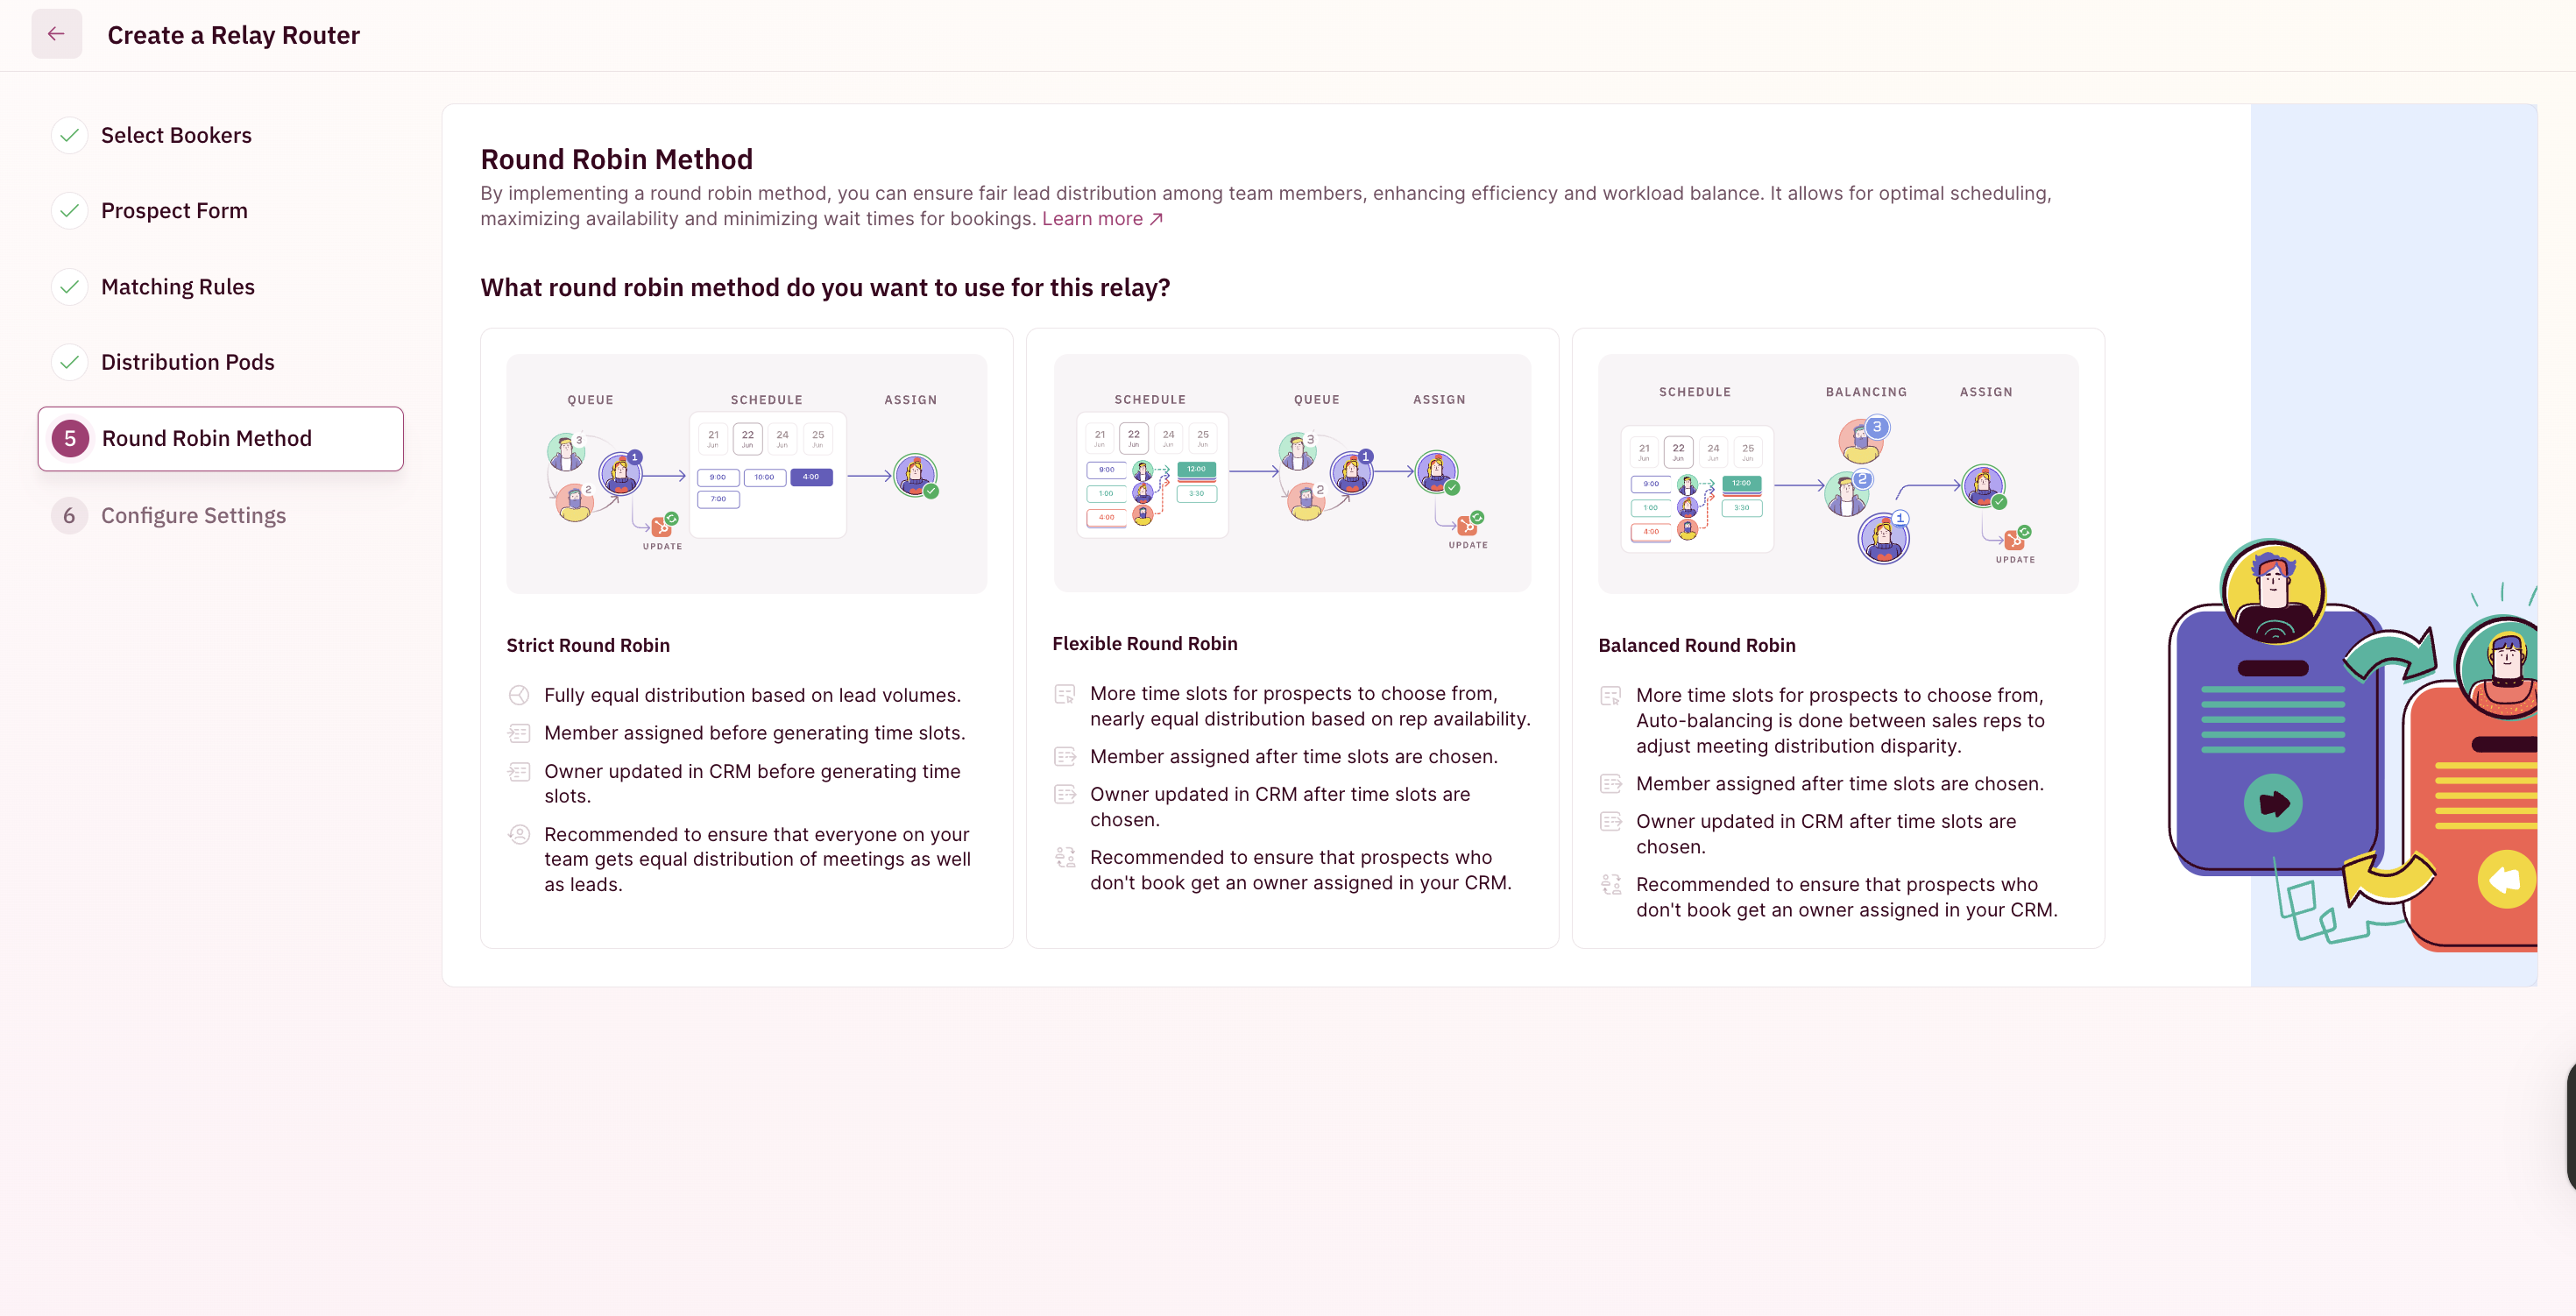
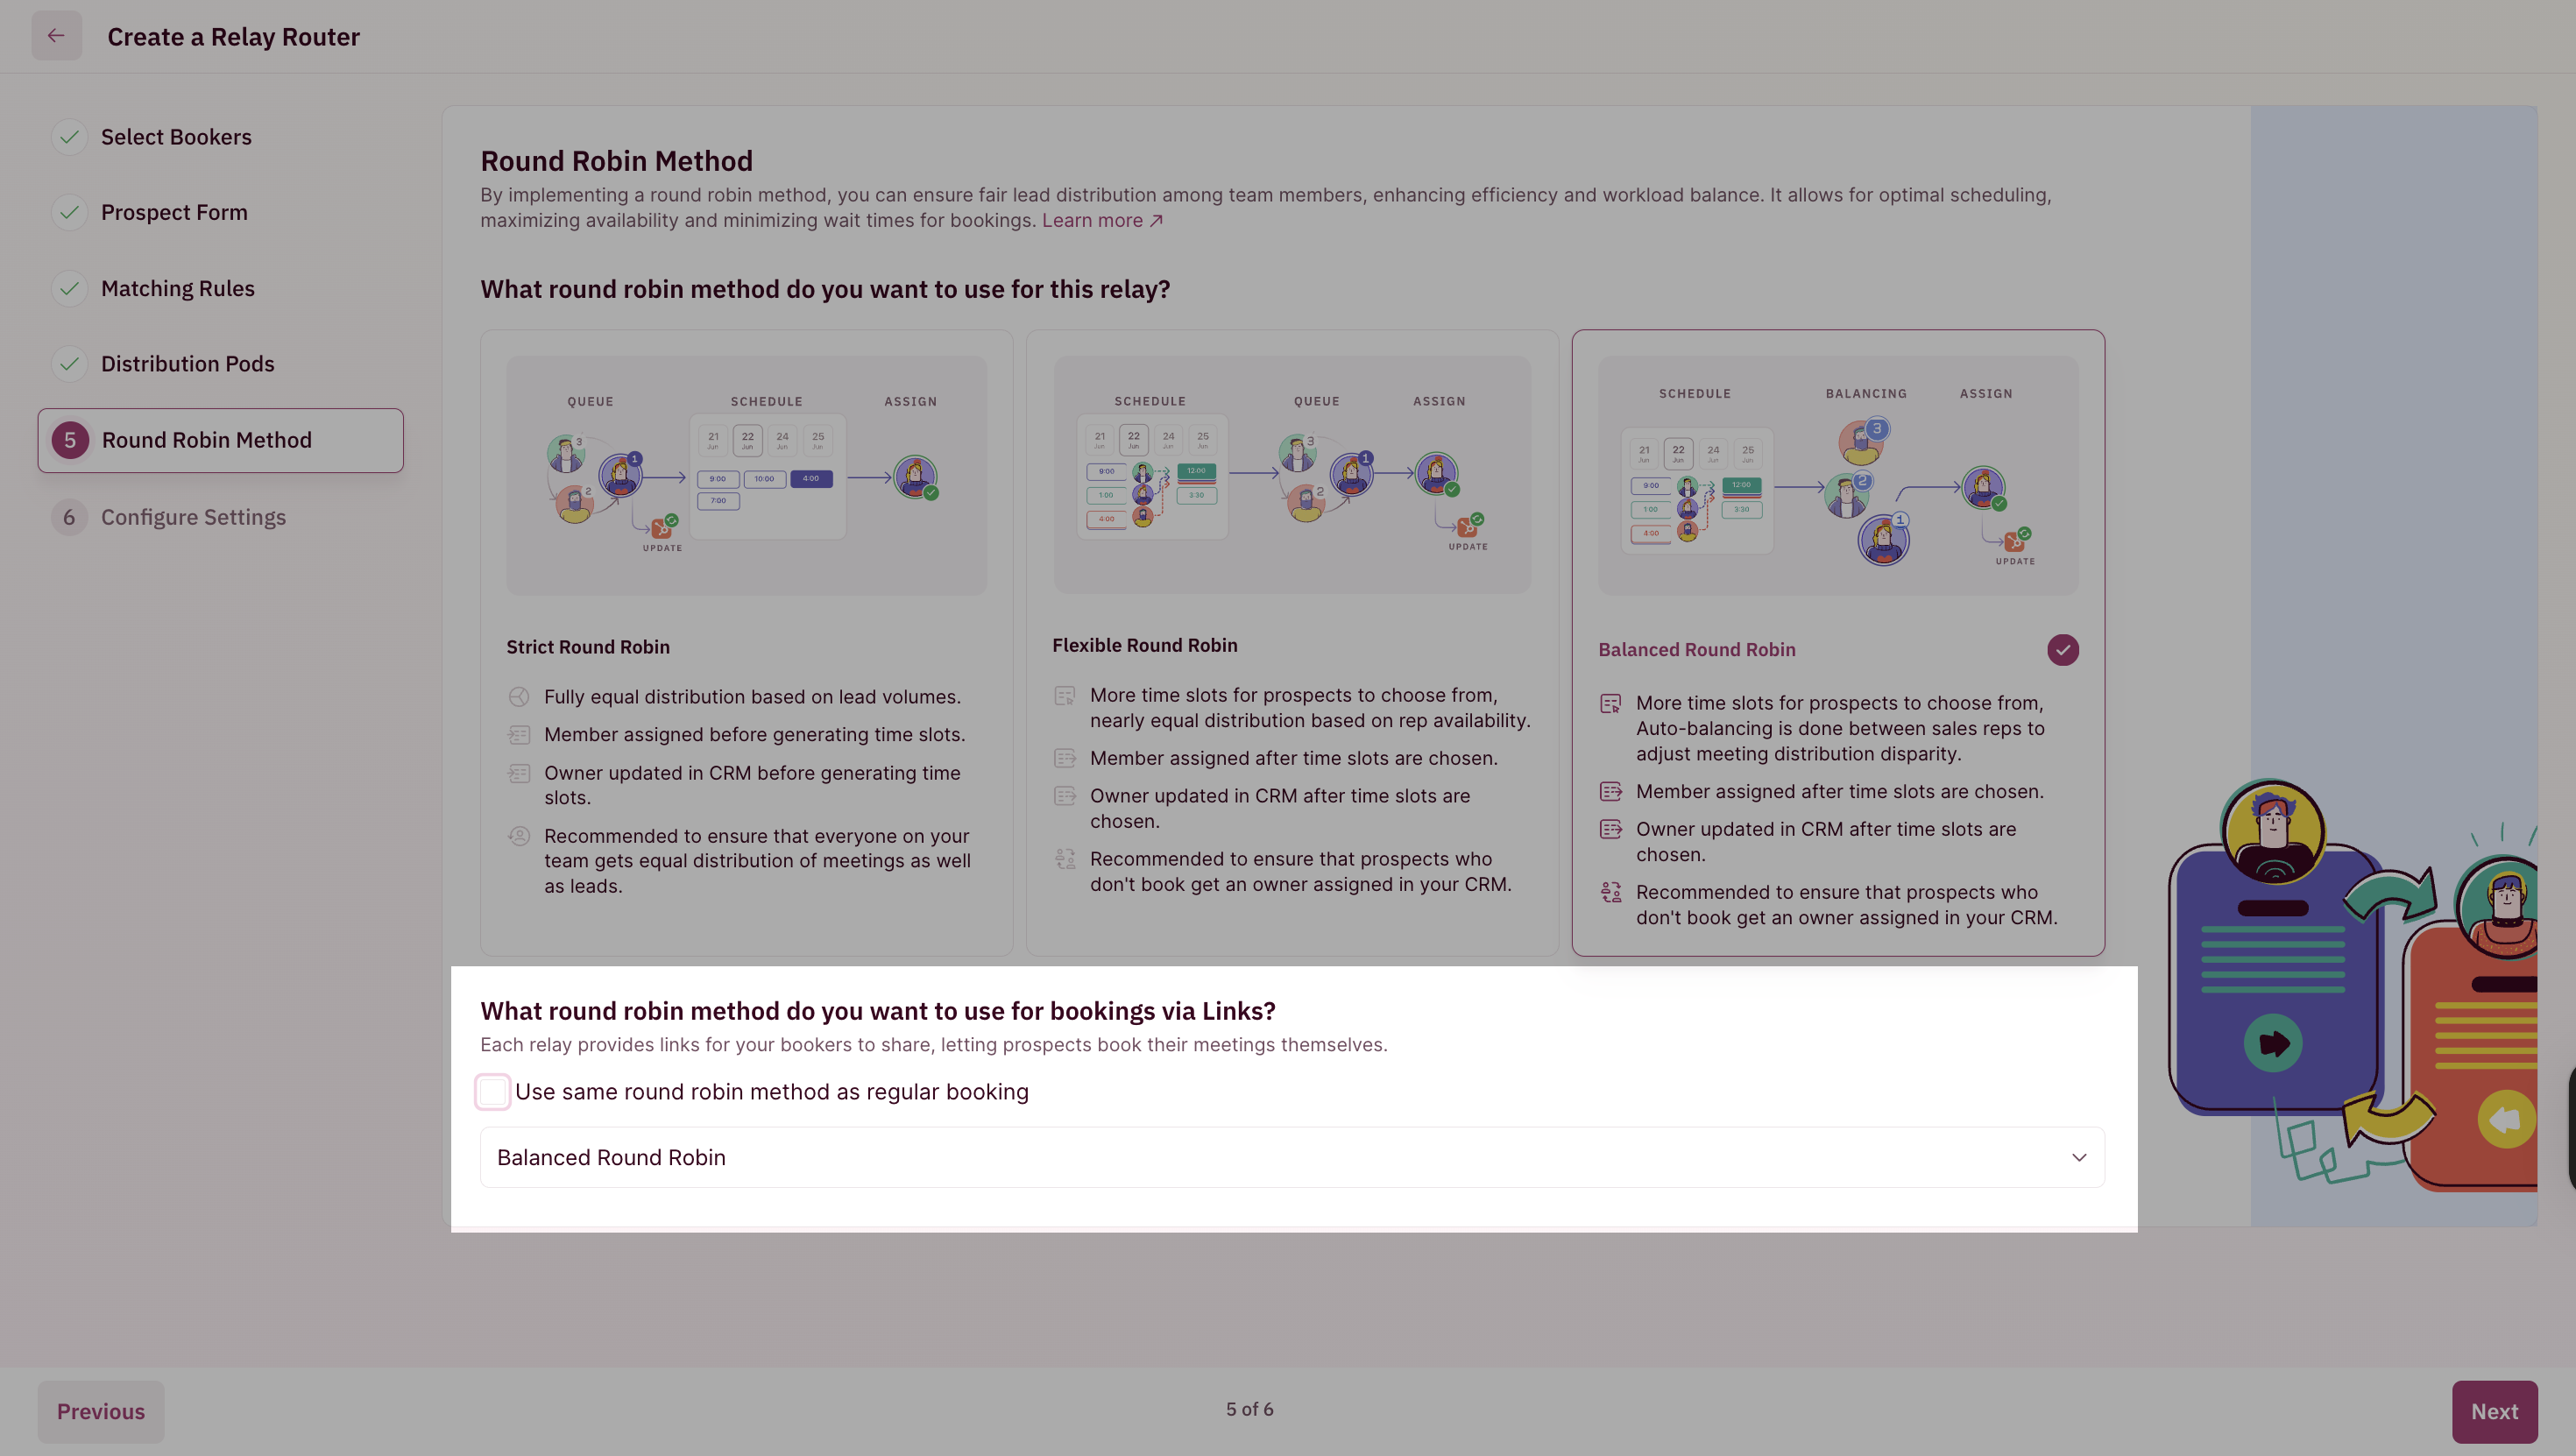
Round Robin Method
In this step, you can determine the round robin method that will be applied to the relay. There are two options to choose from:- Strict Round Robin : Fully equal distribution based on lead volumes. Booker will see the calendar of the first person in the queue.
- Flexible Round Robin : More time slots for bookers/prospects to choose from. Booker will see combined availabilty of everyone in the queue.
- Balanced Round Robin: Ensures fair distribution while giving more booking options. Booker will see the combined calculated availability of everyone in the queue while maintaining the balance.
Configure Settings
Here are the setting you’ll need to configure: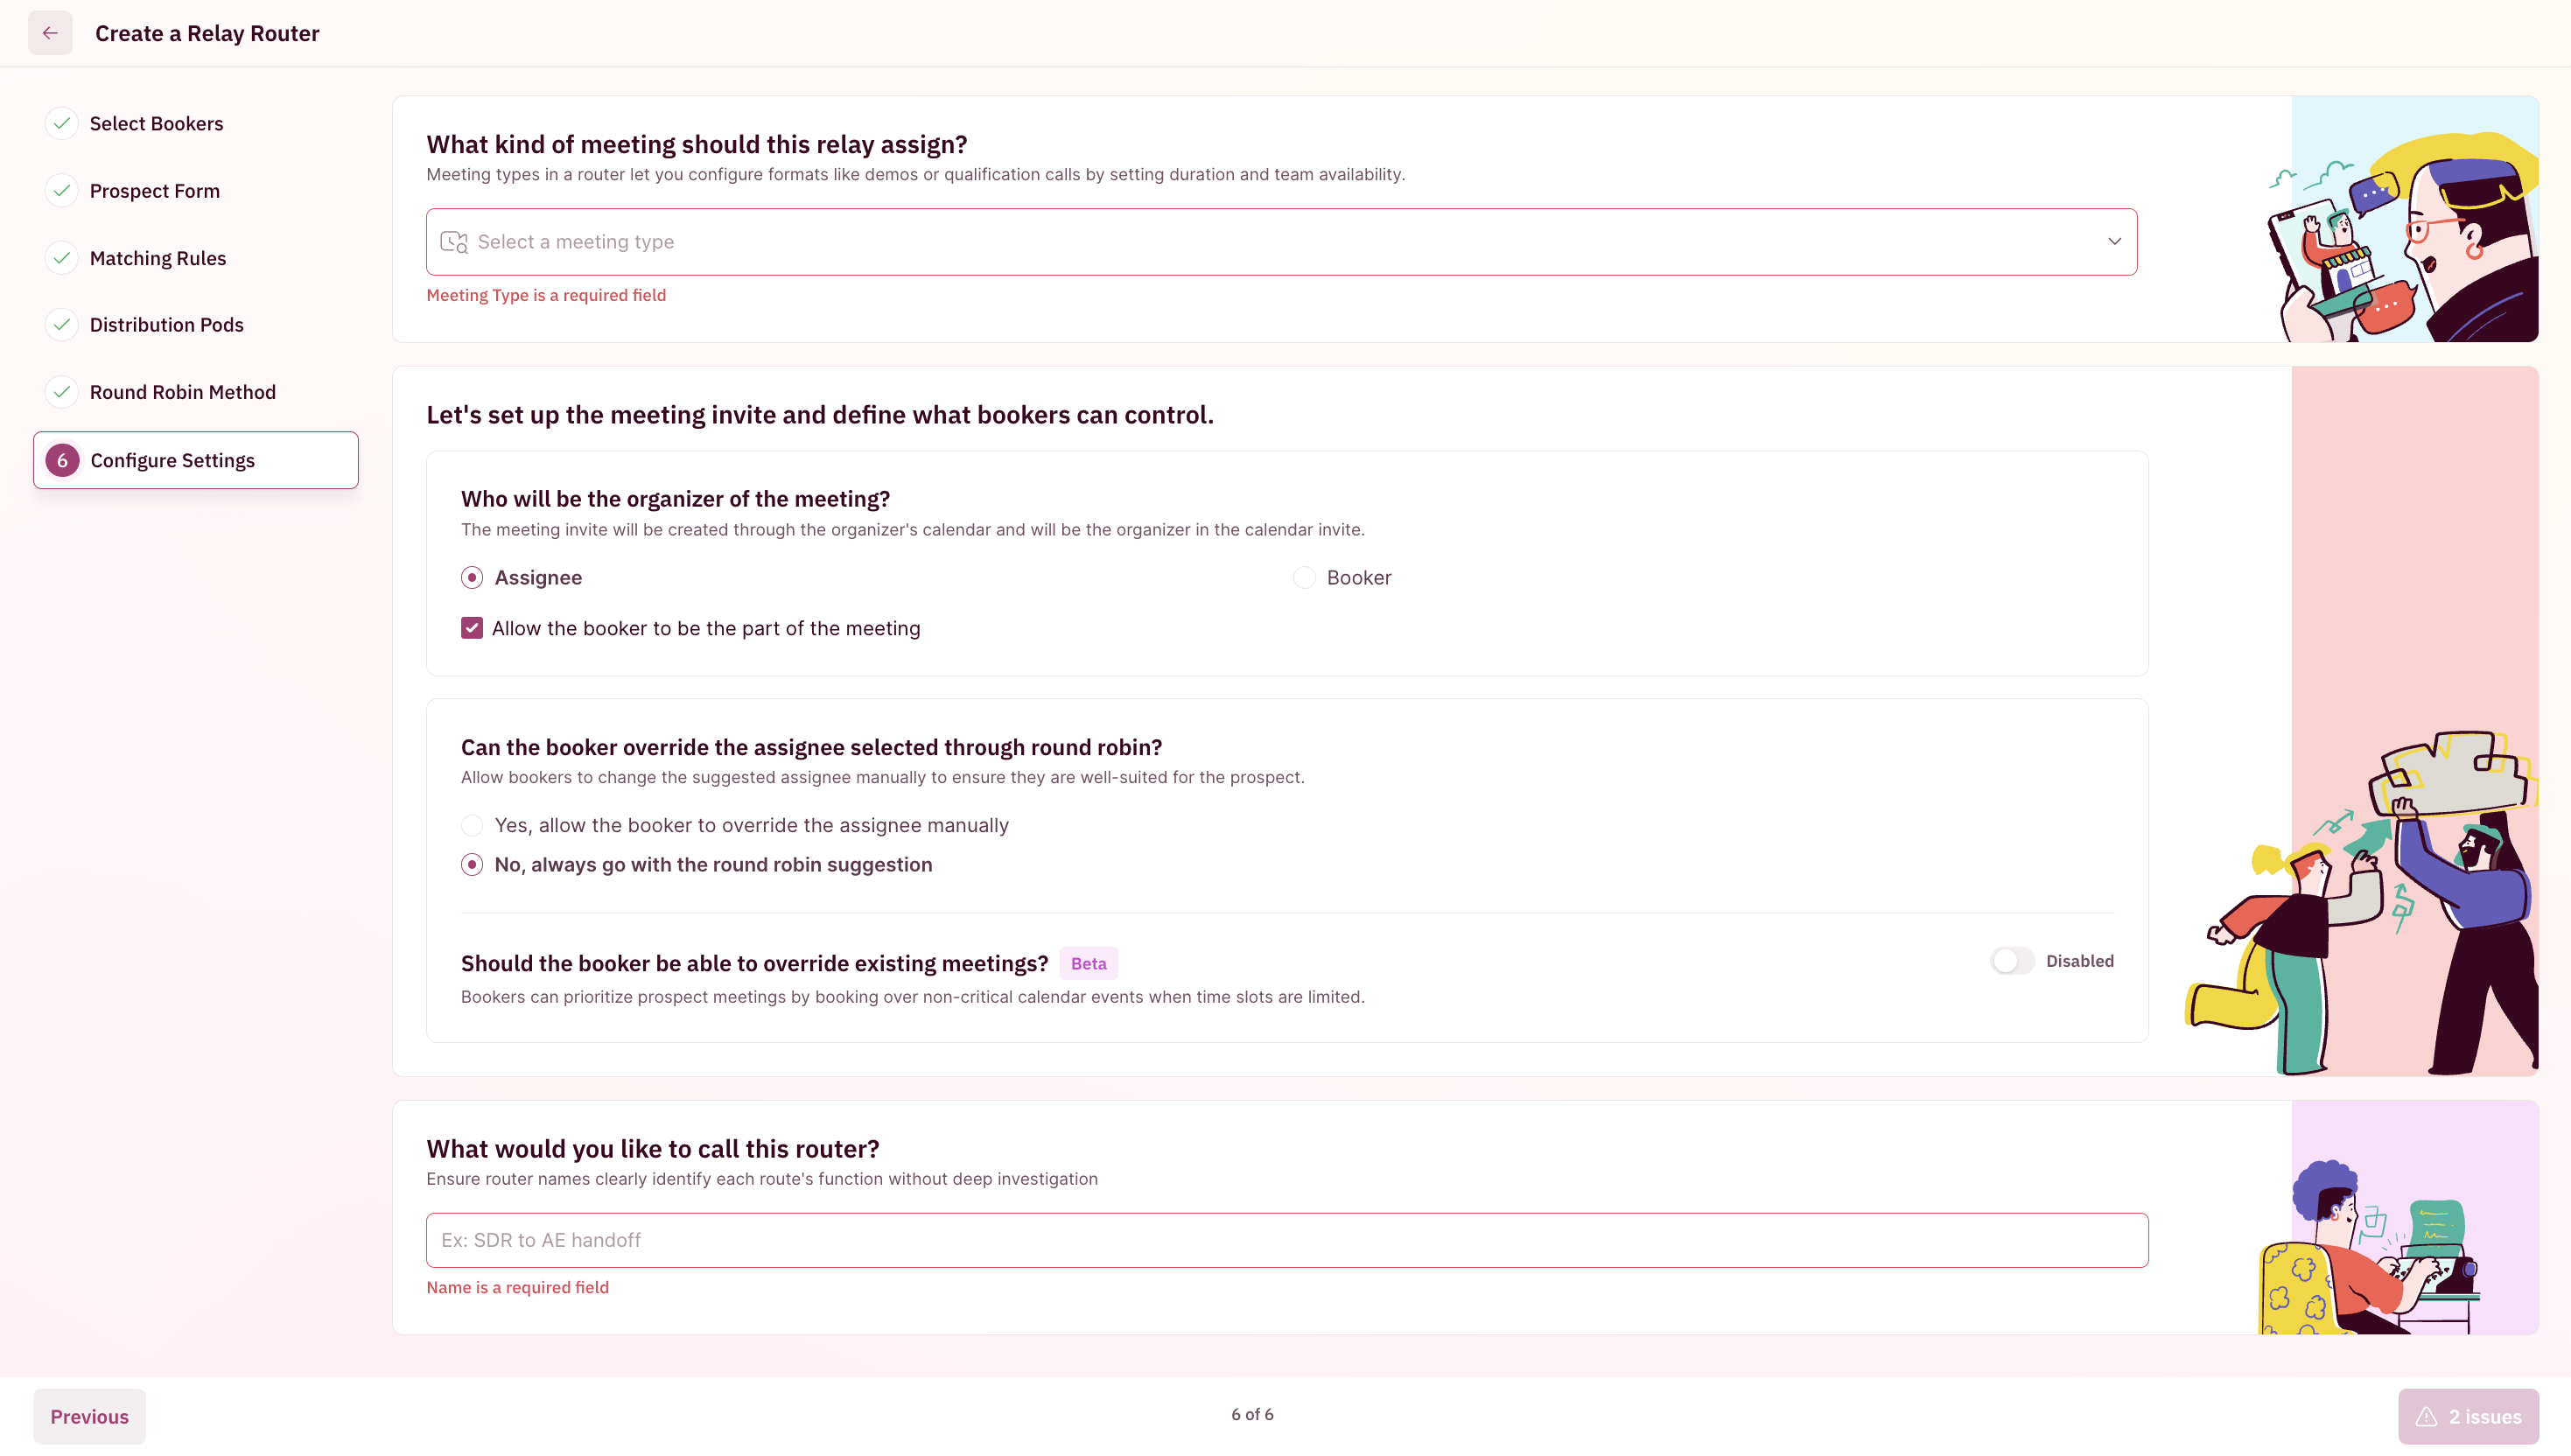
- Select Meeting Type
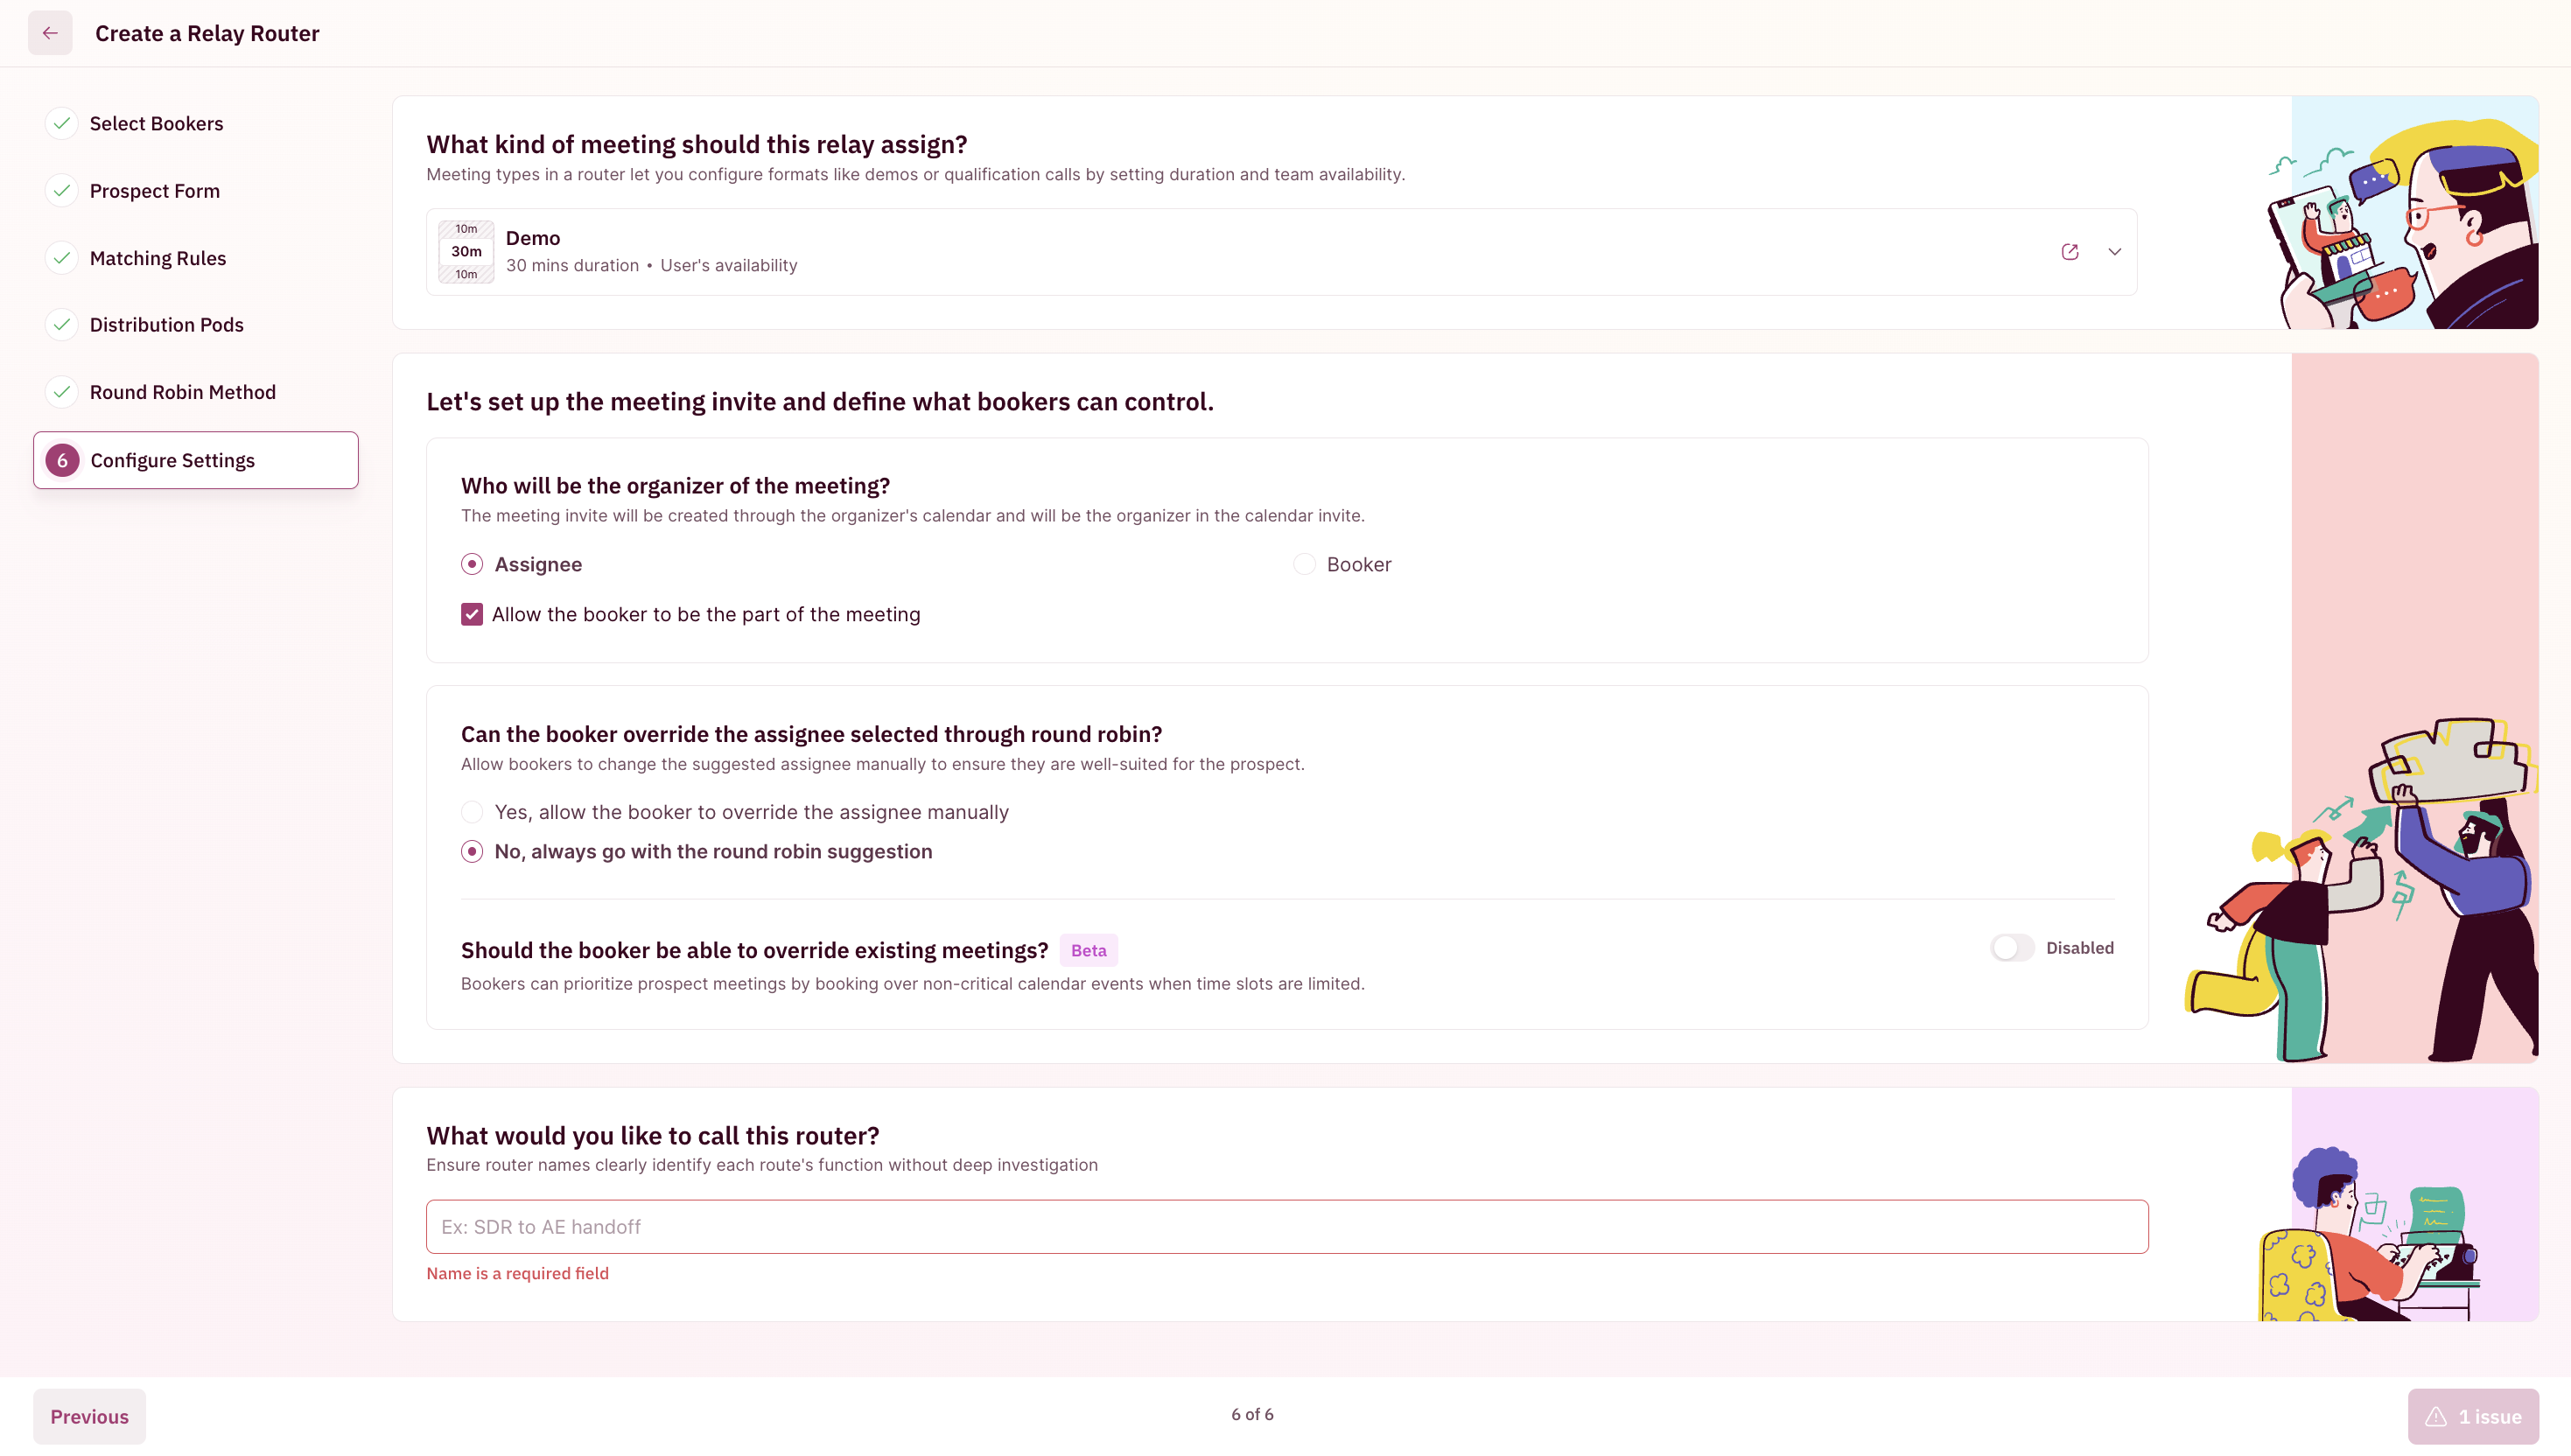
- Meeting Organizer
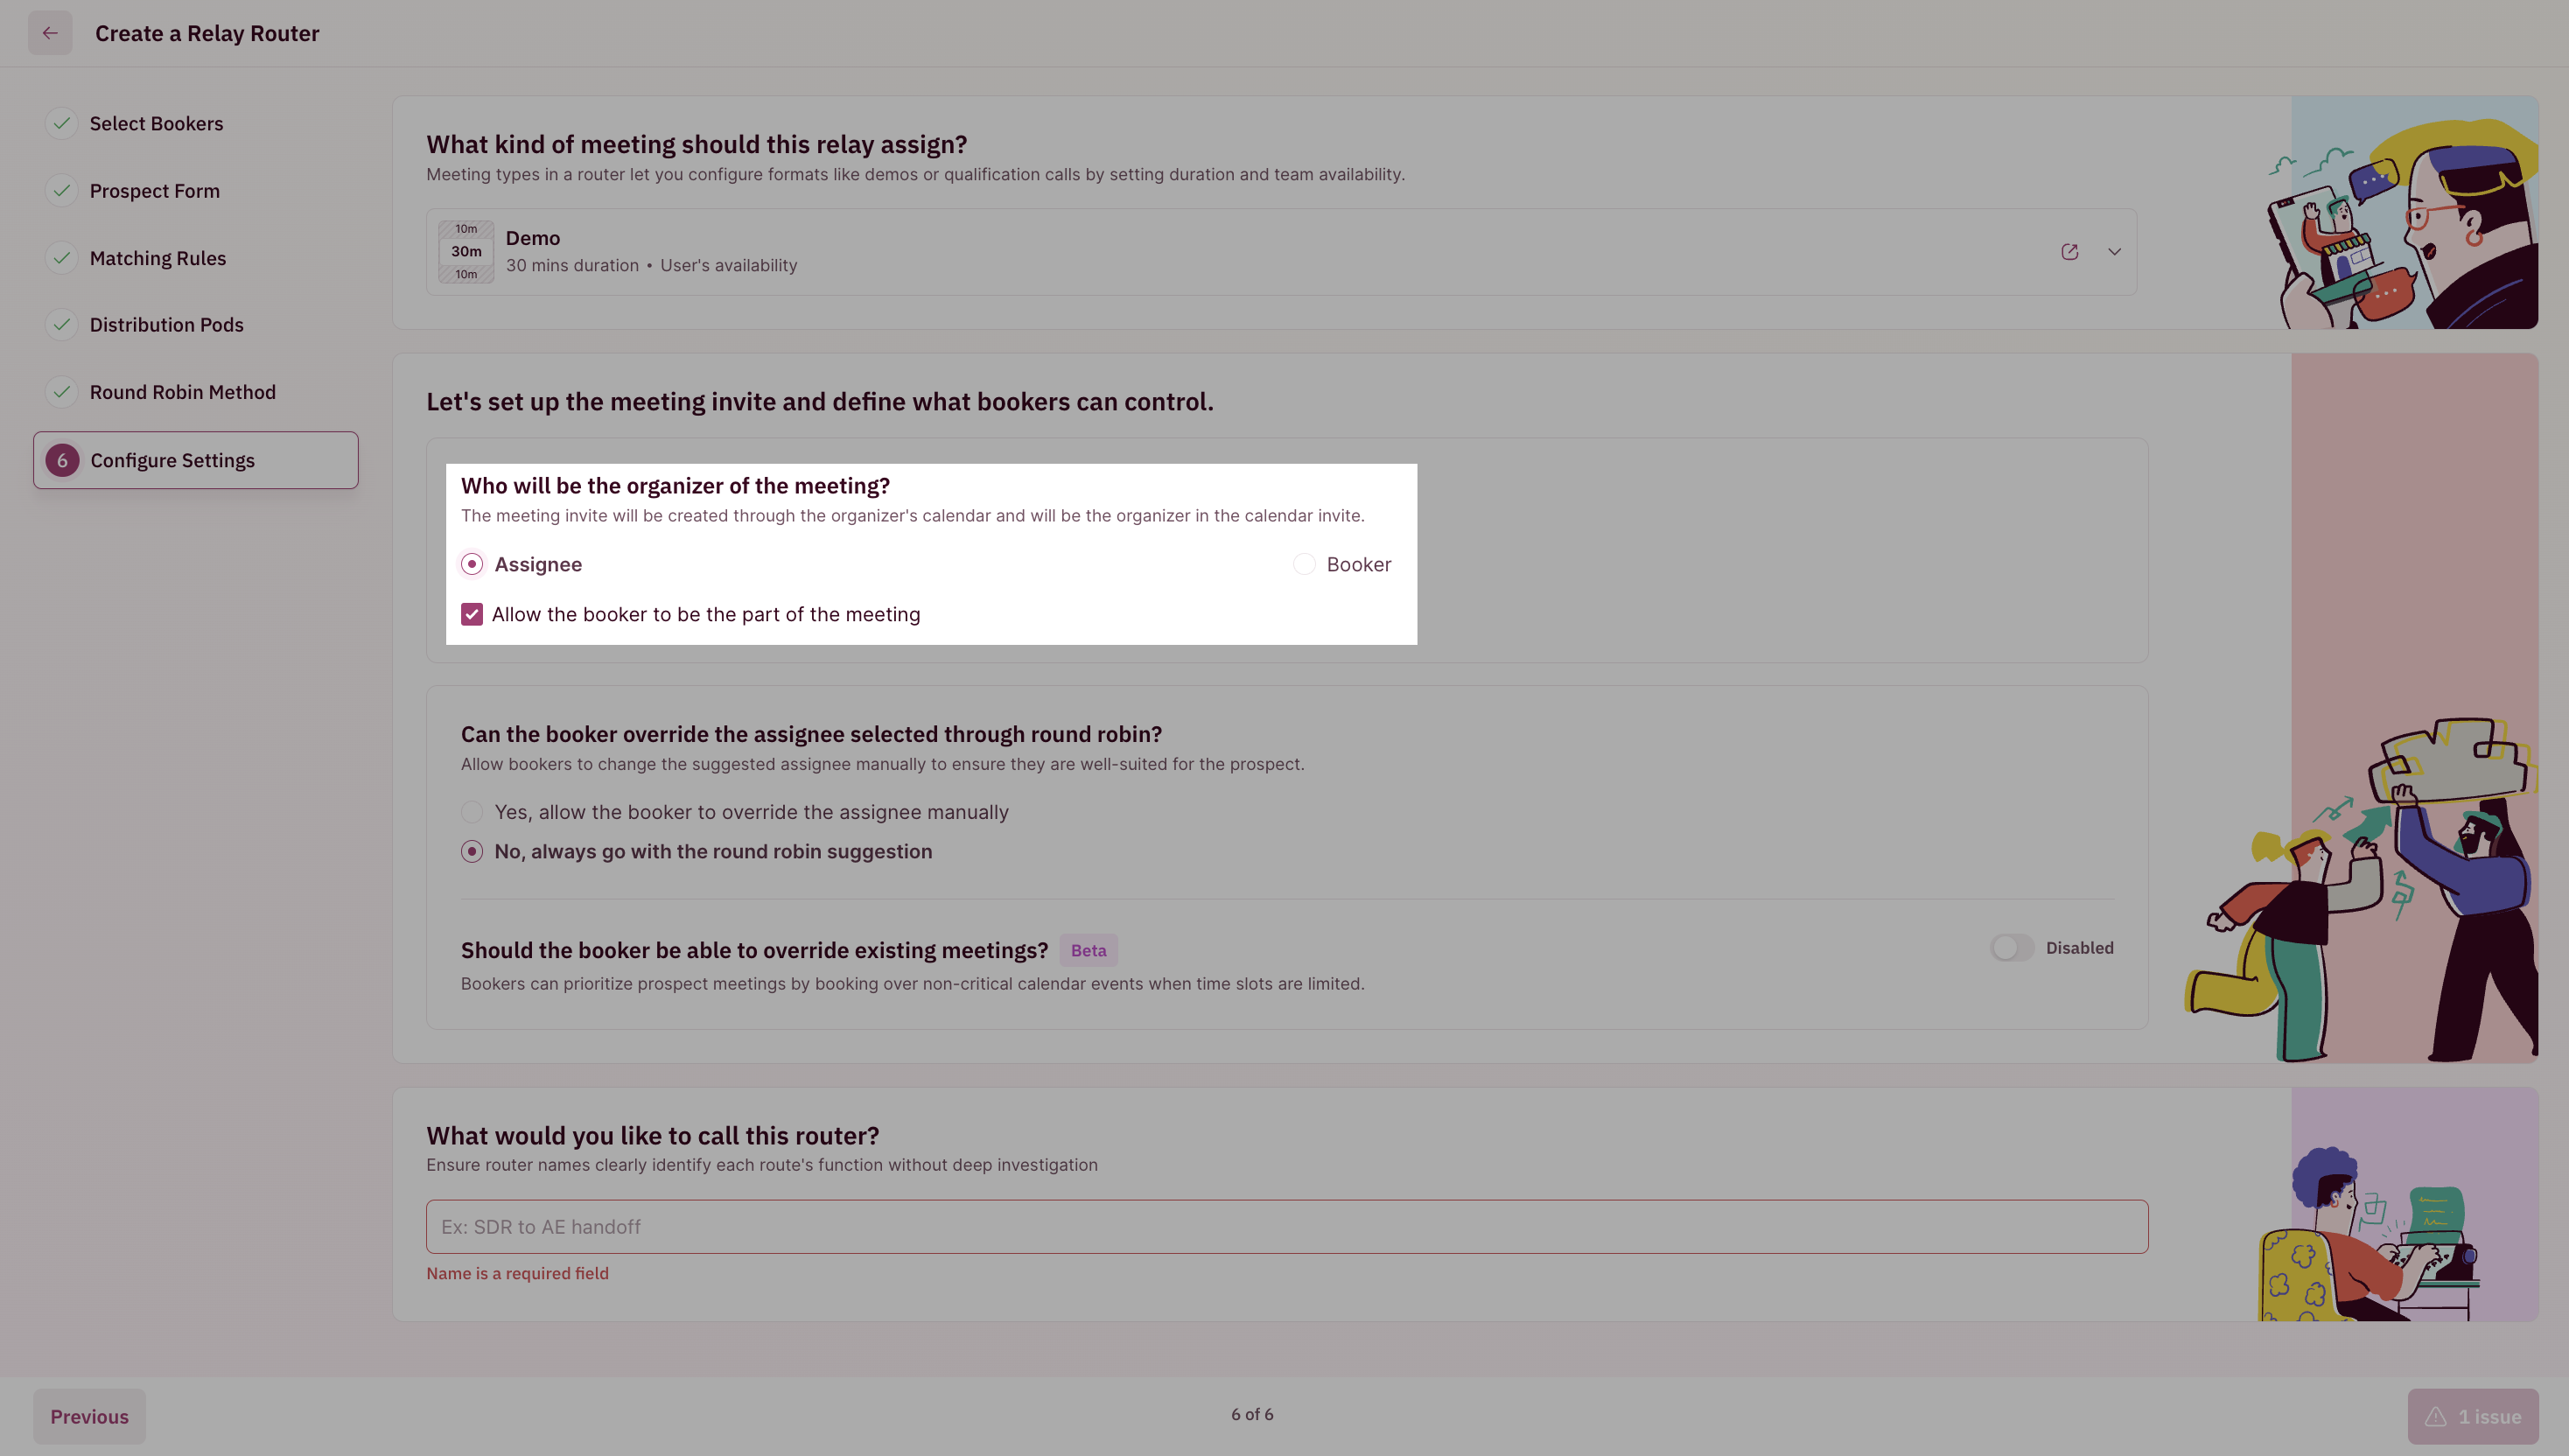
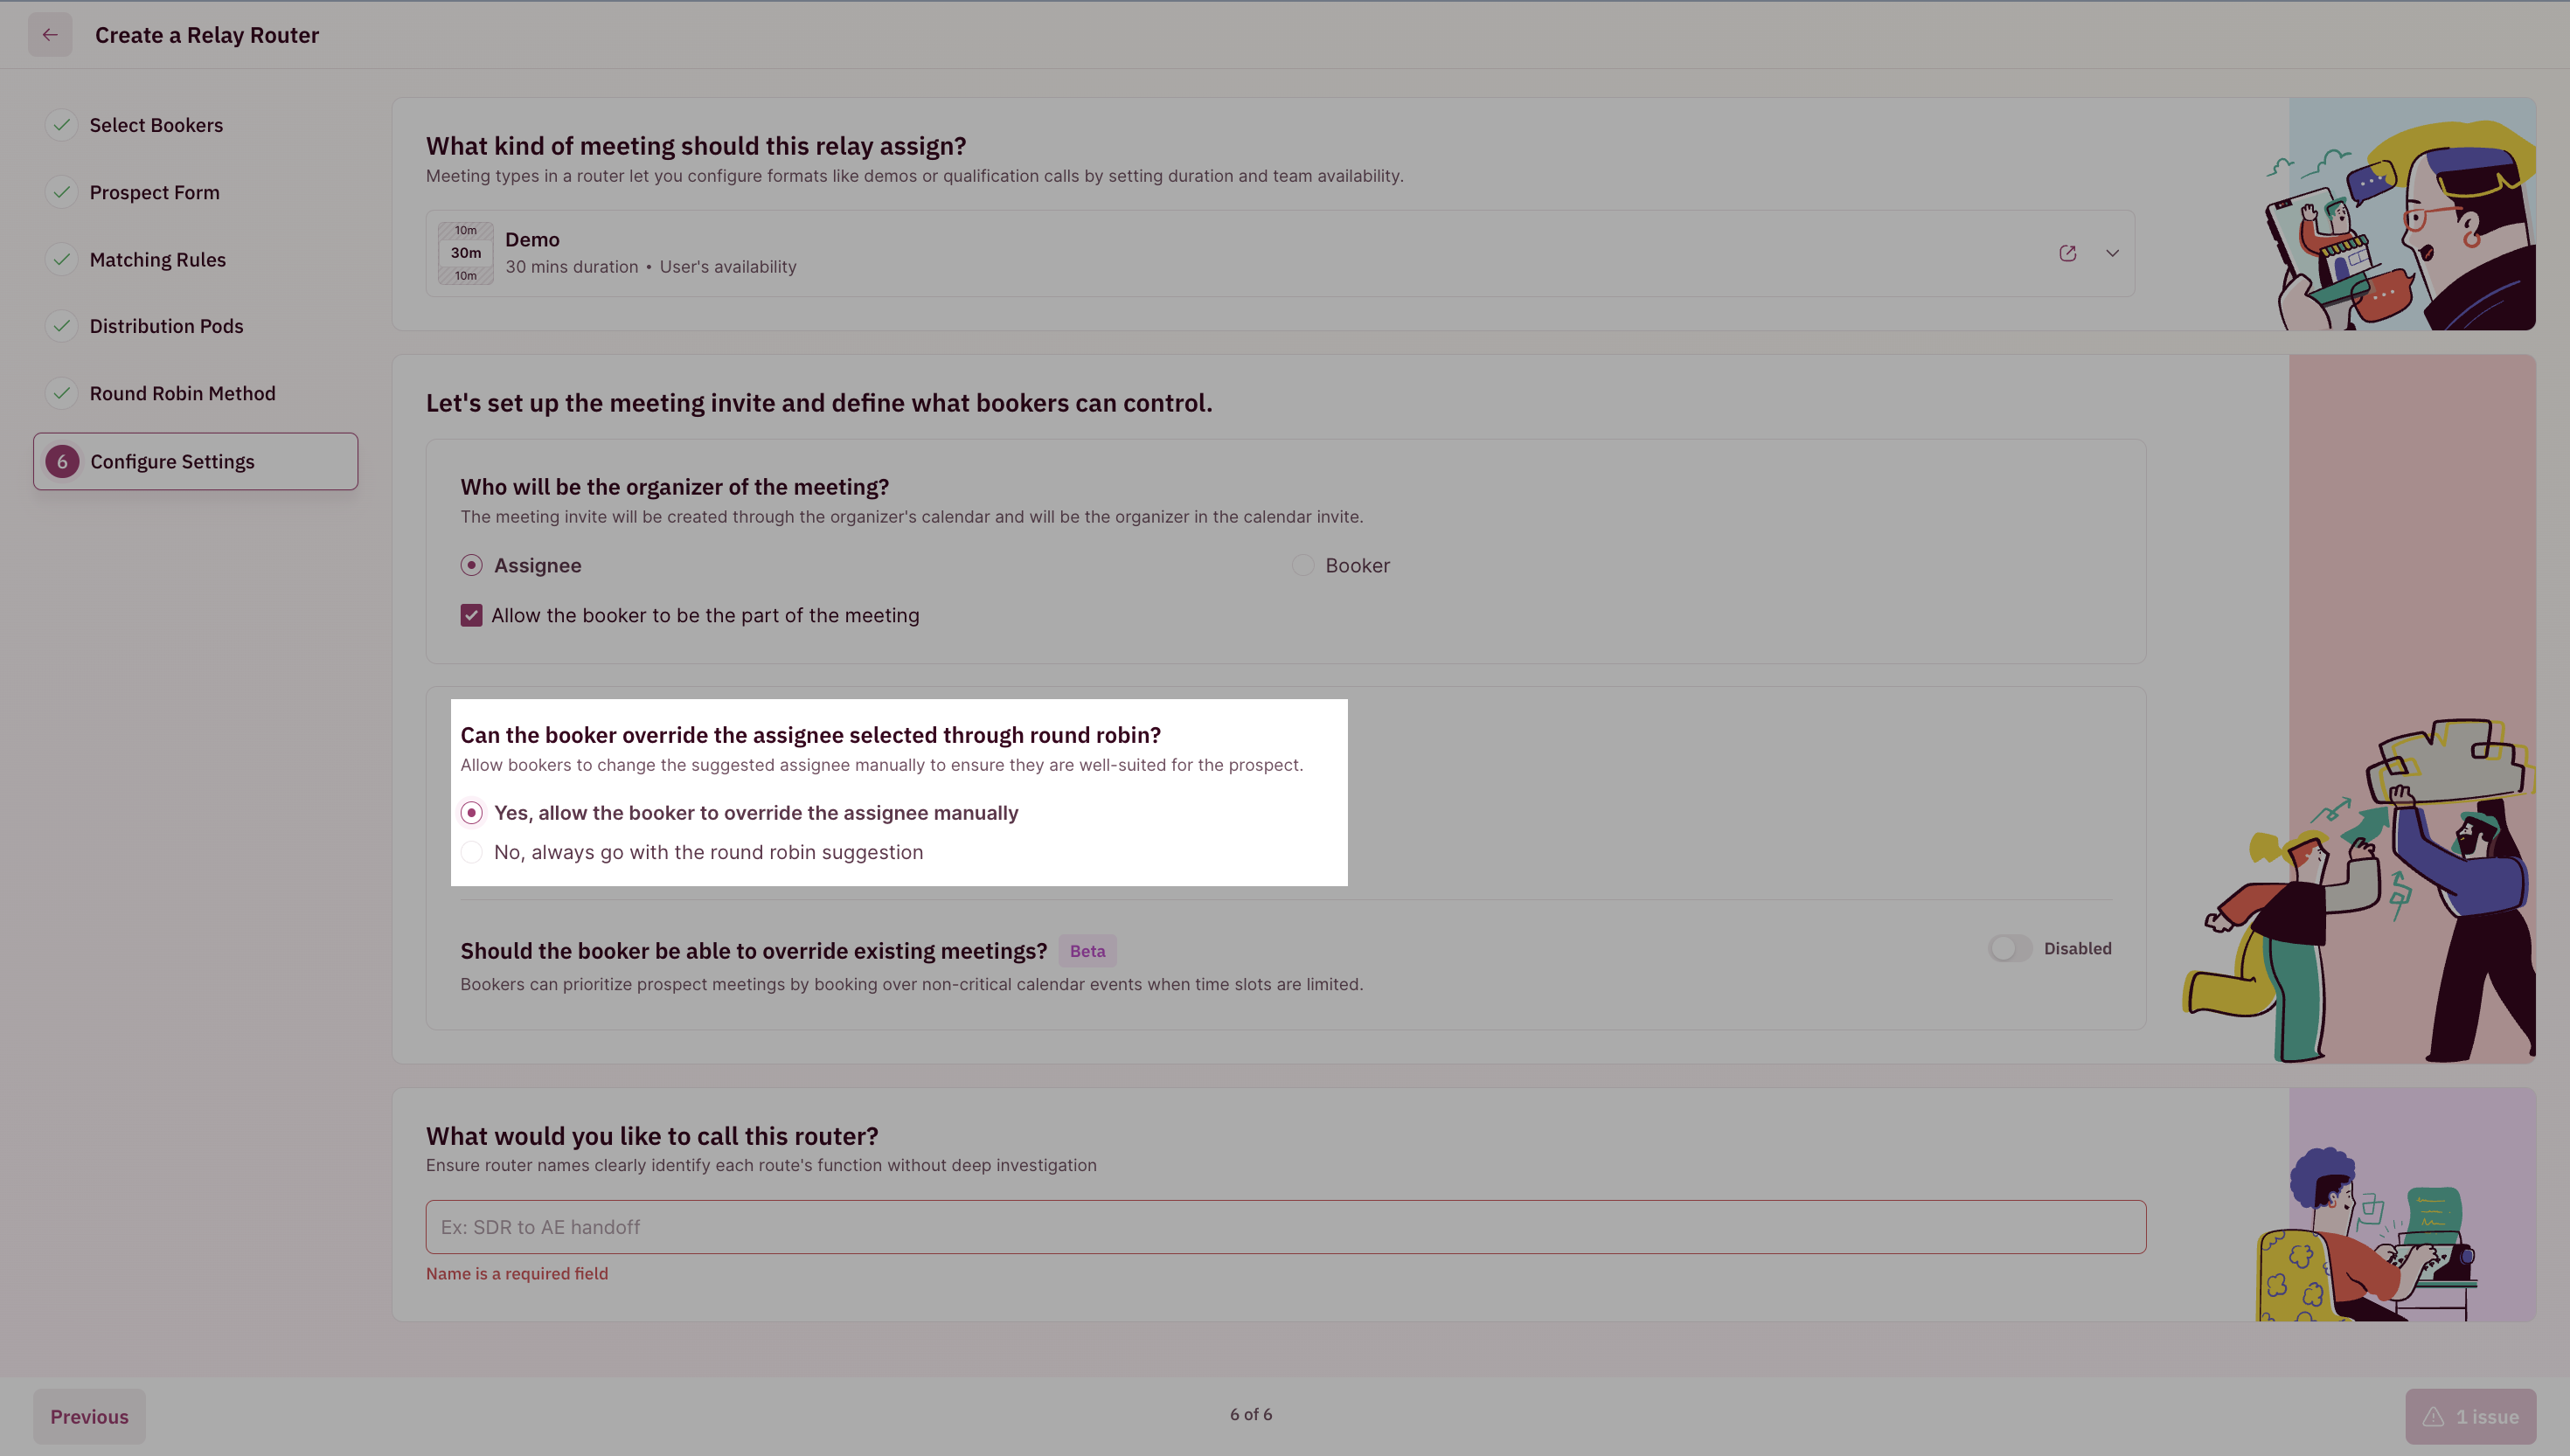
- Override Round Robin
This option is only applicable if the Relay is set to Strict Round Robin.
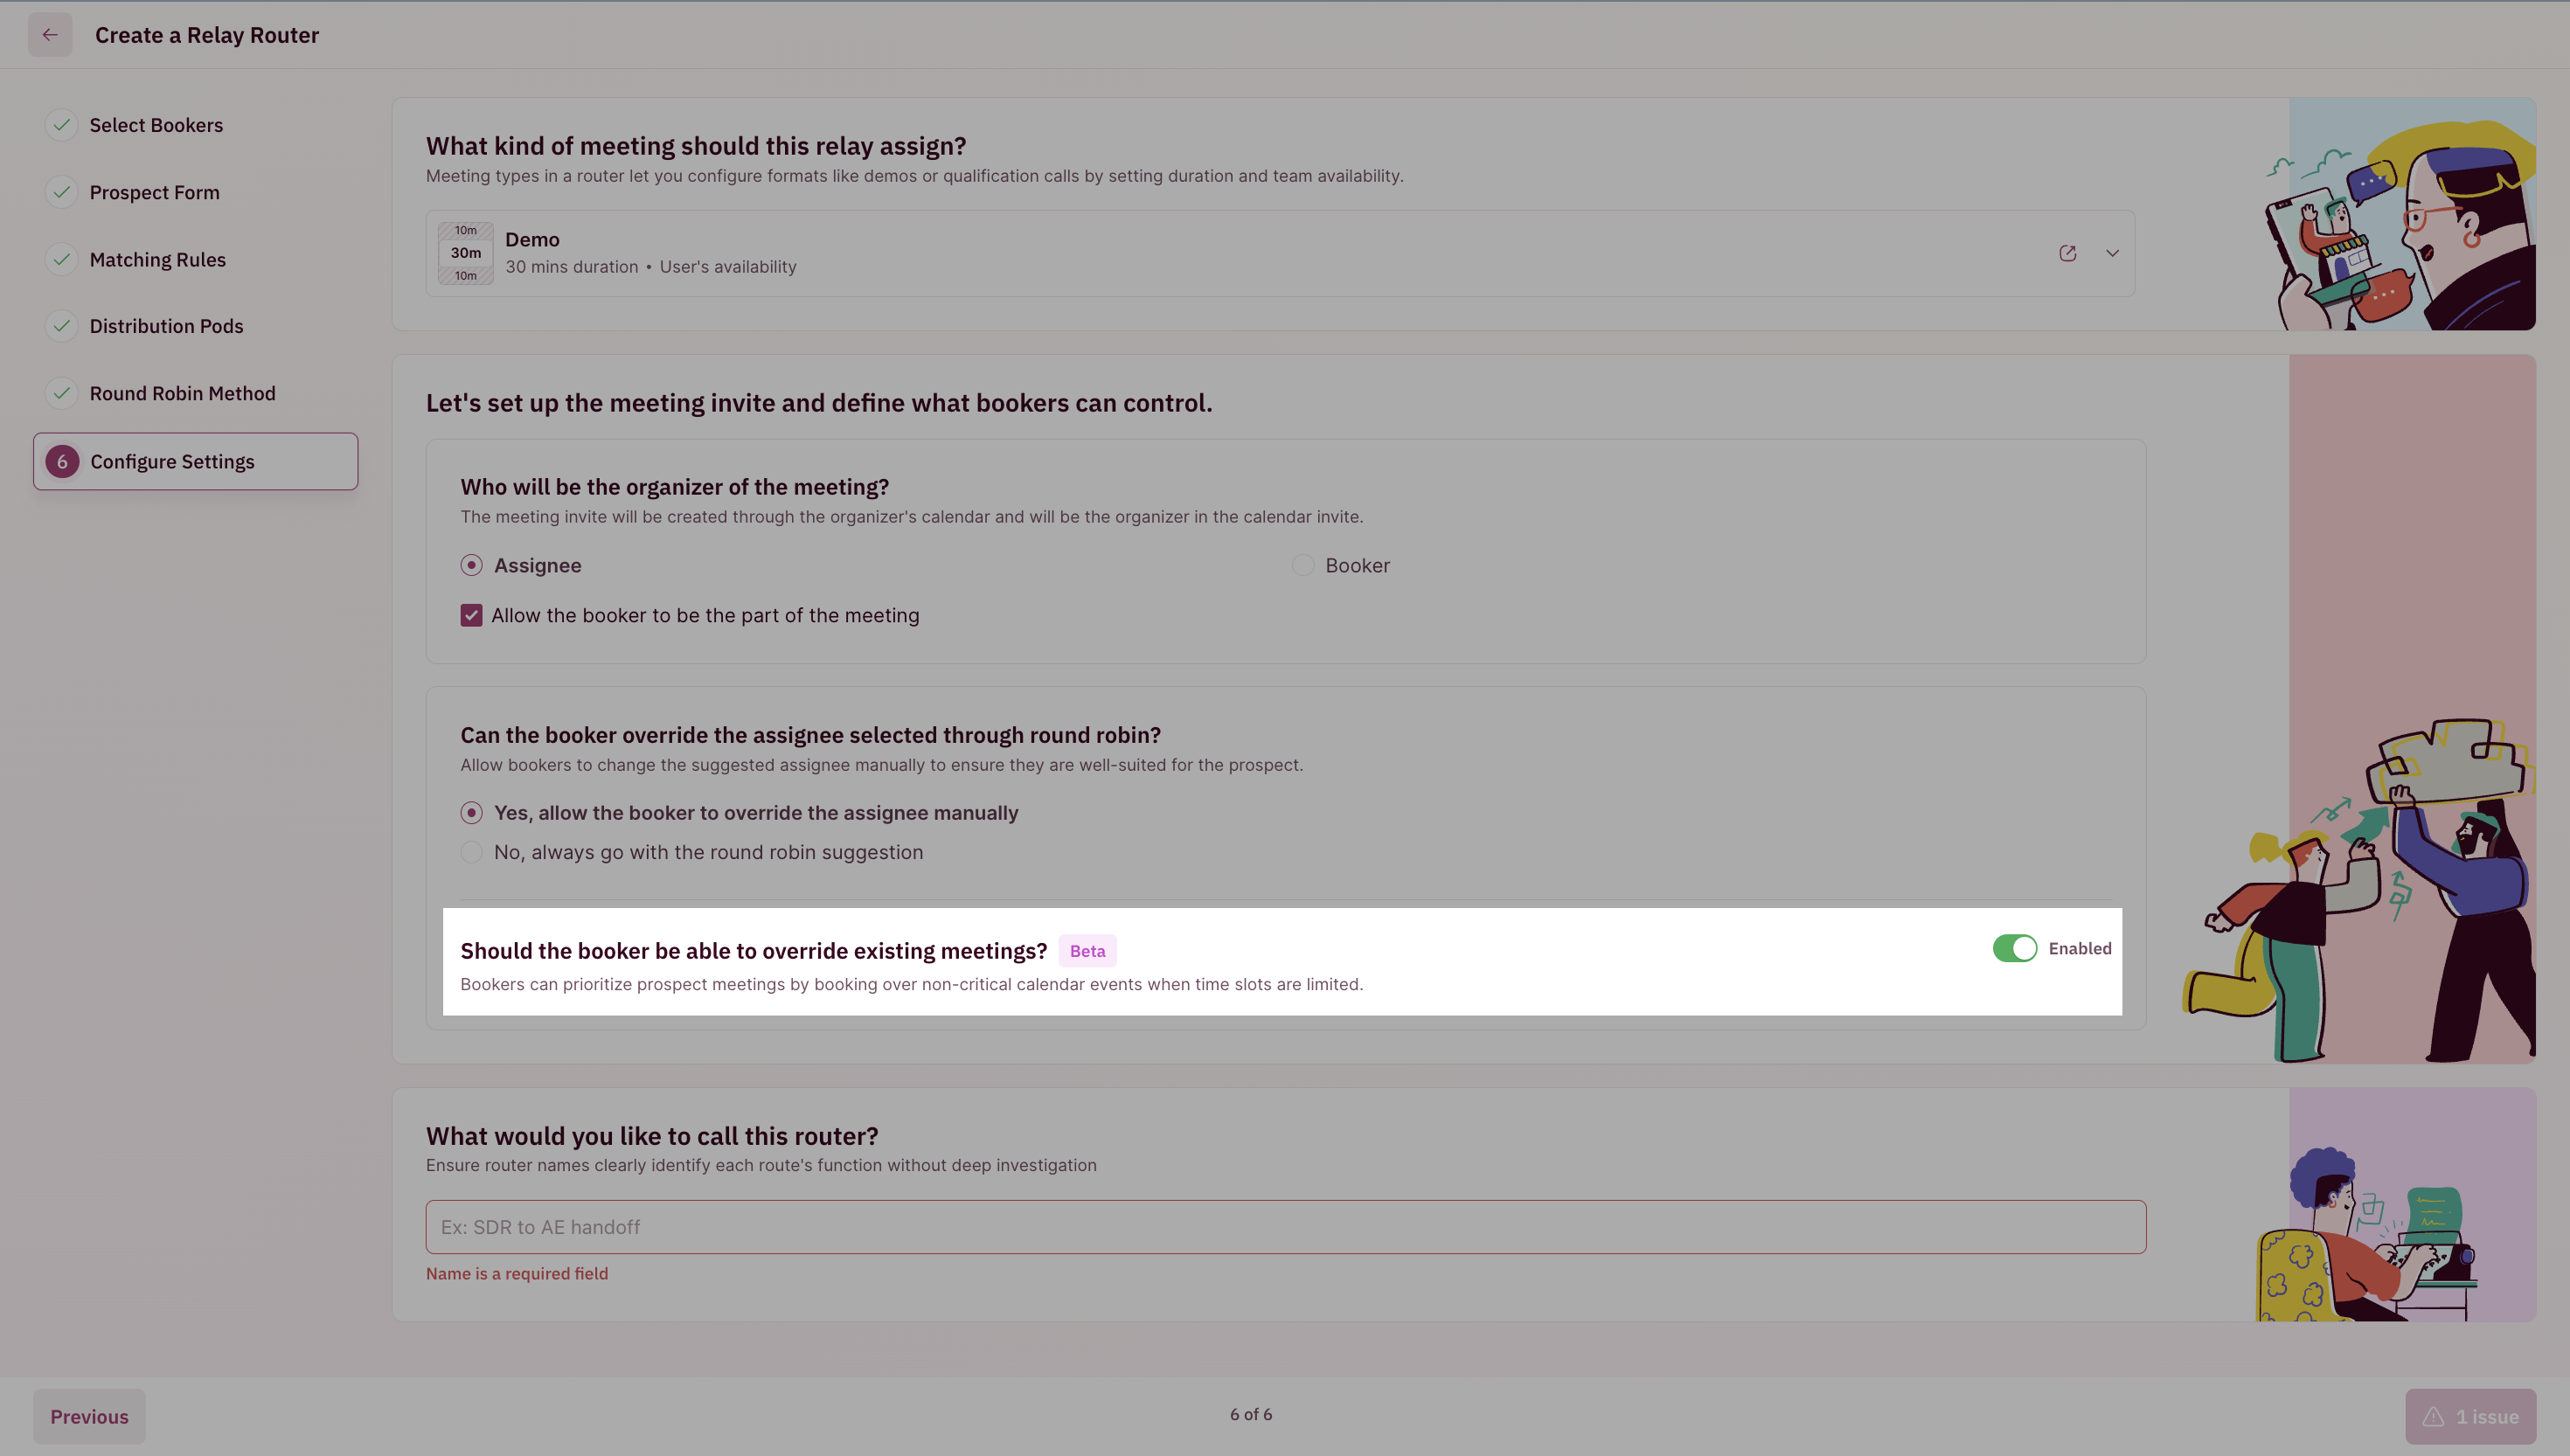
- Override Exisiting Meetings
- Name your Relay
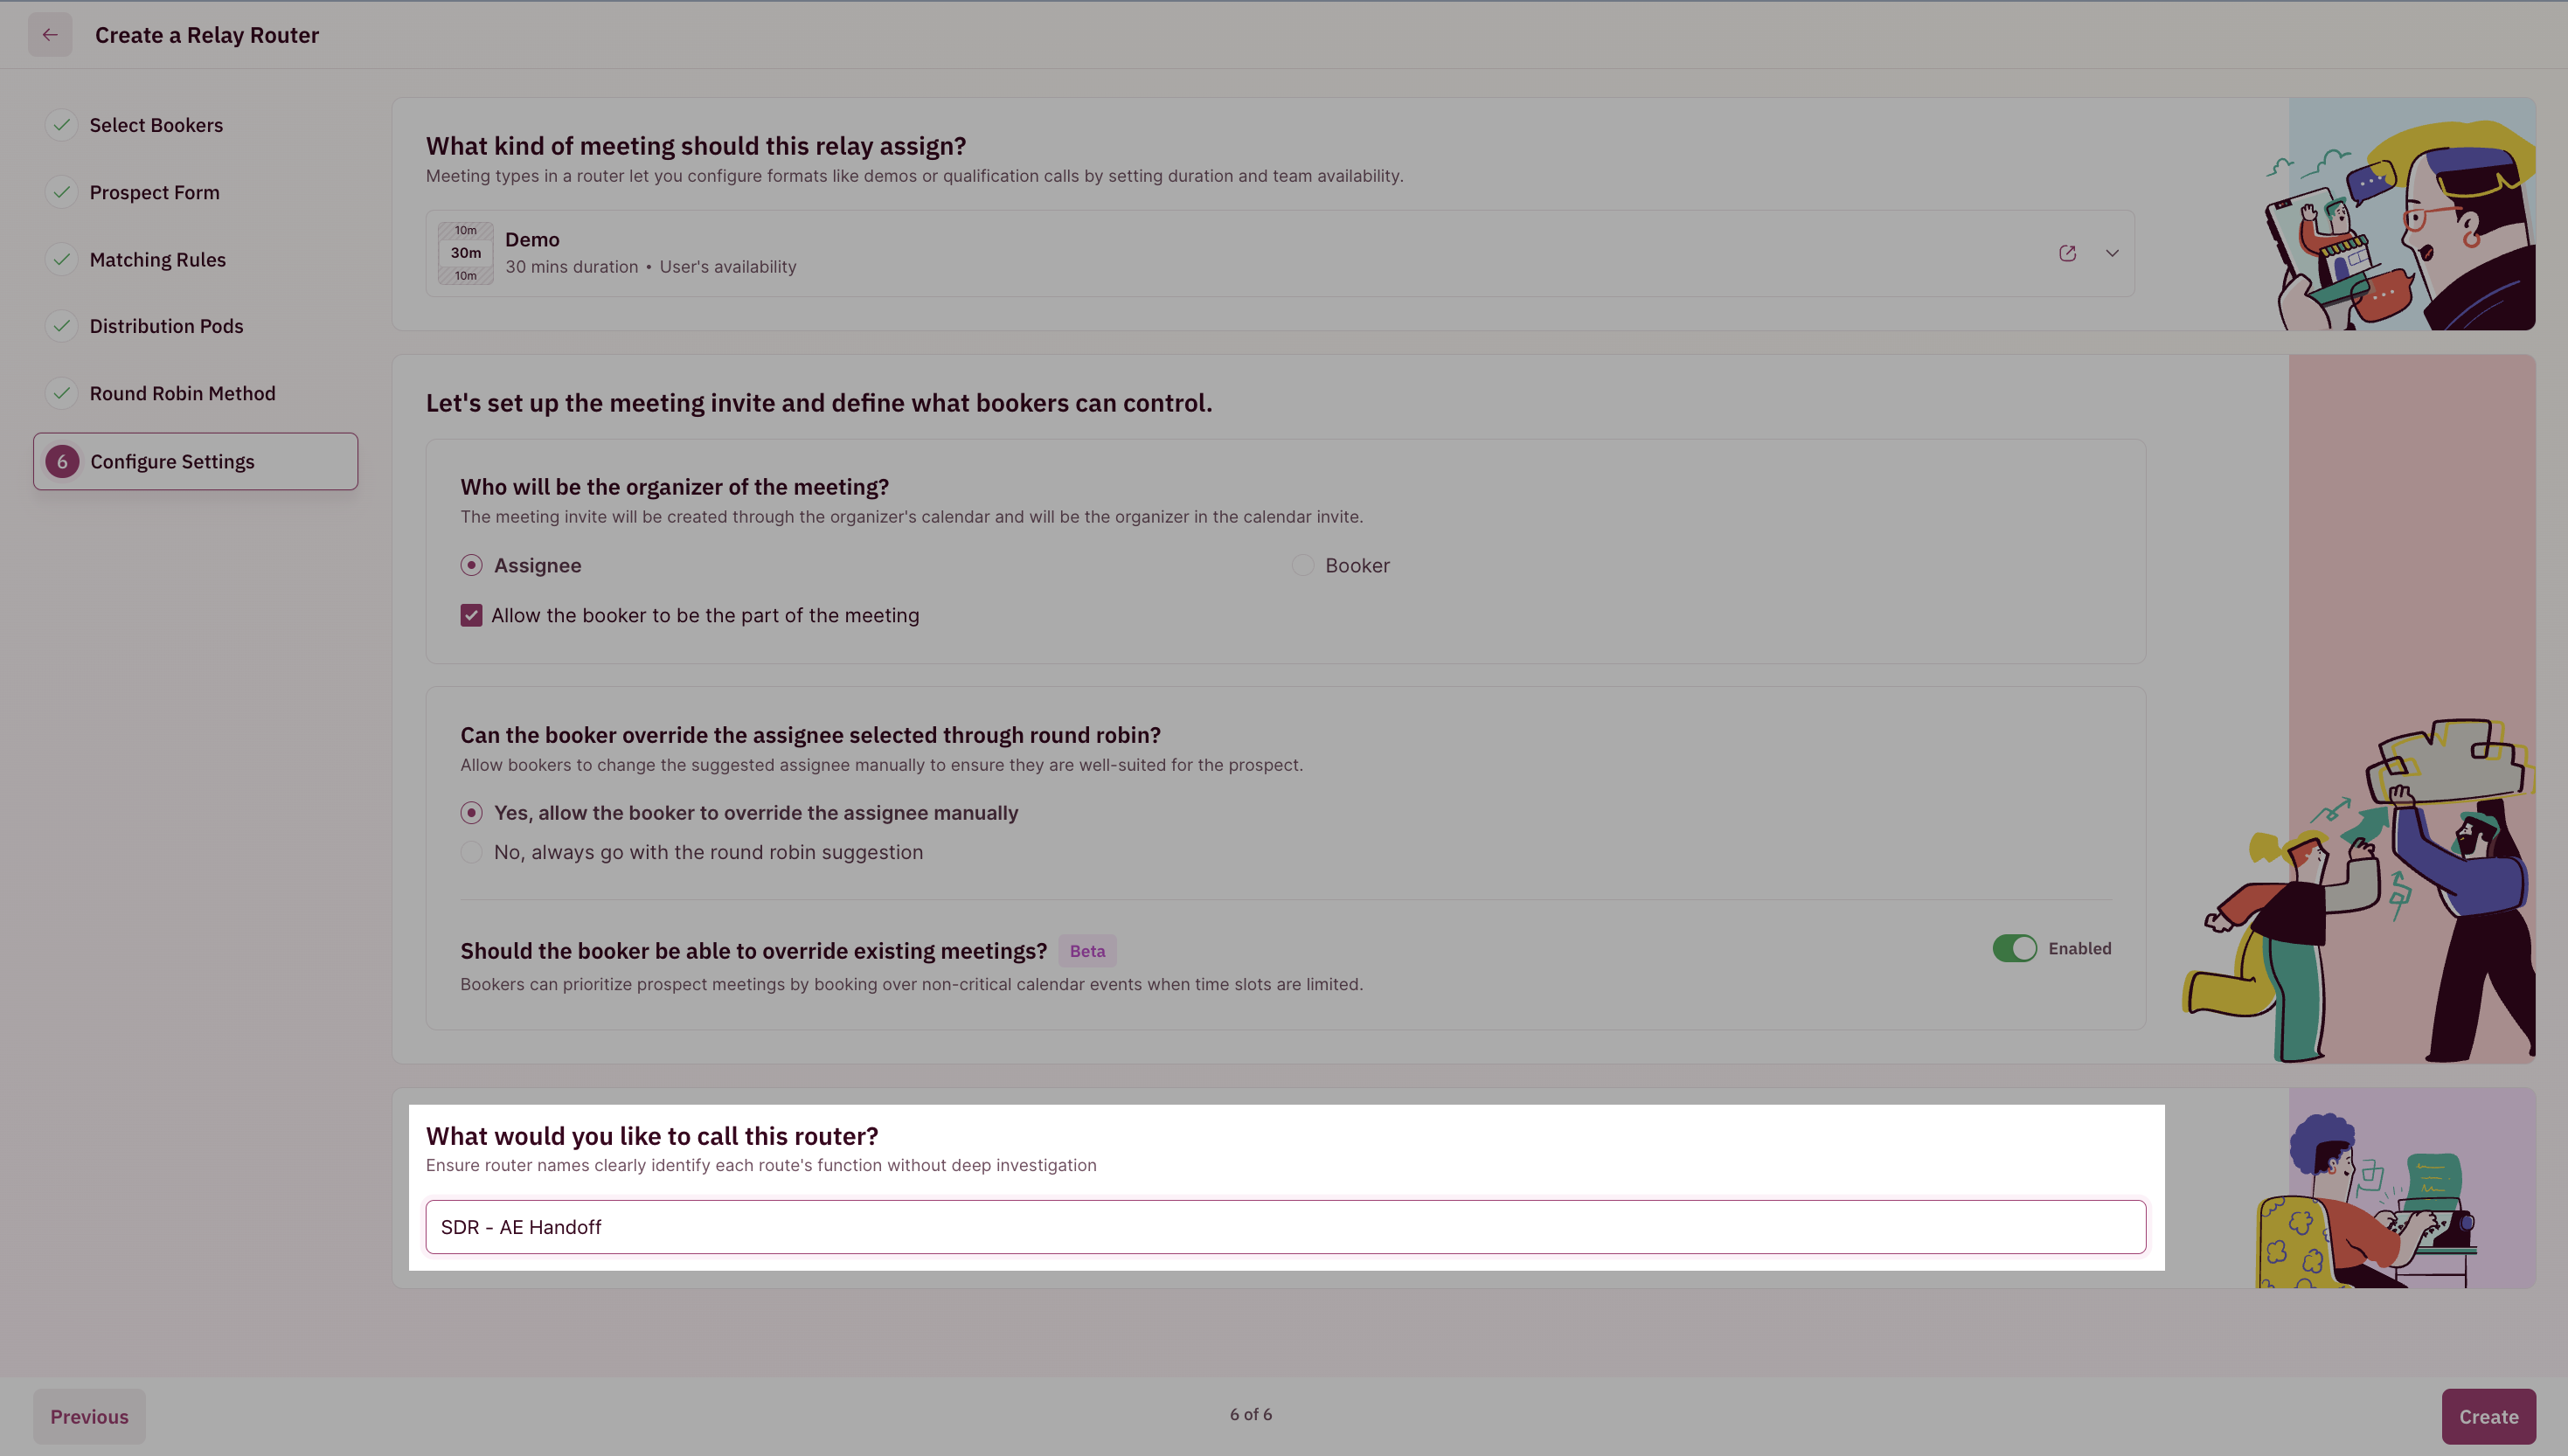
That’s it! You’ve now set up Relays. 🎉🎉🎉