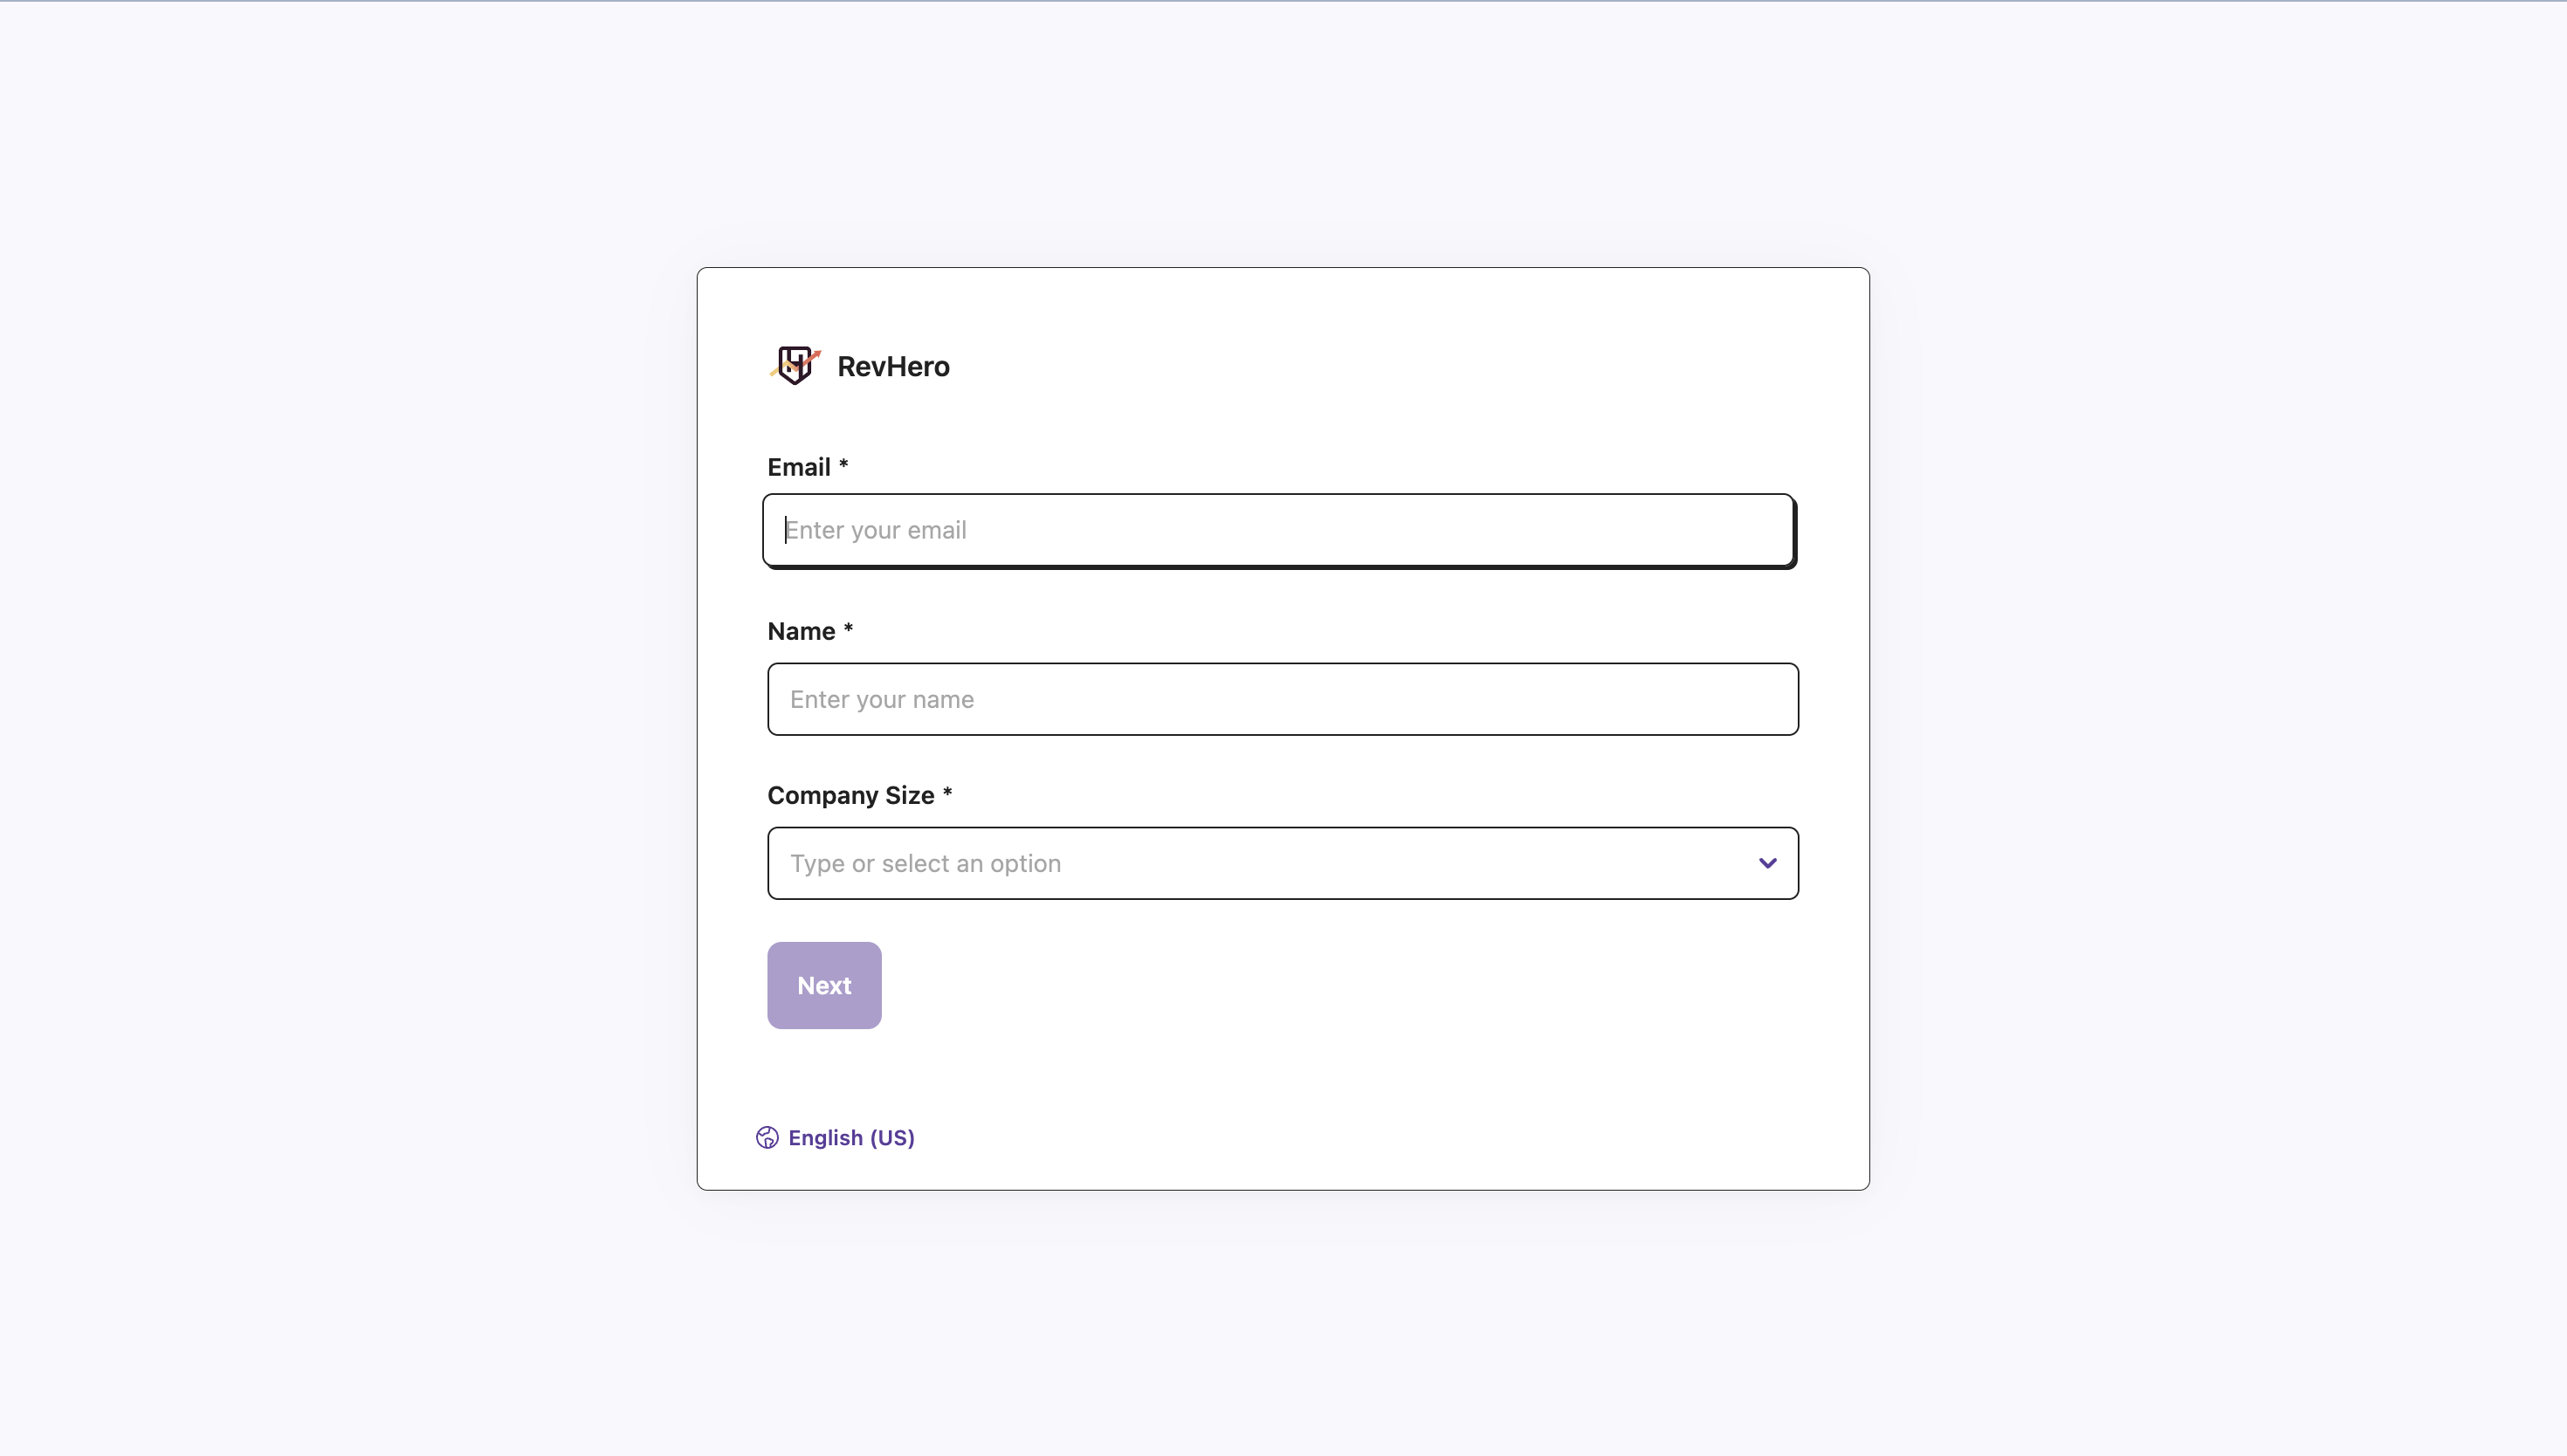
Every campaign router/relay created in RevenueHero will be associated with a pre-built form.
Create a Form
Here are the steps to create a new form:- Click on Forms.
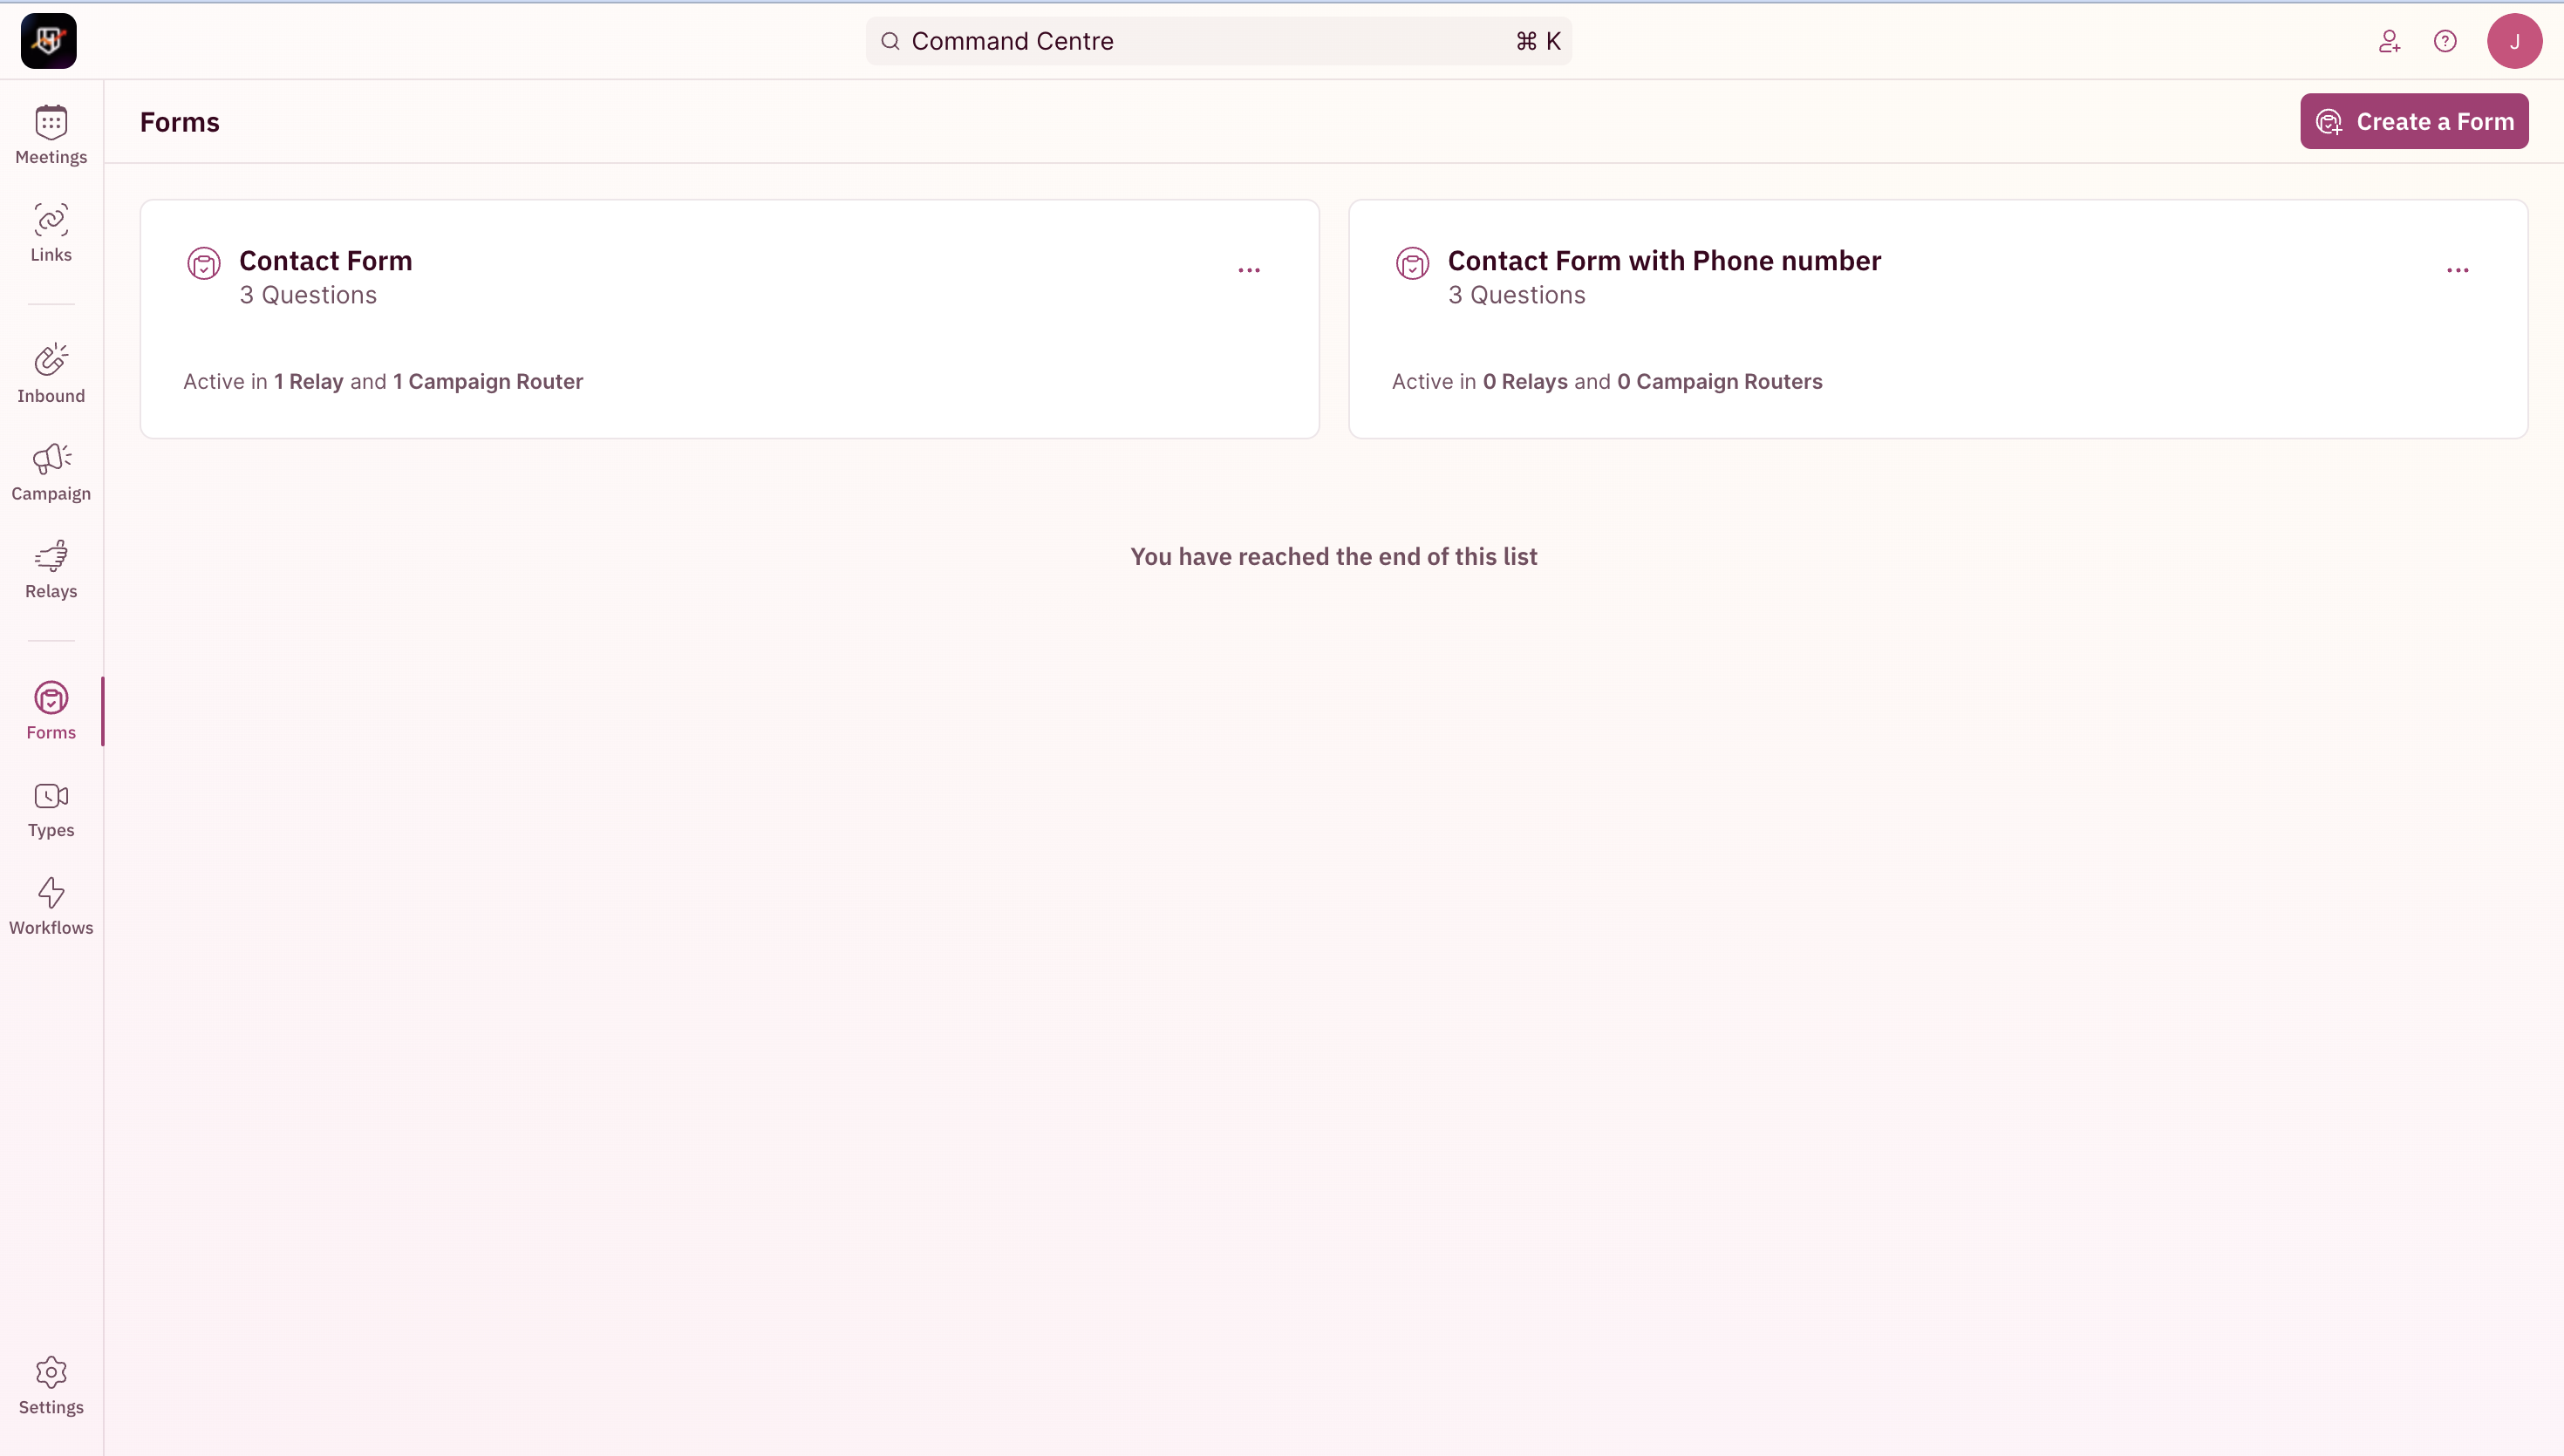
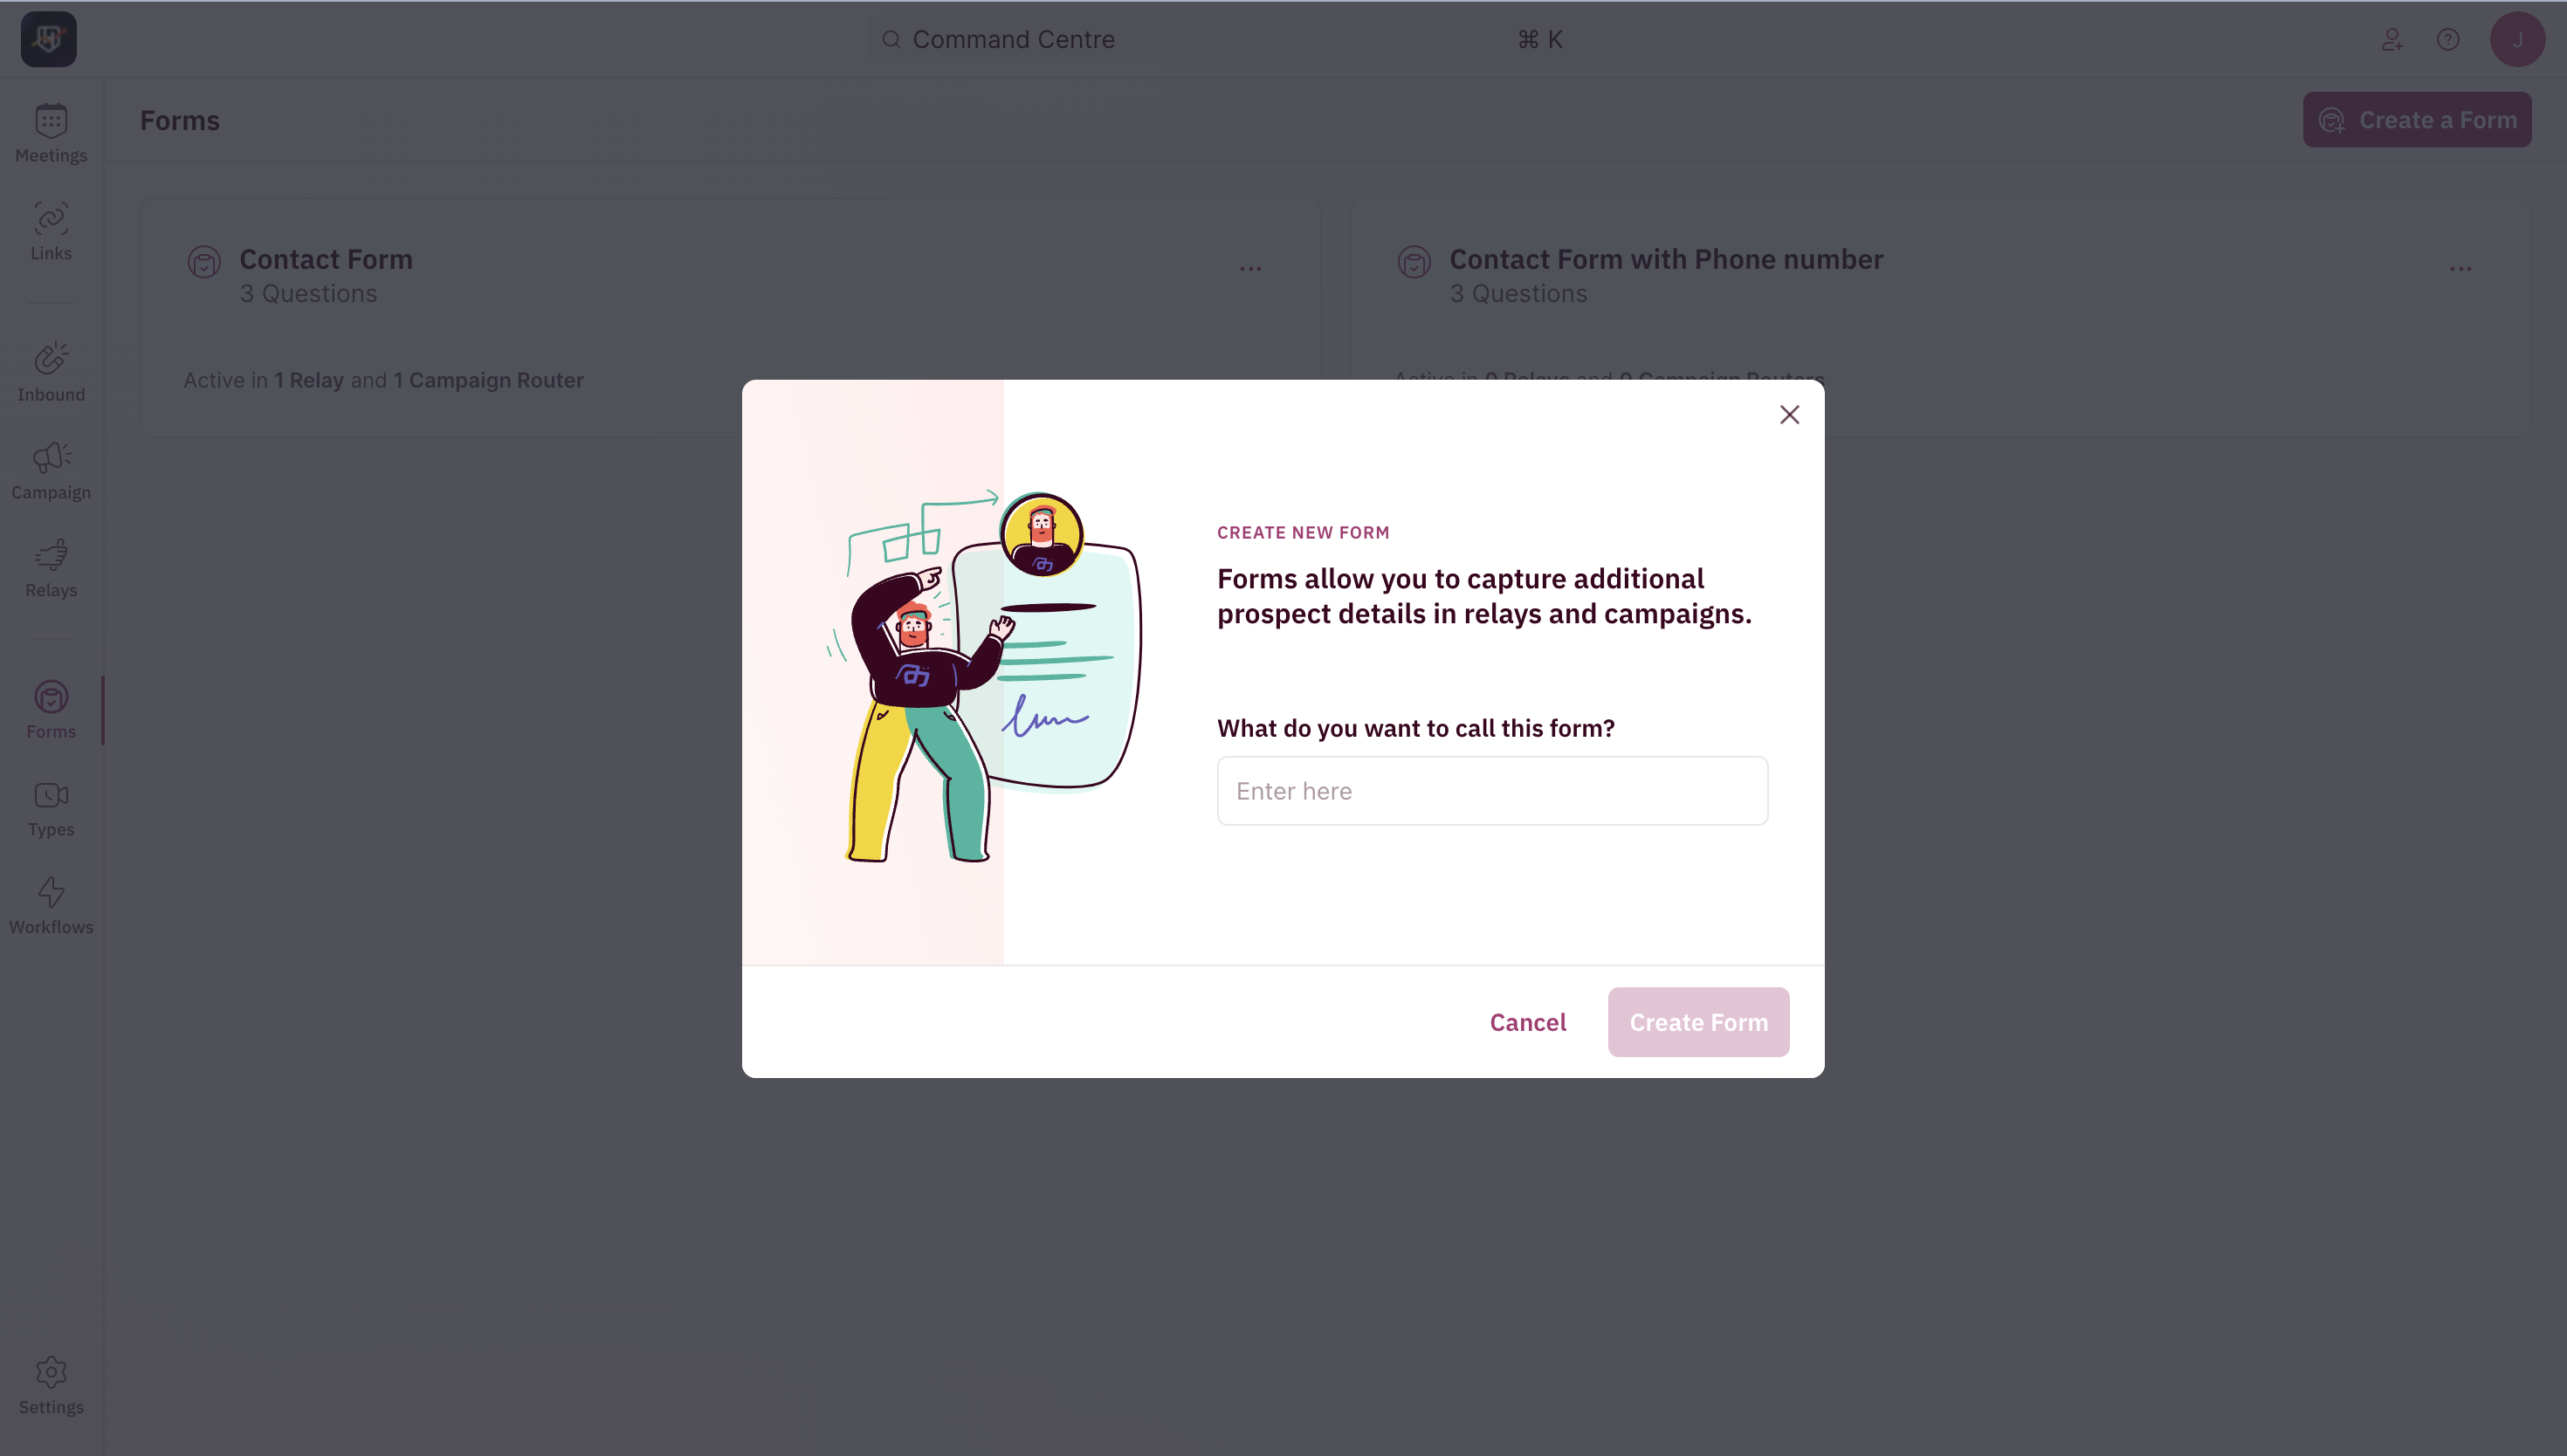
- Click on Create a Form and enter a name.
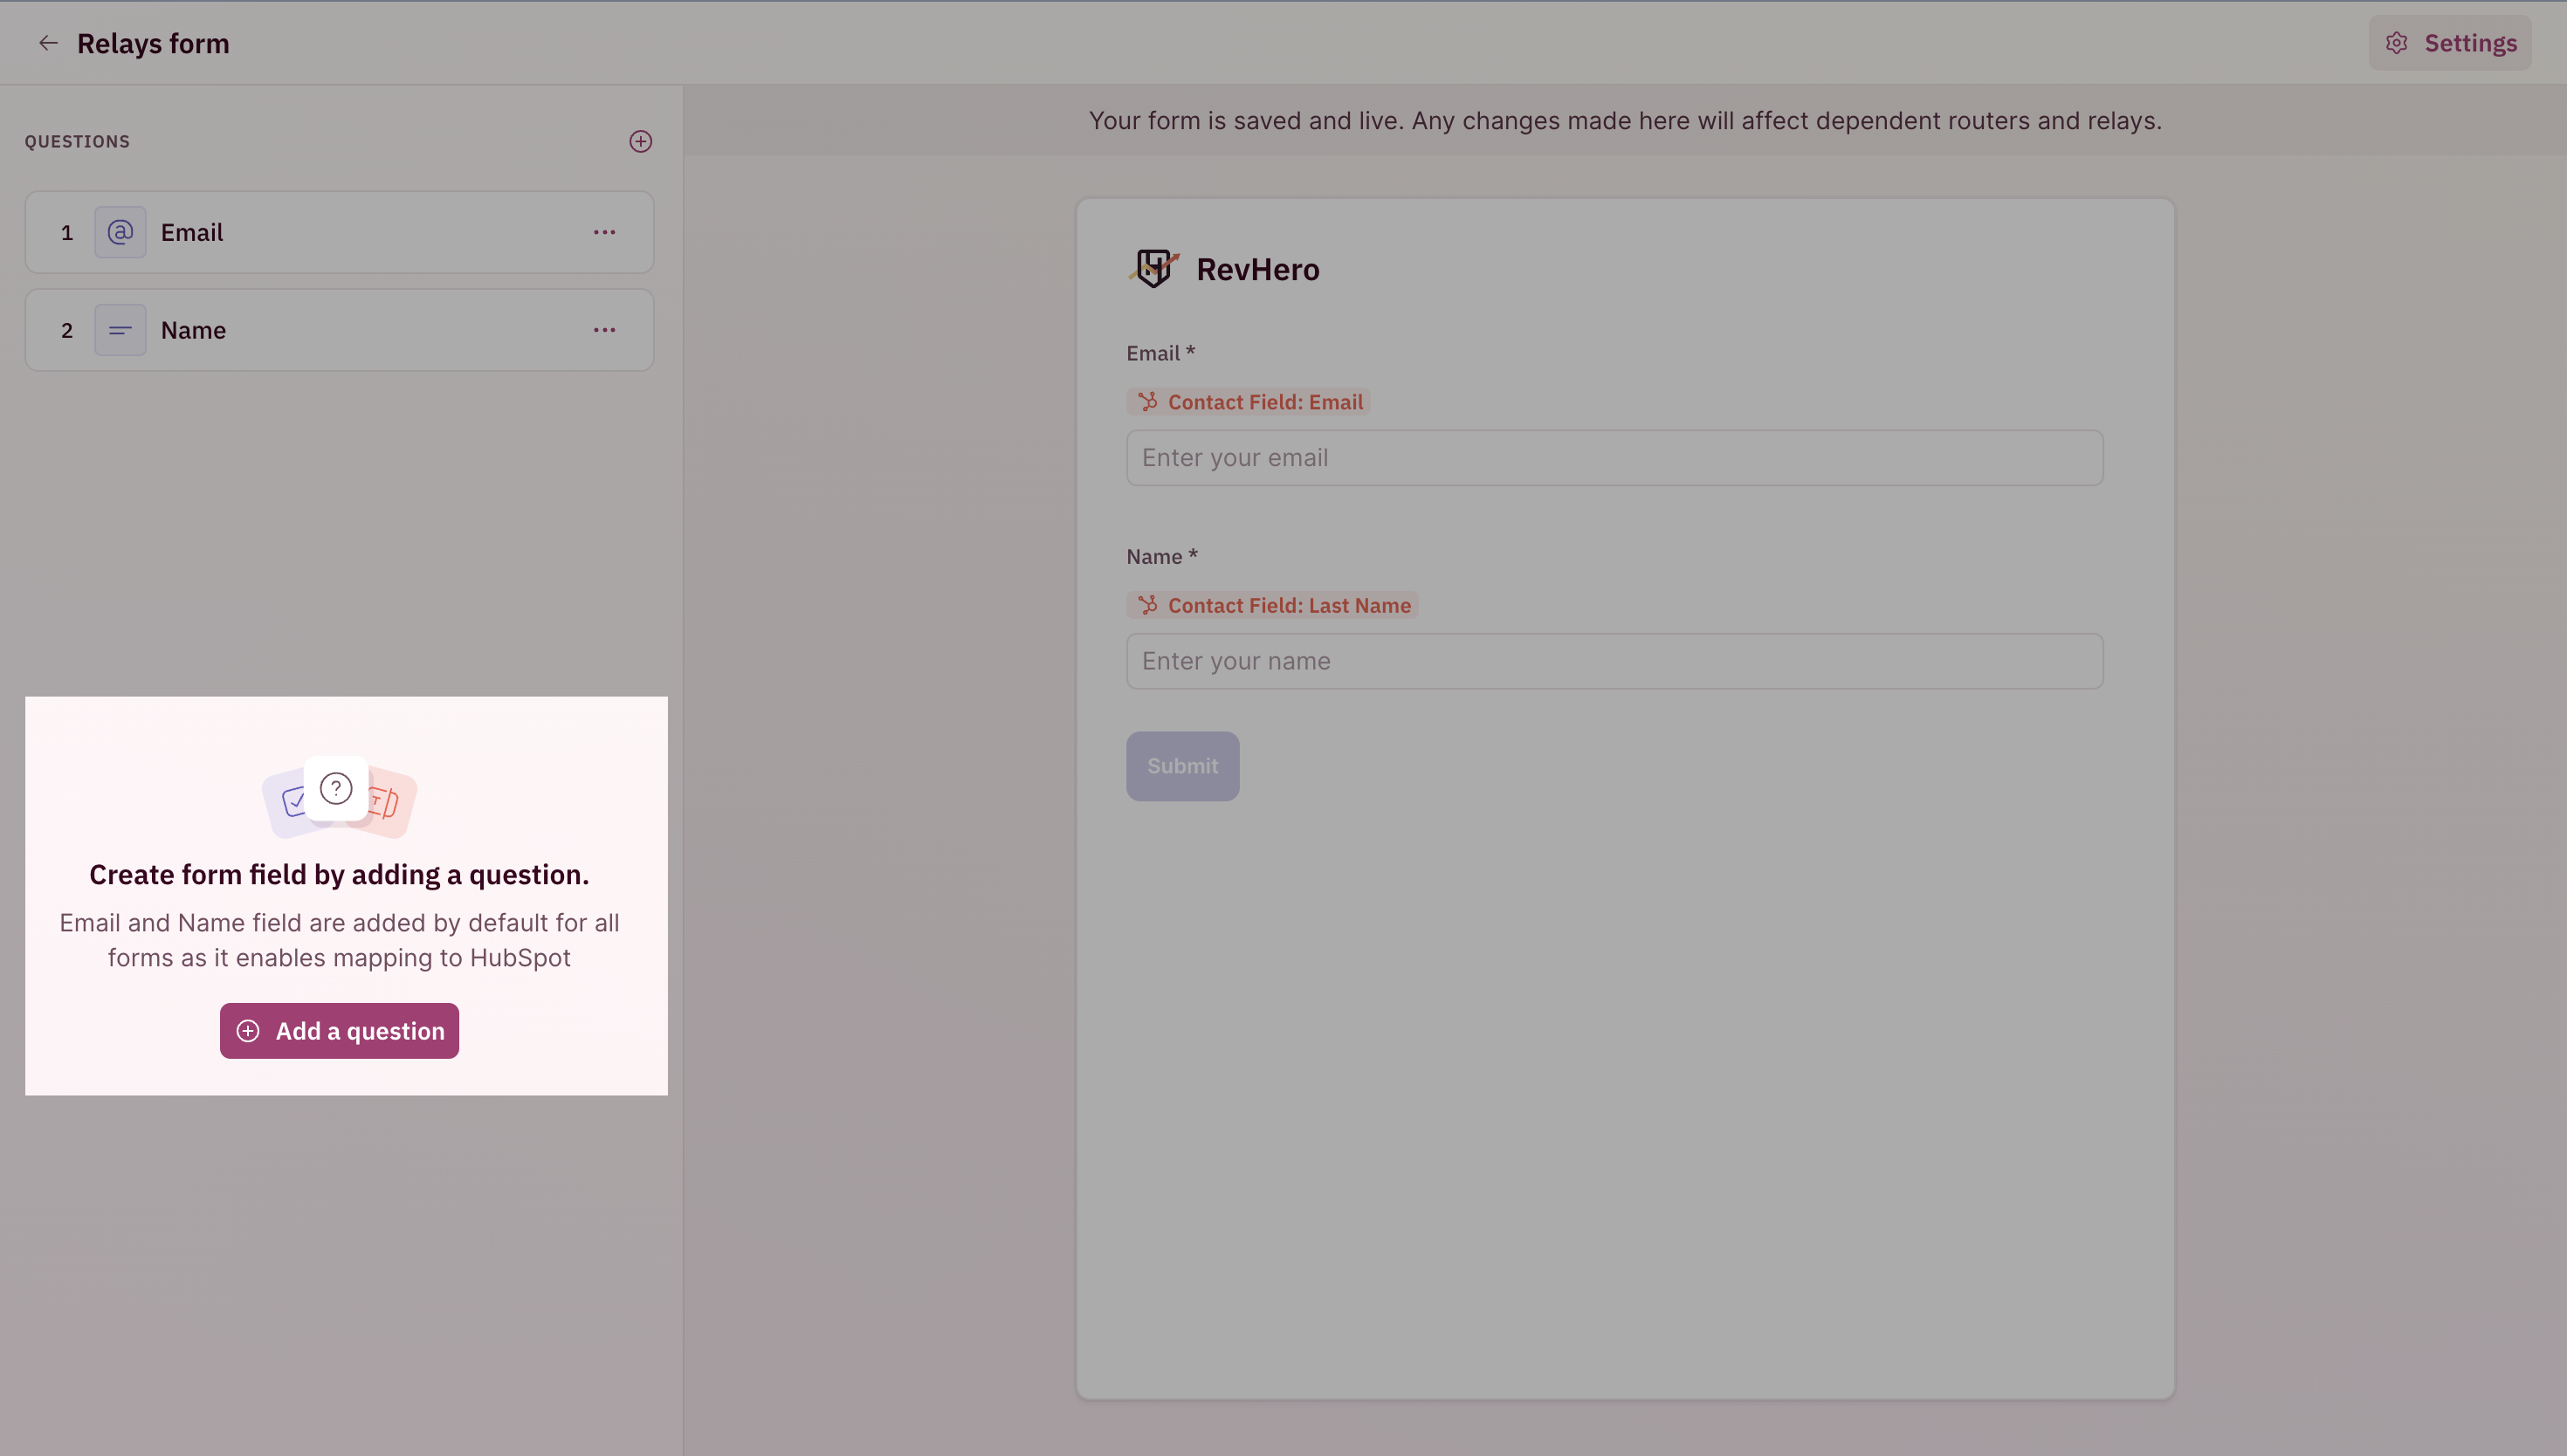
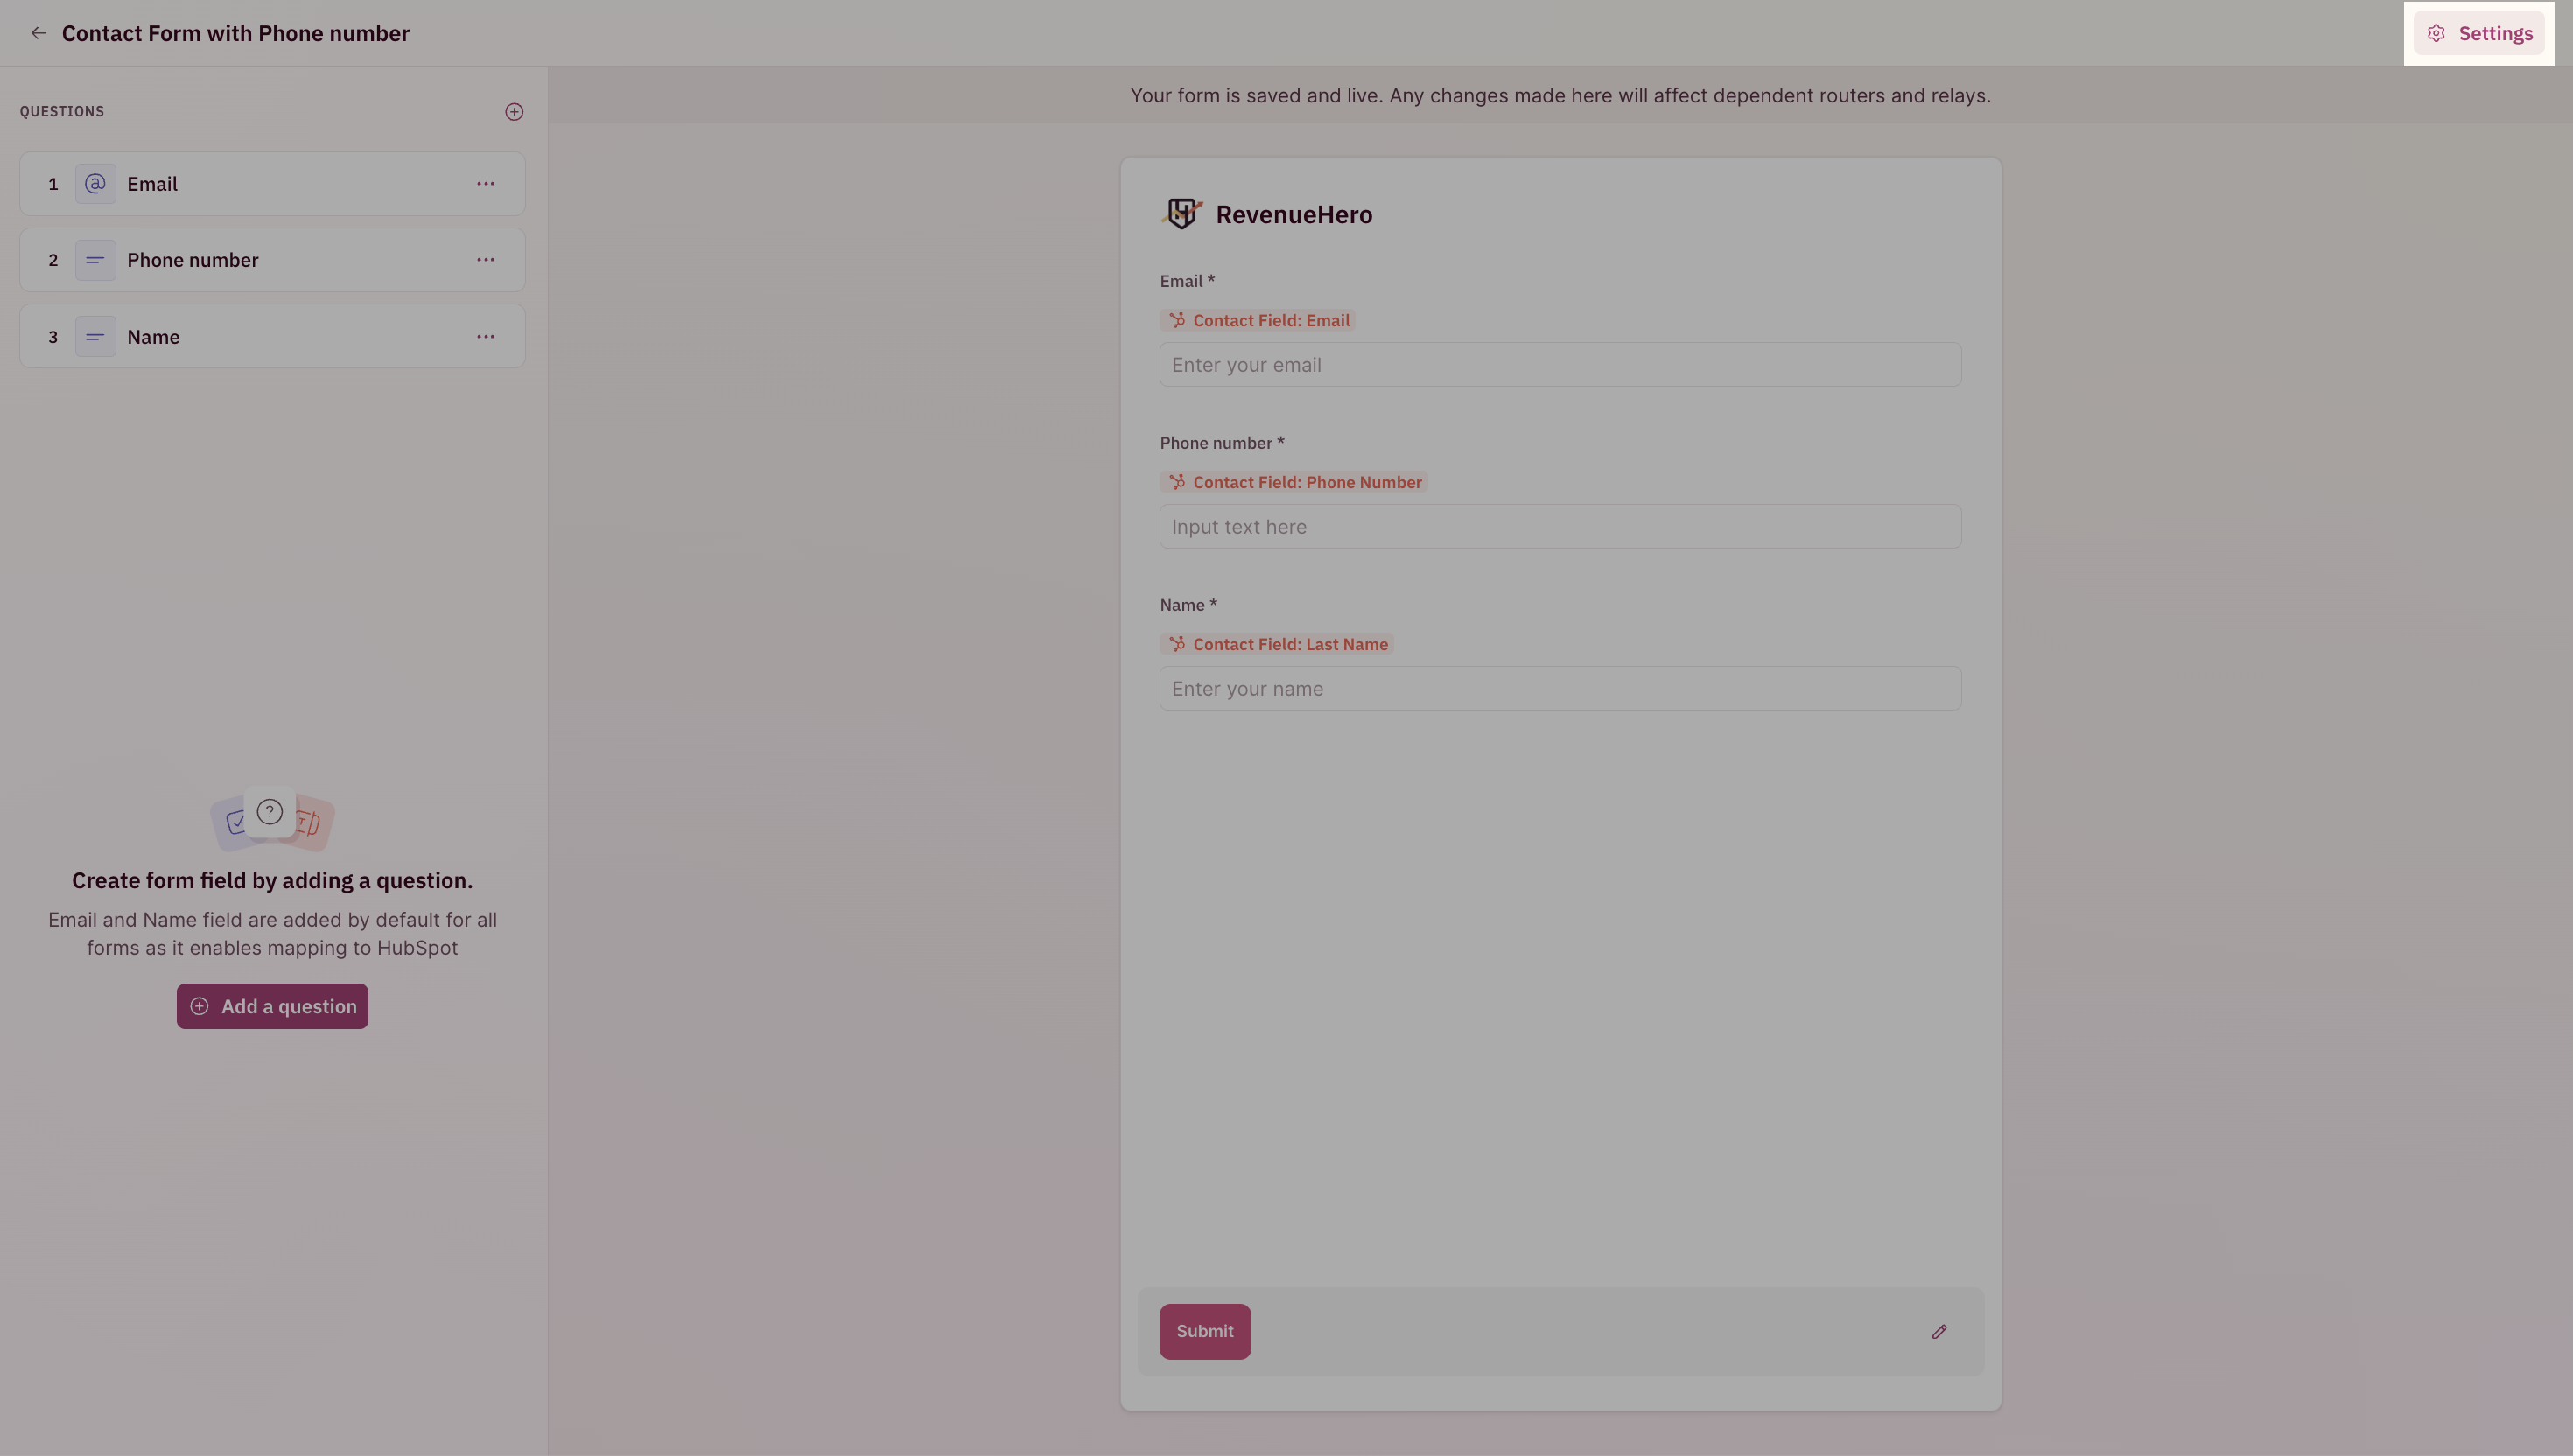
- Every form will already have an email and name field mapped.
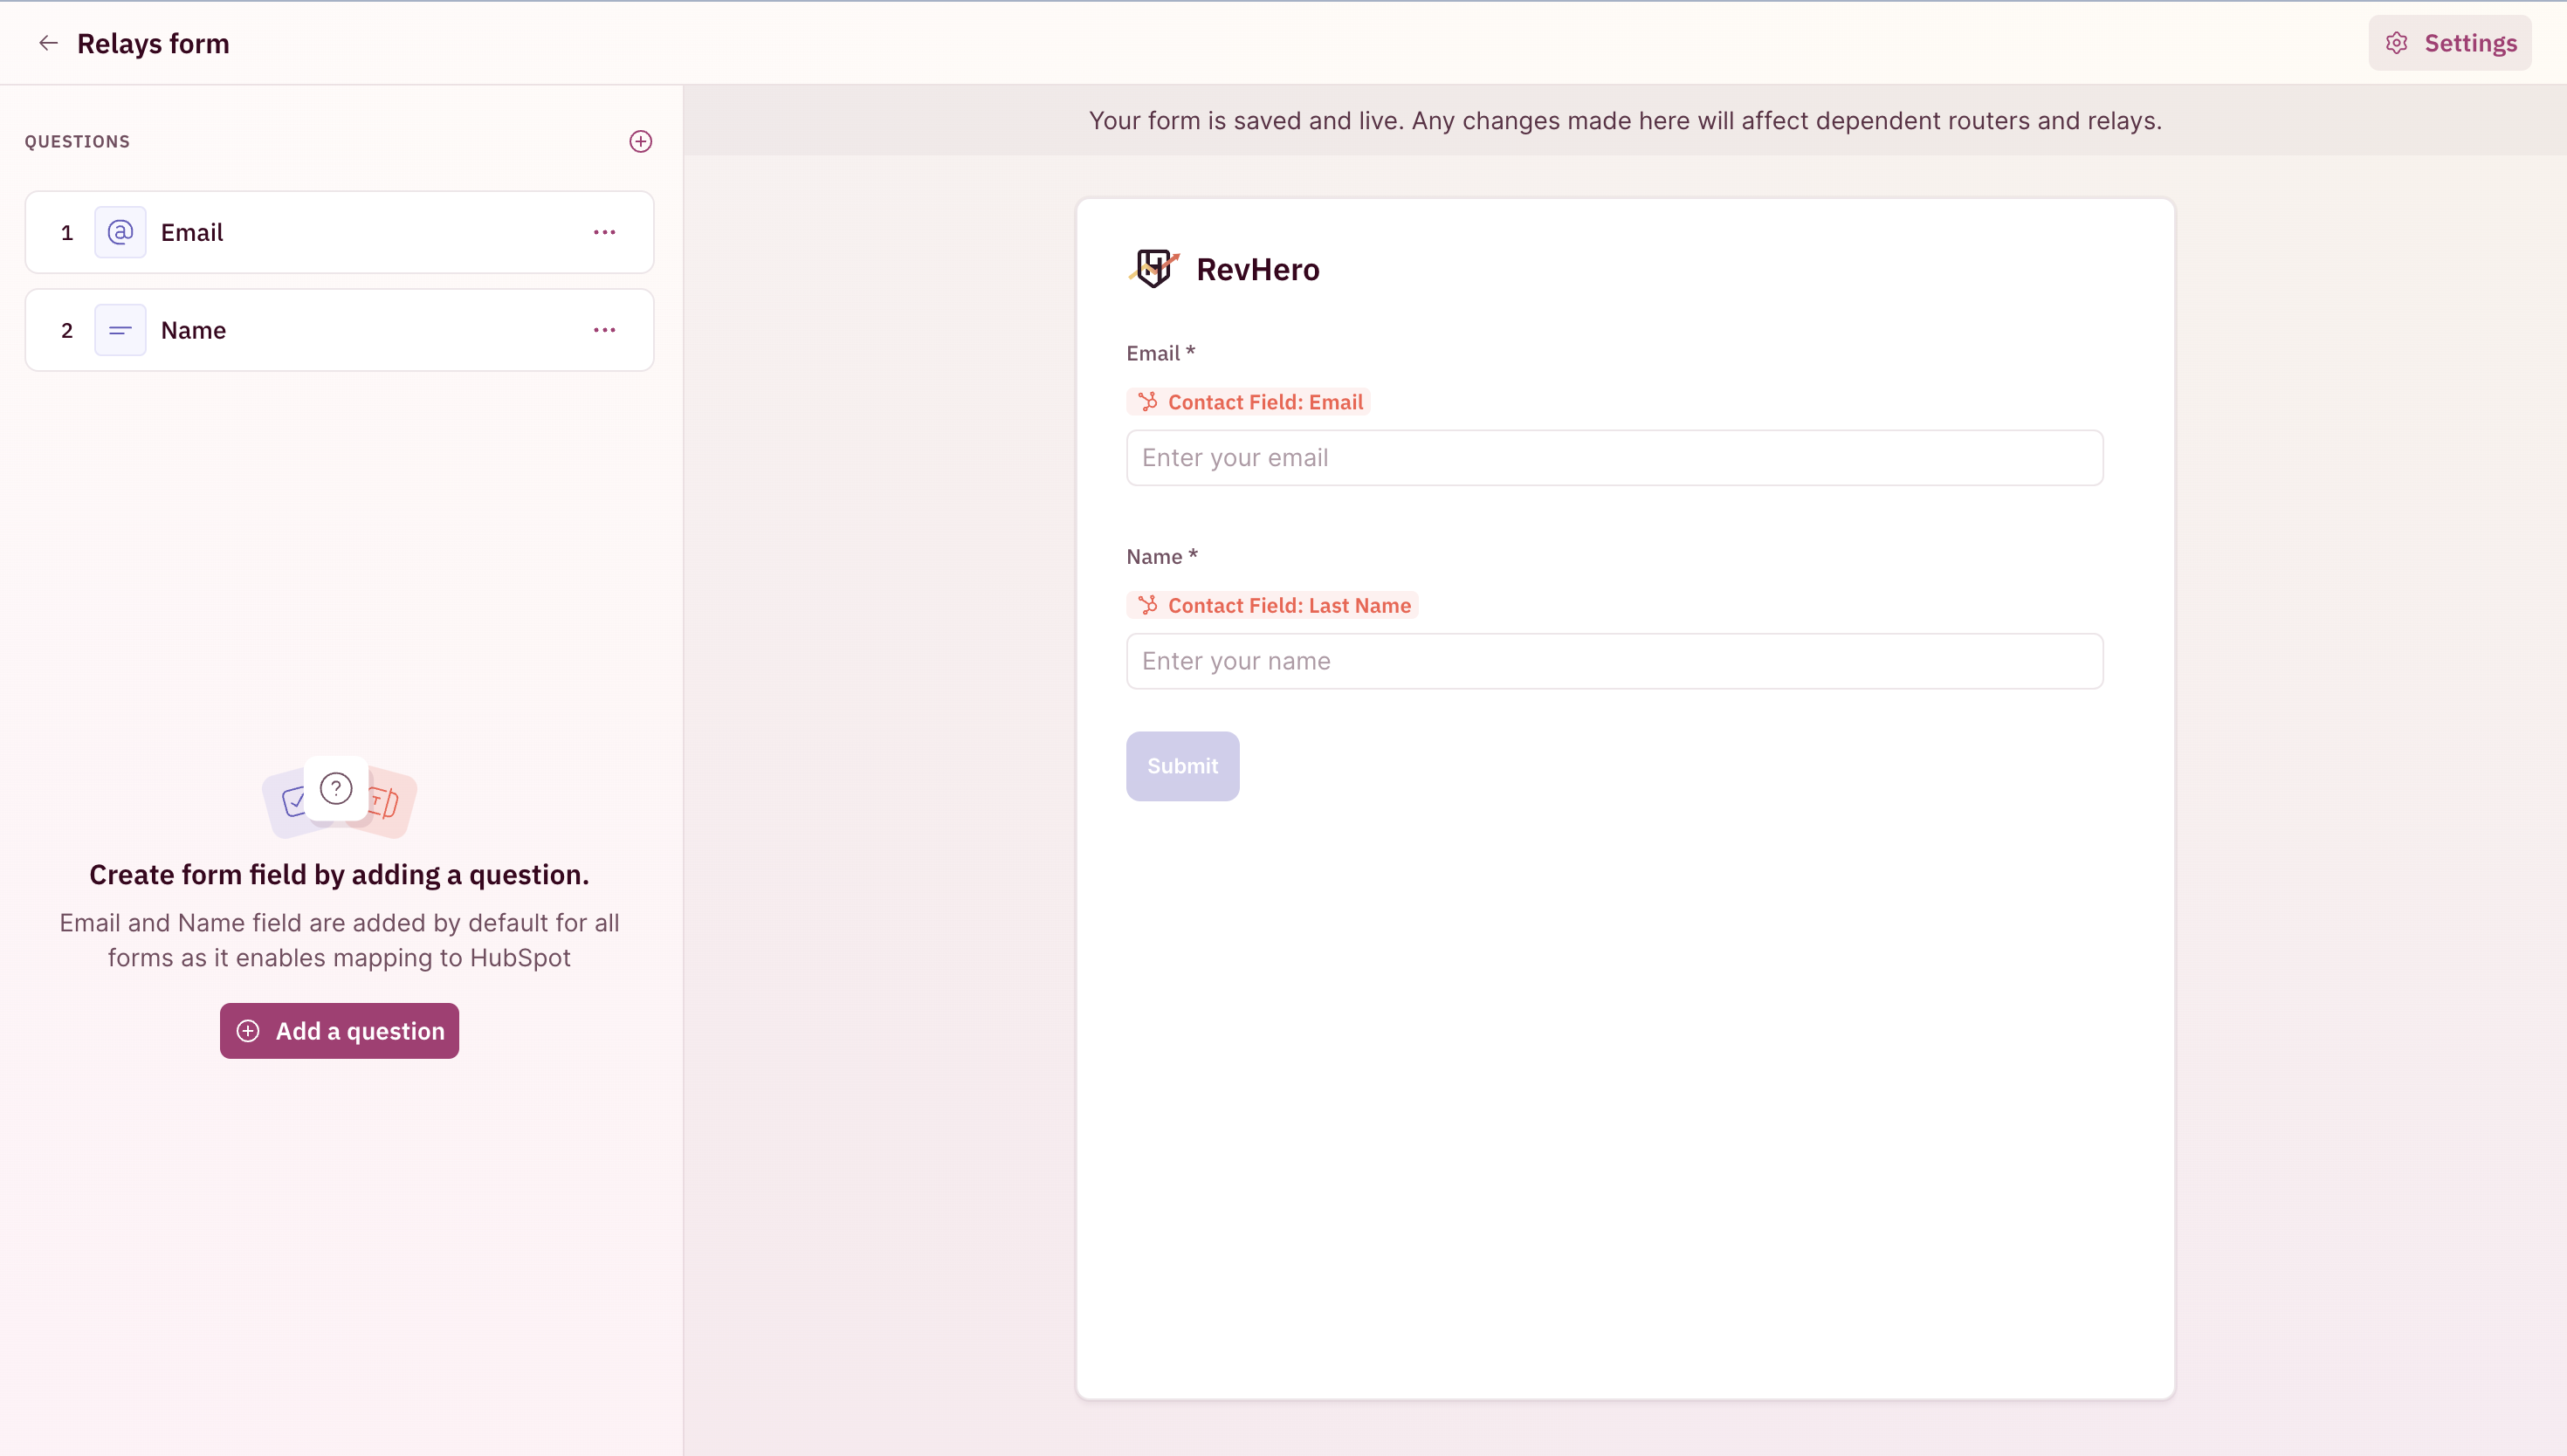
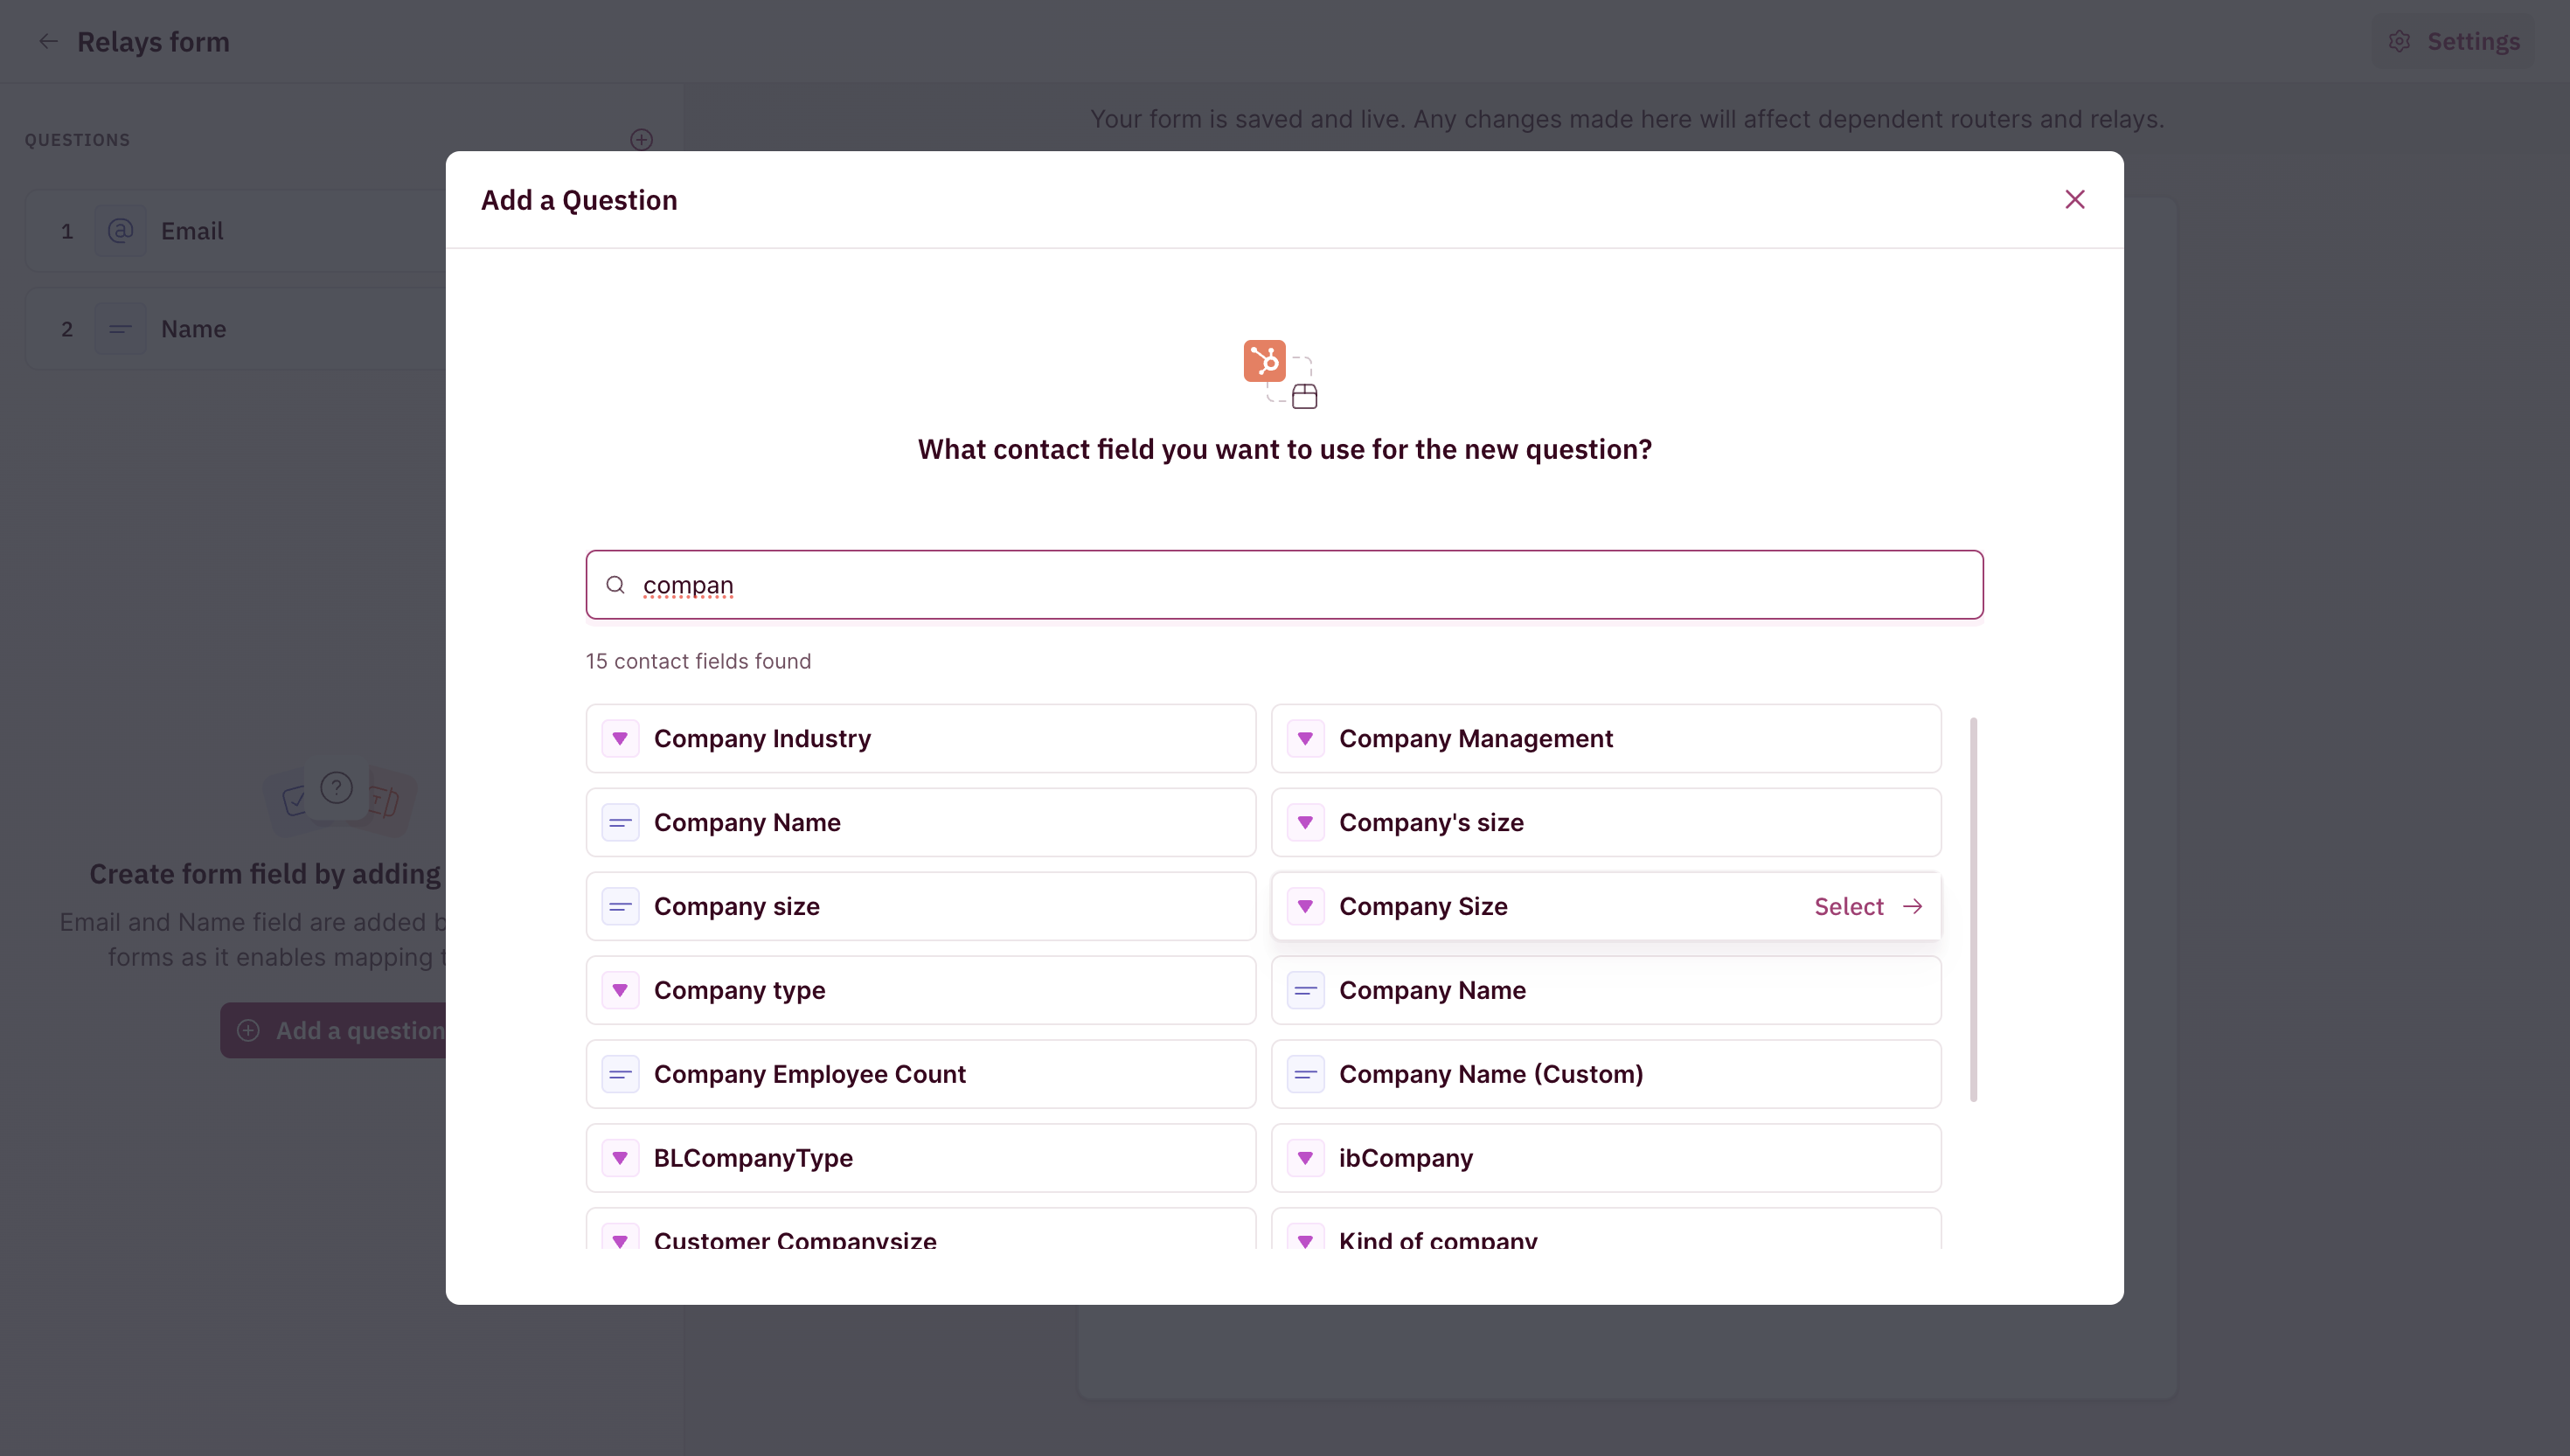
- Add a question.
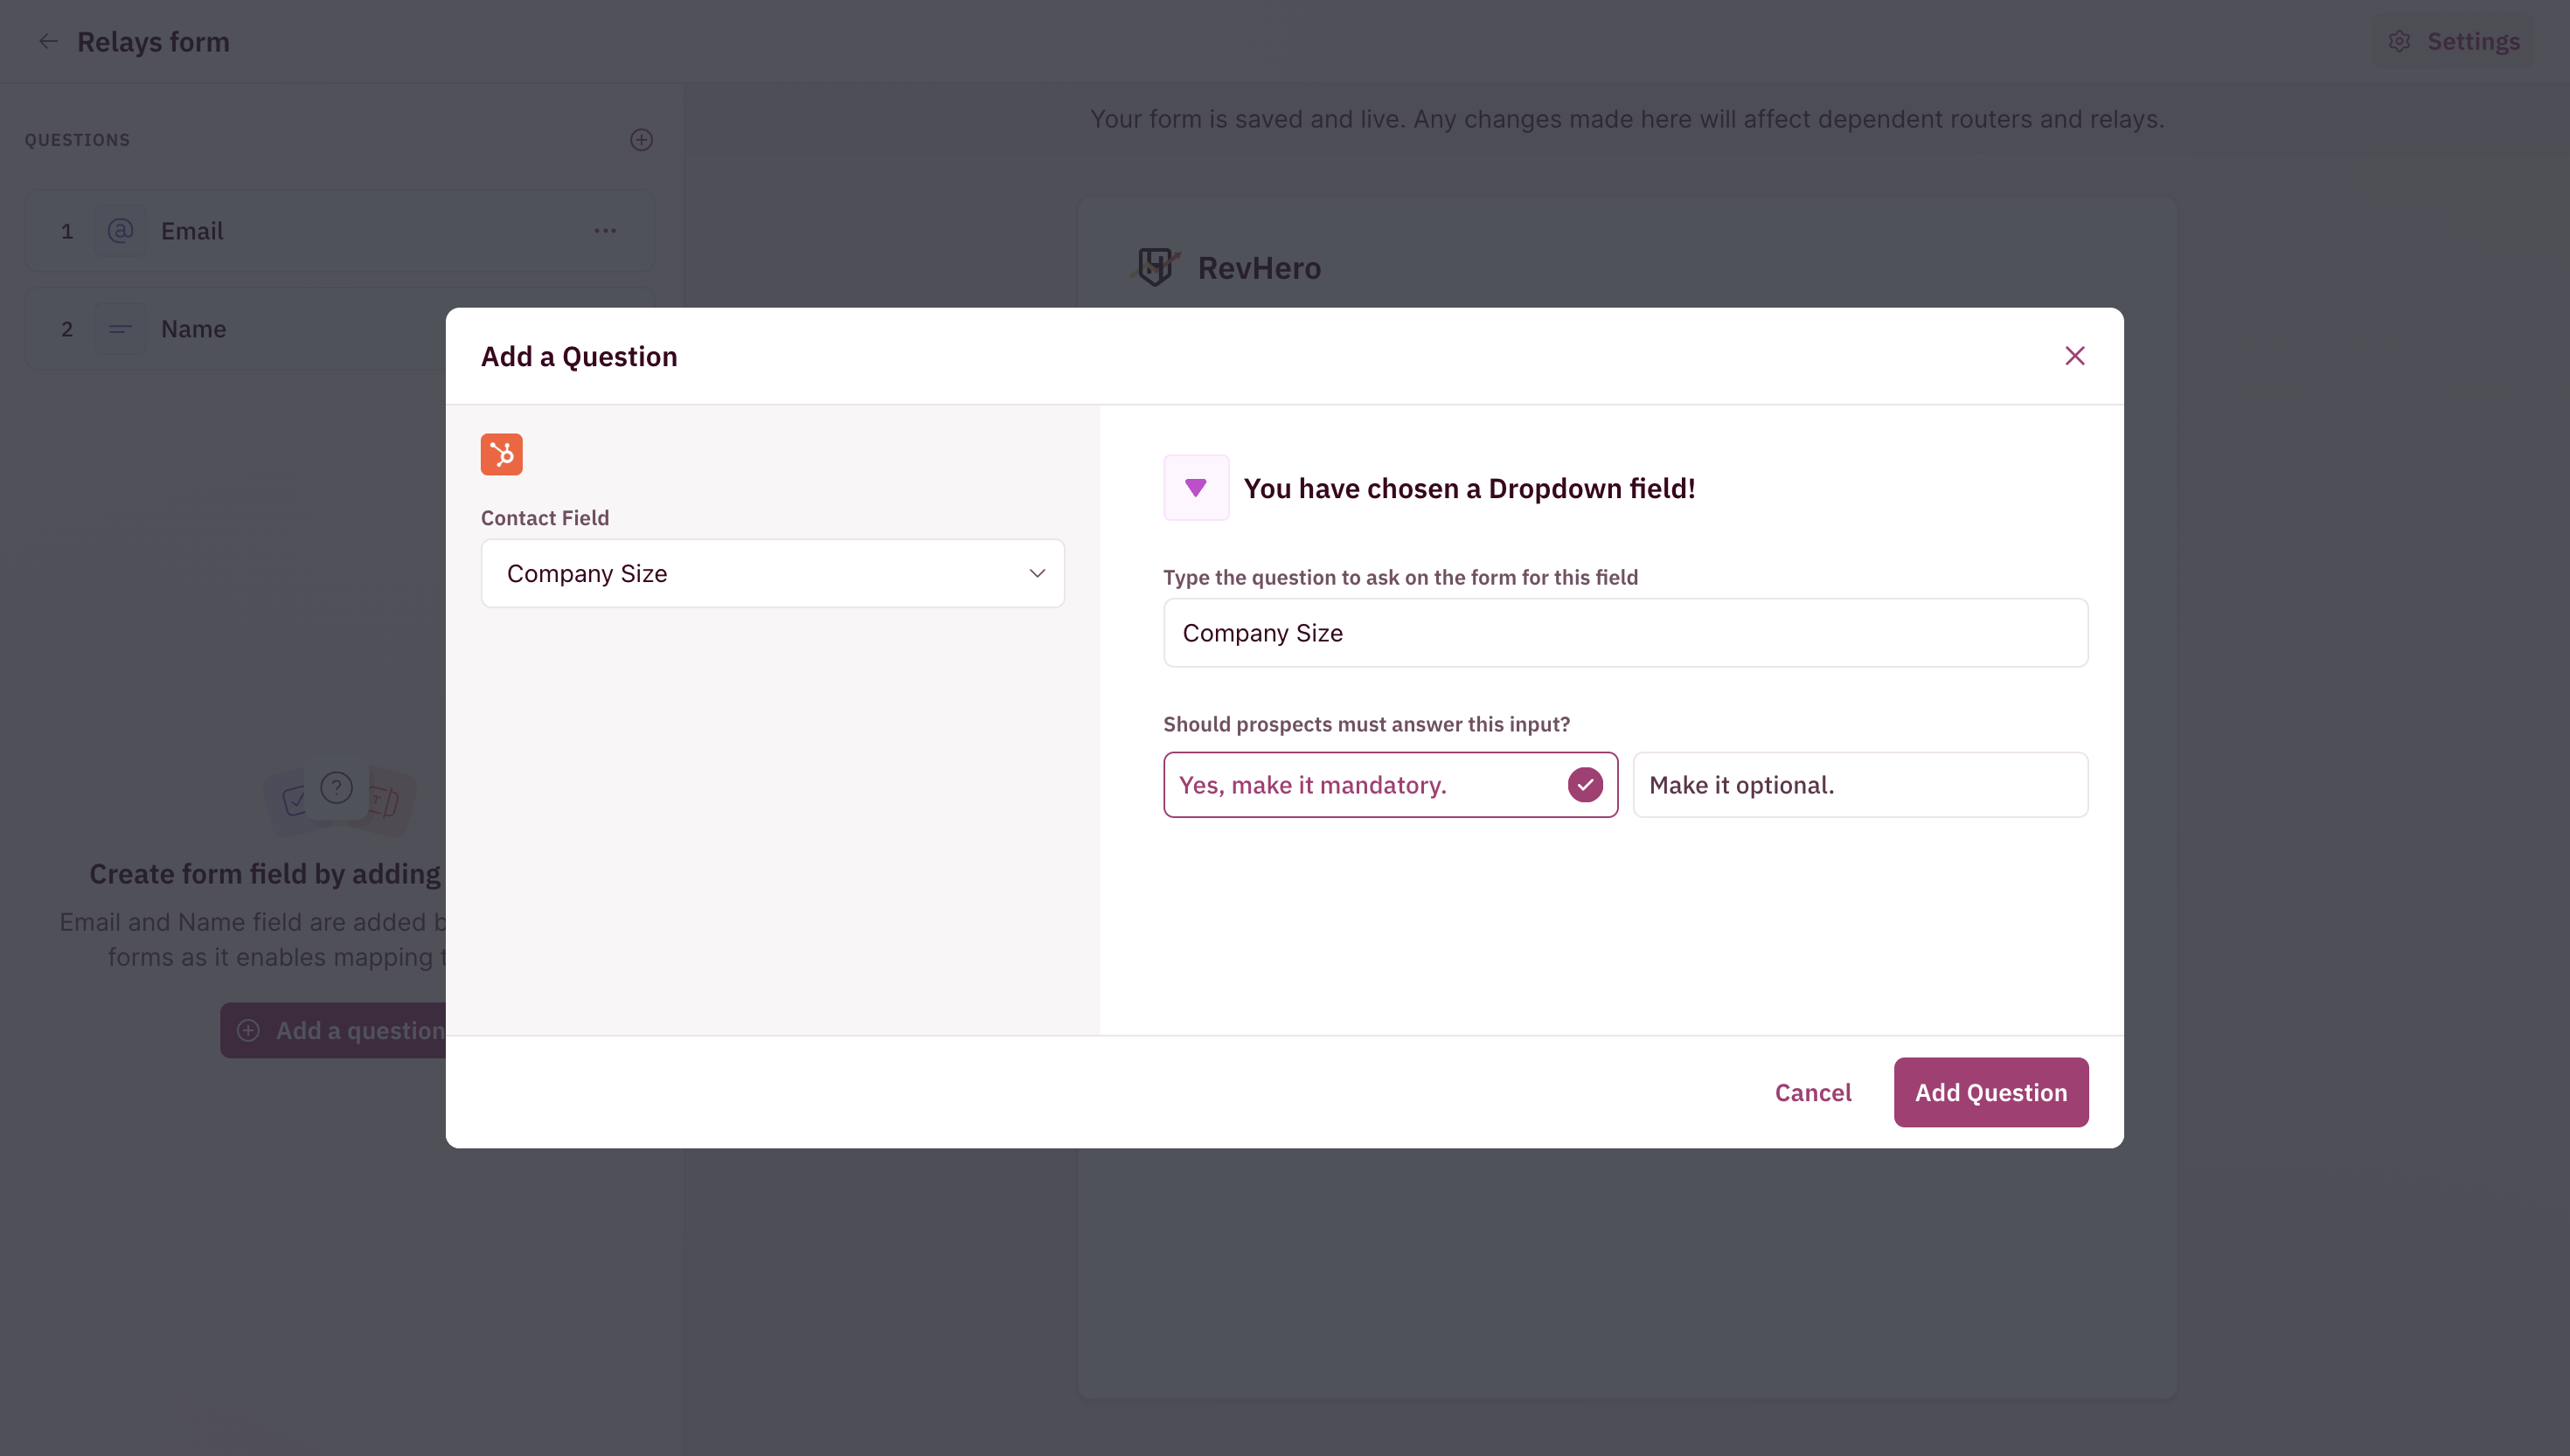
- In this menu, pick a form field from your CRM.
- Give the form field a label i.e the text on the form when the prospect accesses it and choose between Mandatory and Optional.
- Add the desired fields and you’re good to go!
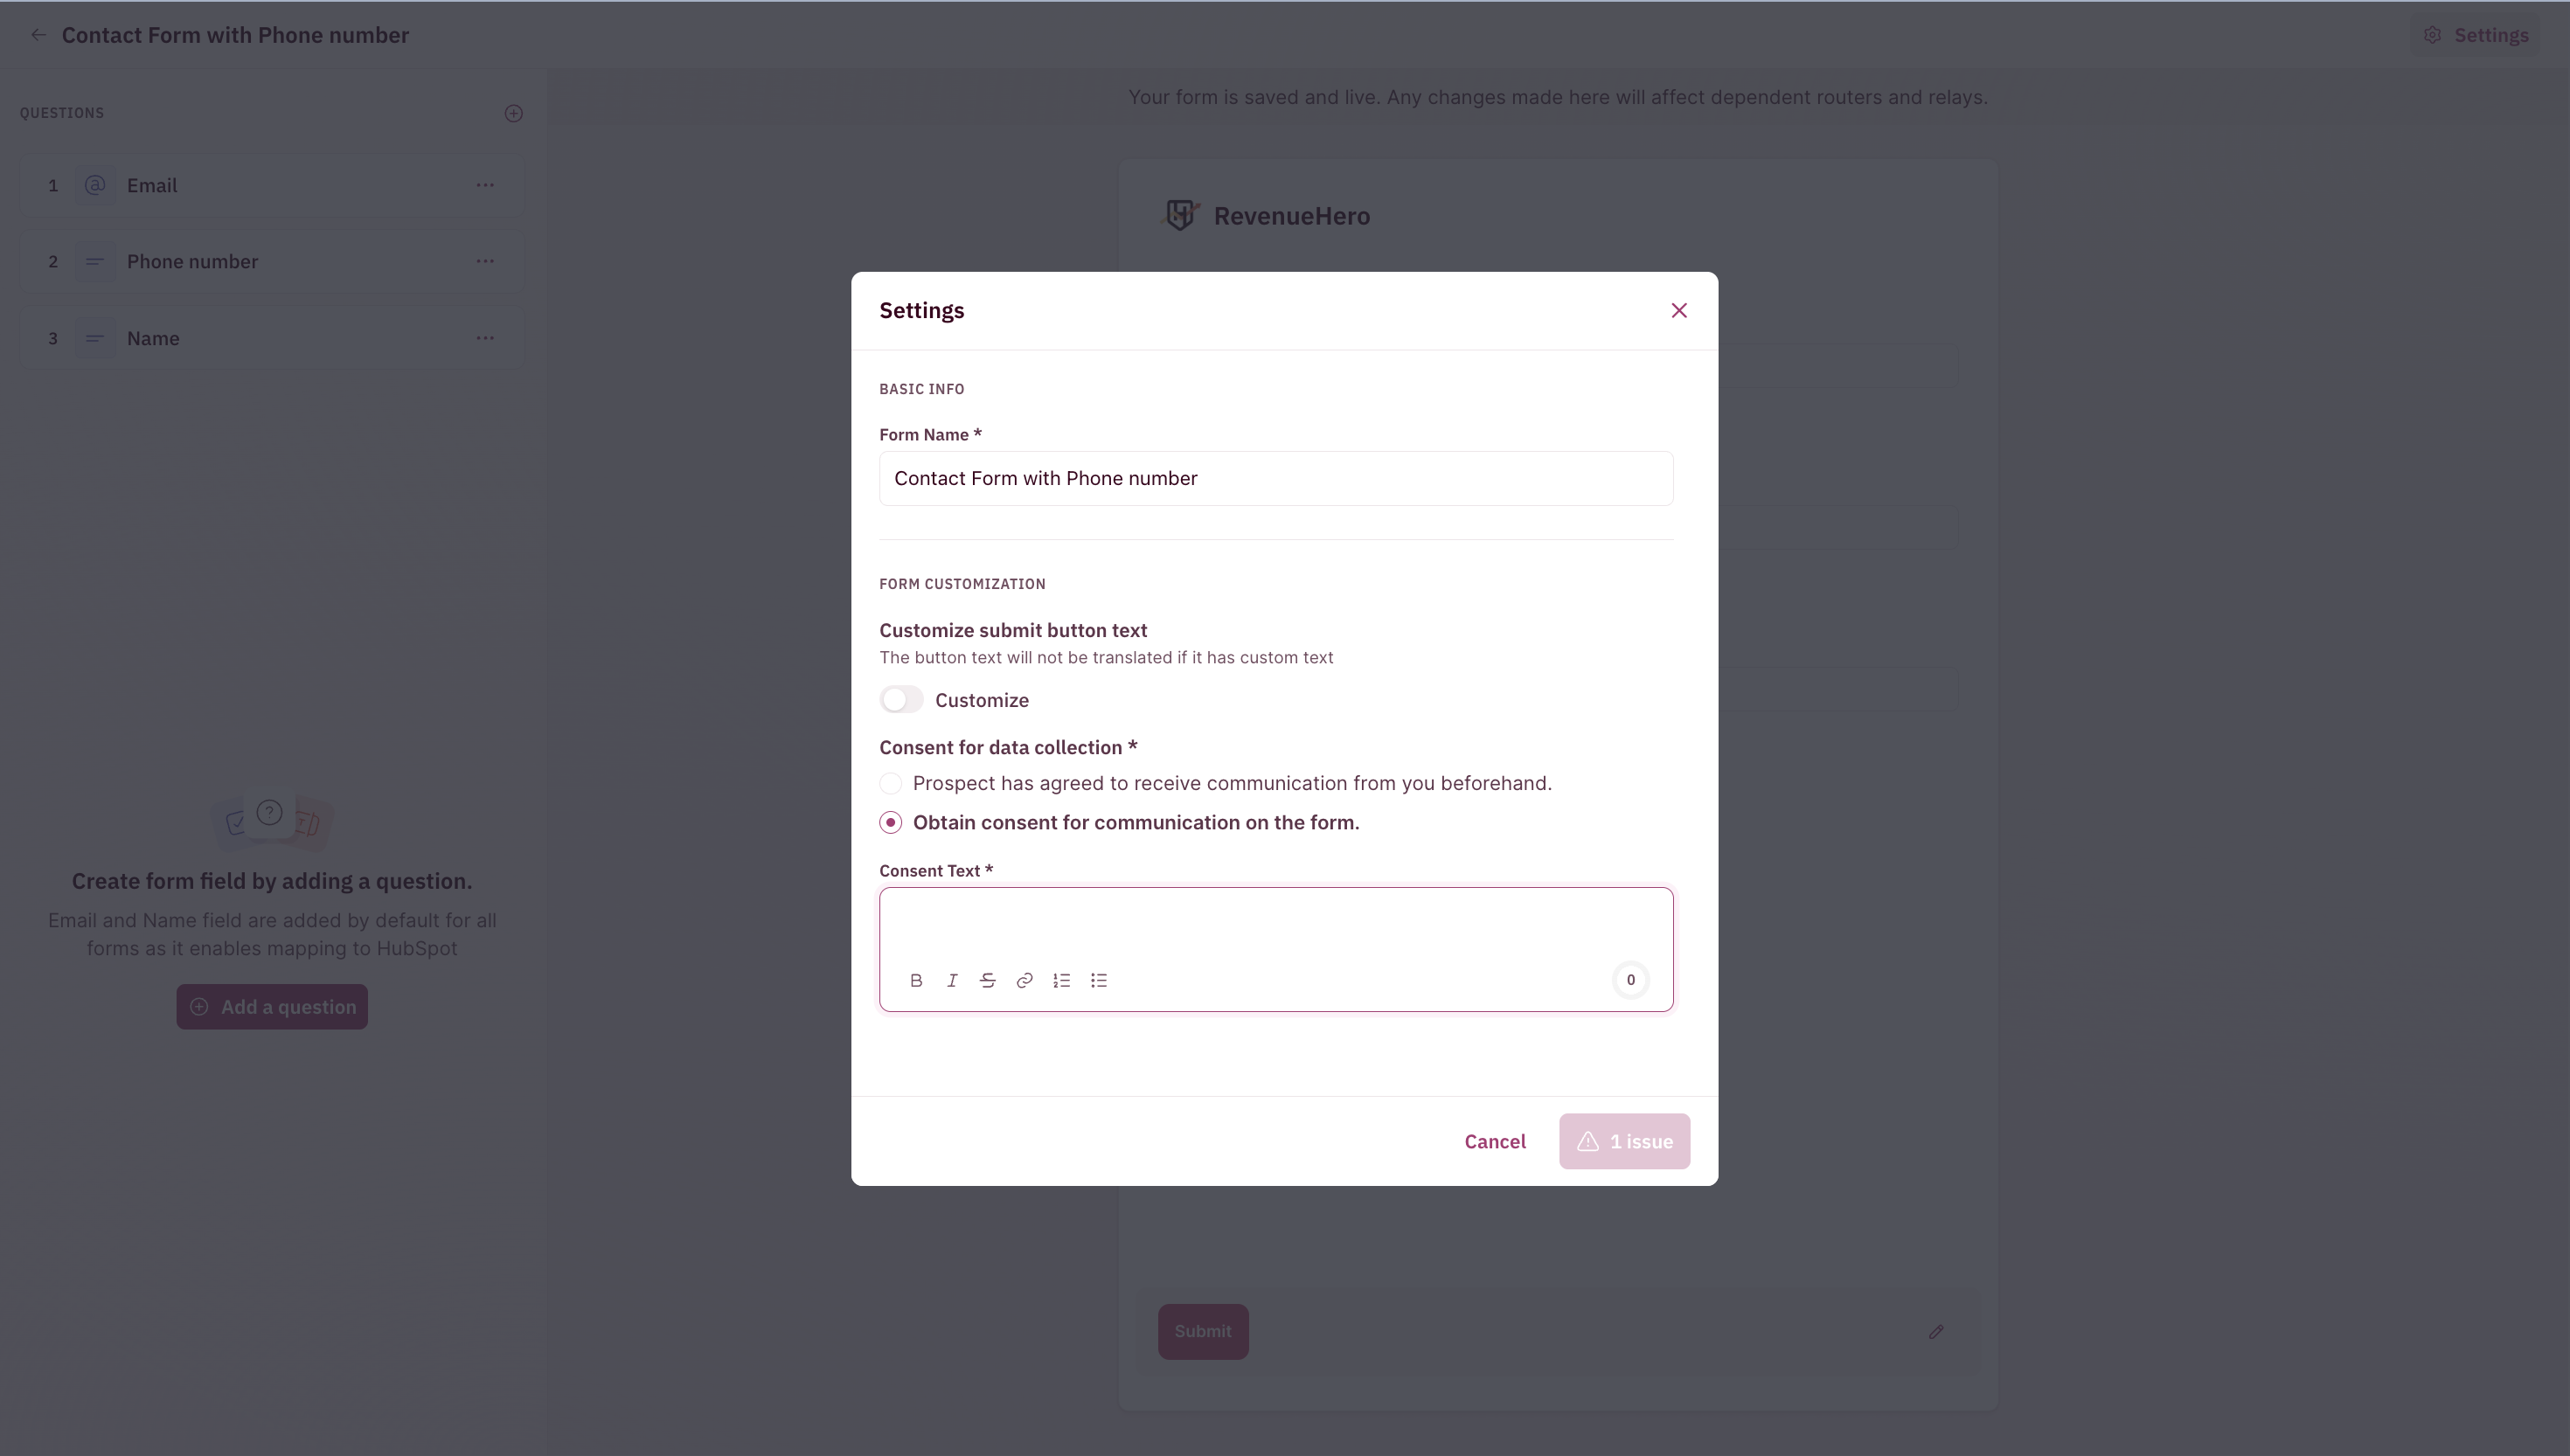
Additional Settings
- Click on Settings in the top-right corner.
- You can edit the following:
- Customize the submit button text
- Add opt-in/consent collection for notifications.
Adding a form to a Campaign Router
- Edit the router under Campaign
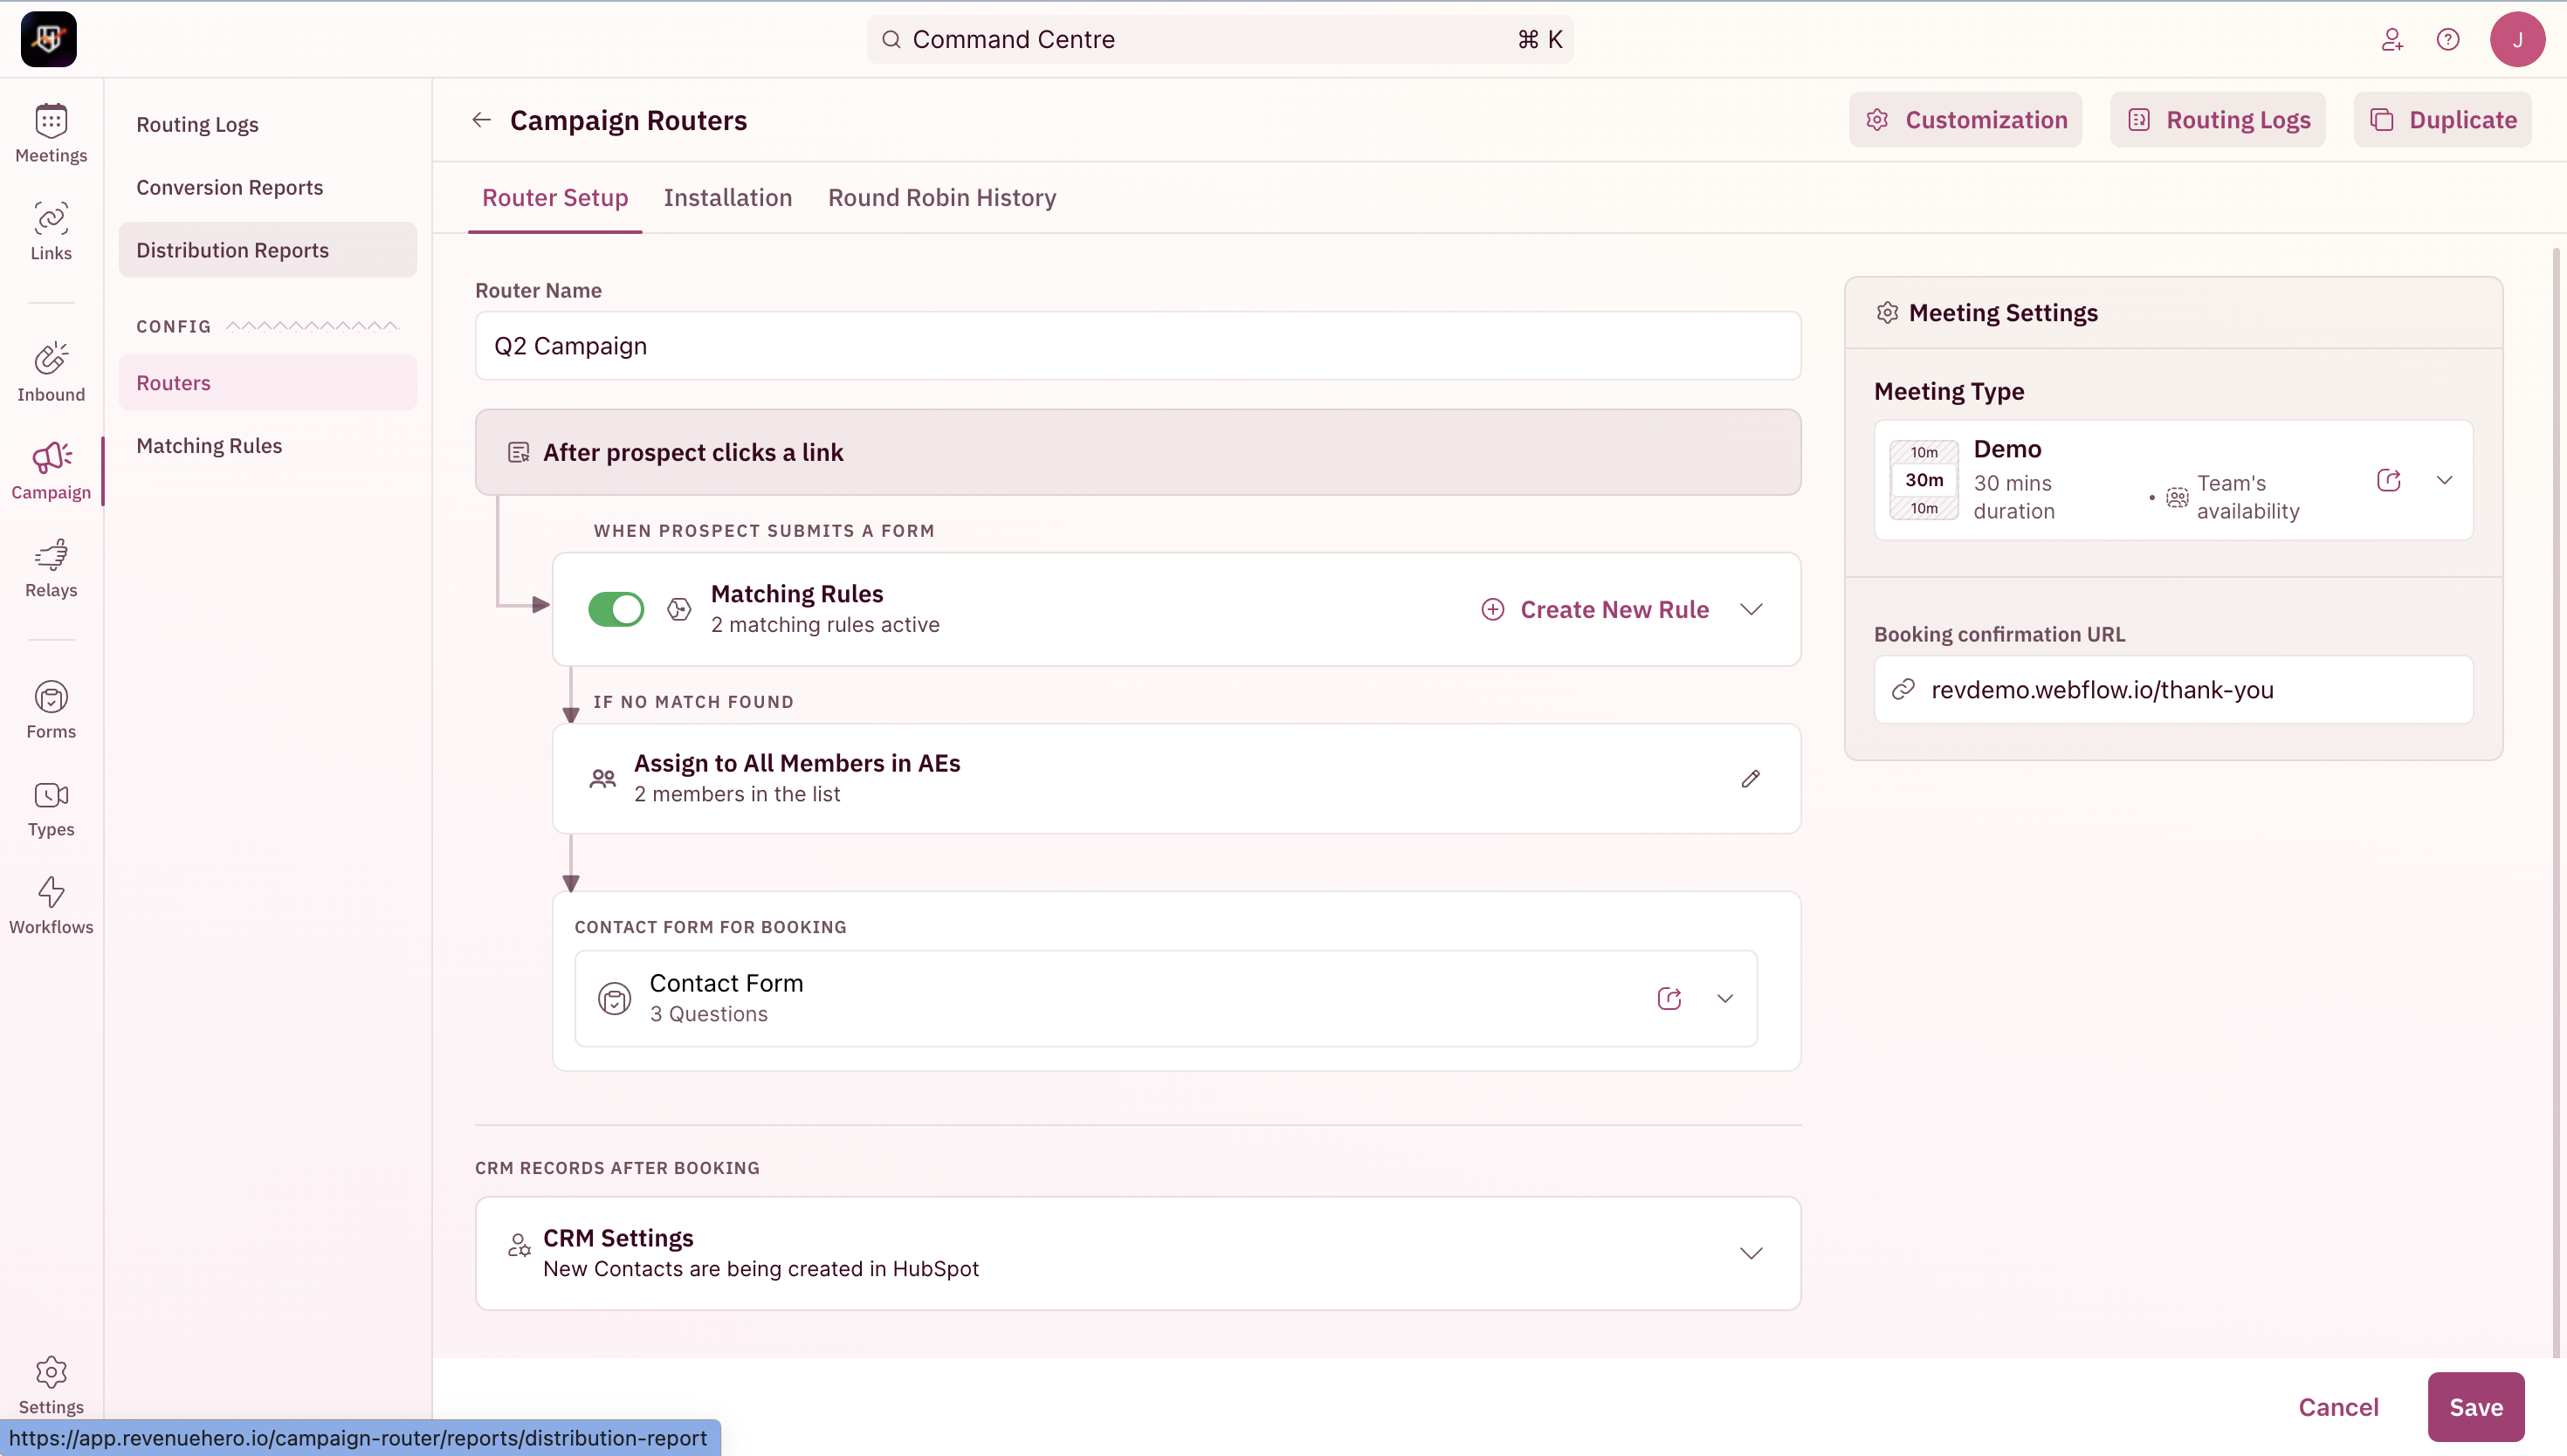
- Swap out the default form with the one you’ve edited/created.
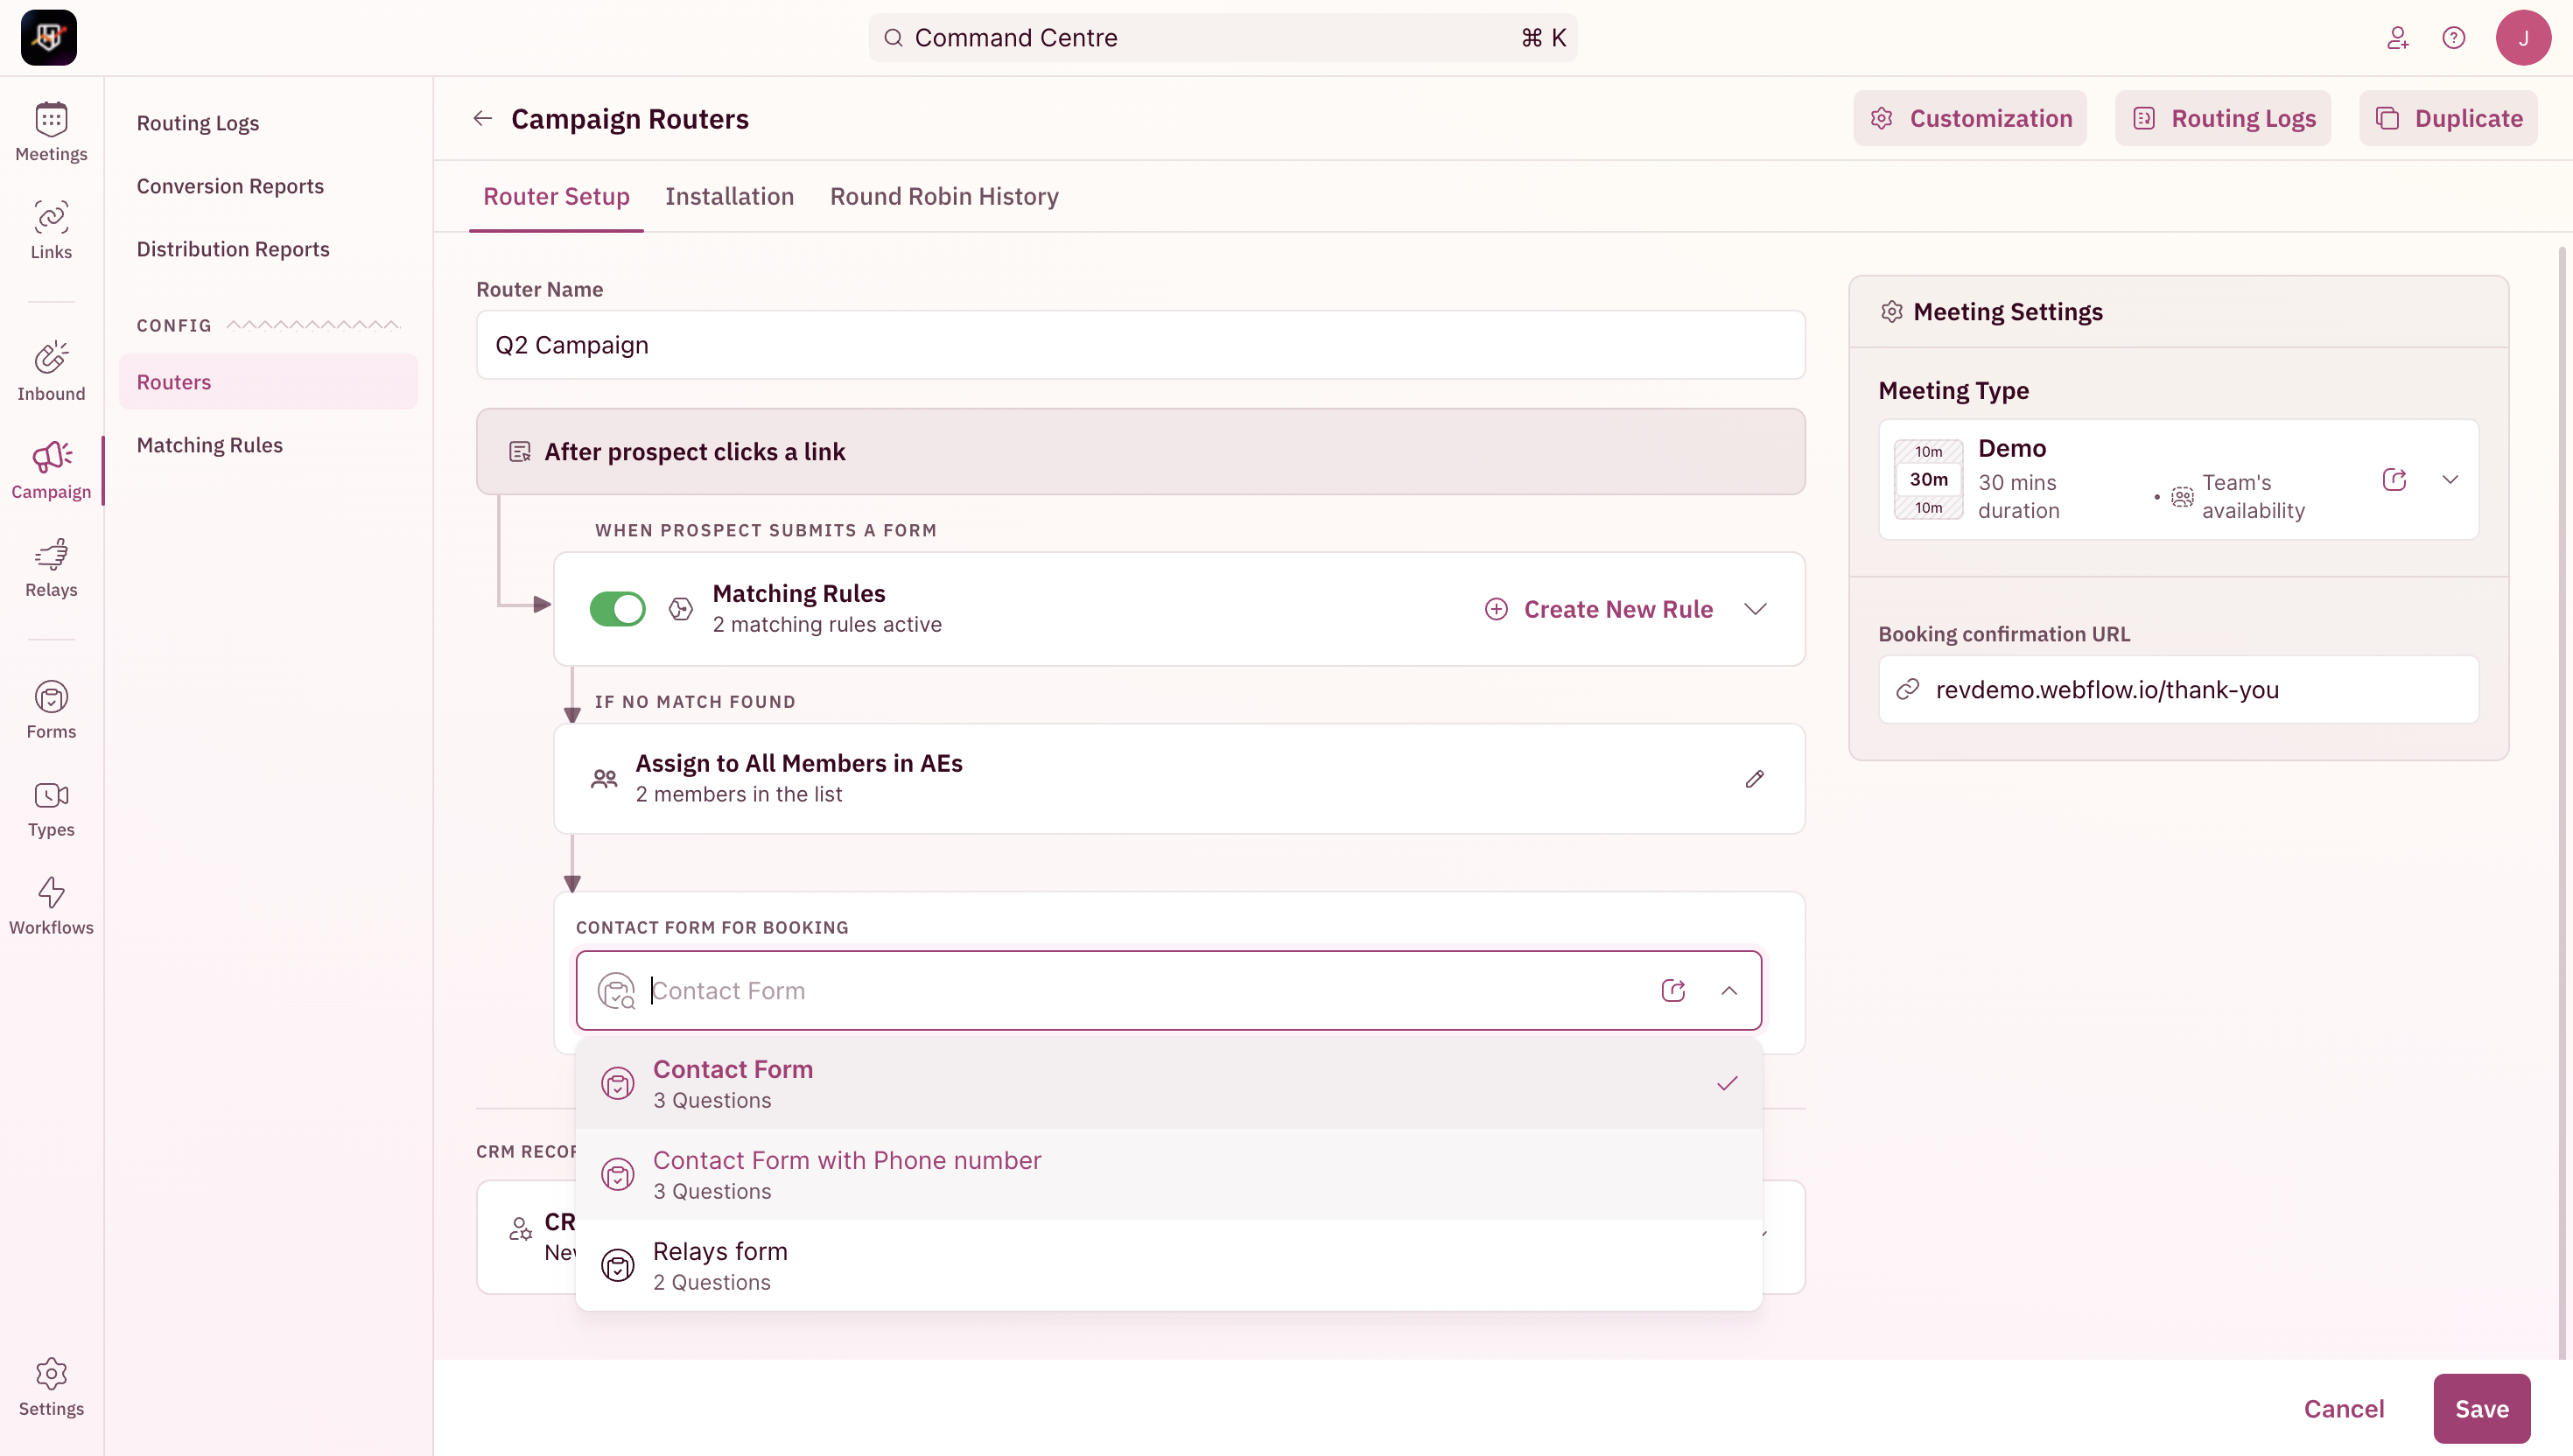
- Save and we’re all set!
The additional form fields attached to a campaign router will pass that information back to the CRM. Conditional routing can’t be performed based on this information.
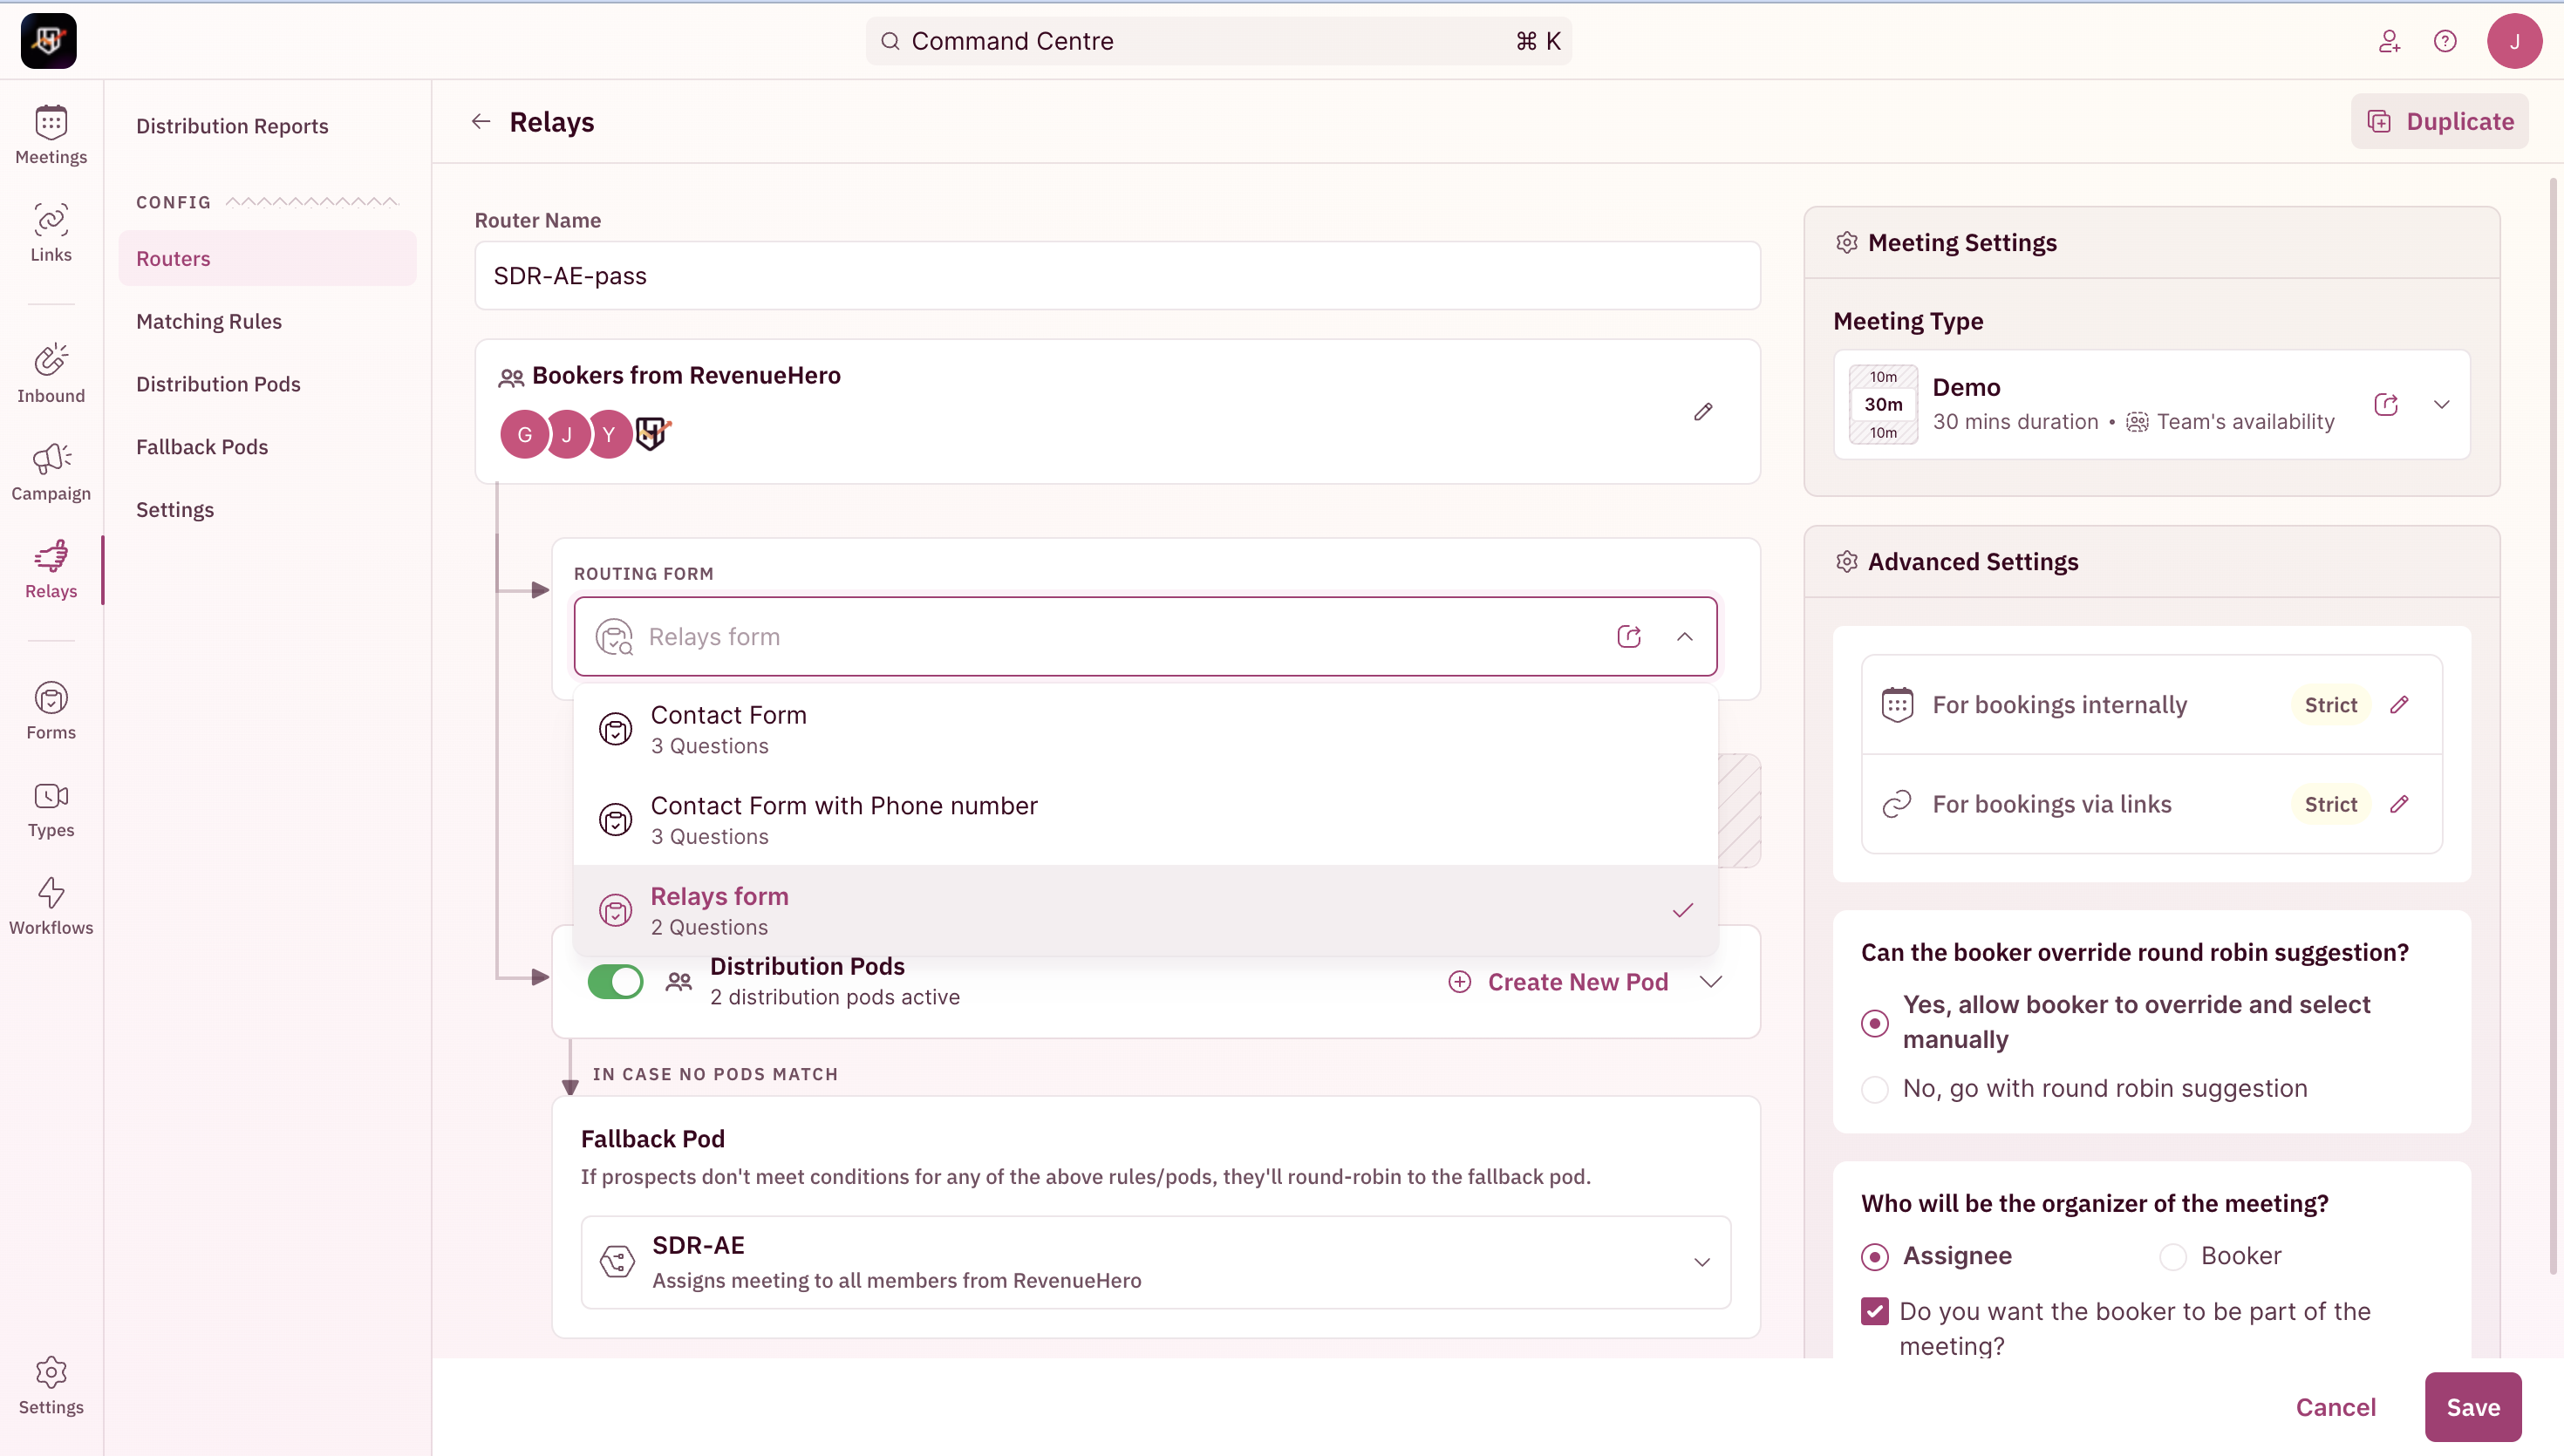
Adding a form to a Relay
- Edit the specific router under Relays
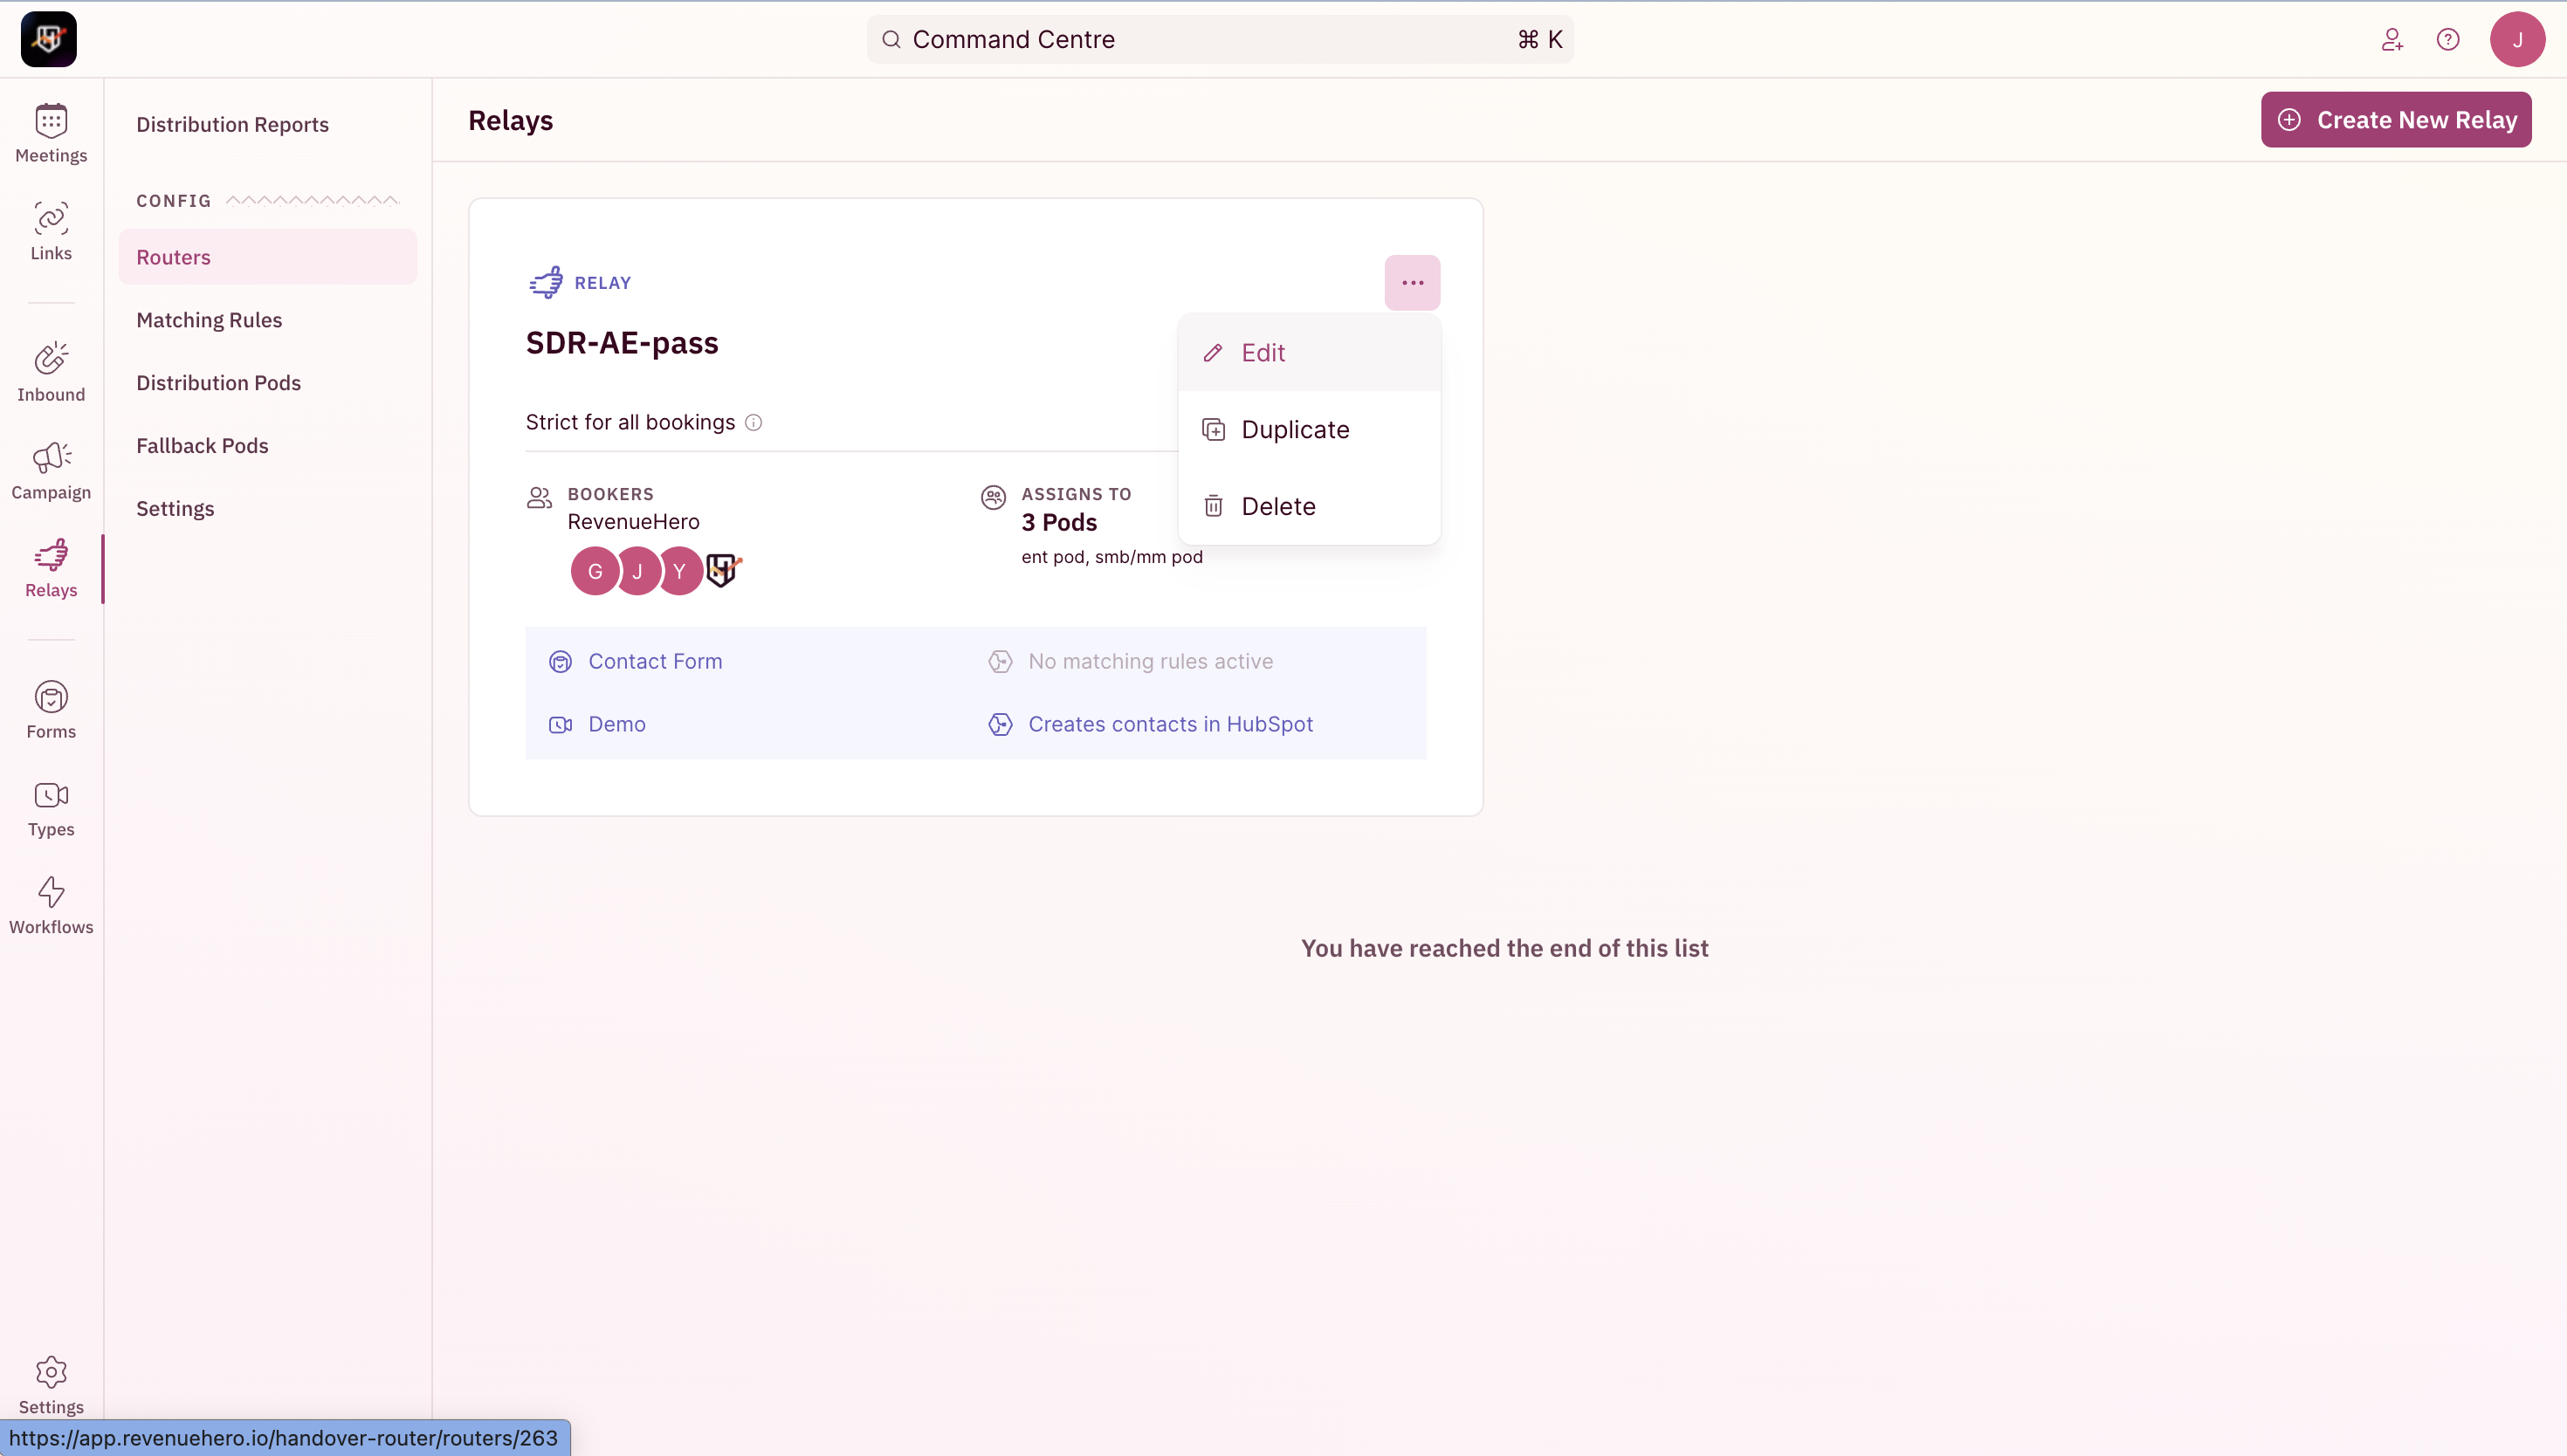
- Swap out the default form with the one you’ve edited/created.
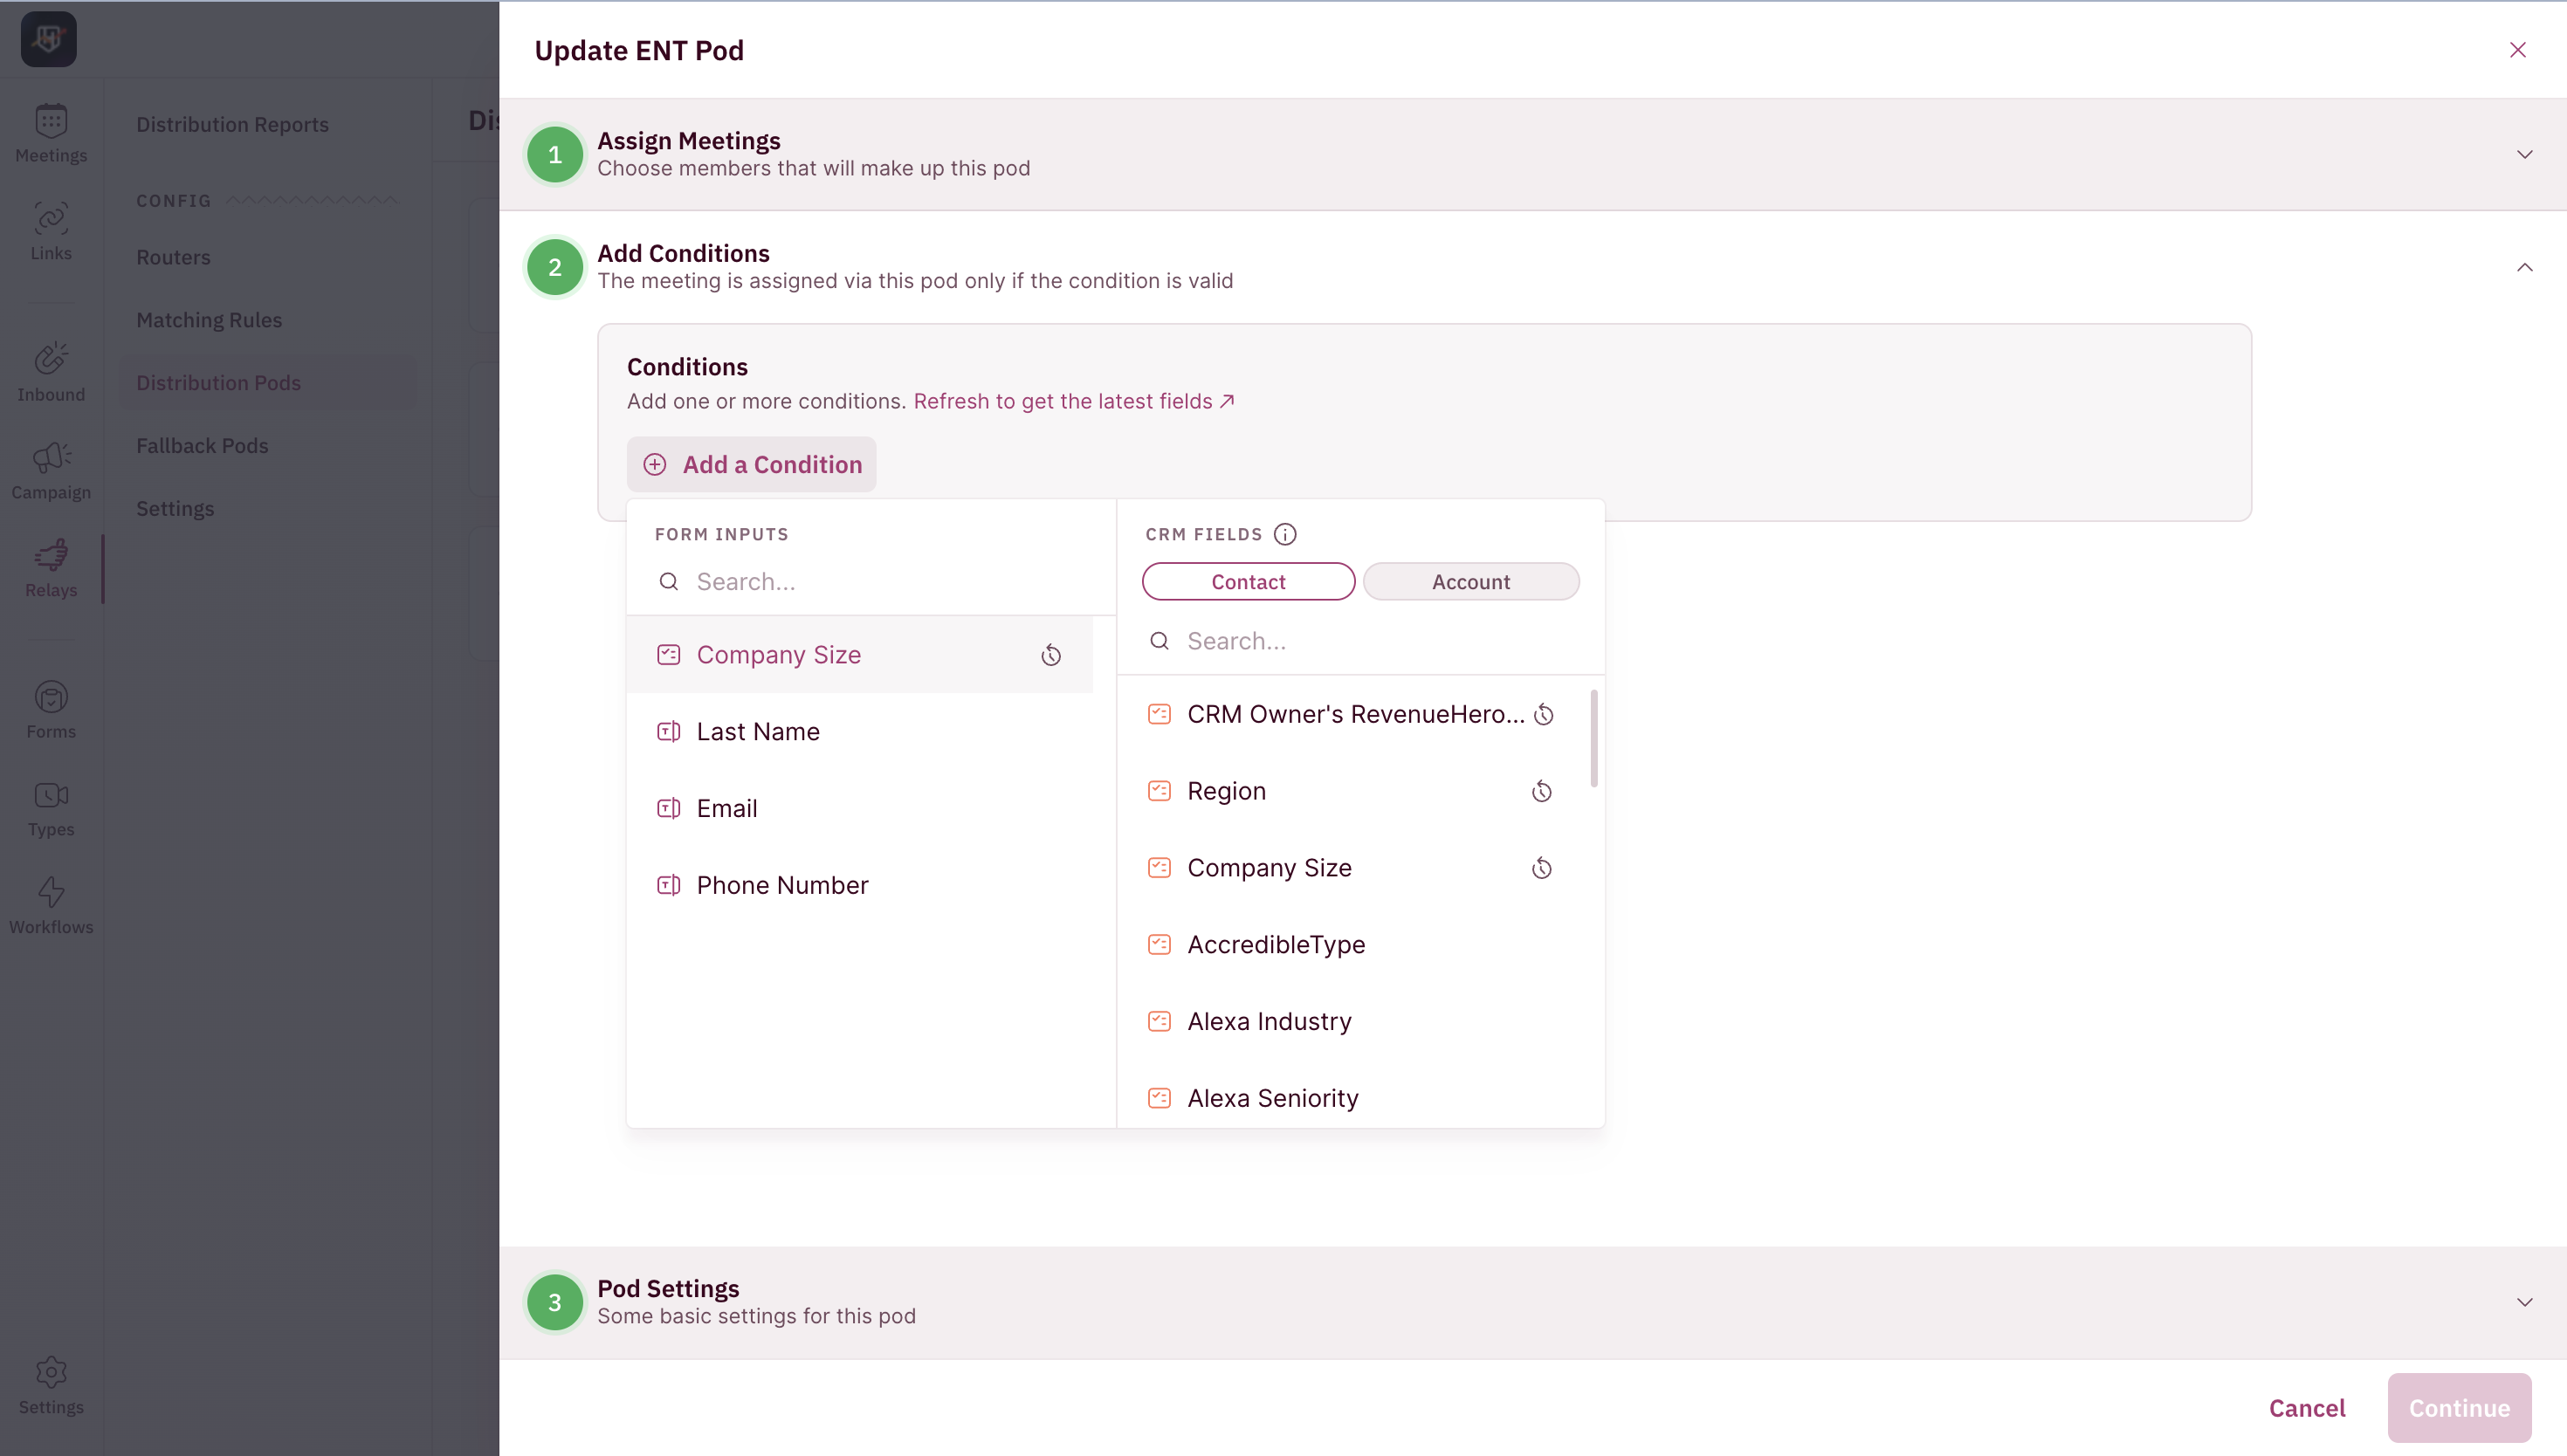
Conditional routing is possible with the information collected by setting your criteria in a distribution pod.
- Edit your Distribution Pods and pick the field from Form Inputs.
- You’re all set. Your reps will be able to fill out these form fields while booking a meeting OR your prospects can fill it out if your reps have sent out a relay link.
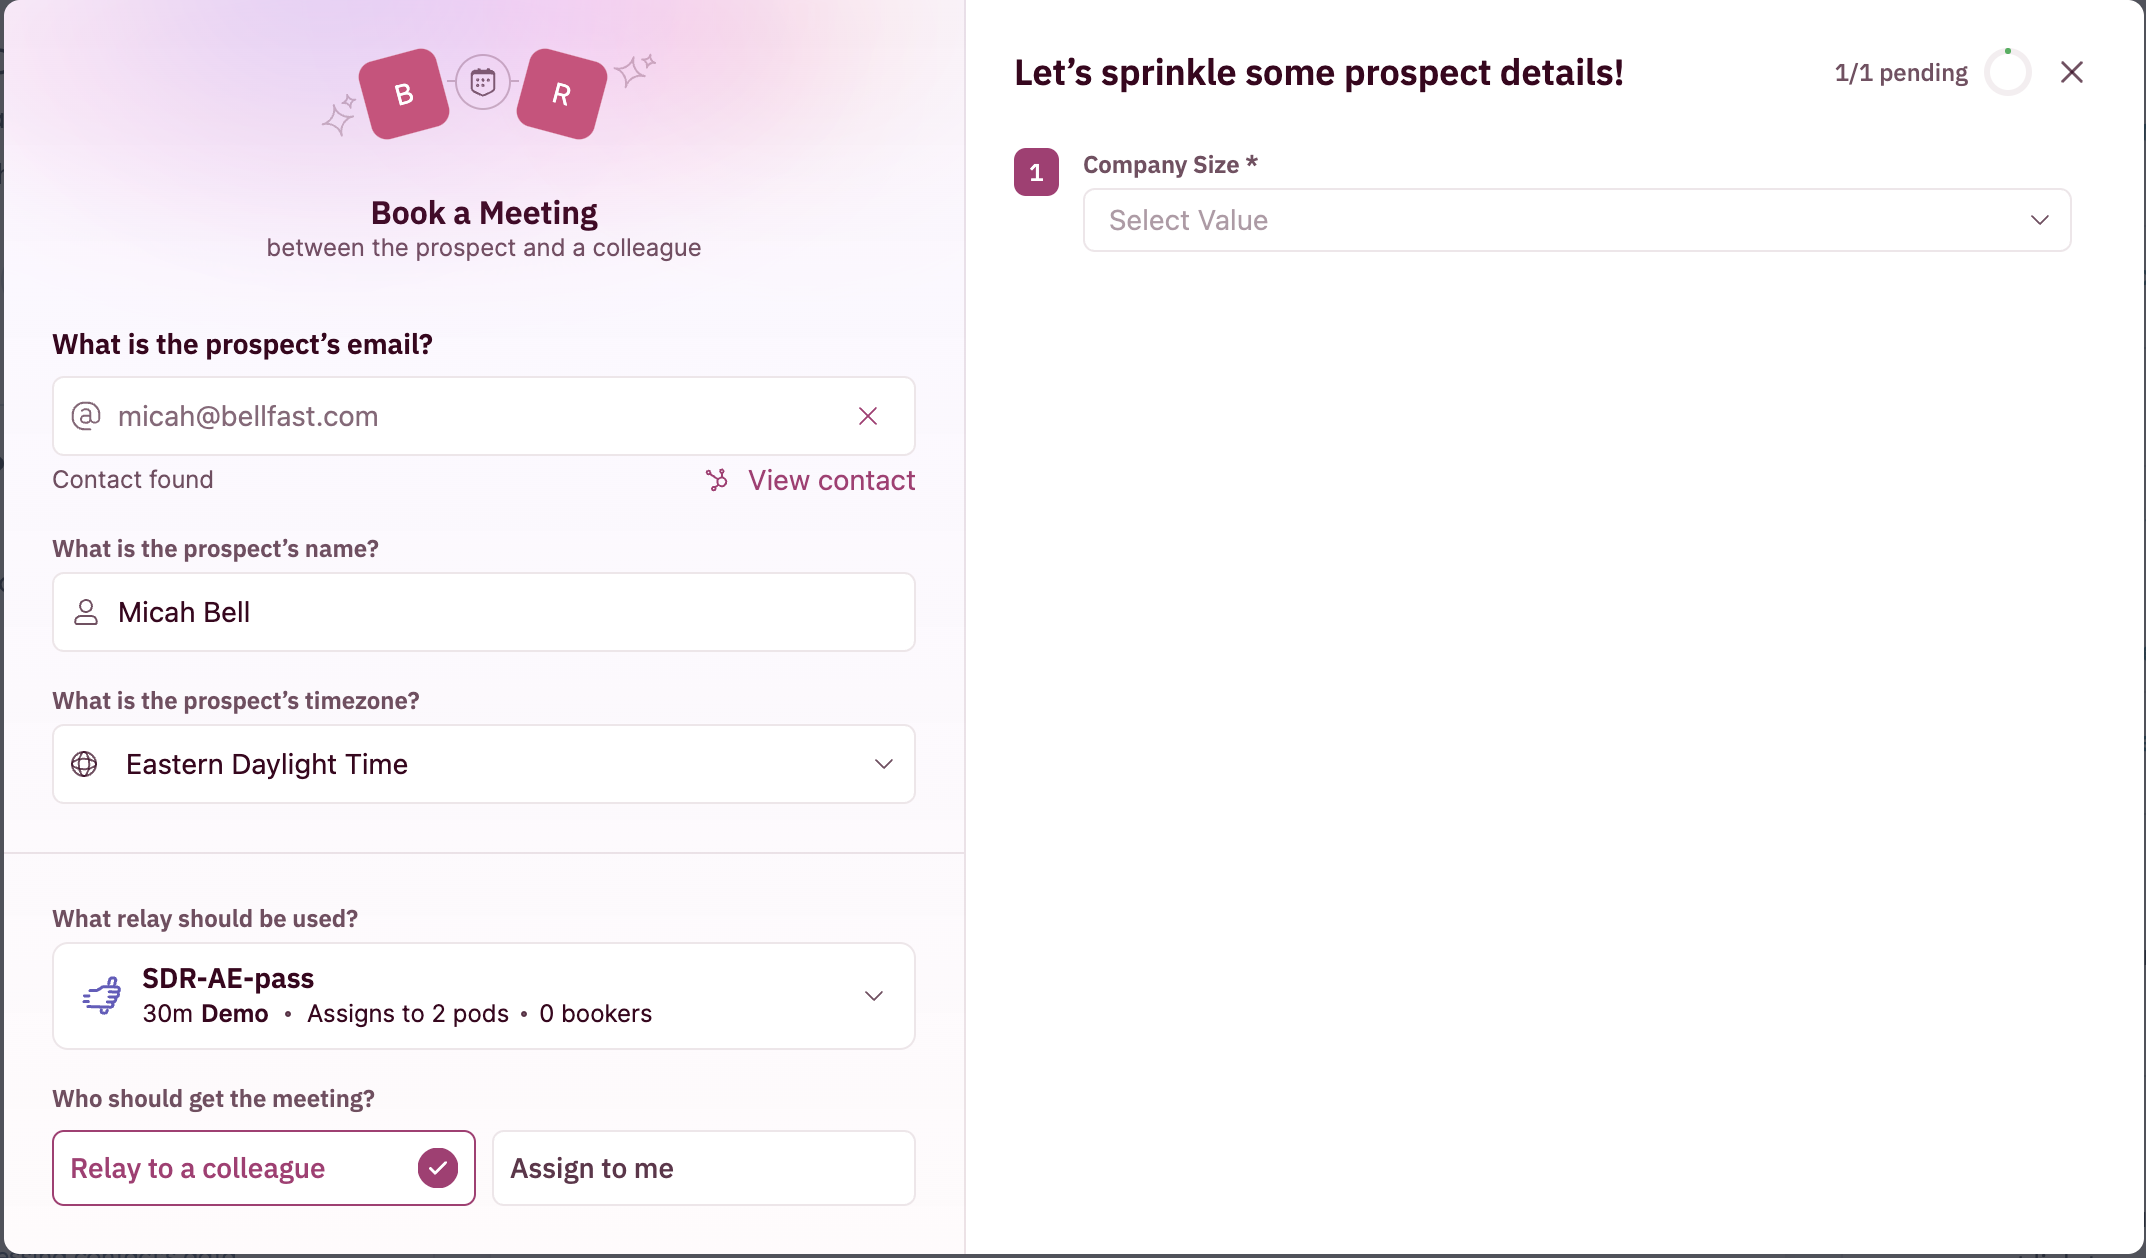
Through Relay UI - Rep's experience
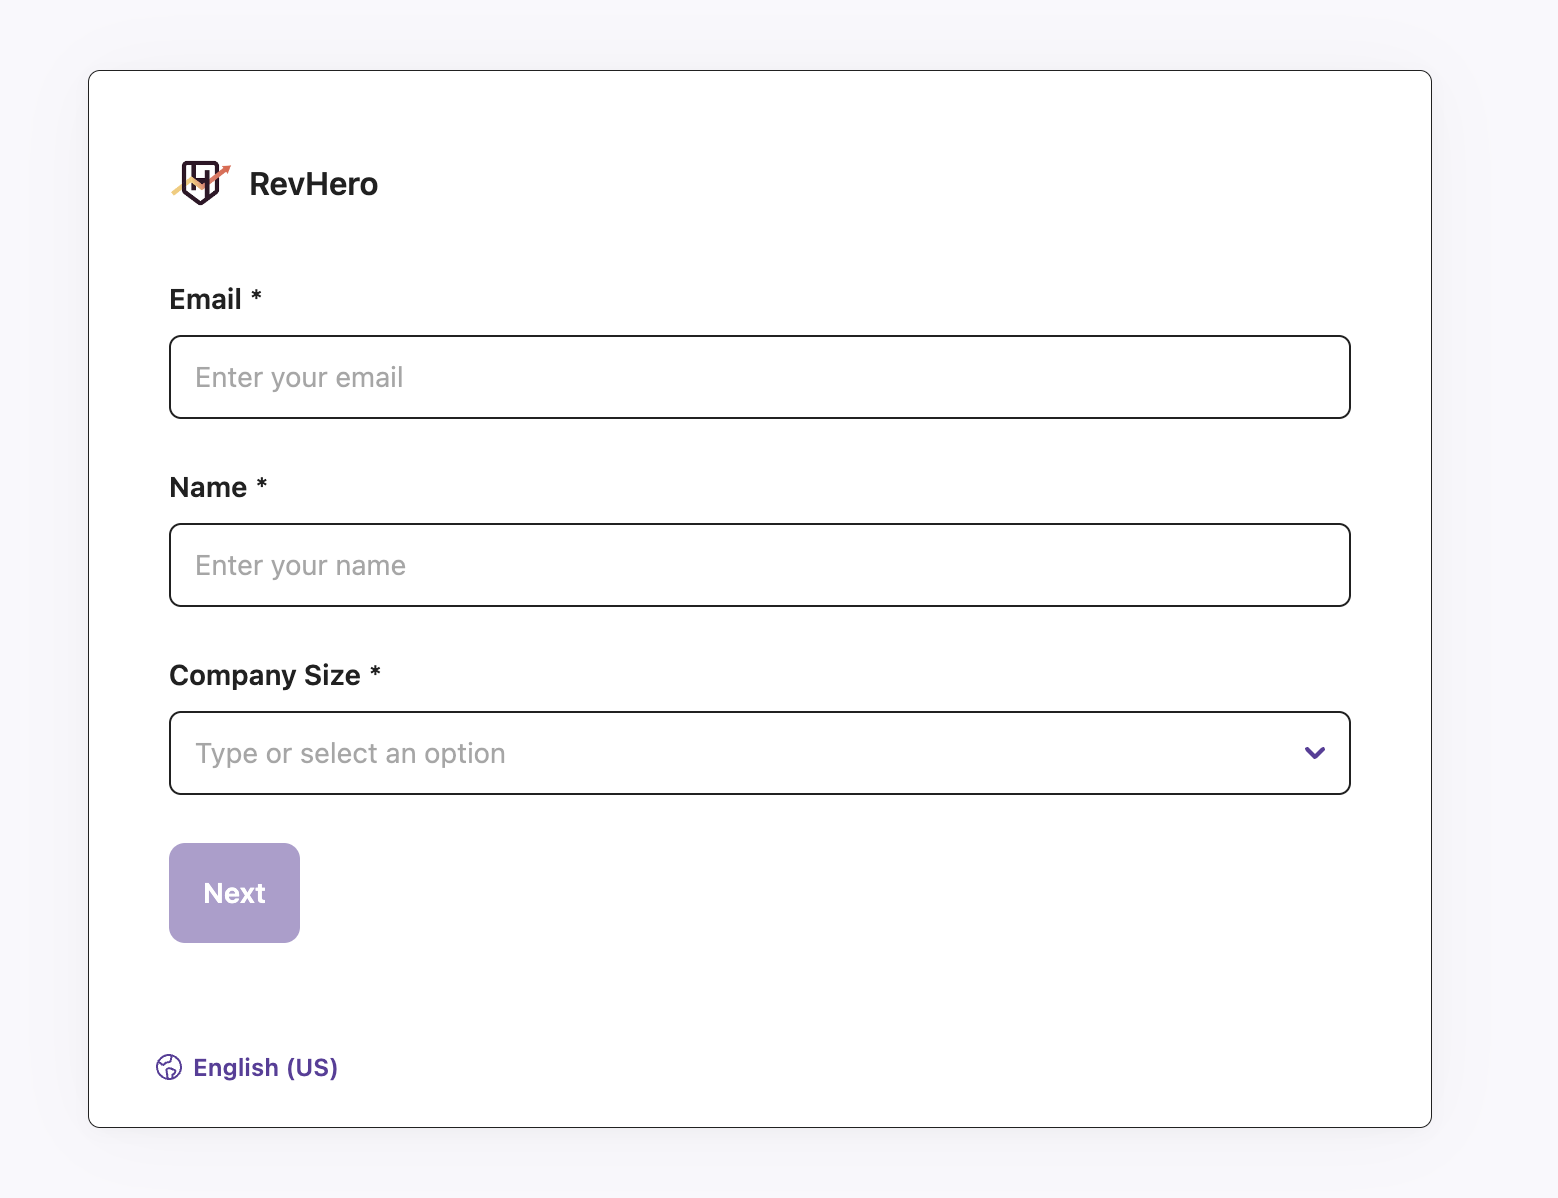
Through Relay links - Prospect experience