BEFORE WE BEGINThere are a couple of pre-requisites to create your first Relay:
Book Meetings from your CRM
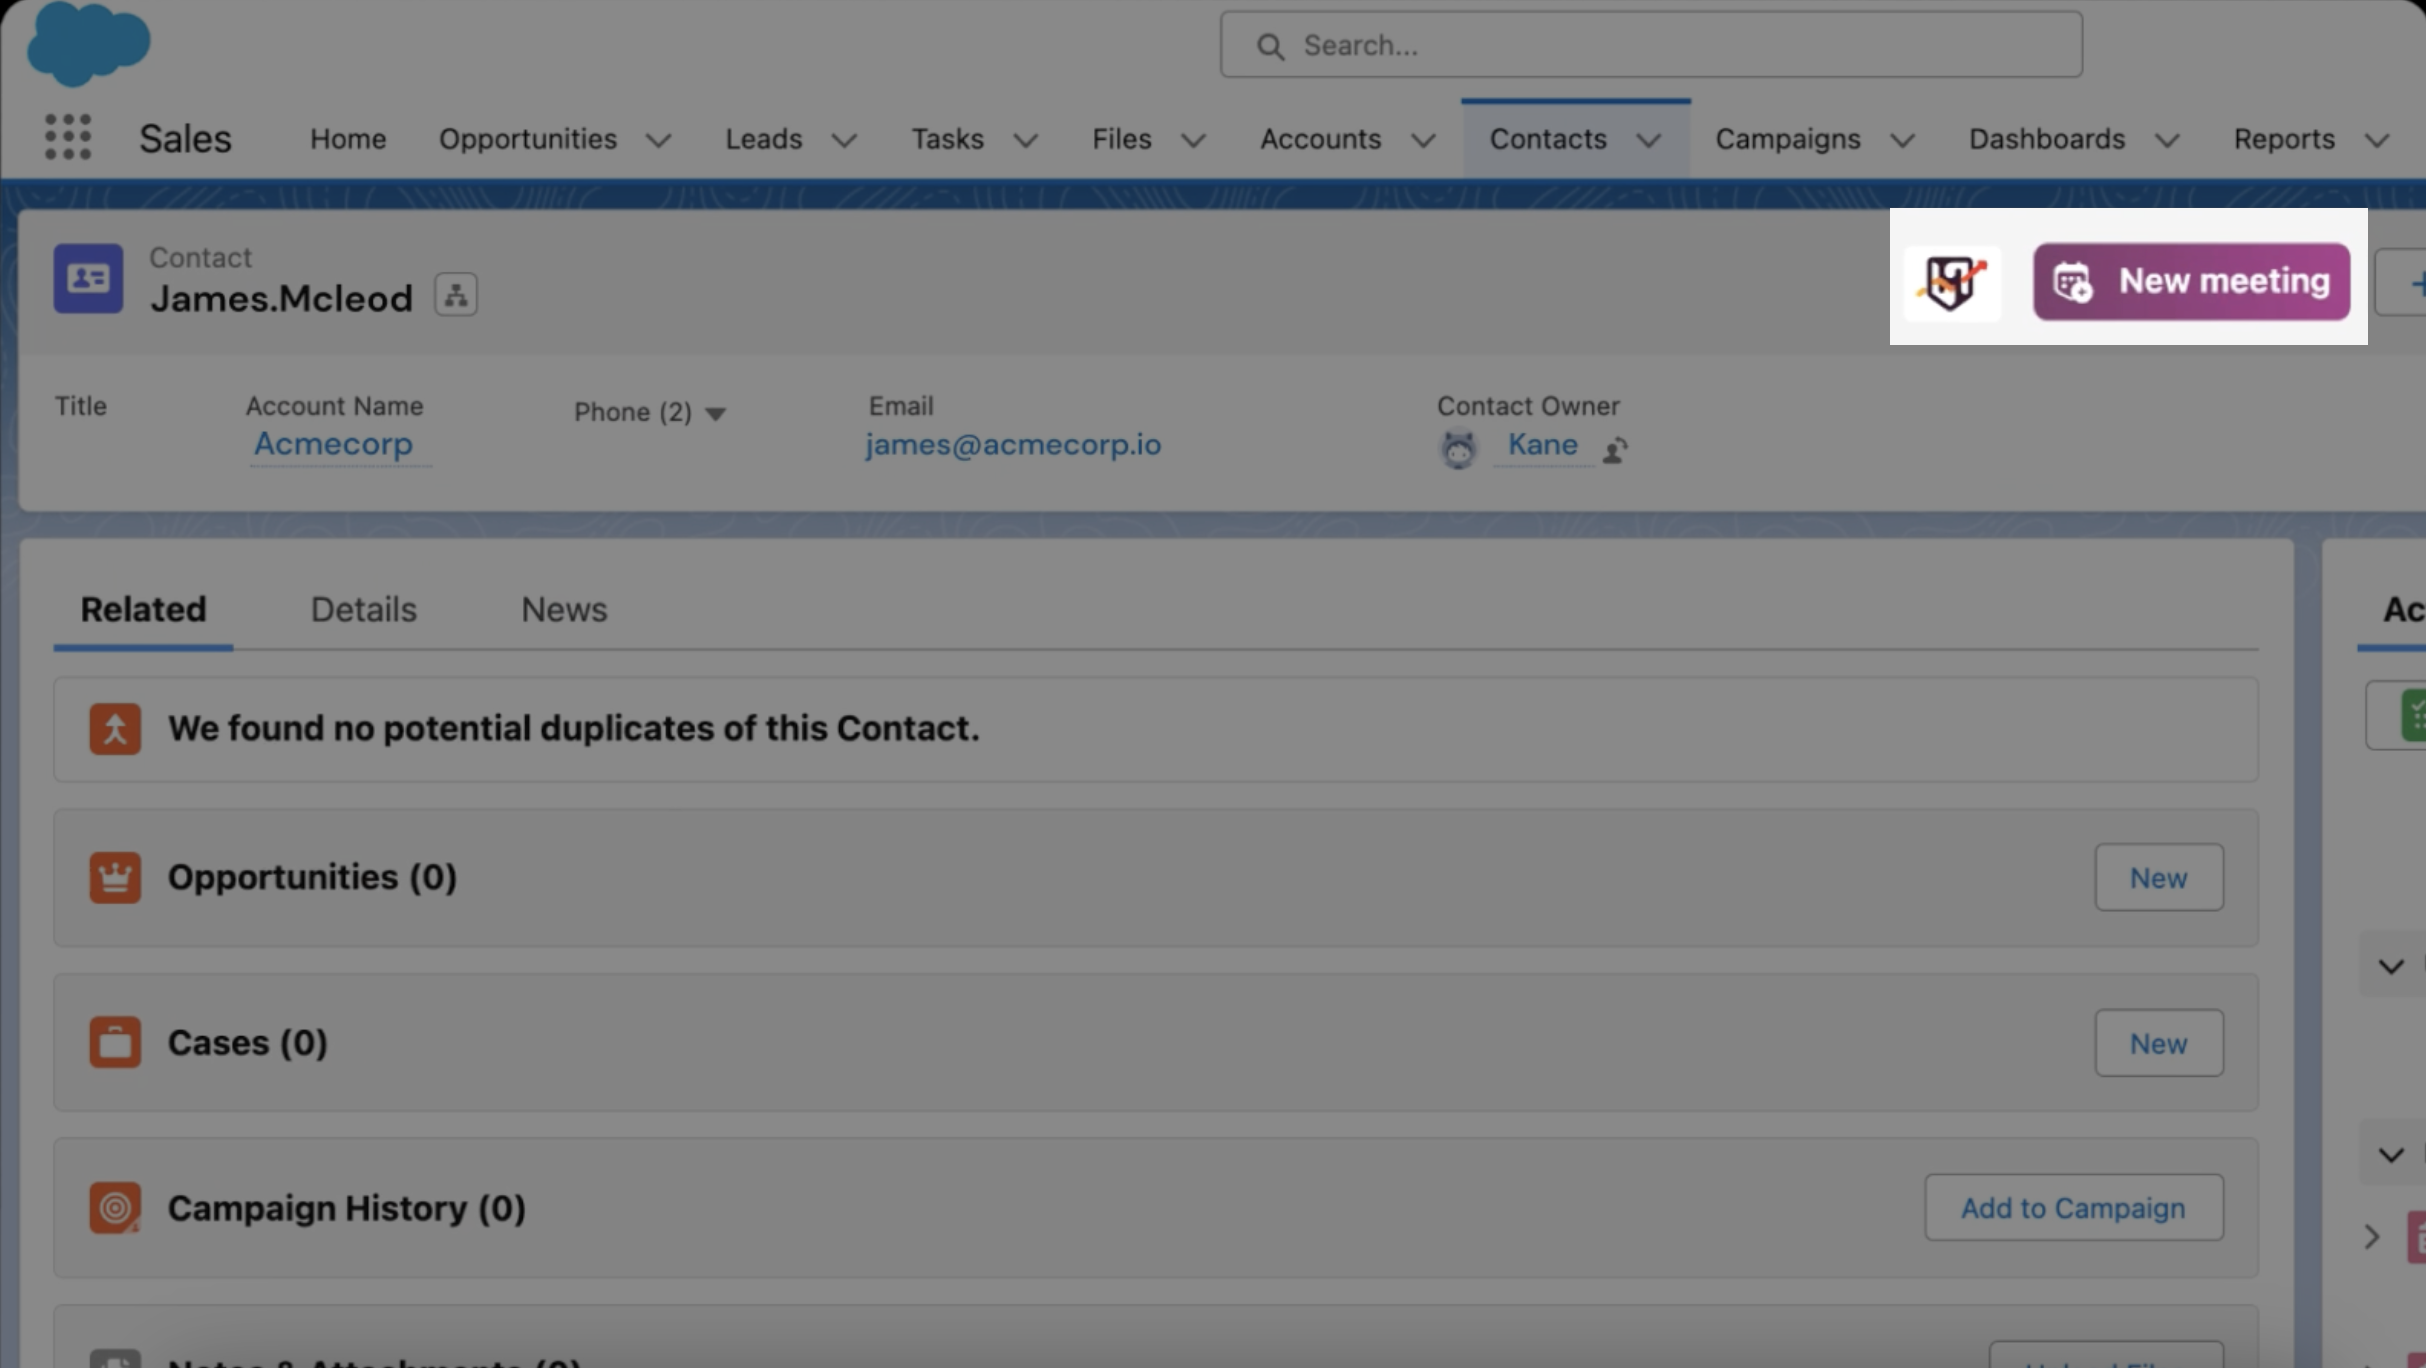
- In your CRM dashboard, you’ll find a “New Meeting” button right next to the RevenueHero logo. (we’ve shown Salesforce for example here, but the same applies to HubSpot and Zoho CRM as well)
- Click on the “New Meeting” button.
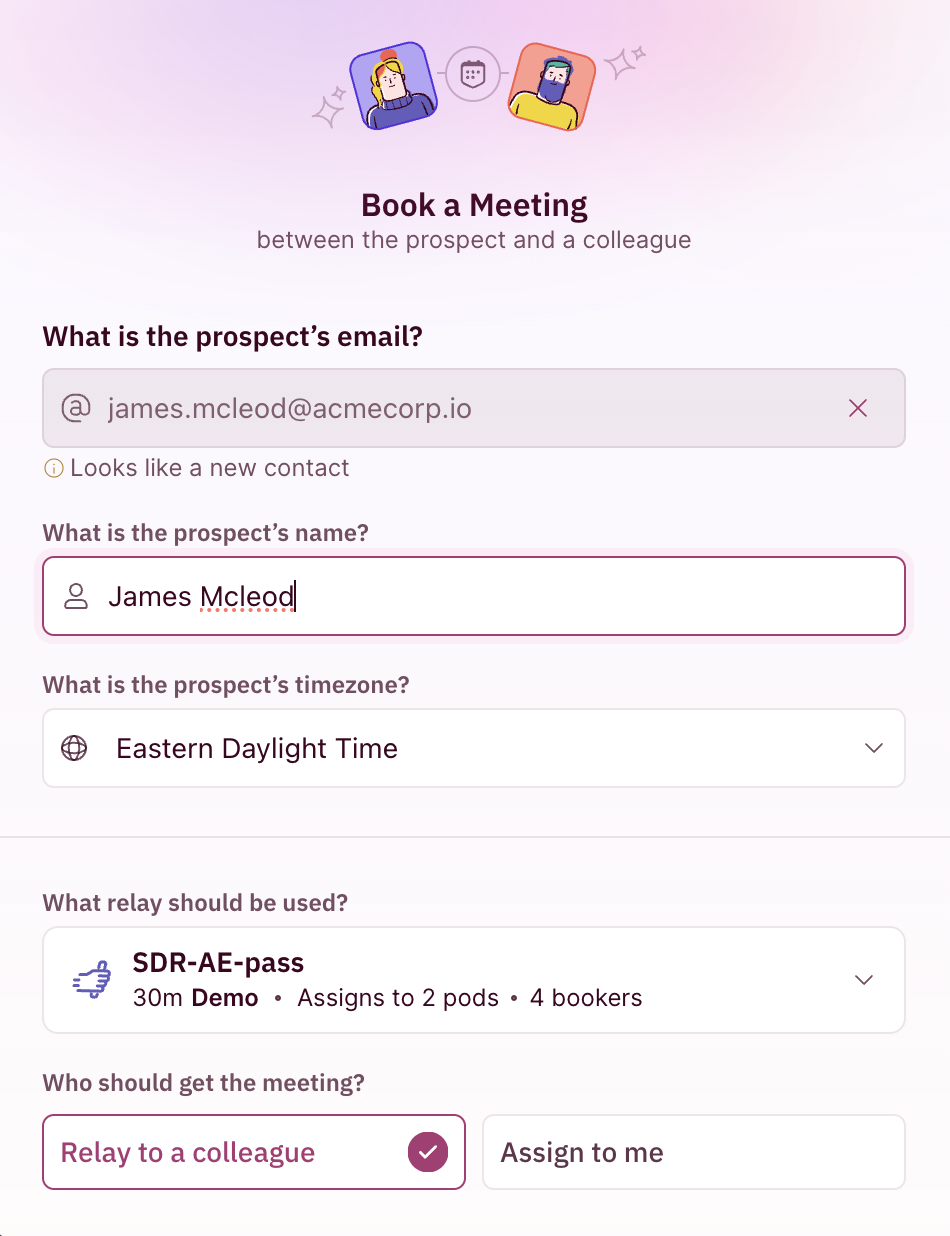
- The “Relay a meeting” window will pop-up on your screen. Enter all the relay details here including the prospect’s name, email, and time zone. Along with this, you’ll need to choose who to assign the meeting to. You can choose between Assign to me or .Relay to a colleague.
- Next up, choose the Relay setting you want to use. Going with our example, remember we named our Relay “US West Handoff”. You can choose that Relay from the drop-down.
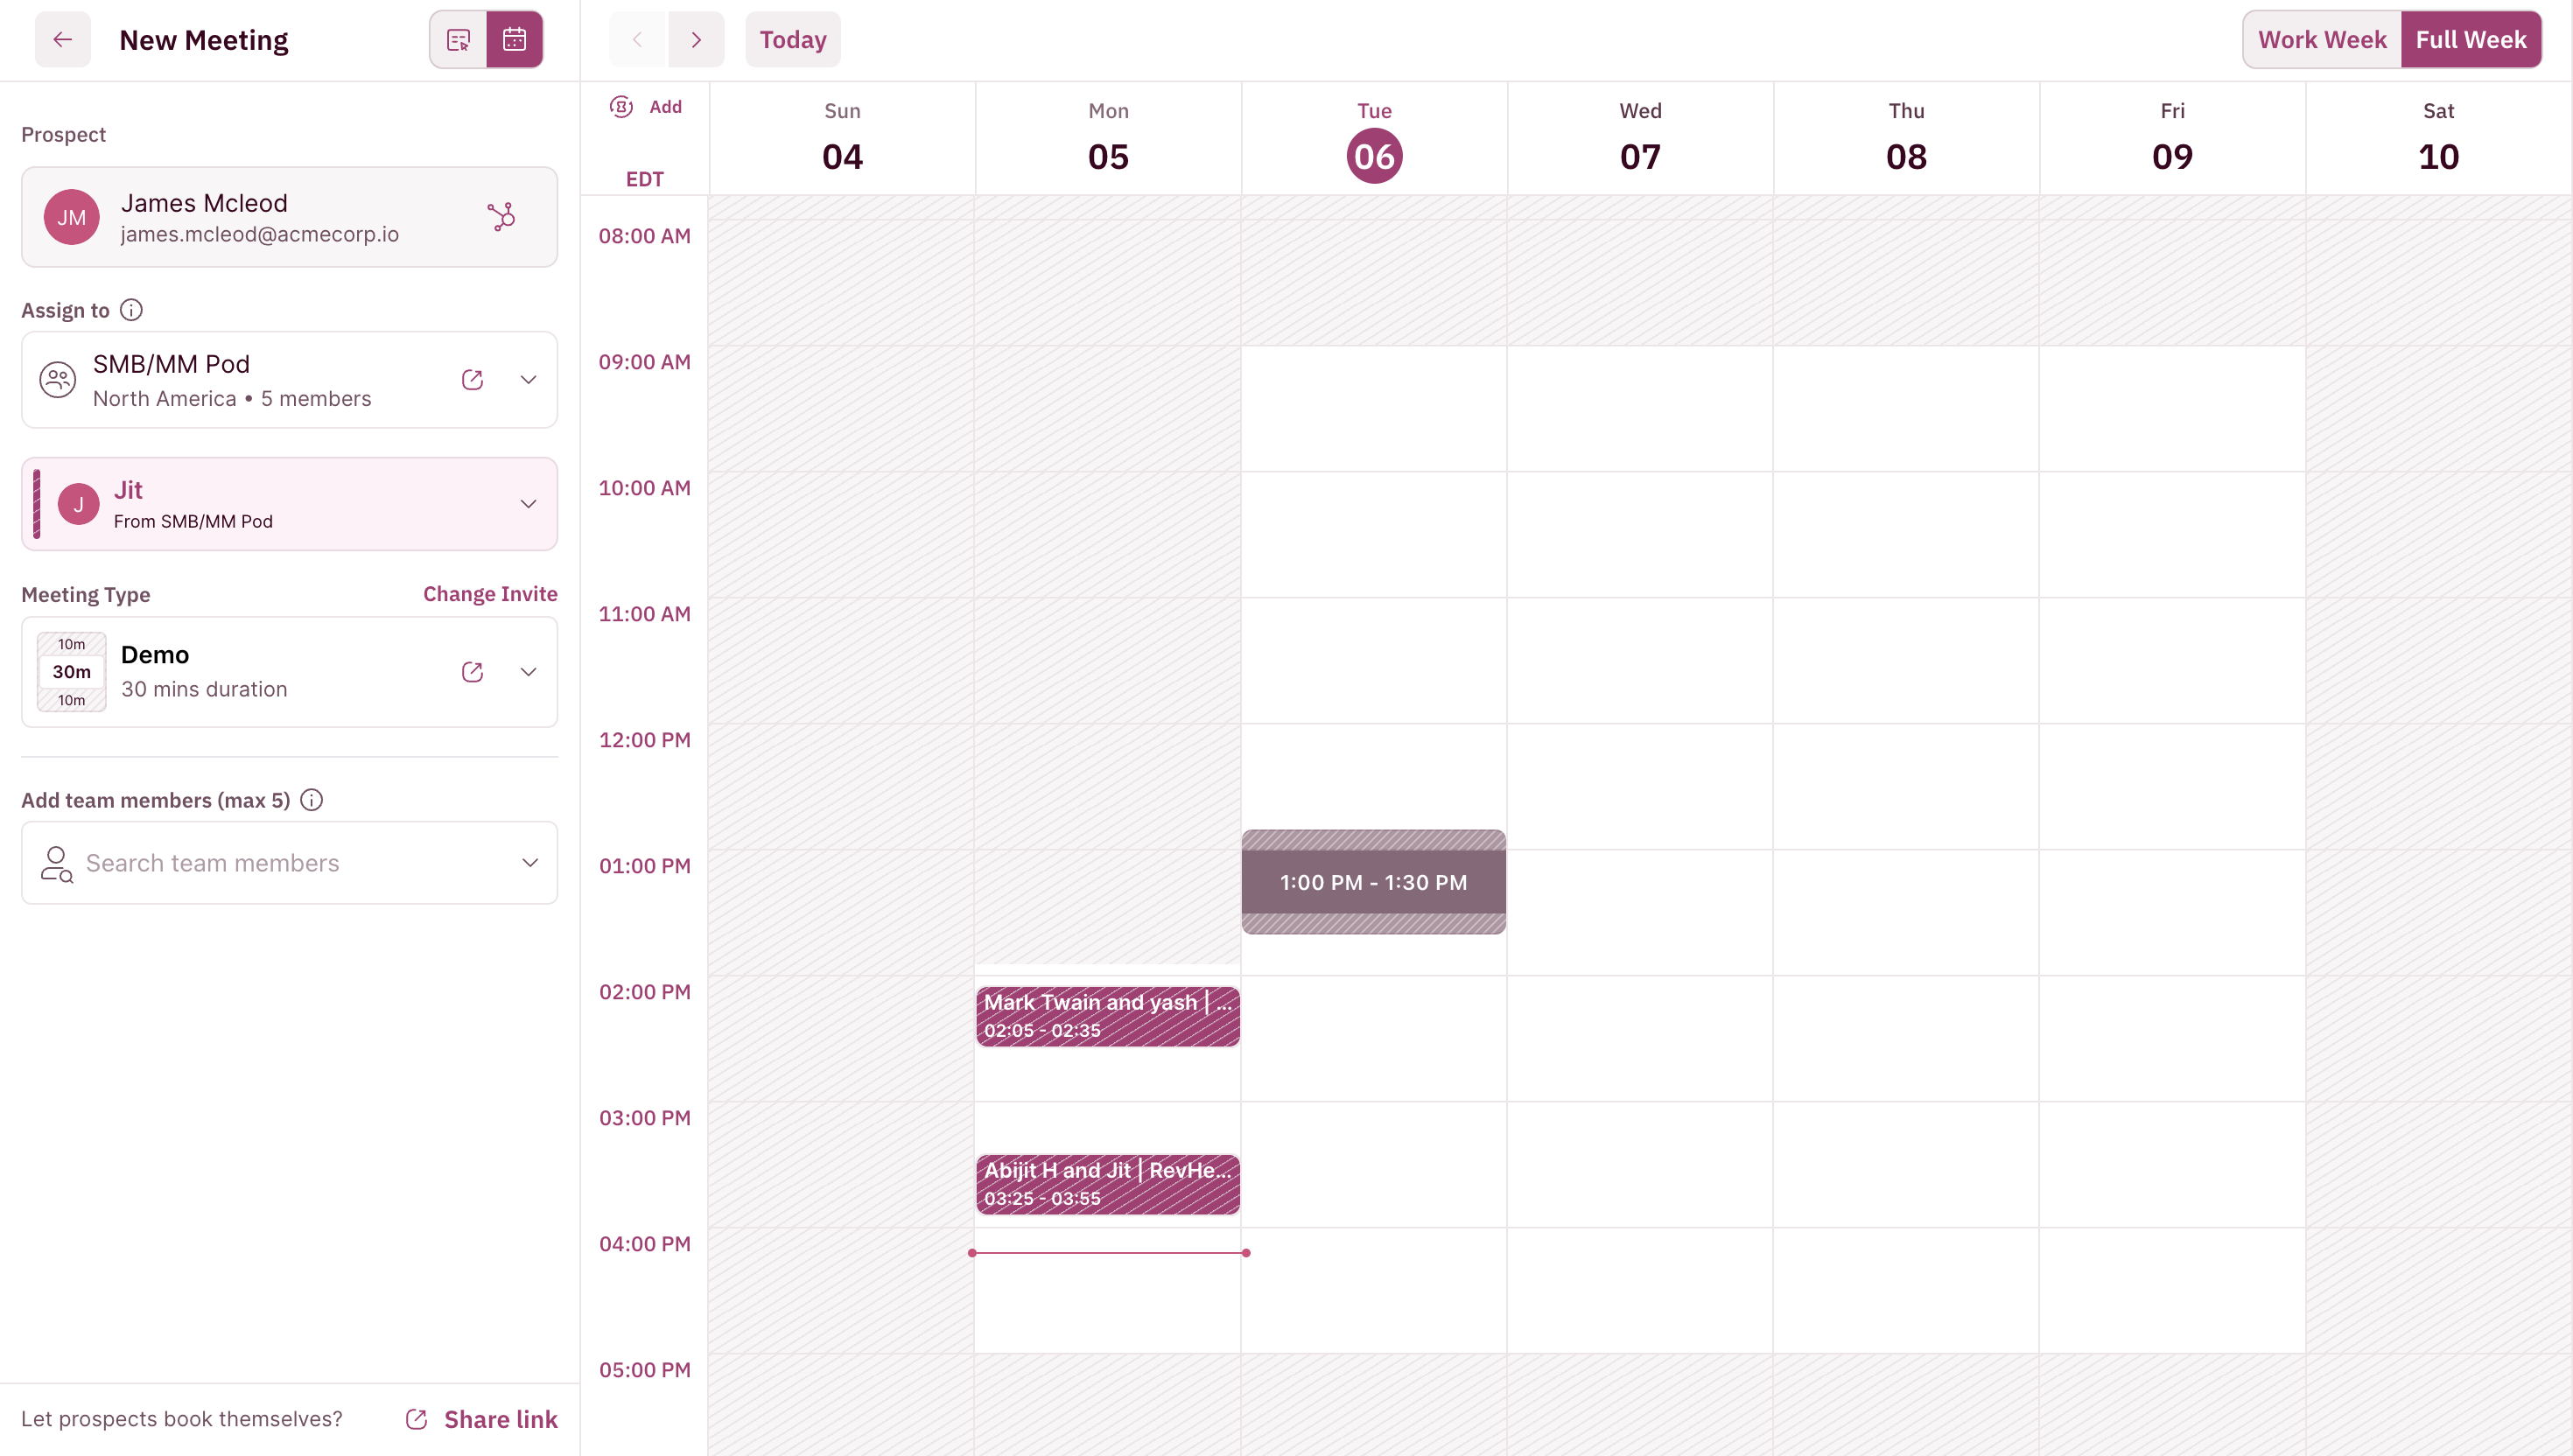
- Here you will be able to see the meeting type, the AE who has been assigned, and their calendar availability. You can also choose to add team members and invite external guests.
- Next, you will be required to pick the time slots from the ones available in the AEs calendar. You can move your cursor and choose one for the desired date.
- You have 2 ways to proceed from here.
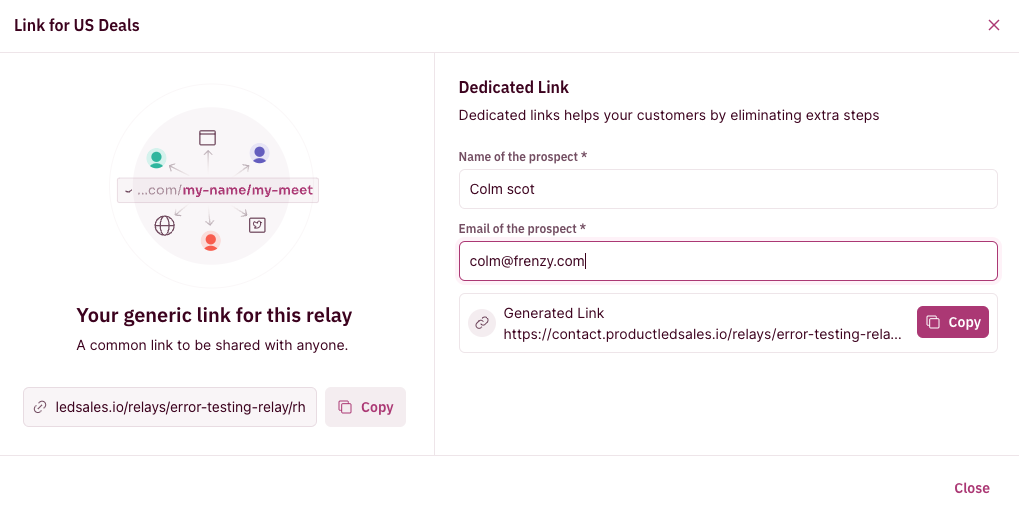
- You can click on “Share Availability” which generates a booking link that you can share with your prospect via email for them to confirm and book the meeting directly.
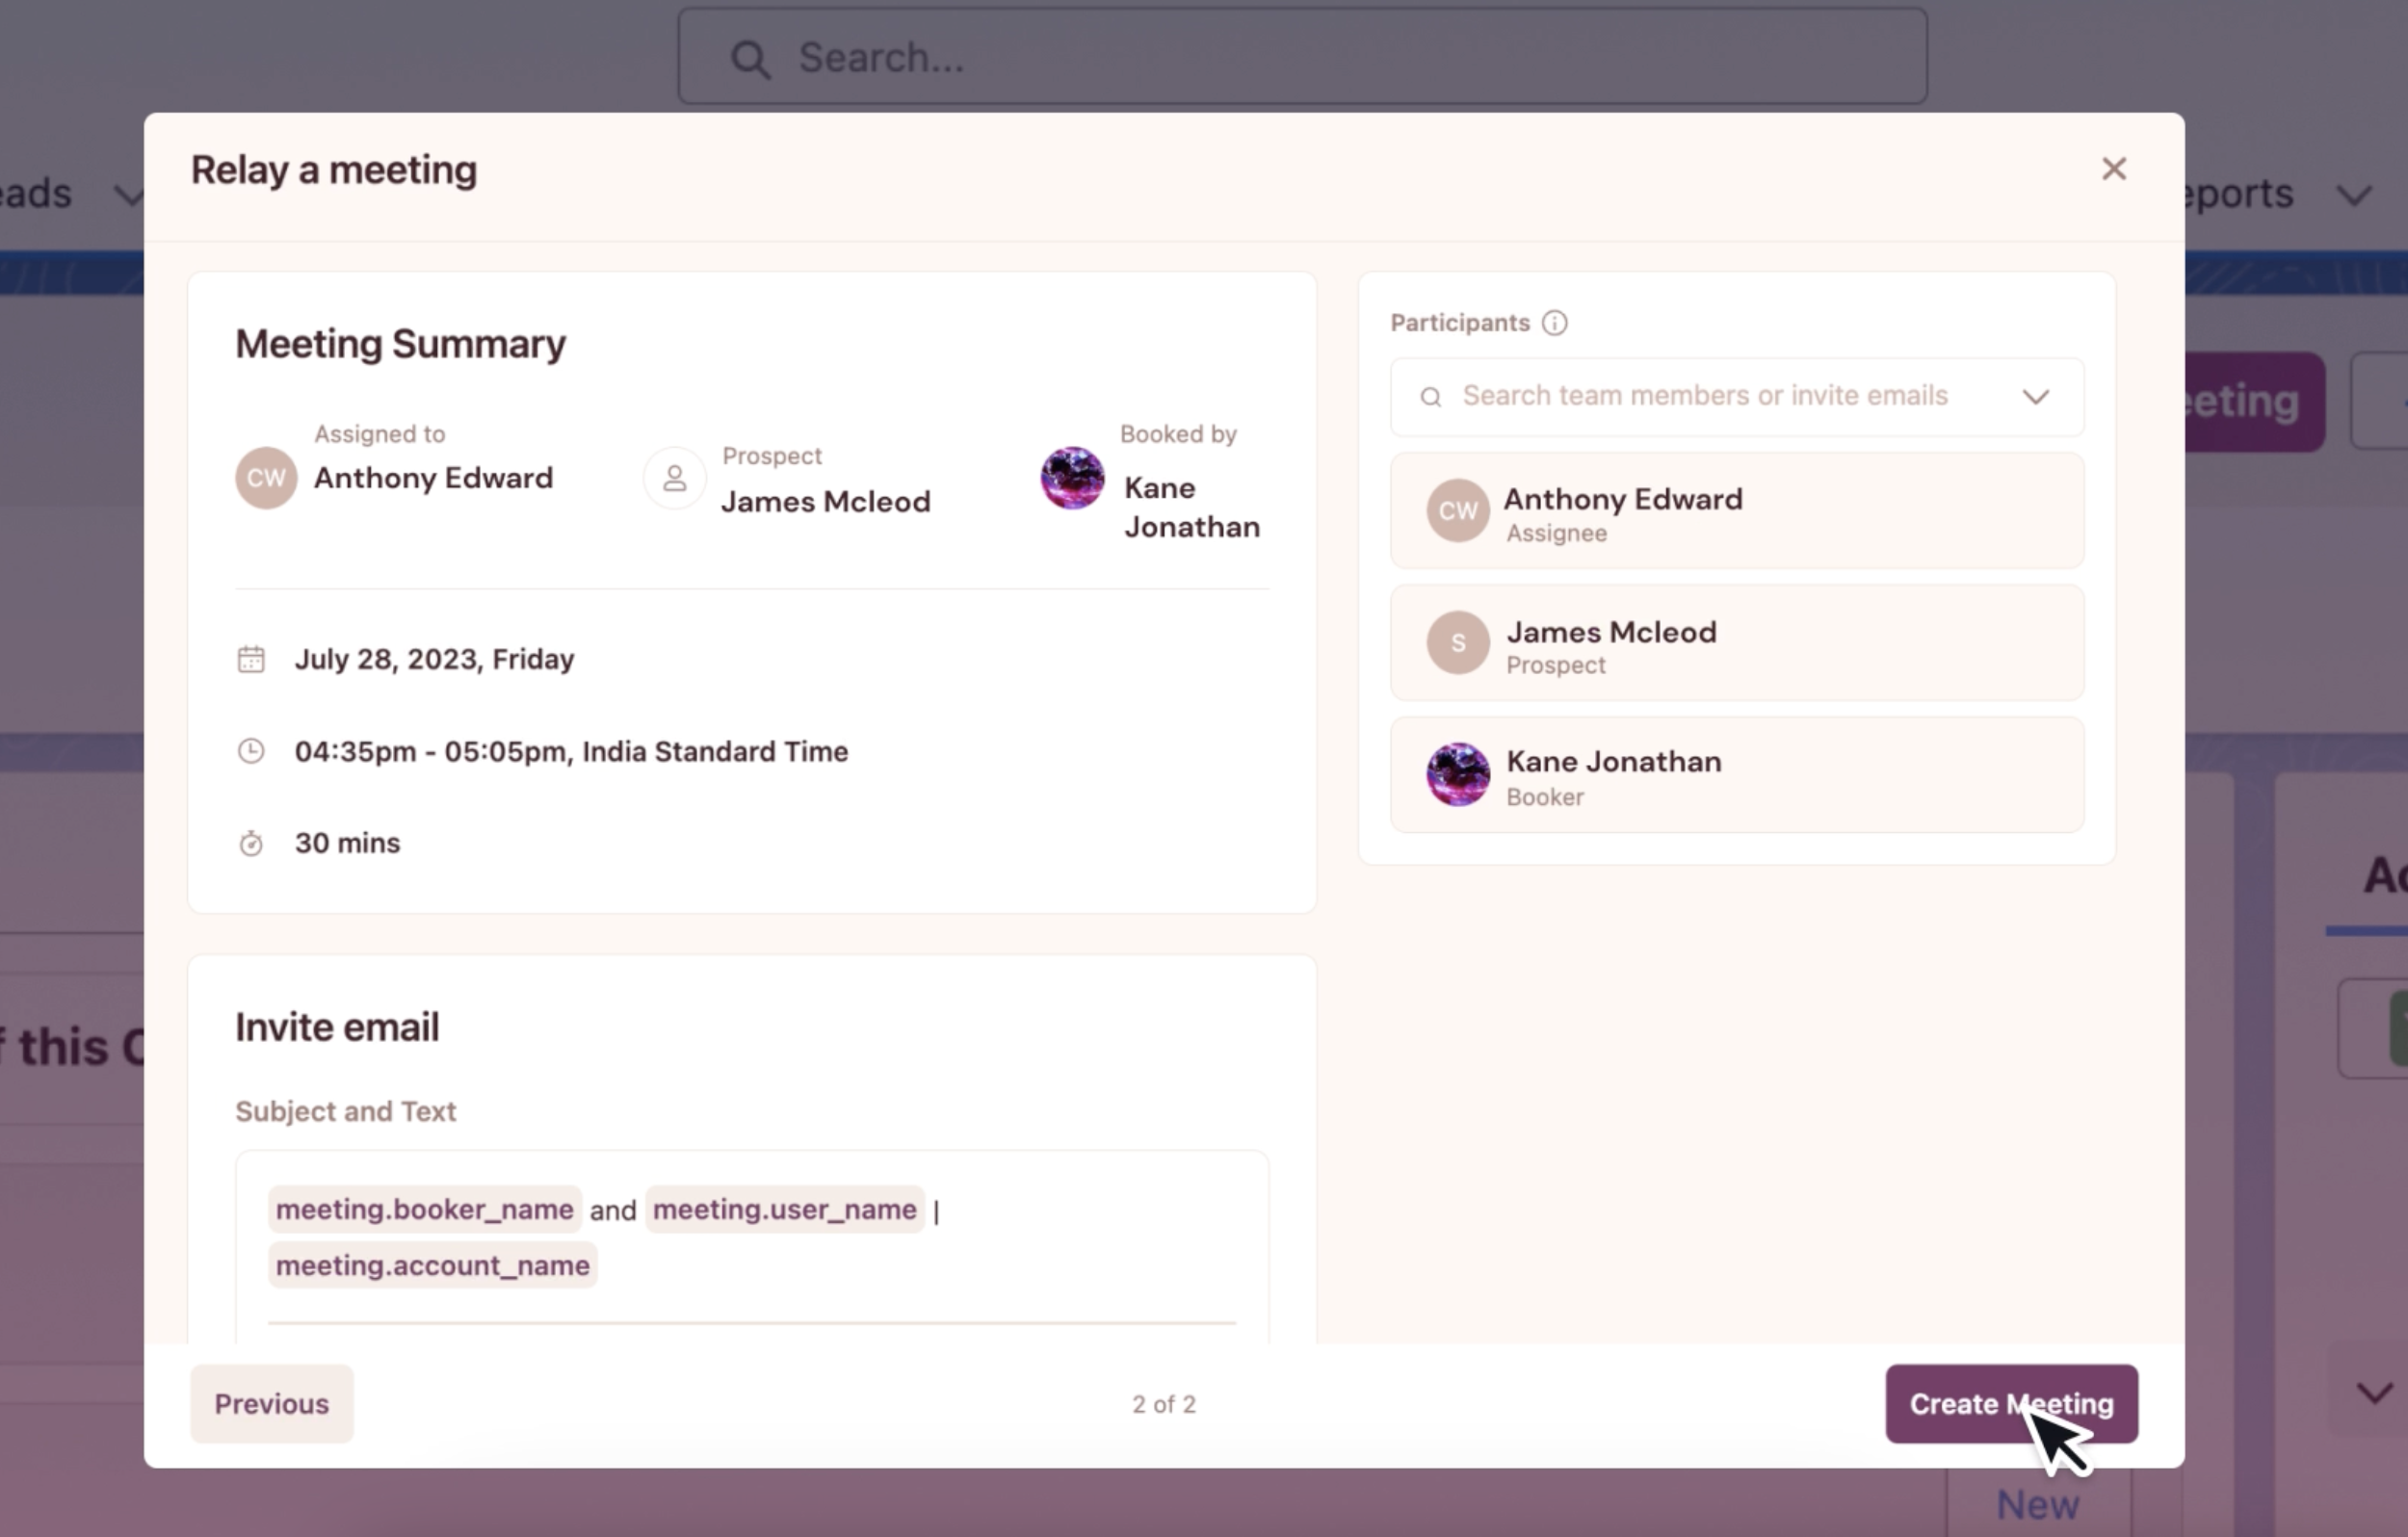
- Or you can click “Proceed to Book” which shows you the meeting summary including all the participants, date, time, and duration. It also gives you a meeting invite email template that you can use as is or edit as required for that extra personal touch.
- Once you review all the details, click “Create Meeting” and the meeting is booked. It will automatically get added to all the participants’ calendars and they will also receive the meeting invite email.
- All the details get automatically updated in your CRM and you’re good to go.