BEFORE YOU BEGIN
- You need a ZoomInfo subscription that includes API access. This is an Enterprise API add-on. Standard packages like Elite Plus do not include API access by default. Confirm with your ZoomInfo account manager before you start.
- You need to be a RevenueHero admin to access enrichment settings.
- Generate a Client ID and Client Secret from your ZoomInfo Admin Portal (Integrations → API).
How ZoomInfo enrichment works
When a lead submits a form, RevenueHero calls ZoomInfo with the submitted email and domain. ZoomInfo returns matched contact and company data, which RevenueHero then uses to:- Qualify the lead (run disqualification rules against industry, employee count, etc.)
- Route the lead (distribution and matching rules can read any enriched attribute)
- Write enriched fields back to your CRM if you map them in Enrichment field mapping
Generate your ZoomInfo API credentials
Step 1: Open the ZoomInfo DevPortal
Sign in to ZoomInfo as an admin. Open the product switcher in the top-right corner, and under ZoomInfo products select DevPortal.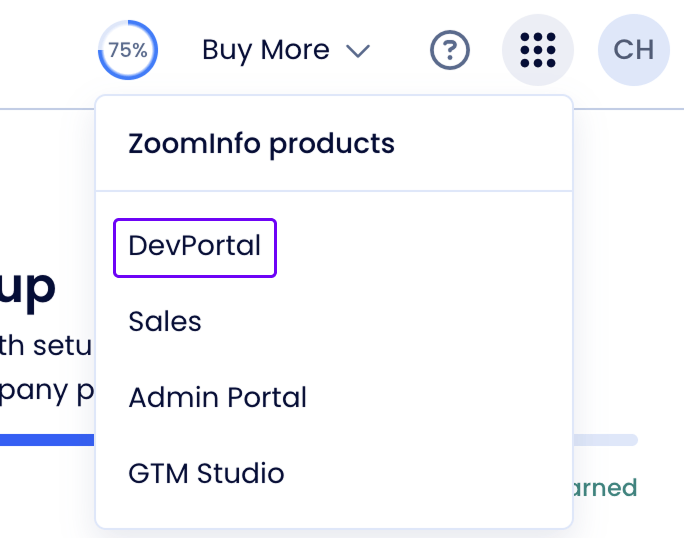
Step 2: Create an API app
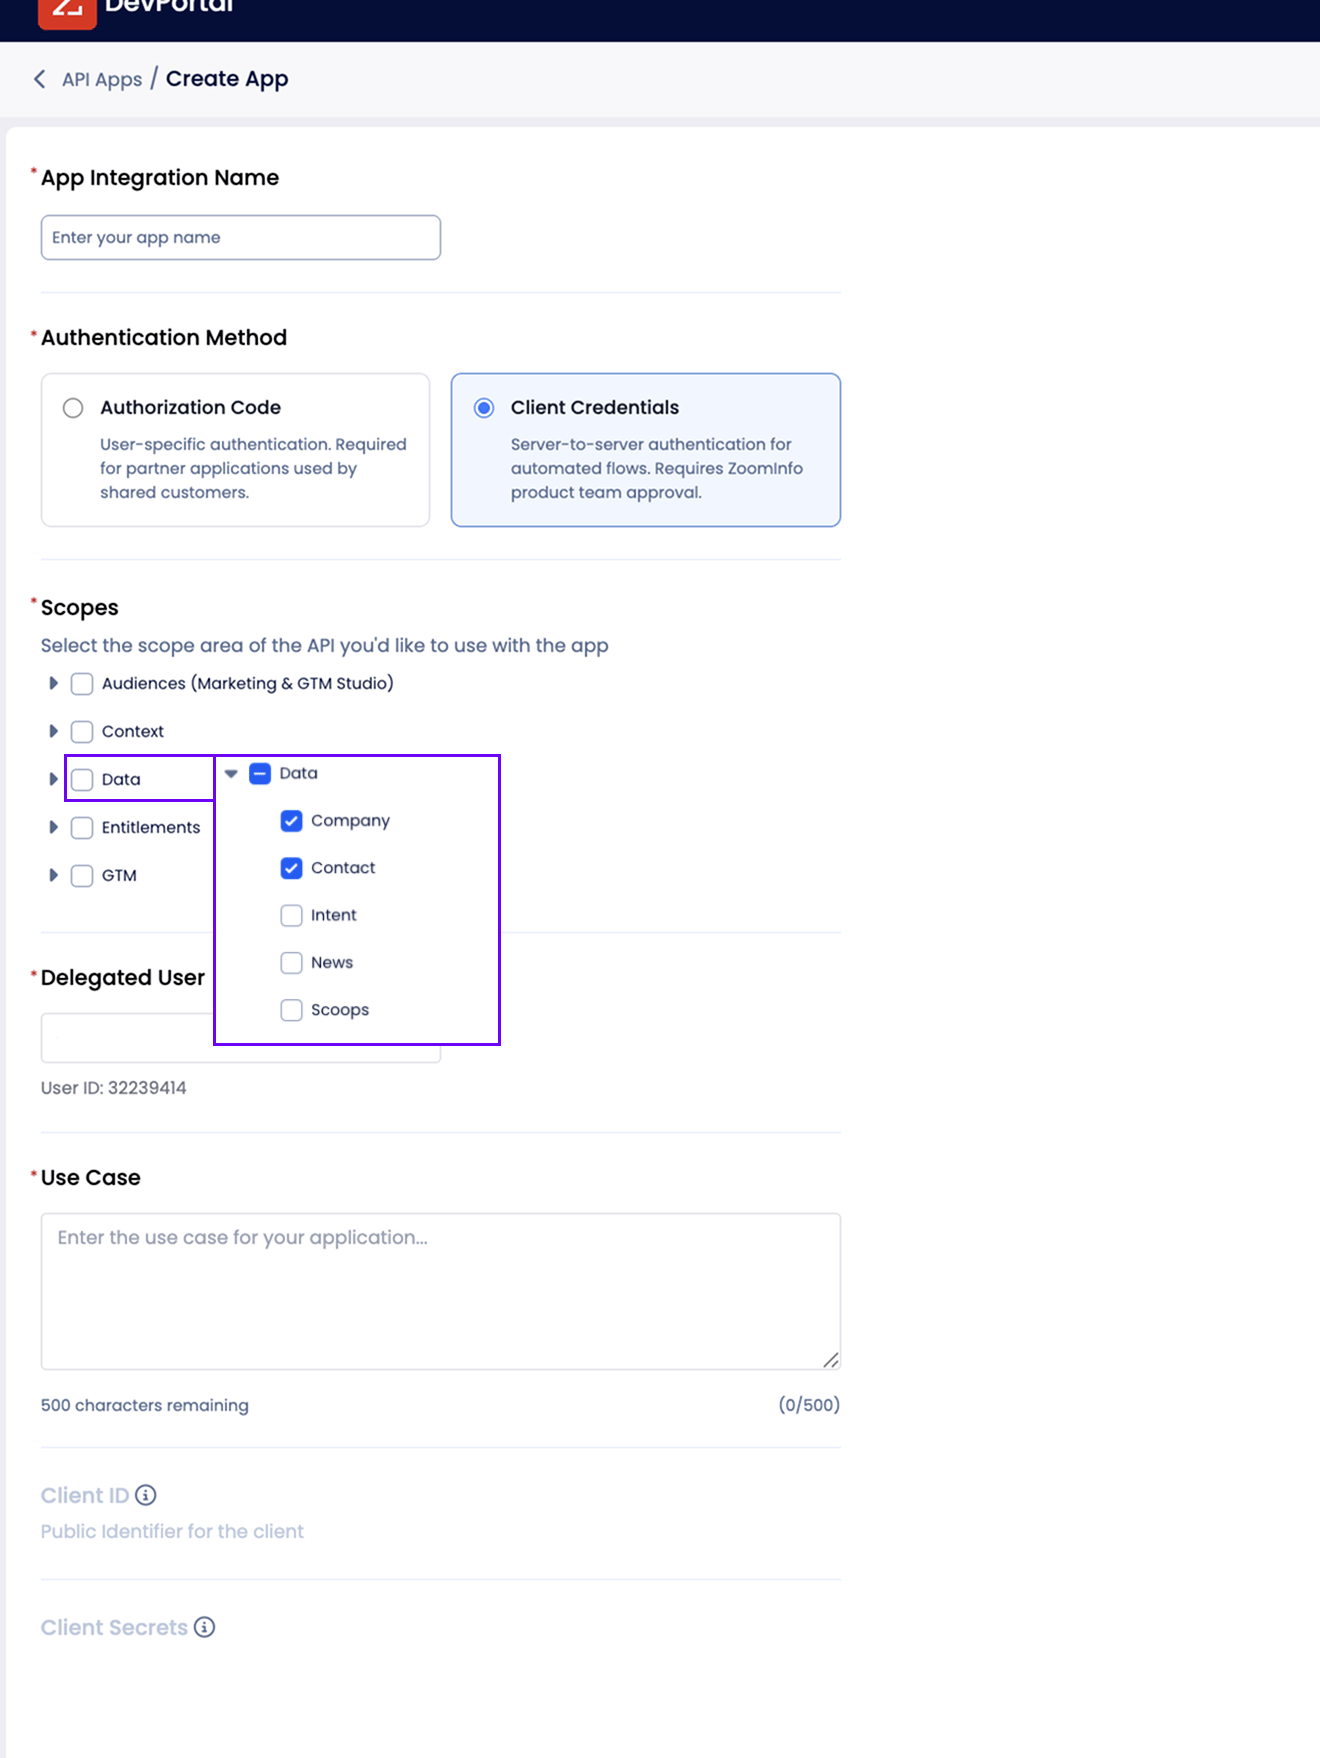
In DevPortal, go to API Apps and click Create App. Fill in the form:- App Integration Name: enter
RevenueHeroso the app is easy to find later. - Authentication Method: choose Client Credentials. This is the server-to-server method RevenueHero uses for automated enrichment. The other option, Authorization Code, is for user-specific partner apps and won’t work here.
- Scopes: expand Data and check both Company and Contact. These two scopes are what let RevenueHero pull firmographics for the person and their company.
- Use Case: enter
Enrich prospect data for qualification and routing in RevenueHero.
Step 3: Copy your Client ID and Client Secret
The app is created and approved right away. It appears in the API Apps list with an Approved status.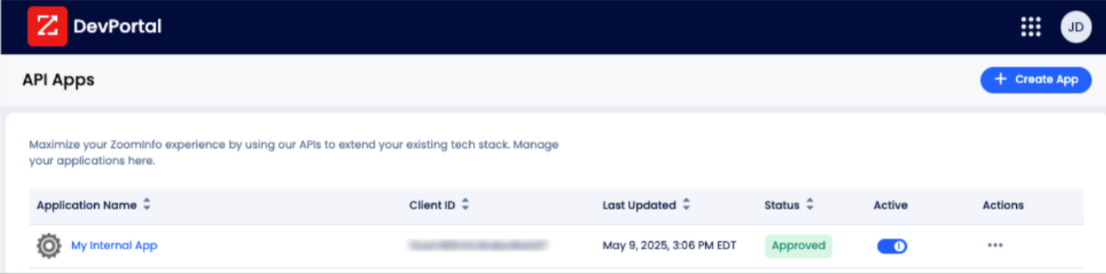
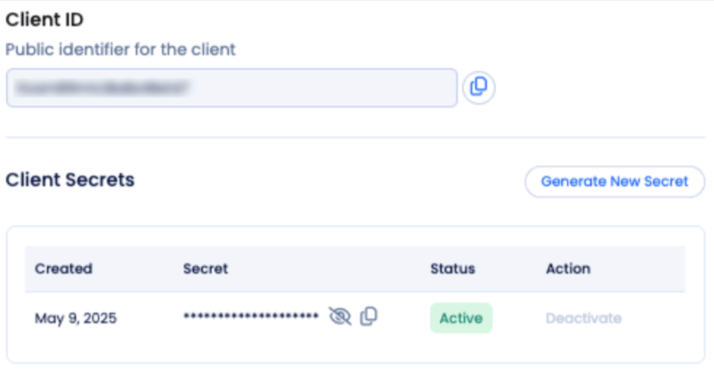
- Client ID: the public identifier for the app. Use the copy icon next to it.
- Client Secret: under Client Secrets, click the reveal icon to show the secret, then copy it.
Connect ZoomInfo to RevenueHero
Step 4: Open the Enrichment settings
In RevenueHero, click Settings → Enrichment in the left sidebar. You’ll see a grid of provider cards. Find the ZoomInfo card.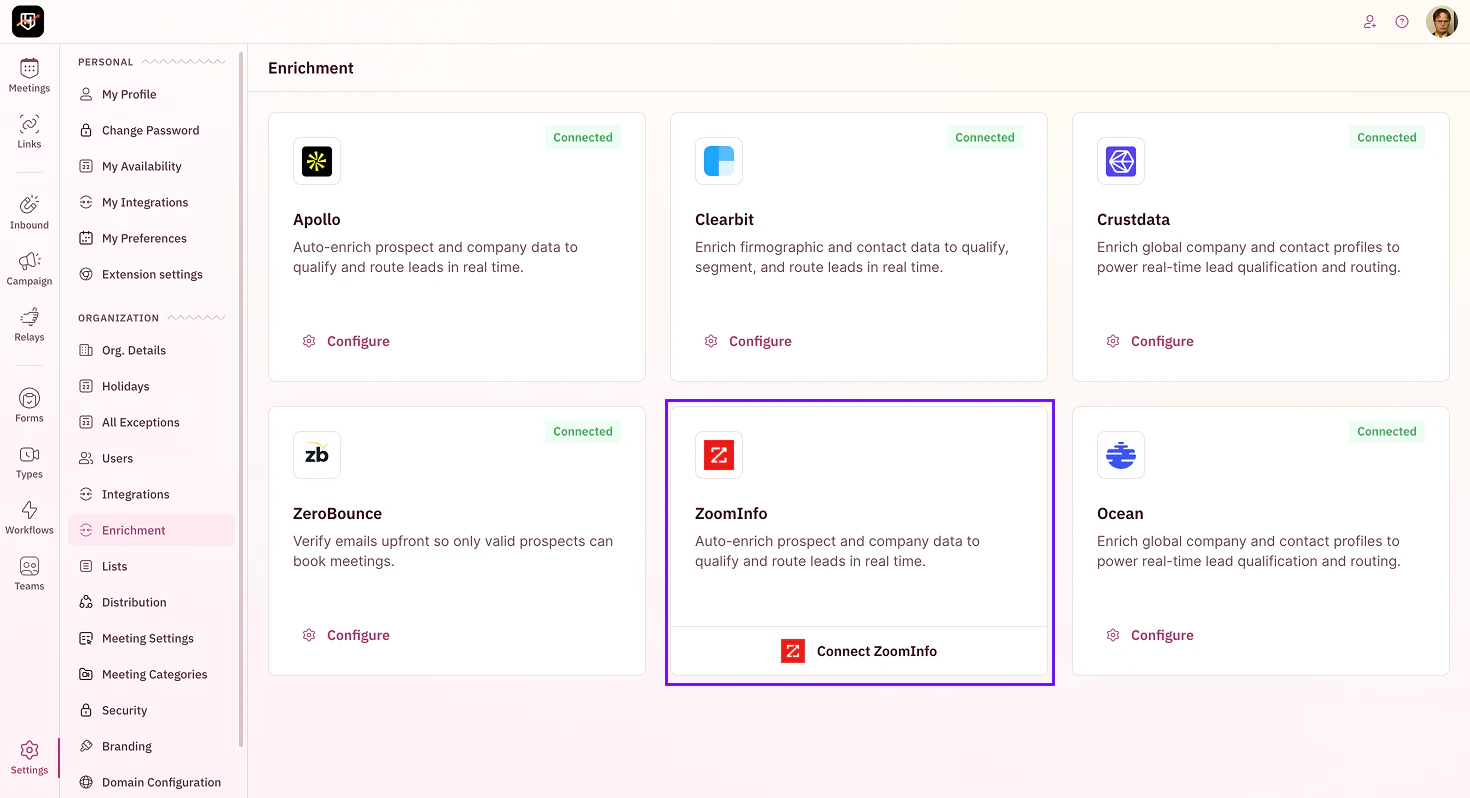
Step 5: Start the connection
Click Connect ZoomInfo on the ZoomInfo card. This opens the ZoomInfo intro page with an overview of what data RevenueHero pulls, how it’s used, and a privacy summary.
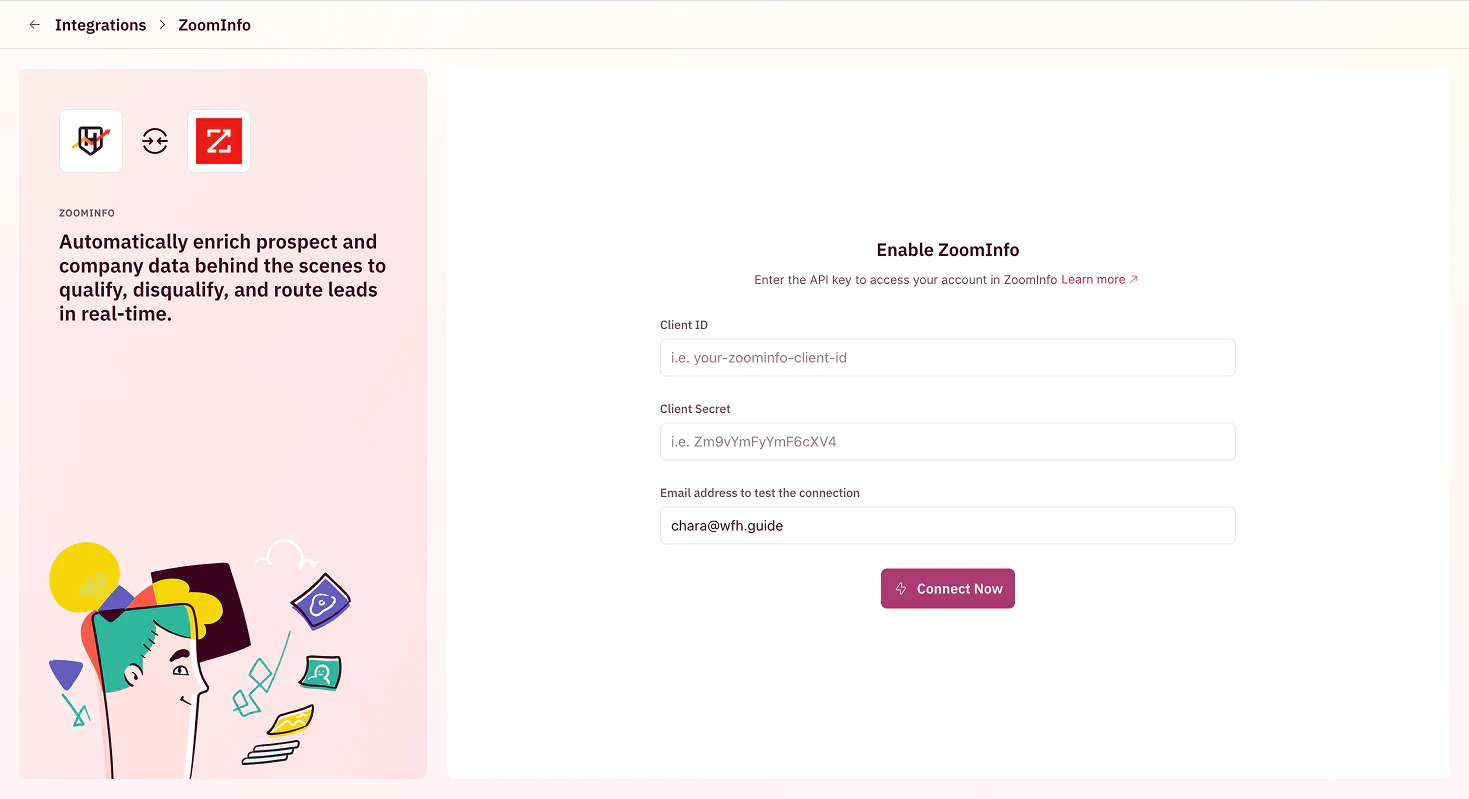
Step 6: Enter your credentials
Click through to the connection form. Paste in three values:- Client ID from your ZoomInfo Admin Portal
- Client Secret from your ZoomInfo Admin Portal
- Email address to test the connection — use a real address on a corporate domain. RevenueHero runs a live enrichment against this email so you’ll know immediately whether your credentials work.
Connected with ZoomInfo successfully when it works.
Use ZoomInfo data in your rules
ZoomInfo enrichment runs automatically for every form submission once connected. To act on the data:- Disqualify leads by industry, employee count, or domain — set this up in your matching rules
- Route by firmographics — use enriched fields as conditions in distribution rules
- Pass data to your CRM — map ZoomInfo fields to Salesforce or HubSpot fields under Enrichment field mapping
Your ZoomInfo enrichment is connected and feeding your routing logic. 🎉🎉🎉
Pass enrichment data to your CRM
Map ZoomInfo fields to Salesforce or HubSpot so enriched data writes back automatically.
Create a distribution rule
Use ZoomInfo’s industry, employee count, and revenue fields as routing conditions.
Create a matching rule
Disqualify leads in real time based on enriched firmographics.
Enrichment 101
See the full list of enrichment providers and how the waterfall decides which one wins.